

I love making small timber things, especially for our son. I document most of them at http://madeatthisplace.blogspot.com.au/
He's 5 now but still likes to play with his kitchen on occasion.
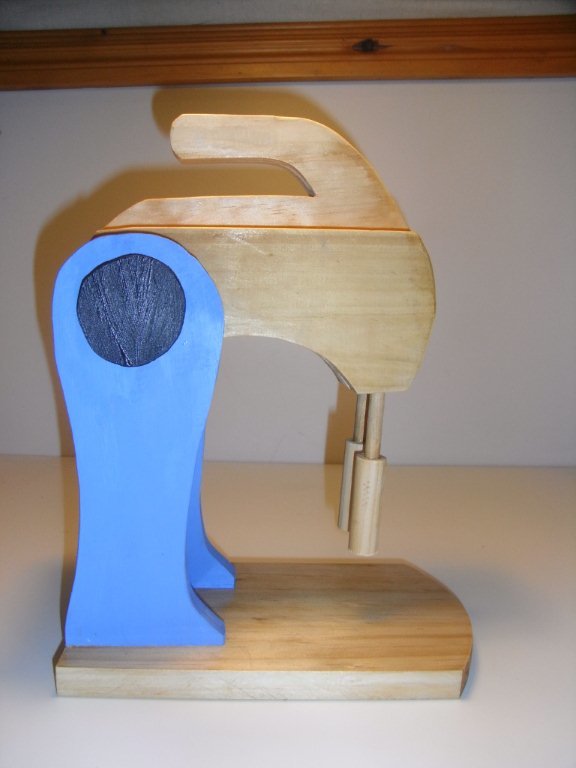
I liked the kids kraft mixer and used it as inspiration.
Preparation
1 inch timber scraps
4 - 1 1/2 inch screws
6 inches or 15cm of 10mm dowel
4 inches or 10cm of 25mm dowel
6 inches or 15cm of 16mm dowel
Scrap of 9mm ply or similar for mixer knobs
See pictures


Please read through the entire plan and all comments before beginning this project. It is also advisable to review the Getting Started Section. Take all necessary precautions to build safely and smartly. Work on a clean level surface, free of imperfections or debris. Always use straight boards. Check for square after each step. Always predrill holes before attaching with screws. Use glue with finish nails for a stronger hold. Wipe excess glue off bare wood for stained projects, as dried glue will not take stain. Be safe, have fun, and ask for help if you need it. Good luck!
Instructions
Step 1
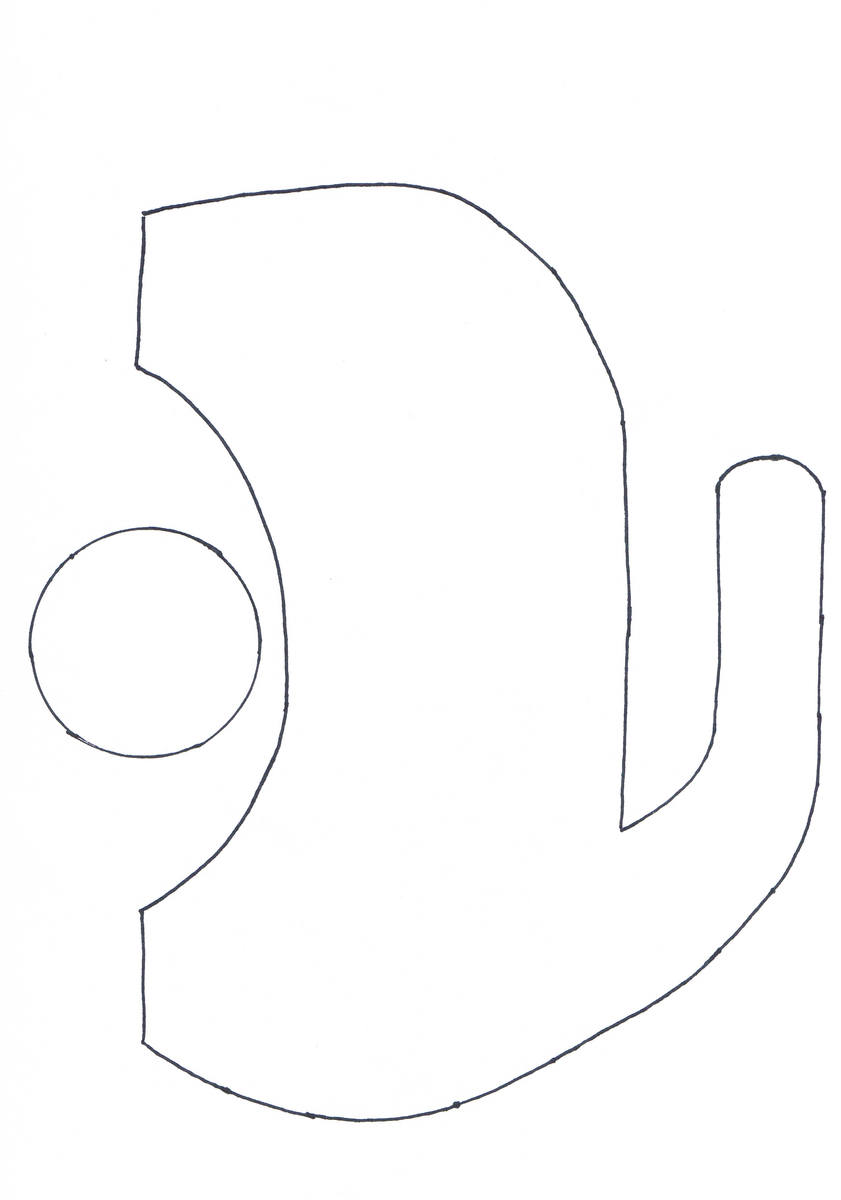
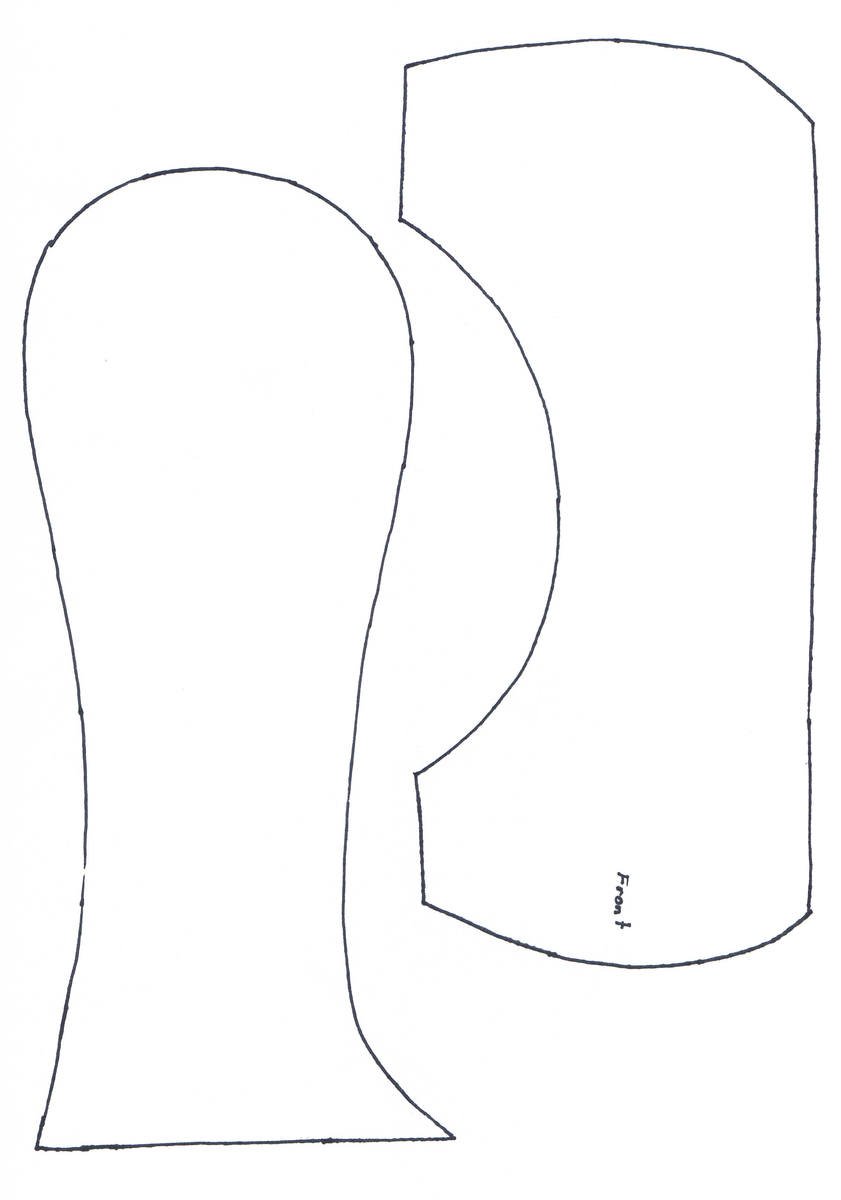
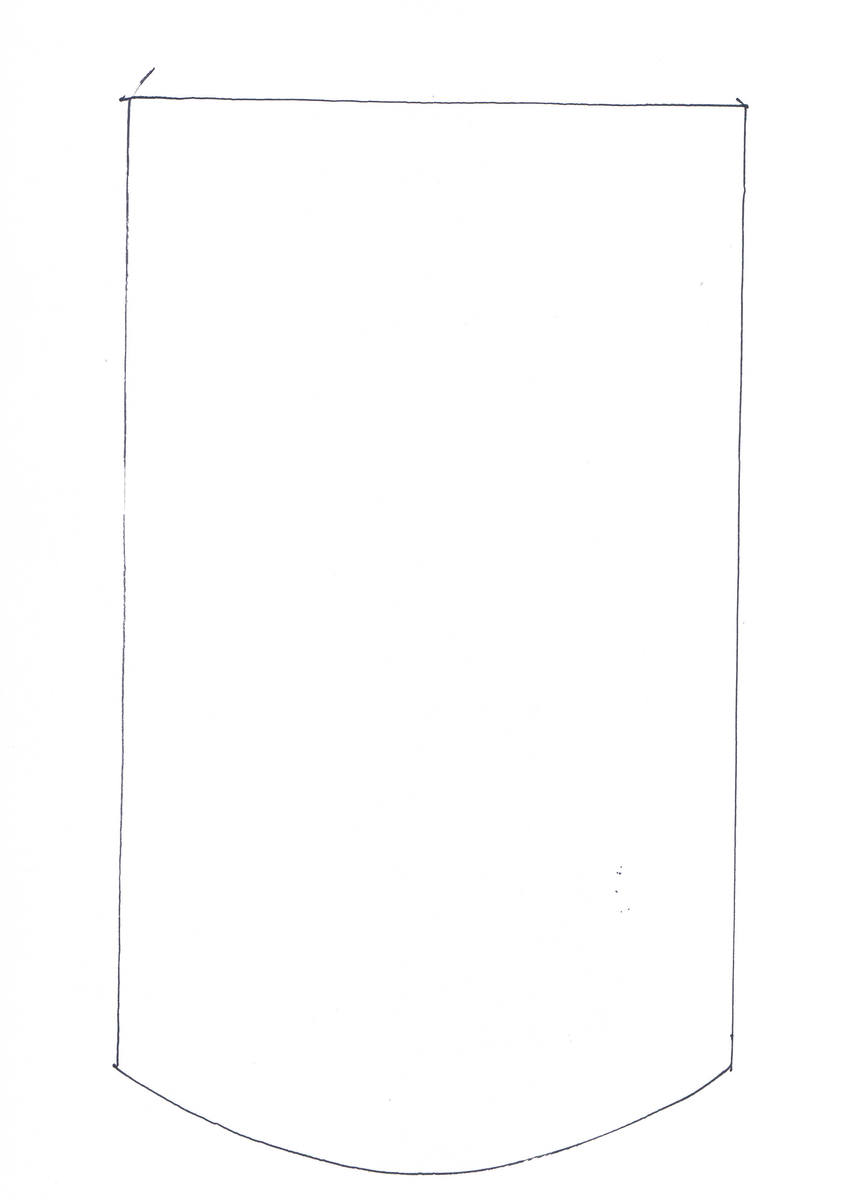
Step 1 - Cut out all the pieces from the pattern, trace around each onto 1 inch timber, with the exception of the mixer knobs which should be traced onto 9mm ply or similar. (You need two of the stand sides and two of the mixer sides).
Step 2
Step 2 - Cut the pieces out with a jig or scroll saw and sand the edges
Step 3
Step 3 - Cut the 16mm dowel into two
Step 4
Step 4 - Cut the 10mm dowel into two
Step 5
Step 6 - Clamp side stand pieces onto mixer body and drill a 1 inch (25mm) hole through all pieces at the centre of the curve of the stand pieces.
Step 6
Step 7 - Glue the 1 inch (25mm) dowel into the hole, making sure the ends are flush with the outer sides of the mixer stand pieces, (You may need to trim this and test its fit before gluing)
Step 7
Step 8 - Drill two holes in the underside of the front of the mixer to accommodate the beaters
Step 8
Step 9 - Drill the same size holes into the two 16mm dowel pieces a short way in.
Step 9
Step 10 - Glue one end of the 10mm dowel into the mixer body and the other end into the 16mm dowel, ensuring they extend to the same length. ( the beaters should look the same)
Step 10
Step 11 - Glue and screw mixer to base board with 4 screws countersunk.
Step 11
Step 12 - Glue the knobs onto each side.
Step 12
Step 13 - Finish paint etc. (note you may find you get a better finish by painting each piece before assembly).
It is always recommended to apply a test coat on a hidden area or scrap piece to ensure color evenness and adhesion. Use primer or wood conditioner as needed.
