
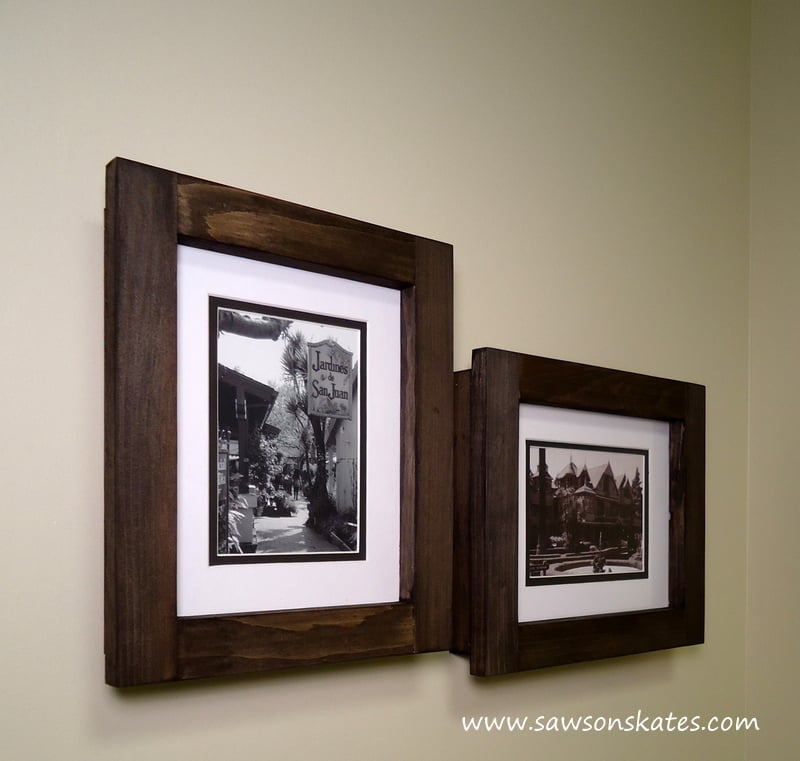

Want to make your own picture frames? Intimidated by miter cuts? Want an easy way to make frames that doesn’t require dealing with any miter cuts? Then these plans are for you! They only require 8 straight cuts! Depending on the finish you choose, you’ll probably be able to cut, assemble, finish and hang on the wall all before dinner! What’s better than not dealing with miter cuts? These frames require hardly any measuring!
I’m always looking for an easier way to do things. And sure, I’ve made miter cut frames, but it does take a little work to get the miters right and tight. I’ve come up with an easy way to make professional looking frames without dealing with finicky miter cuts. They’re so easy to make, a 10 year old could do make them an end up with a frame worthy of a gallery!

The secret is the two jigs. You’ll use the jigs to measure the frame pieces and for assembly. Once you have the jigs, you can make frames any time you want. You can paint, stain or leave them raw. These frames make great gifts. And they’re perfect for last minute gifts, because they are so quick and easy to make.


Preparation


Please read through the entire plan and all comments before beginning this project. It is also advisable to review the Getting Started Section. Take all necessary precautions to build safely and smartly. Work on a clean level surface, free of imperfections or debris. Always use straight boards. Check for square after each step. Always predrill holes before attaching with screws. Use glue with finish nails for a stronger hold. Wipe excess glue off bare wood for stained projects, as dried glue will not take stain. Be safe, have fun, and ask for help if you need it. Good luck!
It is always recommended to apply a test coat on a hidden area or scrap piece to ensure color evenness and adhesion. Use primer or wood conditioner as needed.
