
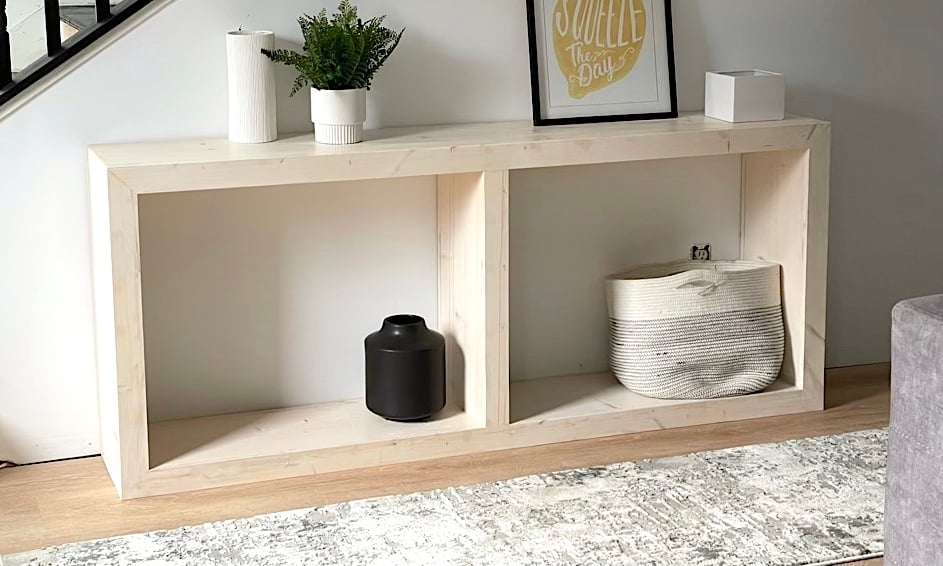

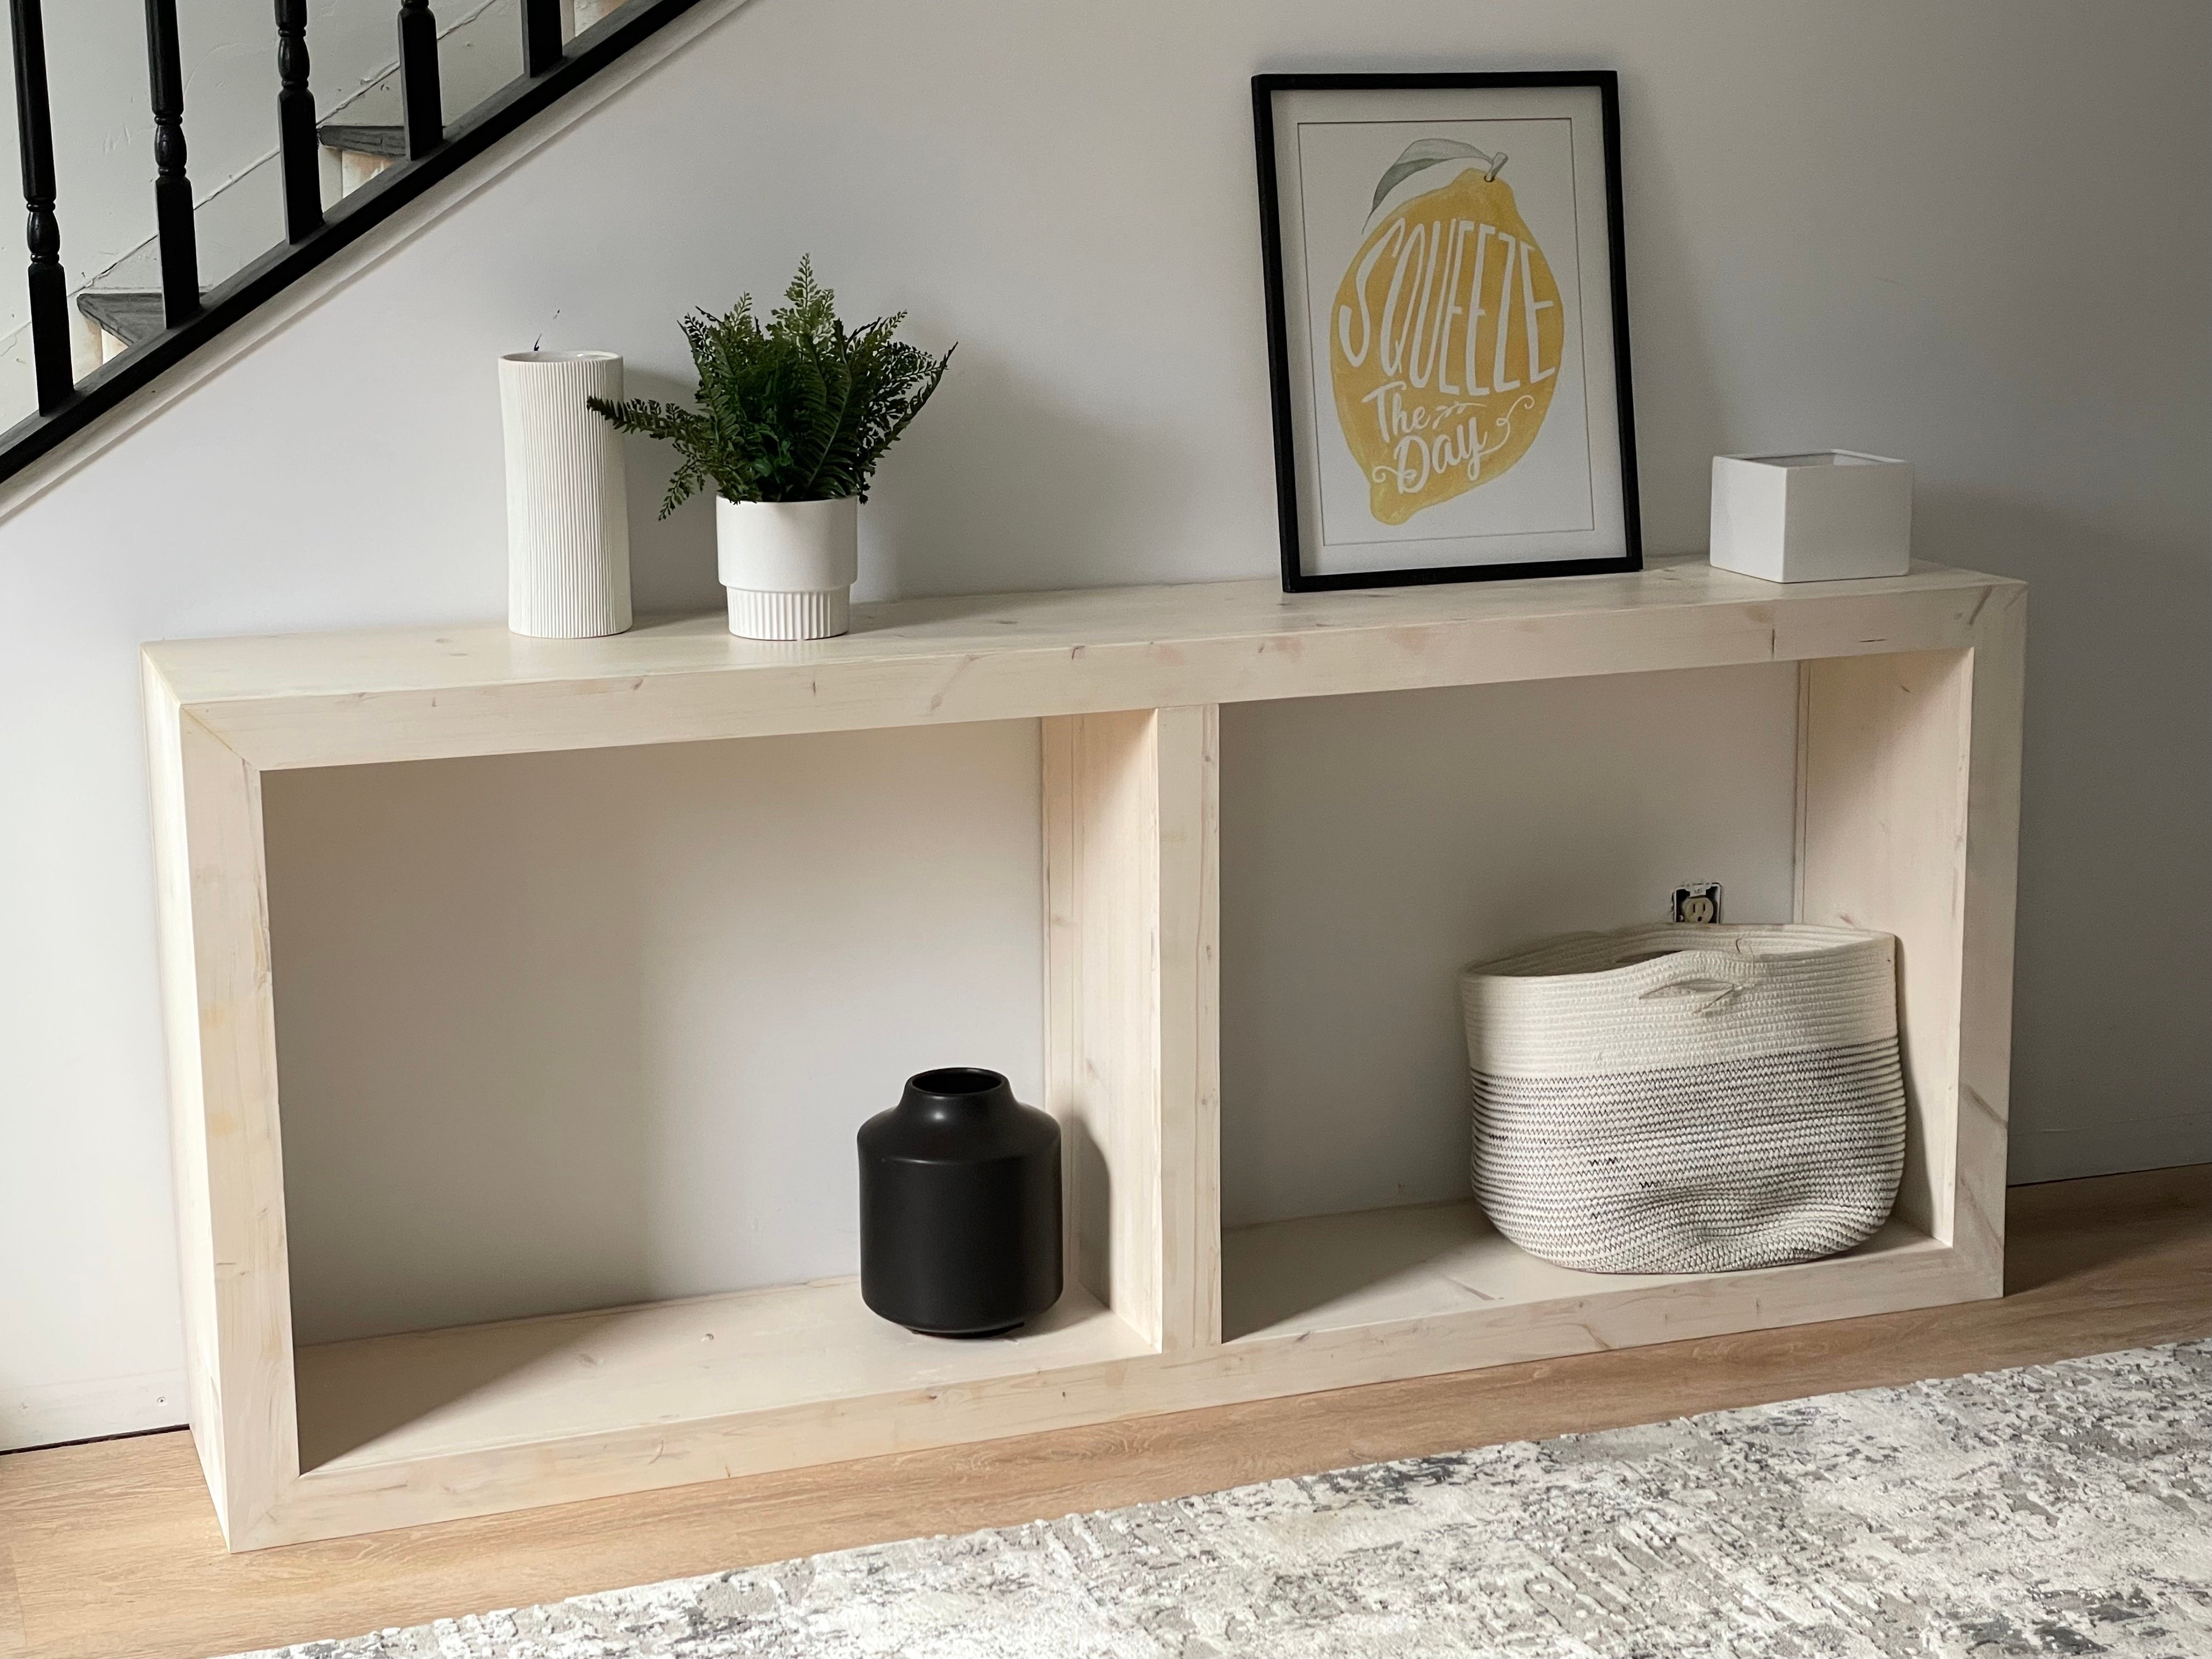
This DIY waterfall framed grand console table is absolutely stunning! I built it using about $150 in whitewood boards.
In this post, I share a free plan, including what to buy, a cut list, step by step diagrams, and a video showing the entire process. You can build it too!
Related: Waterfall Framed 52" Console Plans
My sister just moved into a new house. She loved the Pottery Barn Folsom Grand Console table for her space, but a few problems: It's $1299, they don't ship to Alaska, and it's sold out.
So we decided to build a console table for her space, in just the size she needs, in just the color she wants. Here's how it turned out!
Watch the Build Video
Here's the build video showing me build this console table:
Features of this Waterfall Console Table
- Gorgeous, a work of art for your room
- Frames your things like a beautiful picture frame
- Mitered corners on both face frame and carcass for that waterfall look
- Generous tabletop sufrace
- Two large lower shelves
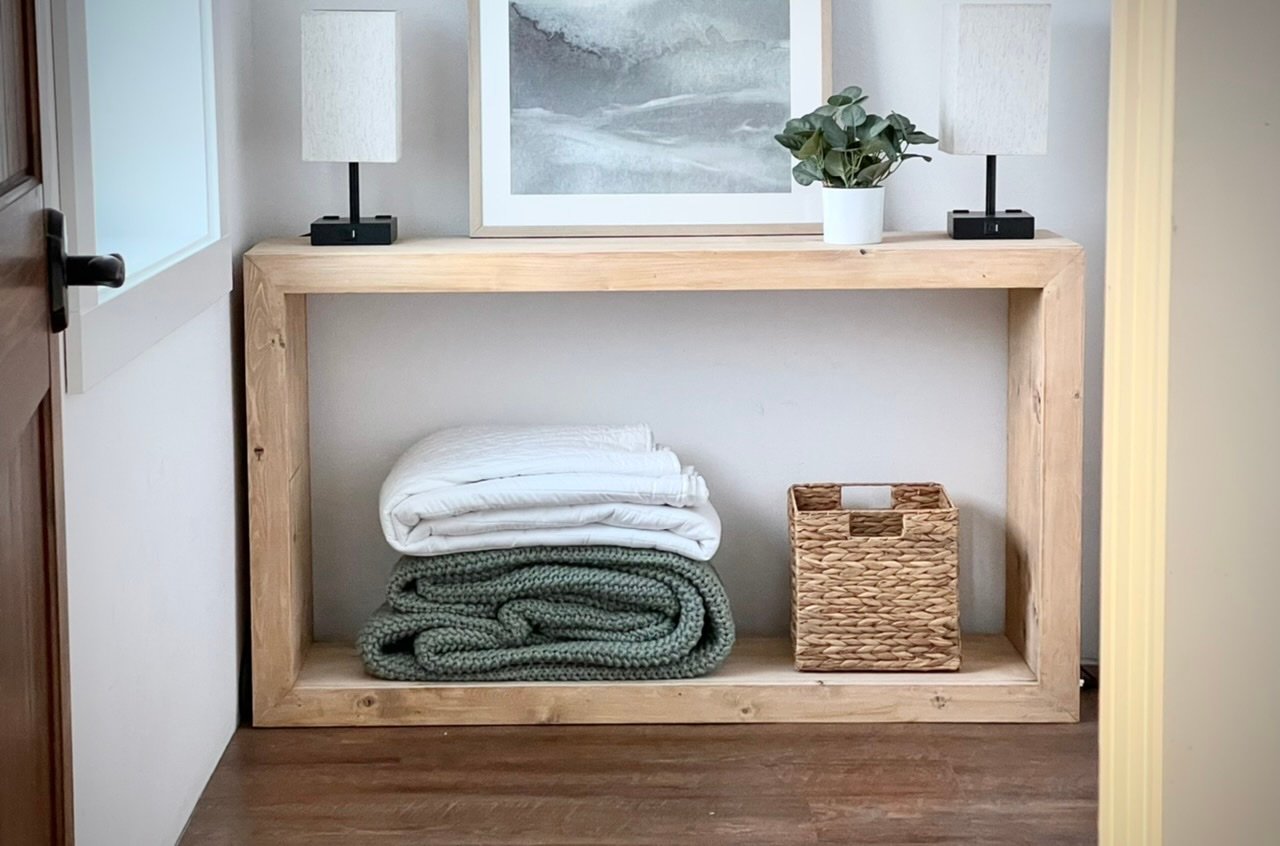
- Solid pine wood exterior can be painted or stained any color
See Also - Waterfall Framed 52" Console Plans and Pocket Hole Construction Video
I loved this console so much, I built a 52" version. I used a pocket hole joinery method for building the smaller version - make sure you check it out here.
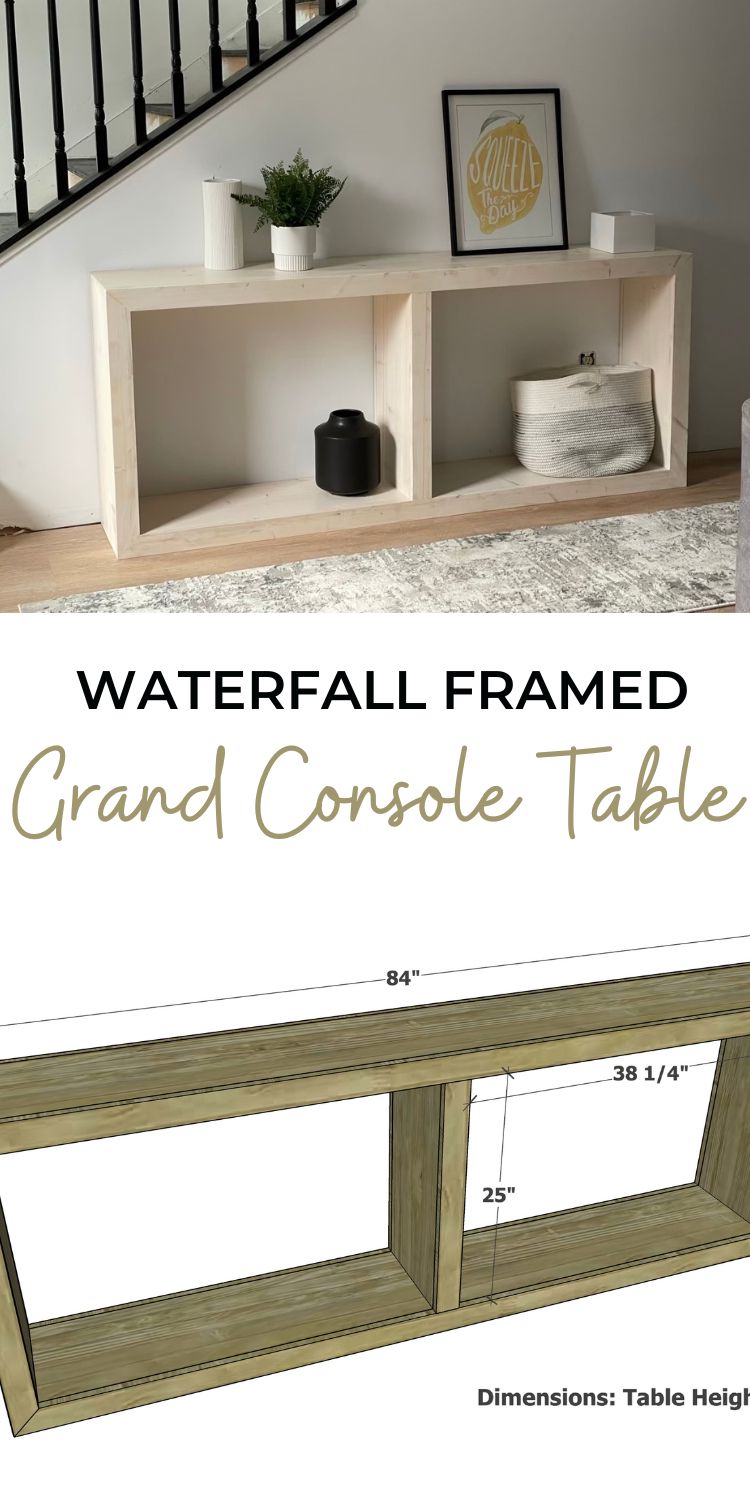
Free Plans for Waterfall Framed Console Table
The free plans for this console table are below. Thank you for using my plans. Please send in a photo of you project when done, we love seeing your work!
Pin For Later!
Preparation
3 - 1x12 @ 10 feet long - Boards should be straight with minimal cupping
4- 1x3 @ 10 feet long - Use straight boards
1 - 1x3 @ 6 feet long (use for the center divider trim)
1x2 @ 4 feet long (scraps or furring strips is fine)
1-1/4" brad nails
wood glue
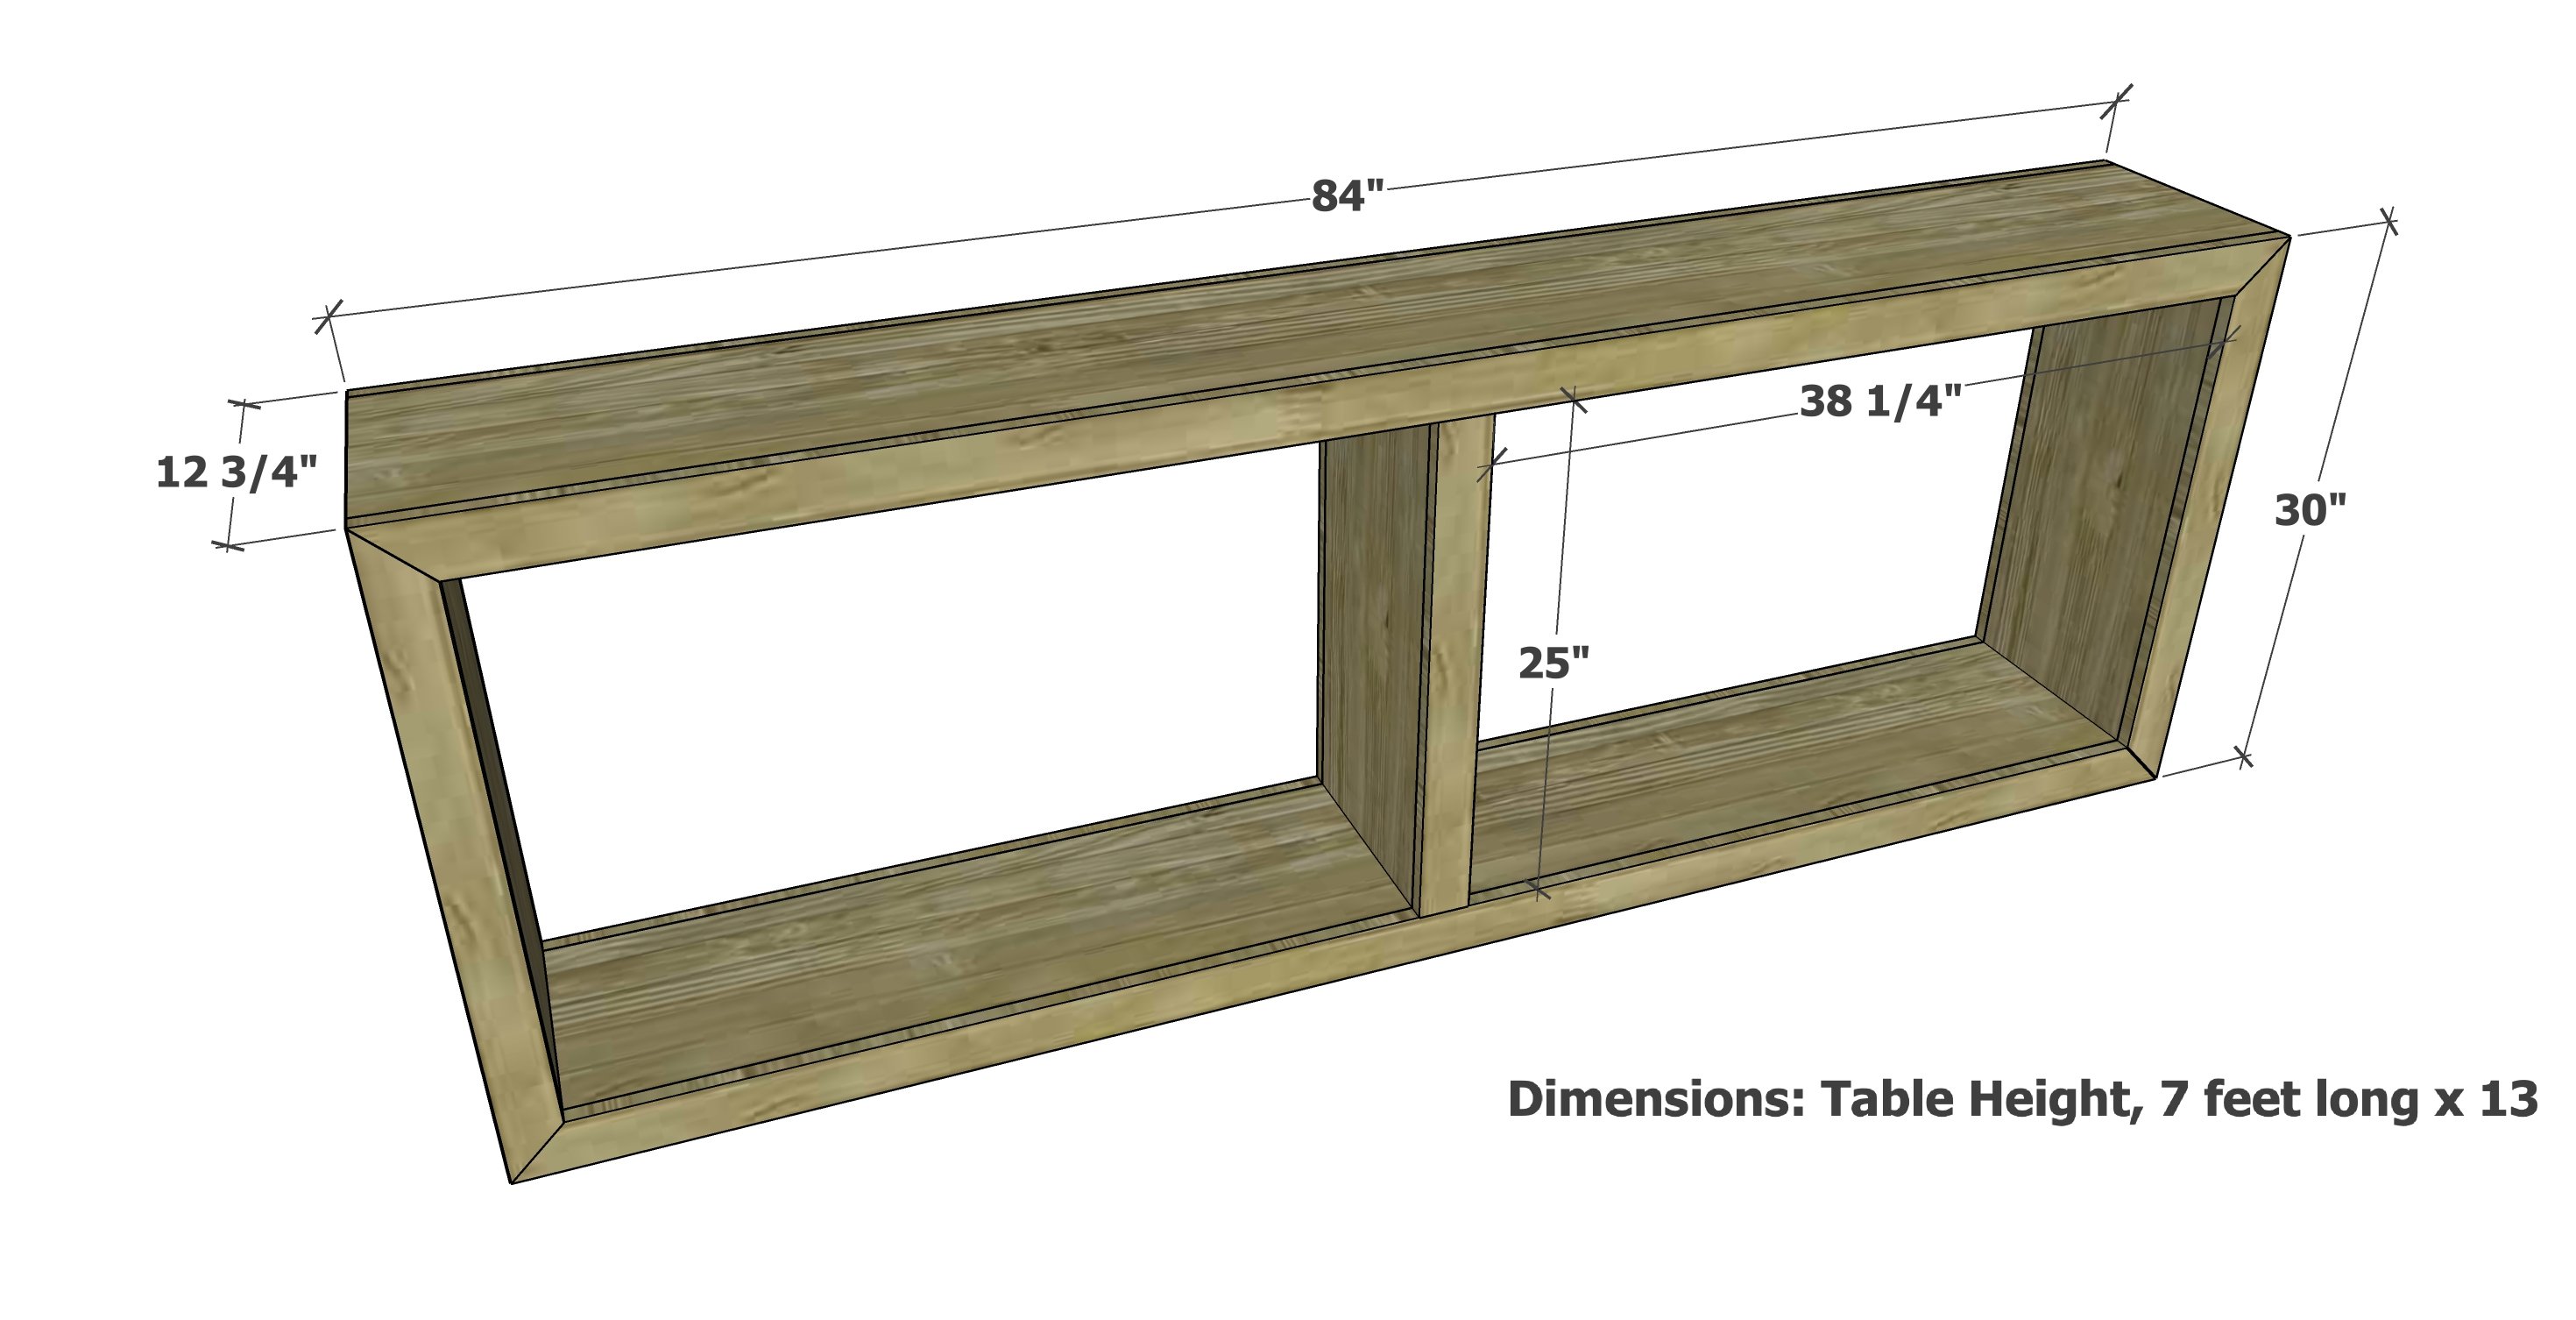
1 - 1x12 @ 84" - long point to long point measurement, both ends cut at 45 degree bevel, ends not parallel
2 - 1x12 @ 30" - longest point measurement, one end cut at 45 degree bevel, ends not parallel
1 - 1x12 @ 82-1/2" - bottom shelf
4 - 1x12 @ 26-3/4" - inside of sides, divider sides
4 - 1x2 @ 11-1/4" - blocking for sides
4 - 1x3 @ 84" - long point to long point measurement, both ends cut at 45 degree miter, ends not parallel
4 - 1x3 @ 30" - long point to long point measurement, both ends cut at 45 degree miter, ends not parallel
2 - 1x3 @ 25"
Cuts should be made on a compound miter saw.
First make test cuts in a 45 degree bevel and check the accuracy. Calibrate the saw if needed according to the manufacturers directions.
Also check and calibrate for angle cuts (1x3s face frame boards) and cross cuts.
The success of this project is very dependent on the accuracy of your saw.
Cut the boards according to the cut list, or alternatively, you can cut as you go.
Cut the longest boards first, so you can fit all the cuts on the boards in the shopping list.


This is an advanced project. Do not tackle as a first project. Success is highly dependent on accurate angle and bevel cuts.
Instructions
Step 1

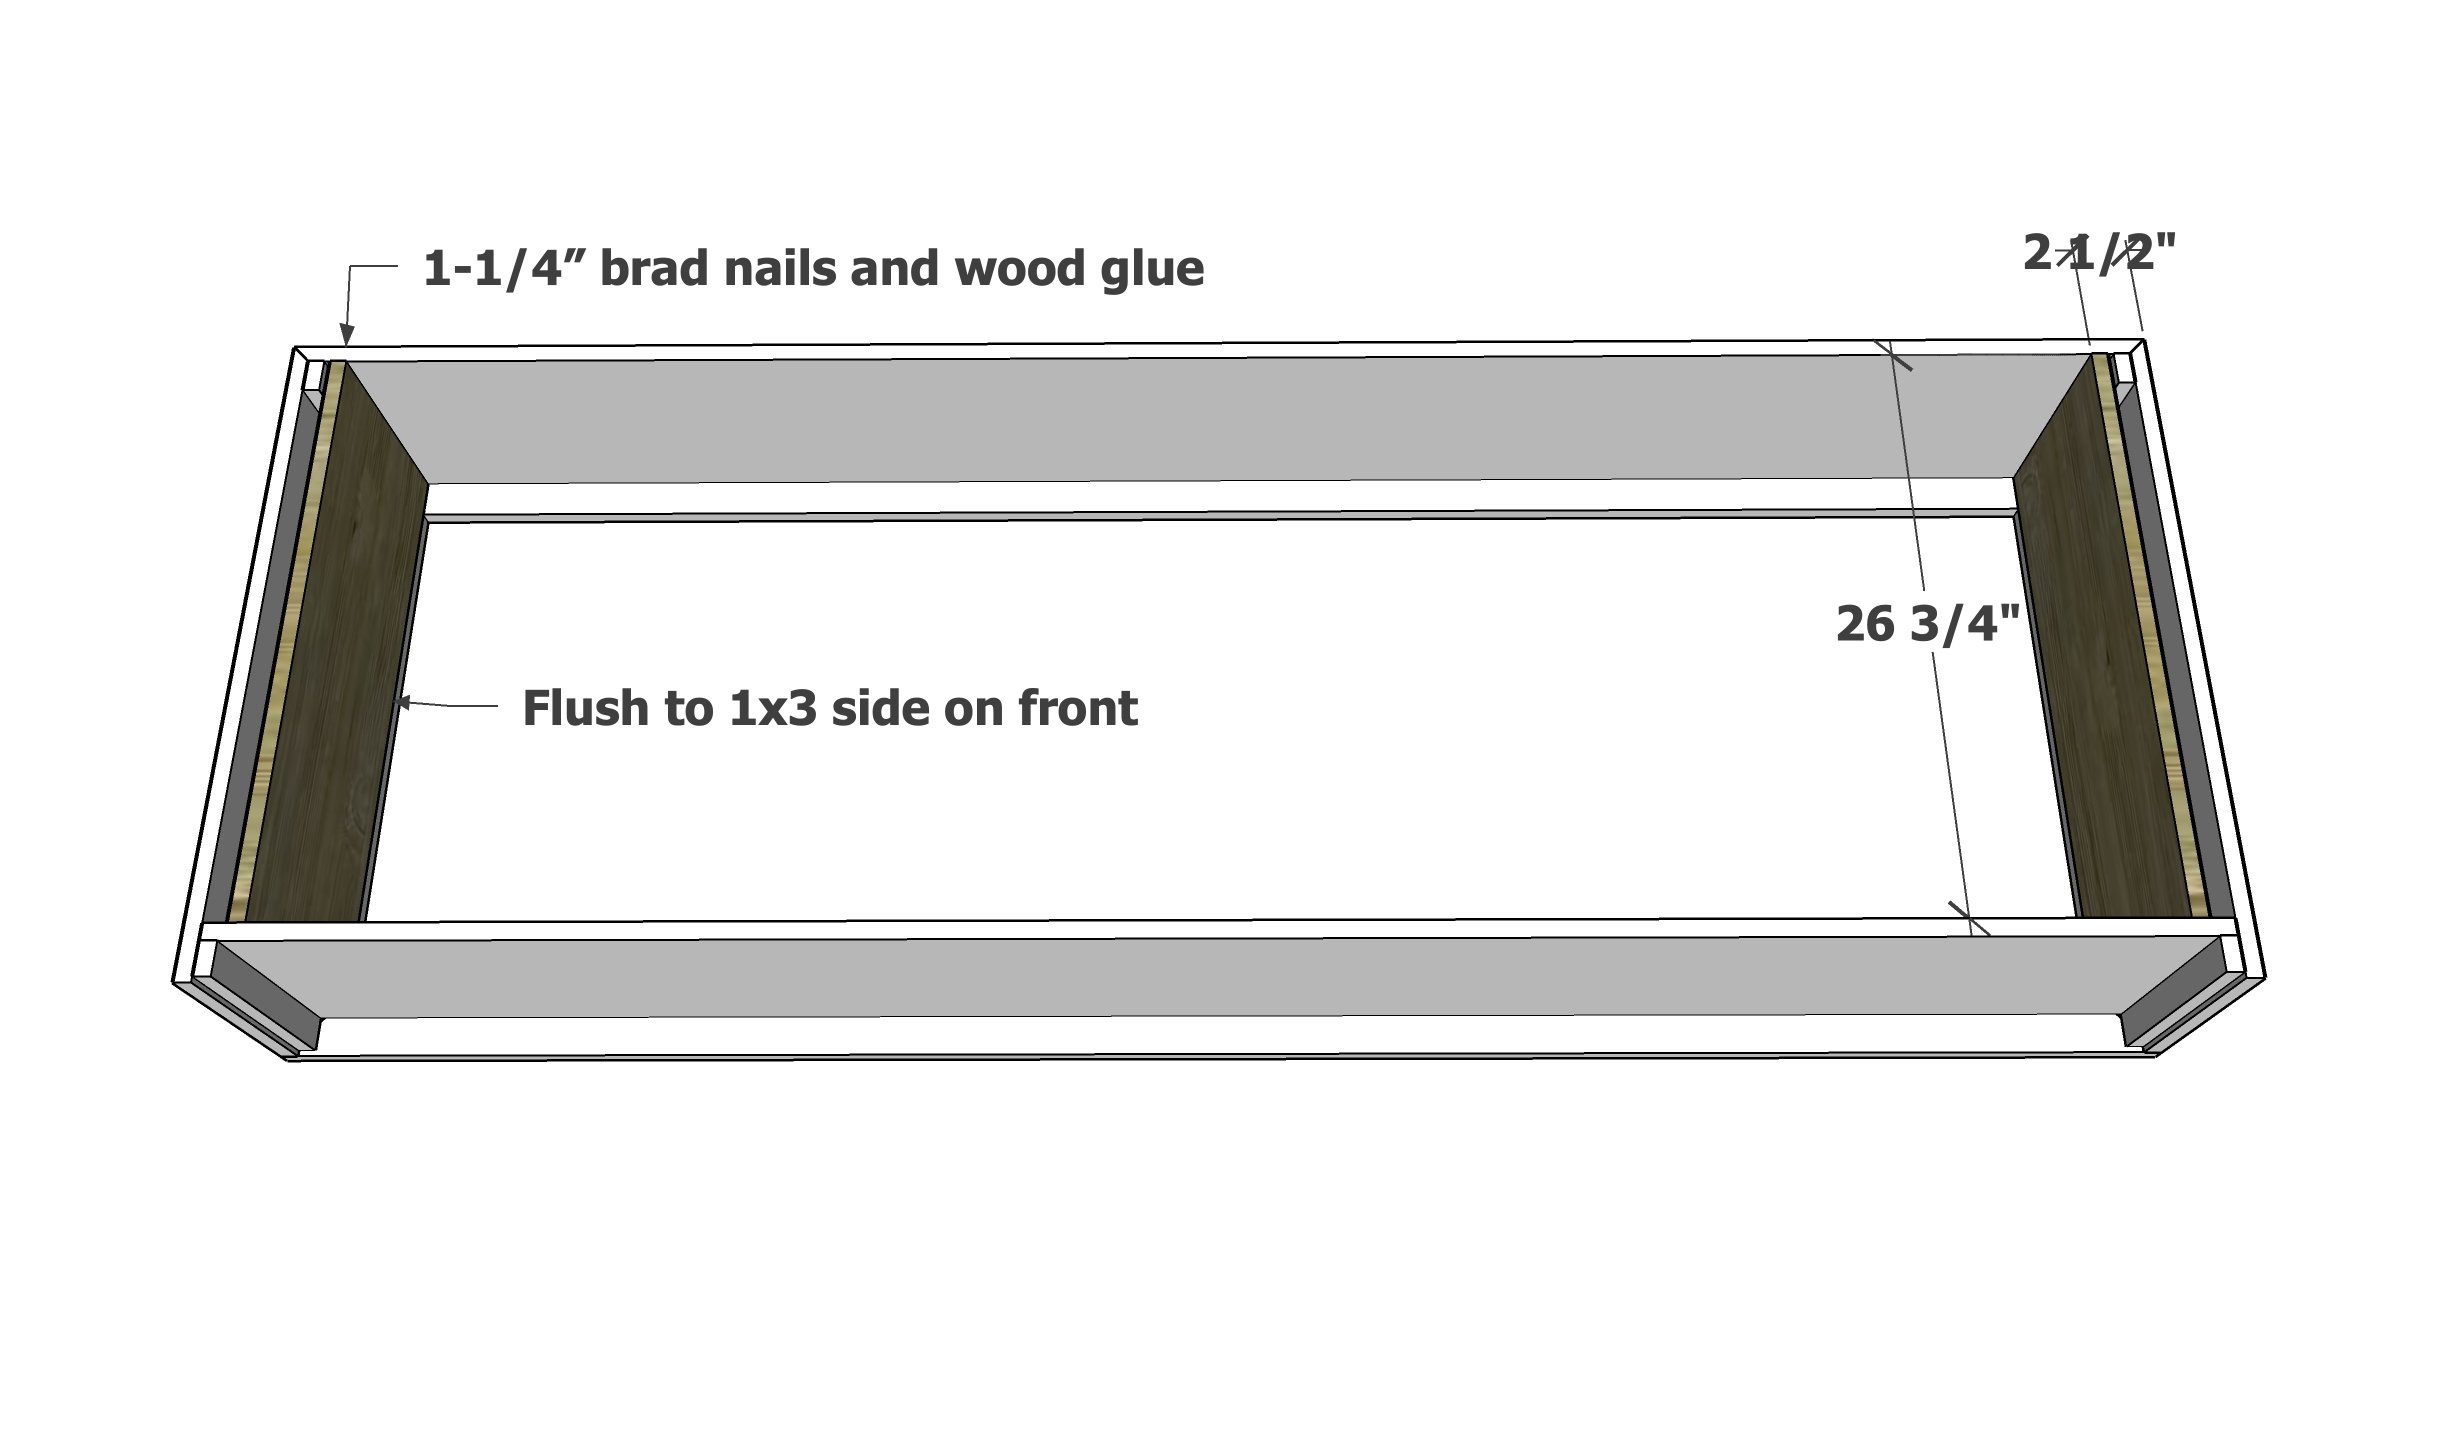
For the side panels, attach the 1x2s on the insides, as shown in the diagram, with 1-1/4" brad nails and wood glue.
Step 2

Attach top to the side panels, with nails and glue.
Step 3
Attach bottom shelf to the side panels with nails and glue.
TIP: The bottom could also be attached from underneath with pocket holes.
NOTE: If adjusting for a 1x4 chunkier frame, simply bring the shelf up 1".
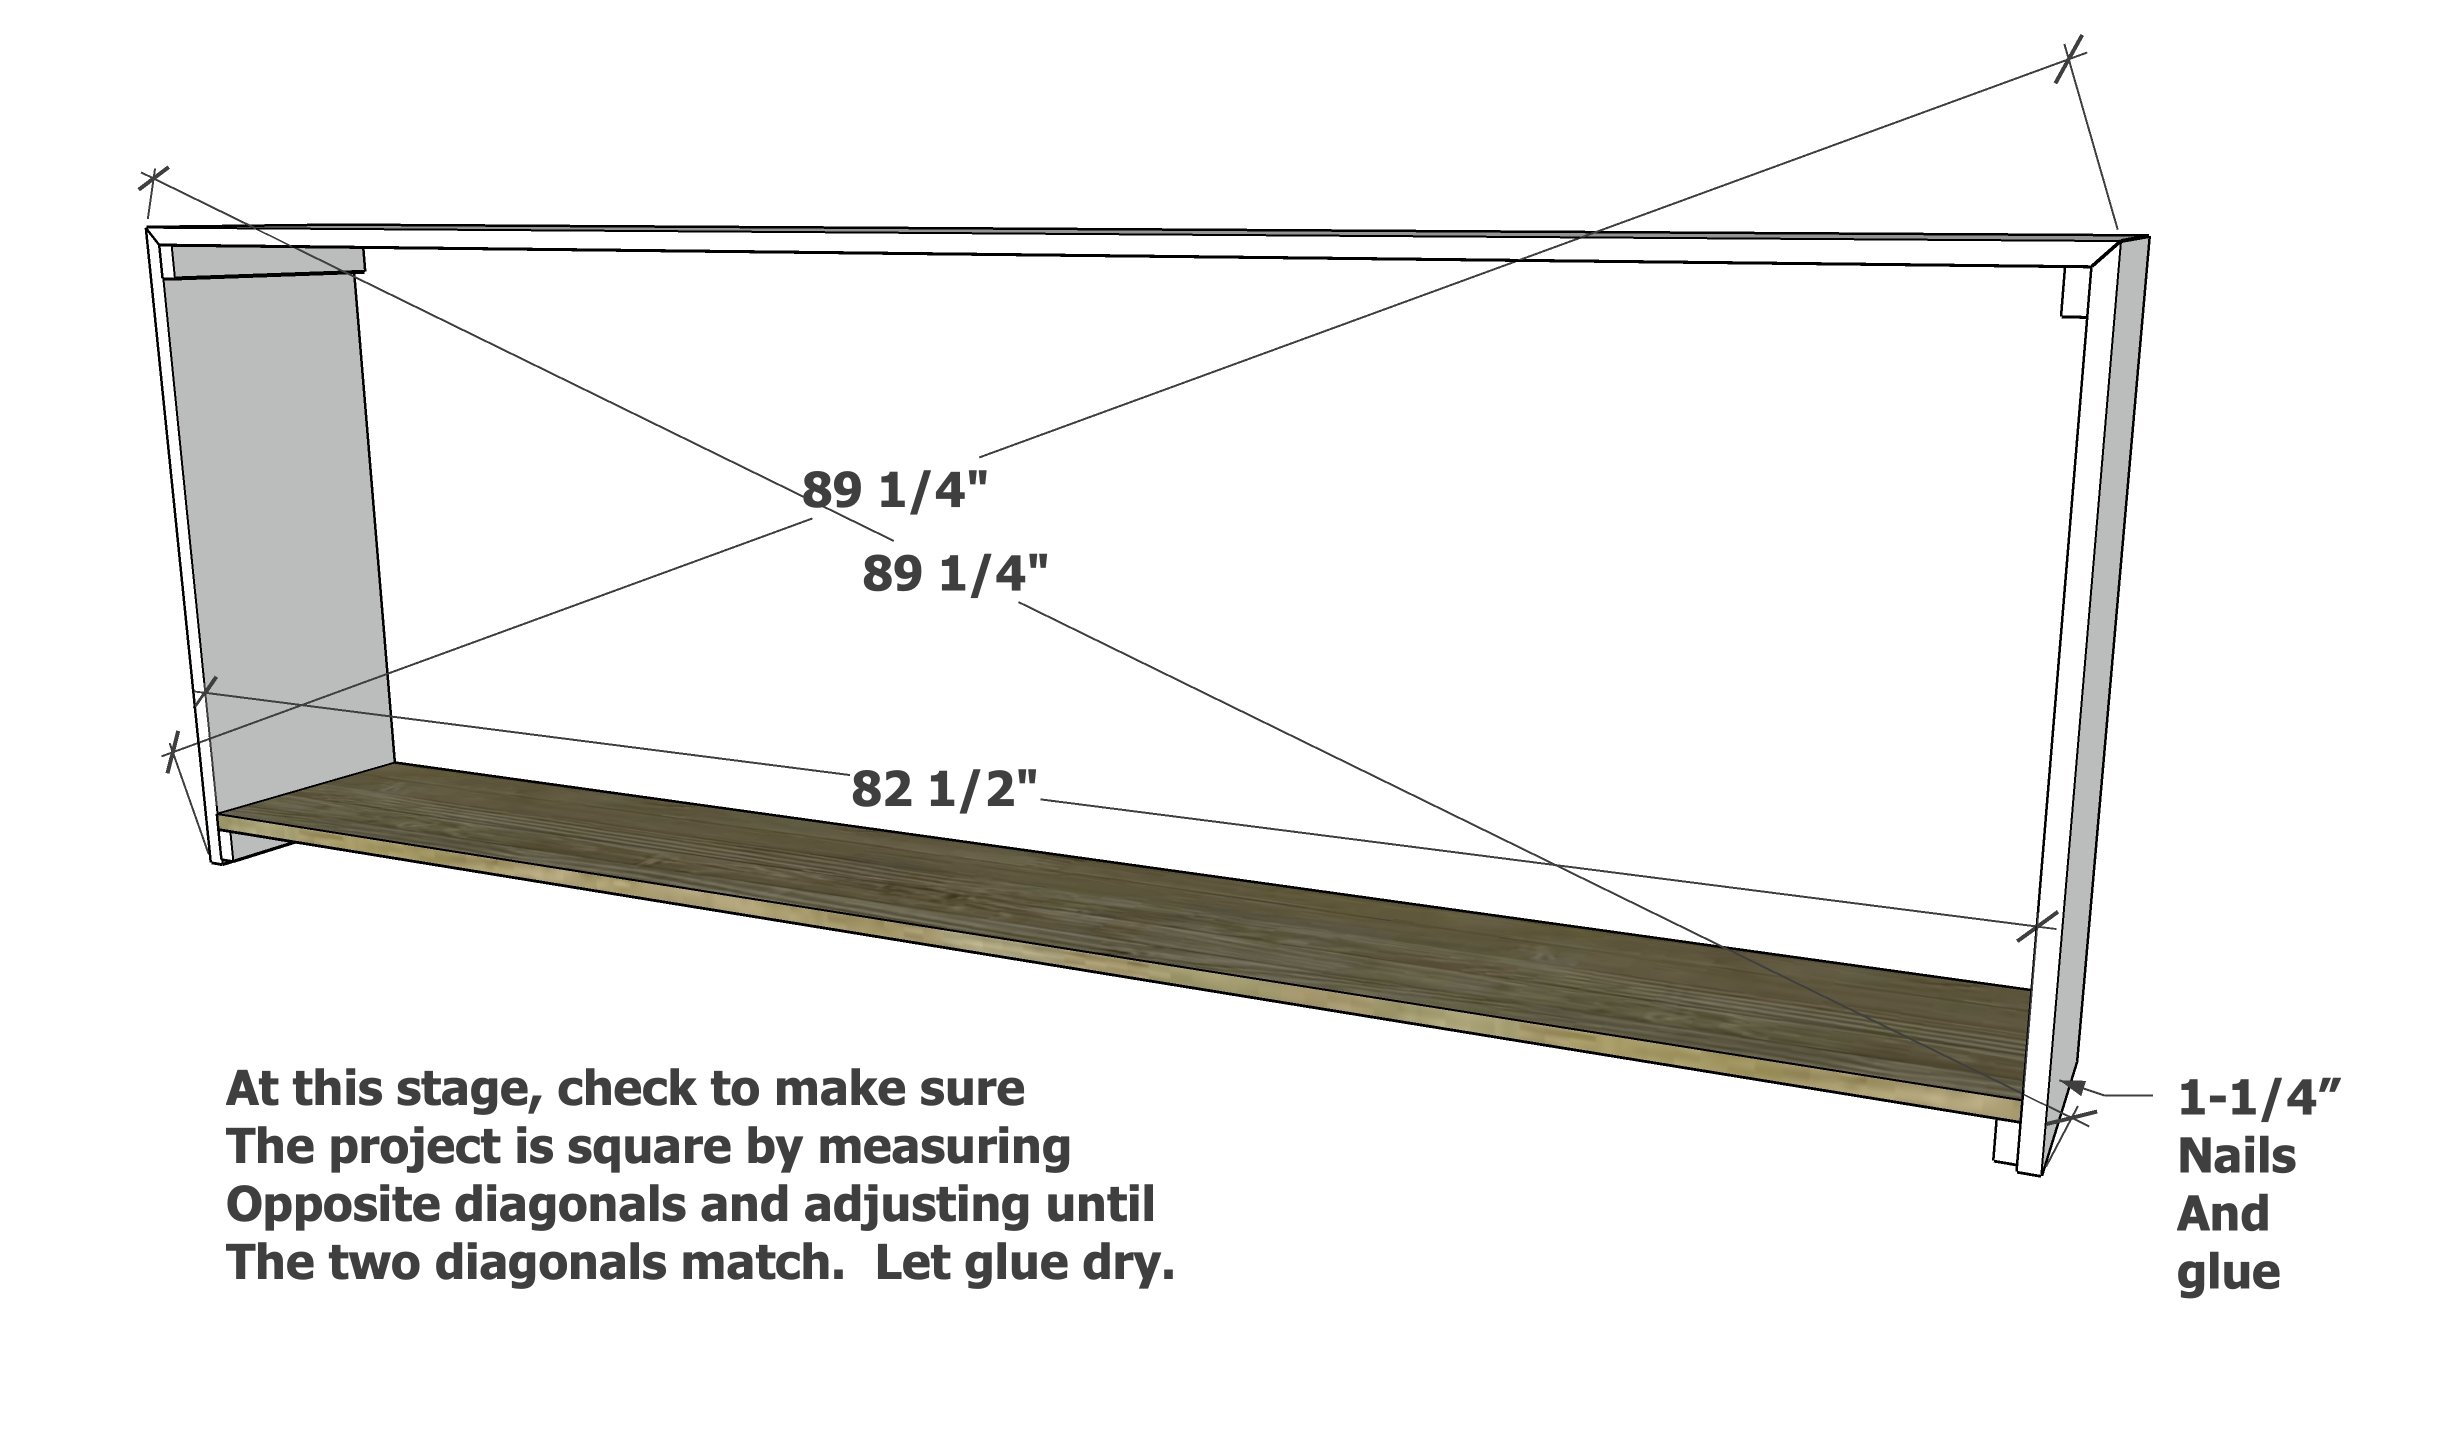
Adjust the project for square.
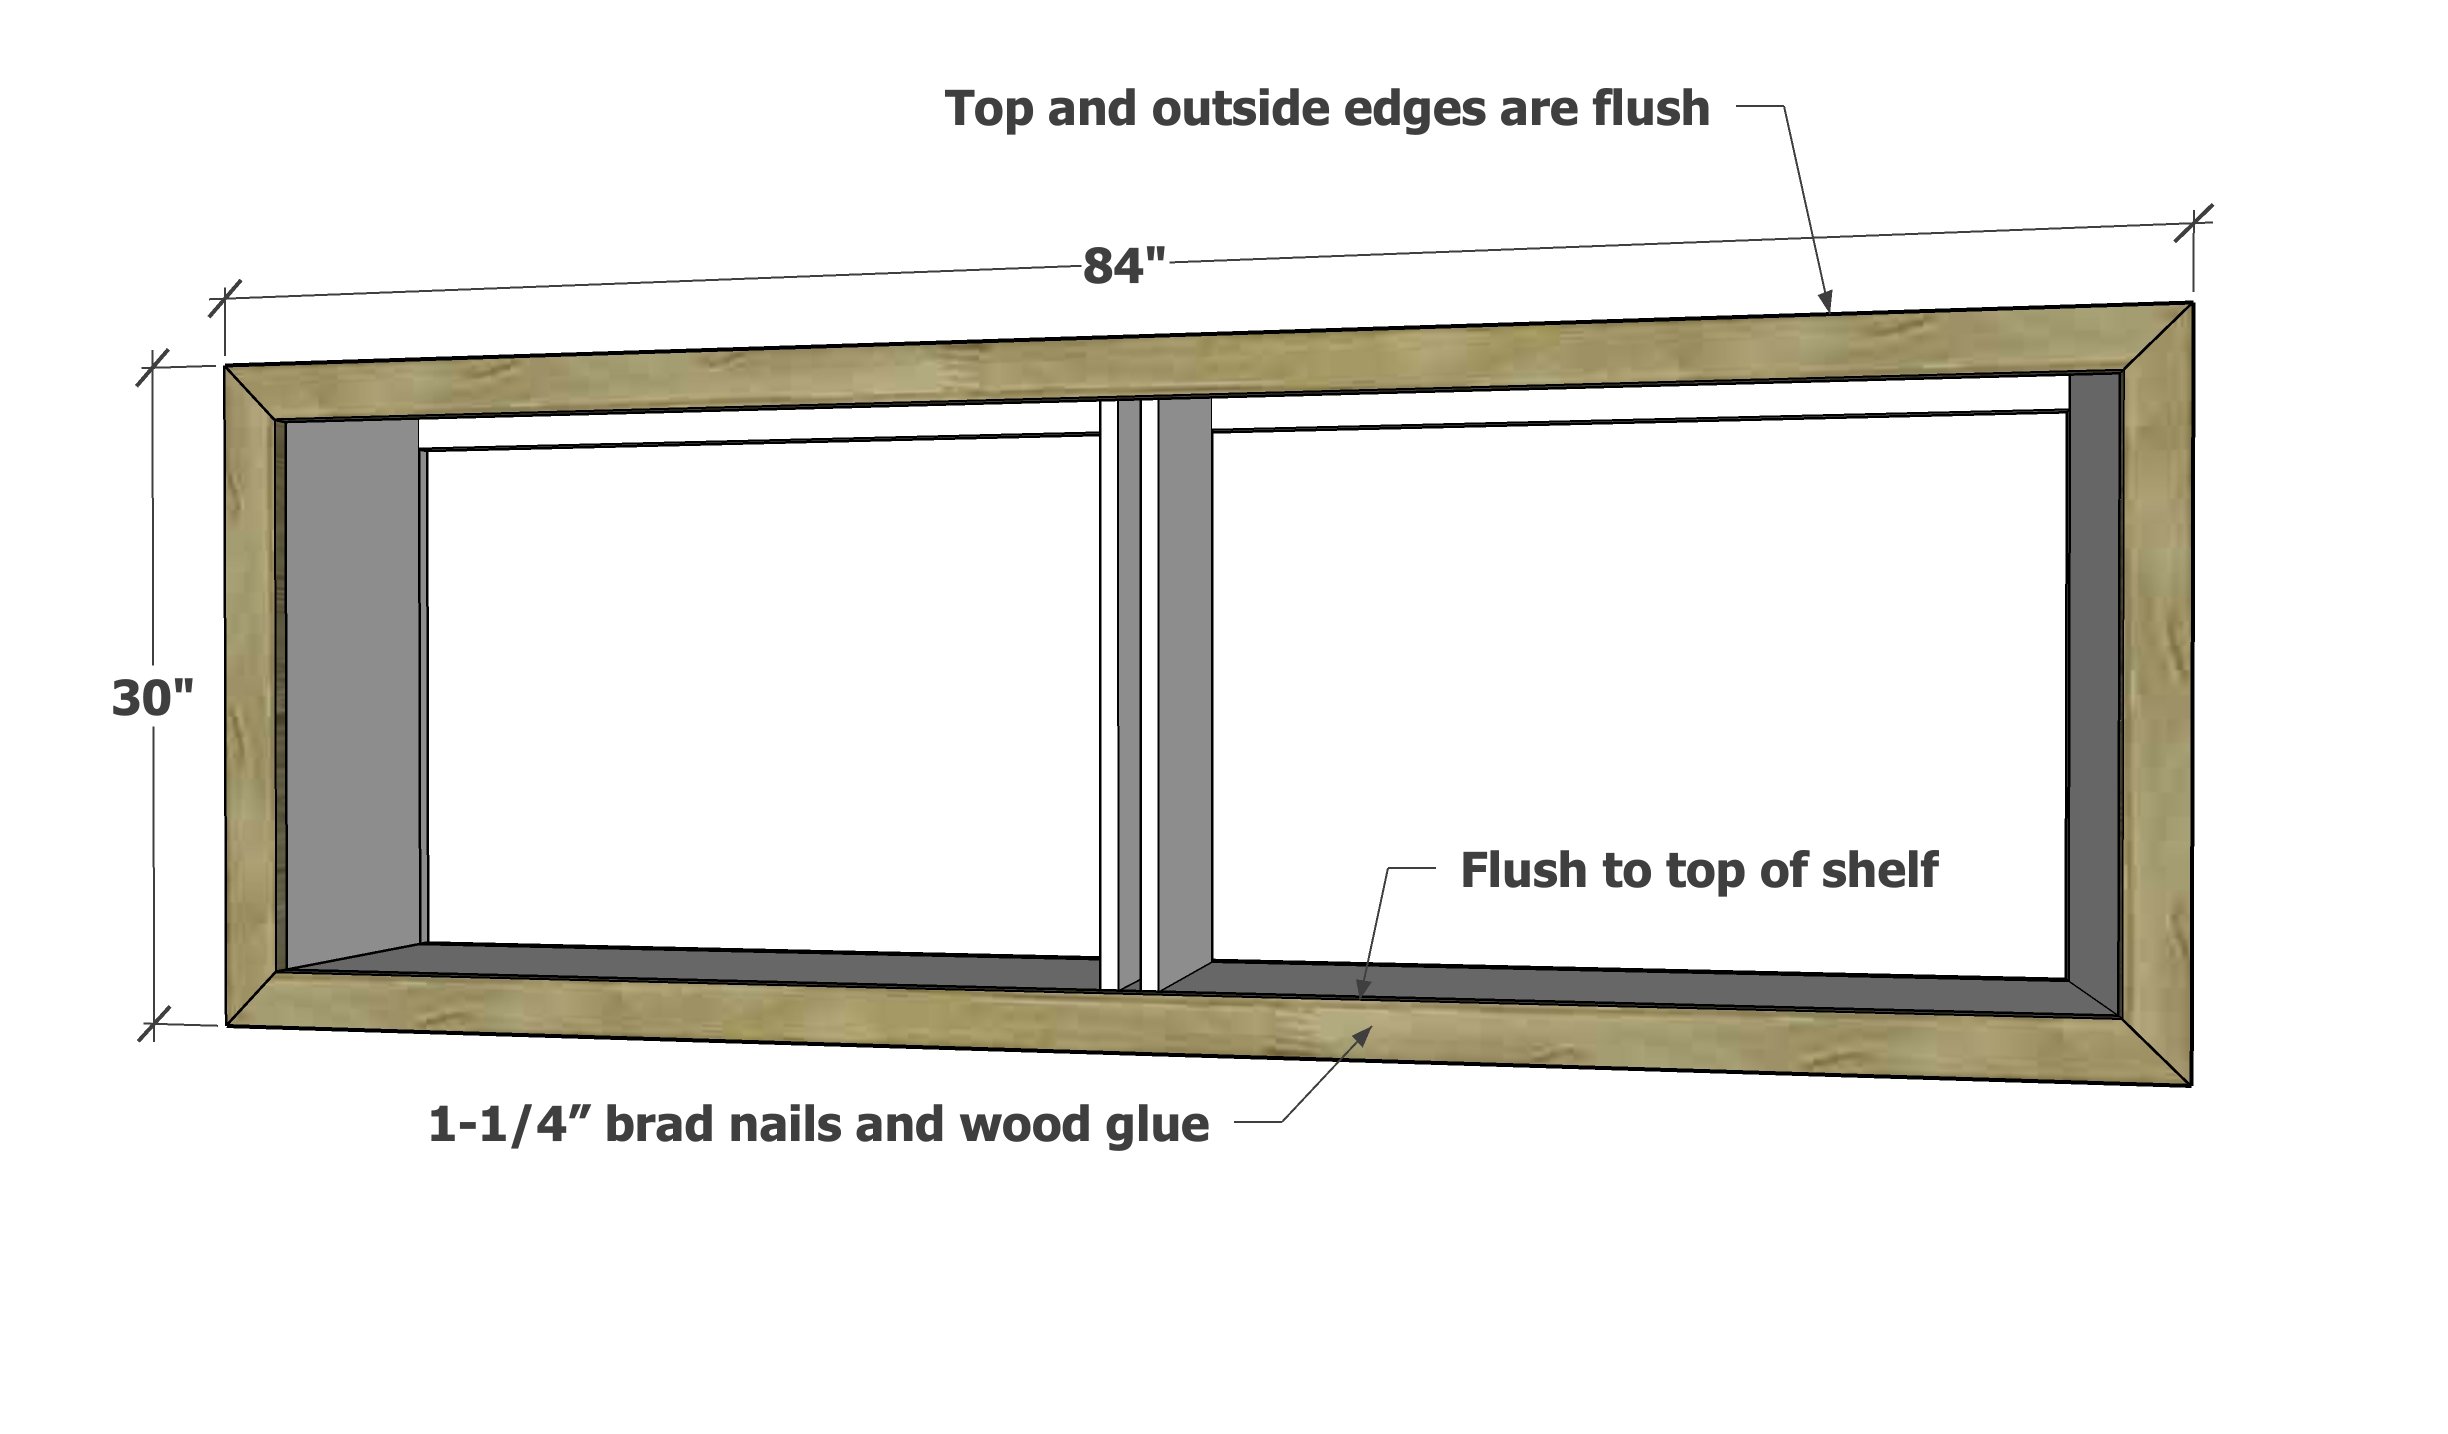
Step 4
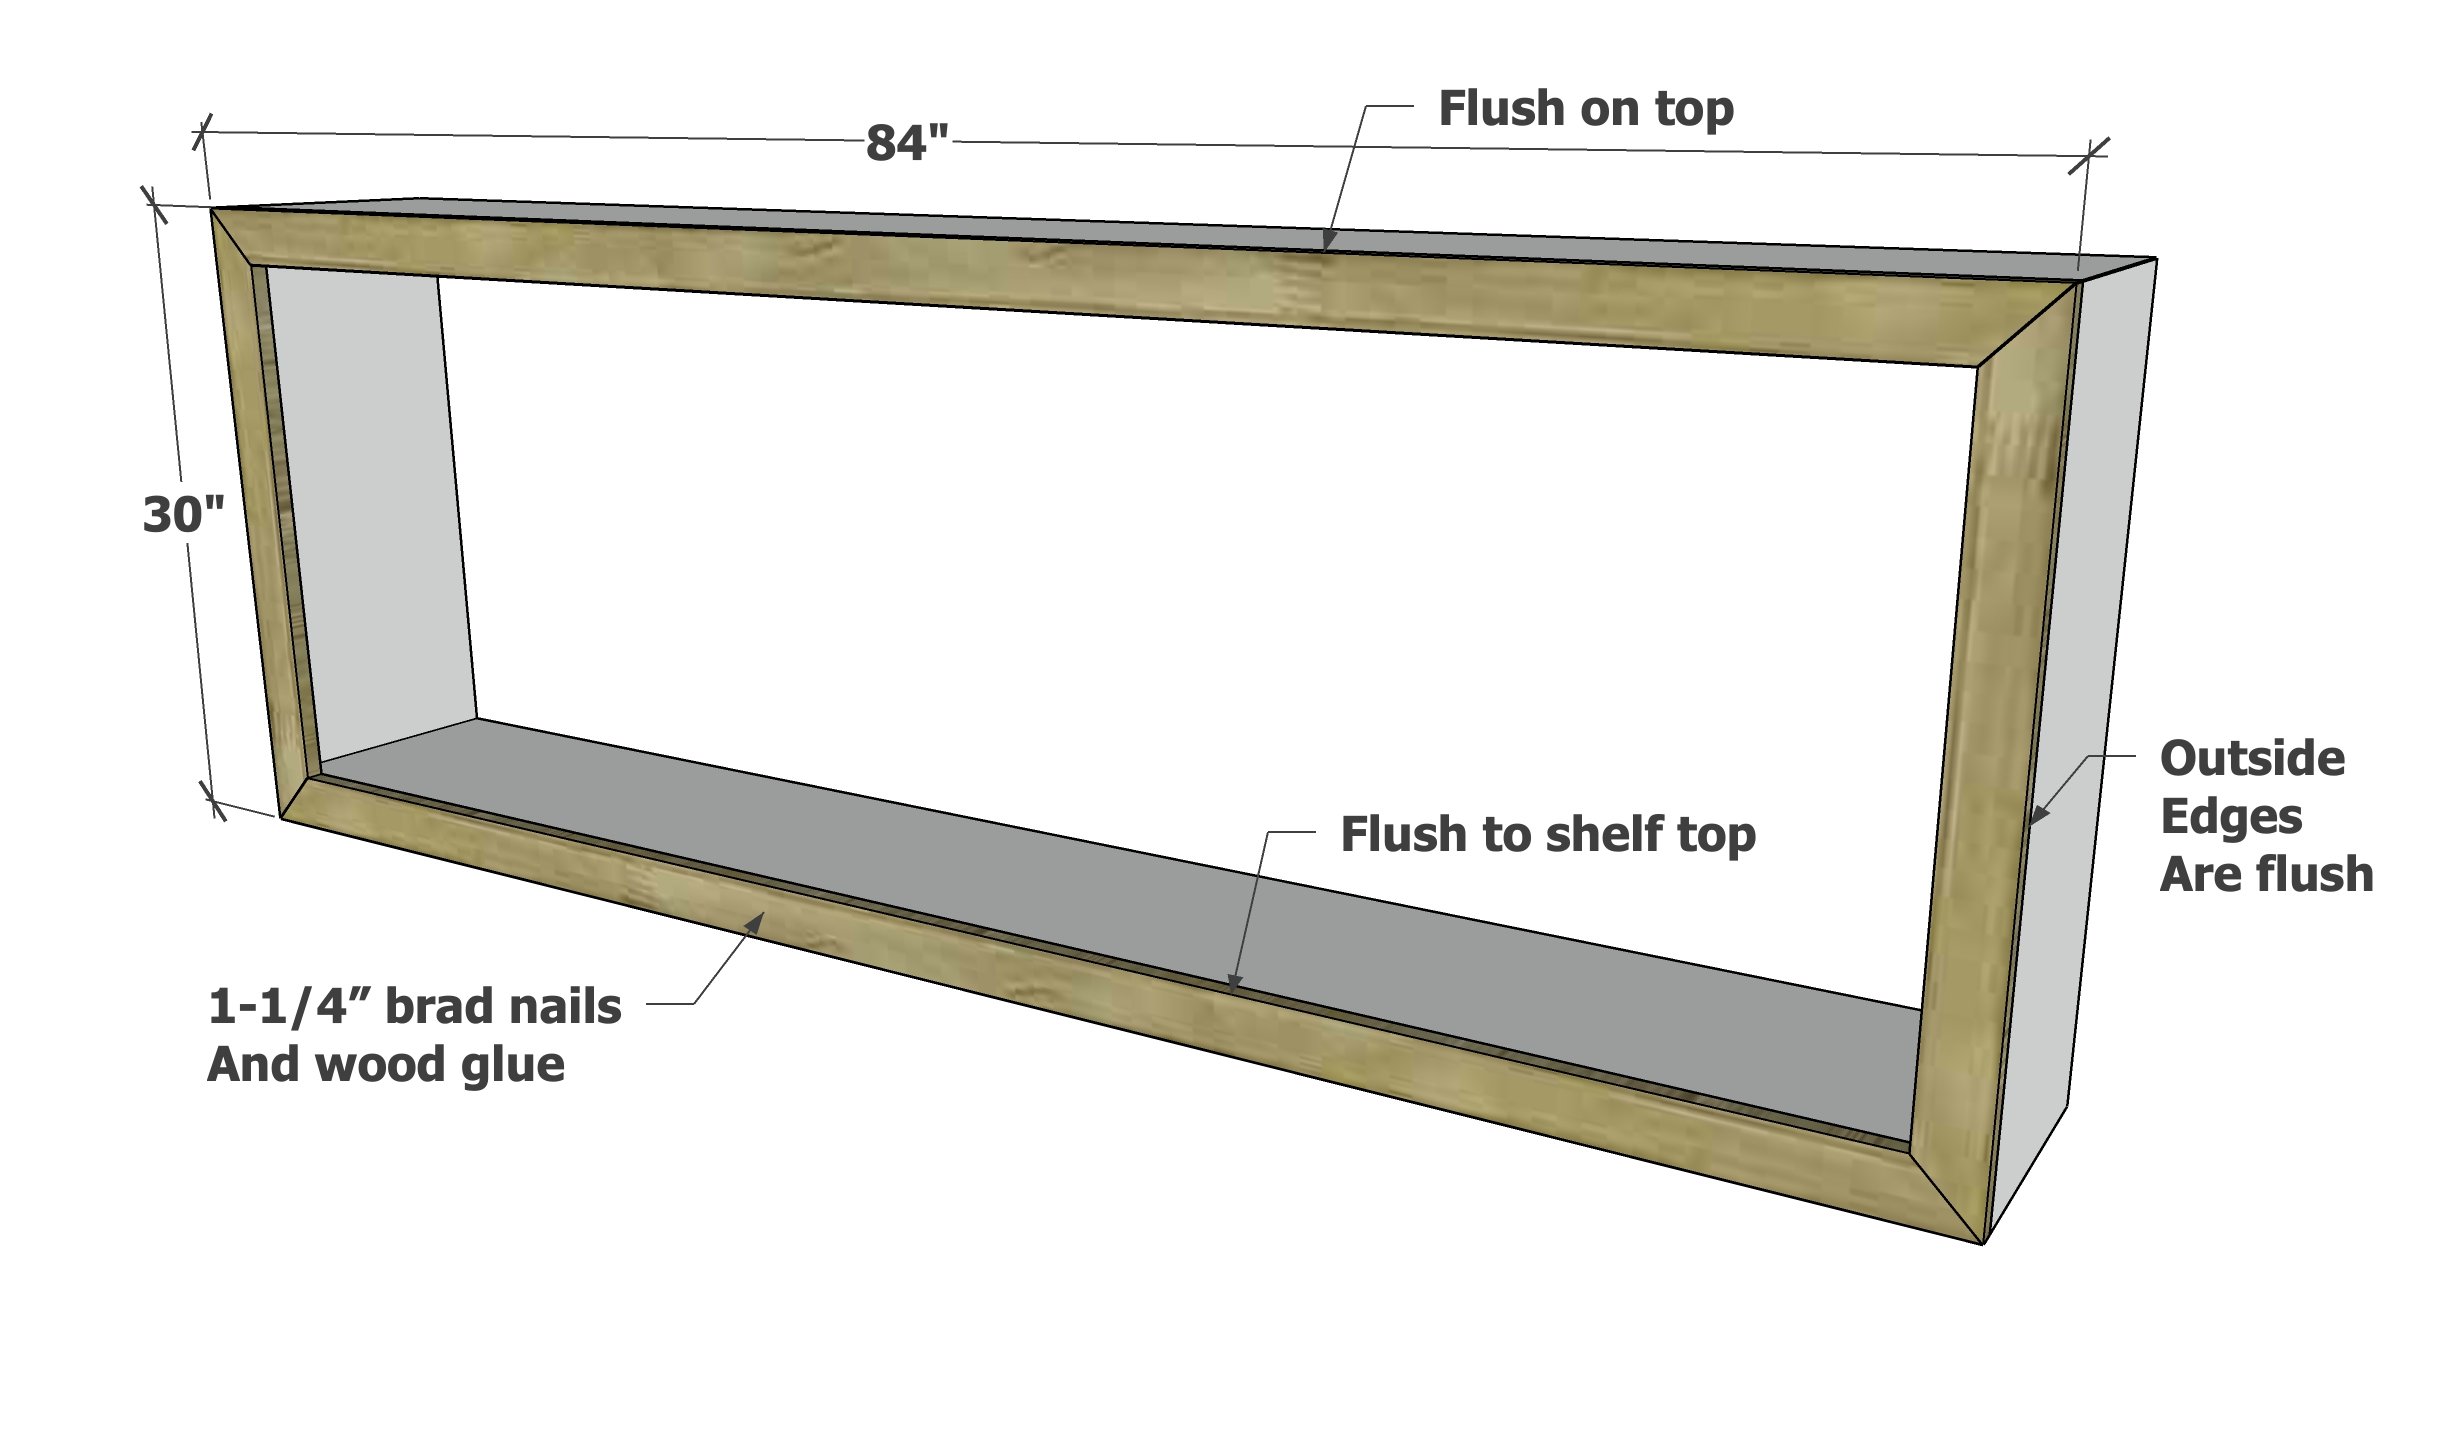
Attach the face frame to the front of the project. Outside edges should be flush, and mitered corners matched.
TIP: For a guarantee the miter corners won't spread over time, attach mitered corners with pocket holes to build the face frame first, and then attach the entire completed face frame to the front. Trim screws could also be used to reinforce the face frame corners.
Step 5
Flip the project over and fill in the sides of the legs, with the new 1x12 board flush to the face frame now on the bottom.
Use a scrap 1x3 to help set the distance over for attaching on the top open side.
Step 6
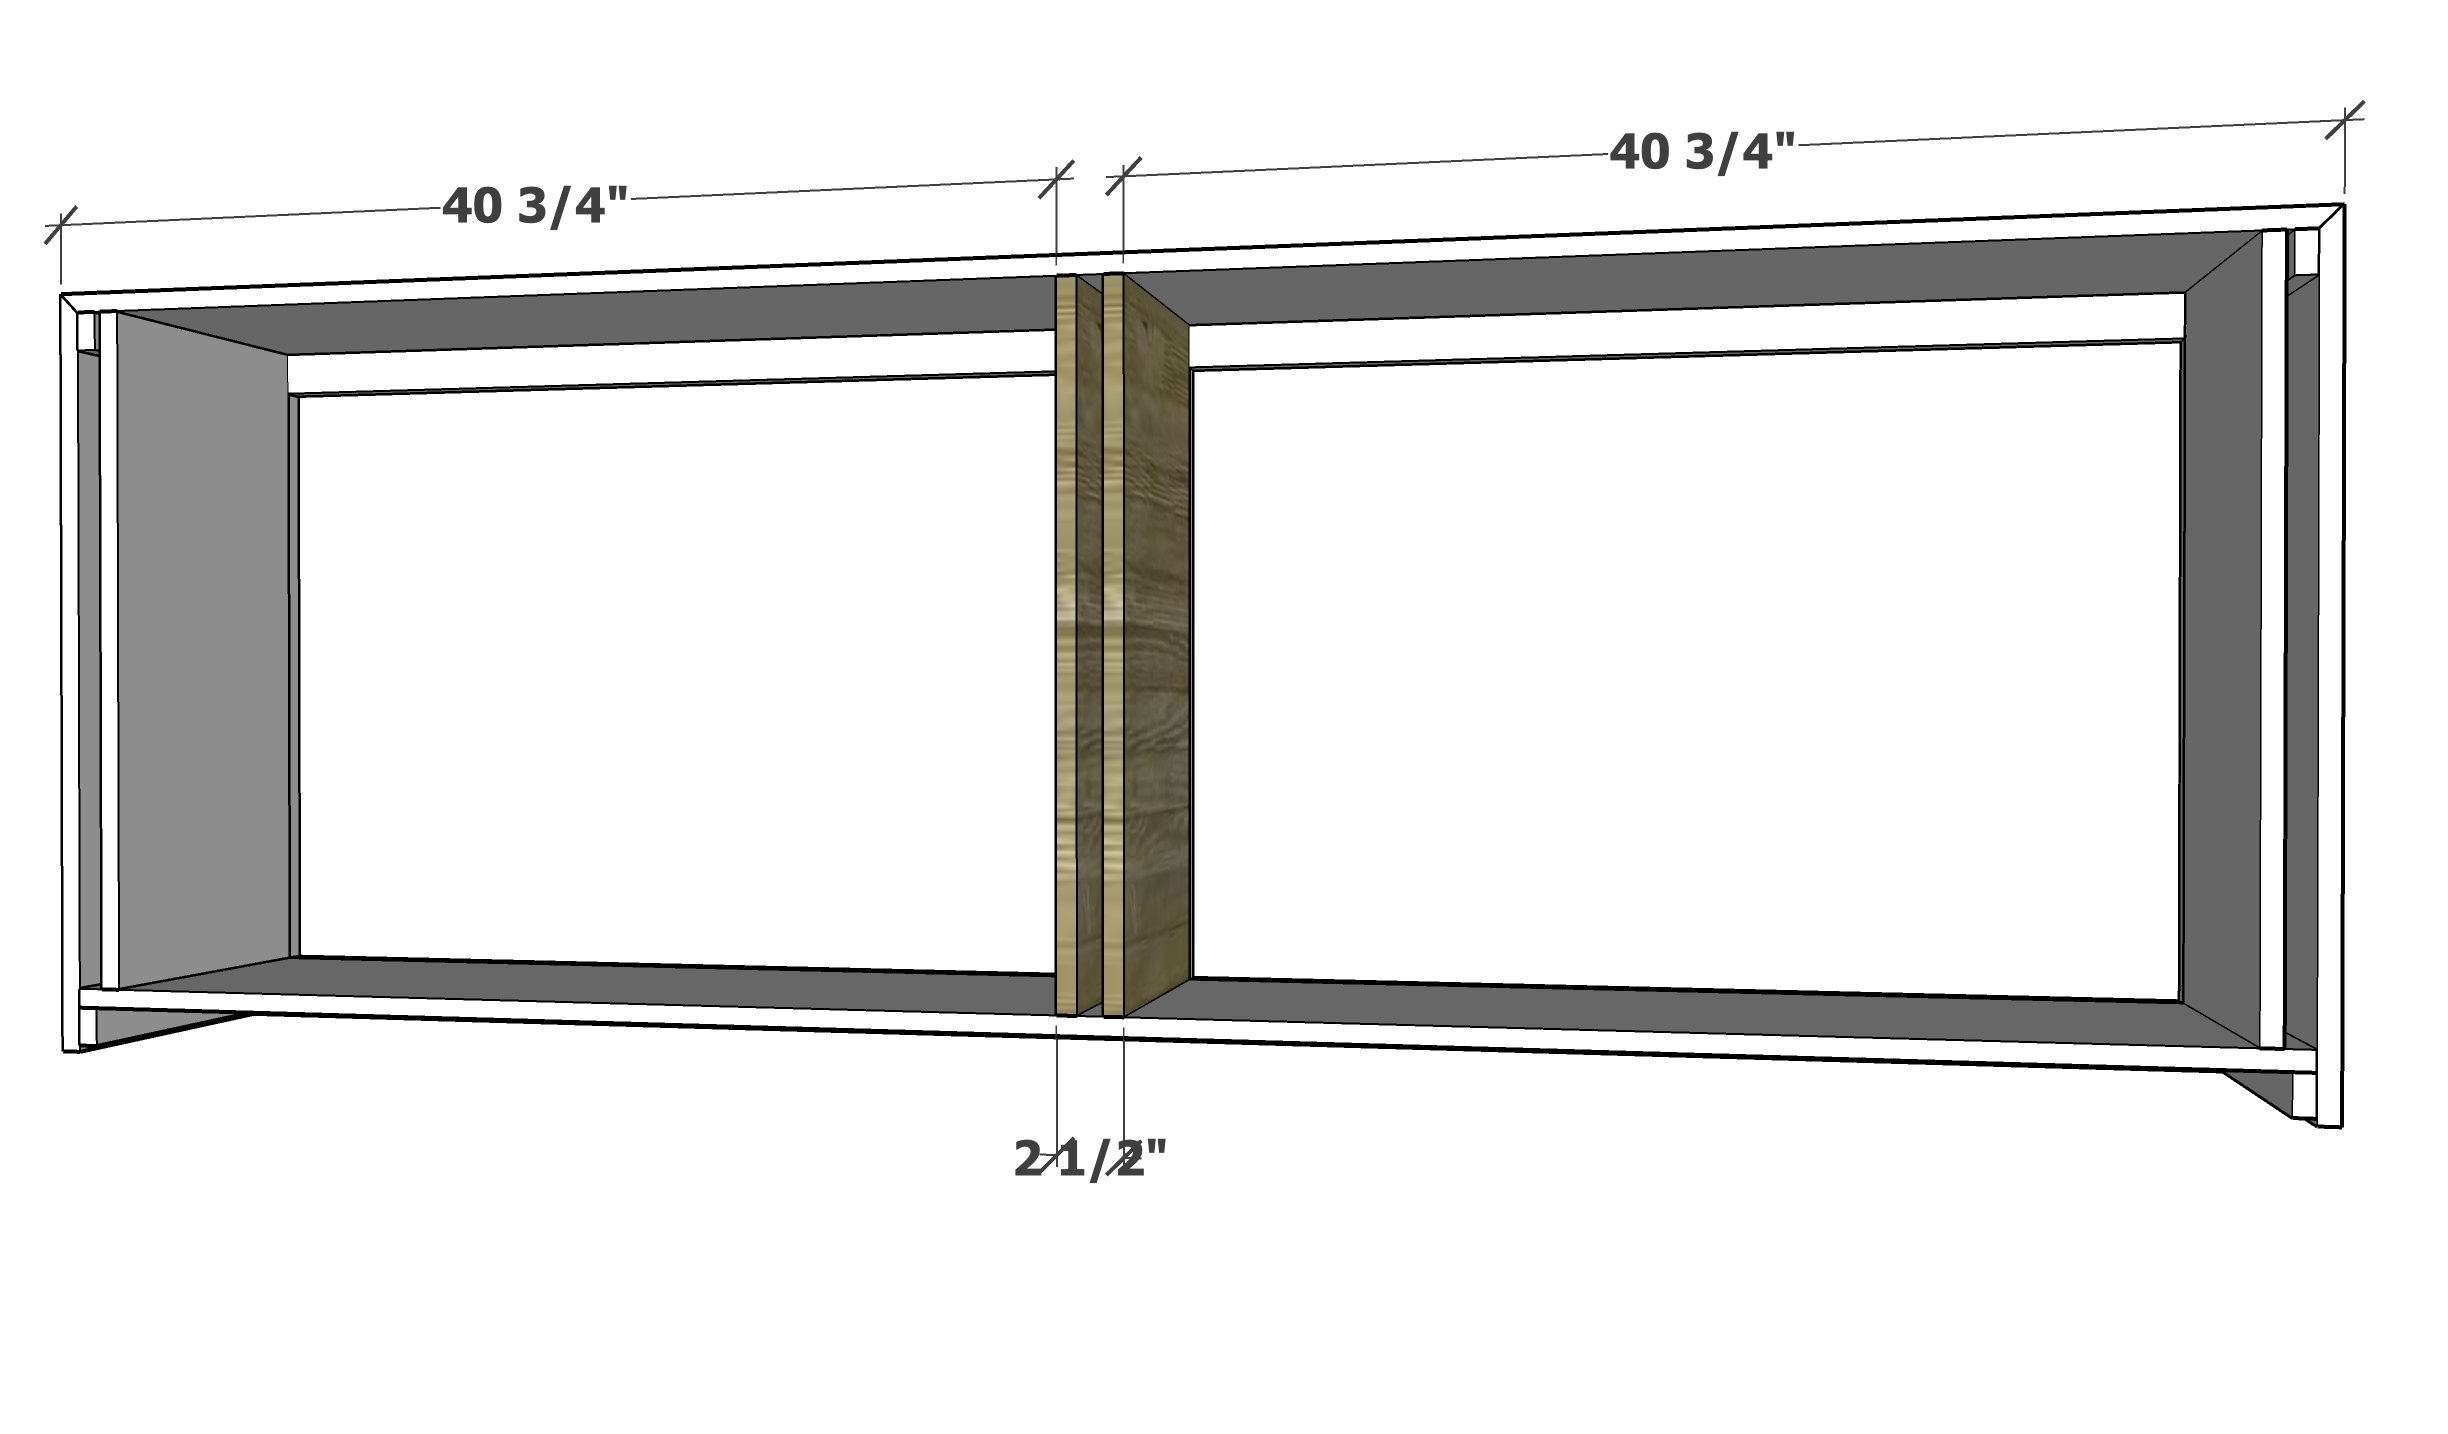
Attach the two middle 1x12 boards as shown. Check to make sure they are the width of a 1x3 apart, so when the 1x3 is added in later steps, the edges are flush.
TIP: For the bottom, screws can be added to pull the bottom shelf in to the dividers. This is not necessary on the top, since the top is reinforced with the face frame and the joint is hidden.
Step 7
Add the face frame to the back side.
Step 8

Fill in the face frame for the center divider with nails and glue.
Flip the project over and finish nailing off in areas that were missed.
Then I added a coat of polyurethane.
I did a final sanding of 220 grit for a super smooth finish.
