


Easy DIY wood Christmas Tree collar - free plans by ANA-WHITE.com
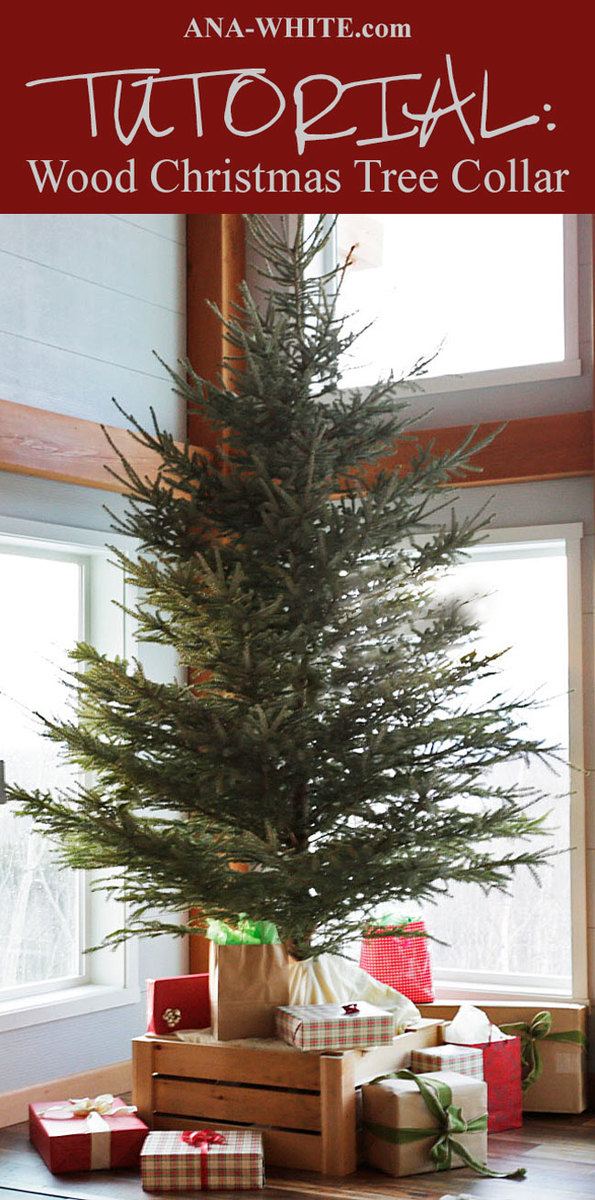
Wood Christmas tree collars are a beautiful addition to a Christmas tree. They dress up the base of the tree and add structure - and never need fixing or adjusting as a fabric skirt might.
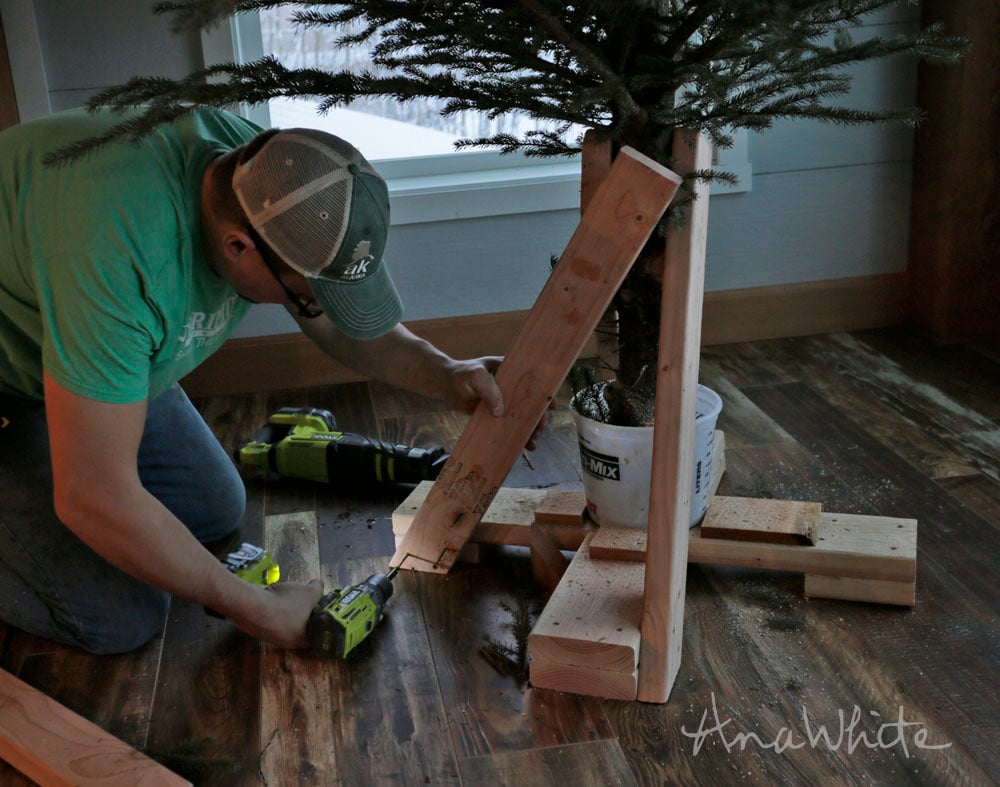
This year, our family DIYed a wood Christmas tree collar. It took us about an hour to make out of standard off the shelf lumber with a few basic household power tools.
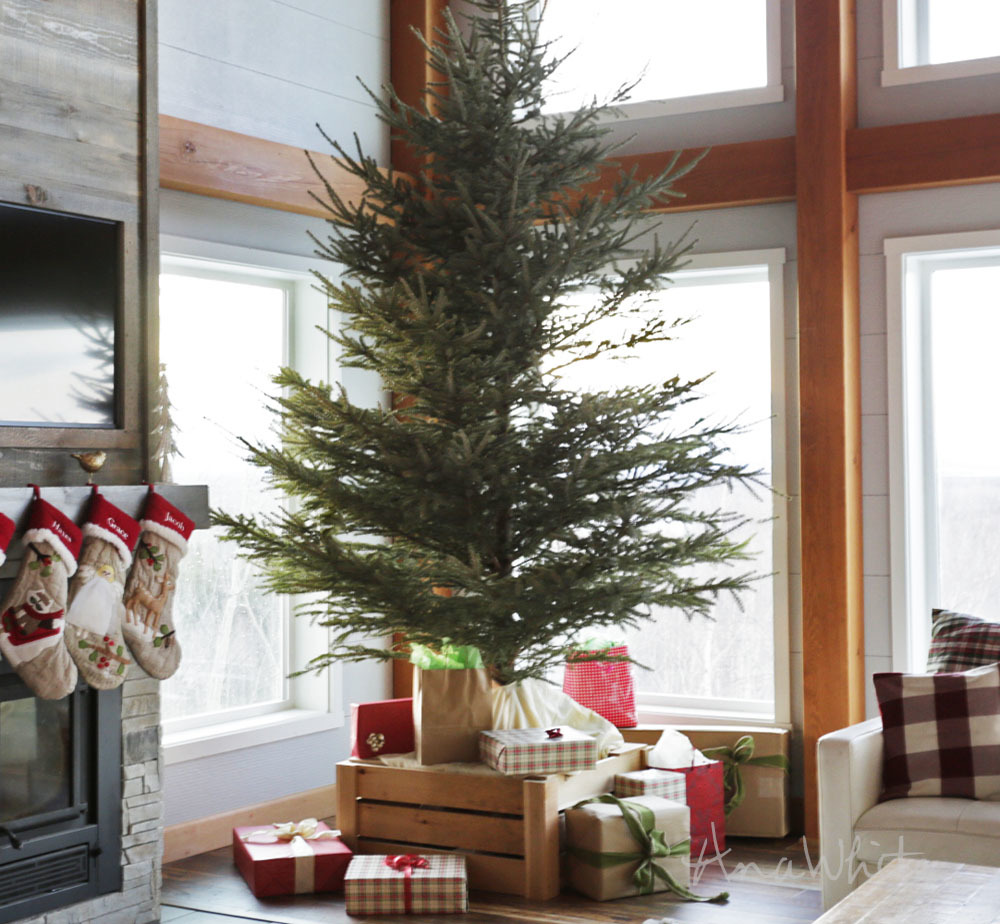
Comparable in cost to a nice tree skit, our wood Christmas tree collar is a big upgrade for a bargain price. We love how gifts can be stacked on top for a tiered display.
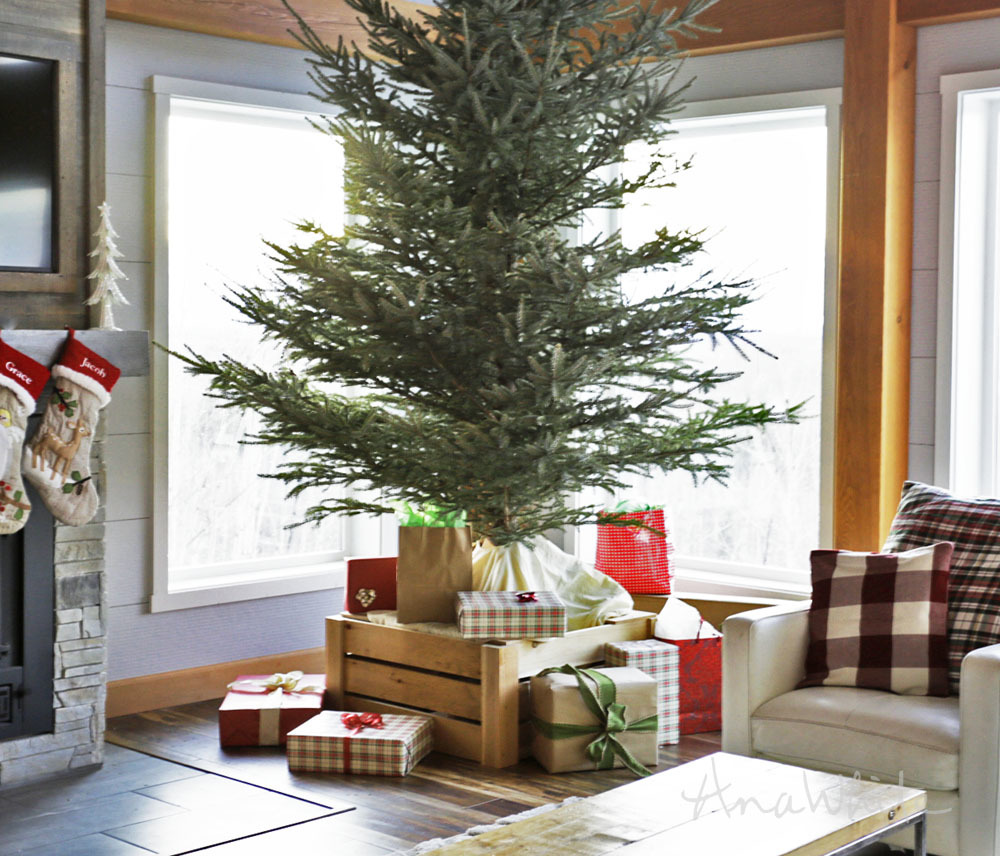
It's also easy to set up and take down, and stores flat to save on space.
Our Christmas tree stand setup was the star of this video - you can watch us build it and set it up (and cut down the tree) -
We love how it turned out and are excited to share the plans with you below.
Happiest Holidays!
Ana
PS - If you also need a Christmas tree base, I shared our how-to here.

BUILD NOTES:
It's easy to adjust the size of this Christmas tree collar.
HEIGHT - To get the desired height, simply divide your overall desired height by 3. Whatever number you come up with, choose that size board. For example, if your desired height is 18", divided by 3 you'd get 6 - so just use a 1x6 board. Just make sure you cut the 1x3s and 1x4s to fit, leaving a 1/2" gap in between.
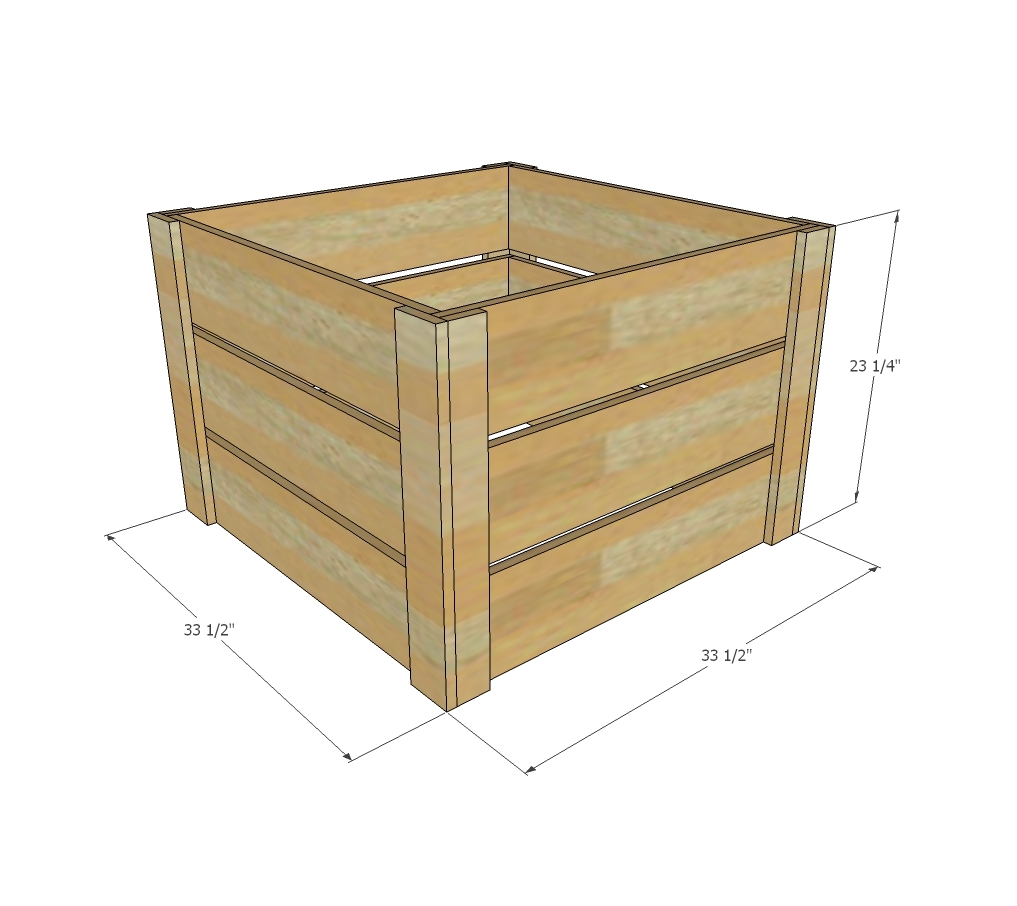
WIDTH/DEPTH - To size to a certain width/depth, simply cut your 1x boards to the desired width/depth. Remember to size at least as big as your Christmas tree stand.
In this plan, I've used 1x8s for a Christmas tree collar about 2 feet tall. Also note certain lengths are more efficient when cutting boards (you can get 3 - 32" pieces from an 8 foot board, but only two 33" pieces) 24" and 48" are good numbers too.
Preparation
FOR THIS CHRISTMAS TREE COLLAR
4 - 1x8 @ 8 feet long
1- 1x3 @ 8 feet long
1 - 1x4 @ 8 feet long
6 - 1x8 @ 32" - cut two from an 8 foot board, and then a 30-1/2" to get all cuts in
6 - 1x8 @ 30-1/2"
4 - 1x3 @ 23-1/4"
4 - 1x4 @ 23-1/4"


Instructions
Step 1

Lay 2 - 1x3s on flat surface and place two 1x8 @ 32" on top, lined up with each end. Use 1-1/4" nails and wood glue to attach.
Step 2

Position center 1x8 in middle with even gaps on both sides and attach.
Repeat to build two of the underlapped ends.
Step 3
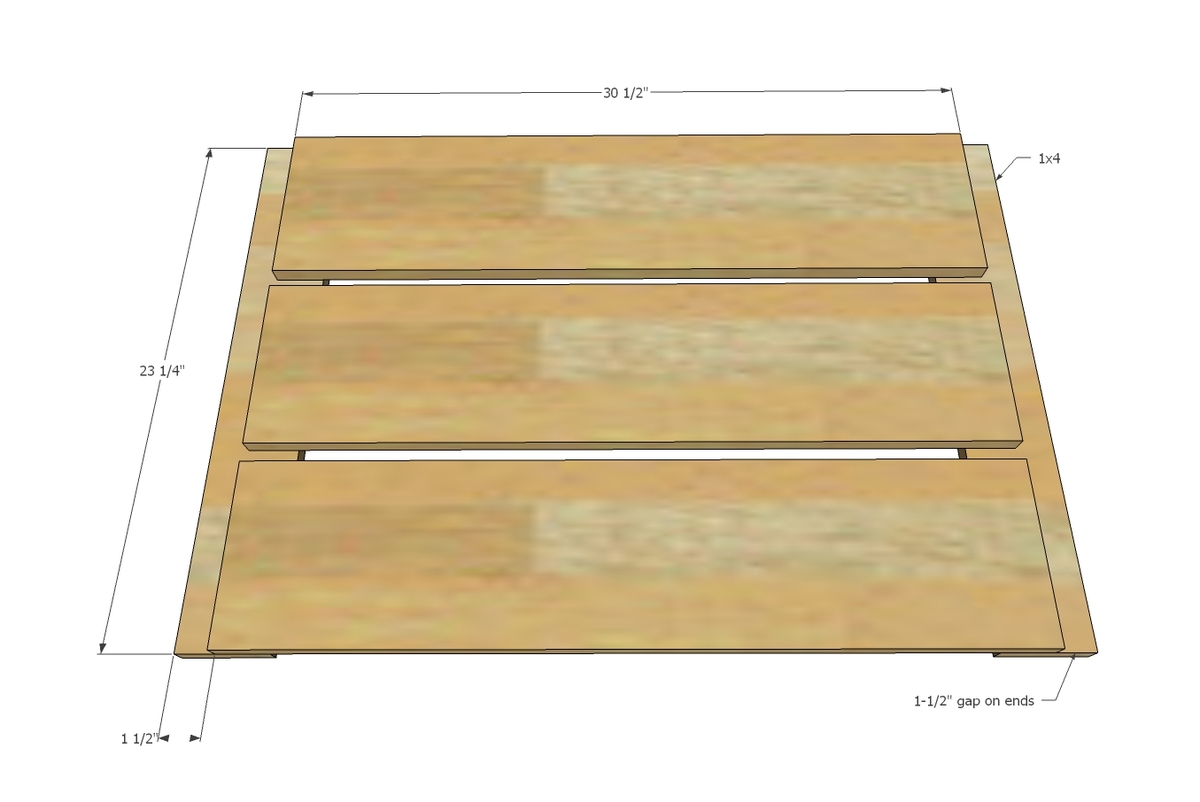
Now for the overlapped ends.
Repeat steps 1-2, but leave a 1-1/2" gap on ends of 1x8s. A 1x2 scrap works great as a guide (just clamp to the 1x8 or hold in place while attaching).
Step 4
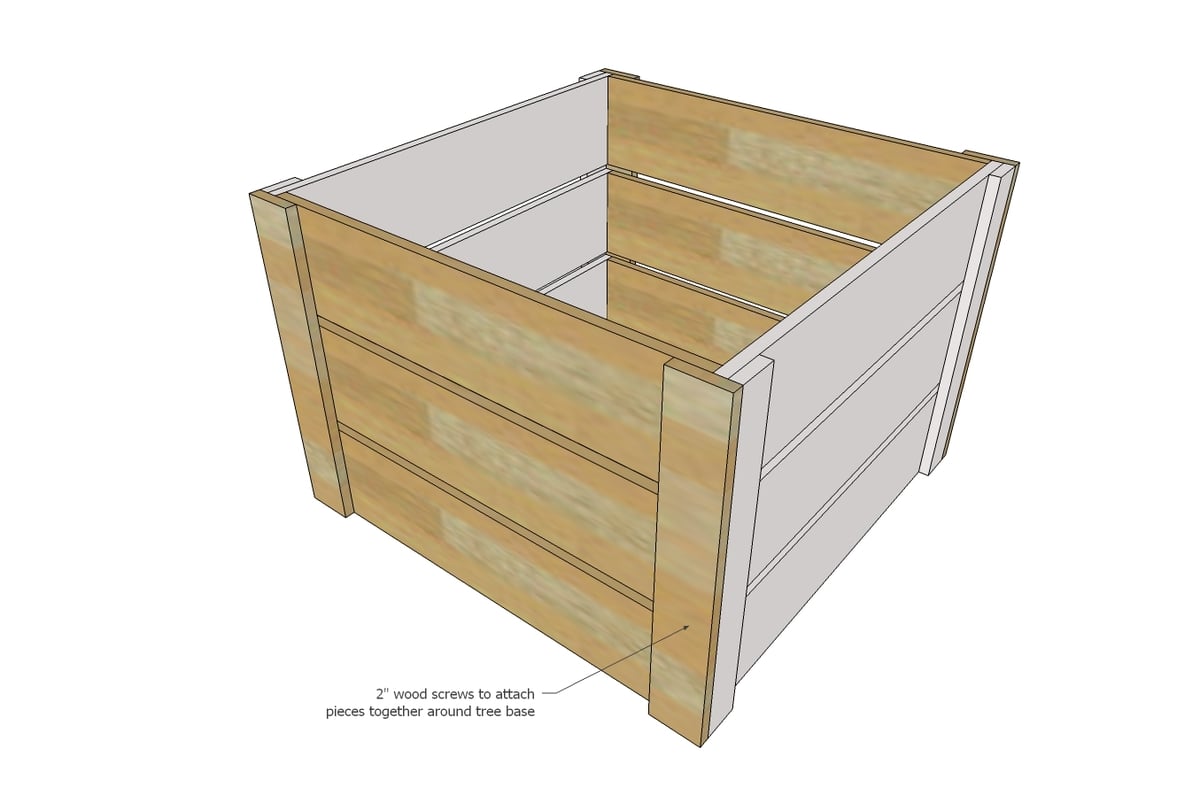
After Christmas tree has been set in stand, screw panels around tree base with 2" screws.
NOTE: We also added plywood scrap pieces on top for resting gifts on top of Christmas tree collar.
