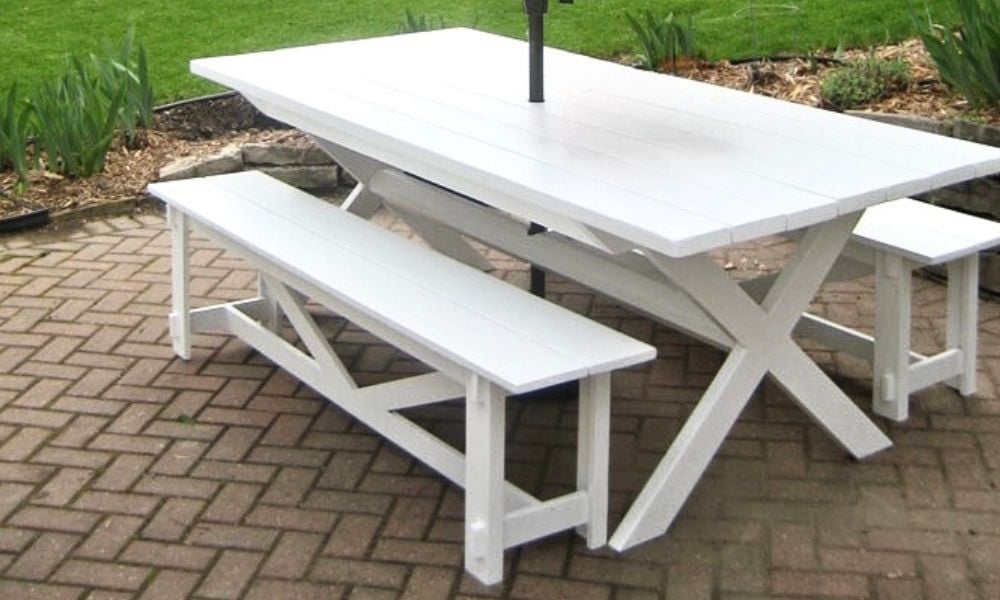


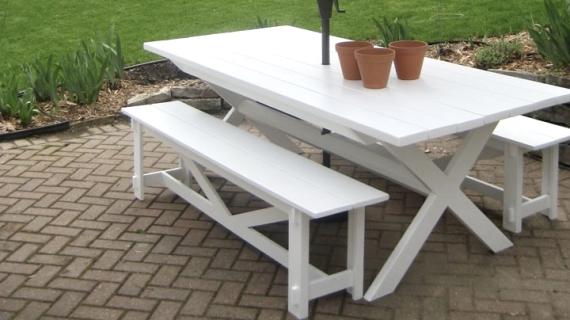
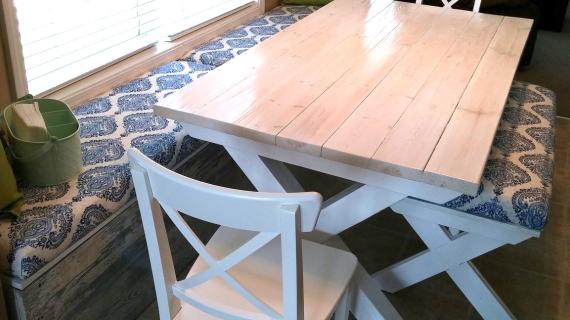
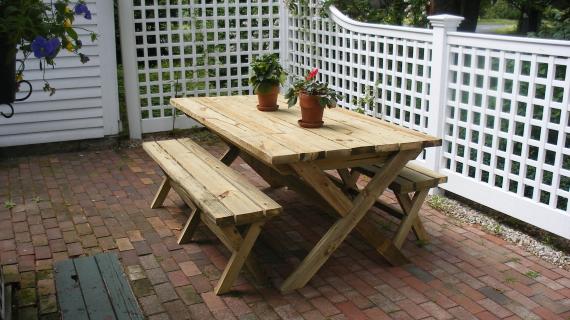
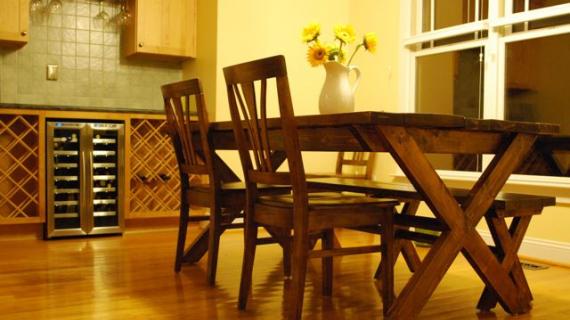
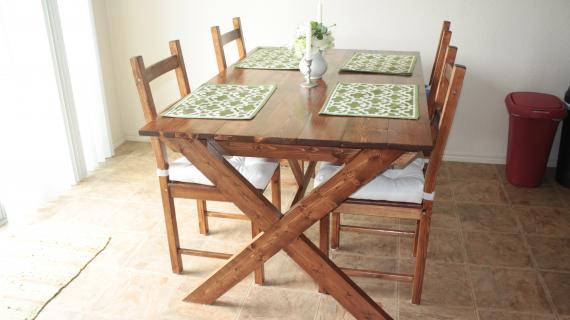
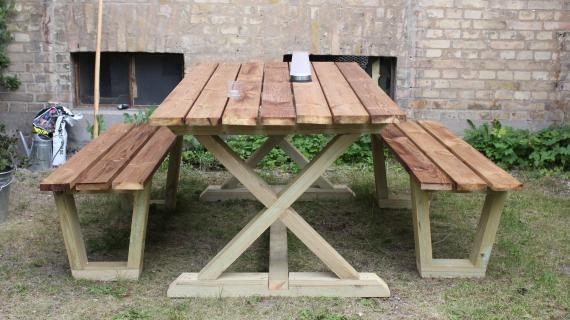
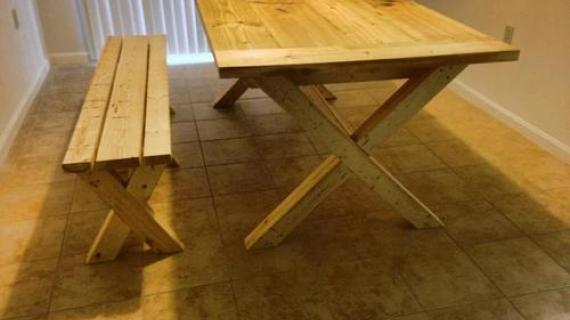
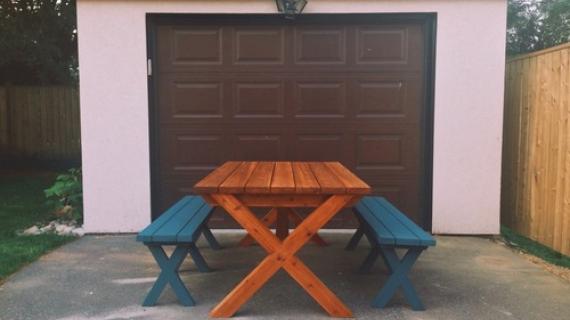
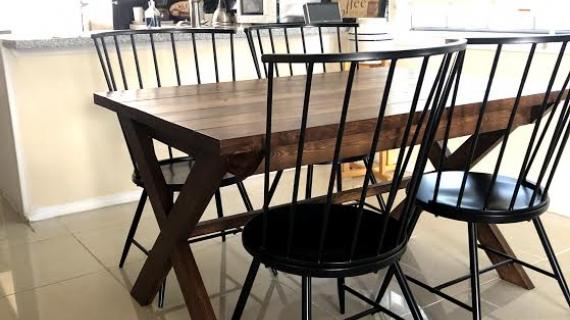
Here's a beautiful, stylish and easy to build outdoor table that you can build with basic materials! This outdoor dining table features and X base and planked wood top. Add outdoor chairs or build your own benches to match.
This is a free, step by step woodworking plan with detailed diagrams, shopping and cut list - everything you need to build your own outdoor table!
RELATED PLANS: Outdoor X Base Benches
Pin For Later!

Preparation
- 3 – 2×6, 12′ Length
- 1 – 2×6, 8′ or Stud Length
- 1 – 2×4, 8′ or stud length
- 1 – 2×2, 8′ Length
- 7 – 1×4, 8′ Length
- Wood Glue
- 1 1/4″ Wood Screws
- 2″ Wood Screws
- 2 1/2″ Wood Screws
- Finishing Supplies (Wood Filler, Paint, Stain, Sandpaper, Sealer)


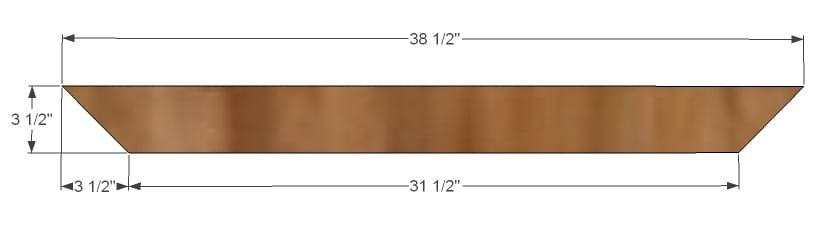
- 2 – 2×4 @ 38 1/2″ (Ends mitered back at 45 degrees as shown in step 1)
- 5 – 1×4 @ 30″ (Supports)
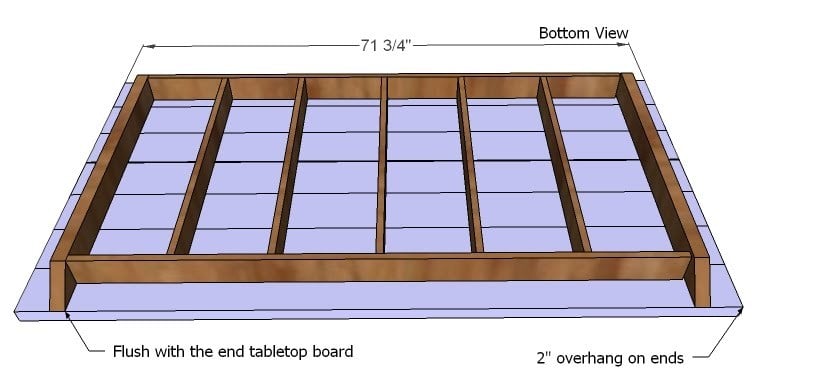
- 7 – 2×6 @ 71 3/4″ (Tabletop Boards)
- 2 – 1×4 @ 61 3/4″ (Side Aprons)
- 4 – 1×4 @ 40 1/4″ (Ends cut at 45 degrees, parallel)
- 8 – 1×4 @ 20 1/8″ (ONE end mitered down 45 degrees off square, measure to fit on legs)
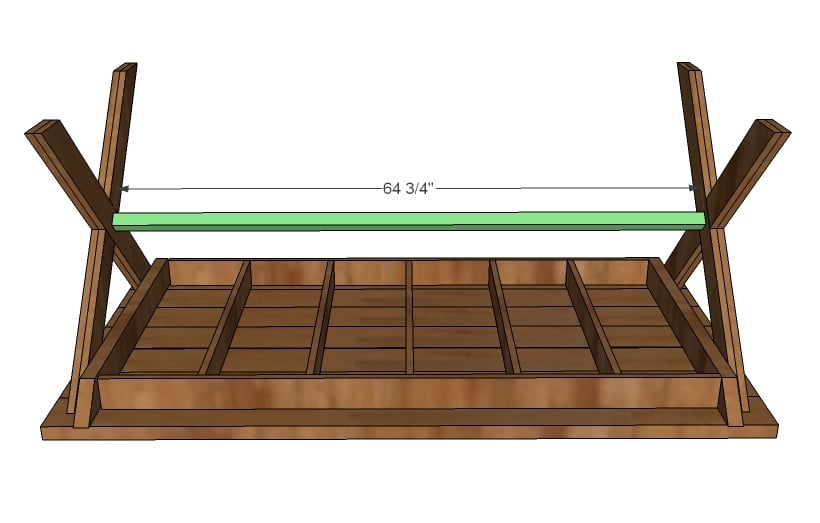
- 1 – 2×2 @ 64 3/4″ (Stretcher)
Instructions
Step 1
Apron Ends
Cut your apron ends as shown above. The angles on the ends are 45 degrees. You will need to cut 2 of these.
Step 2
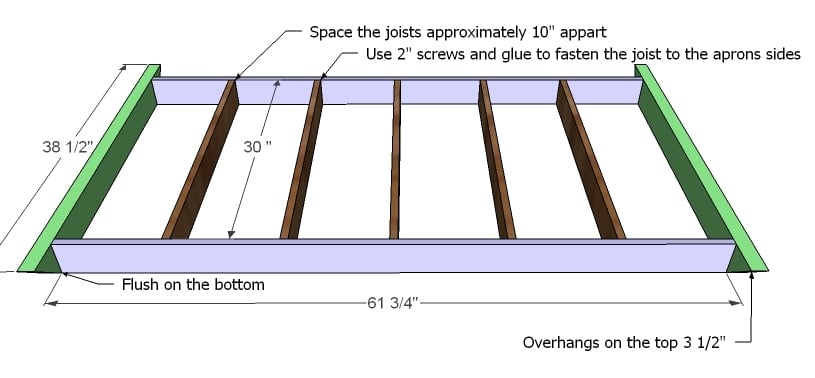
Table Frame
Start by marking your table side aprons (the 1x4s 61 3/4″ long) every 10″ (this does not have to come out exact). Use these marks to guide you as you attach the supports, as shown above. Use 2″ screws and glue. Then screw the side aprons to the end aprons from step 1. Make sure you square your project at this step.
Step 3
Tabletop Boards
Use 2 1/2″ screws and glue to fasten your tabletop boards as shown above. Remember, if you want to use your table for outdoor purposes, you should leave a 1/4″ gap between the boards. You can use a flat carpenters pencil as a guide. This will increase your overhang on the ends by approximately 3/4″, if you choose to ad spacing between your boards. One tip a reader suggested is examining the ends of your boards. Each board will have a “bark” side or a side that the grain bends away from. Alternate the bark side up and the bark side down as you lay your tabletop boards. That way if your boards do “move” as wood can do, the boards will expand in a complimentary fashion, minimizing any tabletop warping.
Step 4

Tabletop board orientation
If you are using the table outdoors, bark side down will avoid cupping, and create better water drainage. The above photo is an exaggeration, but even the slightest amount of crowning will keep water (the enemy) from pooling on top of your outdoor table.
Step 5

Building the X Base Frames
Attach at the center with 2-1/2" self tapping screws.
Step 6

Attaching Legs to Table Base
Finish the legs by attaching the remaining leg trim pieces using 1 1/4″ screws and glue. Hide your screw holes by attaching from the insides. Then using the 2 1/2″ screws, fasten the legs to the side aprons, centering the legs on the side apron.
Step 7
Stretcher
Your table is going to need something to keep the legs from spreading appart – think dragging the table from the end. The amount of leverage on those top screws would be quite strong. So to keep your table together you can do a cross braces from the center of the Xs to the underside of the table. But I choose to keep this super simple and do a 2×2 as a stretcher so that most any beginner could tackle this project. Simply use the 2 1/2″ screws to screw the stretcher to the legs, in the centers of the X. TIP – once one side is fastened, use a level to determine where the other side should be fastened.


Comments
teamshield (not verified)
Wed, 05/05/2010 - 01:22
Ana:I was all set to build
Ana:
I was all set to build your other outdoor table, but now this?!? Which to choose?
Thank you thank you for all your hard work. I am obsessed with your plans, have a list of what I am making next and talk about you constantly.
Leslie (not verified)
Wed, 05/05/2010 - 01:49
OMG, do you ever sleep?
OMG, do you ever sleep? :)
Thanks for this great plan. However, I echo the above post in wondering which plan to choose. There are so many amazing choices. I guess I'll have to build them all!
Have a super day!
Catherine Hans… (not verified)
Wed, 05/05/2010 - 03:10
I love this table!! Thanks
I love this table!! Thanks Heidi and your Dad too!
Mother Hen (not verified)
Wed, 05/05/2010 - 03:54
Great plans/pattern! I
Great plans/pattern! I bookmarked this post so my Cowboys can make me a couple of these as soon as we get moved to the ranch this summer.
http://ourmeanwhileranch.wordpress.com/
kch (not verified)
Wed, 05/05/2010 - 03:59
Love the table and I'm dying
Love the table and I'm dying to enlarge it and make it for our new (giant, 12 seater) dining room table. Question: The cut list mentions a 2x4 but none is listed on the shopping list. Is the 8' 2x6 supposed to be an 8' 2x4?
In reply to Love the table and I'm dying by kch (not verified)
sharon-l
Thu, 08/29/2019 - 09:54
Step 1
Step 1 is where you use the lone 2x4 for those reading this now.
Michelle "Chao… (not verified)
Wed, 05/05/2010 - 04:26
The table is so simple and
The table is so simple and functional...which makes it even more spectacular. Like a little black dress that can be dressed up or down. I would love to be a fly on the wall to see just how long it takes you to knock out a knock off.
It was so much fun to figure out that the table owner lives just a hop, skip and jump away from me.
Nikki (not verified)
Wed, 05/05/2010 - 05:24
I love x tables. I'm so
I love x tables. I'm so doing this one once I have a little more space!
Ana White (not verified)
Wed, 05/05/2010 - 06:25
ooops, yes you will need 1
ooops, yes you will need 1 2x4 8' long. Thanks for being so smart.
Melissa (not verified)
Wed, 05/05/2010 - 20:50
I love this table! I wish I
I love this table! I wish I had somewhere in my house I could use it. We're going to be using one of your other plans for a dining room table. Maybe it could go in our spare room as a work table. Hmm....
Karen (not verified)
Thu, 05/06/2010 - 03:01
Gah! I came here *hoping* for
Gah! I came here *hoping* for this. My husband's birthday is in 4days and, since my birthday was yesterday, he got me the present I was planning to give him (AGAIN! We may be too compatible!). Now I need a good gift and came here just hoping to find this exact table (a big people version of the bigger kid's picnic table) so I can build him a patio set as a gift. You rock :)
Jacqueline (not verified)
Mon, 02/21/2011 - 12:10
I love this plan, its exactly
I love this plan, its exactly how I want to build our kitchen table, after I do nightstands I'm building this!
Sheela (not verified)
Thu, 04/28/2011 - 17:40
Just saw this in Better Homes & Gardens!
Her table was featured in the "I did it" section at the end of Better Homes and Gardens this month (I think that's what the section is called). I knew the table looked familiar, and that's because I saw it here! Very cool, and congratulations to Vanessa!
April Brady (not verified)
Sun, 10/02/2011 - 16:27
How to fasten the top
Hello, Me and my husband just love this table and are going to build this for our home during these chilly fall days but he was wondering if you fastent the top of the table to the legs from the top or underside of the table. He is a little confused. If it is indeed from the top do you use the wood putty to fill in the holes? thanks for explaining!
Audrey (not verified)
Mon, 04/30/2012 - 04:25
Fastening the top
Has anyone determined how to fasten the top? Drill from above or below?? I am stuck...
juls02
Fri, 06/26/2020 - 17:15
What was the answer to your…
What was the answer to your question? Because I have the same one! Thanks.
Guest (not verified)
Fri, 11/11/2011 - 11:11
Can this plan be modified into a kid's size table?
My hubby and I hope to build a mini picnic table for our son. Can this plan be modified into a kid's size table?
Thanks for the help!
Laren
GuestAmy (not verified)
Tue, 09/04/2012 - 06:26
To anyone that has built this
To anyone that has built this table... Do you have any complaints about the sturdiness of the table due to the legs being made of 1x4s? I'm debating whether or not to use 2x4s instead.
Thanks!
Amy
Chellie (not verified)
Mon, 11/26/2012 - 07:01
Supplies
The shopping list only mentions 1-2x6. Do I actually need 7 since those are the tabletop boards?
mspgh6
Sun, 06/02/2013 - 15:45
Type of wood
Hello Ana,
I was wondering, what type of wood do you suggest using?
Is it the same type you'd suggest for this table also?
http://ana-white.com/2012/06/plans/fancy-x-farmhouse-table
Thank you!
mspgh6
Sun, 06/02/2013 - 15:45
Type of wood
Hello Ana,
I was wondering, what type of wood do you suggest using?
Is it the same type you'd suggest for this table also?
http://ana-white.com/2012/06/plans/fancy-x-farmhouse-table
Thank you!
PigzFly
Mon, 12/07/2015 - 20:49
Modify to be a dining table base with glass top?
Great plan and easy- just up my alley (beginner)! How can I modify the plans to only make the table base to hold a glass top? Any suggestions? Thx