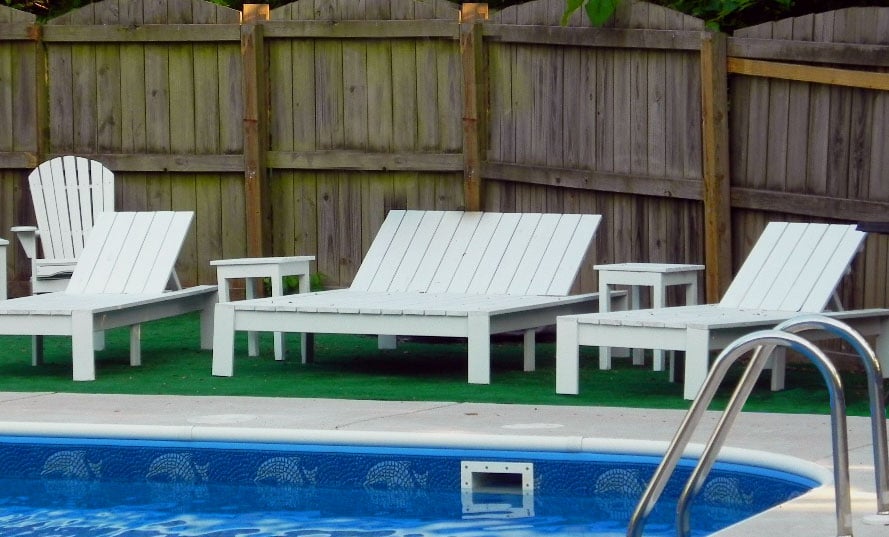


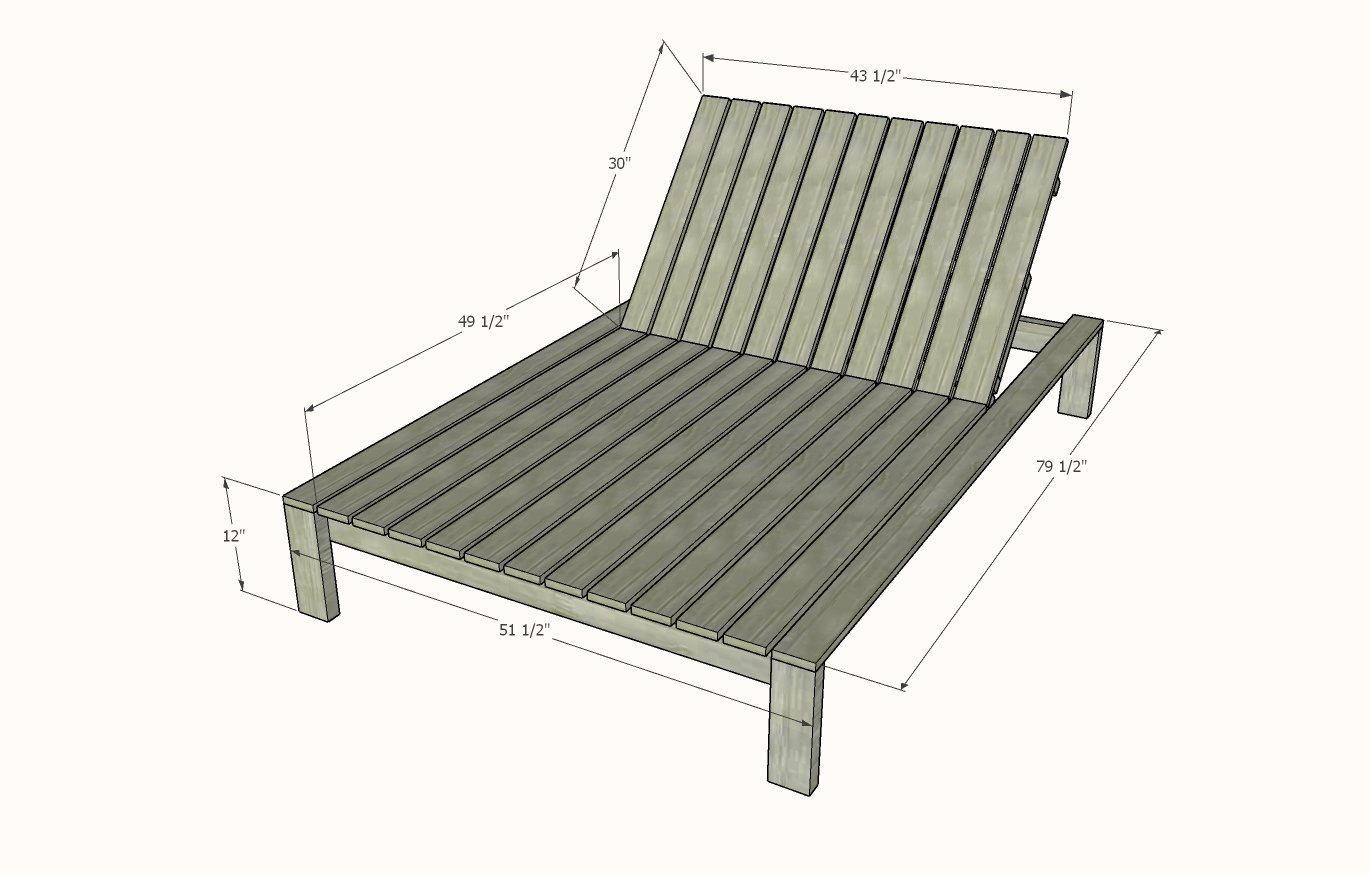
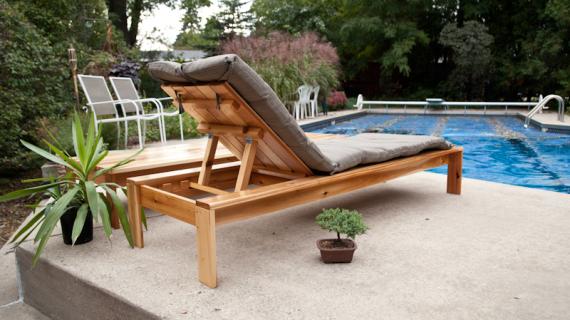
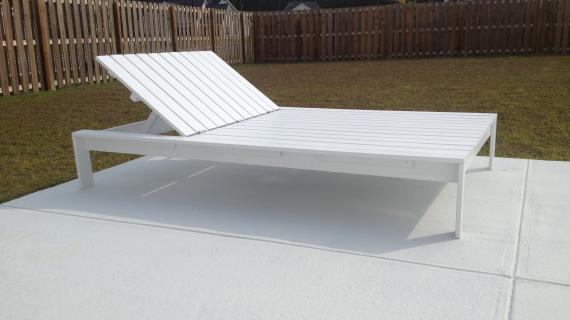
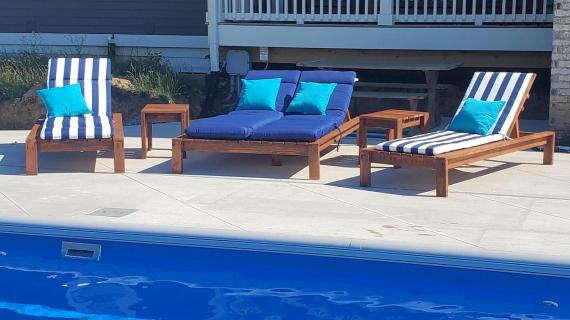
Comfortable, Durable and Stylish Outdoor Seating - Build a luxurious solid wood chaise lounge, suitable for 2! Built using 2x4 framing with 1x4 slats, our free plans make it easy.
See also our matching Single Chaise Lounge Plans.
Preparation
- 7 - 2x4 @ 8 feet long
- 3 - 2x2 @ 8 feet long
- 13 - 1x4 @ 8 feet long (there will be alot of scraps leftover about 16" long. I have created a plan for these scraps to make two matching side tables appended to the bottom of this plan)
- 6 - exterior hinges, heavy duty (at least 3")
- 50 - 2-1/2" to 3-1/4" long - exterior self tapping deck screws
- 150 - 1-3/4" to 2-1/4" long - exterior self tapping screws for screwing deck boards to the frame
Main Frame
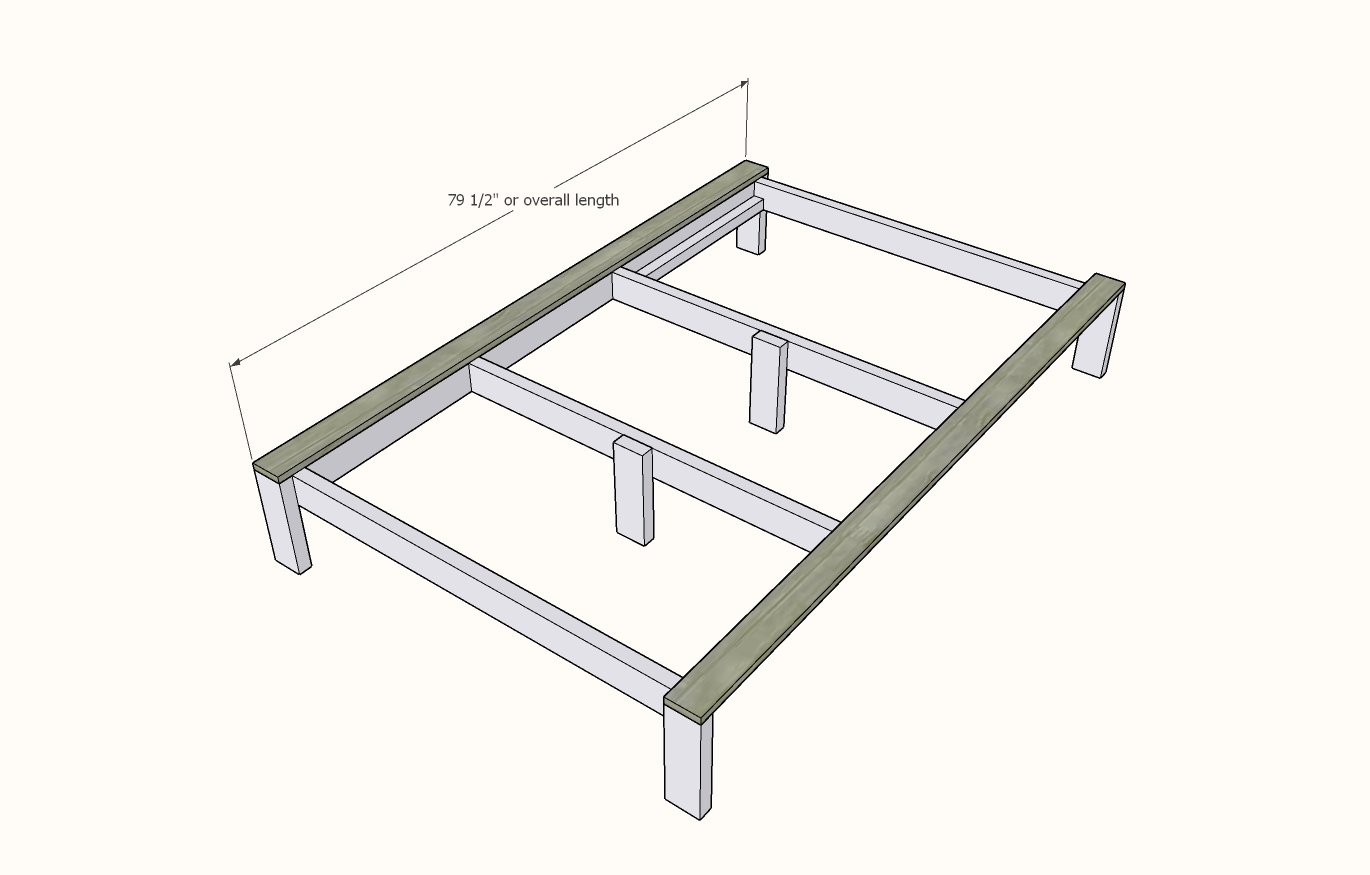
- 2 - 2x4 @ 76-1/2" long - frame sides
- 4 - 2x4 @ 44-1/2" long - frame front/back and supports
- 6 - 2x4 @ 11-1/4" long - legs
- 2 - 2x2 @ 27" long - back rest supports
- 2 - 1x4 @ 79-1/2" long - long deck pieces
- 11 - 1x4 @ 49-1/2" long - center deck pieces
Back
- 11 - 1x4 @ 30"
- 4 - 2x2 @ 43-1/2"
- 3 - 2x4 @ 10"
- 2x2 blocks about 3" long for the back stop blocks


Instructions
Step 1
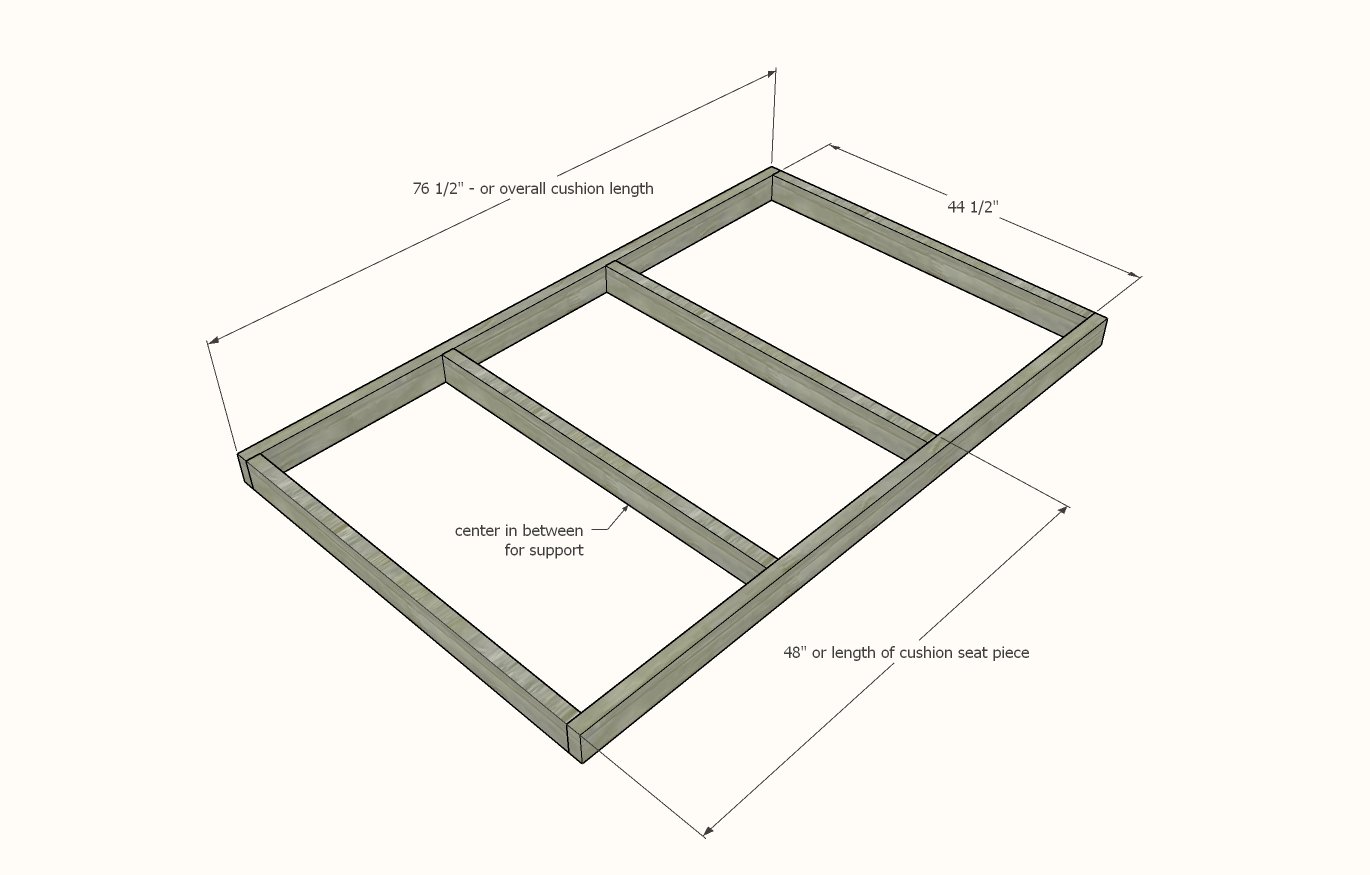
Build the frame using the longer screws, two screws per joint with exterior wood glue.
Step 2
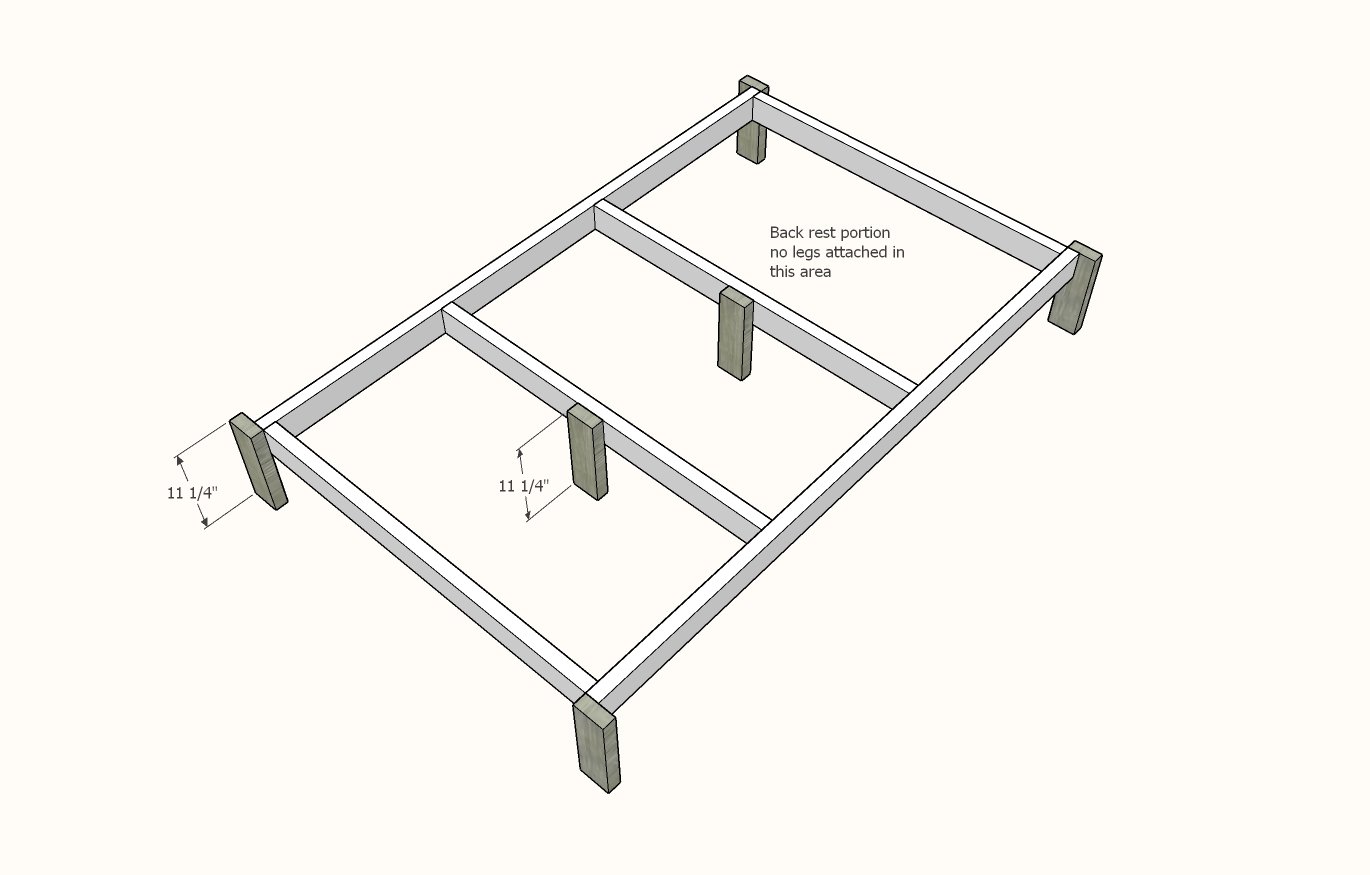
Attach legs with the longer screws, keeping the back rest bay clear of legs.
Step 3
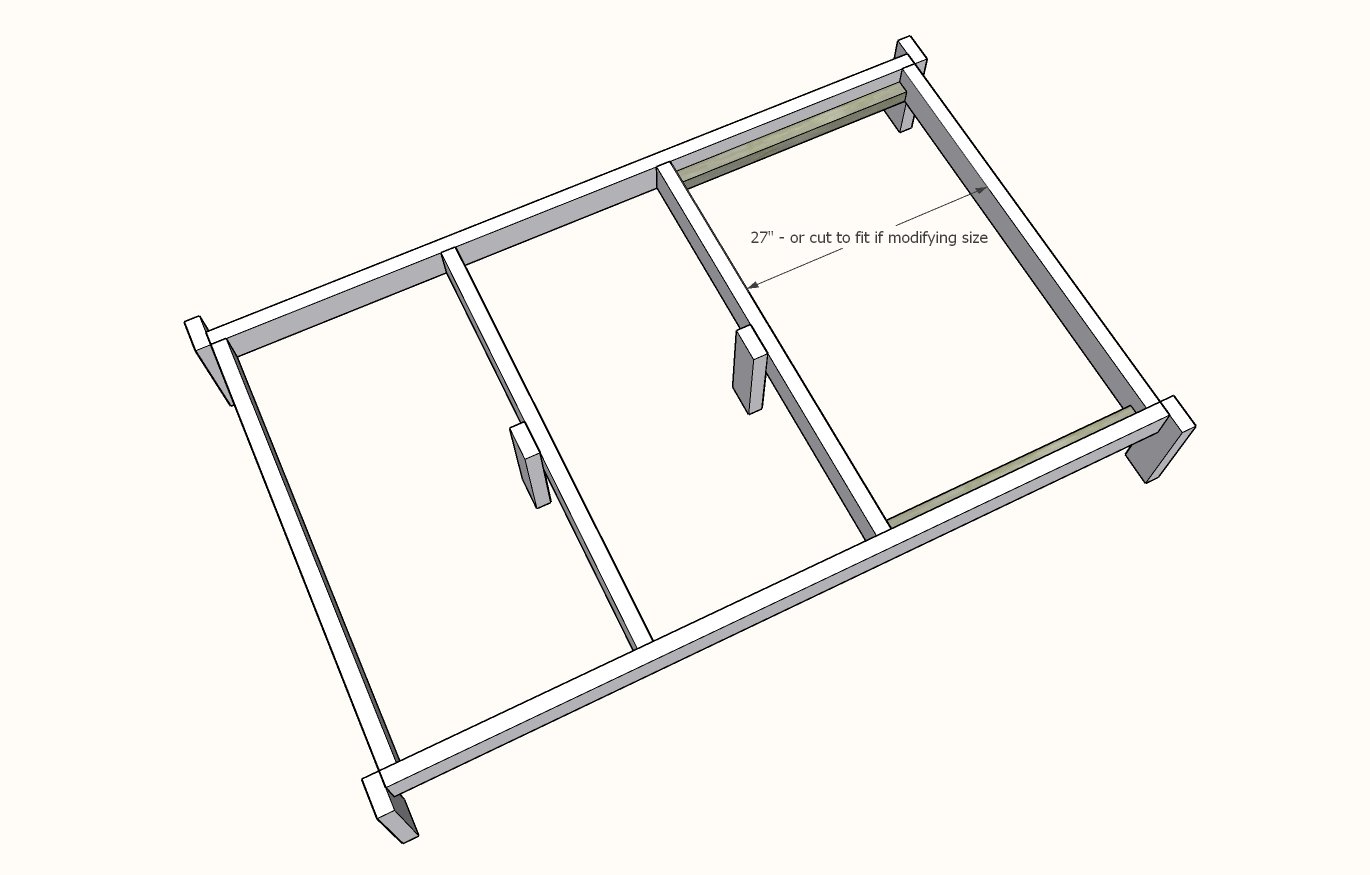
Attach 2x2 cleats inside the back rest area, flush to the bottom, with the longer screws and glue.
Step 4
Adjust the frame for square.
Apply glue and attach long deck boards to top with shorter screws.
Step 5

Space out the shorter deck boards and attach to the frame with the shorter screws.
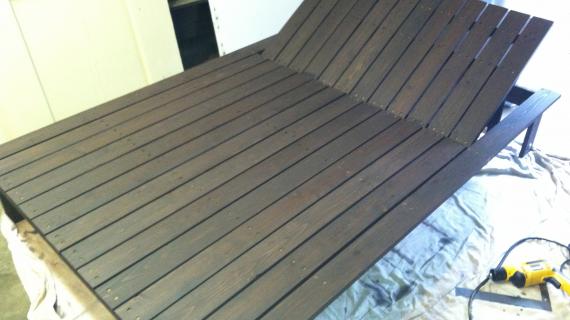
Step 6

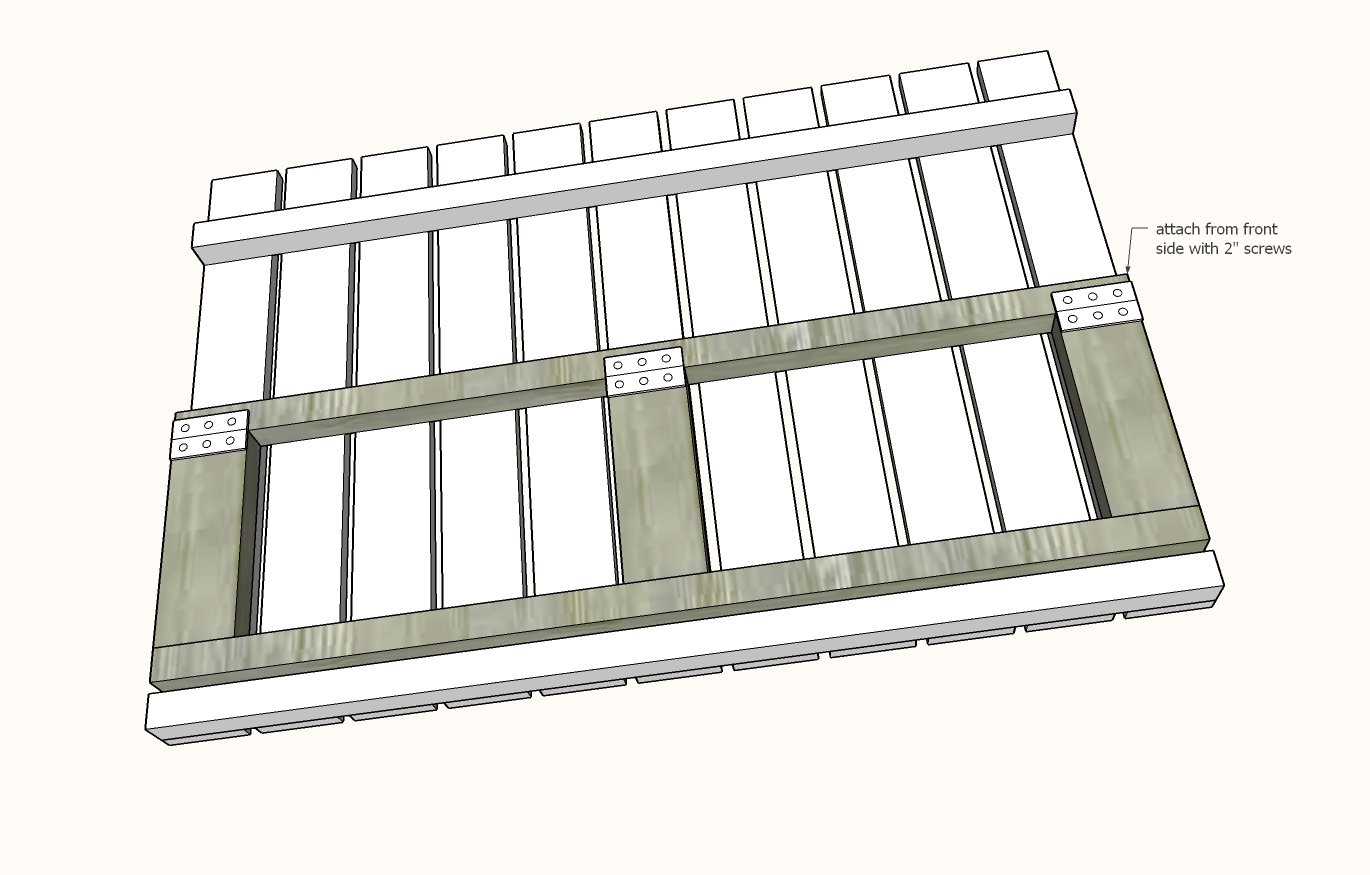
Build the two back pieces.
Use the shorter screws to attach the 1x4 back slats to the 2x2 back rest pieces as shown.
Use the longer screws to attach the 2x2 prop up to the 2x4 prop up spacers. Then hinge the remaining 2x2 to the 2x4 prop up spacers.
Step 7
Attach the prop up to the back with shorter screws from the 1x4s.
Step 8
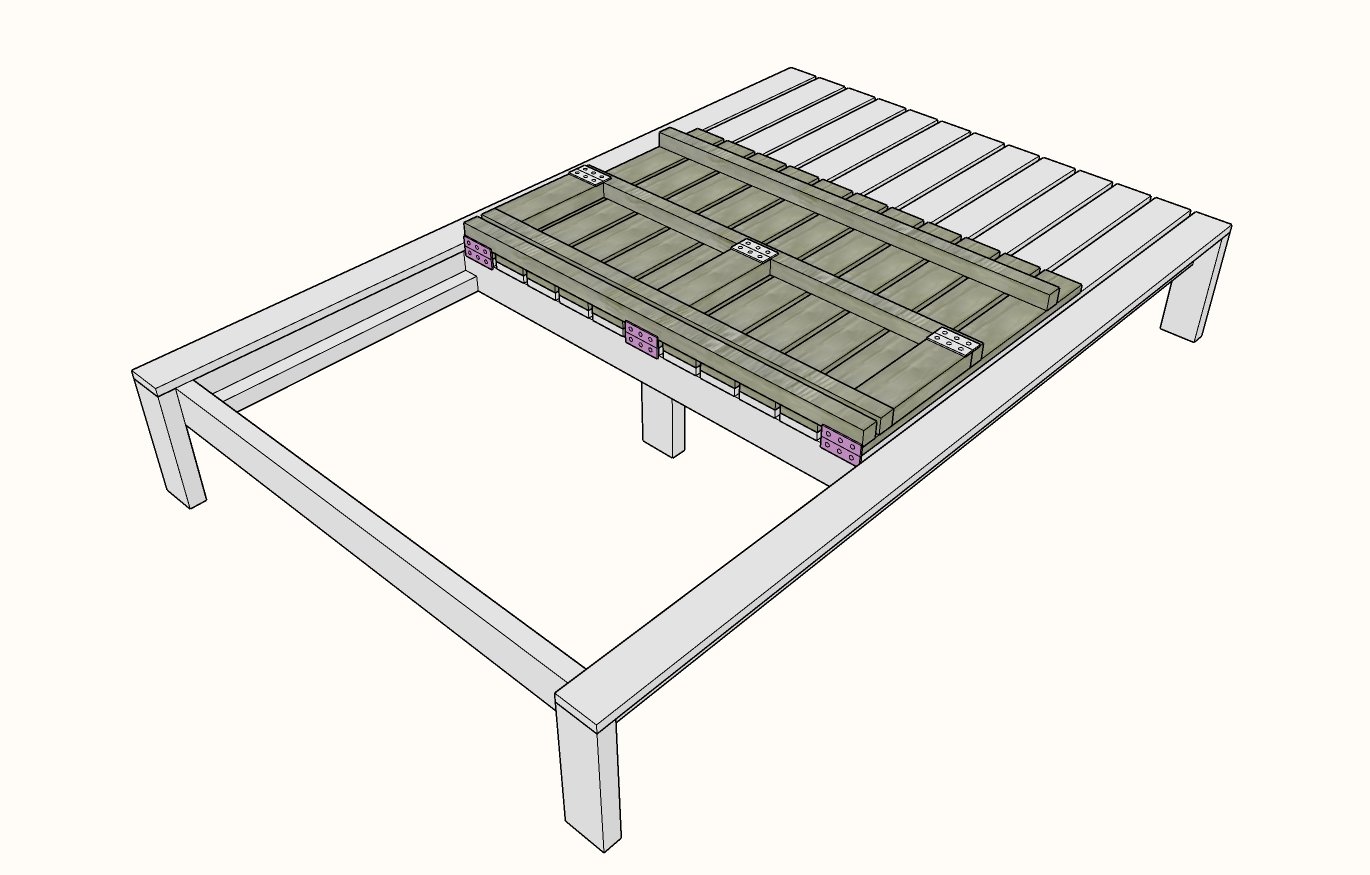
Hinge the entire back rest to the main frame.
Step 9
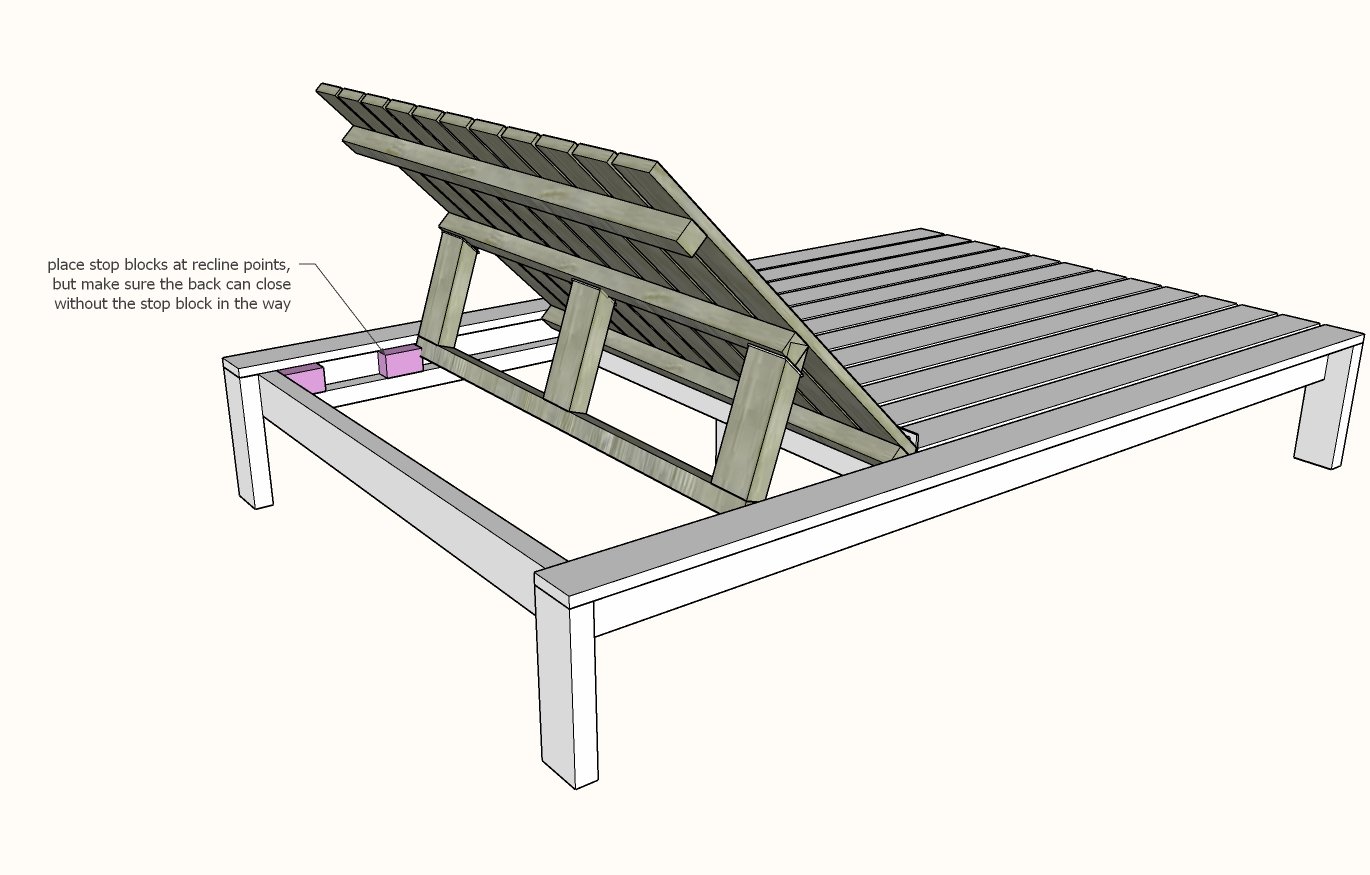
Position stop blocks inside the frame at desired locations. Make sure the back can fully close with the stop blocks in place. Attach stop blocks with the longer screws.
Step 10

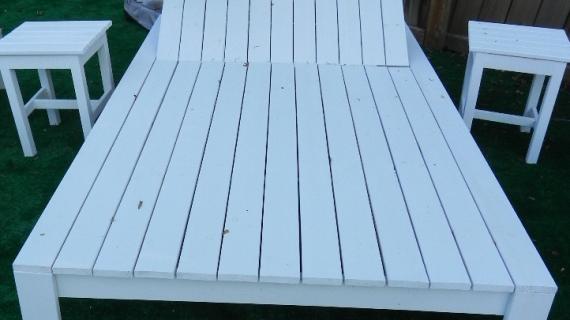
You will have scrap 1x4 leftover.
You will need to purchase two additional 2x4s to make these two side tables, and more shorter and longer screws.
Cut List:
- 12 - 1x4 @ 16" long (can be adjusted in length by simply adjusting the short apron length below)
- 8 - 2x4 @ 17-1/4" long (legs)
- 4 - 2x4 @ 13" (short aprons OR length of 1x4s minus 3")
- 4 - 2x4 @ 16-1/2" (long aprons)
Step 11

Build the side table frames with longer screws.
Step 12
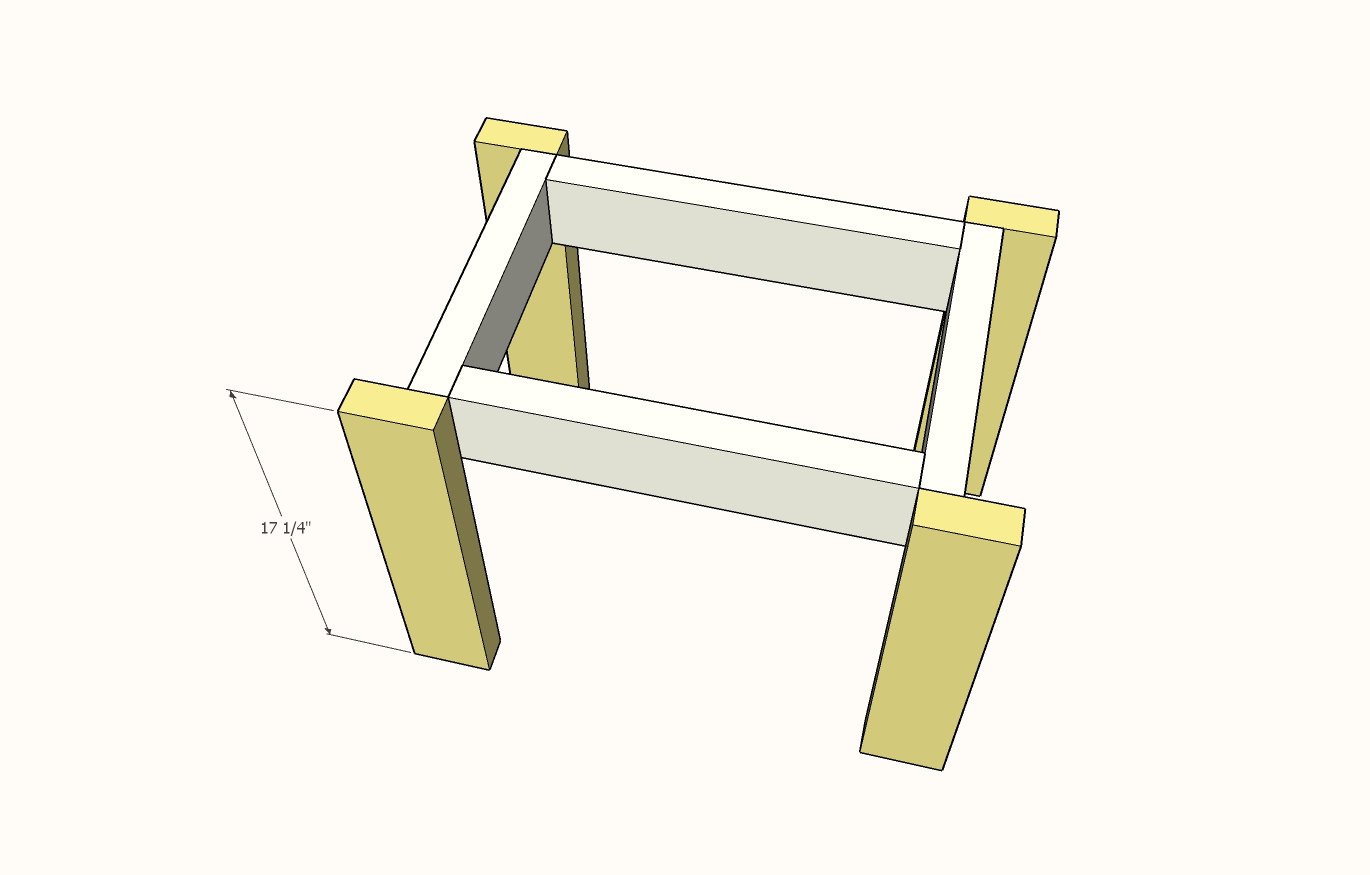
Attach legs with longer screws.
Step 13

Attach slats on top with shorter screws.

Comments
Tina (not verified)
Wed, 05/19/2010 - 02:56
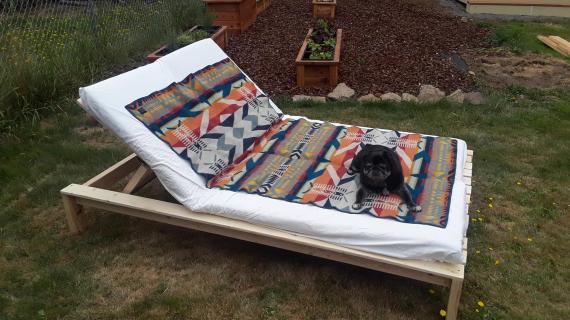
Ana this looks like you can
Ana this looks like you can throw a towel on it and lay down that if you didn't have the cushion you could still use it, wonderful idea!!
Amanda (not verified)
Wed, 05/19/2010 - 03:53
Thank you for this plan! I
Thank you for this plan! I cannot wait to make this! We've been wanting a piece of outdoor furniture like this! We couldn't justify the small fortune we would have to spend -- so this is perfect!!
Waner Family (not verified)
Wed, 05/19/2010 - 04:33
I can't believe I'm about to
I can't believe I'm about to write this, but we are going to have too much furniture the way we are building! ...too much fun!! THANKYOU!
Emily (not verified)
Wed, 05/19/2010 - 07:10
Hi ana!I don't know if this
Hi ana!
I don't know if this is what you are looking for, but from the website, here are the dimensions of the double chaise cushions.
Double Chaise Cushion: 53" wide x 86" long x 2.5" high
I hope that helps.
Natalie (not verified)
Wed, 05/19/2010 - 14:51
I know that requests are
I know that requests are supposed to be done through Flicker, but I don't have a picture to go along with it. I would love to build a canopy daybed in the exact style of the Simple Modern Outdoor Collection!!
Marti (not verified)
Thu, 05/20/2010 - 16:50
I have been searching the net
I have been searching the net for lounge bench plans. I love the way you don't go all Norm Abram on us and take it down to basics. I think I can do this. Thanks! Love your blog.
Allison (not verified)
Wed, 06/16/2010 - 04:58
So this was a great project
So this was a great project for my first from your site. I took your advice on using the 1x3's rather then the 1X4's to cut cost and my entire bill at my local (Fairbanks) Blue was $63.00 for everything. I used a miter saw and it couldn't have been easier. I also noticed in the cut list it called for 4 1x4's for the back, it just needs to be equal to the deck. I ended up using 14 with the 1x3's. I also made my own cushions using a coupon downloaded from the craft store website for 60% off of one item and saved $21.00 on my fabric. Thank you Ana it was a great project and 3 of my 6 sisters have already purchased wood to build this for themselves.
mikecrystal (not verified)
Thu, 06/24/2010 - 10:54
I started to think about this
I started to think about this as a project for the weekend and was going to order up the Pottery Barn cushion for the double and then realized the dimensions wouldn't work. There was a reference to making adjustments to the plans. Has that been done yet?