tweets >>

my other projects >>

Drawer bases turned banquette

Printer-friendly versionPrinter-friendly versionSend to friendSend to friend
Additional Photos
Drawer bases turned banquette
About This Project

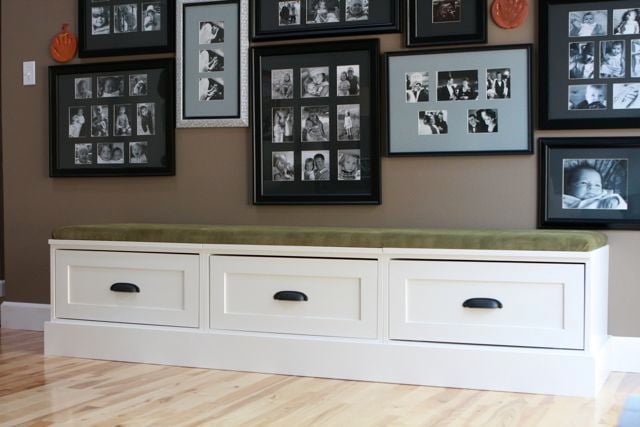
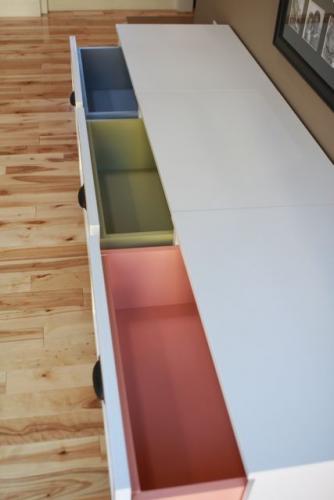
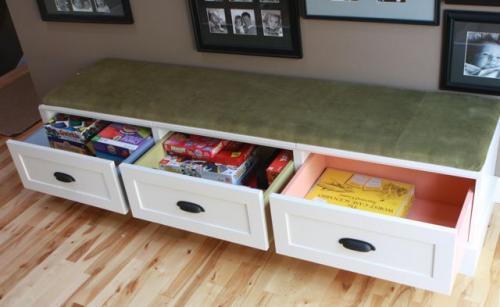
I took Ana's open base and drawer plans, added a few inches to the height (so that the base trim on the storage units would clear the base trim on our walls), and put them together to create a banquette-style bench with tons of storage underneath. We use the drawers for our family board games and photo albums.

Estimated Cost: 
$100-$150
Estimated Time Investment: 
Weekend Project (10-20 Hours)
Required Skill Level: 
Beginner
Type of Wood: 
I used MDF for this project. Next time, I would use something lighter for the drawers.
Finish Used: 
Sherwin-Williams Pro-Classic in semi-gloss followed by Minwax Polycrylic.
Pin it
Ana White's picture
 #
So Fabulous!

I'm rather speechless, perfect drawers, and lovely colors inside too!

 
Daisies and Crazies's picture
 #
The drawers!

Look at the colors inside!! Awesome.

I am so blessed to have a good job working for a company that I like, but WHY am I stuck at my full-time desk job right now?!

 
kyo's picture
 #
Amazing!

I love this... great in a playroom, too.

 
mycreativeescapes's picture
 #
This Rocks

I just left a comment on your wall - I love this!! Love the color pop on the inside!

 
redhead_61's picture
 #
AWESOME

I am massively of the opinion that everything should be drawers!  Love this!

 
QueenMahin's picture
 #
Great idea

What a terrific idea!  I'm thinking of making a banquette in my kitchen and was keeping my fingers crossed that Ana would post a plan, but you turned an existing plan into a banquette.  This is just beautiful, and the drawer colors take the cake!

 
 #
Love this..what wood for bottom/trim?

Hello! Love how the piece has a craftsman look to it. What is the trim/wood you used for the bottom of the piece to get that wide flat, clean look? I am very new to building so don't know all the terminology yet. :) Thanks!

 
hillarylouise's picture
 #
Base trim

This unit is made out of MDF which I had cut at Lowe's. While they were cutting the MDF for the boxes/drawers, I had them also cut a long piece at about 6 inches wide. If I were building with real wood like I normally do, I'd probably use a pine 1x6 for the base piece.

 
Jackie Solomon's picture
 #
incredible

Soo awesome. It looks just incredible, love everything about this, especially the fun color pop inside! Great job.

 
 #
Dimensions?

Something very similar to this is what I want for the base of my storage project. I have a 10’ wall I want to create a storage wall. These drawers will be the base, and then Ana’s cubby project for the top. I plan on making at least two of the cubbies into pull out lateral file drawers, so I know I’ll have to have custom dimensions on those. My question: Did you use Ana’s original dimensions, or create your own?

 
 #
dimensions

I pretty much used the original dimensions. The only thing I changed was the height -- I added a few inches to the side pieces to accommodate higher baseboards.

 
mcclourkeli's picture
 #
The cushion

Did you make the cushion yourself or buy it? If you made it, what materials did you use? I cant sew ANYTHING, but Id make an attempt! Lovely bench btw, looks very high quality!

 
 #
cushion

Hey! I did the cushion myself. I contemplated making a box cushion but didn't want to deal with the welting and zippers, so I used a bunch of MDF scraps, joined them with the kreg jig to make a board wide and long enough for the top of the bench, attached foam with spray glue and then covered with batting and fabric, stapled underneath. I was planning to screw the cushion into the bench from underneath, but it is so heavy (b/c of the MDF) that it hasn't moved.

I think there might be photos of the process on my blog. Here's a link:

http://dickmanfam.blogspot.com/2011/01/game-storagecheck.html

 
mcclourkeli's picture
 #
:)

Thanks!!


Post new comment

The content of this field is kept private and will not be shown publicly.
  • Web page addresses and e-mail addresses turn into links automatically.
  • Lines and paragraphs break automatically.

More information about formatting options

By submitting this form, you accept the Mollom privacy policy.

Not Much >>

What's going on up here in Alaska.

Momplex Cam >>

We are DIYing our moms a Duplex in Alaska! Check out our progress so far as we owner build a home, step by step. Read the Momplex blog here.

Recent comments

User login

Connect with Facebook
Sign in using Facebook

I'm Speaking At:

Haven Conference 2012

Please Visit Our Sponsors!


Pin It