


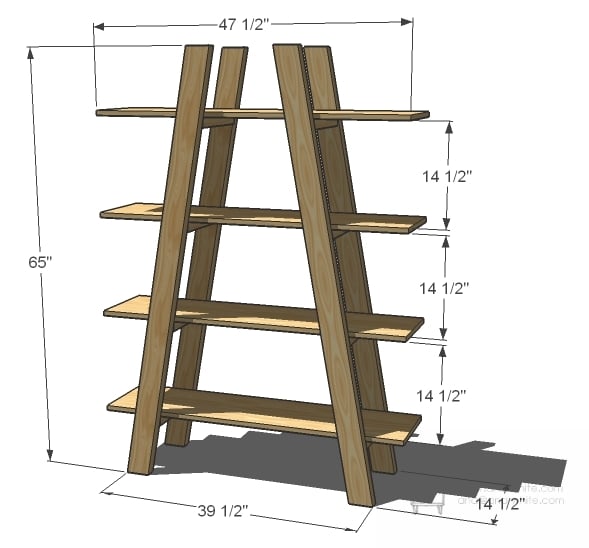
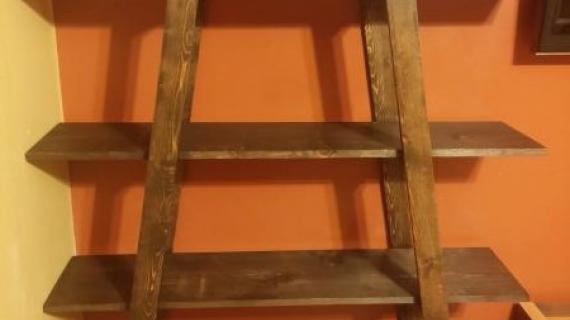
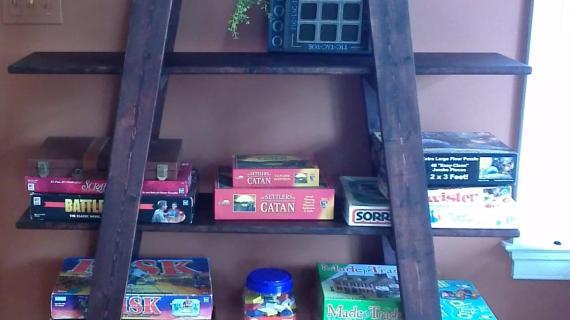
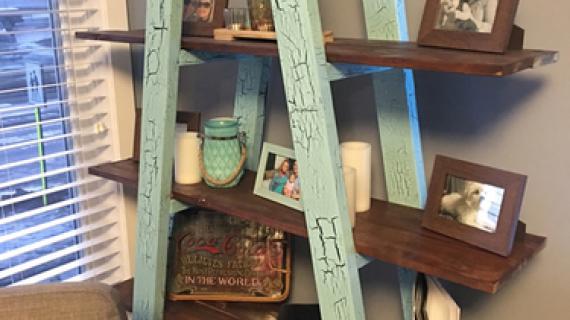
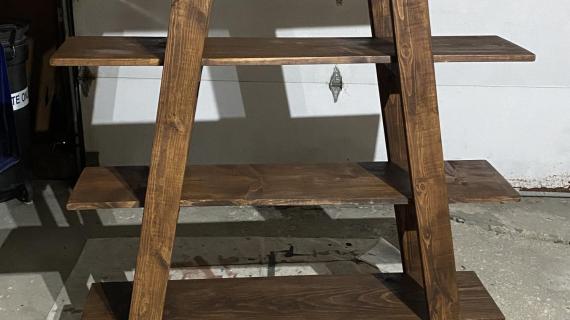
Four open large shelves in the shape of truss.
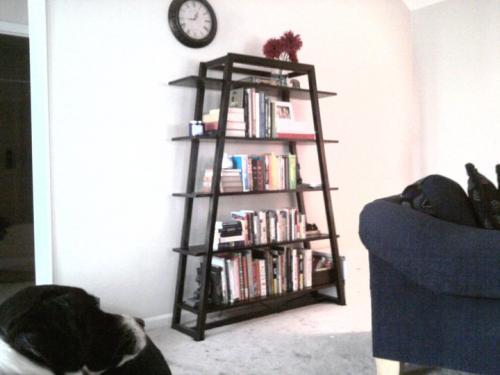
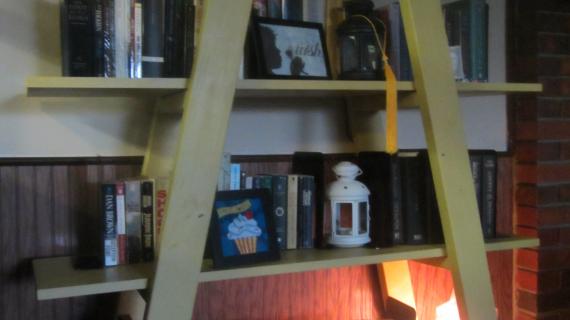
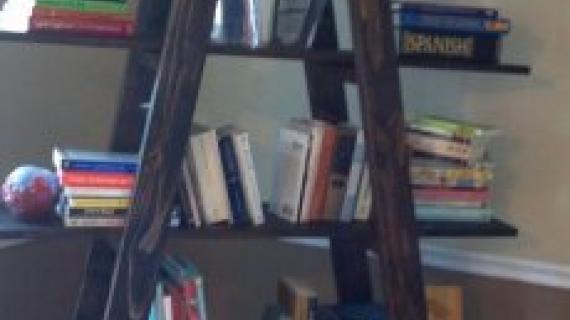
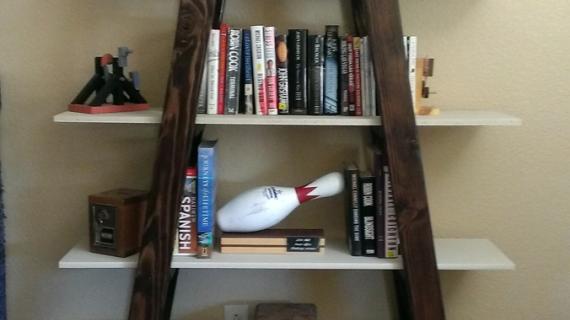
After Sheri shared this amazing photo of her Ipex Bookshelf
I got super inspired to draw up plans for something very similar, but easier to build

And HammerTime built the truss shelves and shared on our Community!

And here is a money saving idea . . . how about purchasing standard MDF shelving in 4' lengths for the shelves? Then all you would have to do is build the 2x4 frame (and 2x4s run about $2 each). So easy! And how about a bright paint?
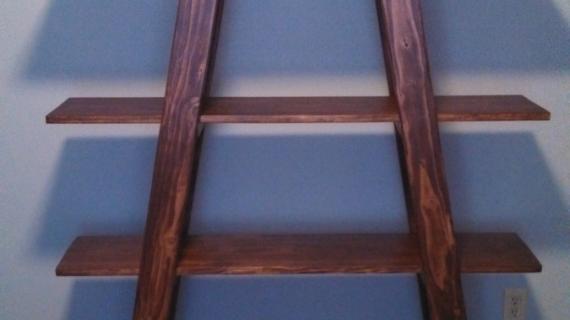
Preparation
4 – 2×4 Boards, 8′ or Stud Length 2 – 1×12 Boards, 8′ Long OR 4 – 4′ Shelves OR 2 – 8′ Shelves (12″ wide) 16 3″ Screws 24 2″ Screws Wood Glue and Finishing Supplies
4 – 2×4 @ 66″ (Legs, ends cut at 10 degrees off square parallel to each other) 8 – 2×4 @ 11 1/2″ (Shelf Supports) And as far as amount of storage per cost of materials, I’m not sure you can beat this one. Because all the wide width boards (the pricy boards) are used fully as storage, and all the supports are cheap (but sturdy) 2x4s. Win win.


Instructions
Step 1

Cut Legs
Cut the legs as shown above, with the legs cut at 10 degrees off square, parallel to each other. If you do not have miter saw, you can use a protractor and a jigsaw or circular saw. Cut four legs.
Step 2

Supports
The supports are all 2x4s, 11 1/2″ long. Make sure you shelves are 11 1/2″ wide first and cut the supports to match (for example, you buy 12″ wide shelving, then you would cut the supports at 12″ long). Then measure each of the legs and mark as shown above. These marks are to the tops of the supports. Screw the supports to the legs. Supports will NOT be parallel to the leg sides, but rather, parallel to the leg tops and bottoms. You can additionally use your protractor to mark the angle – it will be 80 degrees from the top of the shelf to the leg. Use either 3″ screws and glue or 2″ pocket hole screws (for pocket holes) and glue.
Step 3

Shelves
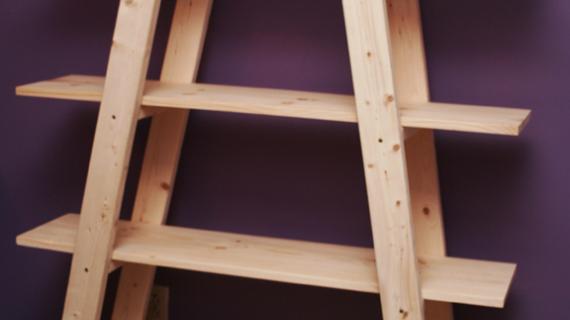
If you survived step 2, this bookshelf is built! Now simply mark each of the shelves from the ends as shown above. These marks will line up with the shelf supports. Screw the shelves to the shelf supports with 2″ screws. And that’s it, your done!

Comments
Trina (not verified)
Wed, 10/06/2010 - 04:36
Oh, I LOVE it!!!
Oh, I LOVE it!!!
Tsu Dho Nimh (not verified)
Wed, 10/06/2010 - 05:53
Marvelous ... and when you
Marvelous ... and when you move, take out the screws holding the shelves and the whole thing turns into 2 ladders and 4 shelves.
darbynwoods (not verified)
Wed, 10/06/2010 - 07:16
the only thing i would add is
the only thing i would add is that you should add cleats to both sides of the base shelve to stop any sliding out of the bottom. it add additional security to the unit.
i use a simular setup at my art shows and it works very well
david
www.darbynwoods.com
www.facebook.com/darbynwoods
Tsu Dho Nimh (not verified)
Thu, 10/07/2010 - 05:10
OOOOHHH!!!! I had an idea!
OOOOHHH!!!! I had an idea!
If you make it out of redwood, cedar or pressure-treated lumber, and treat it with deck sealant ... you have an outdoor plant stand and buffet.
And if you make it out of cheap scraps, you have garage storage shelving. The shelves are just far enough apart to hold "banker's boxes".
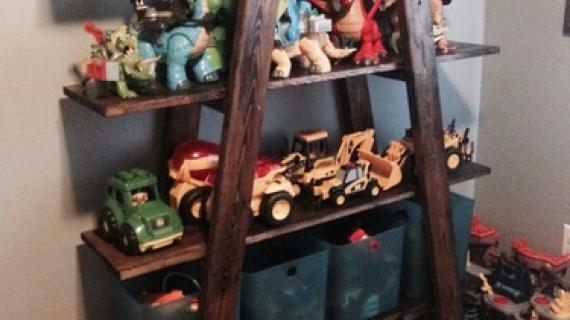
HammerTime (not verified)
Mon, 10/11/2010 - 13:39
I have chosen this as my
I have chosen this as my first project! I am working on it now. Looking forward to posting pics when done. :-)
HammerTime (not verified)
Tue, 10/19/2010 - 09:01
I finished building this.
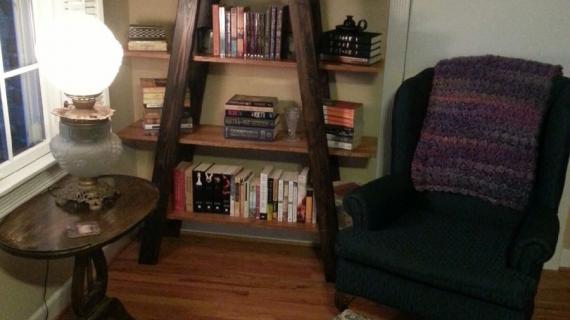
I finished building this. Just need to put some polyurethane on it. It was my first project, and a bit harder than I anticipated, but worth it! I'm quite pleased with how it turned out.
elizabeth (not verified)
Sat, 10/30/2010 - 06:38
I made this for my daughters
I made this for my daughters room!

http://www.facebook.com/photo.php?fbid=448642677843&set=a.448642527843…
http://www.facebook.com/photo.php?fbid=448642822843&set=a.448642527843…
elizabeth (not verified)
Sat, 10/30/2010 - 06:46
ok not sure if those pics
ok not sure if those pics worked. i posted them on facebook, thought I would give that a whirl. I'm better with the saw than I am with the computer.
BusyWorkingMama (not verified)
Fri, 09/23/2011 - 06:48
Awesome shelves! I am going
Awesome shelves! I am going to have to suggest this project to my handy hubby!
Guest (not verified)
Sun, 09/25/2011 - 16:23
The measurements could be
The measurements could be changed to make a smaller version for on a dresser or counter top. It could also be hung on the wall. The places and uses for this are endless.
Convert the measurements from inches to quarter inches.
In the section of home depot type stores where you can find the different 1x2,4,6 etc there should be "mini boards" around 2 feet long but only 1/4 or 3/8ths inchs thick. They will work perfect for making a smaller version.
Use little hooks on top or use a couple long finish nails and drill a hair bigger hole in a couple spots on the wall side of shelf to mount to the wall without seeing nails hooks or brackets.
Me sharing my ideas now has me wanting to make a mini version. Off to the store i goooooo
Nicole Brigham (not verified)
Mon, 11/28/2011 - 17:21
Great Idea!
This inspired me to add shelves to the ladder I'm currently using as a shelf. I will have much more space this way. Thanks!
ademasters
Thu, 08/02/2012 - 18:49
Looks beautiful!
Looks beautiful!
Tsu Dho Nimh
Sun, 08/19/2012 - 16:27
Improving plan
The inspiration photo has some cross-bracing at the top and bottom that would solve the stability problems.
You need a side-to-side brace in 2 spots for each side, and a front-to-back brace in two spots for each side.