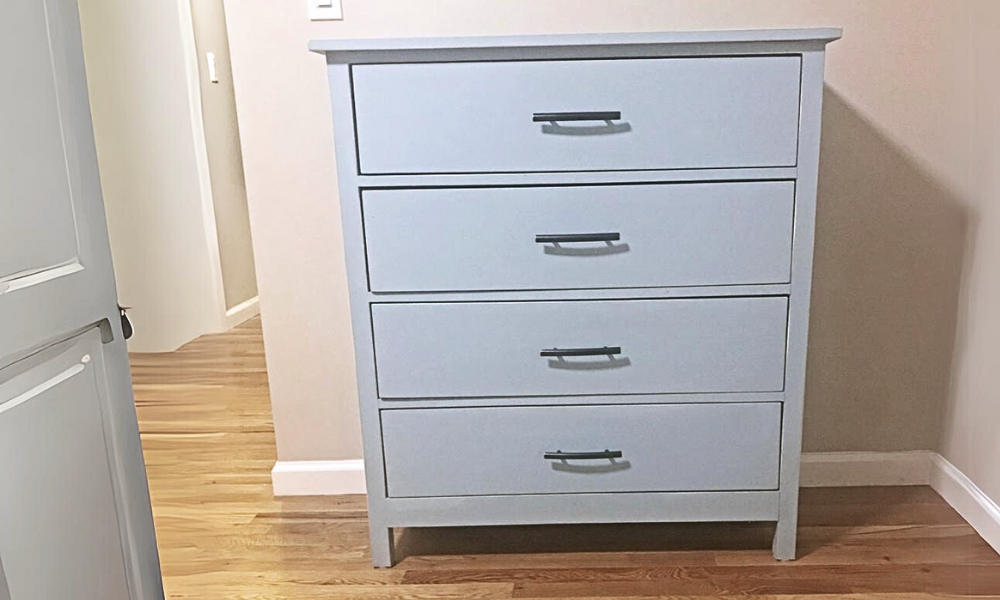


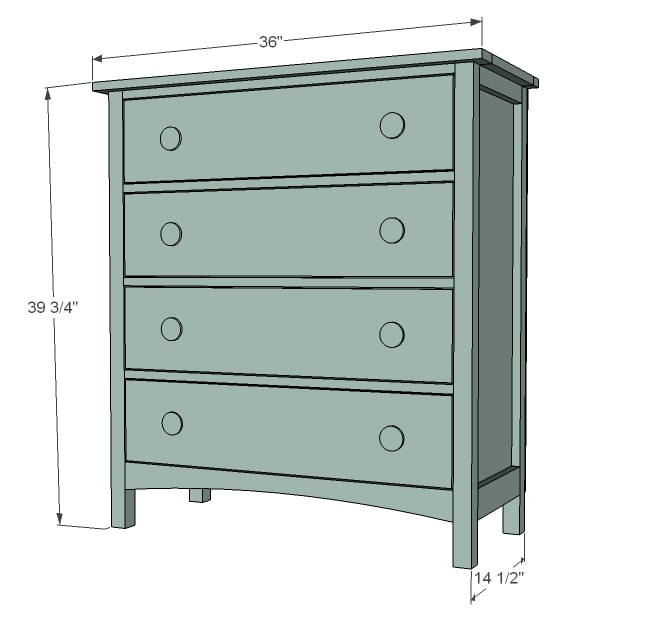
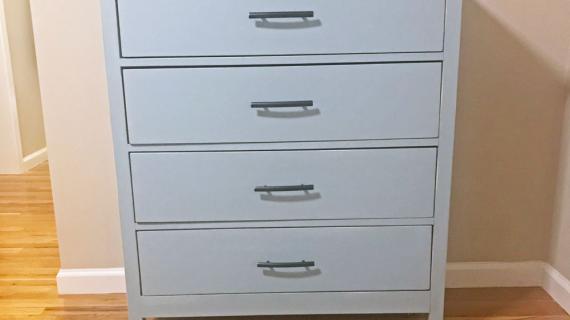
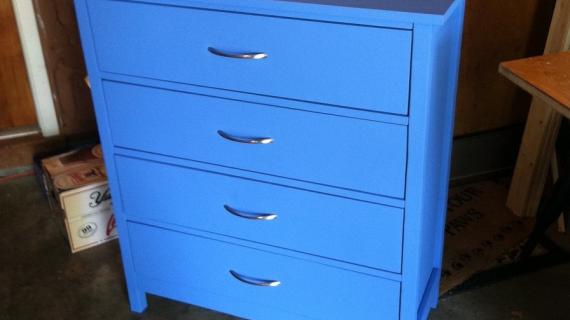
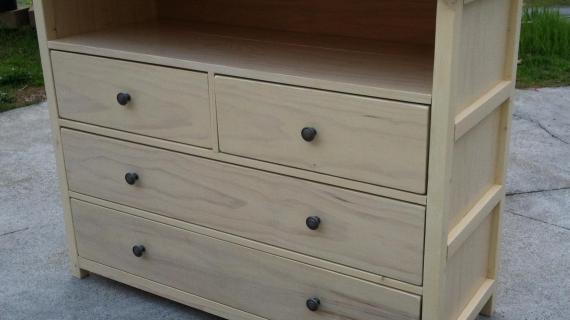
A simple shaker style dresser featuring four drawers and a narrower profile.
Built by Patrick, you can read the brag post here.
Preparation
- 4 - sets of 12" drawer slides, white euro style (available on Amazon)
- 8 - knobs or handles
- 2 - 2x2 @ 8 feet long
- 1 - 1x12 @ 10 feet long
- 1 - 1/4" plywood @ full sheet (4x8 feet)
- 3 - 1x3 @ 8 feet long
- 3 - 1x2 @ 8 feet long
- 3 - 1x6 @ 8 feet long
- 1 - 1x8 @ 12 feet long
- 2 - 1x12 @ 35 1/2"
- 2 - 1x3 @ 11 1/2" (Cut to width of your 1x12 boards)
- 2 - 1x2 @ 11 1/2" (Cut to width of your 1x12 boards)
- 4 - 2x2 @ 39"
- 4 - 1x3 @ 31"
- 4 - 1x2 @ 31"
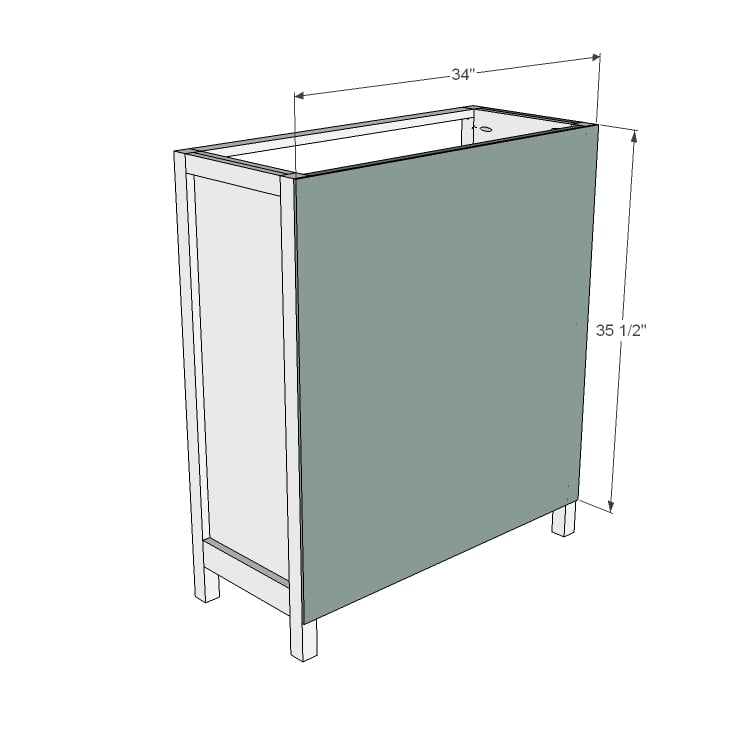
- 1 - 1/4" Plywood @ 35 1/2" x 34"
- 1 - 1x2 @ 36"
- 1 - 1x12 @ 36"
- 1 - 1x3 @ 36"
Drawers - measure and cut to fit to allow clearances per drawer slide instructions
- 8 - 1x6 @ 28 1/2"
- 8 - 1x6 @ 12 1/2"
- 4 - 1/4" Plywood @ 30" x 12 1/2"
- 4 - 1x8 @ 30 3/4"
It is very important that your 1x8s measure 7 1/4" wide. If they do not, you will need to rip the 1x8s down to this size - otherwise, your drawer faces will not fit right.


Please read through the entire plan and all comments before beginning this project. It is also advisable to review the Getting Started Section. Take all necessary precautions to build safely and smartly. Work on a clean level surface, free of imperfections or debris. Always use straight boards. Check for square after each step. Always predrill holes before attaching with screws. Use glue with finish nails for a stronger hold. Wipe excess glue off bare wood for stained projects, as dried glue will not take stain. Be safe, have fun, and ask for help if you need it. Good luck!
Instructions
Step 1

Use 1 1/4" finish nails and glue to attach the trim to the sides. The 1x3 goes on the bottom, 1x2 on the top. Build two of these.
Step 2
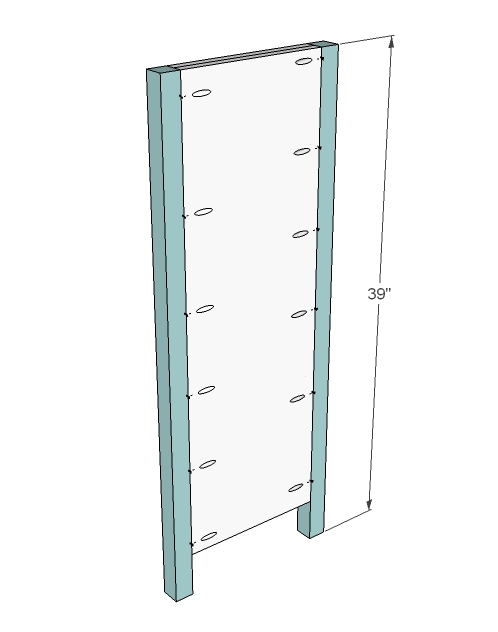
The the sides, attach legs. Use either 3" screws countersunk or Kreg Jig as shown above (set for 3/4" stock, using 1 1/4" pocket hole screws). Do this on both sides.
Step 3
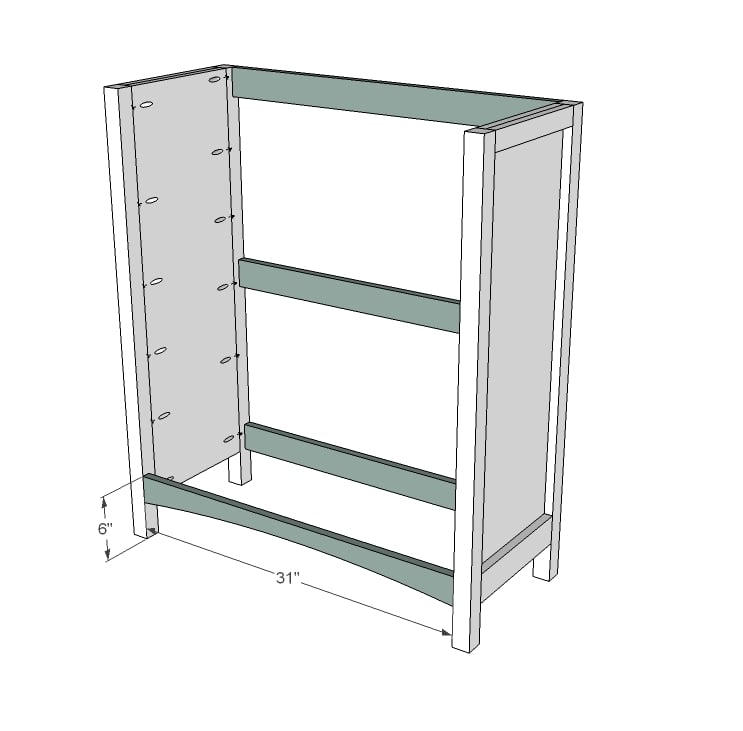
Once the sides are built, attach 1x3s as shown above. All are flush to the outsides. Cut out a decorative pattern from the bottom front 1x3 (shown with arch shape) using jigsaw.
Step 4
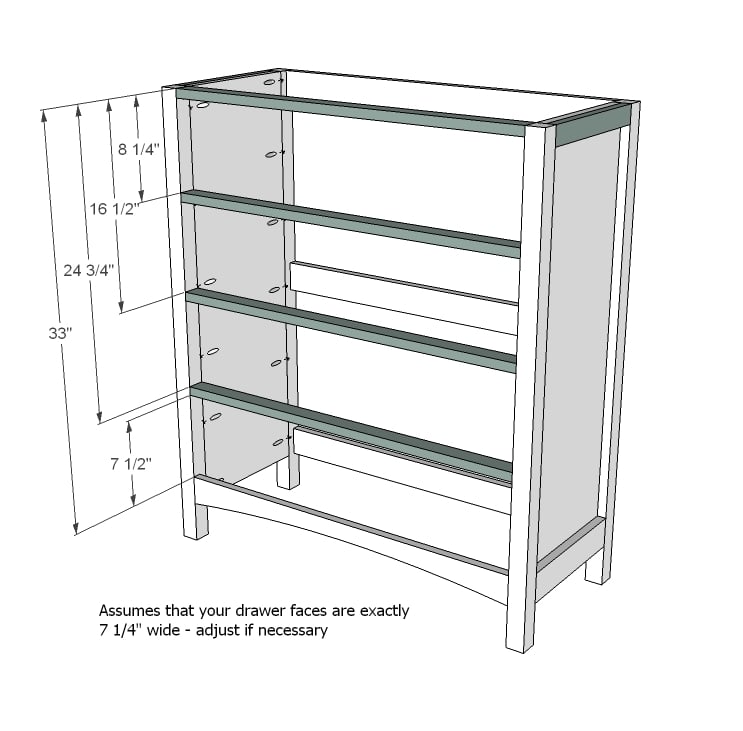
Now attach 1x2 stiles - be very careful here. You must leave 7 1/2" between the stiles so your drawer faces will fit just right.
Step 5
Step 6
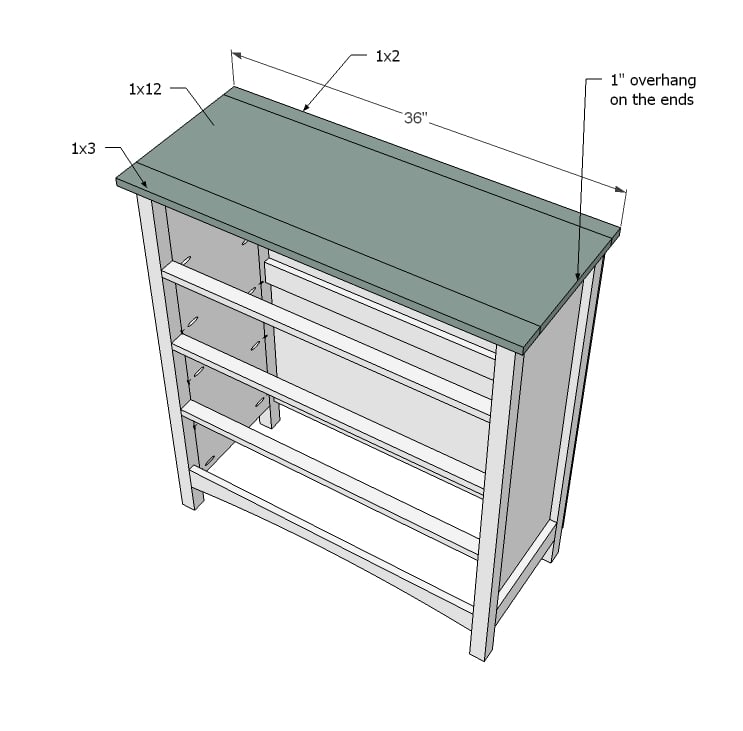
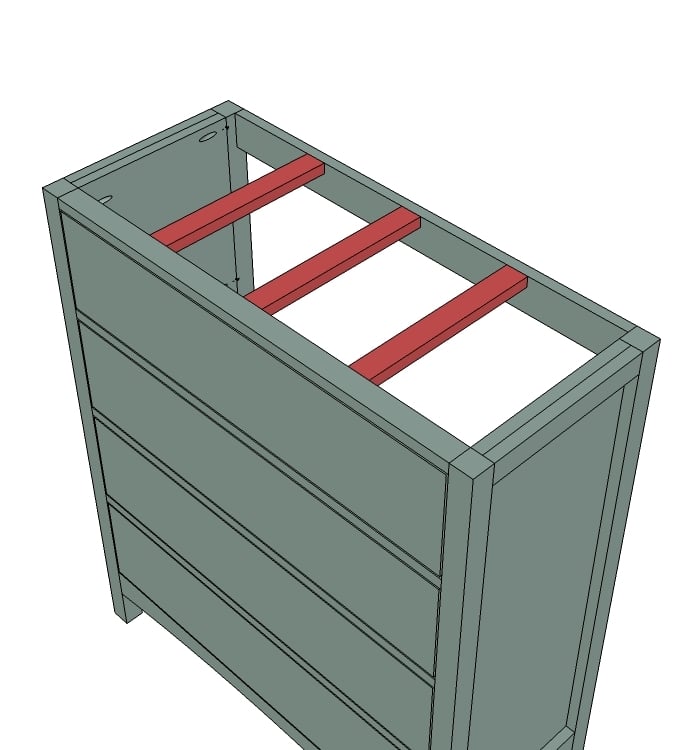
Top. If you have a Kreg Jig, build your top as shown above using pocket holes, and then attach to the top of the dresser. If you do not have a Kreg Jig, attach supports as shown in this diagram and then use 1 1/4" finish nails and glue to attach top pieces. Overhang on front and sides is 1". 
Step 7
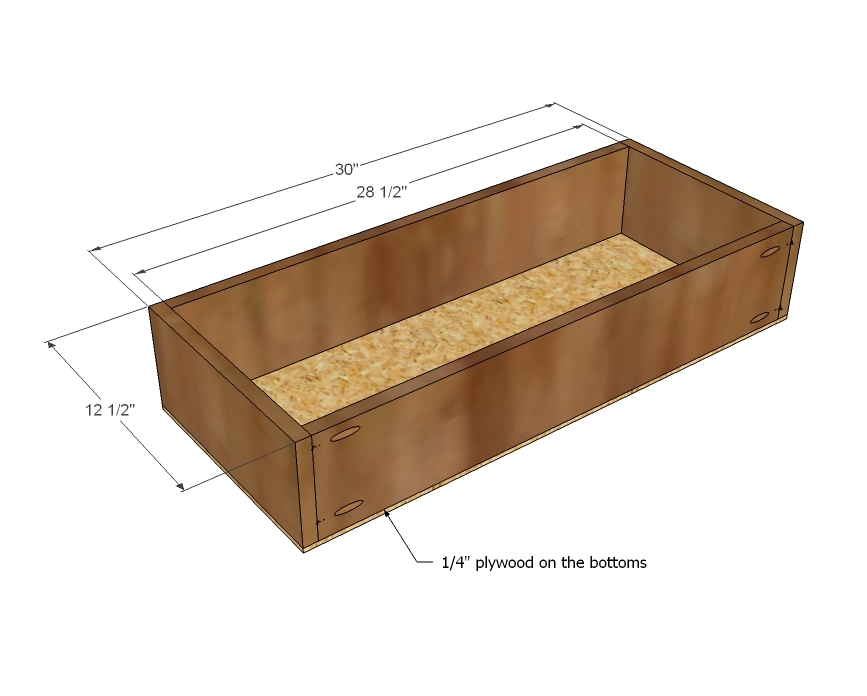
Build drawer boxes as shown above. Tack plywood to bottom. Once drawer boxes are built, use drawer slides to install drawers in the dresser. Remember, the drawer faces sits inset, so you will need to install the drawers 3/4" in from the face of the dresser (see below).
Here's my video tutorial on installing the drawer slides:
Step 8

Will all drawers installed, lay dresser on it's back. Place drawer faces on drawer boxes, centering so an even gap of approximately 1/8" is on all sides of the drawer faces. Attach with a few 1 1/4" finish nails and glue. Be considerate of your hardware location when you nail. Once drawer faces are on, pull the drawers out and attach from insides with 1 1/4" fasteners. Add hardware.
It is always recommended to apply a test coat on a hidden area or scrap piece to ensure color evenness and adhesion. Use primer or wood conditioner as needed.


Comments
ACraftyCauldron
Fri, 05/27/2011 - 10:40
Very Greatful!
I can't say thank you enough for posting this! We just found out that my teenage stepson will be moving in with us in about 2 weeks and his room desperately needed a dresser and this one is perfect. THANK YOU SO MUCH!!!
patrickhosey
Fri, 05/27/2011 - 20:50
This Turned Out Great
Ana this looks awesome. Do you use google sketch up? I need to learn that program.
Jami H
Sat, 05/28/2011 - 01:54
Yay!!! This goes to the top
Yay!!! This goes to the top of the list. I'm going to make this to go with my Farmhouse bed. Antiqued Red, green, gray???
Thank you!
Nick (not verified)
Sat, 05/28/2011 - 05:05
sliders
The entire thing is great,but maybe I am missing it how does the draws work?? did you have side sliders or a center slide?? I am just guessing it is center slides.Keep up your great work,I will be back to see more of your things.Thank you Nick
patrickhosey
Sat, 05/28/2011 - 05:50
Nick, The inside walls of the
Nick,
The inside walls of the dresser need to be flat as possible in order to install your drawer slides. I used full extention slides but like Ana said, if your'e tacking the drawer bottoms on underneath, then you need to get the economy drawer slides because they will hold the bottoms on better. Also once your drawer boxes are in place, a good trick to getting the drawer fronts even on all 4 sides is to use shims in between the gaps. This instructional video is how I installed the drawer boxes. http://youtu.be/vI3jgkhxxPE
aria_dia
Sun, 05/29/2011 - 17:18
can you put slides on tight drawers?
Patrick how would you install slides on this dresser? (its the before pic but also the best pic I have for how close the drawers are...) http://a1.sphotos.ak.fbcdn.net/hphotos-ak-ash4/223263_10150186653387141…
its tight to its sides but has a recess past the face.
it currently is using this kind of "slide" but it breaks easily and is hard for my son to open.
http://a5.sphotos.ak.fbcdn.net/hphotos-ak-ash4/228064_10150190383987141…
patrickhosey
Sun, 05/29/2011 - 21:28
Aria, Remember that the
Aria,
Remember that the drawer box and the drawer face are 2 separate pieces. When you see the front of the dresser, you are looking at the drawer face and that is the part that is tight like you said. Behind that is the drawer box which is an inch shorter in length to leave that 1/2 inch on either side like clay mentioned.
claydowling
Mon, 05/30/2011 - 05:17
Drawer glides at Orange & Blue
They definitely carry the accuride glides. They also charge considerably more than Rockler does. You'll more than make up your shipping costs by ordering from Rockler.
You can probably make those drawers slide more smoothly by removing that plastic guide. I've dealt with the hateful things myself, and don't like them.
natasha
Wed, 08/24/2011 - 09:13
not the right amount...
I started this dresser yesterday, I cut it up and realized the 3- 1x6 @ 8' should be 4 boards
1n4001 (not verified)
Mon, 10/08/2012 - 05:32
Ditto.
There are ~322" of 1x6 needed but only 288" in the 3 1x6's. Unless the OP meant to request 1x6 @ 10' the directions should be updated to reflect:
4 - 1x6 @ 8'
If you're using a kreg jig and pocket holes you'll only need:
2 - 1x2
2 - 1x3
Also, if you're doing the above you can skip the 3" wood screws too.
Guest (not verified)
Fri, 12/30/2011 - 21:27
slides
Euro mount slides are available at Harbor Freight stores really cheap
sandrabees
Tue, 04/17/2012 - 07:51
love this!
I am adding to my to do list! My boys share a room now, but separating them this summer and will need another dresser... think this one will be perfect, thanks for sharing the plans!
bgmaes
Mon, 07/28/2014 - 08:17
updates plans
Ana,
Can you please send the updated plans of this to [email protected] Thank you!
bgmaes
Mon, 07/28/2014 - 08:17
updates plans
Ana,
Can you please send the updated plans of this to [email protected] Thank you!
bgmaes
Mon, 07/28/2014 - 08:19
updates plans
Ana,
Can you please send the updated plans of this to [email protected] Thank you!
Shannon Starvish
Thu, 05/26/2016 - 11:21
LOVED THIS DRESSER!
I had so much fun building this dresser! The drawers were diffcult, but I enjoyed learning something new!
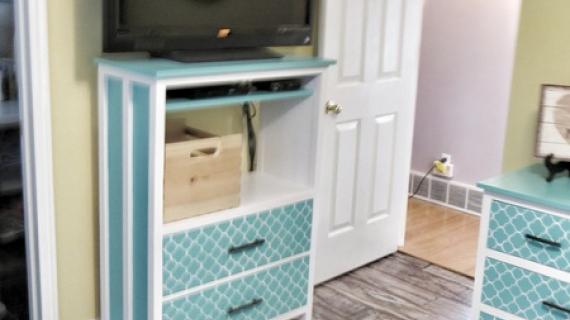
Thank you for the post! Check out how it came out!
Briar's Dresser