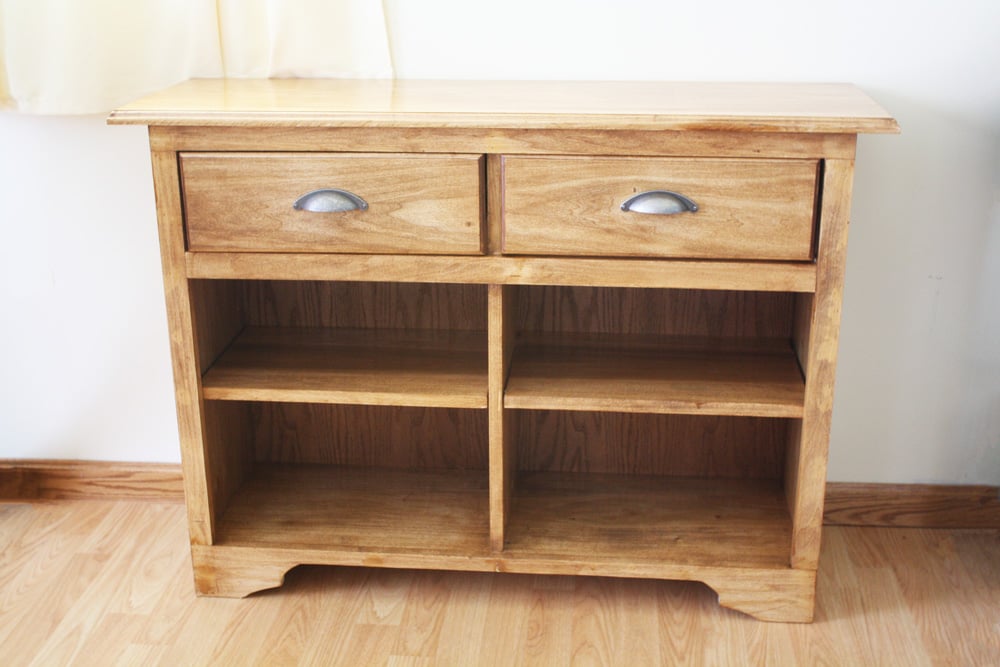


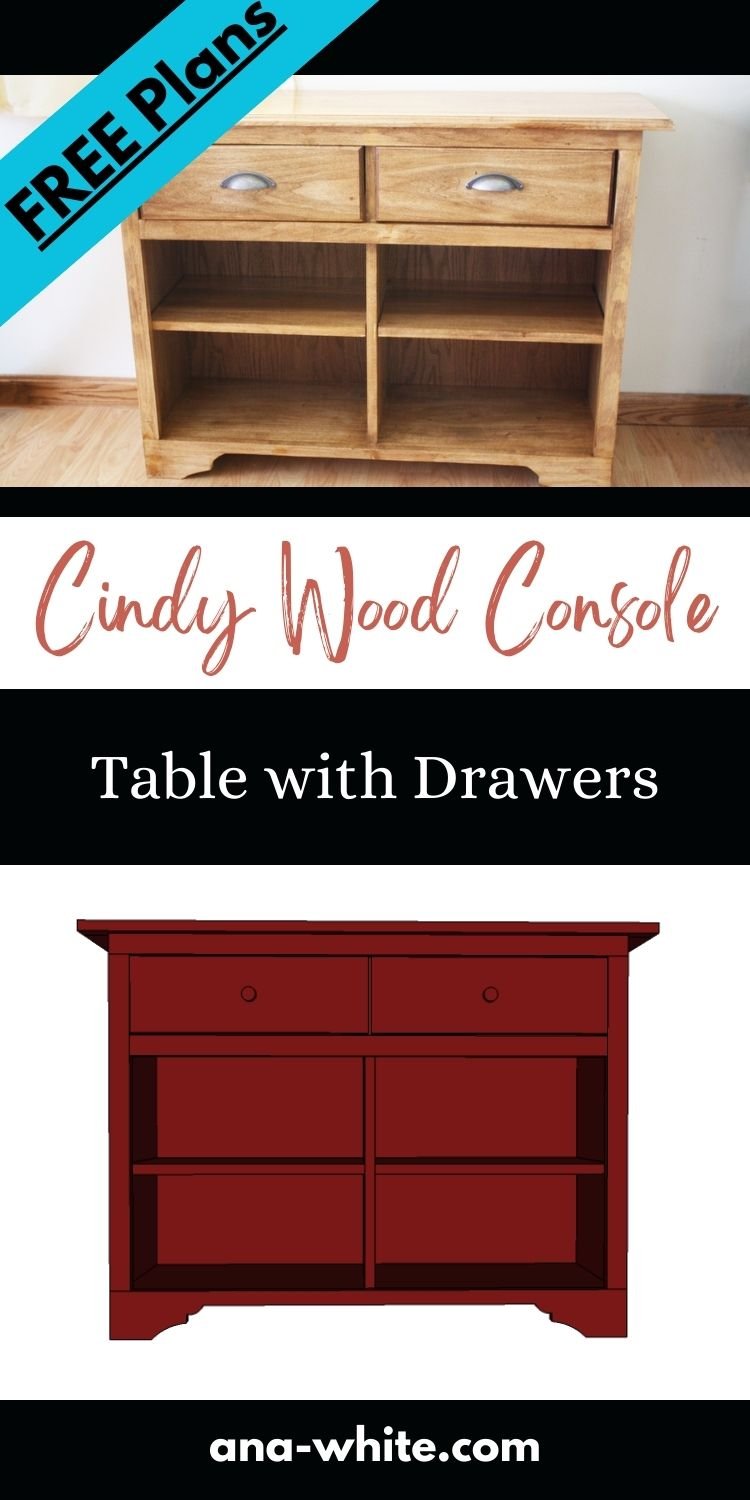
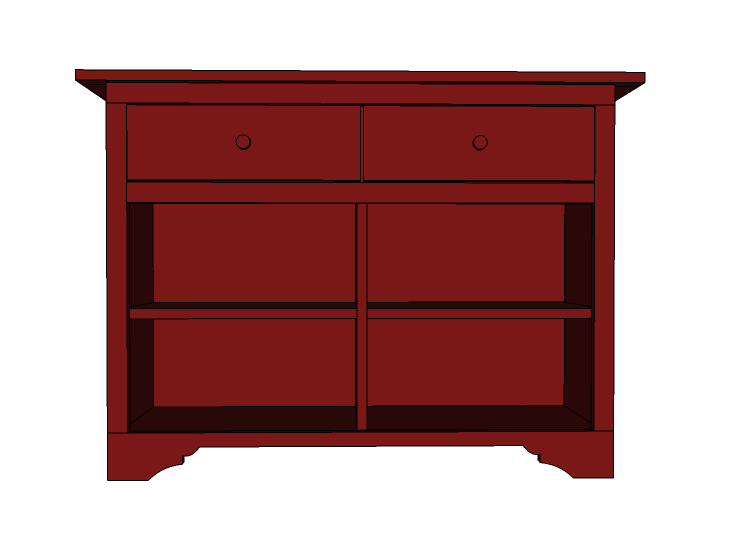
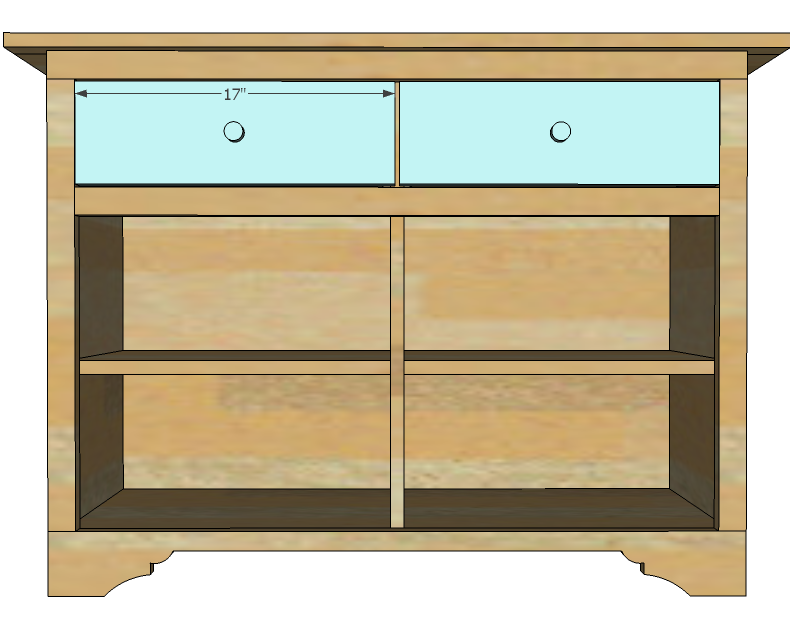
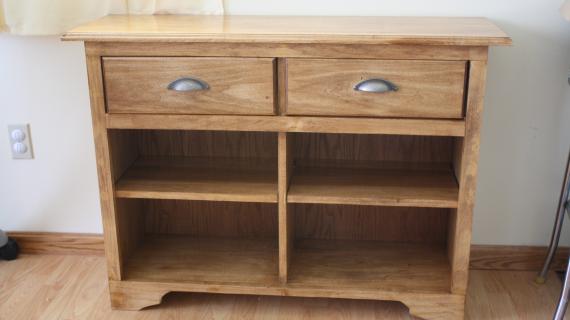
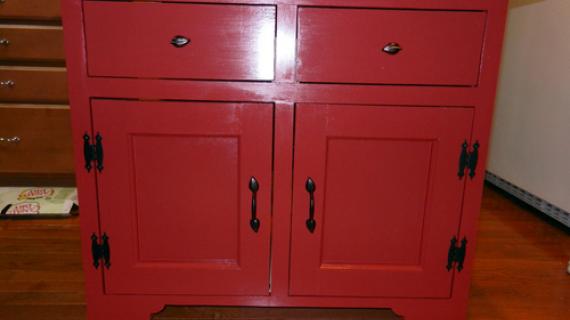
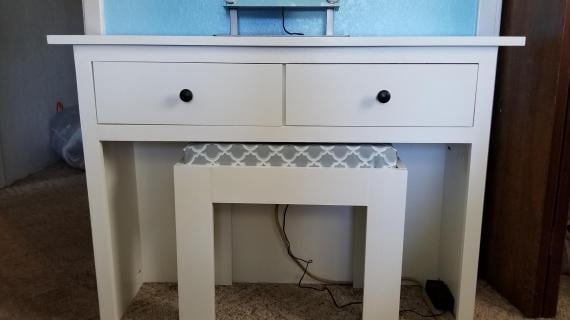
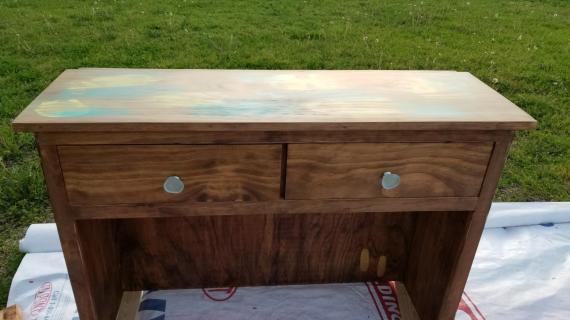
This pretty console table features two drawers and cubbies - it's perfect in an entryway or hall. The top is table height. It's made from 1x12s and 1x2s - so no need to rip plywood. Paint or stain any color of your choice. Free step by step plans by Ana White.
Pin For Later!
Preparation
- 2 - 1x4 @ 8 feet long
- 1 - 1x12 @ 8 feet long
- 1 - 1x12 @ 12 feet long
- 2 - 1x2 @ 8 feet long
- 1/2 Sheet of 1/4" plywood
- 2 sets of 10" drawer slides (Amazon 2 pack for $11 affiliate link)
- 2 - Knobs
- 2 - 1x12 @ 29 1/4" (Sides)
- 1 - 1x12 @ 41 1/2" (Top)
- 1 - 1x12 @ 36" (Bottom Shelf)
- 1 - 1x12 @ 25 3/4" (Center Divider)
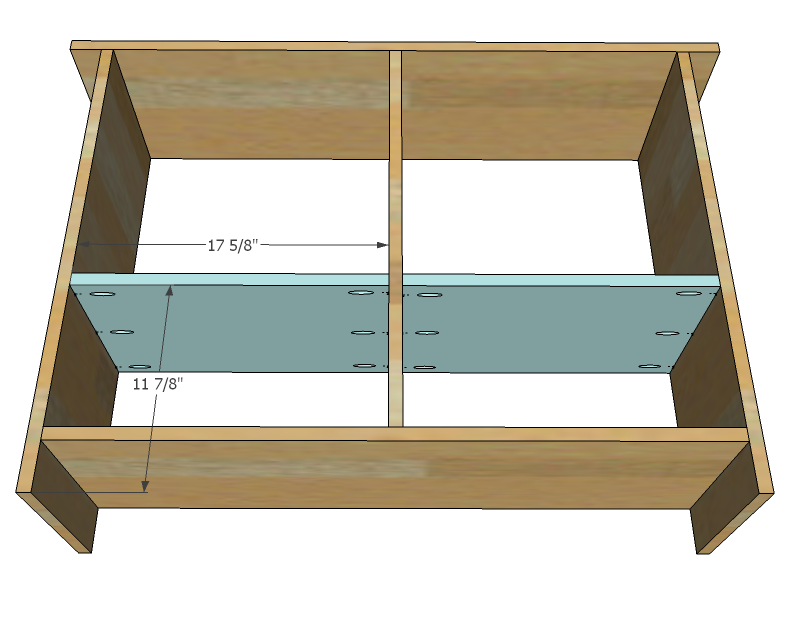
- 2 - 1x12 @ 17 5/8" (Shelves)
- 1 - 1/4" Plywood @ 37 1/2" x 30" (Back)
- 2 - 1x4 @ 11 1/4" (Drawer Slide Spacers - Cut to width of 1x12s)
- 1 - 1x4 @ 37 1/2" (Footer Front)
- 2 - 1x2 @ 24 1/4" (Side Trim)
- 1 - 1x2 @ 37 1/2" (Top Trim)
- 1 - 1x2 @ 34 1/2" ( Center Trim)
- 1 - 1x2 @ 41 1/2" (Top Front)
- DRAWERS- Drawer cuts, see in plan


Please read through the entire plan and all comments before beginning this project. It is also advisable to review the Getting Started Section. Take all necessary precautions to build safely and smartly. Work on a clean level surface, free of imperfections or debris. Always use straight boards. Check for square after each step. Always predrill holes before attaching with screws. Use glue with finish nails for a stronger hold. Wipe excess glue off bare wood for stained projects, as dried glue will not take stain. Be safe, have fun, and ask for help if you need it. Good luck!
Instructions
Step 1

I've included pocket holes in the diagrams for those of you with a Kreg Jig. You can also use countersunk screws with glue, or even finish nails, as this cabinet is fully framed.
Step 2
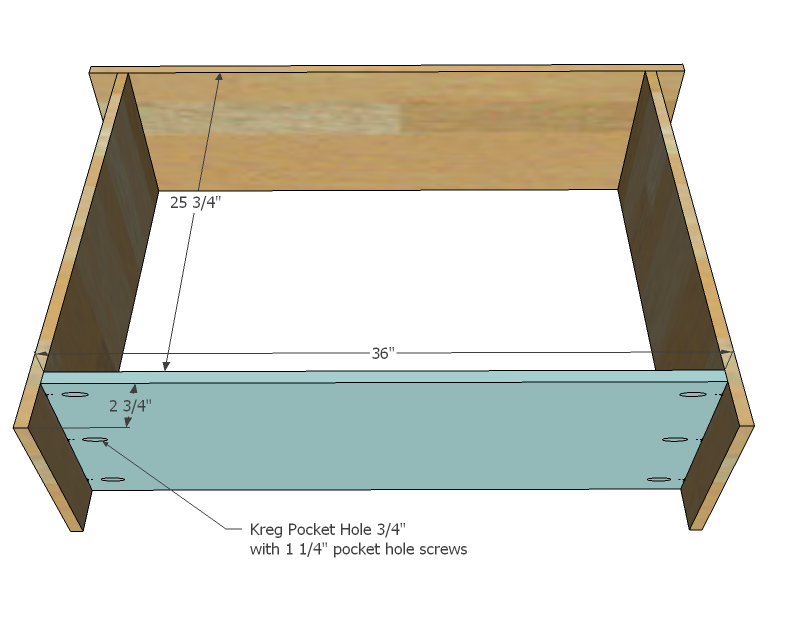
Now the bottom shelf. It sits 2 3/4" from the bottom.
Step 3
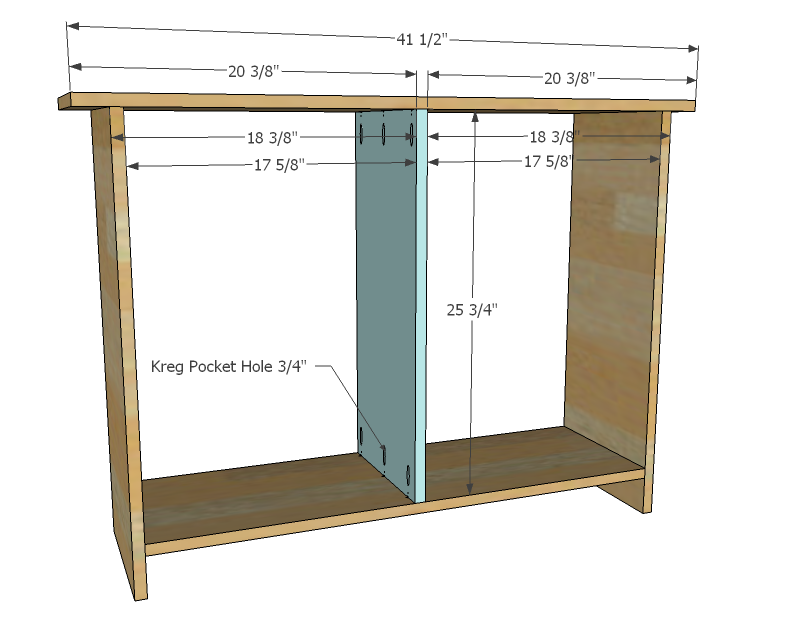
Mark the placement of the center divider and attach in place.
Step 4
You will need a pocket hole jig to make these shelves fixed. But certainly, you could use shelf pins to make adjustable shelves. Here's a great tute on how you can use pegboard as a guide for drilling your shelf pin holes.
Step 5

Drill 3/4" pocket holes on bottoms of shelves and attach inside the cubby area with 1-1/4" pocket hole screws.
Step 6
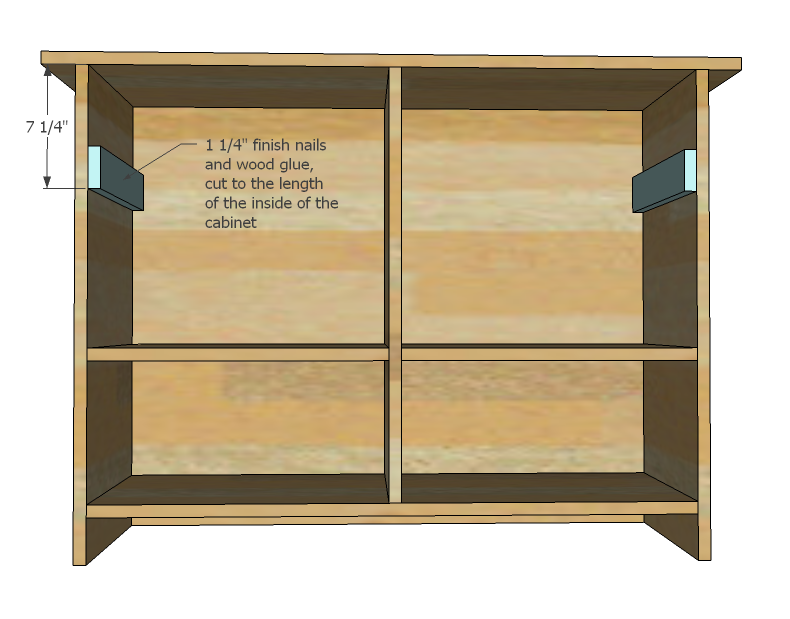
These are for your drawer guides. Use either 1 1/4" screws or nails to attach to the sides as shown in the diagram.
Step 7
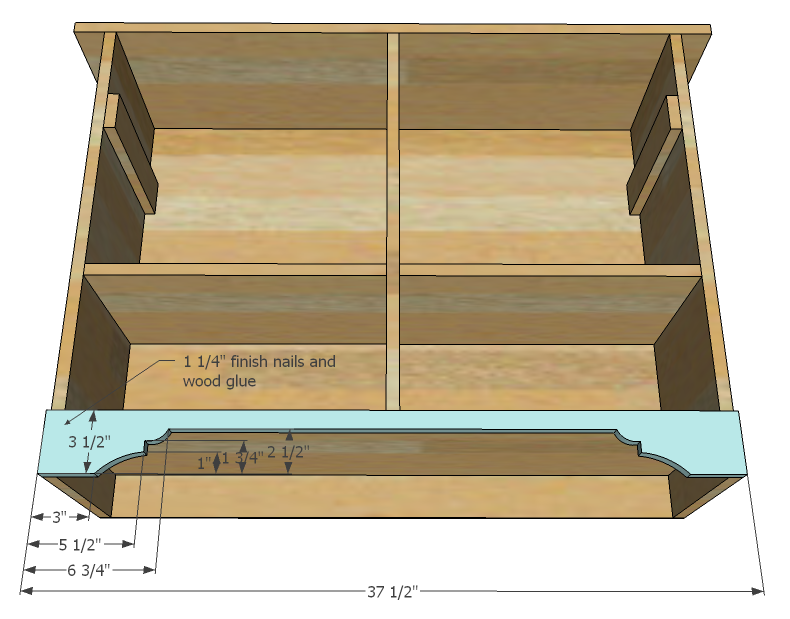
What really makes a cabinet like this one is the cutout footer. Use the diagram above to help you cut a pattern from the footer and attach. You can also start by attaching the footer, and then cut the footer out afterwards.
Step 8
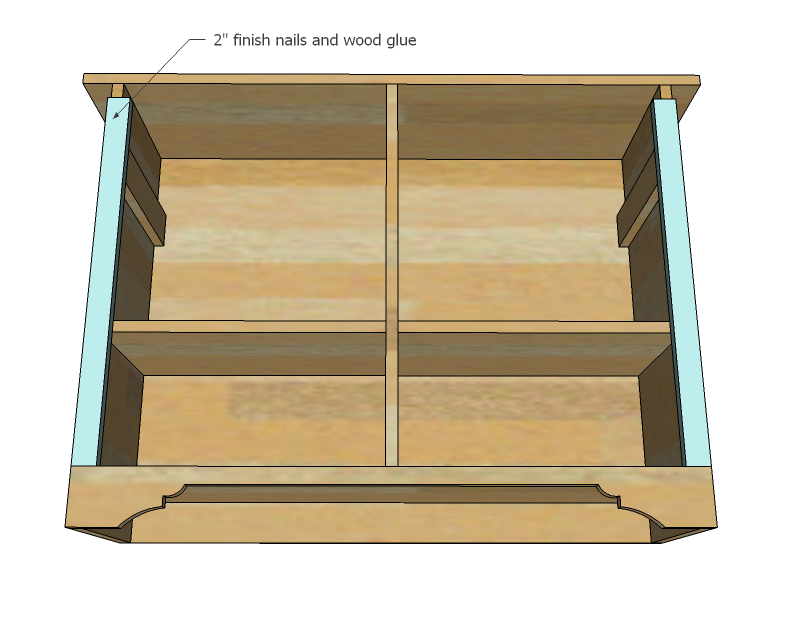
Use 2" finish nails and wood glue to attach the side trim.
Step 9

Now the header. Attach to the center divider as well.
Step 10

And now the drawer trim. You will need to either use pocket holes from the back or 2" screws and glue from the sides, outside to secure trim in place.
Step 11
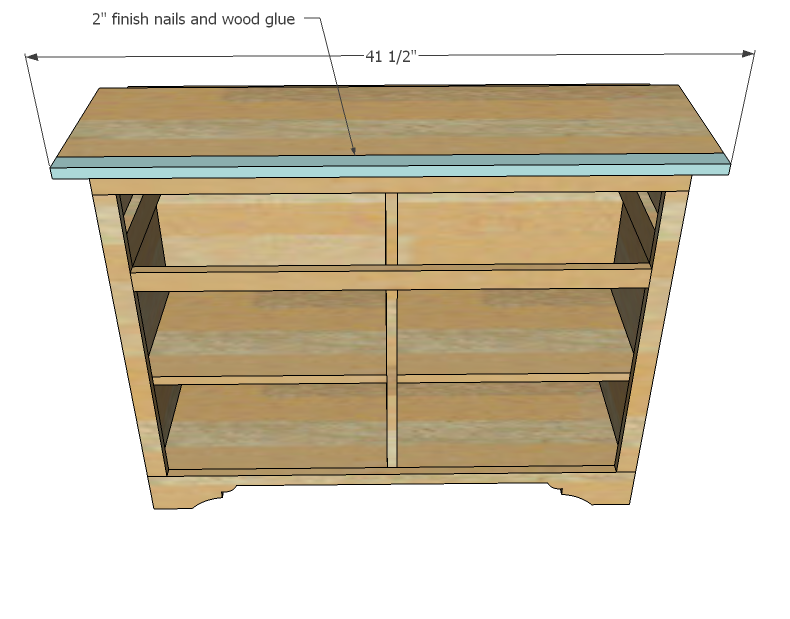
And finally the top front. Attach in place with glue and finish nails.
Step 12
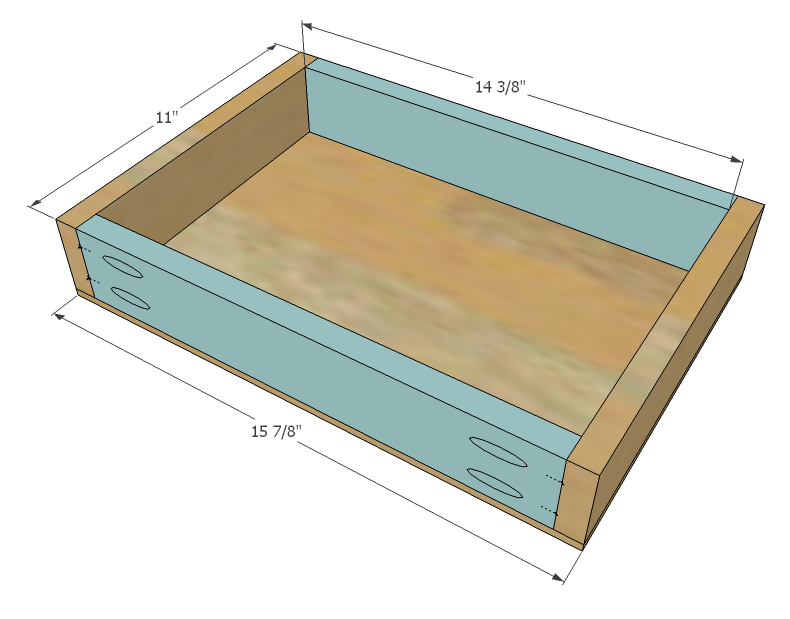
You will need to build two drawer boxes as shown above. Build the drawer boxes and attach 1/4" plywood leftover to the bottom. Don't worry about the plywood falling off - the drawer slides will hold it on. Your drawers should be built to fit your cabinet. Be aware that lumber can differ in width AND thicknesses, so you should always build to the cabinet. Standard drawer slides require 1/2" clearance on each side of the drawer, so make your drawers 1" less than the overall interior opening - use the diagram above as a guide.
UPDATE: We recommend using 10" drawer sides and slides so there's no issue with the drawer face being inset.
Video on how to install drawer slides and size drawers:
Step 13
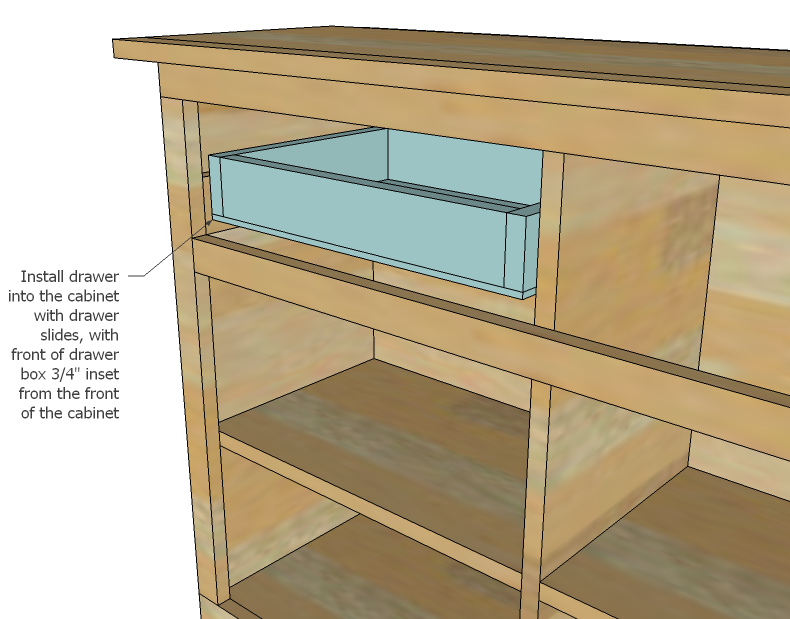
Install drawers into the cabinet as shown above with the drawer slides. Here's a tute on the type of slides you should use and also how I install a drawer. Remember that the drawer box needs to sit 3/4" inset from the face frame to allow for the drawer faces (see next step).
Step 14
Cut your drawer faces to fit the openings, and center of the drawers. Attach with 1 1/4" finish nails (careful about the hardware locations) and glue. Then remove drawer and attach faces to drawer boxes with 1 1/4" screws from the inside.
Step 15
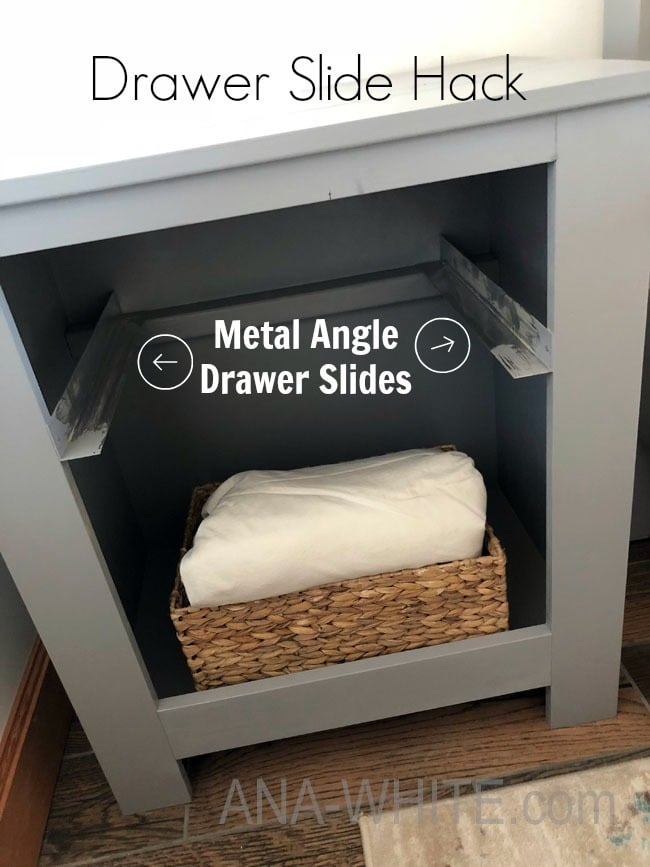
DRAWER SLIDE OPTION:
Use metal angle (about $5 for 4 feet) to support your drawer. Then build the drawer so it fits inside the angle, but leave enough room for your drawer to slide easily.
It is always recommended to apply a test coat on a hidden area or scrap piece to ensure color evenness and adhesion. Use primer or wood conditioner as needed.

Comments
Binh (not verified)
Sun, 07/17/2011 - 23:20
Wow, Ana, congrats on the book!
Such exciting news for all your avid blog followers!
You are an inspiration to all the moms, grandmas, daughters and females in this world. Keep up the awesome work. Will definitely be one of the first in line to buy your book when it comes out. :)
In reply to Wow, Ana, congrats on the book! by Binh (not verified)
Ana White
Sun, 07/17/2011 - 23:56
Thank you thank you! It is
Thank you thank you! It is exciting, I'm personally hoping for a book tour so I can meet everyone :) We'll be sharing more details as we confirm things like the title, release date and other fun stuff.
ddietz12
Mon, 07/18/2011 - 05:35
I hate it when moose eat my
I hate it when moose eat my berries! Or is it mooses? Mossen?
spiceylg
Mon, 07/18/2011 - 08:09
Well deserved!
Congratulations on the book deal Ana, it's so well deserved. Thank you for being you and for being so gracious and generous to us. Everytime I come on-line and see all of the pictures of the projects people have made, especially those of us who never had the courage to build before, I think, you must be so proud. I don't know how you find the time to do all you do. I wouldn't be able to keep up with just a fraction of your list. You really are an inspiration and I'm so thankful to be a part of your community.
ferbit
Mon, 07/18/2011 - 08:58
Oooooooh! A book tour would be awesome!
I cannot wait to buy your book! How exciting! It would be so much fun to meet you!
Gorgeous console table!!!
jigganancy
Mon, 07/18/2011 - 09:39
Doors for the bottom?
book tour is awesome. make a stop in Denver and schedule something at Tattered Cover or Home Depot!
As for this piece .. how difficult would it be to put on the doors?
Baskets the perfect size are always so difficult to find. I'm thinking of putting on doors and frosting them to hid my mess.
Kate (not verified)
Mon, 07/18/2011 - 14:37
I was thinking the same
I was thinking the same thing. This would be great in our dining area to replace the old apartment-trash-pile bookshelf we currently have!
In reply to I was thinking the same by Kate (not verified)
jigganancy
Mon, 07/18/2011 - 14:40
cabinet door
inset doors would be great. I was looking at doing inset doors like the corner cupboard
http://ana-white.com/2010/12/corner-cupboard
Tsu Dho Nimh
Mon, 07/18/2011 - 10:09
BOOK DEAL! Awesome!
Ana -
This is great news.
Ana White
Mon, 07/18/2011 - 13:37
Thank you everyone!
Thank you everyone!
melissa2
Mon, 07/18/2011 - 14:07
Congratulations!
The big news is really exciting. You deserve it, Ana! Congratulations!
ACraftyCauldron
Tue, 07/19/2011 - 06:01
FABULOUS NEWS!
Ana - I love this console but even more than that I LOVE that you talents are being recognized more and more every day! Congratulations on the book - can't wait to see it!
Ayana (not verified)
Wed, 07/27/2011 - 13:44
Love this plan. I need a
Love this plan. I need a table for the my stair wall. I didnt know you got a book deal!! CANT WAIT!!
Guest (not verified)
Wed, 03/28/2012 - 11:39
Hi Anna - My husband and I
Hi Anna -
My husband and I are trying to build the Cyndi Console Table, but cannot find where to order the drawer sliders. Can you please help us out??
Jordanmc1
Wed, 02/11/2015 - 08:21
drawer faces
What wood are we using for the drawer faces? I see the instructions cut to fit but what lumber are people using? It looks like a 1 x 6?