


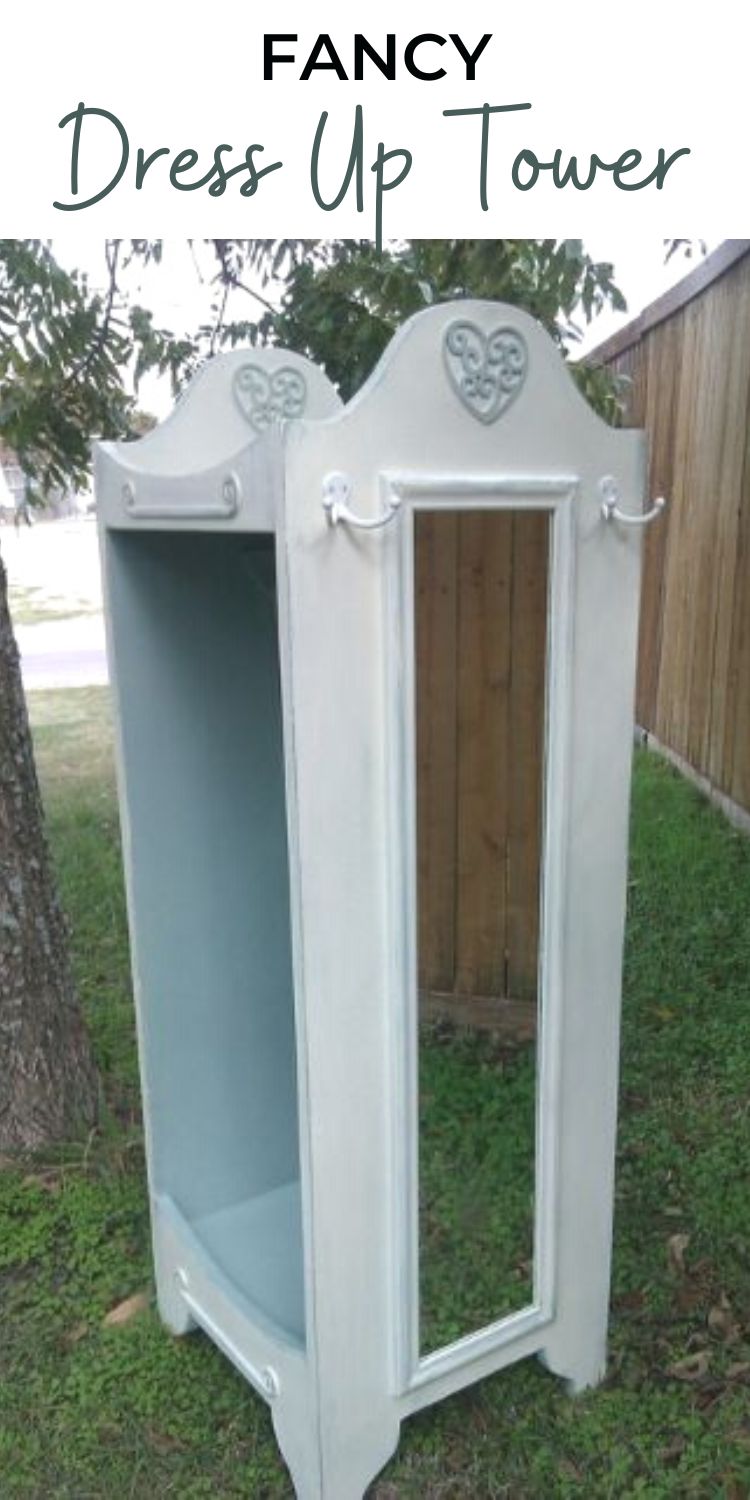
Build your own dress up storage tower for you little ones! This step by step plan includes everything you need to DIY a dress up storage center.
Pin For Later!
Preparation
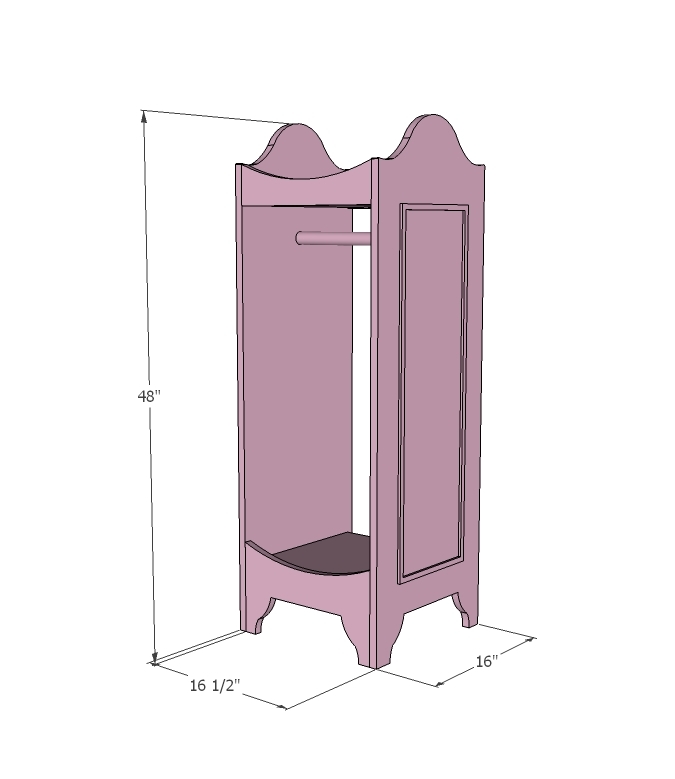
1 - 1/2 sheet 3/4" plywood, MDF or other sheet goods
1 - 1x4 @ 3 feet long
1 - package of rod pocket holders (check the closet aisle)
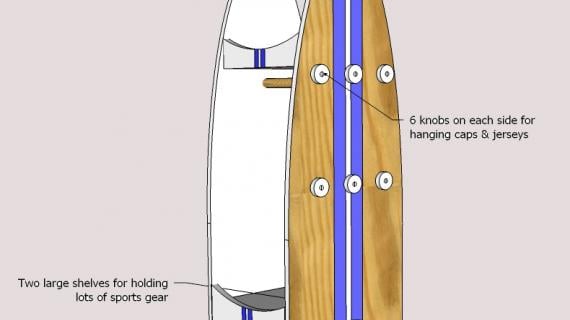
1 - 1 1/4" wood dowel, 16" long (diameter needs to work with the rod pocket holders you choose, so adjust if necessary)
Use either 1-1/4" pocket holes or 1-1/4" brad nails or 2" self tapping screws
2 - 1x4 @ 15"
2 - 3/4" plywood @ 48" x 16"
2 - 3/4" plywood @ 14 1/2" x 15"
2 - 3/4" plywood @ 8 3/4" x 15"


Please read through the entire plan and all comments before beginning this project. It is also advisable to review the Getting Started Section. Take all necessary precautions to build safely and smartly. Work on a clean level surface, free of imperfections or debris. Always use straight boards. Check for square after each step. Always predrill holes before attaching with screws. Use glue with finish nails for a stronger hold. Wipe excess glue off bare wood for stained projects, as dried glue will not take stain. Be safe, have fun, and ask for help if you need it. Good luck!
Instructions
Step 1

If you can get your hardware store to cut your plywood into two 16" wide strips and one 15" wide strips, this will save you much time and make transporting the boards much easier. Otherwise, rip the plywood with the grain into strips as shown in diagram. Then make cross cuts for the shelves and trim boards as shown in diagram.
Step 2

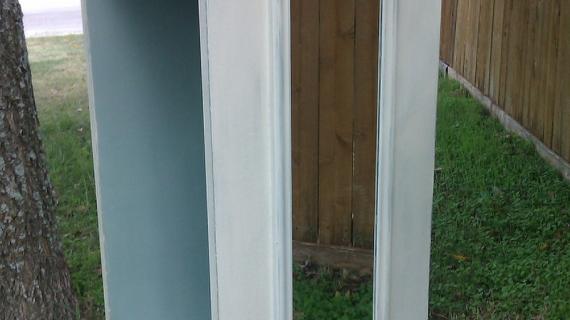
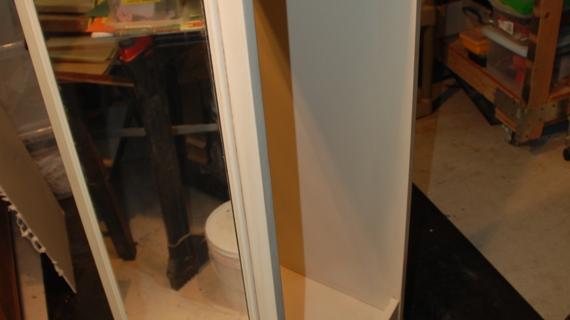
From large side pieces, carefully mark out a pattern as shown in diagram. You will need to cut two identical sides, so practice on scraps with your jigsaw until you are confident. Once you are happy with one side, use it as a pattern to cut the other side. Remember that the saw blade takes up space, so be very aware of what side of the traced line you cut on. Sand and sand some more when you are finished. This project will work best with a painted finish, but you could iron on edge banding if desired.
Step 3

Cut the two bottom trim pieces as shown here, with the same care as you did the sides.
Step 4

From the 1x4 pieces, cut the top trim.
Step 5

Step 6

Mark the insides of the bottom trim 2" from the top. Attach sides to shelves, hiding pocket holes (if used) to the undersides of the shelves (this is shown opposite in diagram, my apologies).
Step 7

Start by attaching the sides to the base. Then attach top shelf to sides.
Step 8

Add the rod pocket holders with included screws and cut and place wood dowel in rod pockets. For a little extra fancy, glue wood moulding to the sides.
Step 9

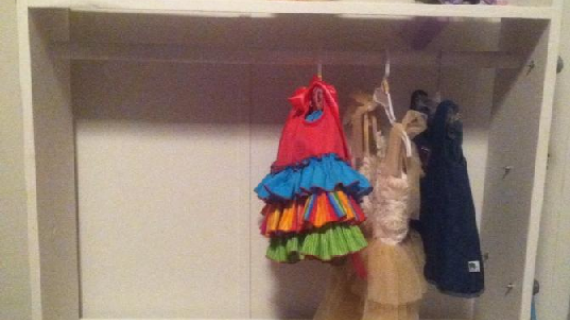
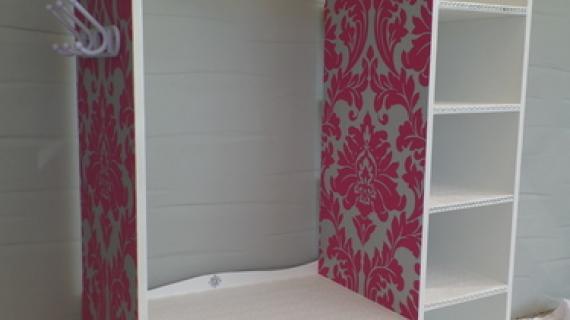
You can get really creative here - adding hooks for necklaces and hats and capes, or a mirror (love the stick on mirror tiles!) or even a french pin board. It's the details that will transform this 1/2 sheet of plywood into a beautiful gift!
It is always recommended to apply a test coat on a hidden area or scrap piece to ensure color evenness and adhesion. Use primer or wood conditioner as needed.


Comments
meganmarie
Thu, 09/29/2011 - 12:45
LOVE IT!
Thank you Ana!
In reply to LOVE IT! by meganmarie
Ana White
Thu, 09/29/2011 - 13:40
Thank you for reading and
Thank you for reading and commenting! You are so welcome, really excited to see this one built! Can't wait, it's gonna be darling!
Guest (not verified)
Thu, 09/29/2011 - 13:54
Mirror, Mirror
I love it! It would totally suit a mirror on the side panel too! And if you made it just a tad wider, a hanging shoe organizer. Love your plans! Thanks.
cherie82
Fri, 09/30/2011 - 07:37
Beautiful!
Nice and compact. Think I will be replacing the one I built the girls last winter, takes up a lot of valuable floor space. Love it!
And you are so right! When my daughter is showing off her stuff and telling people I made it my heart swells. Now she (almost 9) is requesting homemade birthday gifts for her friends.
jesse (not verified)
Mon, 12/05/2011 - 09:46
Looks good
I tackled this project over the weekend. I followed their advice and had my hardware store make the 16" and 15" cuts. I tried using my circular saw to make the 14 1/2 and 8 3/4 cuts and couldn’t keep the cut straight and ended up breaking down and getting a table saw. The other problem i ran into was the directions called for 2" screws, but the Krieg’s jig specified 1 1/4" for 3/4" wood, what's another trip to the hardware store at this point? Finally you differently need to sand and then sand some more as recommended. Over all i would say this project is very doable.
Guest (not verified)
Sun, 12/11/2011 - 17:04
Dress up station
build for girls