The next step for the Momplex is the basement slab.
We could have poured the slab inside the footers, right after we put the footers in, but we ultimately decided to wait. We wanted to elevate the slab above the footer so it is insulated on all sides, saving our Moms on future heating costs and removing the likelihood of cold floors closer to exterior walls. Also, by waiting to pour the slab, we take away the risk of the slab being damaged by the bracing system, or worse yet, a heat tube being punctured when anchoring the braces.
And while we choose not to pour the slab right after the footer, the story of this slab actually starts back a month or so ago, in the middle of the ARXX blocks.


See Ram Working?
Remember when we first put the ARXX blocks up? After two rows of blocks, it dawned on us that after we put the garage doors in, we would not be able to bring gravel into the Momplex with heavy equipment.
Procrastination = Wheelbarrow
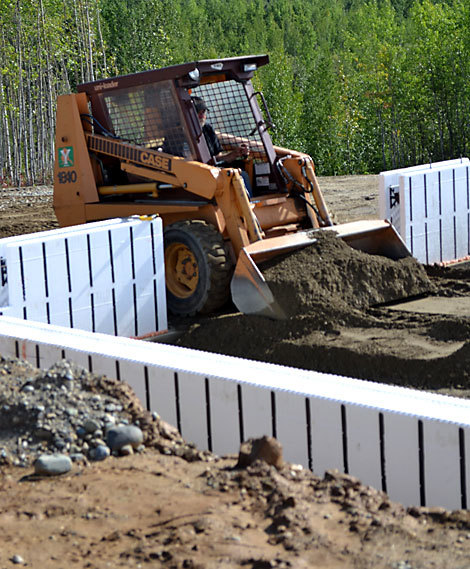
So we took a day off from block building to bring the gravel up to the tops of the footers.
Amazing how fast Alaska has changed colors.
The gravel is watered and compacted until it's at the height of the footers all the way around.
Braces First
We choose not to pour the slab at this stage because the slab would risk getting damaged with the bracing system ... or worse yet, a heat tube would get punctured. So braces and first story walls get poured, and then we go back to the slab.
Load Bearing Wall Footer
Well, here we are, getting ready to pour the slab. The center is dug out for extra deep concrete to support a load bearing center wall dividing the two units of the Momplex.
Remove Wood Bucks Below Slab
Since the slab sits on top of the footers, we removed the bottom portion of the wood door bucks and garage door bucks. That way there isn't plywood down in the slab, ticking away at when it's going to rot out and just become a dirt catching void.

Vapor Barrier for Slab
Once the ground is properly prepared for the slab, it's time to lay the vapor barrier over the bottom of the slab. This will keep moisture from seeping up into the slab from underneath.
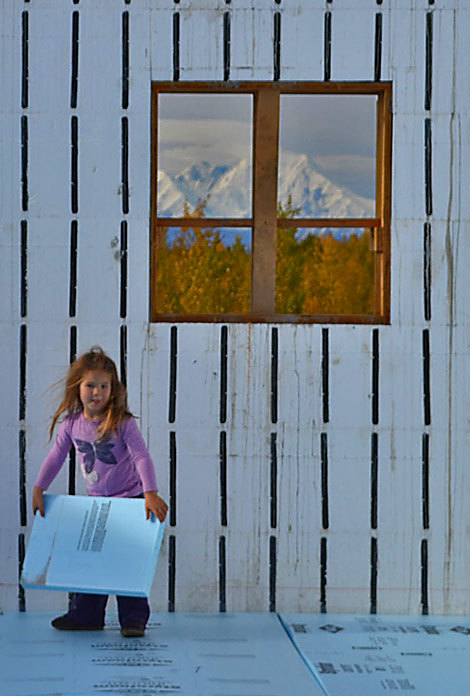
Laying Foam
Foam blueboard follows the vapor barrier. It's layed right on the compacted ground, right over the plastic paper. So easy my preschooler can do it, right?

Calm Before the Storm
In no time at all, the foam was layed on the entire floor for the Momplex. Time for heat tubes and concrete, right?

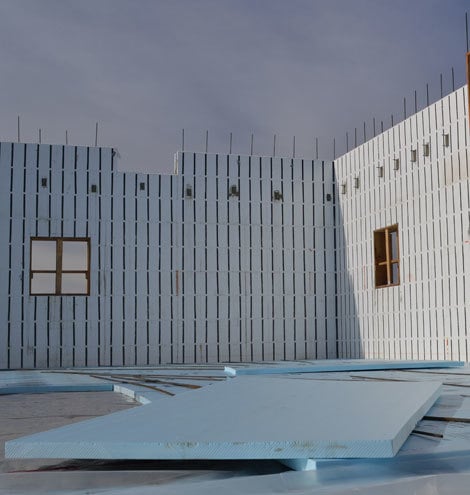
Windstorm
Wrong. We are days away from that. Just like that, the wind started to BLOW. And up there on top of that hill, with on shelter, it HOWLED. It started with just one sheet of foam flying in the air, landing upside down, blowing the rebar right off of it.

Giant Kites
The foam blueboard is lightweight and flat and sturdy. It acts like a giant kite, perfect for flying in the wind. And we've got several thousand dollars worth of foam blue board about to fly away as the wind starts gusting to 60 MPH, all layed out on the inside of the Momplex.
Panic mode starts right now.
Photos get scarce.
It's all hands securing the blueboard right now.

Secure the Fort!
To eliminate gusts inside the Momplex, whatever materials we have on hand are used to cover all windows and doors. Anything that can be done to reduce wind flowing through the Momplex will increase our chance of not loosing thousands of dollars worth of foam.
Thank goodness we waited to pour the slab. Without a fort to secure, our foam would be flying high in the sky right about now.

After the doors and windows are secured, there is not much else we can do but hope things don't get any worse.
Three days later . . .

Did we loose the blueboard?

Are we out a few thousand dollars in insulation, a horrible blow (pun intended) to our morale and budget? Or is it time to put heat tubes in and pour the slab?

To be continued . . .
Comments
luis cano
Tue, 09/13/2011 - 05:45
What a cliff hanger
Guest (not verified)
Tue, 09/13/2011 - 06:19
Question
In reply to Question by Guest (not verified)
Ana White
Tue, 09/13/2011 - 22:07
Frost Footers
Sara (not verified)
Tue, 09/13/2011 - 06:31
Really enjoying these posts
babysteps
Tue, 09/13/2011 - 08:16
Like a Friday afternoon Soap Opera
Denise Boyle (not verified)
Tue, 09/13/2011 - 08:23
Hurray, an update!
k g (not verified)
Tue, 09/13/2011 - 11:47
Oh! I hope all turned out
logangb345
Tue, 09/13/2011 - 12:53
I realize that this project
Ana White
Tue, 09/13/2011 - 22:11
Thank you everyone, we are
Guest (not verified)
Wed, 09/14/2011 - 07:23
Amazing!!
Guest (not verified)
Fri, 09/16/2011 - 07:18
You Can Do It!