

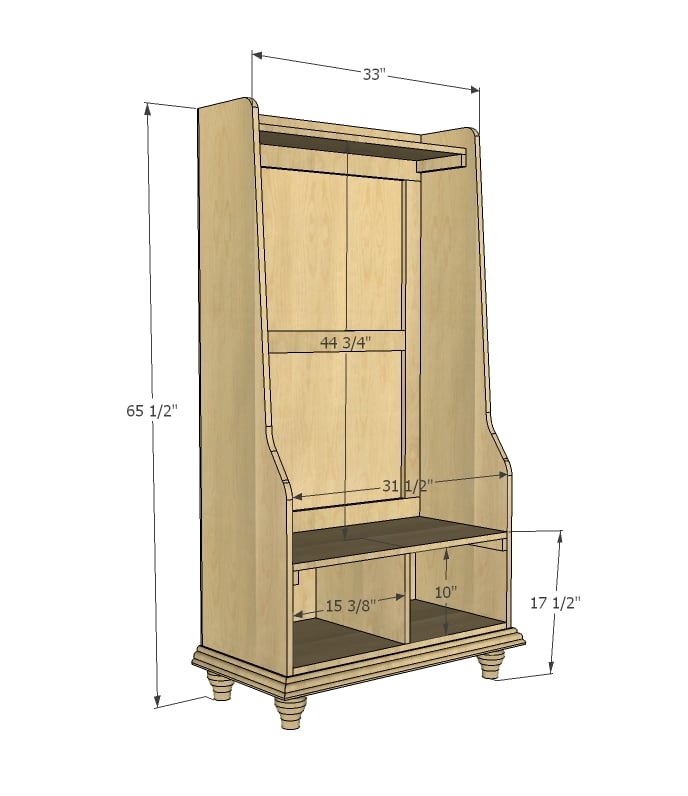
Build a rustic hall tree inspired by Pottery Barn Grant Hall Tree! Free simple step by step plans feature detailed diagrams, cut list and shopping list. Everything you need to diy your own beautiful furniture!
So I run into this problem all the time ... two ways to build something, so which do I blog?
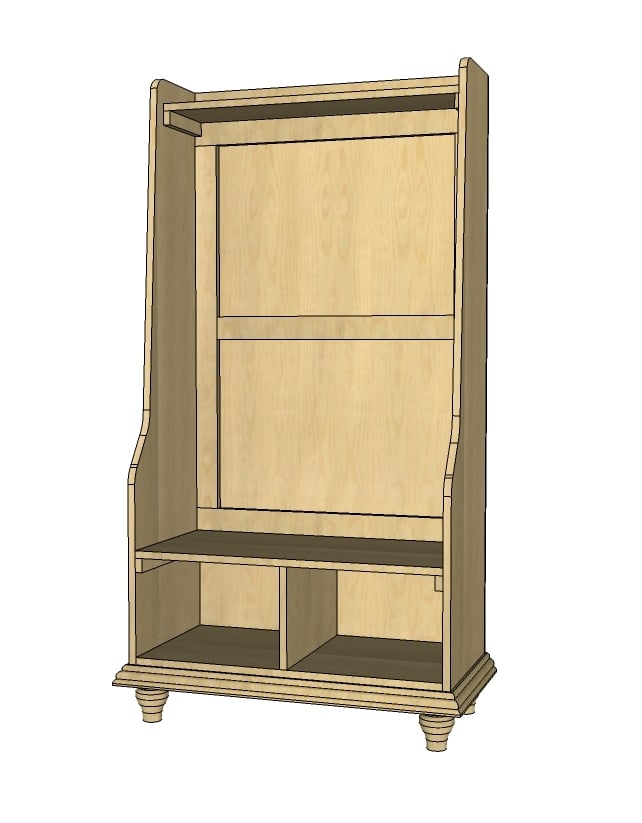
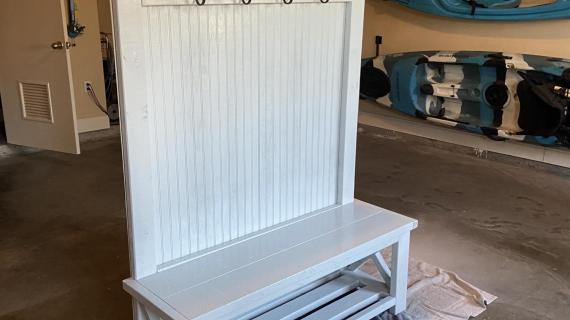
When Teresa requested plans for a Hall Tree inspired by Pottery Barn Grant Hall Tree, I drew up plans using a plank style.

Preparation
1 - Sheet of 3/4" Plywood (as shown PureBond Formaldehyde Free Plywood in Pine) or other sheet goods cut into three strips each 8 feet long, 15 3/4" wide (referred to as 1x16 boards throughout this plan)
4 - Tulip feet 4 1/4" tall
1 - small crown moulding piece, 7 feet long
2 - 1x2 @ 8 feet long
3 - 1x3 @ 8 feet long
1/4" plywood (full sheet in matching plywood grain)
You can use either pocket hole screws or countersunk screws
3 - 1x16 @ 31 1/2" (one will get trimmed down for top shelf)
1 - 1x16 @ 10"
2 - 1x16 @ 61" (Sides - will cut out sides in decorative shape)
2 - 1x2 @ 15 3/4" (Under Shelf Support Trim)
2 - 1x2 @ 31 1/2" (Bottom Trim)
2 - 1x2 @ 14 1/4" (Bottom Under Support)
2 - 1x2 @ 8" (Top Shelf Supports)
1 - 1/4" Plywood @ 61" x 33" (Back)
Back Inset Frame
2 - 1x3 @ 39 3/4"
3 - 1x3 @ 31 1/2"
1 - 1x3 @ 26 1/2"


Please read through the entire plan and all comments before beginning this project. It is also advisable to review the Getting Started Section. Take all necessary precautions to build safely and smartly. Work on a clean level surface, free of imperfections or debris. Always use straight boards. Check for square after each step. Always predrill holes before attaching with screws. Use glue with finish nails for a stronger hold. Wipe excess glue off bare wood for stained projects, as dried glue will not take stain. Be safe, have fun, and ask for help if you need it. Good luck!
Instructions
Step 1
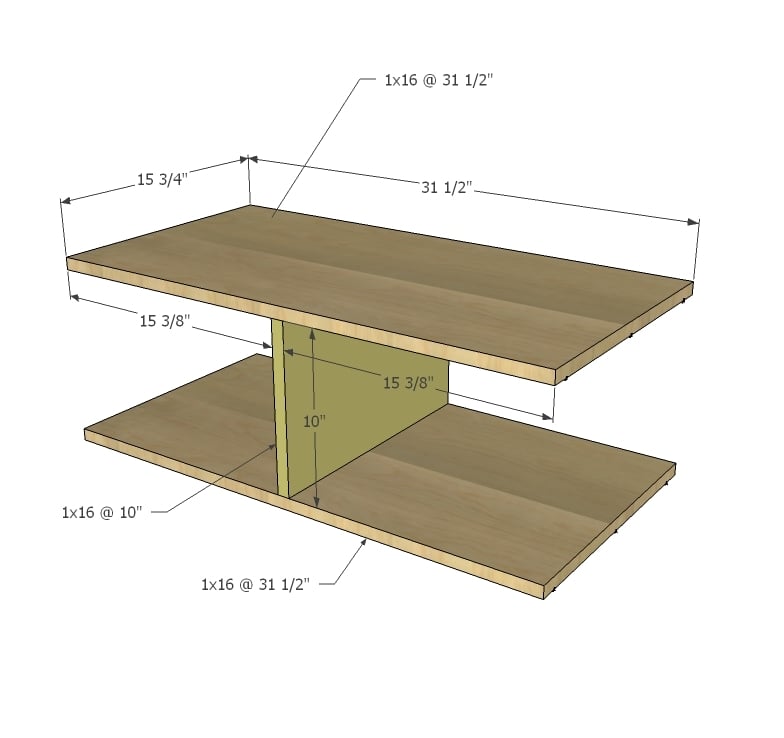
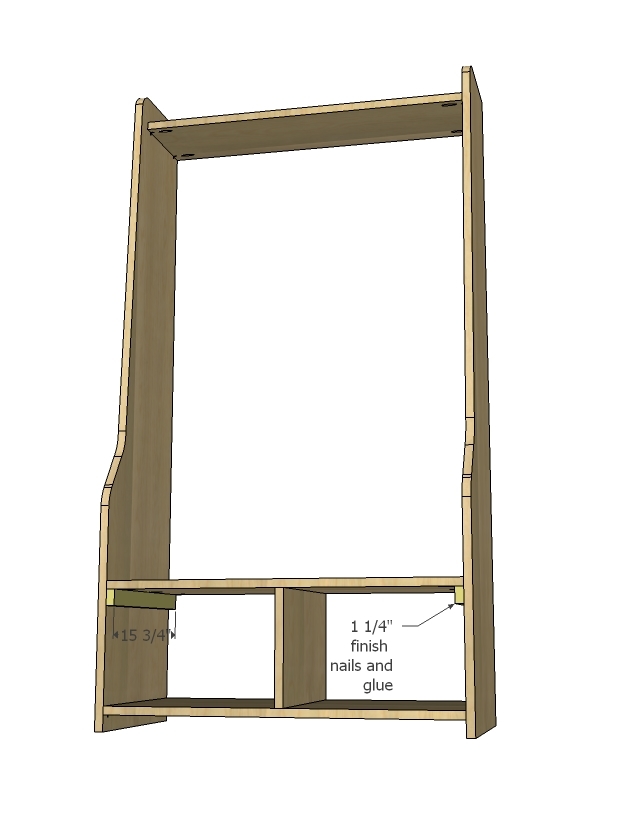
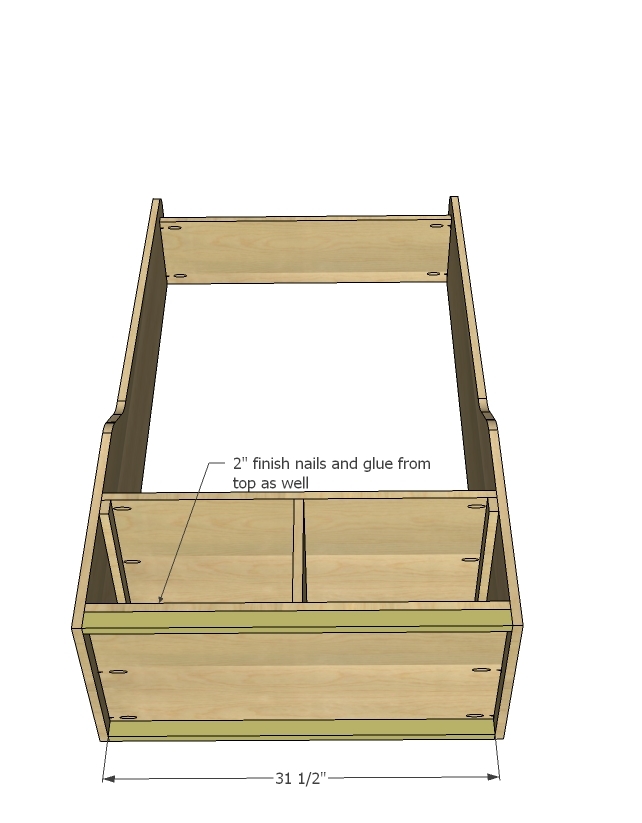
Build the shelf system with 2" finish nails and wood glue.
Step 2

Cut out sides as shown above with a jigsaw from 61" long 1x16 boards.
Step 3
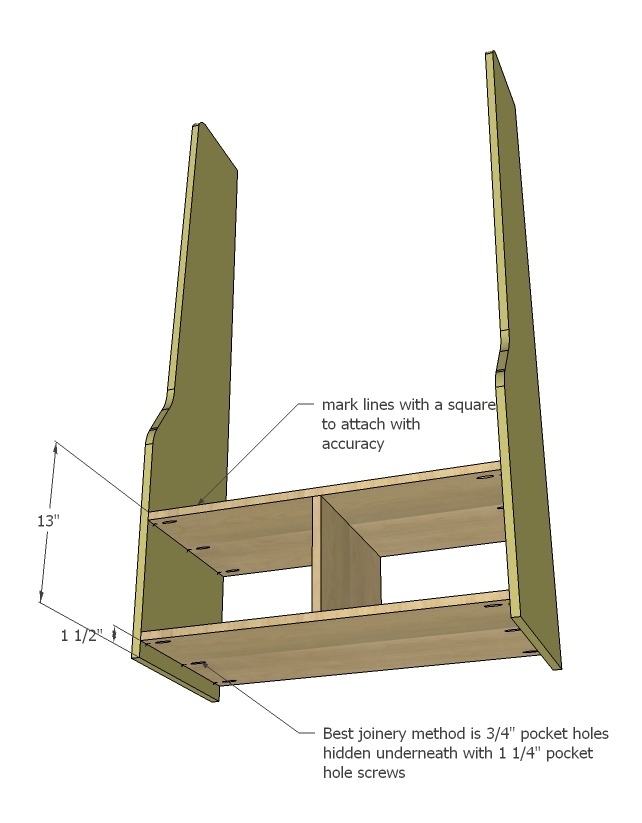
Mark sides for location of shelf system and attach. You can use either pocket hole screws or 2" screws countersunk from outsides, or even 2" finish nails, as all shelves get supported with 1x2s later.
Step 4
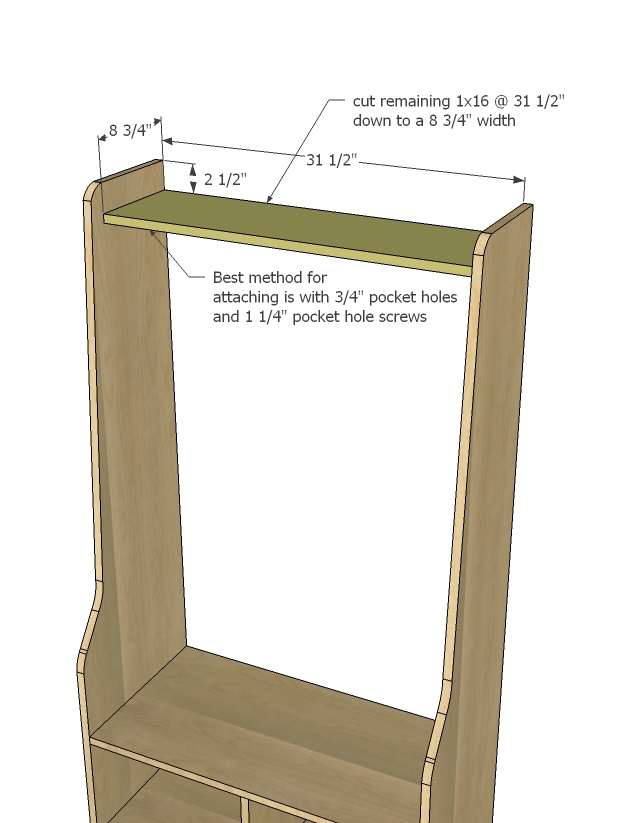
Top Shelf - use a circular saw or jigsaw to trim the remaining 1x16 @ 31 1/2" down to 8 3/4" wide - put the prettiest side to the front.
Step 5
Step 6
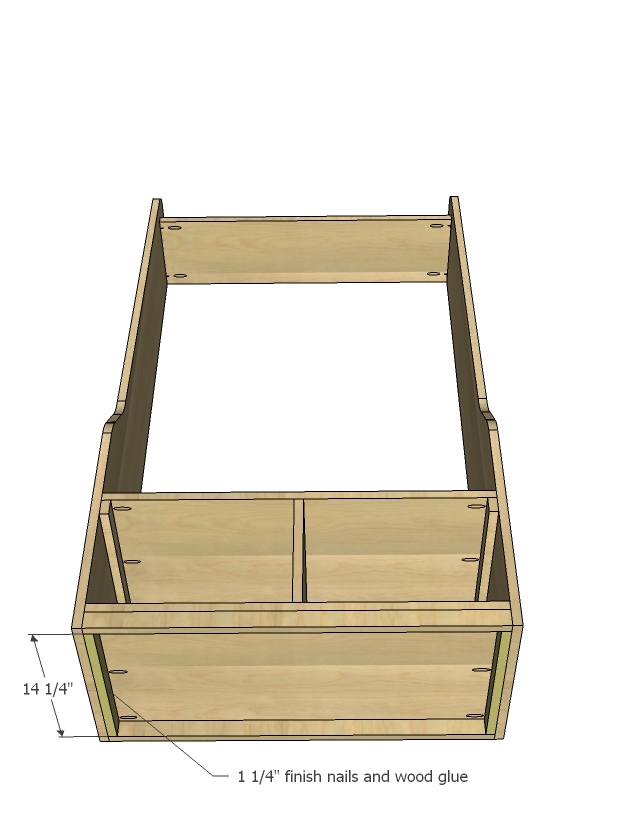
Bottoms get nailed in - or you could use your Kreg Jig here.
Step 7
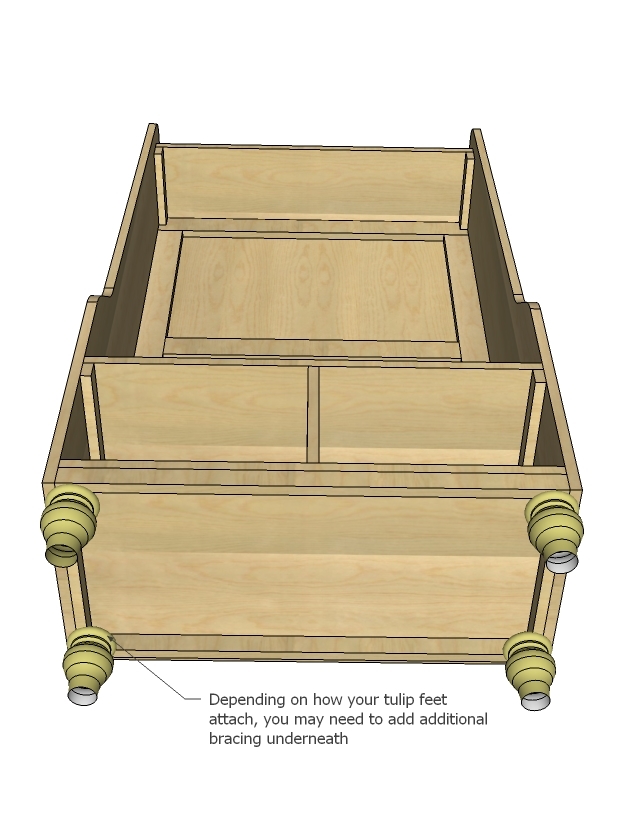
Fill in the blanks - you don't necessarily need these, but when it comes time to add the tulip feet, you will need something to attach to. You may even need to add additional boards, depending on how your tulip feet attach.
Step 8
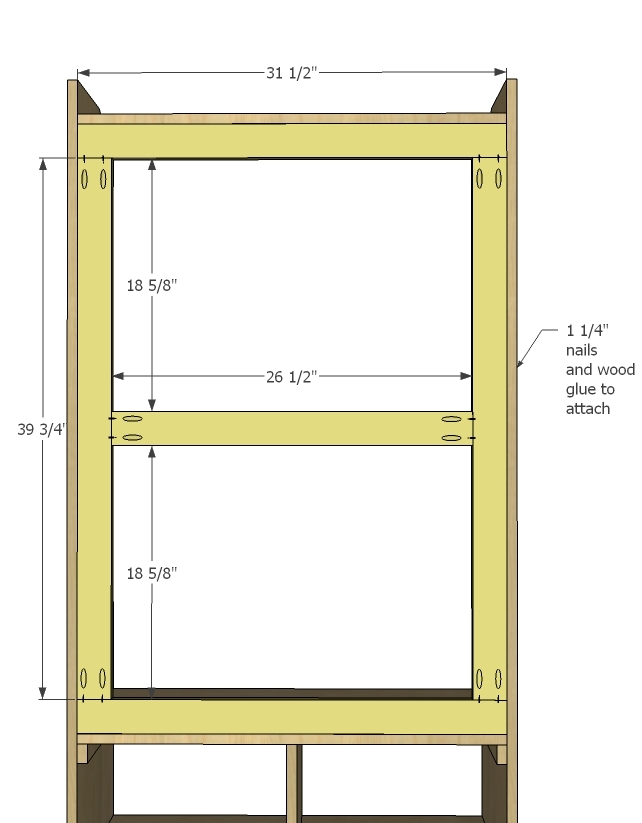
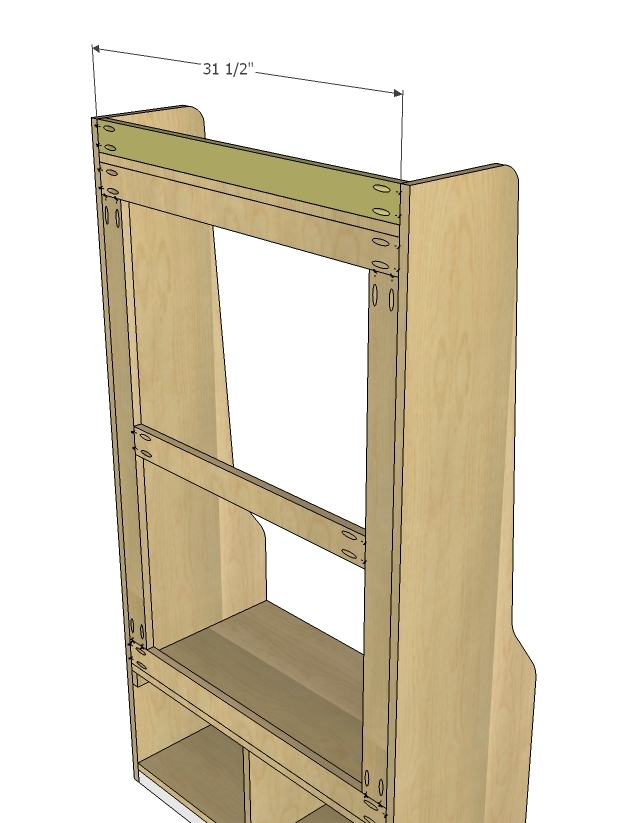
Build the back frame as shown above and attach in place with finish nails.
The back frame sides are not essential - but the top and bottom are because you will not have anything to hang hooks on. If you don't have a pocket hole jig, the easiest work around is simply nailing the top and bottom 1x3s in place and omitting everything else.
Step 9
Now the top.
Step 10
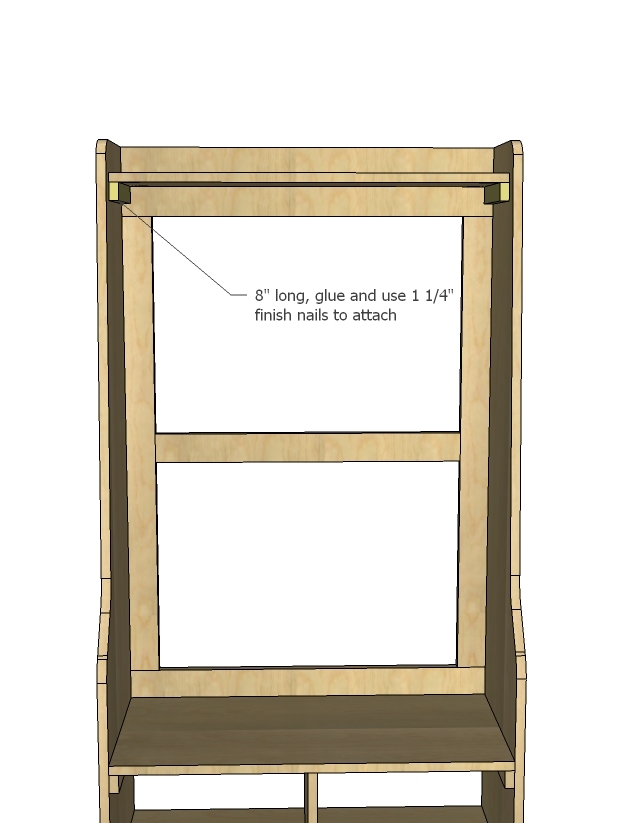
Shelf supports just get nailed in from sides and top.
Step 11
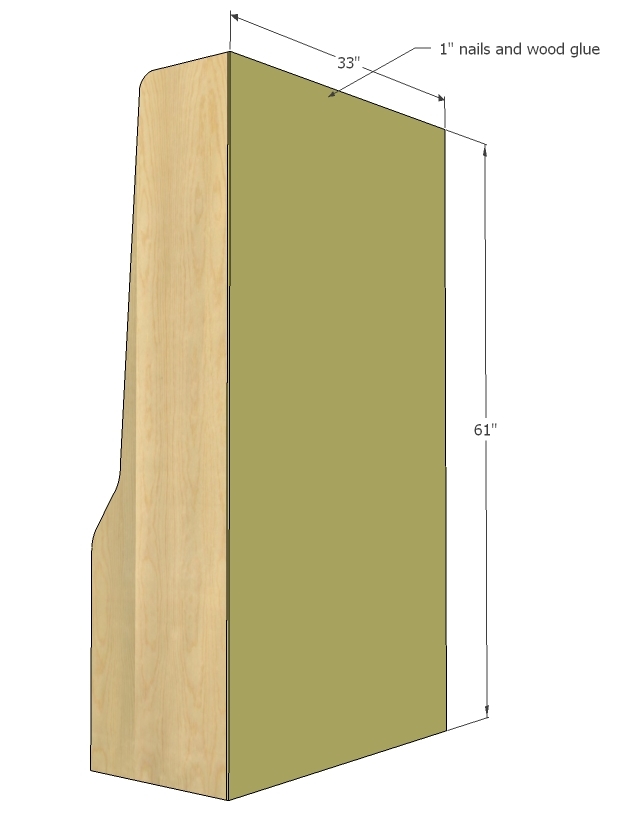
Adjust for square and nail back on. Be very aware of what you are nailing to and using the right depth nails here.
Step 12
Attach tulip feet per manufacturer recommendations. NOTE - Depending on the type of crown moulding you purchased, you may wish to move the tulip feet to fit the crown moulding. Do a dry fit, or perhaps put the moulding on first, feet second.
Step 13
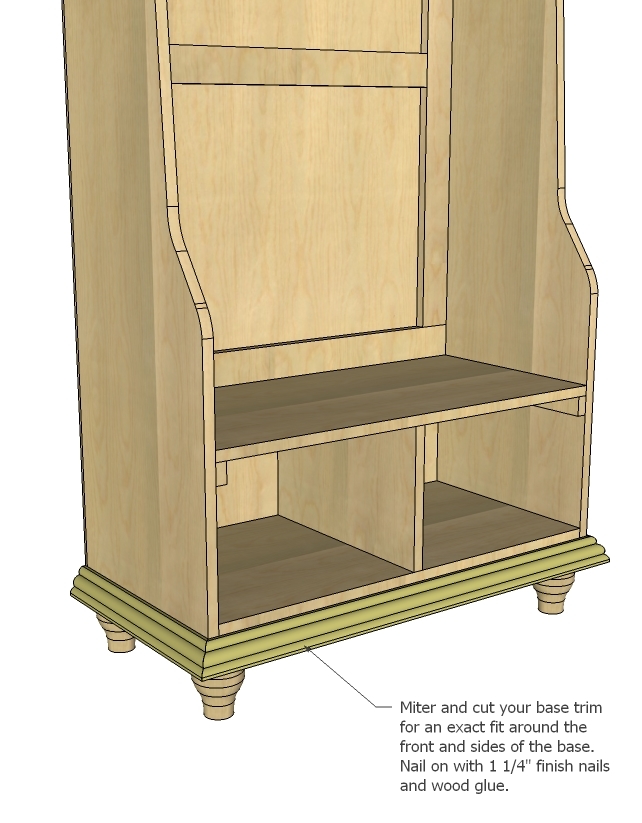
I'd love to be able to give you exact dimensions, but for moulding, you should always cut to fit. Miter corners with a miter saw. Attach with glue and finish nails.
Step 14
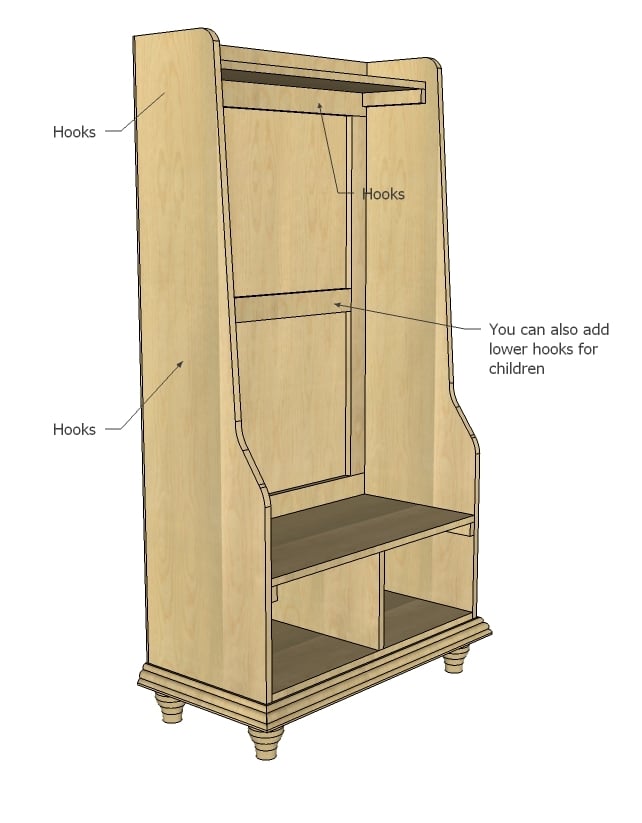
Install hooks!
It is always recommended to apply a test coat on a hidden area or scrap piece to ensure color evenness and adhesion. Use primer or wood conditioner as needed.

Comments
ademasters
Fri, 08/03/2012 - 10:53
Love it, it's not too big,
Love it, it's not too big, perfect size for people like me who have a small cabin house but are in need of a place to hang coats and store shoes or whatever.
This is DEFINITELY going on the "to-do" list!
Thanks!!! :)