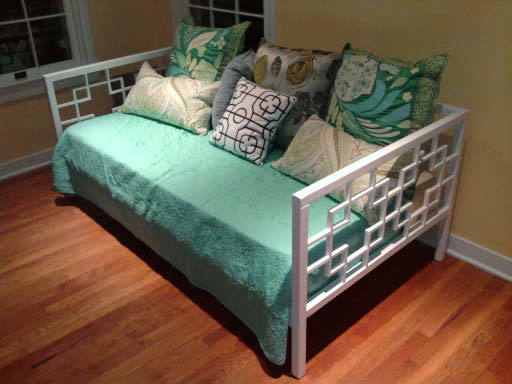


Full size day-bed. After making all the cuts, I started on the sides by gluing and nailing the 1/2 X 3/4 wood into the side design. That was the most difficult part of the build. The rest of the bed went fairly smooth but it did take me well into the night to get it sanded and painted. I got the plans from this site after we had seen this same bed at a furniture store for about ten times the cost of what it took me.
Preparation


Please read through the entire plan and all comments before beginning this project. It is also advisable to review the Getting Started Section. Take all necessary precautions to build safely and smartly. Work on a clean level surface, free of imperfections or debris. Always use straight boards. Check for square after each step. Always predrill holes before attaching with screws. Use glue with finish nails for a stronger hold. Wipe excess glue off bare wood for stained projects, as dried glue will not take stain. Be safe, have fun, and ask for help if you need it. Good luck!
Instructions
Step 1

Step 2

Step 3

Step 4

Step 5

It is always recommended to apply a test coat on a hidden area or scrap piece to ensure color evenness and adhesion. Use primer or wood conditioner as needed.

Comments
claydowling
Fri, 02/24/2012 - 14:20
Nice lighting
The bed is lovely, but of course we've seen that design before. The lighting on that photo though, that's very lovely and dramatic. It brings out the colors nicely and ads a lot of interest because of the shadows.
AnnaV
Wed, 02/29/2012 - 14:34
is there a more comprehensive
is there a more comprehensive set of plans available?
In reply to is there a more comprehensive by AnnaV
orangesugar
Sat, 03/03/2012 - 16:36
Plans
Here are some better plans:
http://ana-white.com/2011/08/rectangles-day-bed
http://ana-white.com/2012/01/plans/stacy-daybed
http://ana-white.com/2010/11/overlapping-squares-daybed-and-end-tables