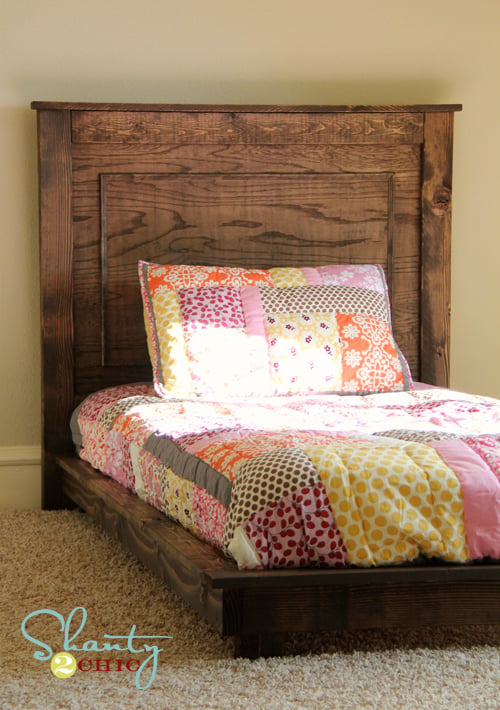


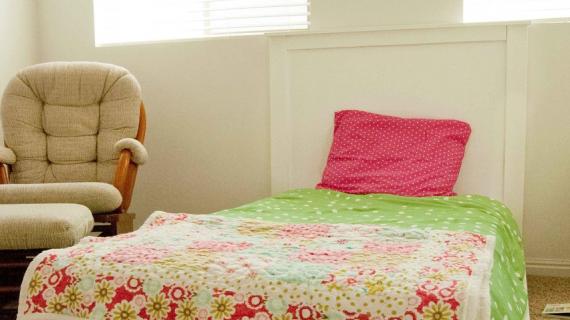
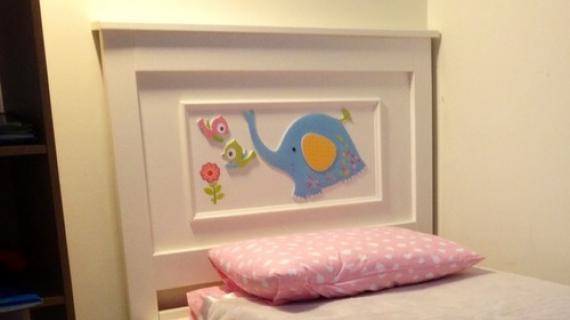
Build a beautiful headboard to match our twin platform bed plans. Features panel style with beautiful detailing. Free step by step plans with full diagrams from Ana-White.com.
You can make an entire bed for about $75 - including the bed frame (no box spring required).

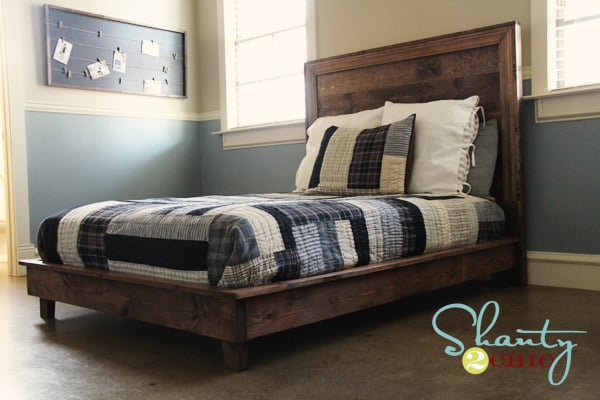
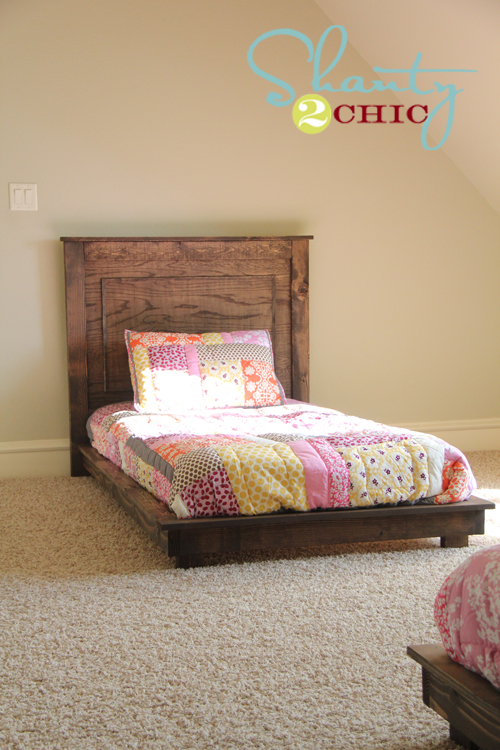
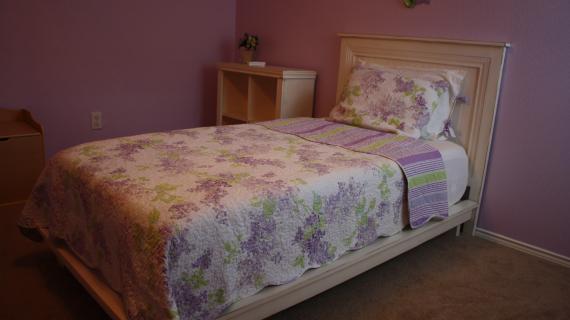
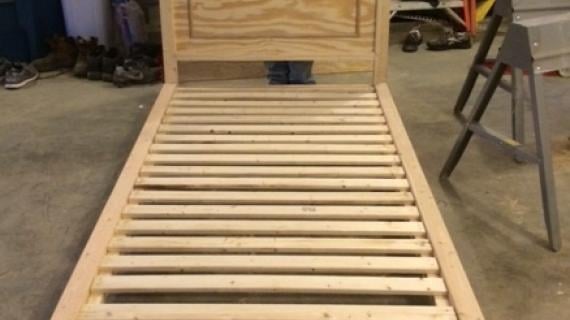
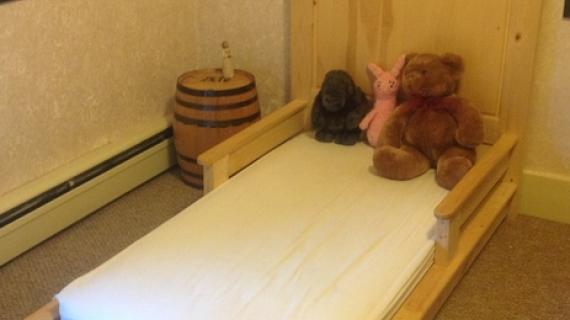
Stop on over and check out many many more photos and read from Whitney on how she finished this bed. Today's plan is for the headboard. We'll be adding the twin platform bed plan this week.
Preparation
- 4' x 4' sheet 3/4" plywood or MDF
- 1 – 1x2 @ 4 feet long
- 1 – 1x3 @ 8 feet long
- 1 – 2x3 @ 8 feet long
- 1 – 2x4 @ 4 feet long
- 1 – small moulding @ 10 feet long
- 1 1/4" and 2 1/2" pocket hole screws
- 1 1/4" and 3/4" finish nails
- 1 – 3/4” plywood @ 39” x 32”
- 1 – 1x2 @ 39”
- 1 – 1x3 @ 39”
- 2 – 2x3 @ 43 1/4"
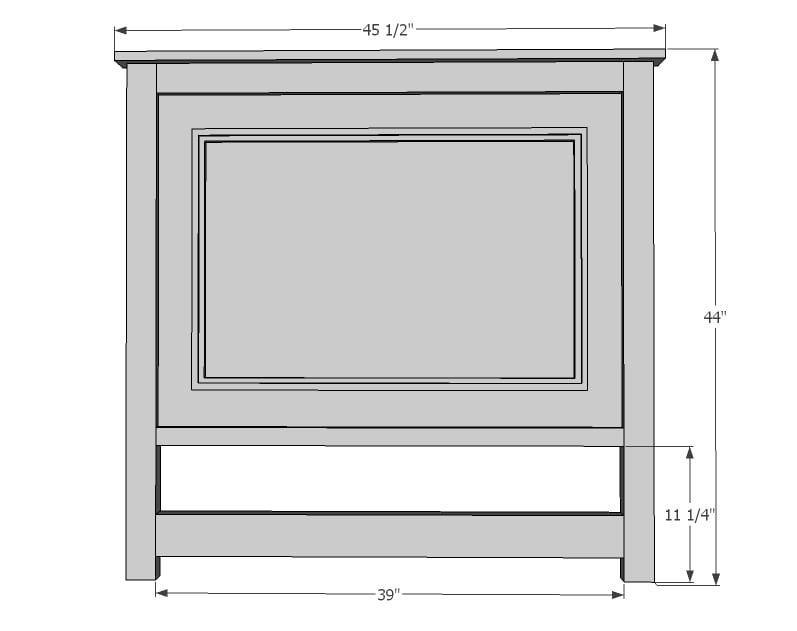
- 1 – 1x3 @ 45 1/2"
- 1 – 2x4 @ 39”
- MOULDING
- 2 – 3/4" wide moulding @ 22” (long point to long point, both ends mitered at 45 degrees off square, ends are NOT parallel)
- 2 – 3/4" wide moulding @ 33” (long point to long point, both ends mitered at 45 degrees off square, ends are NOT parallel)


Please read through the entire plan and all comments before beginning this project. It is also advisable to review the Getting Started Section. Take all necessary precautions to build safely and smartly. Work on a clean level surface, free of imperfections or debris. Always use straight boards. Check for square after each step. Always predrill holes before attaching with screws. Use glue with finish nails for a stronger hold. Wipe excess glue off bare wood for stained projects, as dried glue will not take stain. Be safe, have fun, and ask for help if you need it. Good luck!
Instructions
Step 1

On the back side of your plywood panels, drill 3/4" pocket holes around side and top edges. This is for attaching in later steps the legs and the header.
Step 2

On the front side of the bed, attach with 1 1/4" finish nails and glue your panel trim. TIP: you can actually clamp trim in place, and then nail from back to hide nail holes and avoid pocket hole locations.
Step 3
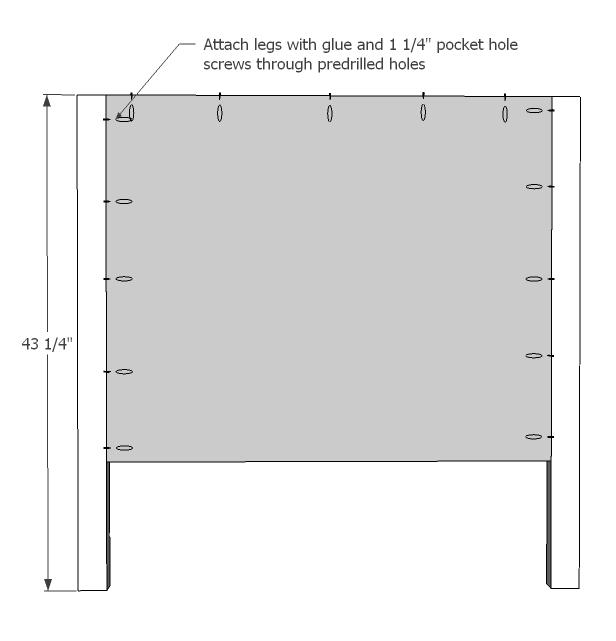
Next, add the legs with glue and 1 1/4" pocket hole screws. Legs are flush to top of top panel trim and should match the thickness of the panel + trim.
Step 4

Keep the header flush to the back, with even overhangs on ends, and attach with 1 1/4" pocket holes and wood glue.
Step 5
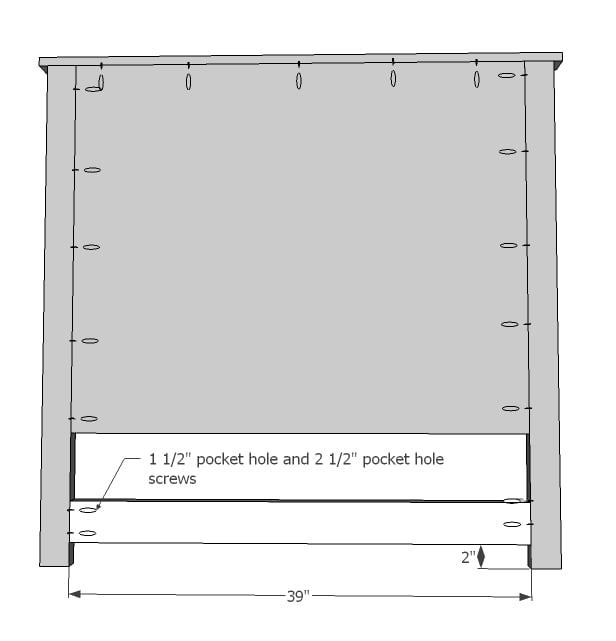
Attach headboard panel to the legs with pocket hole screws (3/4" setting and 1-1/4" pocket hole screws for 3/4" thick material)
Attach base with 1-1/2" pocket holes and 2-1/2" pocket hole screws.
Step 6

Now the final step! Cut out trim pieces and carefully position. It's a great idea to measure and mark out trim. Attach with glue and 3/4" finish nails.
We will also post plans for the twin platform bed part later this week. It is designed to work with this bed as well.
It is always recommended to apply a test coat on a hidden area or scrap piece to ensure color evenness and adhesion. Use primer or wood conditioner as needed.

Comments
shastacoke
Tue, 02/21/2012 - 10:30
Gorgeous!!! I get to add
Gorgeous!!! I get to add another MUST build to the list!!! Thank you for posting this!!!
amywaterman
Tue, 02/21/2012 - 20:38
question
I realize this might be a tall order but I absolutely Love this bed. I need to make a queen size version and would like it tall enough to slide short storage boxes under. Is that possible with this design?Thank you in advance:-)
gabbiegal
Wed, 02/22/2012 - 20:33
Changing the size?
Is there any kind of way to easily convert these plans to a toddler bed.
Blushing Basics (not verified)
Thu, 02/23/2012 - 12:32
WOW! I am so impressed that
WOW! I am so impressed that you have these skills. I would love to have you over to my place for some DIY fix-ups ;)
Guest (not verified)
Thu, 03/15/2012 - 08:12
Bigger HeadBoard
How would you suggest altering the plans to make this headboard larger to fit plans for a queen size bed?
Guest (not verified)
Thu, 03/22/2012 - 15:54
Love this! where is the quilt
Love this! where is the quilt from? its to die for!
melniemi
Mon, 04/23/2012 - 11:01
How would I make this in a
How would I make this in a full size? I need it in my girls room!
Sari (not verified)
Wed, 05/16/2012 - 09:10
Queen Size?
Absolutely love this headboard and platform! Do you have dimensions for a queen size? It would be much appreciated! Thanks! Sarah
beuts (not verified)
Wed, 05/16/2012 - 09:14
Queen?
Do you have the dimensions for a queen size?? I absolutely love the design! Thank you!
Melissa F (not verified)
Mon, 06/25/2012 - 09:43
Daybed?
Any suggestions on how to make the headboard go along the side instead of the head so this can be used more like a daybed?
Ashlee (not verified)
Tue, 11/13/2012 - 11:41
King Bed?
I would love to make a King size bed like this, but like another person said, high enough off the ground to slide short boxes under it. Do you have King plans?
Alecks (not verified)
Mon, 12/31/2012 - 13:51
King Size
Hey did you ever find the dimensions for the King sized bed?
KELLYNOLAN
Sat, 05/25/2013 - 18:27
King Bed
As several people mentioned previously, I am interested in making a King size version of this. I actually have two old doors that I was considering using as a headboard but I really want a platform bed frame. I too am looking for it to be high enough for some under bed boxes. Do you have anything like that? By the way, I am IN LOVE with your site. You are very talented and THANK YOU for sharing your considerable knowledge.
maegan1619
Wed, 11/13/2013 - 18:06
Nailer necessary?
If I don't have a nailer, can I just use a hammer instead? Thanks!
Ahaffey
Sat, 09/03/2016 - 18:37
making this into a full size bed??
Could someone share the plans and sizes for making this into a double bed? Thanks :)
tmilz2016
Thu, 10/06/2016 - 07:13
attaching headboard
Can this headboard be attached using lag screws directly to the bed, or would this need to be attached to a wall?