

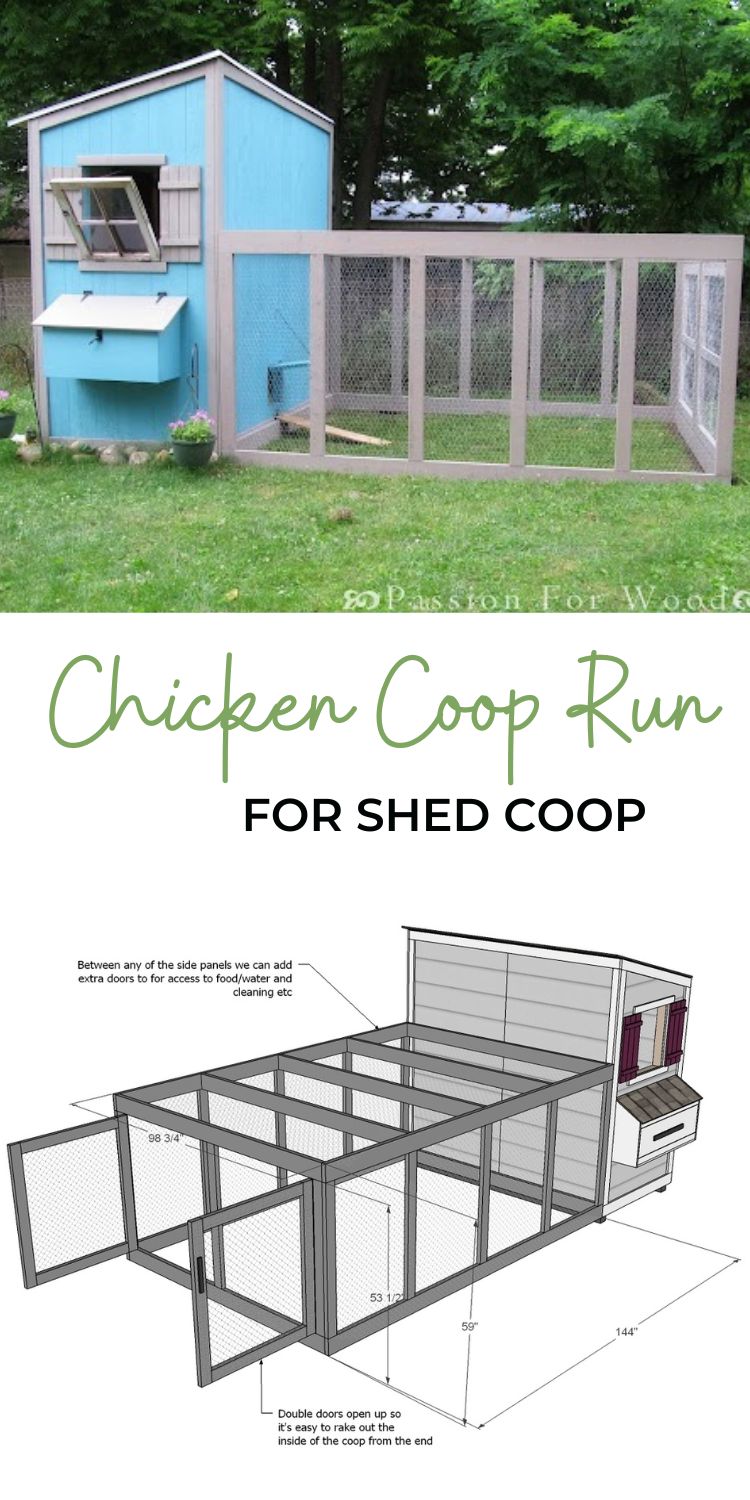
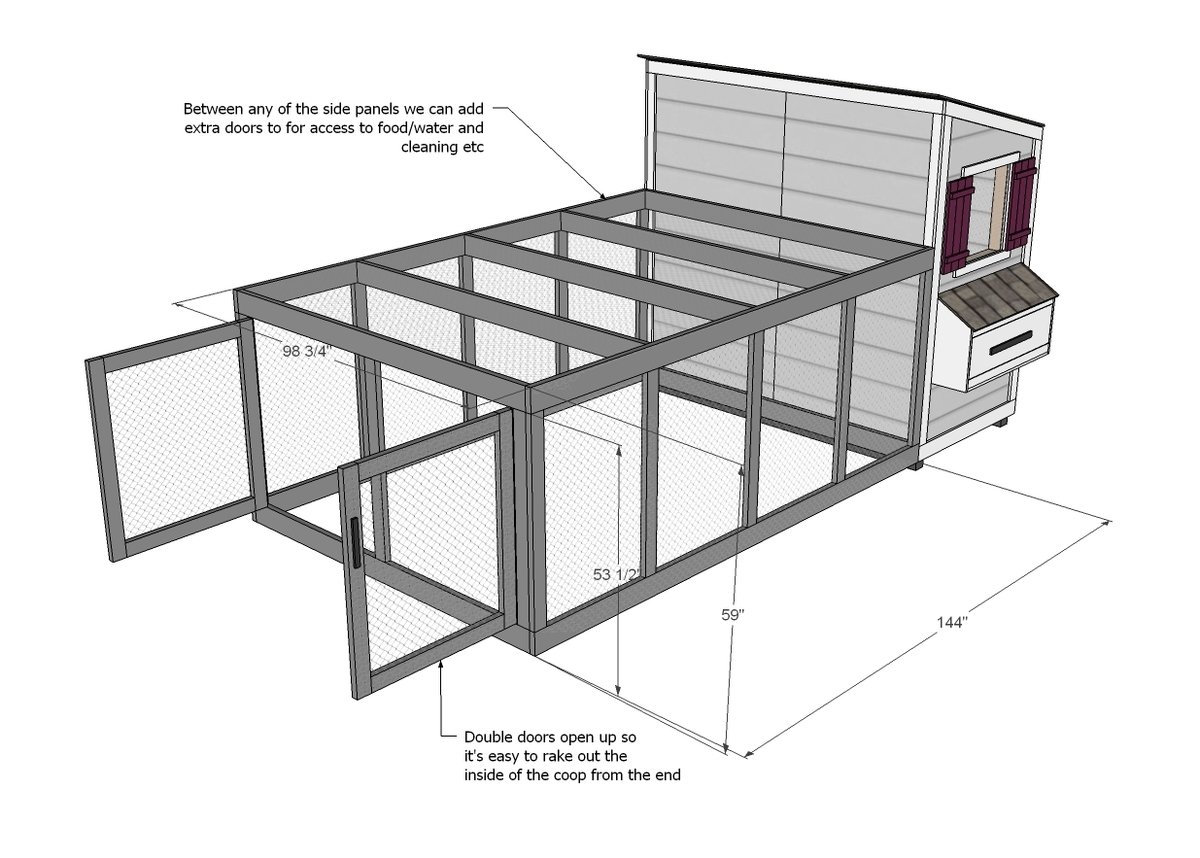
Build a run for your chicken coop! Free easy step by step tutorial from Ana-White.com

Now I know what all the fuss is about.
Or rather, should I say what all the clucking is about
We've had the girls in our backyard for a few months now, and my goodness, are they fun! And the ladies haven't even started laying eggs!!!
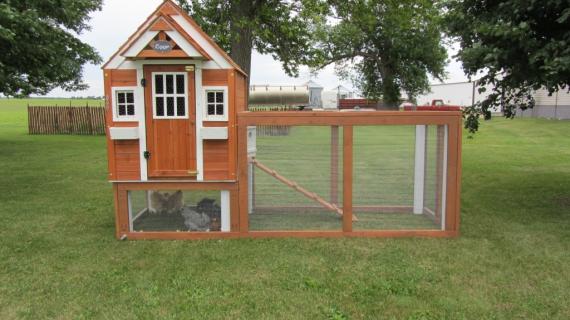
We've only got four chickens, and they are quite happy in their little A Frame Coop, let free during the day.
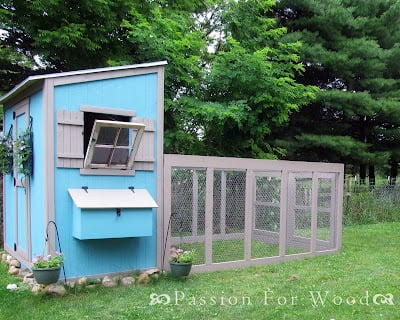
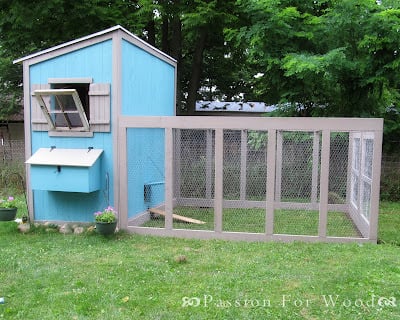
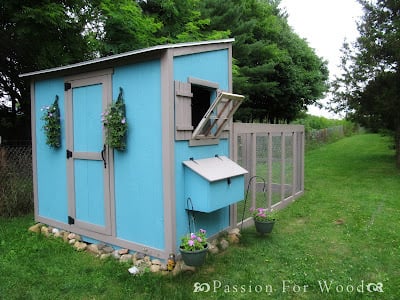
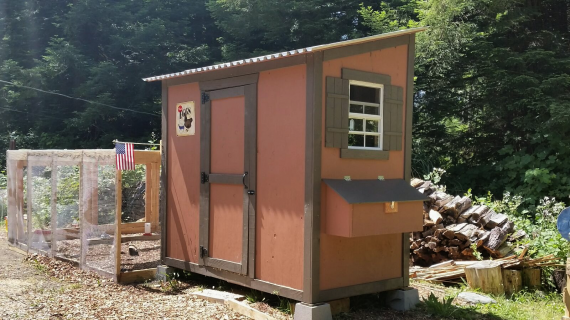
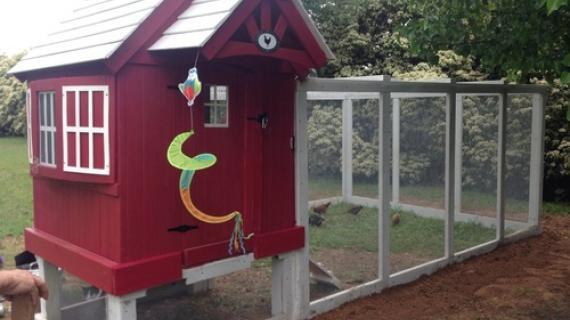
But if you fancy a fancier chicken coop, you really must check out the Shed Coop Plans that Whitney built a while back.
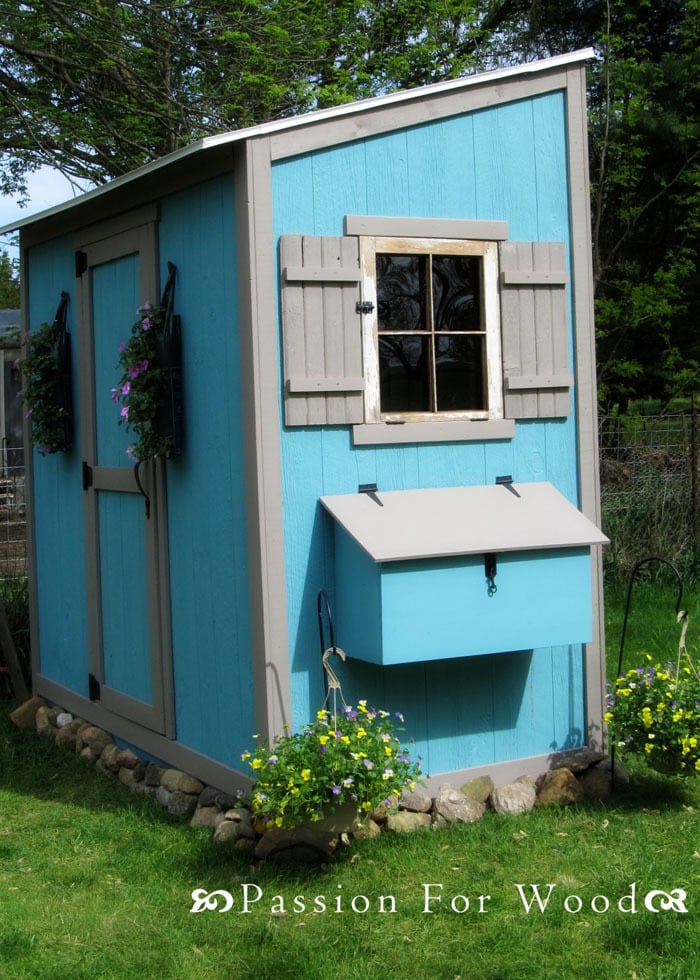
Hello Cuteness!!!!
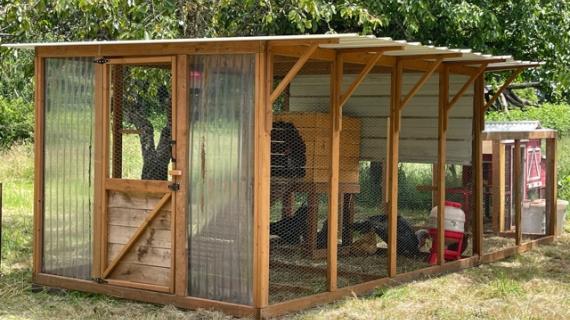
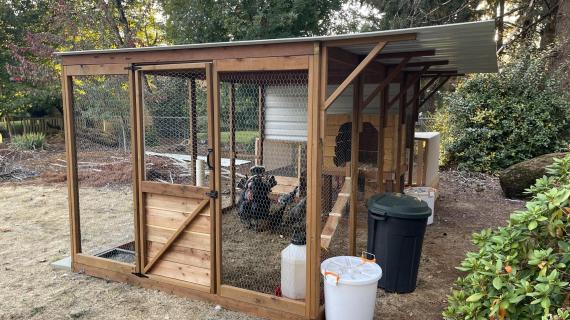
But the chicks in Whitney's Shed Coop still needed a run. I don't know if it is true that a happy chicken lays a better egg, but I can tell you this: A happy chicken running around in a coop clucking can definitely make your day better.
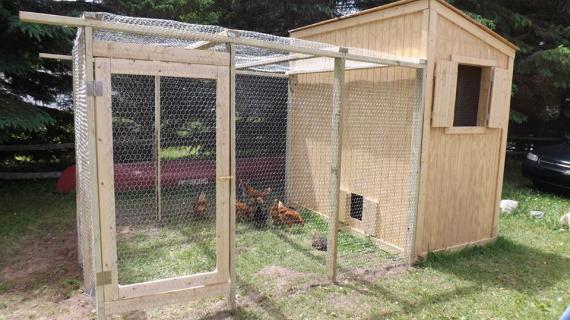
So Whitney and I worked together to create a coop plan that minimizes scraps and maximizes space savings. And a plan that would be easy to build.

Two days later. Less than $200.

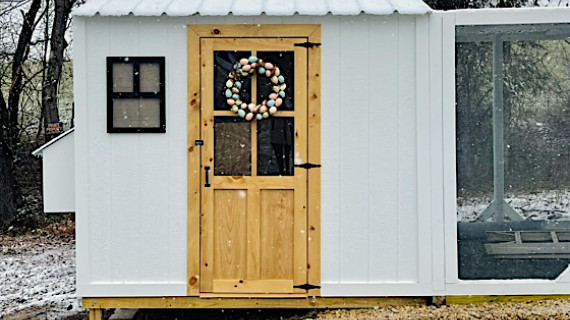
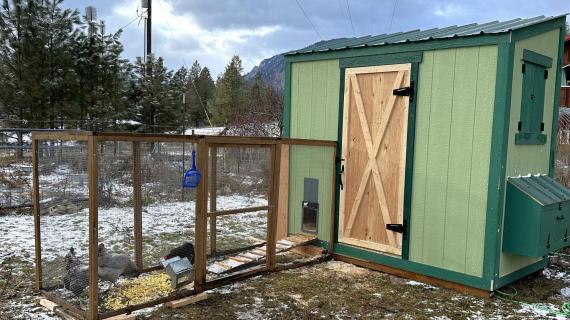
Whitney did a few modifications to use materials that are available to her - specifically 24" chicken wire - so make sure you check out her post here for more details.
Thanks Whitney! And of course, the plans follow! Check them out!
Pin For Later!
Preparation
- 4 – 2x6 @ 12 feet long
- 7 – 2x6 @ 8 feet long
- 9 – 2x4 @ 8 feet long
- 1 – 2x4 @ 10 feet long (cut three 35” door pieces from this board to conserve lumber)
- 1 – 100 foot roll 36” wide chicken wire
- ½” staples
- 2 exterior gate hinge sets
- 2 ½” Pocket Hole screws
- 4 – 2x6 @ 12 feet long
- 13 – 2x4 @ 48” long
- 7 – 2x6 @ 8 feet long
- DOORS
- 4 – 2x4 @ 35”
- 4 – 2x4 @ 47 ½”


Please read through the entire plan and all comments before beginning this project. It is also advisable to review the Getting Started Section. Take all necessary precautions to build safely and smartly. Work on a clean level surface, free of imperfections or debris. Always use straight boards. Check for square after each step. Always predrill holes before attaching with screws. Use glue with finish nails for a stronger hold. Wipe excess glue off bare wood for stained projects, as dried glue will not take stain. Be safe, have fun, and ask for help if you need it. Good luck!
Instructions
Step 1

Build the two walls.
Step 2

Then attach tops and ends.
Step 3

And then the door framing.
Step 4

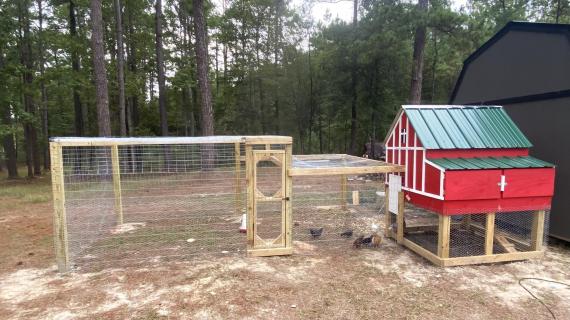
Now just run your chicken wire over the top.
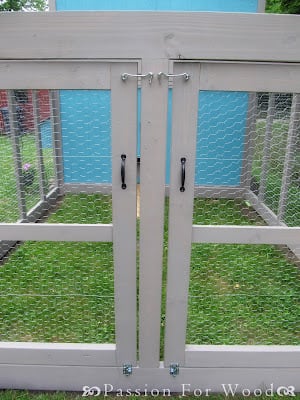
Step 5

Build doors using pocket holes and door pieces.
Attach chicken wire to front of doors.
It is always recommended to apply a test coat on a hidden area or scrap piece to ensure color evenness and adhesion. Use primer or wood conditioner as needed.

Comments
keagan
Sun, 04/06/2014 - 14:25
Cost to build?
Does anyone know approximately how much it costs to build this coop?
keagan
Sun, 04/06/2014 - 14:25
Cost to build?
Does anyone know approximately how much it costs to build this coop?
jensonaj20
Thu, 04/02/2015 - 09:53
Drilling of Pocket Holes
The plans for call 1 1/2 PH and then 2 1/2 PH screws. Given that we are using lumber with 3/4" thickness; what measurement do we set the Kreg Jig to?
This is my first project using the Kreg Tool...very excited for it!
In reply to Drilling of Pocket Holes by jensonaj20
Ana White
Fri, 04/03/2015 - 11:30
For 3/4 stock you will use
For 3/4 stock you will use the 1 1/4" screws. You will need to set your
collar for the 3/4" stock. Take a look at this video for added tips
https://www.youtube.com/watch?v=IrIFHMEPkXs Can't wait to see your first
project using the Kreg Jig!
melvin216
Thu, 07/30/2015 - 10:29
size of lumber
Is there a reason I need to use 2 by 6s for the rafters and long members of the walls? I was thinking of using 2 by 4s for all parts of the run.
Peter Henderson
Sat, 03/26/2016 - 13:33
chicken coop run construction questions
Hi! I'm about to start putting the run together. Does the chicken wire go to the outside of the frame? Should I sand the frame before adding the wire?
Thanks!
Peter
Jodo4390
Sat, 09/10/2016 - 19:15
Interior?
Are there any pictures you could spare of the inside of your coop? I'm trying to decide where I want everything to go but thought you might have some insight ☺️
Zekouetteof69
Wed, 06/26/2019 - 00:25
Find someone
Bonjour Jean claude Saïgon.