We are rockin' today at the Momplex.
Have you been thinking that the Momplex front is looking a little ... uh ... big?
Now we've done this on purpose, building the Moms a perfect box for efficiency and ease of building. Hey, we are on a DIY budget, and some of our helpers are still in the single digits. You gotta do what you gotta do to get her done!
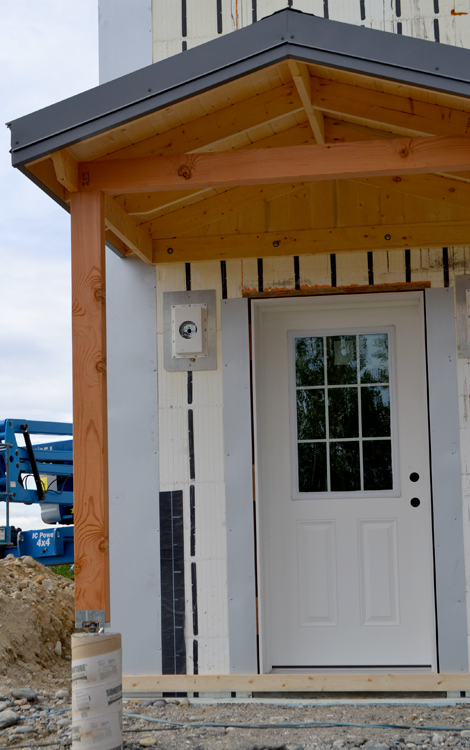
But there are some tricks that we can do to "fake it" or make the Momplex front look a little more interesting and not so ... big. For starters, we added a new do to the front of the Momplex, and then framed up some little roofs to cover the garage man doors. Or should I say mom doors?
But I still think we need a little something more to break up the front.
We need some rock!

First we determine where we want the rock to start. We decided to hold it up a tiny bit from the concrete for water drainage and so we can get underneath and pour Mom a nice sidewalk later on.

We screw 2x4s to the walls of the Momplex to use as a guide. We do this everywhere we plan to add rock.

And then we check it all with the laser level.
NOTE TO DIYERS - if you are going to DIY a house, buy a laser level. It has become our MVT on the hill.
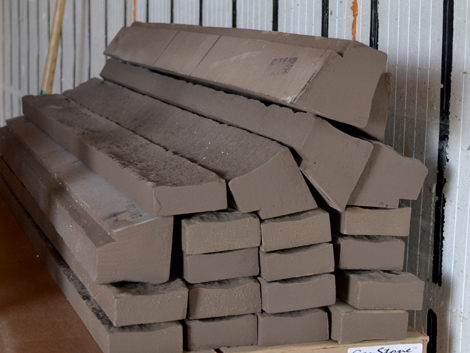
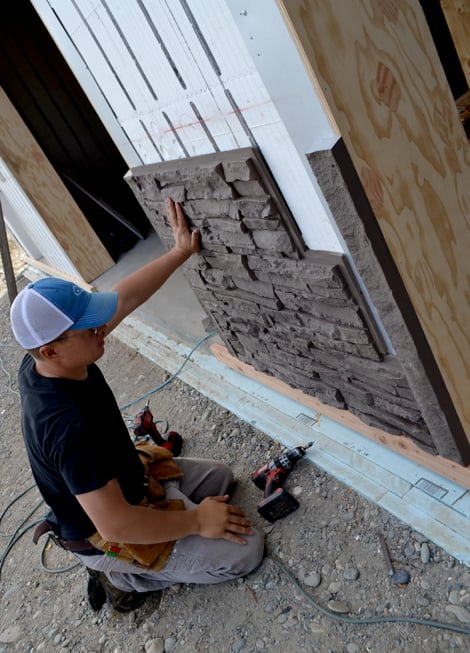
We've decided to use simulated stone siding for the rock work. It's just foam (bonus - adds insulation to the Momplex!) that is moulded to look like stone. It comes in all different colors and styles, we've chosen a neutral to keep things from looking dated in years to come.
The simulated stone siding or faux stone siding panels comes with accessories to trim out the panels. We start with the trim pieces.

The straight trim pieces are going to be attached to the ends of the panels to finish off ends.
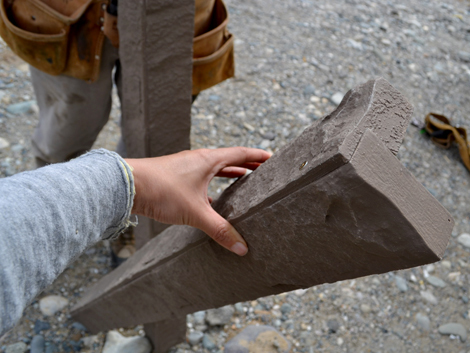
We had originally planned to not round the corners of the Momplex with the faux stone siding, but we decide to go ahead with the corners. Instead of ordering corners, the Ram did some fancy smancy cutting and gluing and was able to attach two trim pieces together to DIY a corner and we won't have to wait 10-14 days for corners to special order!
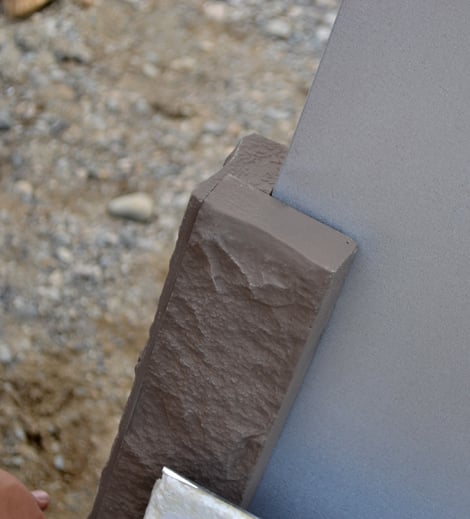
They fit perfectly!

And then one of our helpers still in the single digits holds it in place.

We put all the trim up, sort of like drawing a picture out with marker ....

And then all we need to do is color inside the lines!
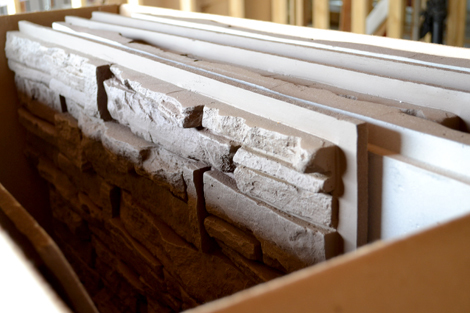
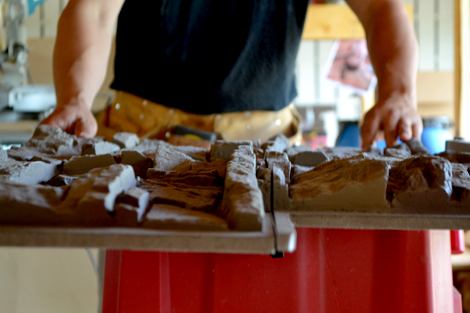
The panels themselves are lightweight and easy to work with. They are staggered to give the finished product a more random and natural appearance, and have a lip on them for attaching to walls and lapping.
First we dry fit the panels.
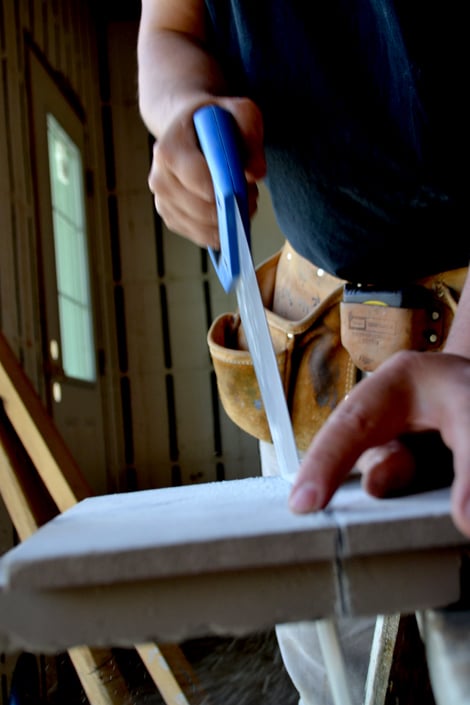
And then hand cut the panels to the right size.
Since we are going up exactly 1 1/2 panels, we use a tablesaw to rip panels in half the long way.

And place the rip cuts to the bottoms.
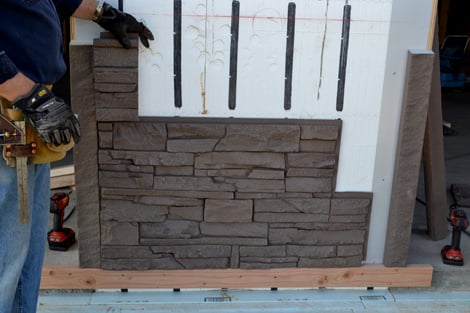
Once the areas are all dry fit and we are pleased with the overall look, it's time to attach the simulated stone siding to the ICF walls!

We found this really GREAT STUFF to glue the simulated stone siding panels to the ICF walls.
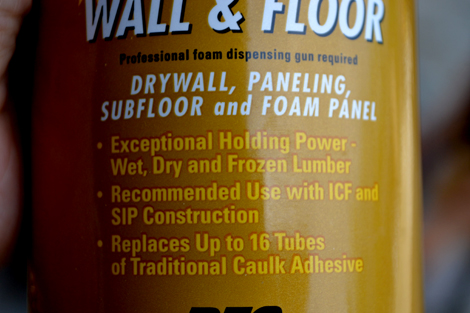
It is exceptional.
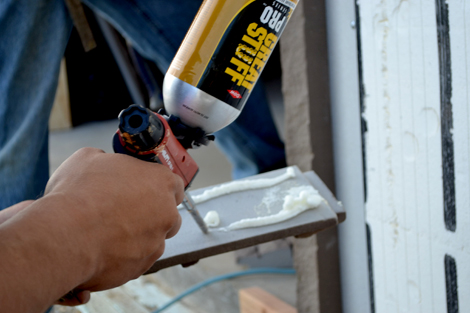
We just squirt the adhesive to the backs of the simulated stone siding panels

And glue the panels on.

And then we attach with screws at the top lip to be hidden by the next row of panels

And hide screws in the rock in the panel itself. The simulates stone siding actually comes with a touch up kit to fill any exposed holes.

Once we got rolling we were really rocking! This stuff goes on fast, especially if you had a larger application.

Fitting smaller pieces tended to take the most time.
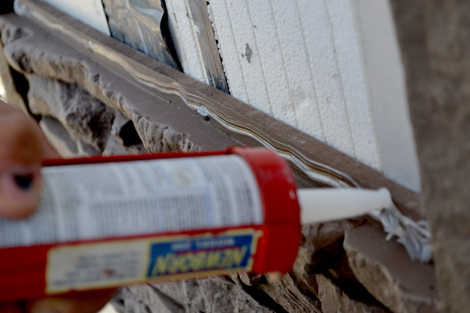
We applied silicone to prevent water leaking through the siding between panels.

And then silicone at the very top too.

Grandpa Tim has been helping us the whole way, making sure everything fits just right.

We put the top ledger pieces on ...

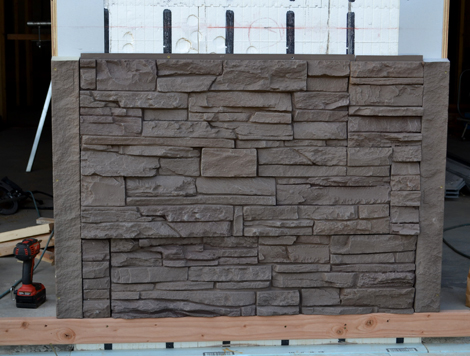
And one section is done!

And we just keep right cutting

And rocking on until the entire front of the Momplex has rock work on the bottom.

We are very pleased with the outcome of the simulated stone siding.

For about $1000 and in a day, we've installed simulated stone siding that adds curb appeal and insulation to the Momplex. We are very pleased with the product and love the results!
What do you think?
Comments
Lady Goats
Tue, 08/07/2012 - 11:49
WOO HOO!
Ana White
Tue, 08/07/2012 - 11:53
Hi Gina! The stuff we used
mirandarmitchell
Fri, 05/28/2021 - 06:47
What did you use!!?
What did you use!!?
Alice (not verified)
Tue, 08/07/2012 - 12:03
That's fabulous! It's really
Stanley Pearse (not verified)
Tue, 08/07/2012 - 12:06
Momplex
Ana White
Tue, 08/07/2012 - 12:31
Siding Panels
Jillian Brown (not verified)
Tue, 08/07/2012 - 13:58
Awesome
Lauren from Alabama (not verified)
Tue, 08/07/2012 - 16:23
Love it!
Suz in NZ (not verified)
Thu, 08/09/2012 - 20:00
great cover up idea
terrillr (not verified)
Tue, 08/07/2012 - 16:54
Looks Great! What will go
In reply to Looks Great! What will go by terrillr (not verified)
Ana White
Tue, 08/07/2012 - 20:47
Momplex Siding
terrillrillr (not verified)
Wed, 08/08/2012 - 08:16
Can't wait to see that, I
Dani (not verified)
Wed, 08/08/2012 - 07:42
Wonderful
lugnutgirl
Wed, 08/08/2012 - 08:16
I don't know if anyone has asked this yet...
Ana White
Wed, 08/08/2012 - 10:24
Appreciation!
In reply to Appreciation! by Ana White
spiceylg
Wed, 08/08/2012 - 12:58
Rut?
BonnieB (not verified)
Thu, 08/09/2012 - 06:41
That stuff looks Great! I
karahart
Thu, 08/09/2012 - 07:00
so impressive!
ferbit
Thu, 08/09/2012 - 07:25
Foam Stone
mirandarmitchell
Fri, 05/28/2021 - 06:46
What is it?
What is the simulation stone siding you used??