Mini Media Wall

The free plans on this website are made possible with advertising and affiliate links.  Thank you for helping us keep plans free.


Difficulty
Intermediate
| Print this plan

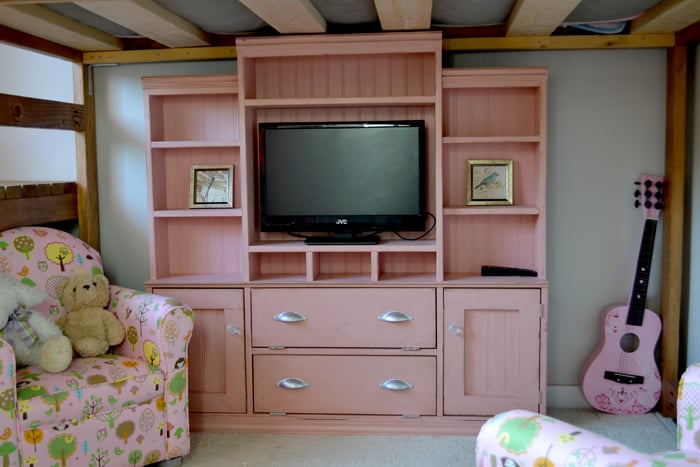
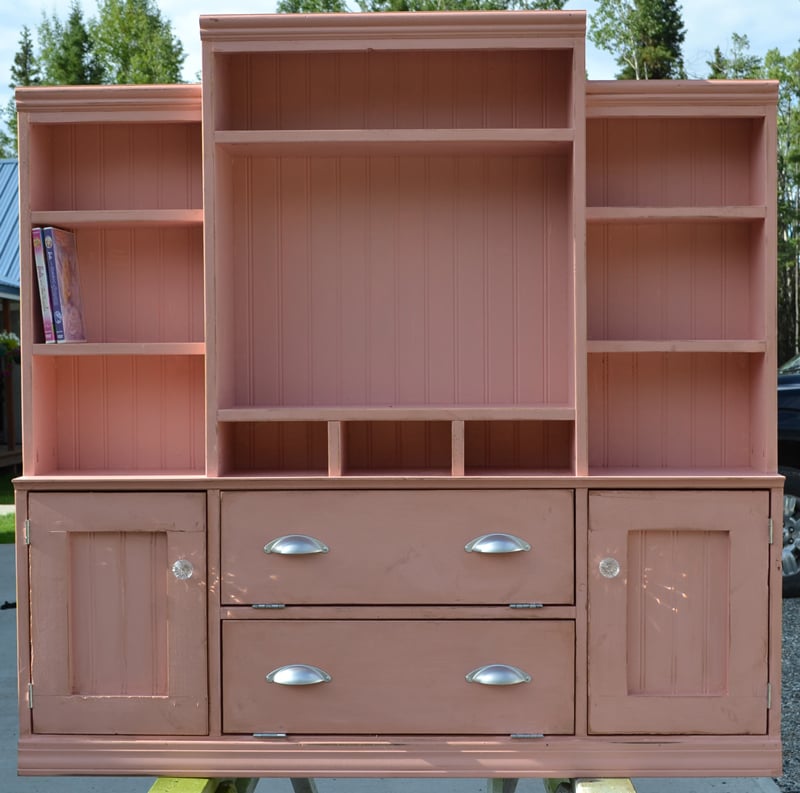
Build a kid sized media wall! Free plans from ana-white.com

If there's a play kitchen, why wouldn't there be a play media wall? You know, a miniature version of the real deal?

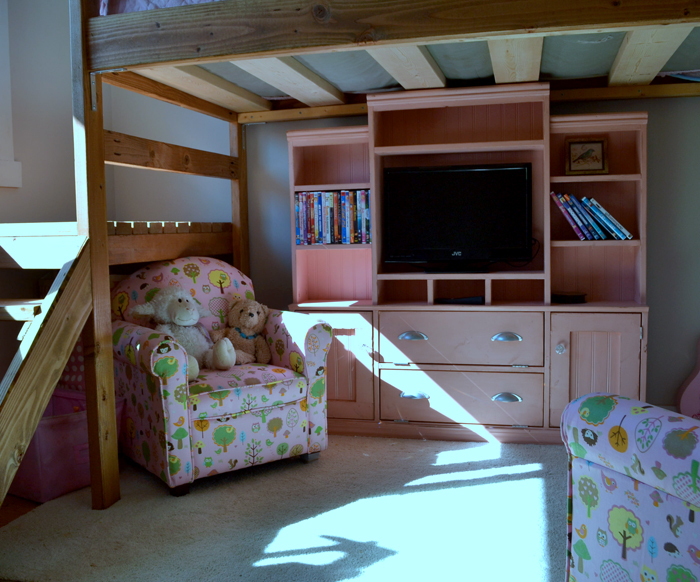
After we built Grace a new loft bed with stairs, we thought, why not make the area under the loft bed a mini living room?

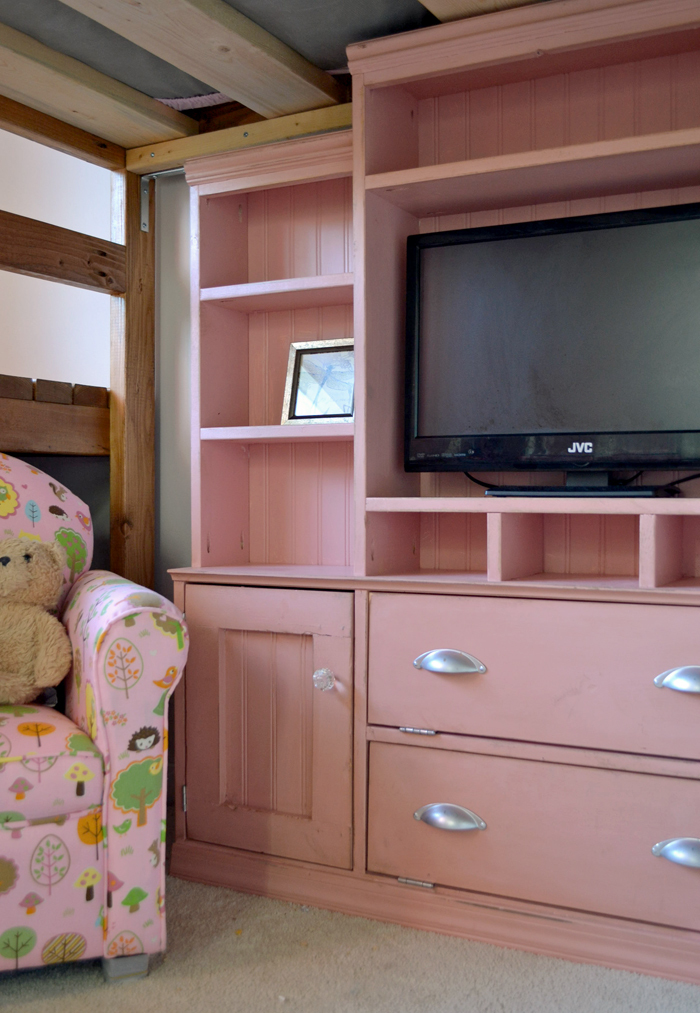
I spent about a day building and painting (will share that tute with you too later this week!) and we couldn't be more pleased with the final result. It's so cute and charming, but functional too!

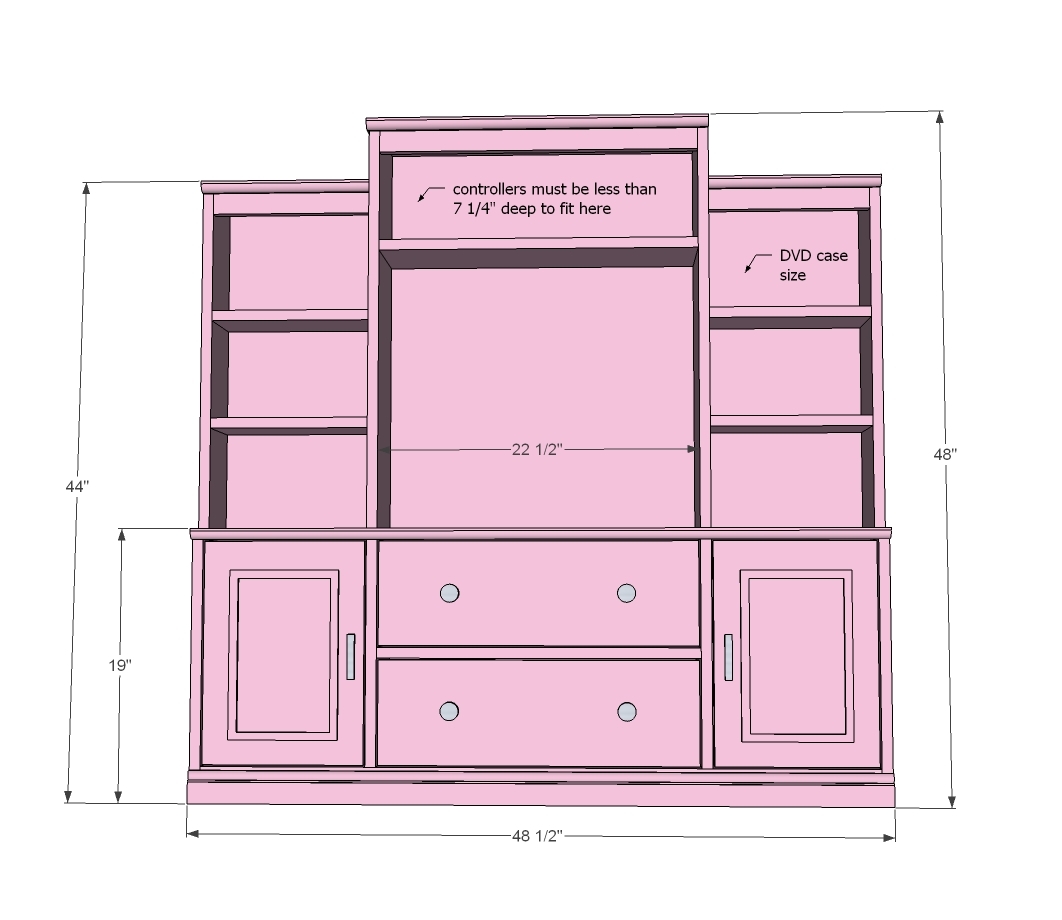
The side shelves and shelves behind doors are designed to fit DVD cases! We find the girls are constantly displaying their favorite stuff in the other shelves. They love it!

This project would make a fantastic Christmas gift or Birthday gift.

Enjoy the plans!

Dimensions
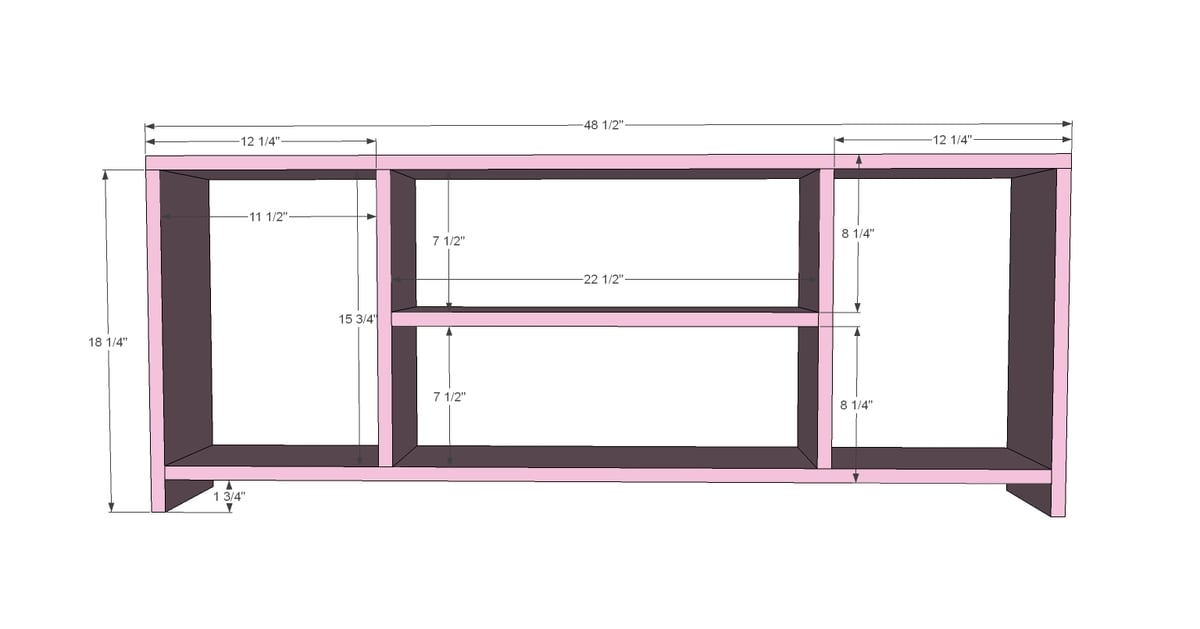
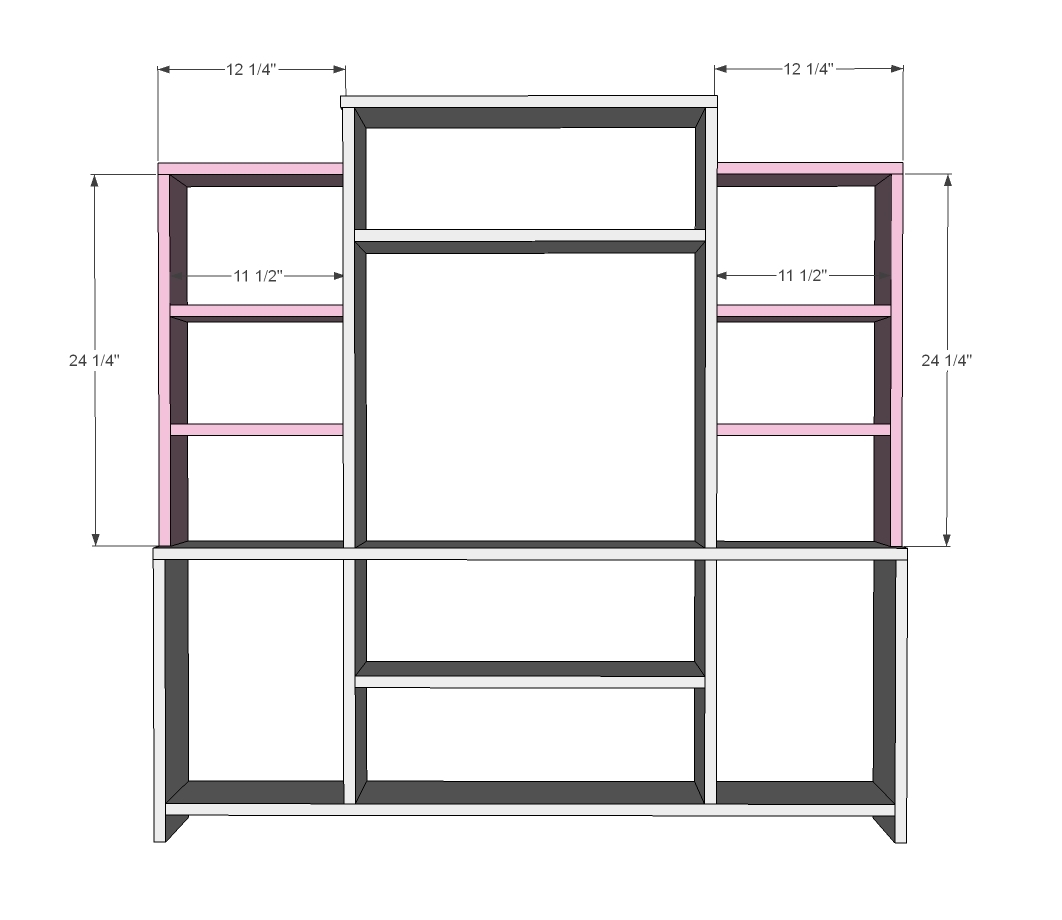
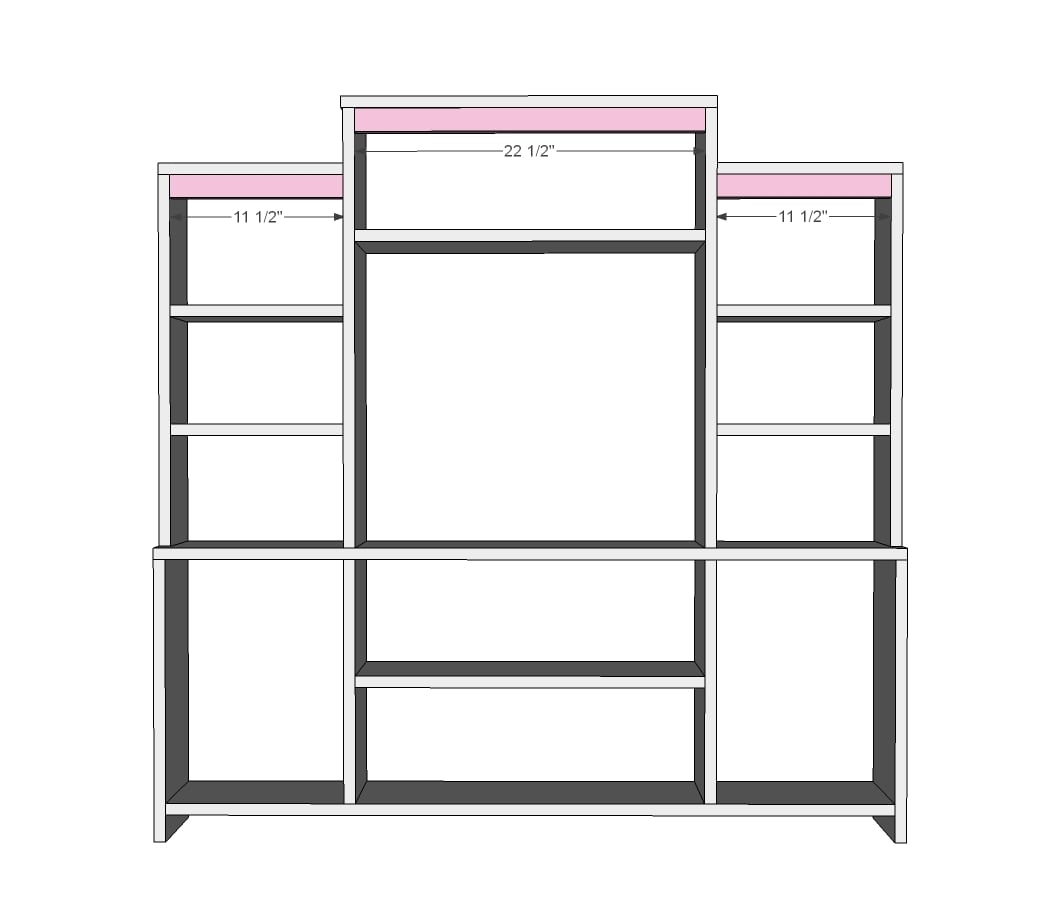
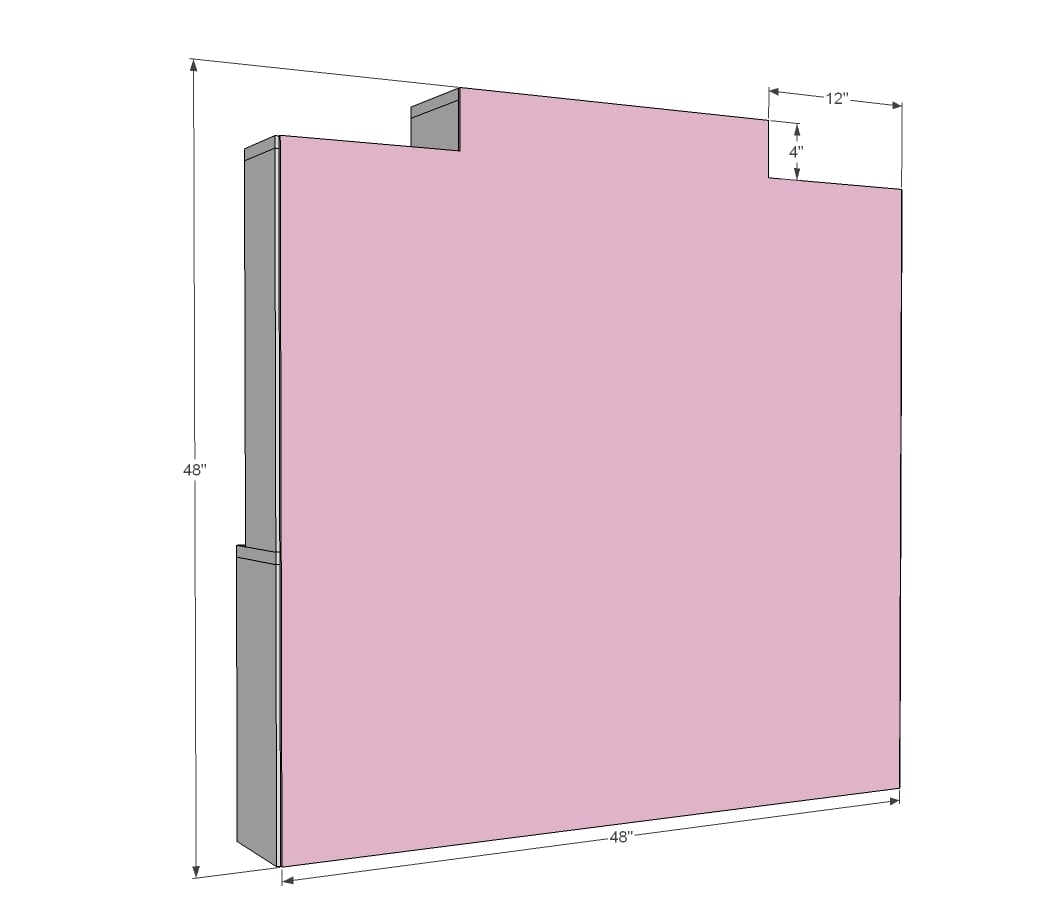
Dimensions shown above.

Preparation

Shopping List

4 – 1x8 @ 8 feet long
2 – 1x6 @ 8 feet long
1 – 1x12 @ 3 feet long (for doors)
1 – 1x2 @ 8 feet long
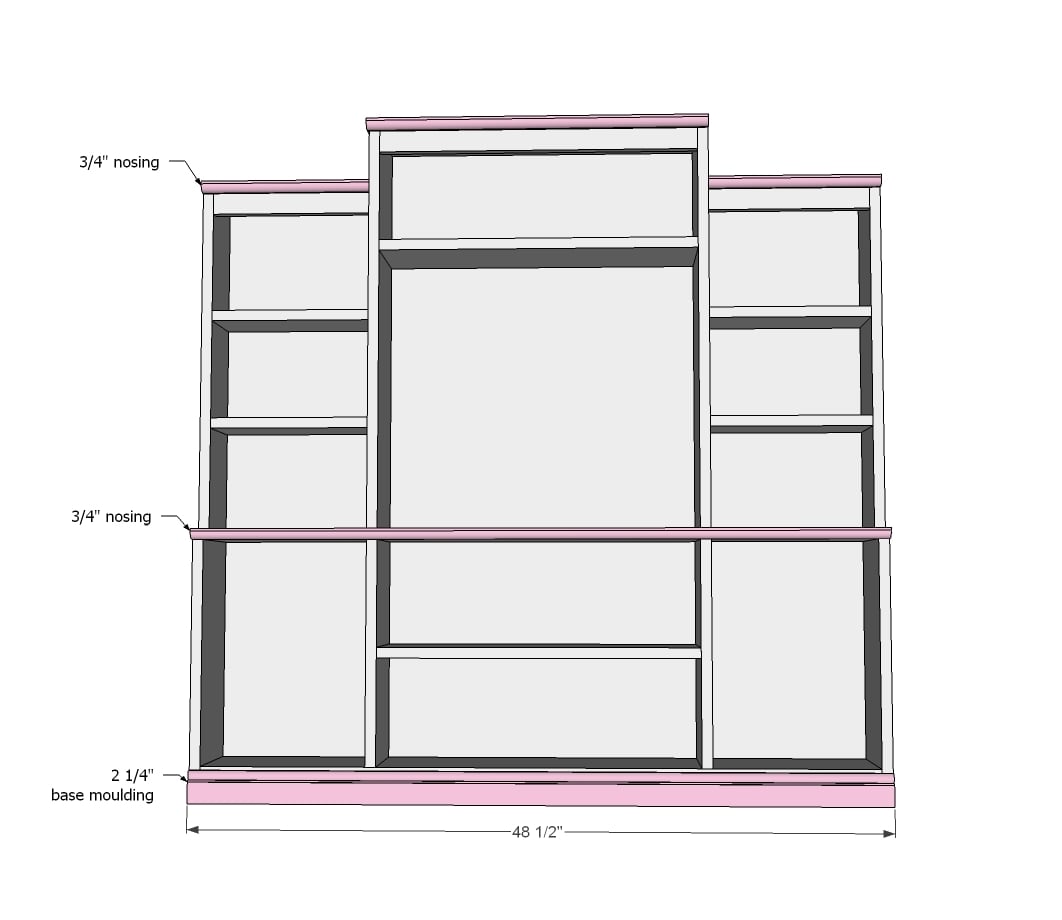
1 – 2 1/4” base moulding 6 feet long
2 – ¾” nosing 6 feet long
4 sets narrow profile hinges (smallest ones you can find)
6 knobs or handles
½ sheet ¼” plywood or beadboard for back

Common Materials
1 1/4 inch finish nails
120 grit sandpaper
primer
paint
paint brush
Cut List

1 – 1x8 @ 48 ½”
2 – 1x8 @ 18 ¼”
1 – 1x8 @ 47”
2 – 1x8 @ 15 ¾”
3 – 1x8 @ 22 ½”
2 – 1x8 @ 28 ¼”
1 – 1x8 @ 24”
2 – 1x6 @ 24 ¼”
4 – 1x6 @ 11 ½”
2 – 1x6 @ 12 ¼”
2 – 1x2 @ 11 ½”
1 – 1x2 @ 22 ½”
2 – 1x12 @ 15 ½”
2 – 1x8 @ 22 ¼”
2 1/4” moulding cut to fit
¾” nosing cut to fit

Tools
Tape Measure
Speed Square
Pencil
Safety Glasses
Hearing Protection
Kreg Jig
Drill
Circular Saw
Brad Nailer
Power Sander
Drill Bit Set
General Instructions

Please read through the entire plan and all comments before beginning this project. It is also advisable to review the Getting Started Section. Take all necessary precautions to build safely and smartly. Work on a clean level surface, free of imperfections or debris. Always use straight boards. Check for square after each step. Always predrill holes before attaching with screws. Use glue with finish nails for a stronger hold. Wipe excess glue off bare wood for stained projects, as dried glue will not take stain. Be safe, have fun, and ask for help if you need it. Good luck!

Instructions

Step 1

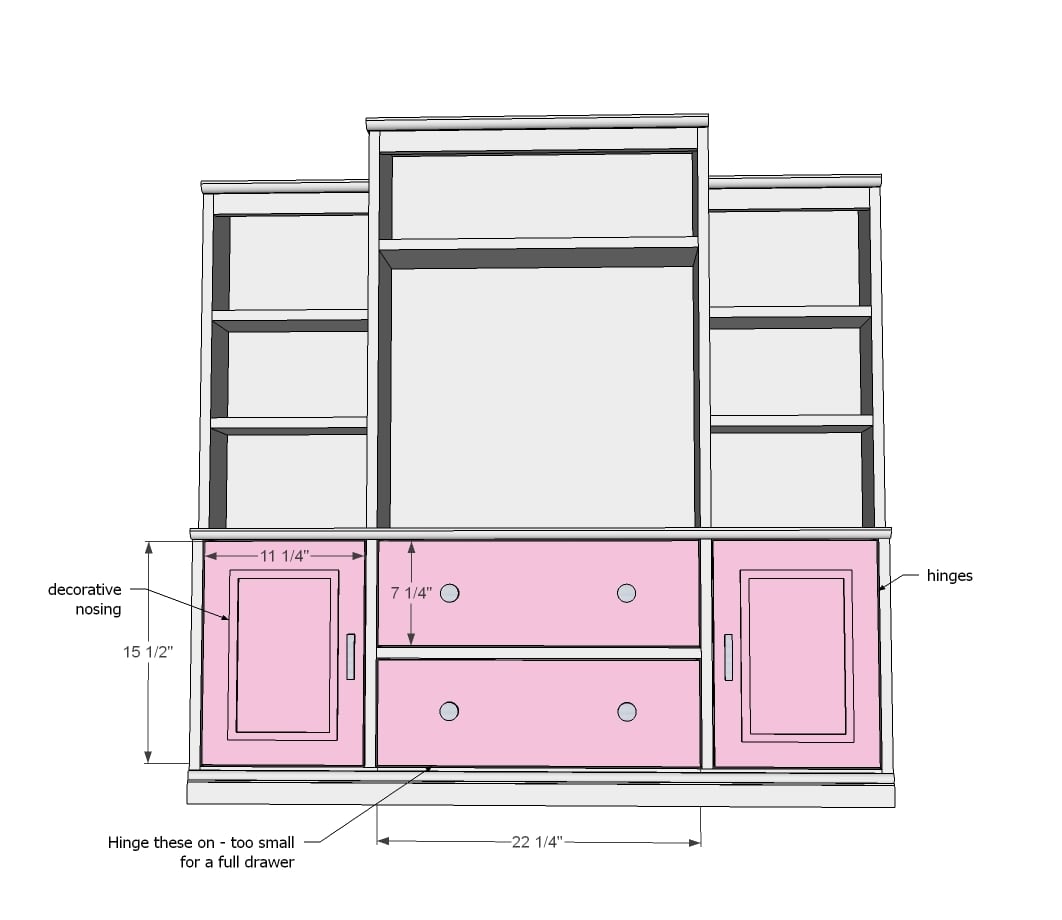
First, put the console part together. I used 3/4" pocket holes and 1 1/4" pocket hole screws. This part went together pretty fast, just following along the diagram. One thing to note, the console is designed for 1x8 and 1x12 door faces that measure 11 1/4" and 7 1/4" wide, with an 1/8" gap all the way around. If your 1x8s and 1x12s differ in width, you may need to adjust the console.

Step 2

Then I just started adding the hutch part. You do not have to follow along an exact order, this just worked for me to go in this order.

Step 3

And then I added the side hutches, still using the 3/4" PHs/1 1/4" PH screws, keeping everything flush to back. Here's where I started using the 1x6s instead of 1x8s to add varying depths to the media wall.

Step 4

And then some support. I just nailed and glued these babies on.

Step 5

Step 6

And then add the moulding. Big regret for me is I did not wrap my moulding around the sides. Would have looked so much better! I highly recommend you considering mitering the corners and wrapping moulding around sides.

Step 7

The doors are just 1x12 and 1x8s hinged on with narrow profile hinges (the cheap, tiny, basic hinges that sit in the gap between the door and the cabinet opening). I was short on 1x12s so I made a frame from 1x3s and glued and nailed beadboard to the back for my larger doors.

Step 8

When I was done, I felt like the center needed a little something more ...

Step 9

So I added a few shelves to the insides. Love this mod!

Finishing Instructions
Preparation Instructions
Fill all holes with wood filler and let dry. Apply additional coats of wood filler as needed. When wood filler is completely dry, sand the project in the direction of the wood grain with 120 grit sandpaper. Vacuum sanded project to remove sanding residue. Remove all sanding residue on work surfaces as well. Wipe project clean with damp cloth.
It is always recommended to apply a test coat on a hidden area or scrap piece to ensure color evenness and adhesion. Use primer or wood conditioner as needed.