


I have really been enjoying working with Minwax to develop step by step tutorials to help us all finish our beautiful handmade furniture with stains. And the furniture I have been building with these tutorials has become my favorite because I love the finishes so much!!! 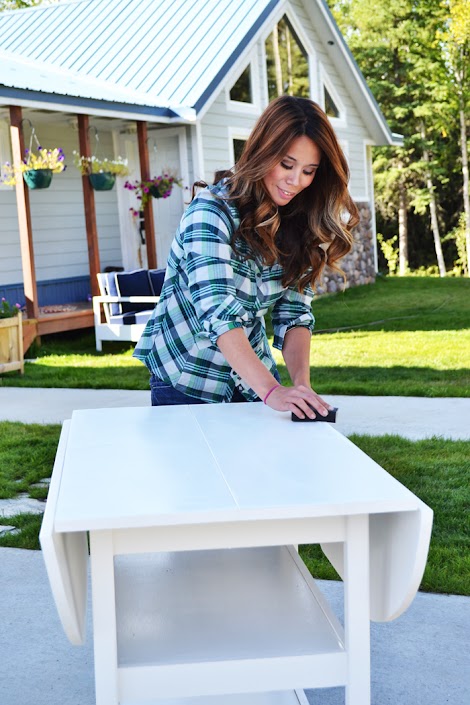 But of all the finishing tutorials I’ve put together, this one is my most favorite of all. I cannot tell you how excited I am to share it with you!
  Because in this tutorial, I am going to show you how I achieve my favorite finish, Antique White with Distressed Edges, in the simplest possible way. I have a secret distressing weapon! No gloves or mineral spirits required!
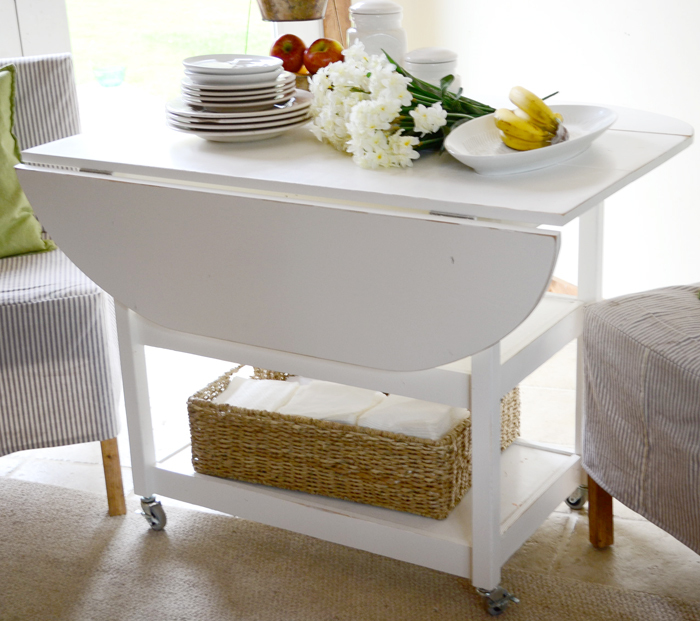
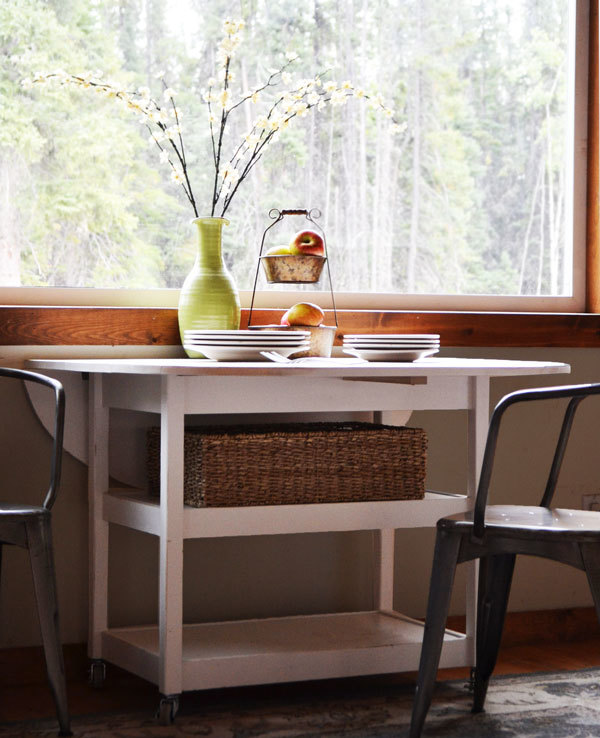
  I especially love Antique White with Distressed Edge Finish because Antique White is less harsh than a true white, but still brightens any space and goes with pretty much anything. And I LOVE DISTRESSED EDGES because I refuse to be like my Mom and cover the dining table with an old tablecloth to protect it. What’s the use of having a beautiful table beneath an ugly tablecloth? Might as well make natural edge wearing done ON PURPOSE, right??? And distressed edges bring out the character in a project too. Read on to find out what my secret weapon is!!!! PS - I'll be posting plans for this table next week!!!
• Antique White Paint with Primer in Semi-Gloss
• Medium and Fine Sandpaper or Sanding blocks
• Brushes for Painting or Paint Sprayer
• Minwax Stain Marker in Golden Oak
• Minwax Water Based Polycrylic in Spray Can
Painting
For my project, I started with a sanded table made mostly of pine. But I did have a few 1x16 plywood pieces from shelves painted an off white (leftover from another project), so I used them for the shelves. You can mix different wood types for this finish!
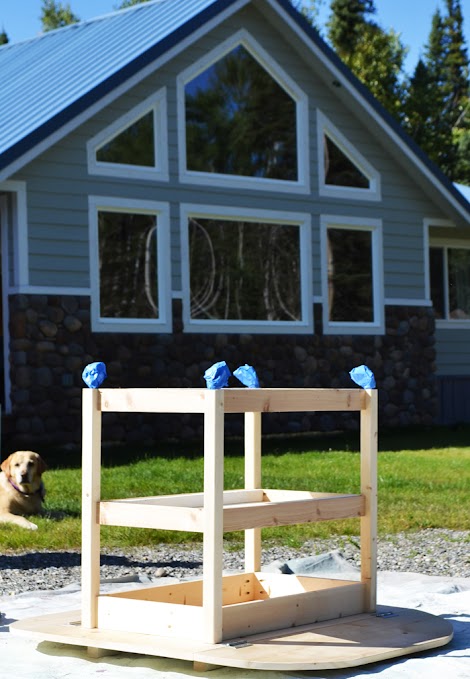
You can remove hardware, or just tape it off.
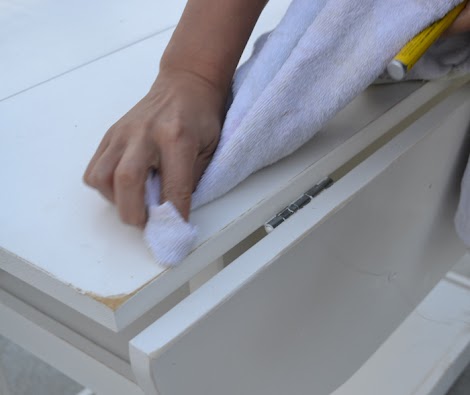
Make sure the project is free of any sanding residue by brushing or vacuuming with a soft bristled brush. I go the extra step and wipe down with a damp cloth as well.
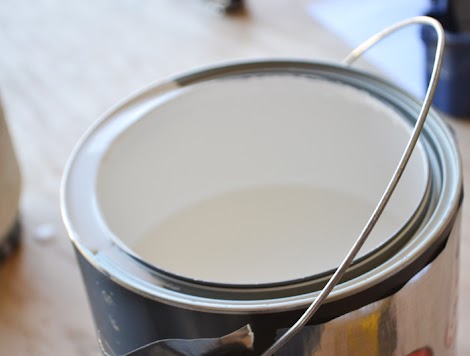
Most paint brands carry an “Antique White” right off the shelf, or you can have something mixed up. Just pick something with a warm muted undertone. I recommend a Semi-Gloss Paint with Primer in it because it saves a step.
You must use a primer with white, as over time, it will yellow if you do not!
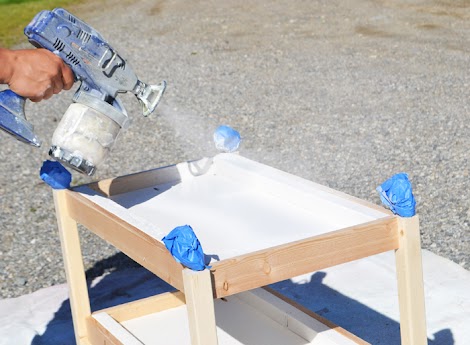
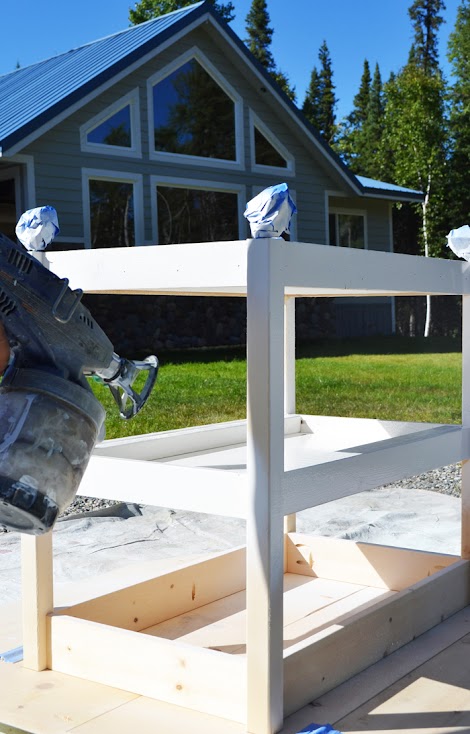
These same results could be achieved with a brush or paint in the can, but I wanted to show you how we spray a project in this tutorial. We always start with the project turned upside down, and paint the hardest to reach areas first.
Then we work our way outwards.
If you were brushing, you would do the same. Paint the underside, hardest to reach place first. Then move outward.
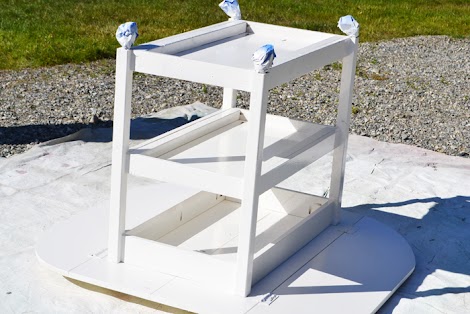
Once the underside is completely painted, allow to dry to touch before you flip over the project.
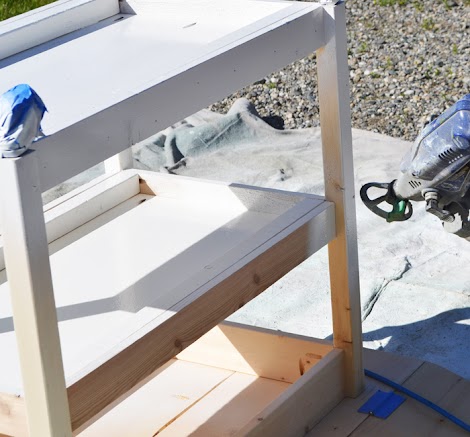
After you flip the project over, begin again in the most difficult to reach place, and work your way outward.

Finally, paint the top and outsides.
For a vintage white, I highly recommend just one nice even coat of paint. Remember, we’ll be going over the paint with top coat!
Allow the project to completely dry as recommended by the paint can.
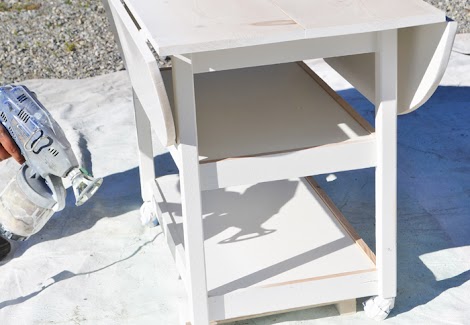
Distressing Edges
When your project is dry, it’s time to distress! How fun! If you have a small project or for light distressing, just use a sanding sponge or make up your own sanding block!
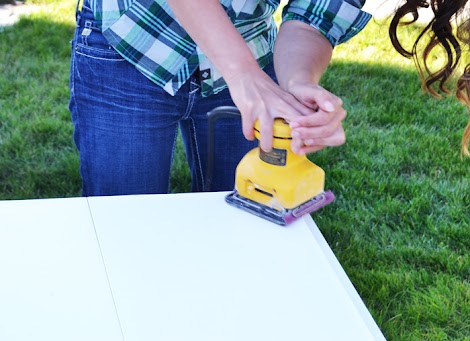
But for a larger project, you can pull out the power sander! Just be careful when using a power sander to not take too much paint off.
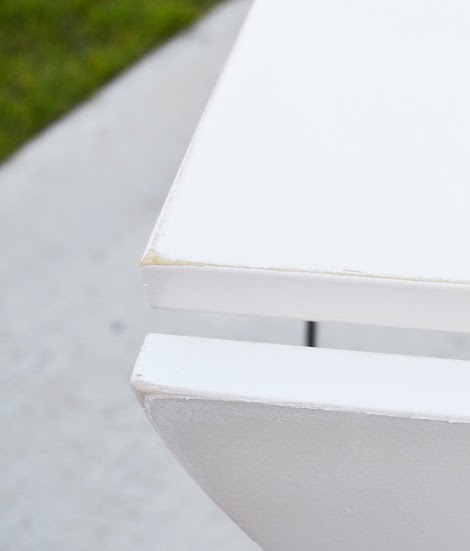
But here’s the problem. When you distress, your edges will not offer significant contrast. You won’t even be able to see the distressing! We have to darken that wood up!
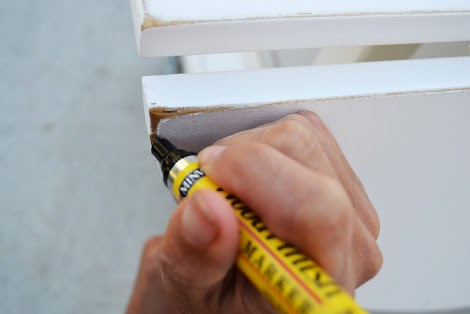
Here’s my secret weapon.
Yes, a stain in a marker!!!! All you have to do is color the distressed areas with the Minwax Stain Marker! For the Antique White, I used Golden Oak. Not too dark, not too light, just right!
There is actually 8 different Minwax Stain Marker colors, ranging from light to dark, so you can customize the wood color to your own personal preference.
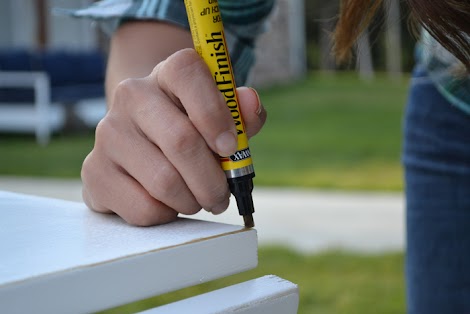 Minwax Stain Marker and depress the point until stain saturates it, and start coloring!
And if you don’t stay inside the lines, no worries, just quickly wipe off with a clean rag.
The Minwax Stain Marker dries immediately, so no waiting and wiping down or any of that stuff.
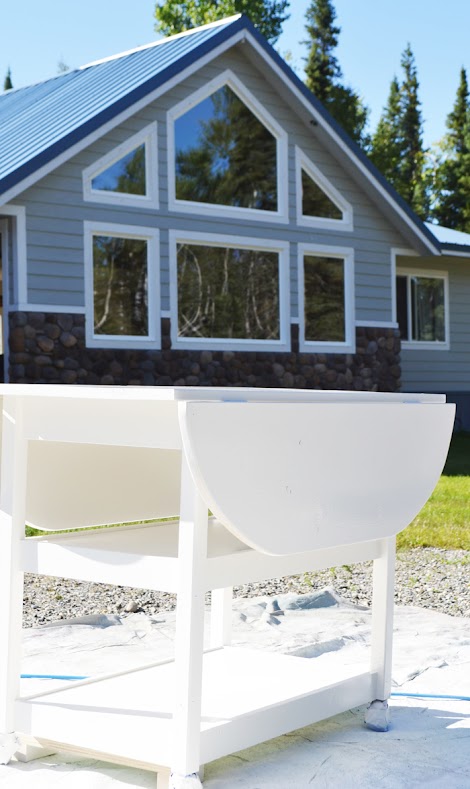
Ah, much better! You can actually see the distressed edges now!!!
And you can keep the Minwax Stain Marker around to touch up “natural distressing” quickly and easily – inside your house! I can totally see myself touching up furniture five minutes before guests arrive for a dinner party!
Top Coat
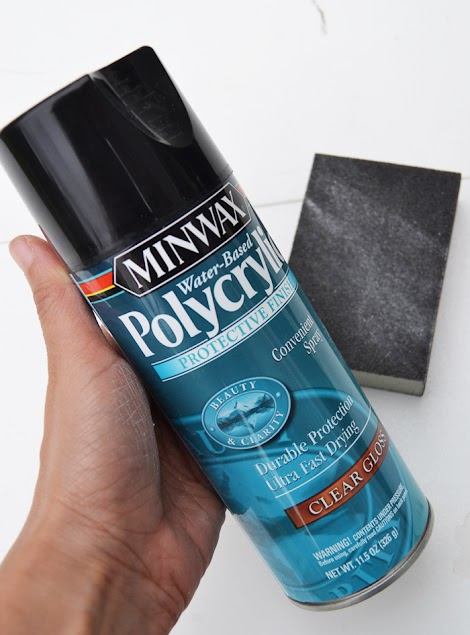
You’ll need to add a top coat to seal in those distressed edges. I of course turn to my most favorite and durable top coat, Minwax Water Based Polycrylic in High Gloss.
Because this is a table, and lots of hot dinners and painting projects will be happening right on this finished surface, I am going to also add top coat to the painted surface in addition to the distressed edges.
Note that because I am adding top coat over a white paint, I choose to use Minwax Water Based Polycrylic. If you chose the Minwax Polyurethane, it will amber over time, and alter the white color of your project. This could be desirable - or undesirable to you.
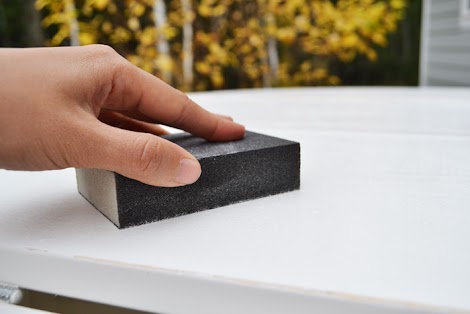
I start by sanding the table with a fine sanding block to get the Minwax Water Based Polycrylic to bond with the paint. Then I remove all sanding residue from the project with a brush and wipe the project down with a damp rag.
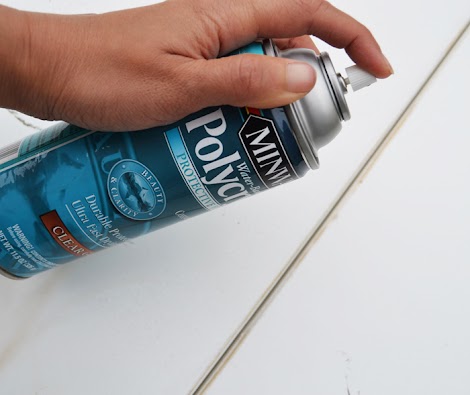
Then I just spray the Minwax Water Based Polycrylic on the project. I like to do three coats, sanding with fine sandpaper between each coat. Make sure you give the project a couple hours to dry between coats.
Right now I can work outdoors, being careful about overspray and working on nice, dry days. But if you have to work indoors or weather isn't cooperating, Minwax Water Based Polycrylic also comes in a quart and gallon sizes so you can brush it on as well.
The final product is beautiful and durable and so smooth!!!!
Comments
dmcarwin
Fri, 09/07/2012 - 11:53
Great tip!
Ana White
Fri, 09/07/2012 - 12:08
Thank you! The stain marker
Jodieth
Fri, 09/07/2012 - 12:12
Love it!
Candice (not verified)
Fri, 09/07/2012 - 13:03
Paint Sprayer
Ana White
Fri, 09/07/2012 - 13:22
Hi Candice! I am so excited
In reply to Hi Candice! I am so excited by Ana White
tracysmith
Tue, 07/16/2013 - 09:24
Paint Sprayer
JoanneS
Fri, 09/07/2012 - 13:49
Perfect timing!
Carra (not verified)
Fri, 09/07/2012 - 15:28
You are a Mind reader!
Geraldine (not verified)
Fri, 09/07/2012 - 16:48
Perfect timing
Kathleen (not verified)
Fri, 09/07/2012 - 17:49
I want to be handy too!
AmyA (not verified)
Fri, 09/07/2012 - 19:11
paint brand?
In reply to paint brand? by AmyA (not verified)
Ana White
Fri, 09/07/2012 - 20:07
Hi Amy! The paint used for
jessica kennedy (not verified)
Fri, 09/07/2012 - 19:24
plans?
In reply to plans? by jessica kennedy (not verified)
Ana White
Fri, 09/07/2012 - 20:04
Drop Leaf Storage Table Plans
Bunnie1978
Sun, 09/09/2012 - 13:59
I was just going to ask
Jessica654321 (not verified)
Fri, 09/07/2012 - 19:34
Thank you! This looks
birdsandsoap
Fri, 09/07/2012 - 23:54
I've always distressed this
Lisa Bethers (not verified)
Sat, 09/29/2012 - 13:14
question?
Katie Jones (not verified)
Fri, 11/09/2012 - 07:46
Advice on A Good Clear Coat
MARGARET (not verified)
Mon, 11/12/2012 - 14:43
REFINISHING
eforekorapl
Sat, 02/02/2013 - 10:22
This is a well written
chmabersol
Sat, 02/09/2013 - 03:31
I have been seeking
BuzzWilliams
Mon, 02/11/2013 - 23:31
nice one!
jaime123
Tue, 03/12/2013 - 09:21
you did nice work your post
sam1
Tue, 03/19/2013 - 12:32
HTC Butterfly
matt28mon
Tue, 04/02/2013 - 01:26
This post has helped me to
Stephanie Ingram
Mon, 04/15/2013 - 05:59
I am looking forward to
paintguy
Mon, 05/06/2013 - 07:22
Distressed paint adds such an
Imadethis
Mon, 05/13/2013 - 08:10
sprayer
muzzo
Fri, 07/12/2013 - 03:03
Just MuZzO.. I like the way you do.. Great Work
blackue9
Fri, 07/19/2013 - 00:27
Beautiful! This gave me a
jemy1
Thu, 08/08/2013 - 05:12
Top Rated Hair colorists NYC
meganrm
Tue, 10/08/2013 - 10:28
Plans?
megganmc
Sun, 08/02/2015 - 17:57
Extra support
It appears in one of your extra pictures located at the top of the post that you used extra support, rather than just the hinges. We will most likely be using one side of the fold down leaves pretty consistently in the 'up' position and I'm slightly worried about how the hinges will hold up. I appreciate any suggestions or advice!!