


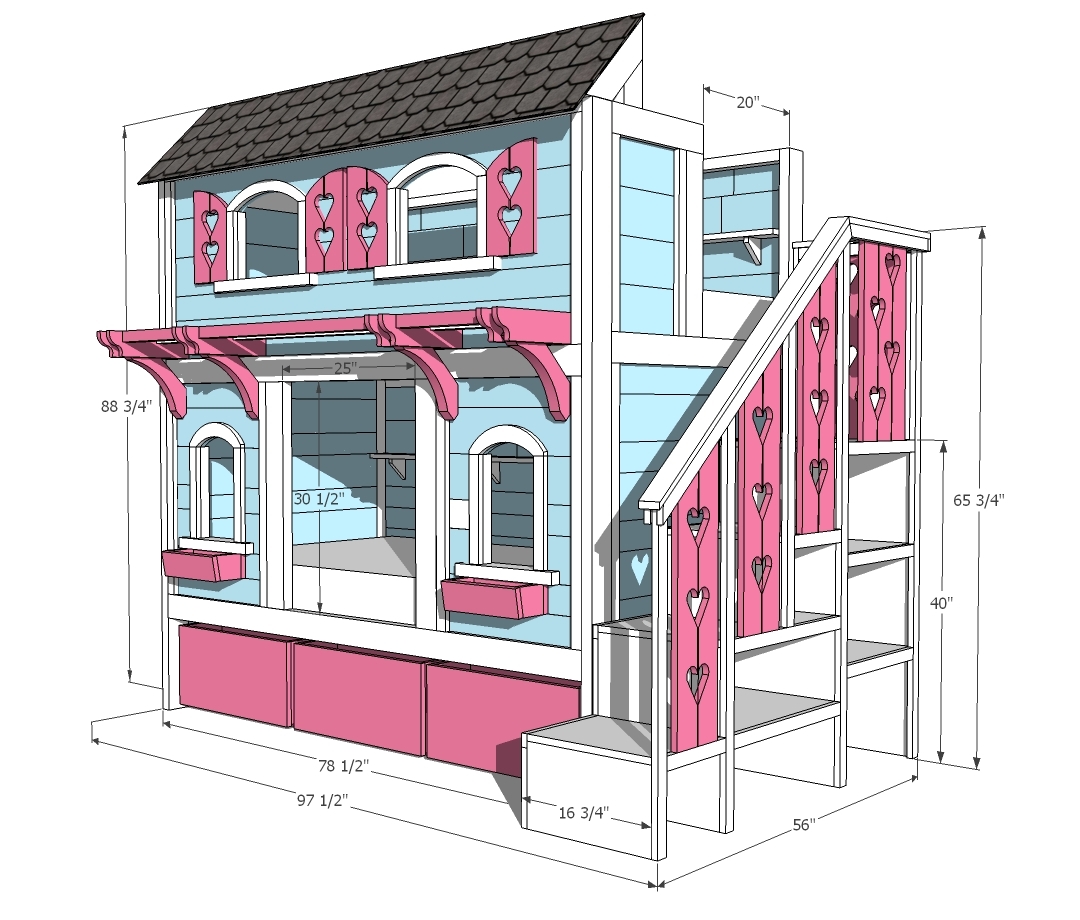
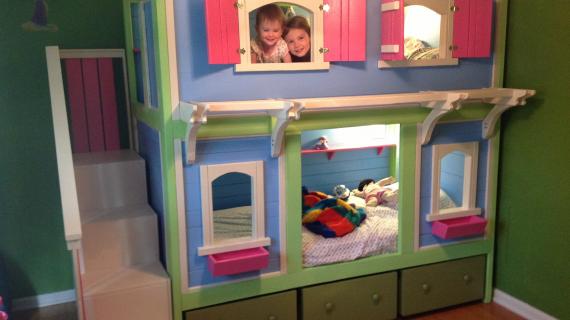
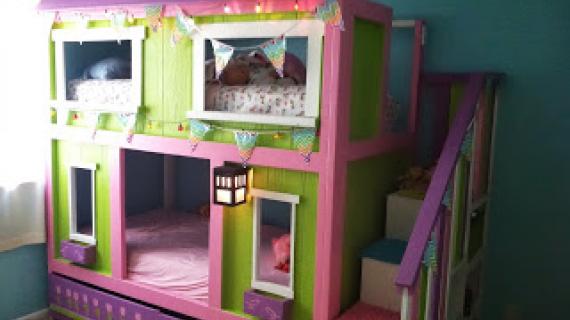
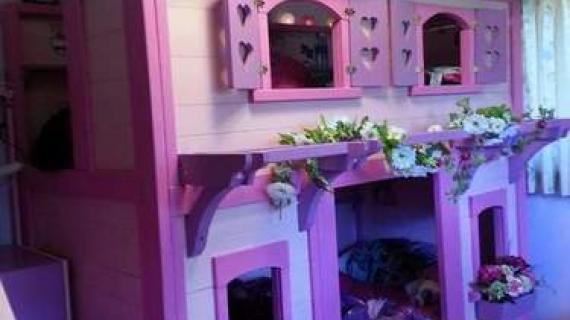
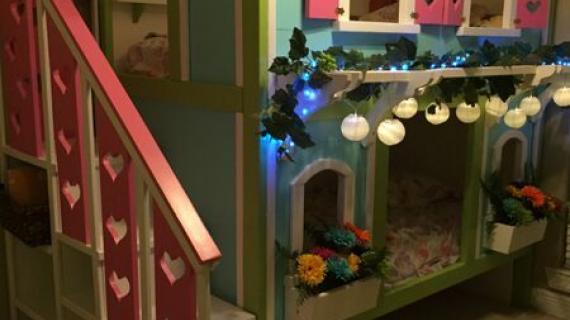
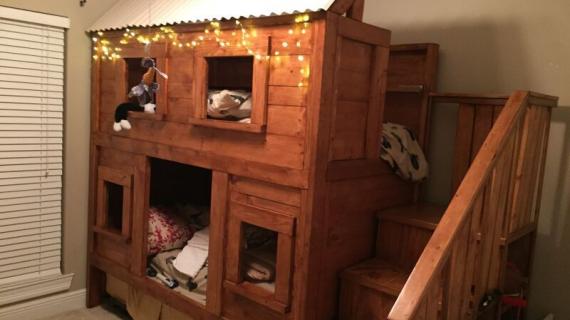
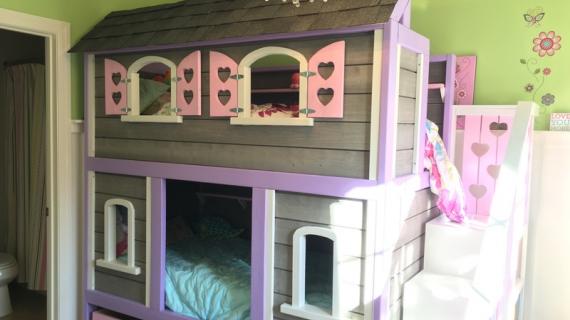
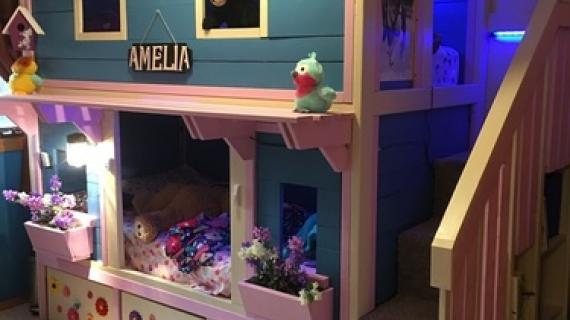
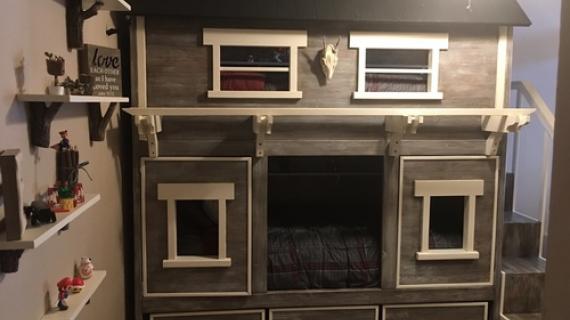
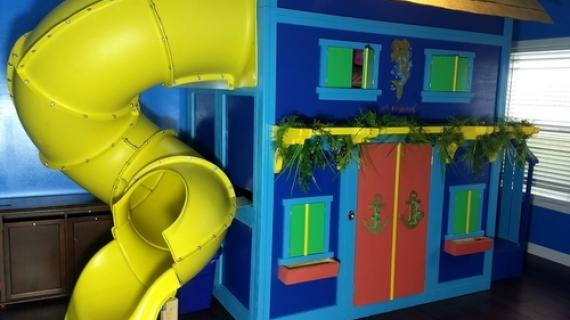
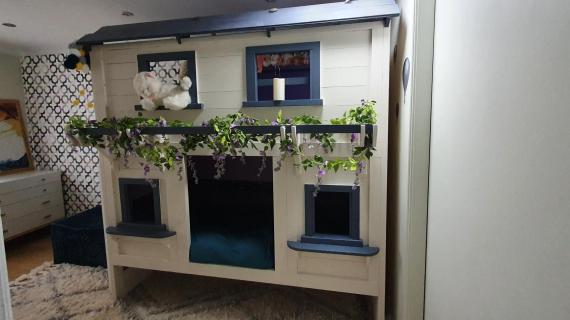
Add a cute pergola and roof to the Sweet Pea Garden Bunk Bed!
Preparation
Shopping List is included with main Sweet Pea Bunk Bed Post
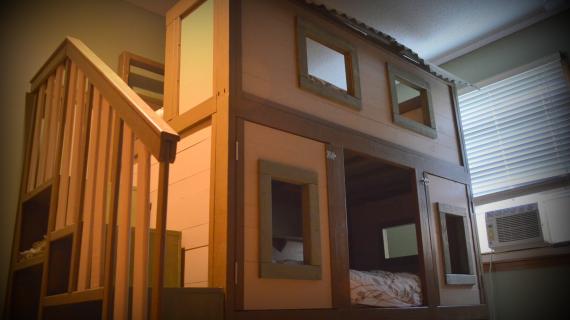
Roof
Roof Frame
(2) 2x4’s @ 45 degree angles on one end. Longest side measures 5 5/8” long. Roof frame ends.
(4) 2x4’s @ 15 inches45 degree angles on both ends. Long side is 15.” Roof brackets
(2) 1x4’s @ 25” roof bracing
bracing (optional depending upon roofing material).
(1) 1x4 @ 24” center roof brace (optional depending upon roofing material).
Pergola
(8) 1x4’s @ 13” with S- curve cut into end. Top bracket pieces.
(4) 2x4’s @ 8” with 45 degree cuts on both ends. 8” is short side of board. Also cut arch into opposing side and trim long ends back 1” @ 90 degrees from long side. These make the angled brackets.
(4) 2x2’s @ 14 ¼” top pergola braces above windows (cut to fit)
(2) 2x2’s @ 33 ½” for center braces over opening (cut to fit)


Please read through the entire plan and all comments before beginning this project. It is also advisable to review the Getting Started Section. Take all necessary precautions to build safely and smartly. Work on a clean level surface, free of imperfections or debris. Always use straight boards. Check for square after each step. Always predrill holes before attaching with screws. Use glue with finish nails for a stronger hold. Wipe excess glue off bare wood for stained projects, as dried glue will not take stain. Be safe, have fun, and ask for help if you need it. Good luck!
Instructions
Step 1

Cut 4 boards at 45 degrees on each end, 15” on the long side between the two cuts. These will be your panel supports.
NOTE: Do this on the ground.
Step 2
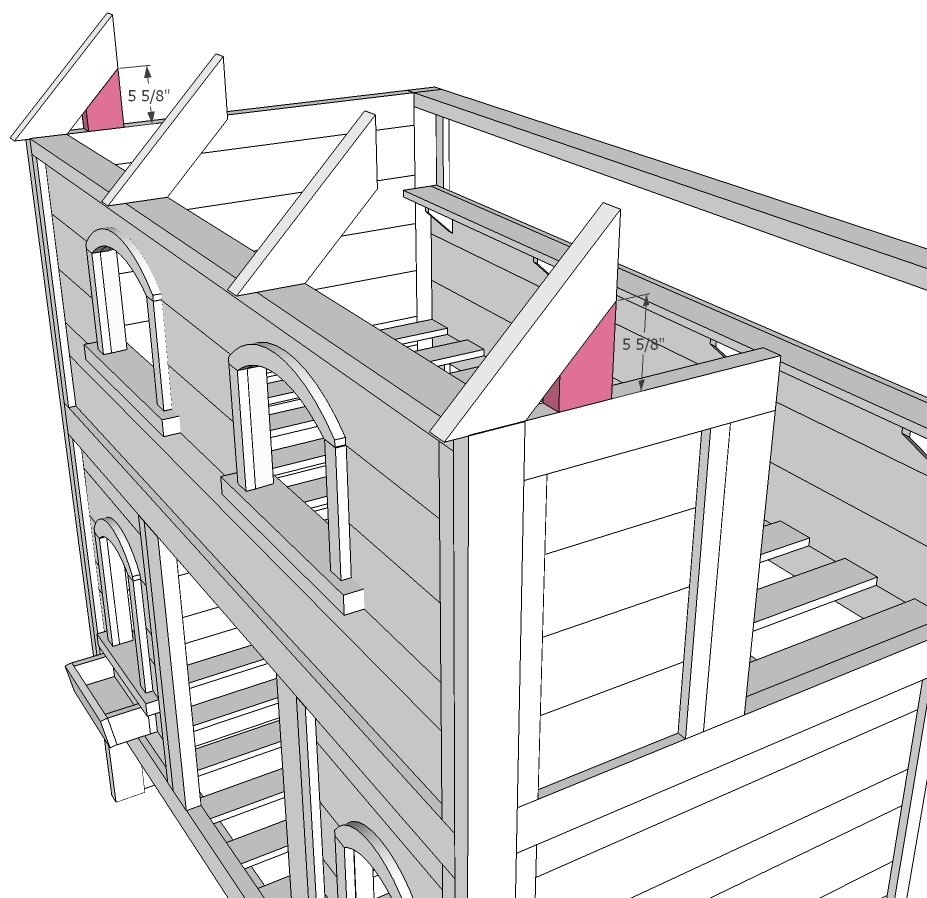
Cut (2) 2x4 boards with a 45 degree angle on one end. The boards will measure 5 5/8” on their longer side.
Predrill pocketholes on the straight ends for 2 ½” pockethole screws. Also drill pocketholes on the angled end.
Step 3

Take the two smaller boards and two of the 15” frame pieces and make a right triangle. Use glue and pockethole screws to attach the angled ends creating a 90 degree angle. These are the outer frame pieces.
Step 4
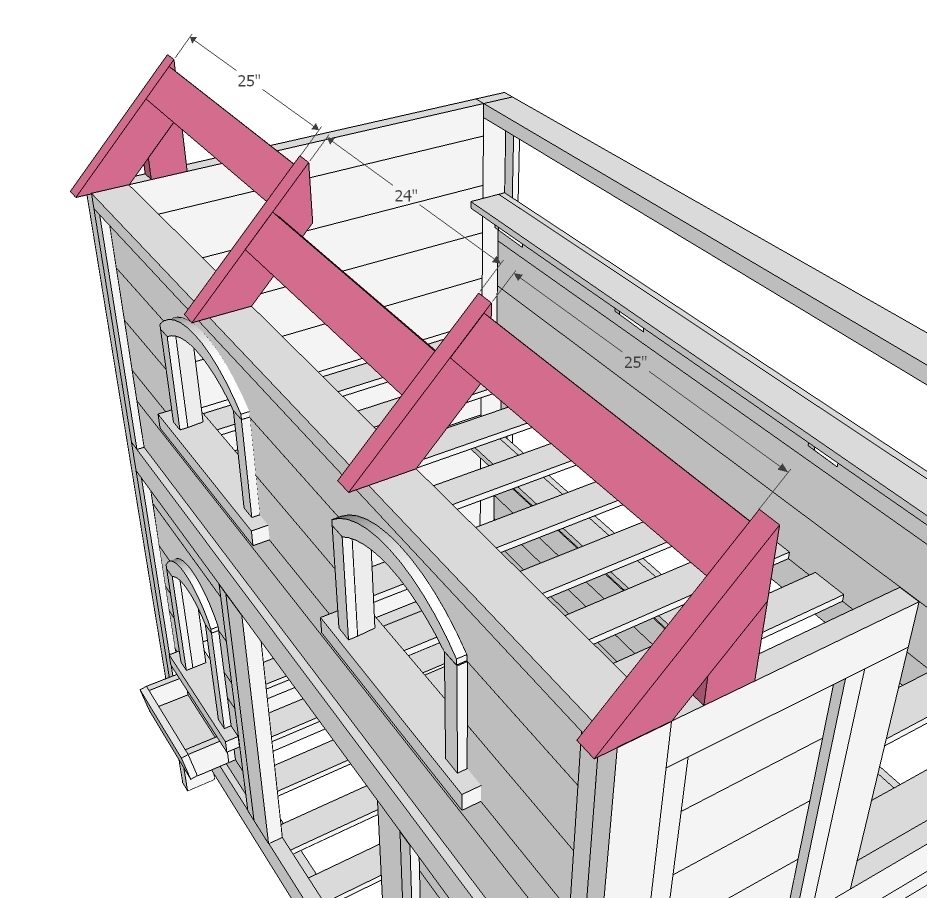
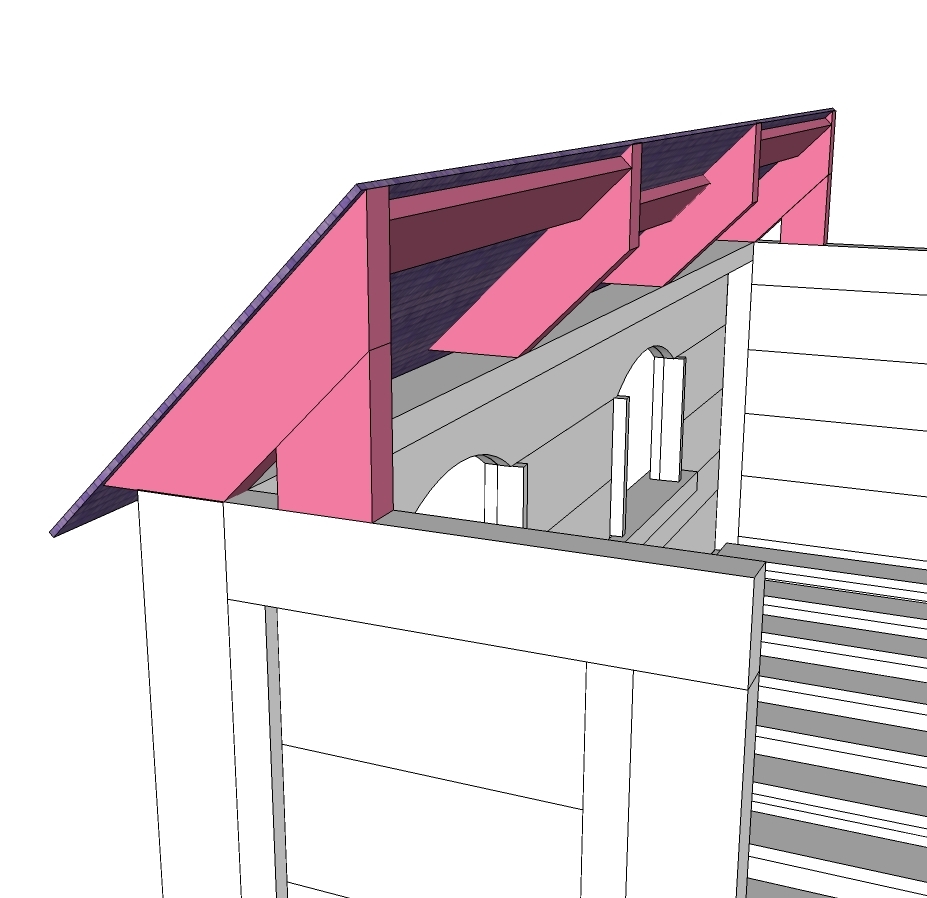
The roof panel will measure 82x18”. It is 2” wider than the overall width of the bed, and three inches taller than the roof frame. I wanted my panel to have a 3” overhang along the bottom edge of the roof and a slight over hang on the sides. I assembled my roof on the ground, outer frame marked 1”in from the sides, and all pieces attached flush with the top of the panel. The two frame pieces between the edge frames were placed at 25” in from each outer frame.
NOTE: You may wish to attach roof to frame before attaching to bed depending on your room ceiling height.
Step 5
Step 6
To install the roof, I had a helper lift it into place, and then secured the outer roof frame to the side panels with pockethole screws. The four frame pieces that attached to the front edge of the bed proved to be a challenge; because of the small clearance under the roof, I couldn’t get my drill in a good position to use pocketholes, but instead, I secured it with screws driven in at several angles. It’s not as pretty as I had hoped, but it is sturdy.
Step 7

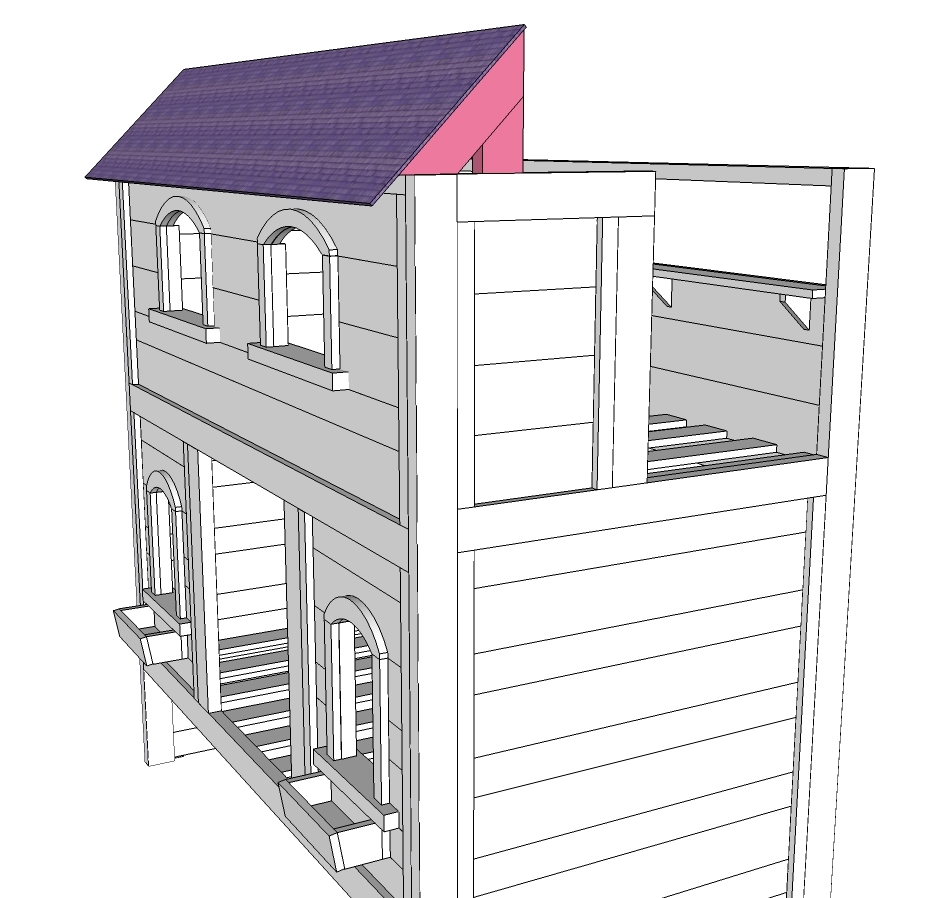
My favorite detail! The pergola consists of 4 brackets installed along the lower bunk of the front panel with bracing in between. Attach the pergola after the bed is moved in to position.
Step 8
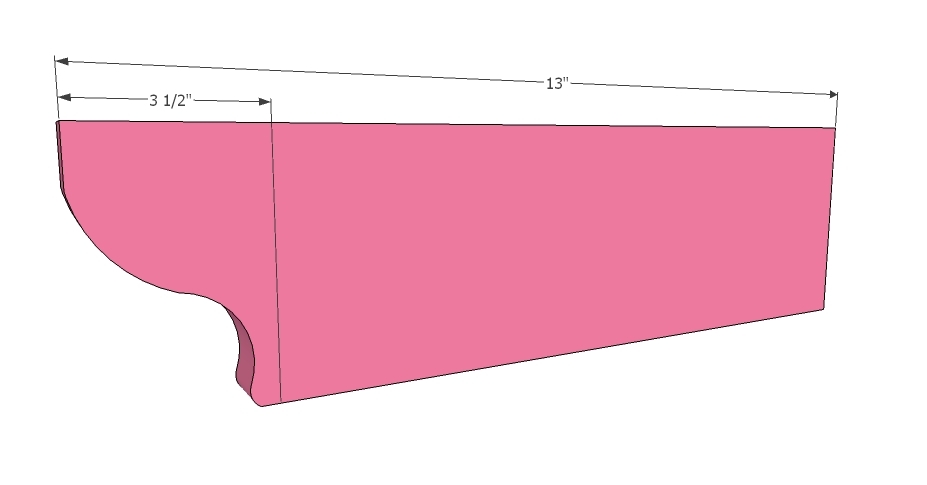
Starting with the 1x4 boards, take the 13” board and measure back 3 ½” from the end and mark across. This will give you a “square” area to work with. Within that area, draw an “S-curved” line starting at the edge of the board and ending at the mark. These will be the decorative ends of your pergola brackets. Cut them out with a jigsaw and sand the edges smooth.
Step 9
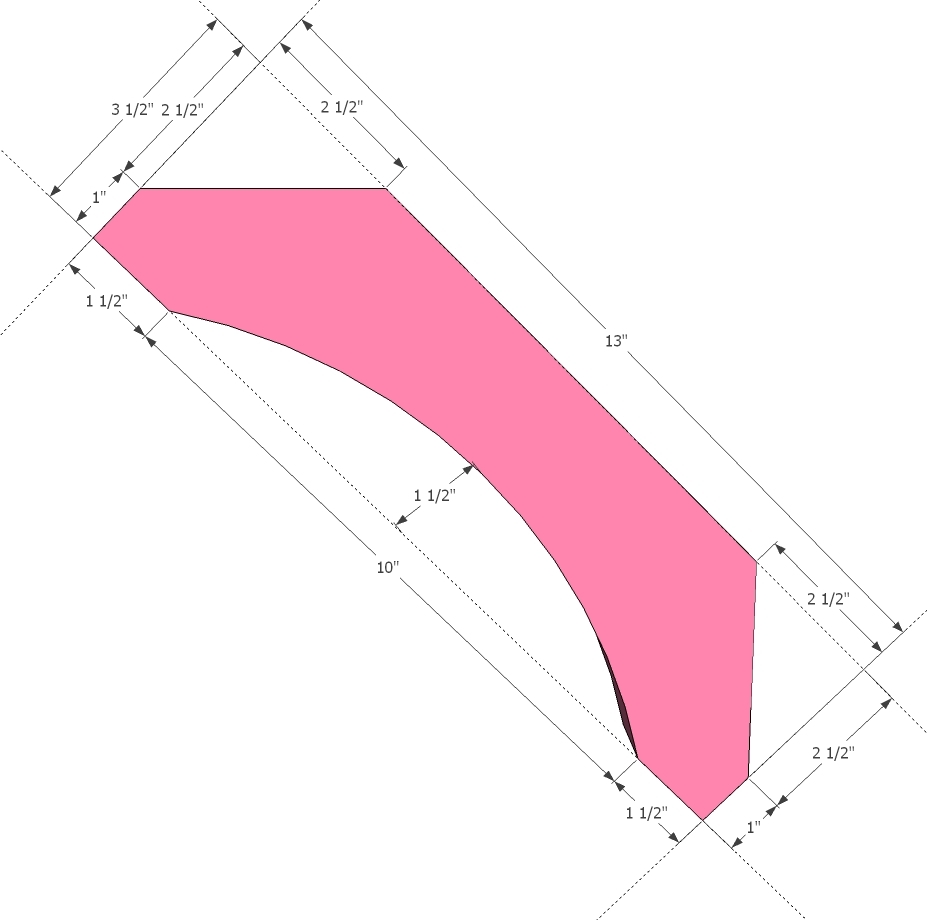
Moving on to the 2x4’s, cut each end of the board at a 45 degree angle, the longest side of the board will measure 15”. On the long side of the board, measure in 2 ½” in from each end and place a mark. Between these two marks, draw an arch measuring 1 ½” high at it’s tallest point. Also measure 1” in from each end and draw another line at 90 degrees from the edge. Cut out the curved line with a jigsaw and sand edges smooth. Use a miter saw to trim the 1” off of each end.
Step 10
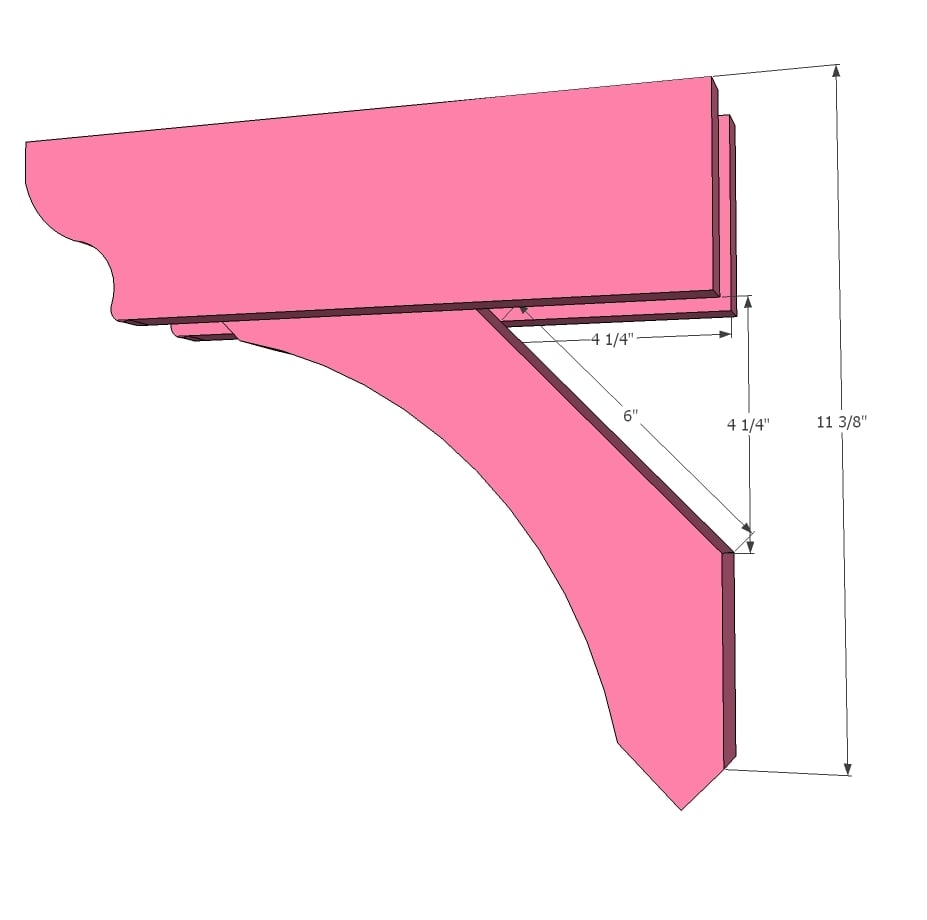
Assemble the brackets, sandwiching the 2x4 angled piece between the (2) 1x4 horizontal pieces. Using a scrap piece of wood, mark 4” and assemble the bracket against the straight edge and around the marks. You will need 4”between the horizontal pieces and the bottom angled piece to fit over the bed frame. Use wood blue and a nail gun to pin in place.
Step 11
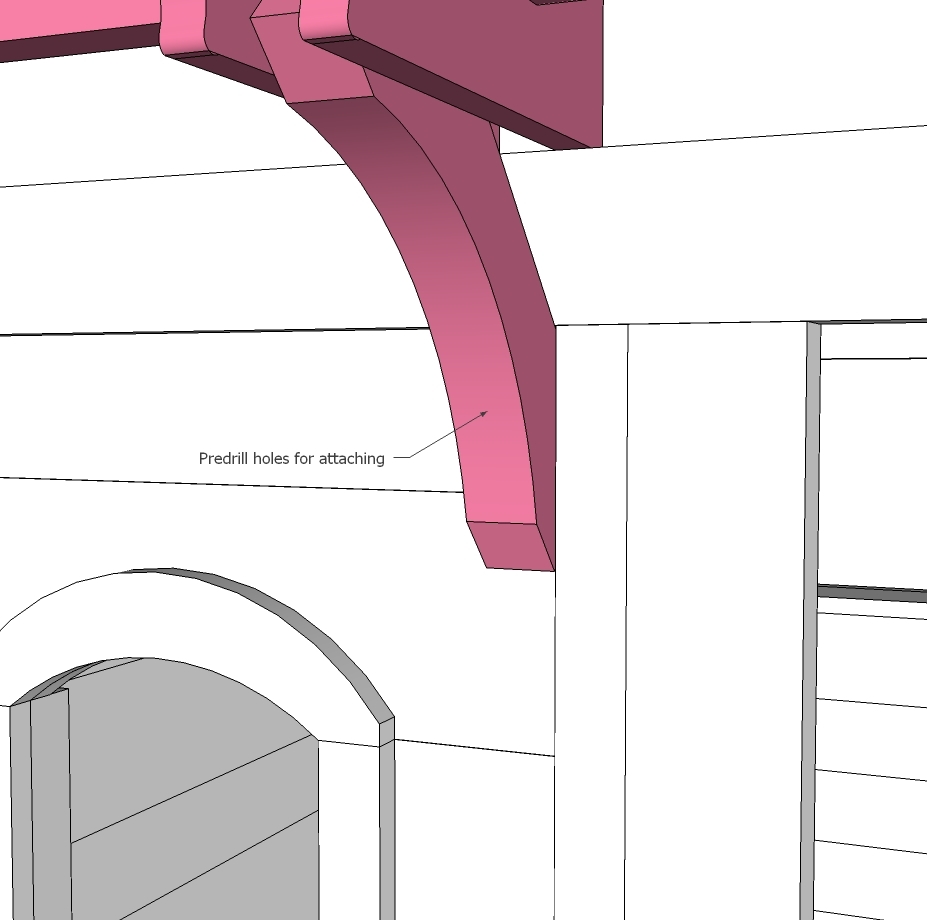
Once your brackets are built, pre drill holes into the bottom of the bracket at 90 degrees angle the rear part of the bracket. This will be for attaching the bottom of the bracket to the wall.
Step 12
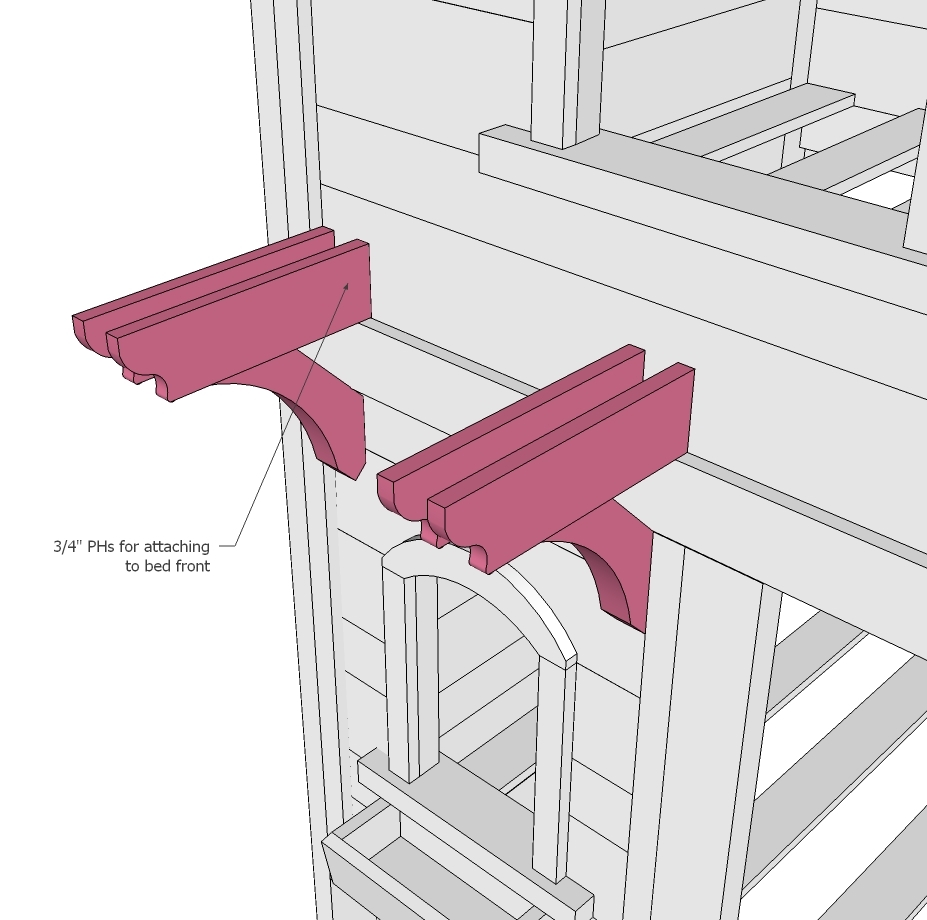
Next drill 3/4”pocketholes into the horizontal bracket ends. Each bracket will have 4 pocketholes that will screw into the front wall panel.
Step 13
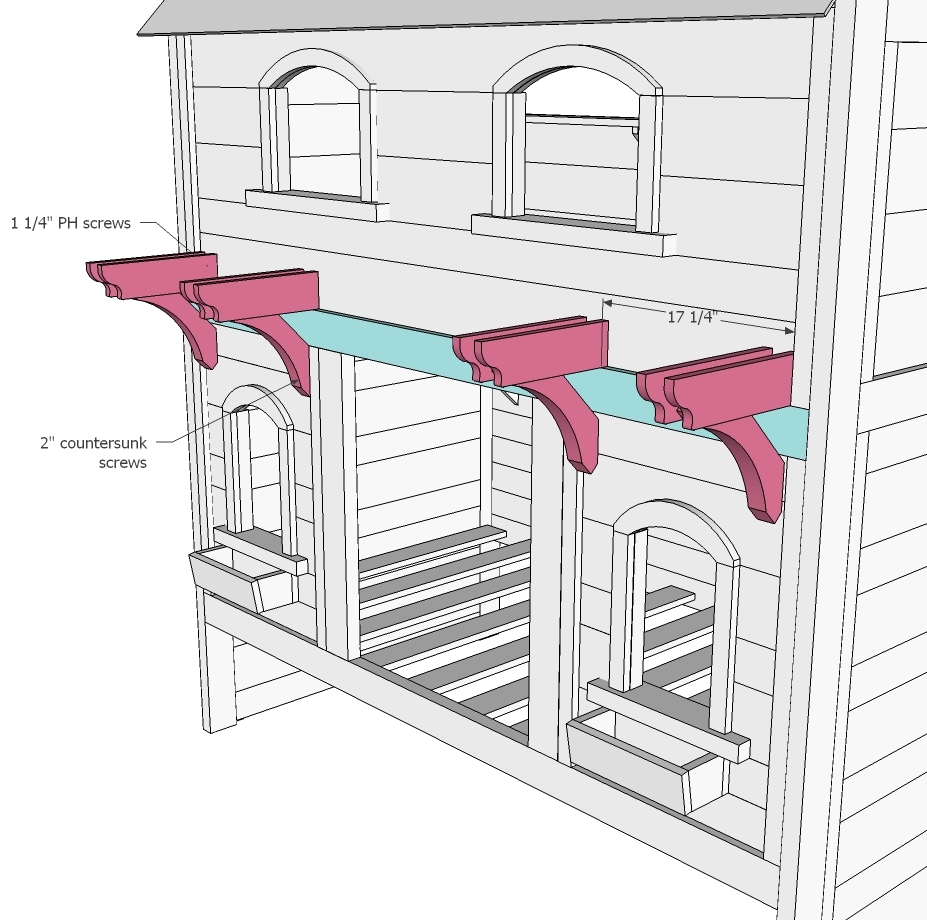
Using 1 ¼” pockethole screws and 2” screws, attach each bracket to the front panel. The top of the brackets will rest on top of the center frame piece and the lower support will rest against the lower trim edge.
Step 14
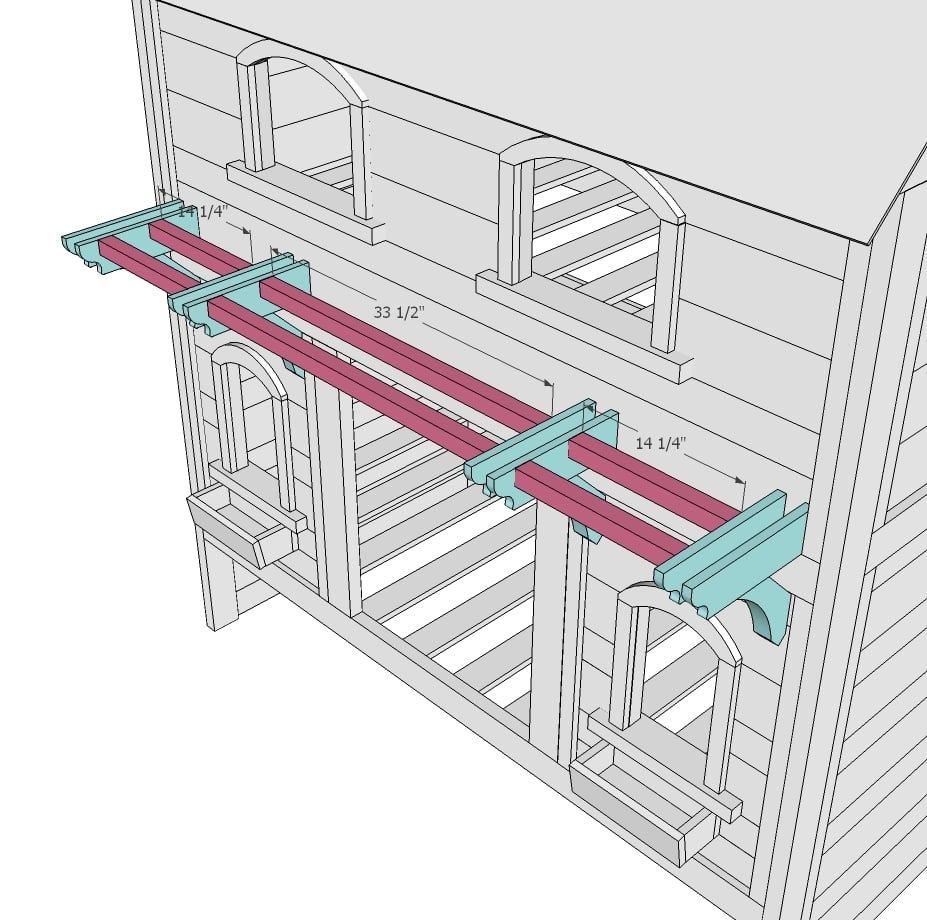
Once all 4 brackets are installed, use the 2x2 strips to brace the pergola. The first row will sit back 4” from the front top edge and the second row will sit 4” back from the first. Use wood glue and a 2 ¼” pockethole screw to secure. Shorter pieces (14 ¼”) will fill in the space over the windows and longer pieces (33 ½”) will fit over the lower bunk opening. These are cut to fit as the trim pieces can be slightly off. Line them up evenly across the width of the bed.
It is always recommended to apply a test coat on a hidden area or scrap piece to ensure color evenness and adhesion. Use primer or wood conditioner as needed.
Comments
Periwinkle (not verified)
Thu, 09/27/2012 - 08:57
bunk bed
This is the CUTEST bunk bed I've ever seen. Makes me wish I was eight again so I could crawl in and enjoy the space. Just wonderful!!!
amorakkabi
Sat, 04/06/2013 - 00:34
Converting an existing bunkbed from Ikea to this build
Hi am interested in converting an existing bunkbed from Ikea to this build with these measurements:
NORDDAL
Bunk bed frame
Product dimensions
Length: 77 1/2 "
Width: 40 1/8 "
Height: 63 "
Mattress length: 74 1/2 "
Mattress width: 38 "
I was wondering if you could give new measurements and materials with that in mind? Thank you either way, this is a great project.
17reaby
Sat, 10/05/2013 - 14:53
Tips
Hi how easy/hard is it to change the sheets? Also is it hot in the bottom bunk? We live in a very hot climate. Any tips or suggestions appreciated =)