

Free plans to build a barn shaped bookshelf - perfect for your farm themed children's room! Our step by step plans include diagrams, shopping and cut list, and lots of reader submitted photos.
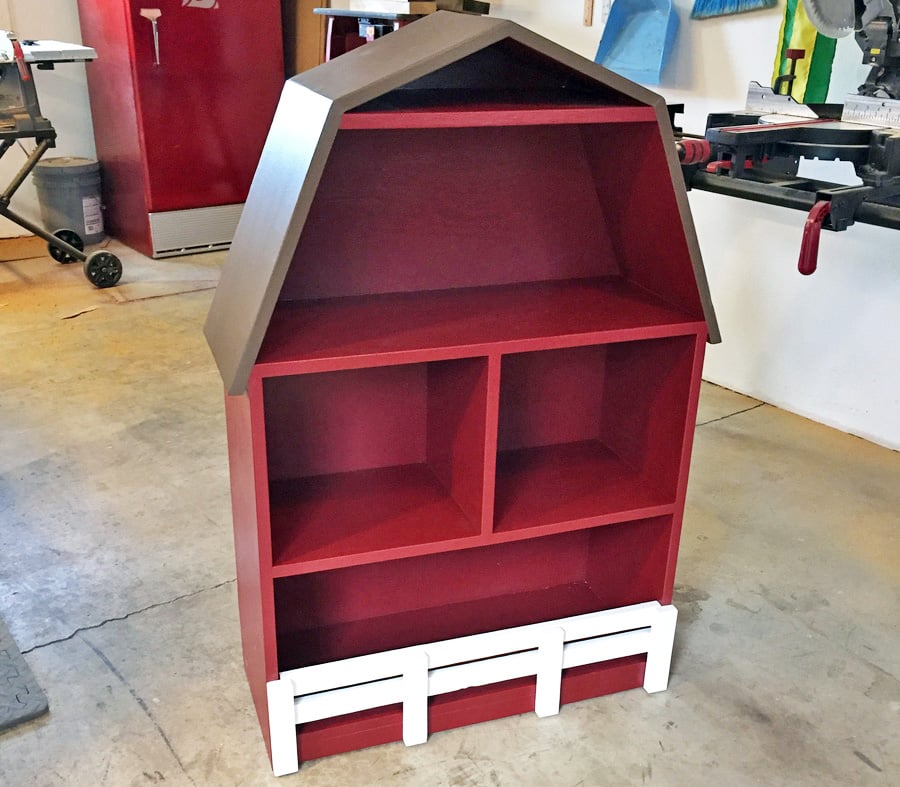
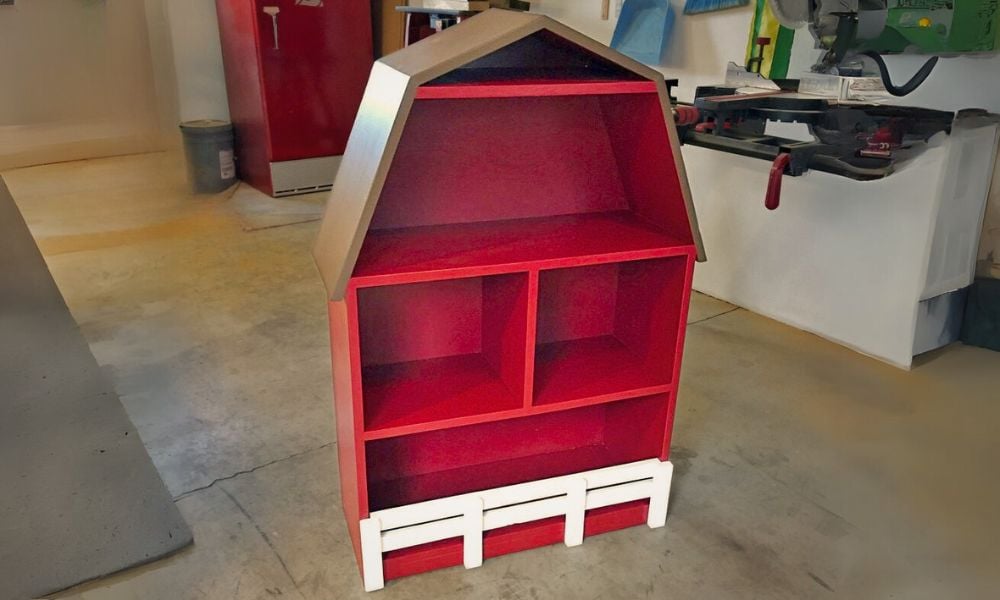
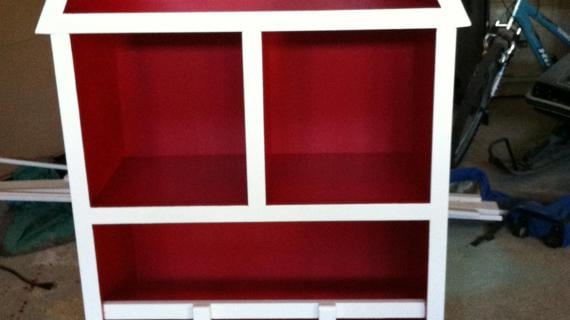
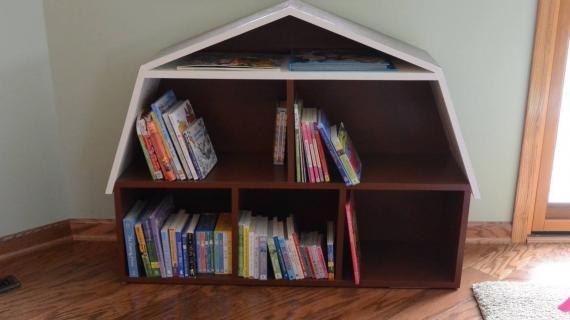
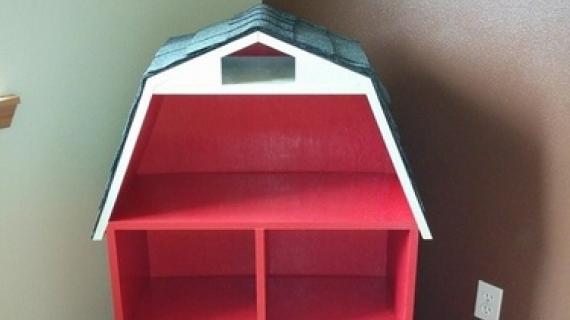
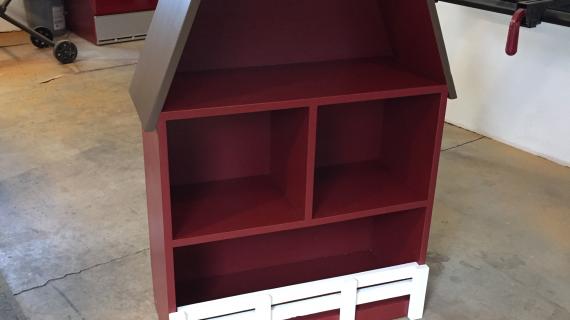
Reader submitted photo by HARBERBUILDERS
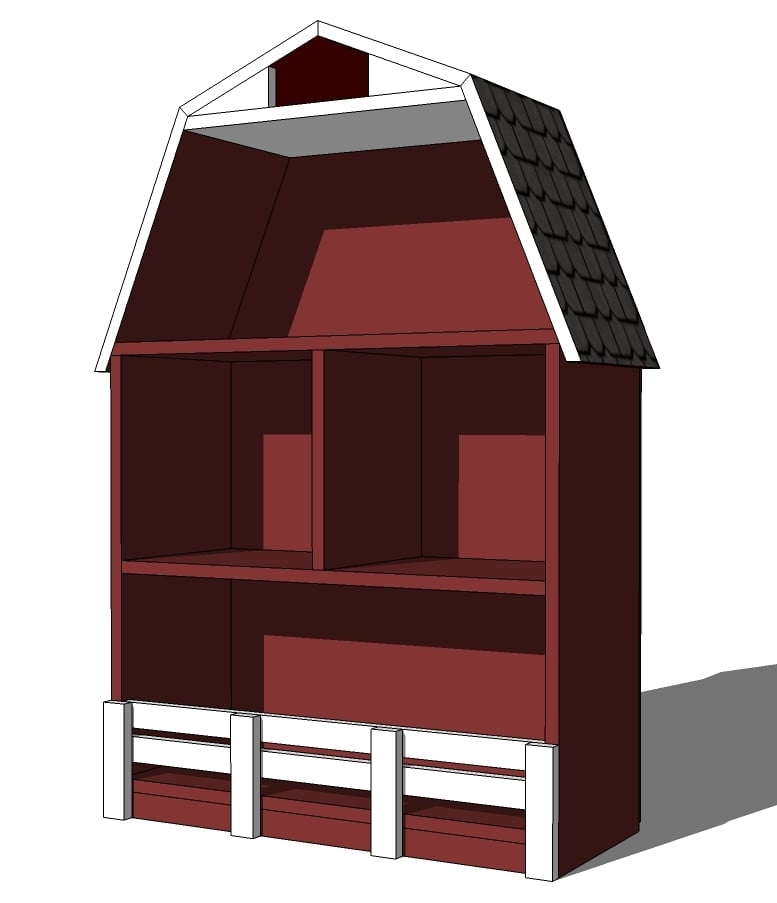
Complete with a barn style roof, three large shelves, and a stuffed animal coral, this barn bookshelf is perfect for your farm loving little one! You'll need a mitersaw that bevels to 22 1/2 degrees to pull off those roof angles, or a circular saw with a blade that bevels. Other than that, this one is pretty easy to build!
Pin For Later!

Preparation
- 3 - 1x12 @ 8 feet long
- 2 - 1x2 @ 8 feet long
- 6" of 1x6 scraps
- 1/2 sheet of 1/4" plywood for back
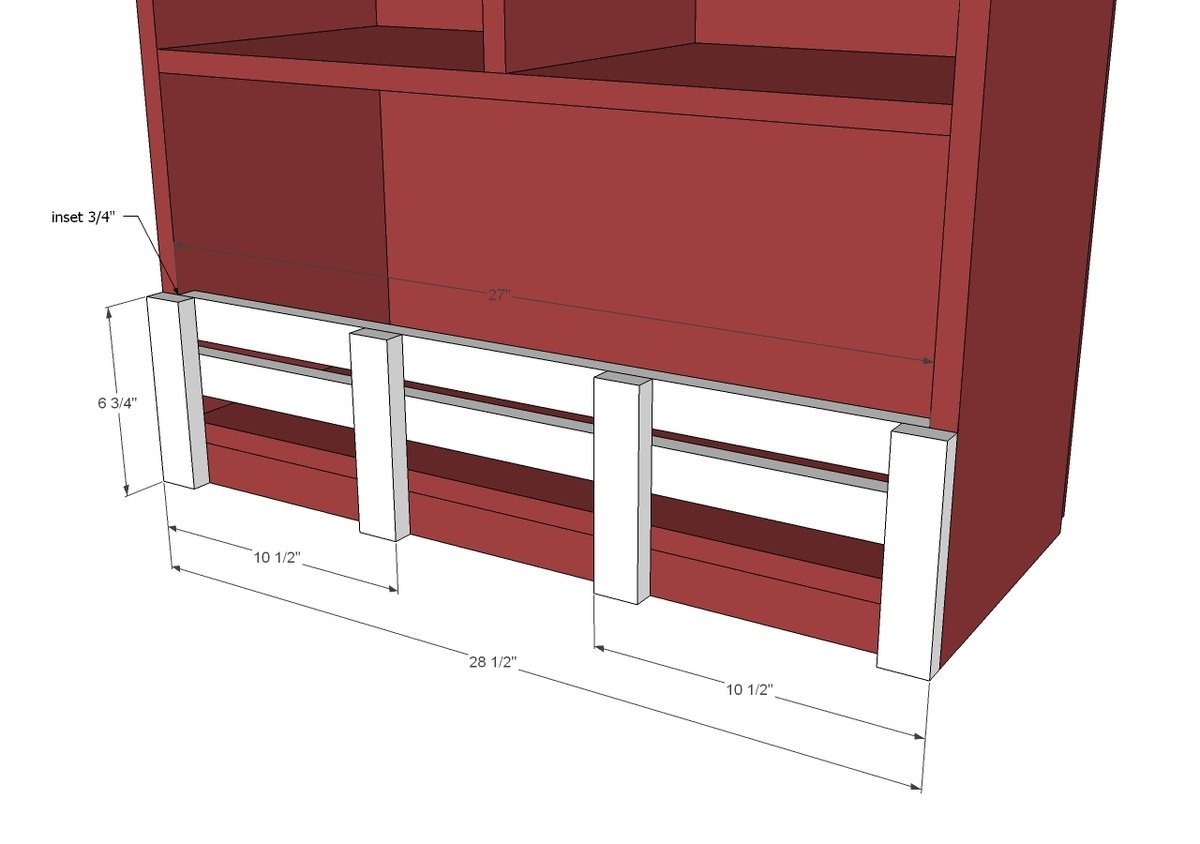
- 4 - 1x12 @ 27” (shelves and sides)
- 1 - 1x12 @ 12” (divider)
- 1 - 1x12 @ 28 1/2” - both ends BEVELED at 22 1/2 degrees off square, long point to long point, ends NOT parallel (middle floor)
- 1 - 1x2 @ 27" (footer)
- 2 - 1x12 @ 16 1/4” - both ends beveled at 22 1/2 degrees off square, long point to long point, ends NOT parallel (lower roof)
- 1 - 1x12 @ 18” - both ends beveled at 22 1/2 degrees off square, long point to long point, ends NOT parallel (loft floor)
- 2 - 1x12 @ 10” - both ends beveled at 22 1/2 degrees off square, long point to long point, ends NOT parallel (upper roof)
- 2 - 1x6 @ 2 1/4” long point, cut at 22 1/2 degrees off square (optional loft siding)
- Back plywood is 45” x 28 1/2” overall.
- FENCE 2 - 1x2 @ 27" 4 - 1x2 @ 6 3/4"


Please read through the entire plan and all comments before beginning this project. It is also advisable to review the Getting Started Section. Take all necessary precautions to build safely and smartly. Work on a clean level surface, free of imperfections or debris. Always use straight boards. Check for square after each step. Always predrill holes before attaching with screws. Use glue with finish nails for a stronger hold. Wipe excess glue off bare wood for stained projects, as dried glue will not take stain. Be safe, have fun, and ask for help if you need it. Good luck!
Instructions
Step 1

Start by building the bookshelf base. You can use 2" countersunk screws and glue or 3/4" PHs/1 1/4" PH screws and glue, but nails are not recommended because there is no face frame.
TIP: If using PHs you may wish to add the top (step 2) first to fit the drill in there, and then add middle shelf second.
Step 2

Now add the top.
Step 3

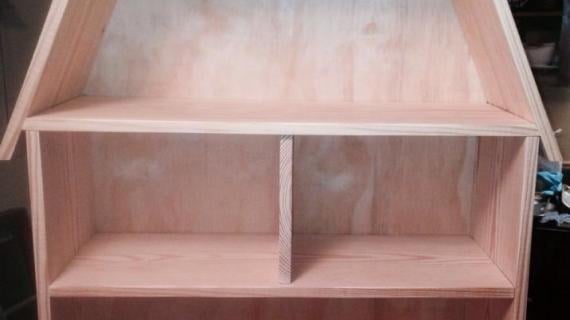
Now add the divider. You can just nail or screw this guy in.
Step 4

And the footer - glue and nails will do the trick here.
Step 5

Step 6

Now add the loft floor. Easiest way is 3/4" PHs and 1 1/4" PH screws from underside.
Step 7

Glue and nail the remaining roof pieces in place. The next pieces will strengthen everything up.
Step 8

Add the roof pieces to secure top roof. Use glue and finish nails.
Step 9

Finally, add the back to the entire project with 1 1/4" finish nails and glue.
Step 10
It is always recommended to apply a test coat on a hidden area or scrap piece to ensure color evenness and adhesion. Use primer or wood conditioner as needed.


Comments
CreativeNative
Mon, 11/19/2012 - 13:05
Barn dollhouse yes please
I really cant wait to see the barn dollhouse plans, my husband is going to build a barbie house for our daughters 3rd birthday Jan 1st,can you post them soon please.
patiently waiting from your Yukon neighbor
James Reeves (not verified)
Tue, 11/20/2012 - 08:14
Very nice project, any child would love nice christmas gift .
I like this barn shelf, so much room for kids to put books stuffed animals etc awesome design
Jim, Ontario, Canada
4munchkins (not verified)
Tue, 11/20/2012 - 14:22
Love this!
I love this! I've been looking for something for my nephews and this is perfect!
Milca (not verified)
Wed, 11/21/2012 - 10:20
very cute design
I have no use for this personnally BUT I think its just adorable :) The bottom section would be perfect for stuffing toys and things. Love it.
Juanita_r
Thu, 11/22/2012 - 03:46
i love it
My boys r a bit too big for this now, but it would b perfect in a cowboy theme room. so cute! amazing yet again Ana !
Anonymous Coward (not verified)
Thu, 11/22/2012 - 04:27
Could be "Victorian" doll house, too
With that nice roofline, it could be turned into a Victorian doll display shelf.
kimberleyisobel
Mon, 05/18/2015 - 19:06
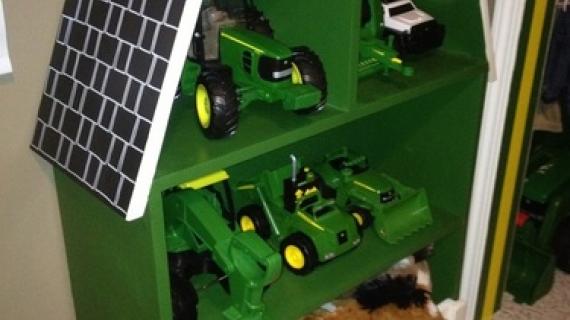
Love love love
Just finished putting this one together. Waiting for putty to dry and then I can paint it. This will be for our little cousins (1 & 3) who live on a farm for all their trucks and farm toys!