

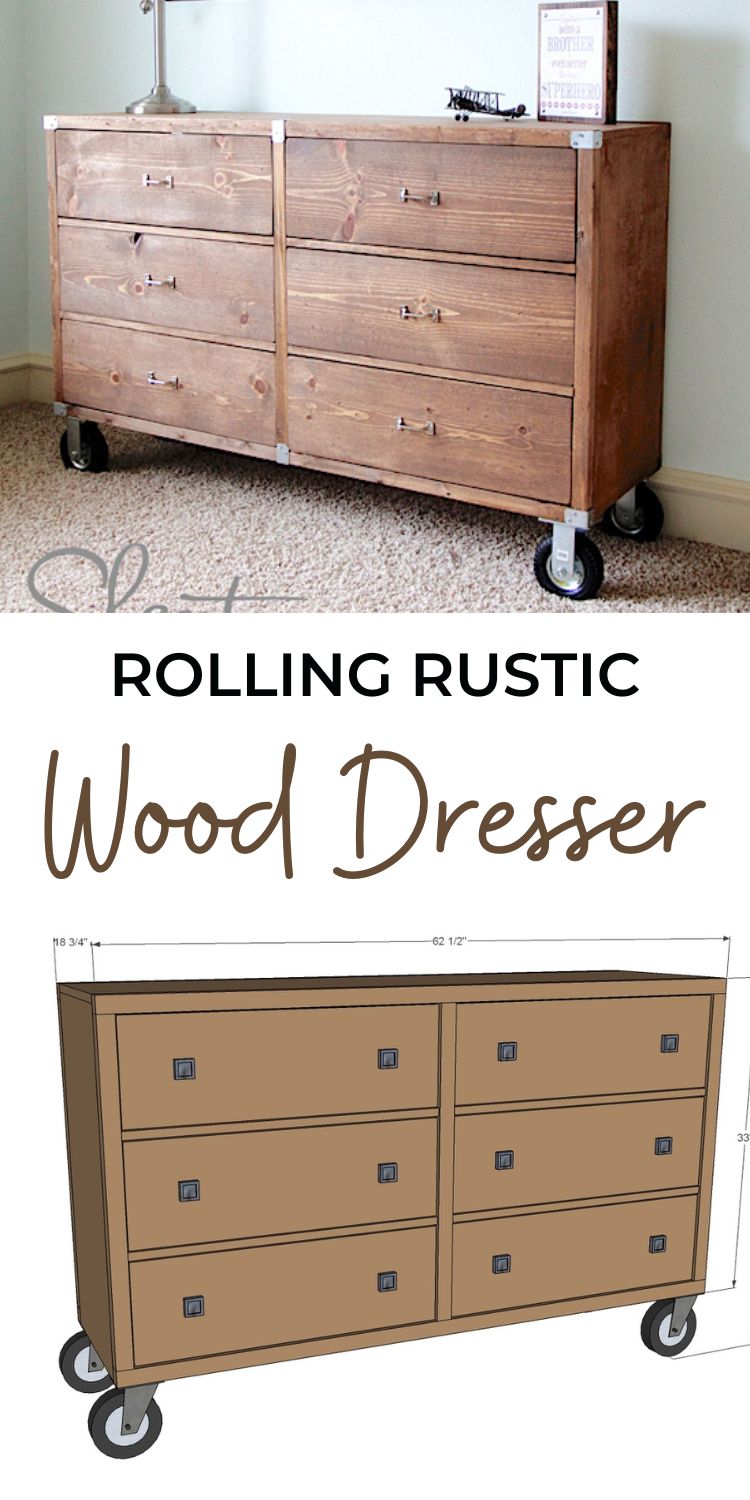
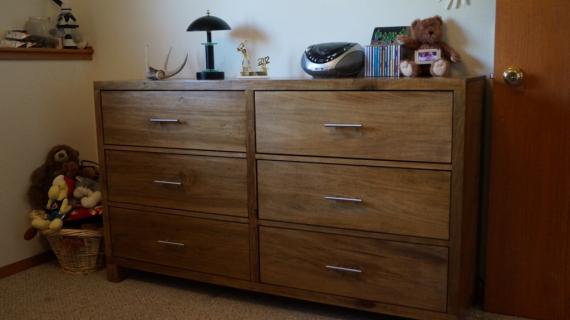
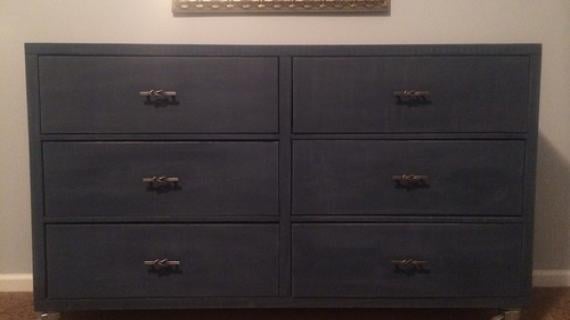
Free plans to build a solid wood, rolling dresser from ana-white.com
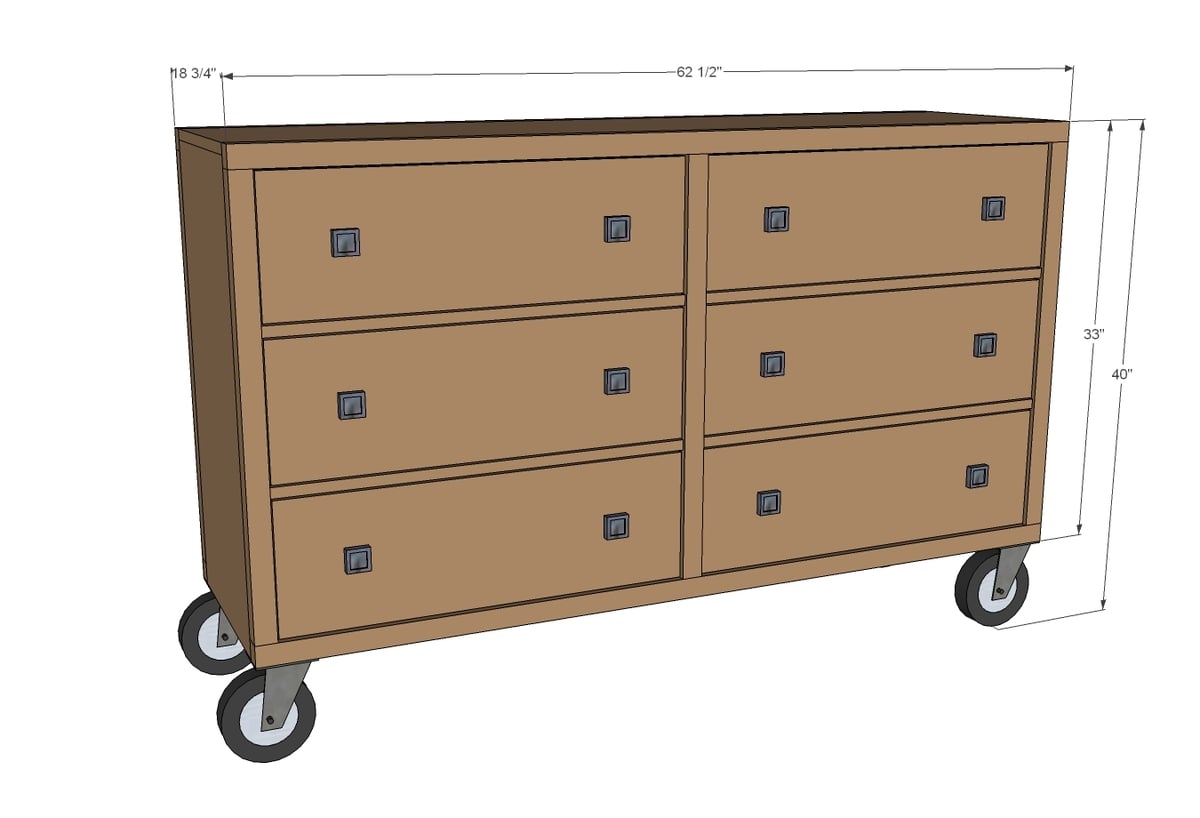
This dresser is beautiful and blends with just about any style and decor. The plans include step by step diagrams, shopping list, cut list and more.

Heck, yeah, that's DIY!
And you can make it too!
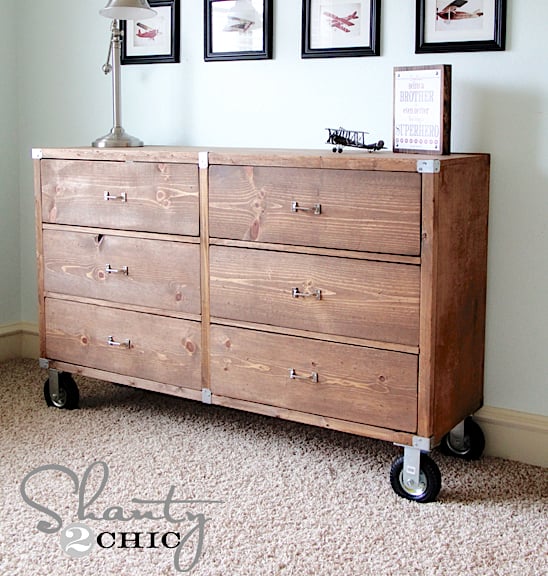
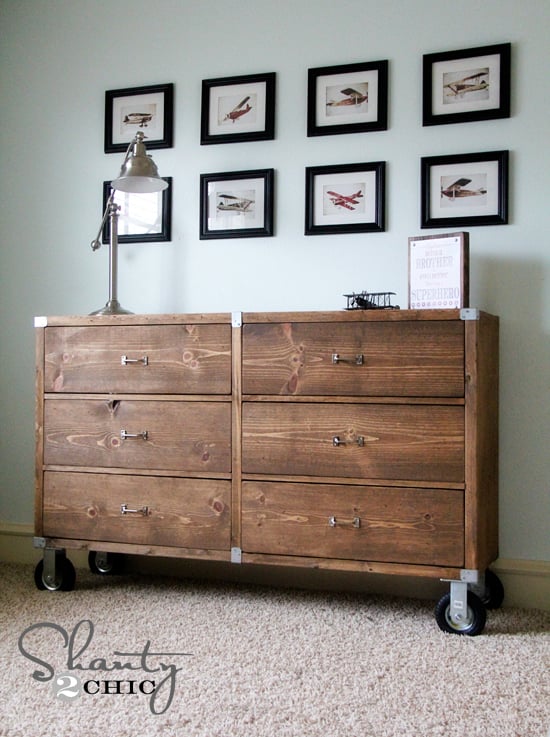
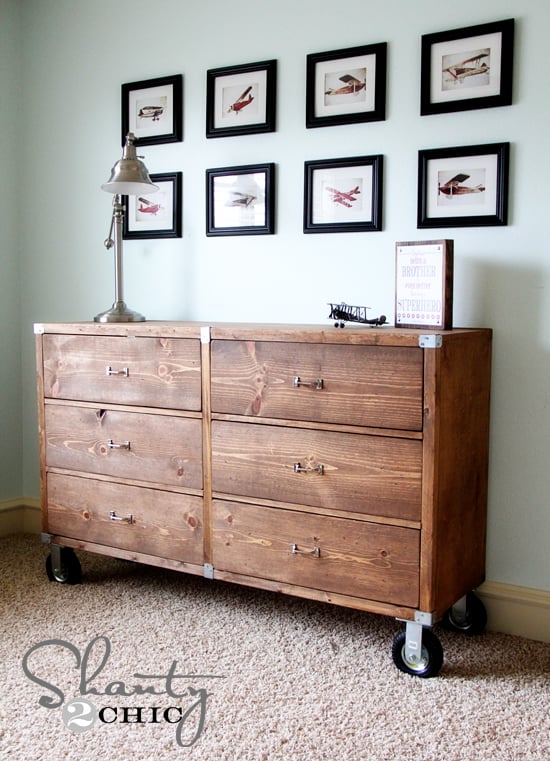
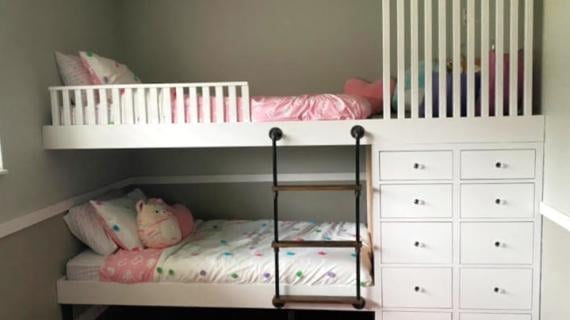
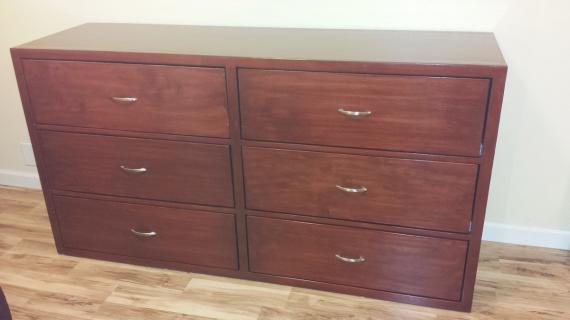
This beautiful dresser was built by Whitney from Shanty2Chic from plans we worked on together. It's also made from solid wood and PureBond Formaldehyde free plywood for a fraction of retail cost - not too shanty, eh? Here's from Whitney:
Oh how I LOVE this dresser. If my son's room wasn't empty, I would be tempted to keep it downstairs in my own room! I was intimidated by the thought of building 6 drawers at first, but I mastered my own 'shanty' way of attaching the metal drawer slides and they work perfectly! I have given a detailed tutorial on how I attached them in my post. This might be my favorite build yet. Thanks for designing this with me Ana, and for once again helping me save hundreds of dollars!!

Whitney, this might be one of my favorite dressers every too! I love the hardware you choose to accent the dresser! Beautiful and inspiring, thank you for working with me on it!
Of course, if you want lots more photos and construction details, please visit Whitney over at Shanty2Chic.
And of course we got you covered with the step by step DIY plans! Enjoy!
Pin For Later!
Preparation
- 1 - sheet 3/4” plywood ripped into strips 15 3/4” wide referred to as 1x16 boards throughout this plan
- 3 - 1x2 @ 8 feet long
- 6 - 2x2 @ 8 feet long (MUST BE VERY STRAIGHT)
- 6 - 1x8 @ 8 feet long
- 2 - 1x10 @ 8 feet long
- 1 - 1/4” plywood for drawer bottoms/back
- 6 - 16” euro style white drawer slides (bottom corner mount)
- 1 1/4” and 2 1/2” Pocket Hole screws
- 1 1/4” brad nails
- Knobs or handles
- 6” caster wheels and screws to attach
NOTE: This plan assumes your 1x10 boards are 9 1/4" wide to fit a 9 1/2" wide drawer opening. Measure the width of your 1x10s and adjust if necessary, allowing for an 1/8" gap around all sides of drawer faces.
- 2 - 1x16 @ 32 1/4”
- 6 - 1x2 @ 15 3/4”
- 1 - 1x16 @ 62 1/2”
- 4 - 2x2 @ 62 1/2”
- 6 - 2x2 @ 30”
- 4 - 2x2 15 3/4”
- 4 - 1x2 @ 29”
- 2 - 2x2 @ 41” (both ends cut at 45 degrees off square, ends NOT parallel, longest point measurement)
DRAWERS
- 12 - 1x8 @ 26 1/2”
- 12 - 1x8 @ 16”
- 6 - 1/4” plywood 28” x 16” (tip: have 1/4” plywood ripped into 16” widths at hardware store)
- 6 - 1x10 @ 28 3/4”
Back of dreser is optional


Please read through the entire plan and all comments before beginning this project. It is also advisable to review the Getting Started Section. Take all necessary precautions to build safely and smartly. Work on a clean level surface, free of imperfections or debris. Always use straight boards. Check for square after each step. Always predrill holes before attaching with screws. Use glue with finish nails for a stronger hold. Wipe excess glue off bare wood for stained projects, as dried glue will not take stain. Be safe, have fun, and ask for help if you need it. Good luck!
Instructions
Step 1

These spacers added will be where you attach the drawer slides. Attach level with 1-1/4" brad nails and glue. NOTE: You may wish to drill 3/4" pocket holes facing upward for attaching top and also 3/4" pocket holes facing forward for attaching front face frames in later steps.
Step 2

Then attach top. Either use the predrilled pocket holes from step 1 and 1-1/4" pocket hole screws or use finish nails and glue. NOTE: You may wish to drill 3/4" pocket holes facing forward and backward for attaching face frames in step 3.
Step 3

Build your face frames first, check for square, and then line up with the cabinet box and attach. You can attach with 2" brad nails AND GLUE or through pocket holes drilled in steps 1 and 2 with 1-1/4" pocket hole screws and glue.
Step 4

These guys are for your drawer slides. Attach with 1-1/2" pocket holes and 2-1/2" pocket hole screws and glue.
Step 5

Attach the 1x2 pieces carefully in place with 3/4" pocket holes and 1-1/4" pocket hole screws. Place pocket holes on underside.
Step 6
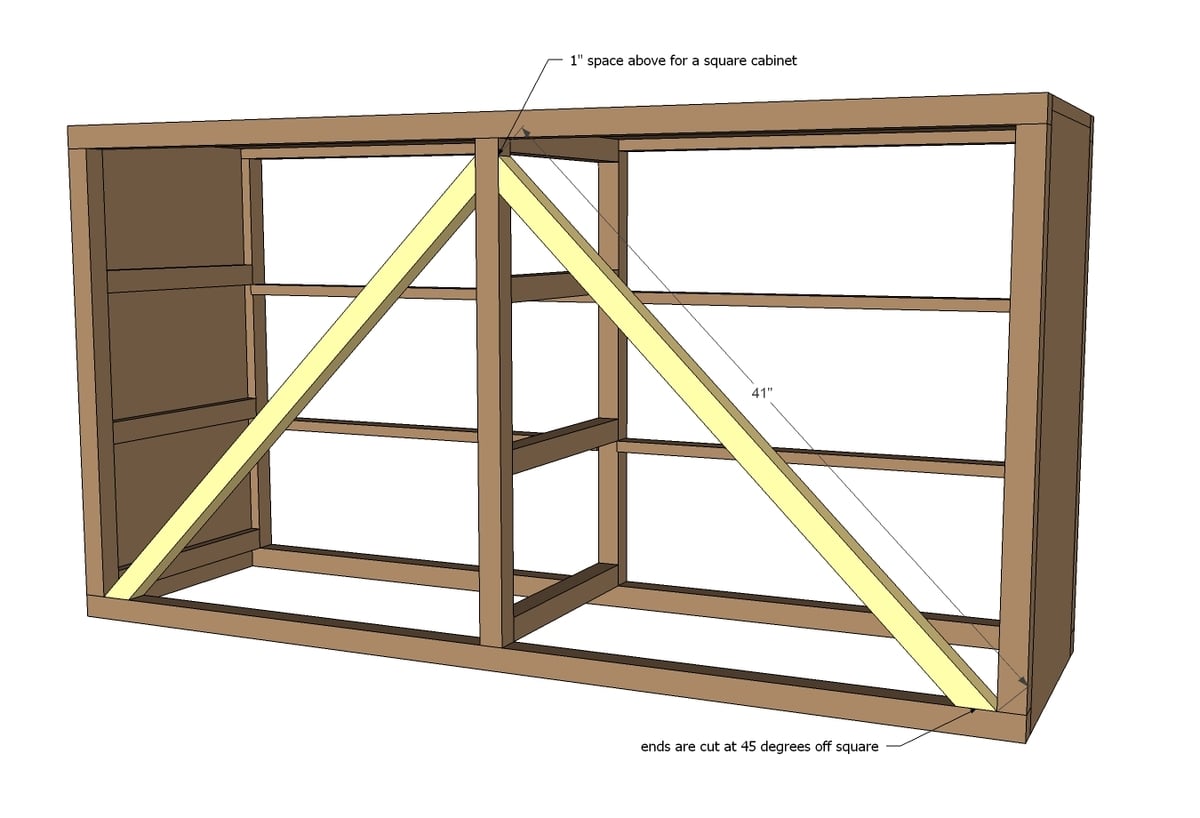
These guys are to help take the weight off the center of the dresser and distribute it, and also to keep things square. You may feel you don't need them - I'm an overbuilding kinda gal :) Another option if you find your dresser needs additional center support (hey, you never know, you may be storing gold in there!) you can add and additional 5th wheel to the center.
Step 7
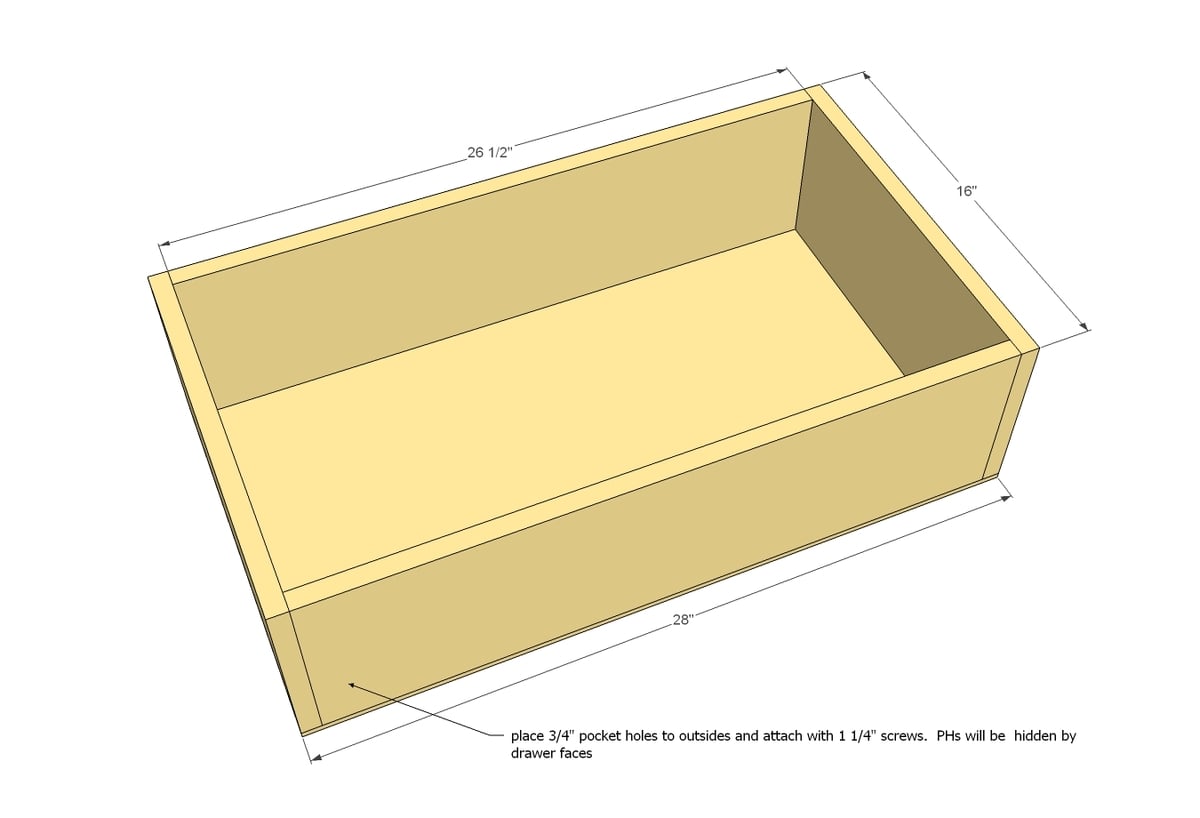
Drawer time! It's super important that your drawers are square and measure 1" less than the overall interior width of the drawer opening. NOTE that some drawer slides may vary in clearance requirements, so always read through the drawer slide instructions before building drawer boxes.
Drawer video - please watch this video for drawer installation:
Step 8

Install drawers with the metal drawer slides.
Step 9

Now the fun part! Attach faces, with even 1/8" gap around all sides. I do this by setting in place with 1/8" shims on bottom and sides and attaching with glue and a couple of 1 1/4" finish nails. Then I open the door and attach from inside with a few 1 1/4" screws to secure. NOTE: Depending on your hardware, you may wish to attach hardware first to drawer face.
Step 10

Final step is to add the wheels!
It is always recommended to apply a test coat on a hidden area or scrap piece to ensure color evenness and adhesion. Use primer or wood conditioner as needed.


Comments
Katie B (not verified)
Wed, 01/09/2013 - 14:52
Is there a price breakdown
Is there a price breakdown anywhere??
Jimbo09
Tue, 09/29/2015 - 08:36
Price Breakdown at my local lowes.
I went to lowes today to pick up enough product for building 2 of these dressers, one for me and one for my son, some extras, like the Kreg rip cut guide, and some stuff for a 2X6 bathroom door and a few other things for other projects. My total for everything was 483.68. now, I will breakdown cost for one dresser.
Shopping List:
1 - sheet 3/4” plywood ripped into strips 15 3/4” wide referred to as 1x16 boards throughout this plan
23.58
3 - 1x2 @ 8 feet long
1.12 each, total-3.36
6 - 2x2 @ 8 feet long (MUST BE VERY STRAIGHT!!!!)
1.67 each. total 10.02
6 - 1x8 @ 8 feet long
8.62 each, total 51.72
2- 1x10 @ 8 feet long
12.37 each, total 24.74
1 - 1/4” plywood for drawer bottoms/back
21.92
6 - 16” euro style white drawer slides (bottom corner mount)
5.27 each, total 31.62
1 1/4” and 2 1/2” PH screws
1 1/4” finish nails
Knobs or handles on hand.
I ommitted the wheels, knobs vary, mine were 1.68 each, total 10.08.
total cost of just materials, without knobs and wheels:
166.96 + tax so, 176.96 here in PA.
I thought this breakdown may help people get an idea in advance for this project. I budgeted $500 just for the dressers because I was unsure, no I am getting some other projects in the works as well.
Greg (not verified)
Thu, 01/10/2013 - 05:59
2x2
Where do you find 2x2 wood? I was building another dresser and could only find 2x2 in oak in a 36" piece at the orange box store.
I ended up having to rip down 2x6s but that was in pine. I would love to find somewhere that sells 2x2 in hardwoods for good furniture like this.
Dan S (not verified)
Thu, 01/17/2013 - 23:46
Home depot and Lowes sells
Home depot and Lowes sells them in their lumber dept. They are usually by the 1x2 and 1x3 if you can find those. Hope that helps
Tanja
Sun, 09/15/2013 - 06:42
Great design!
Luv this design! Wondering... with a little tweeking.. these would make great cabinets in my new 'old world, modern' kitchen! I'm traditional old world my hubby is more modern... LOL. Dresser looks great!
keltik
Fri, 07/11/2014 - 08:45
Legs instead of wheels?
I really like this, but would prefer legs instead of wheels. Looking at the design, I could make the 2x2's longer than 30", but the plywood is attached to them. I could maybe cut 4 2x2s at 3" long and then attach underneath?
Any suggestions? I'm new to this. :)
jgbreeden
Sat, 07/12/2014 - 10:20
Extend the 2x2s
Definitely extend the 2x2s. If you cut short stubs, they would have no lateral support. It should not change how the plywood attaches, you'll just need to cut the lower rails 3" shorter.
Klevine34
Tue, 10/18/2016 - 21:40
Change it up
Is it possible to make this a 6 drawer vertical dresser with some measurement tweaking? I love it, just have a narrow space.
Klevine34
Sun, 10/23/2016 - 20:32
I love this dresser but I'm
I love this dresser but I'm needing to build a vertical 6 drawer dresser for the space I have. If I would alter this plan a bit, would I still need the supports in the back?
huckleb33y
Wed, 07/14/2021 - 19:36
Where can i find the metal…
Where can i find the metal pieces that are on the corners and in the middle of the dresser for decoration and what would i look up to find them?