


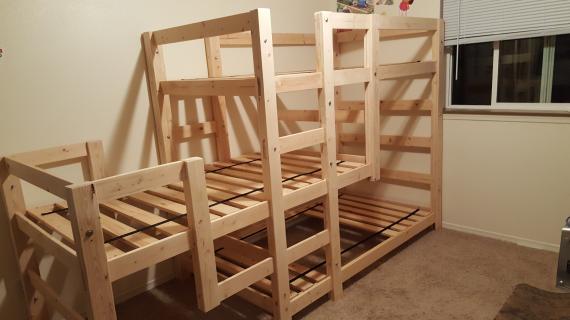
This Triple Bunk Bed, based on the Classic Bunk Beds, uses a staggered design to fit under common 8' ceilings while maintaining head room.
You can also download the original Sketchup file from the author's web site at http://doityourselffurniture.com/triple-bunk-beds/#sketchup
If you have Sketchup installed, you can open the file and pull the pieces apart, rotate around, zoom in, and even modify it for your needs.
Preparation
52 – 1×4 x 8′
5 – 2×3 x 8′
32 – 3” bolts with nuts & washers
4 – 2.5” bolts with nuts & washers
Verticals
12 – 1×4 x 70.75” Legs
4 – 1×4 x 45.25” Legs (single end)
4 – 1×4 x 43.5” Hanging end support
4 – 1×4 x 29” Hanging mid bunk step
Vertical filler
6 – 1×4 x 3.5” feet
2 – 1×4 x 29” feet (single end)
2 – 1×4 x 47.5 double end
2 – 1×4 x 22” hanging support
2 – 1×4 x 1.75” hanging bottom end
28 – 1×4 x 9.25” between steps and rails
2 – 1×4 x 12.75″ ladder top
Horizontals
6 – 1×4 x 59.5” Rails
6 – 1×4 x 21” Rails (foot section)
2 – 1×4 x 61.25” Top safety rails
4 – 1×4 x 22.75” Fourth step & mid bunk side rail
2 – 1×4 x 42” Second-mid step
18 – 1×4 x 39” End rails
Slat supports:
2 – 2×3 x 54” Lower
2 – 2×3 x 34.75” Upper
14 – 2×3 x 15.5” 8 middle, 4 upper, 2 lower
12 – 1×4 x 2.5” Supports on inner verticals
Slats:
27 – 1×4 x 40.25
4 – 1×4 x 39


See the Classic Bunk Beds plan for basic assembly descriptions.
Please read through the entire plan and all comments before beginning this project. It is also advisable to review the Getting Started Section. Take all necessary precautions to build safely and smartly. Work on a clean level surface, free of imperfections or debris. Always use straight boards. Check for square after each step. Always predrill holes before attaching with screws. Use glue with finish nails for a stronger hold. Wipe excess glue off bare wood for stained projects, as dried glue will not take stain. Be safe, have fun, and ask for help if you need it. Good luck!
Instructions
Step 1
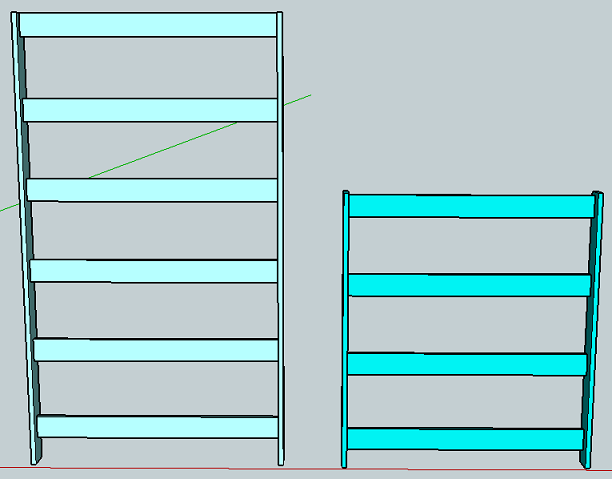
Build the end pieces. One is full height, the other is for the mid bunk end.
On the verticals, make marks, from the top down, at 12¾”, 25½”, and 38¼”, with two more on the full height vertical at 51”, and 63¾”. The last mark should be 7” from the bottom of each vertical. Those marks are the top of each horizontal rail.
With the cross rails centered on the face of the verticals, there will be 1 3/8” on either side.
Pre-drill through the verticals and attach to the cross rails using 2” screws, and glue.
Step 2

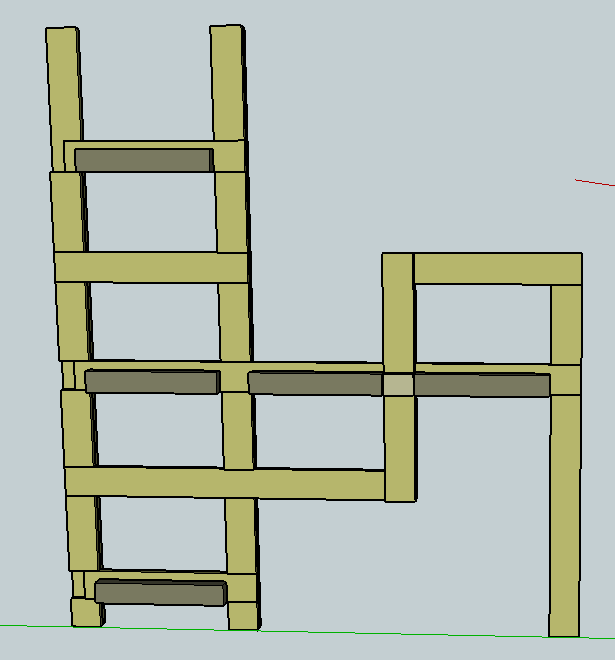
Build the 2 inner cross sections. There is one full height, and one hanging section.
Each rail is the same 12 ¾” apart like the end pieces.
These cross sections each have one rail that is installed flat, that will end up being one of the mattress supports. A 2½” piece of 1×4 should be glued and screwed into the vertical directly below the flat cross piece on each side for extra support. Attach the supports for the flat rails as shown, by aligning with the bottom of each rail. The top of the flat rail will be ¼” lower than the matching cross rail (comparing to the end pieces).
Pre-drill through the verticals and attach to the cross rails using 2” screws, and glue. Use 1¼” screws for the small support pieces under the flat rails.
The hanging cross section should have a 1” hole drilled just below the top safety rail (4½” from the top), where the bolt will go that connects the main pieces together. This is to allow the nut on the assembly bolt to be countersunk to keep it safely away from the person in the top bunk. The upper filler pieces, which are attached to the outside verticals in most places, are attached to these verticals as shown, 3½” from the top. At least 2 screws should be used near the 1” hole. The bolt will grab the surface of the filler piece when assembled, so this piece must be secured to the vertical with both screws and glue.
Step 3

Build the front and back double sections. These pieces need to be mirror images of each other.
On the full height verticals, make marks, from the top down, at 12¾”, 25½”, 38¼”, 51”, and 63¾”. That last mark should be 7” from the bottom. Those marks align to the top of each horizontal rail.
Details to note:
–the hanging vertical extends 1¾” below the mid bunk rail, allowing space for an assembly bolt.
–one full height vertical and the hanging vertical are on the outside of the rail, and the other is on the inside.
–the 3 main bed rails only cover half the width of the inside vertical.
On the inside vertical, which goes next to the ladder, a 1” hole similar to the hanging cross piece is needed, along with the filler piece being attached to the inside rail 3½” below the top, using screws and glue.
For all of the other filler pieces, 1¼” nails with glue can be used in place of screws to make assembly a little faster, since these pieces will not be subject to lateral stress. All nails and screws should go through the filler into the vertical to keep the heads hidden.
Start by laying the two outside verticals on the floor, and lay the rails on top. After attaching, flip it over to attach the inside vertical.
Step 4
Build the front and back single/ladder sections. These pieces are also mirror images of each other.
Make marks on the verticals at the same spacing as the double front/back sections.
On these pieces, all of the main verticals are on the outside of the rails. There is a second vertical on the hanging support that goes inside the rail, which should be attached last. This inside vertical can be attached with finish nails and glue rather than screws, since the screw heads would remain visible, and this piece is less structurally critical.
Step 5
Drill the bolt holes. Bolts holes should be drilled about 1” below each bed rail, plus one below the top safety rail. This will place the nuts in a safe position directly below the cross rails. That is 4 bolts each in the 3 full height verticals (2 cross sections and the ladder overlap), and 3 bolts each in the 2 short verticals.
Clamp 2 sections at a time together in their final position, and drill through both sections at once.
Step 6
Connect the slats together. Although the slats could be screwed to the slat supports after assembly, that would eliminate the ability to easily disassemble the bed. By simply be attaching the slats to each other, it will maintain spacing and still be easy to remove.
The slats for each bunk should be connected together in two groups, since the top bunks have a built-in slat in the middle. Lay a yard of cloth across 5 slats, properly spaced (about 3¼” between them) and staple to the slats. Four of the 6 groups will have a shorter piece in the middle. One will need 6 slats, all full length.
Or, as an alternative to cloth, use 2 extra 1x strips about 32” long for each half, perpendicular to the slats, and screw into the slats (these 1x’s will need to be on the bottom of the slats when in use).
It is always recommended to apply a test coat on a hidden area or scrap piece to ensure color evenness and adhesion. Use primer or wood conditioner as needed.
Comments
ncsowders
Fri, 06/28/2013 - 09:14
Awesome
I will definitely build two of these after I get done with the triple pedestial farmhouse table and benches. It's perfect for the two bedrooms my 5 girls share!
moonprysm
Mon, 04/14/2014 - 08:22
I'm almost ready to assemble
I'm almost ready to assemble this, but I'm a little overwhelmed with the assembly instructions. I feel like a lot of this plan was left to general knowledge or something that I obviously don't have. lol I spent a lot of time in sketchup turning the pieces around and around to figure out exactly what went where. But I'm excited to finally get it set up, assuming I can figure out assembly. lol
balloongal247
Mon, 04/14/2014 - 08:30
Read General Instructions, before step 1
GENERAL INSTRUCTIONS
See the Classic Bunk Beds plan for basic assembly descriptions.
moonprysm
Mon, 04/14/2014 - 13:04
I did, but this project has
I did, but this project has many more pieces than that plan, and I had difficulty extrapolating the instructions to fit this plan. I figured it out, mostly. Once all the pieces were done I stood around with several other people and we all held pieces up so we could get an idea of what we were doing before we started.
jgbreeden
Wed, 04/16/2014 - 10:31
I can answer any questions
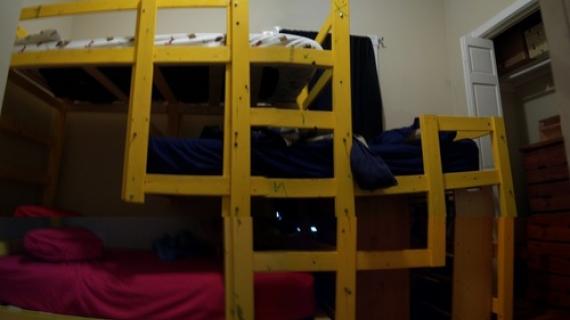
Hi, you may have guessed from the lack of real pictures that I posted this plan without having built one--I admit I was a little concerned it would be too hard to assemble. I'm guessing you would start with the double end piece and one side piece, and sort of work diagonally from there, but it sounds like you got past that. Anything left to do? I'm dying to see your brag post!
Jeff
moonprysm
Wed, 04/23/2014 - 09:05
I did get it finished last
I did get it finished last week, but I've had such a difficult time photographing it because it's quite large and my boys' room is quite small (which is why we needed it!) I love it - but I did definitely have some issues with the directions. It could've been as simple as the thickness of my wood being slightly different or something, but I'll get a brag post up with details here shortly. :)
elclaussen
Fri, 04/29/2016 - 08:48
Wobbly?
Ana I built these exactly accordingn to plan. We LOVE them. My only concern is since it's so long, it feels a little wobbly from side to side. What can this nervous mom do to shore it up a little better to have less wobble? Thank you!