


DIY your own bathroom vanity with free plans by Ana White. Farmhouse style vanity with turned legs and open bottom shelf. Use with a store bought countertop and sink or build your own. Includes full step by step diagrams with instructions.


Bathroom vanities can be expensive! The good news is you can build your own and save a ton of money - AND get exactly what you want!

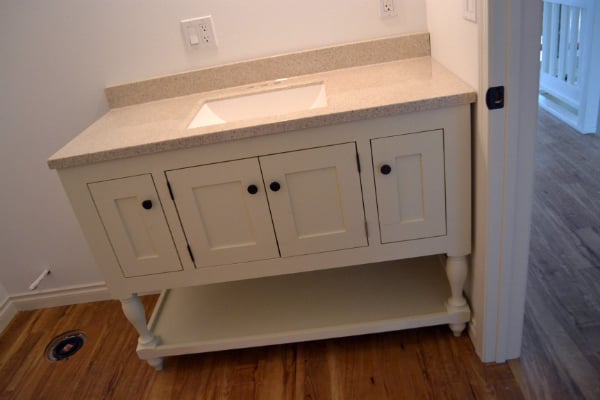
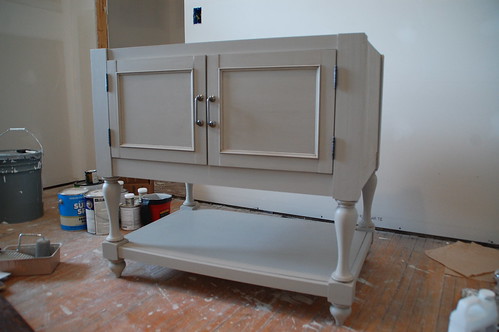
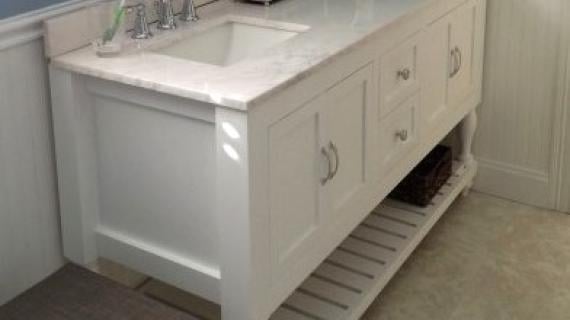
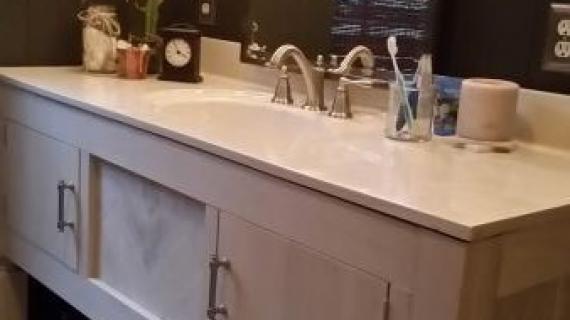
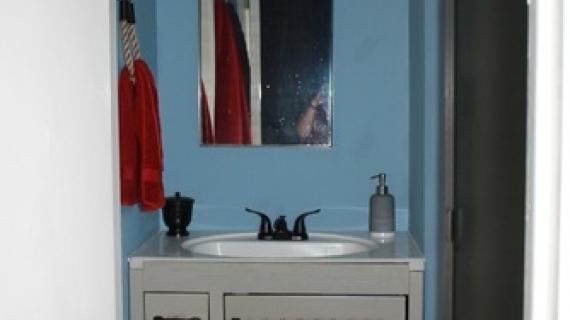
And it can look this good.
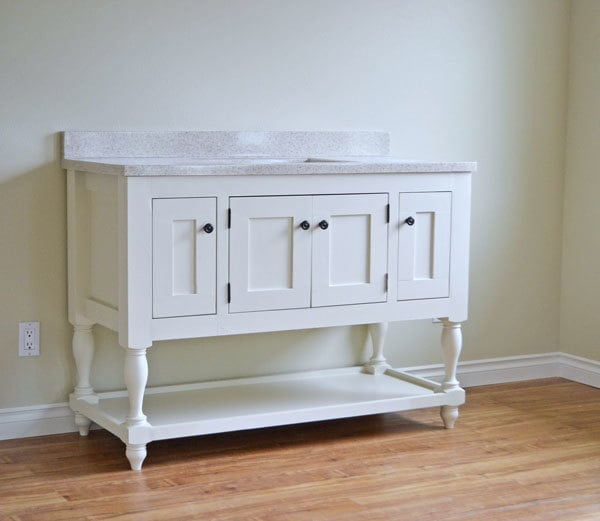
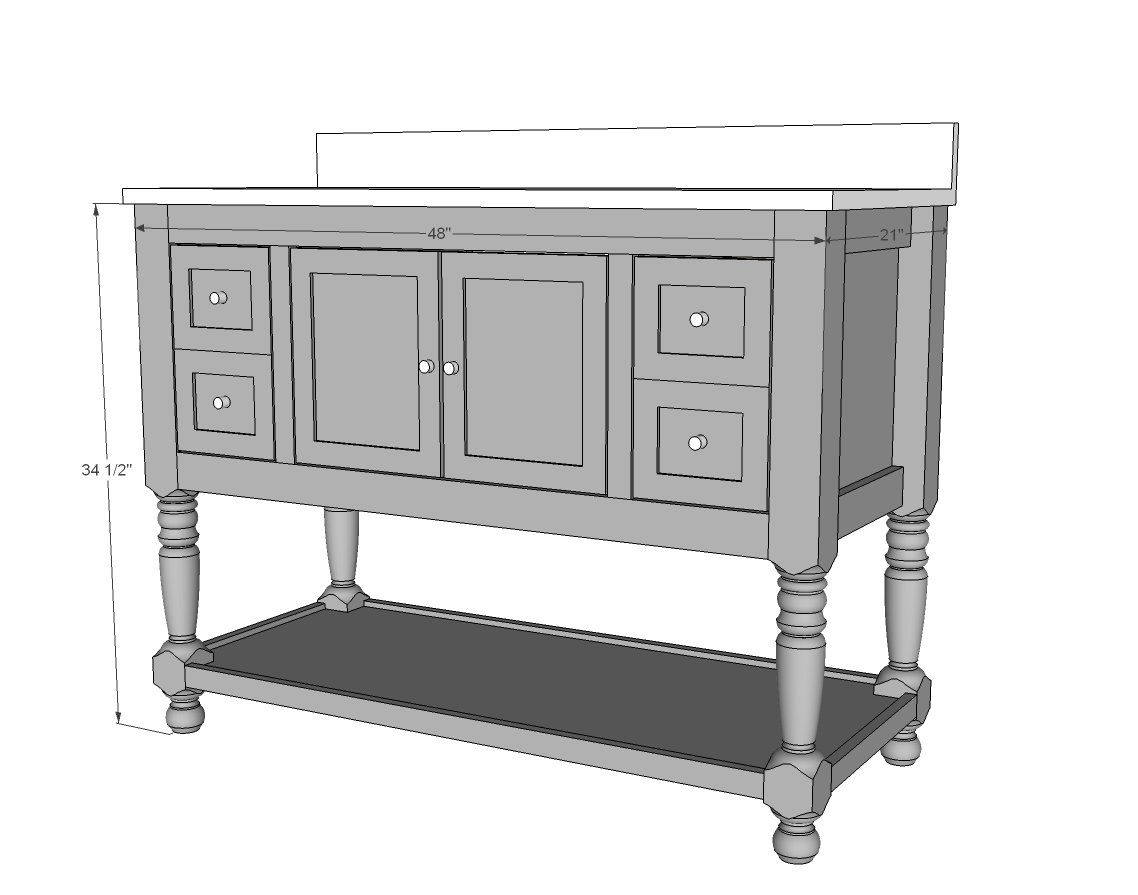
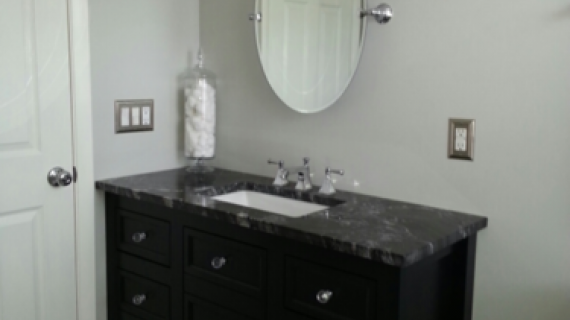
We are delighted to share the plans for this vanity with you. It's designed for a single sink, 48" wide, but I've created these plans so you can easily customize the overall length, number of sinks, and use different sized store bought turned legs.

The legs we used were provided by Osborne Wood - you can get more details on these exact legs here.
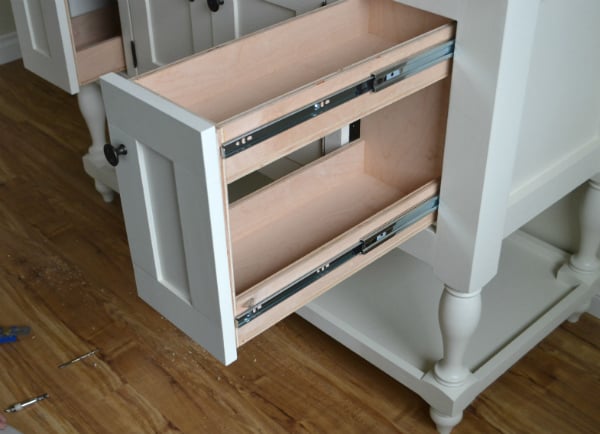
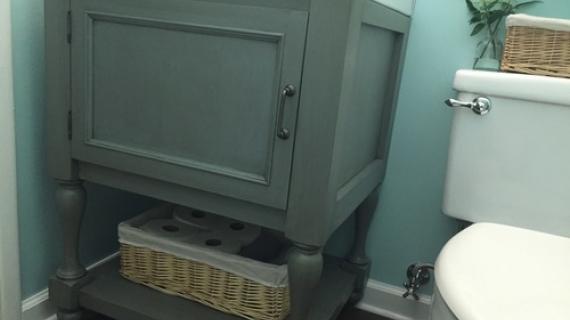
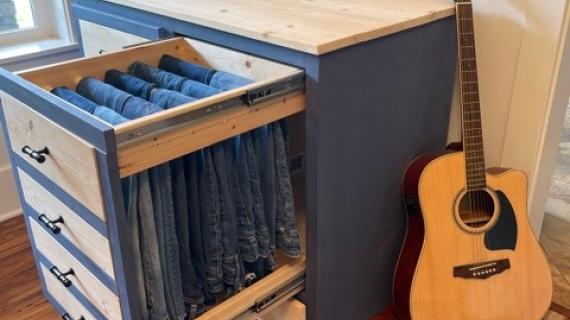
We opted for pull out drawers with trays and shelves instead of just a hard to reach shelf. You can find that tutorial here.
We also created a tutorial for making these doors here.
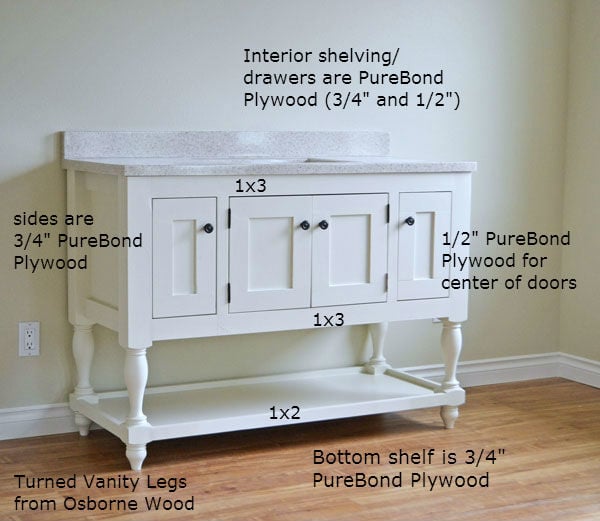
This vanity is made of solid wood and PureBond Plywood - so formaldehyde free! It's also cheaper and easier to use plywood for things like the bottom shelf, the door panels, and the side panels, than it would be to use solid wood boards.
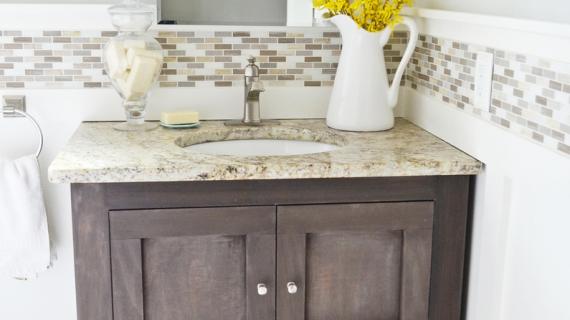
PS - I think you'll also love this smaller DIY turned leg vanity from DIY Diva!
Pin For Later!

Preparation
4 Turned Vanity Legs
1x3s
1x2s
3/4" plywood
1/2" plywood for drawer panels and pullout drawers
1 1/4" pocket hole screws
I'd love to give you just a simple cut list, but because all legs are going to vary, it's better to cut your boards to fit your legs.
Cut list is for Osborne Wood Vanity Leg 2401 - I highly recommend adjusting your cut list to match your legs and vanity top - especially if you are using a store bought vanity top.
Leg Ends
4 - Turned Vanity Legs with bottom stretcher block
4 - 1x3 @ 15"
1 - 3/4" plywood @ 19" x 15"
Front/Back Face Frames
I opted to leave the back open for easier access to plumbing, but the back could also be solid plywood.
4 - 1x3 @ 42"
4 - 1x2 @ 14"
Bottom Shelf
2 - 1x2 @ approx 15" - cut to fit distance between bottom stretcher blocks for bottom shelf (measure) mine actually matched the upper stretcher block
2 - 1x2 @ approx 42" - cut to fit distance between bottom stretcher blocks for bottom shelf (measure) mine actually matched the upper stretcher block
3/4" plywood cut to fit for bottom shelf, notched out for turned legs
Interior Shelving
See in plan


Please read through the entire plan and all comments before beginning this project. It is also advisable to review the Getting Started Section. Take all necessary precautions to build safely and smartly. Work on a clean level surface, free of imperfections or debris. Always use straight boards. Check for square after each step. Always predrill holes before attaching with screws. Use glue with finish nails for a stronger hold. Wipe excess glue off bare wood for stained projects, as dried glue will not take stain. Be safe, have fun, and ask for help if you need it. Good luck!
Instructions
Step 1
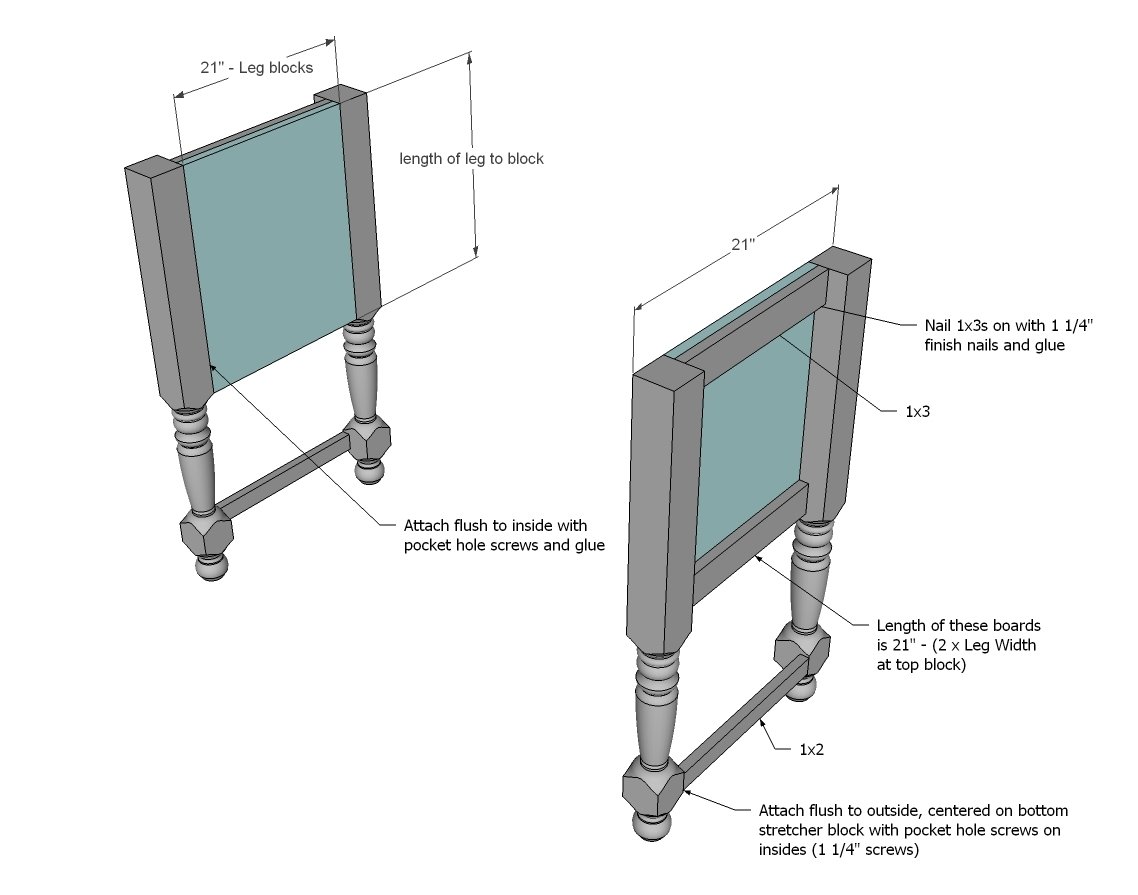
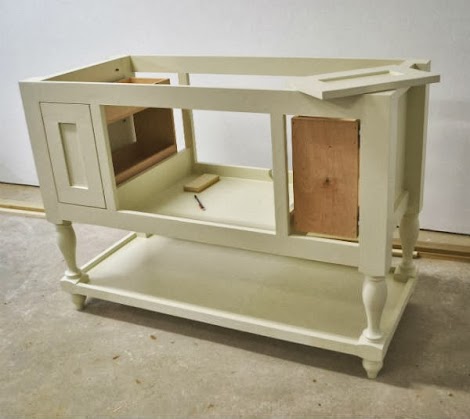
We built the two leg sets flush to the insides because one side is against the wall and the other side will hold the toilet paper hardware. This also makes it easier to mount drawer slides later on. We even considered adding a built in magazine rack.
We used 3/4" pocket holes and 1 1/4" pocket hole screws to put everything together.
Step 2

Then we built two identical face frames for the front and back using again 3/4" pocket holes and 1 1/4" pocket hole screws. The face frames were then attached to the two leg sets.
For a longer vanity, you may wish to use 3/4" plywood instead on the back to beef it up - or if you are putting a heavy vanity top on.
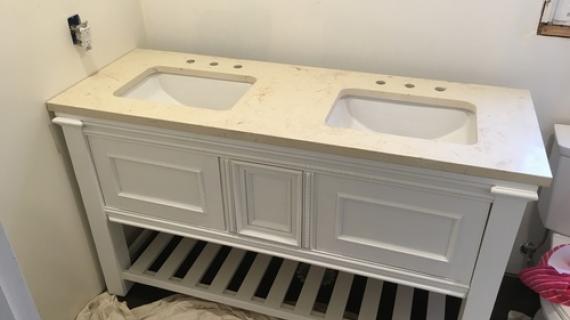
IMPORTANT: Depending on your sink size and location, build these face frames to suit. I highly recommend for store bought vanity tops and sinks to purchase first, measure and leave plenty of space for the sink. We errored on the safe side and left the standard 24" opening for the sink in the center (25 1/2" to the outsides of the face framing to allow for shelf sides of 3/4" thickness each).
Step 3
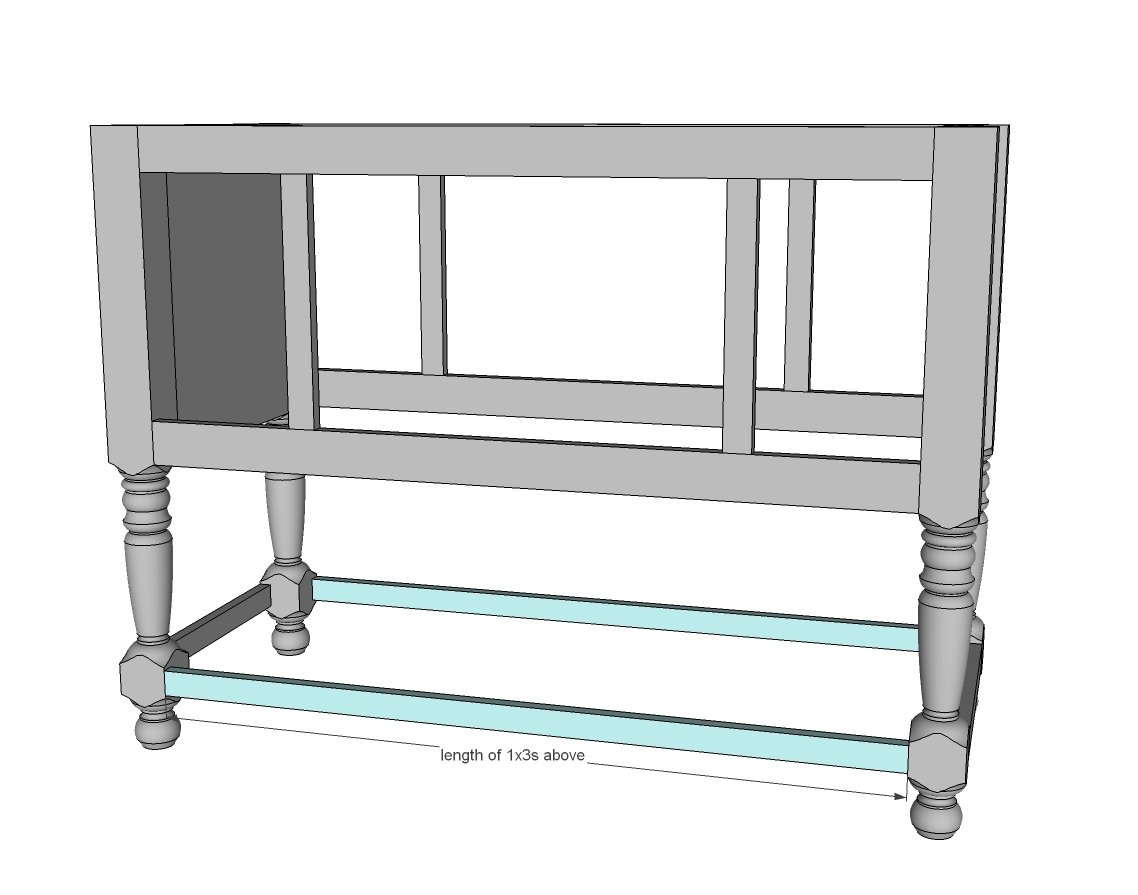
Then we finished the trim for the bottom shelf. Our bottom shelf stretcher blocks matched the top, so we were able to just use the same length boards as the top face framing.
We kept these guys flush to the outside just to maximize storage space underneath, but this ended up forcing us to have to place the pocket holes to the outside (turned legs kept splitting when attached to inside because there just wasn't enough wood to bite into). No biggie for us because we are painting, but for a stained finish, you may wish to inset the bottom trim a little to prevent this issue.
Step 4
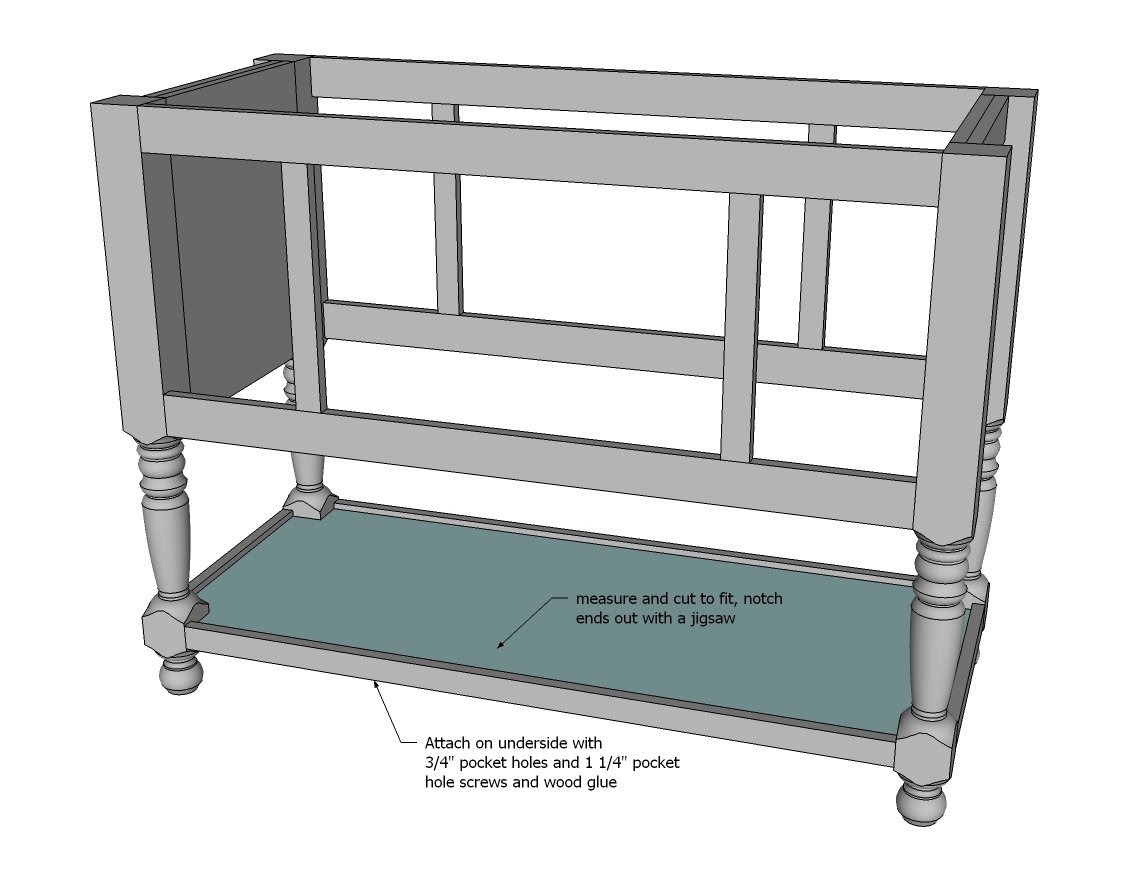
We cut the plywood to fit in a rectangle, then used a jigsaw to notch out the legs. Then we drilled 3/4" pocket holes around the underside of the shelf and attached with 1 1/4" pocket hole screws to shelf trim.
For heavier loads/longer spans an easy trick to beef up the center of the shelf is to attach hidden center "legs" under the bottom shelf.
Step 5

Step 6
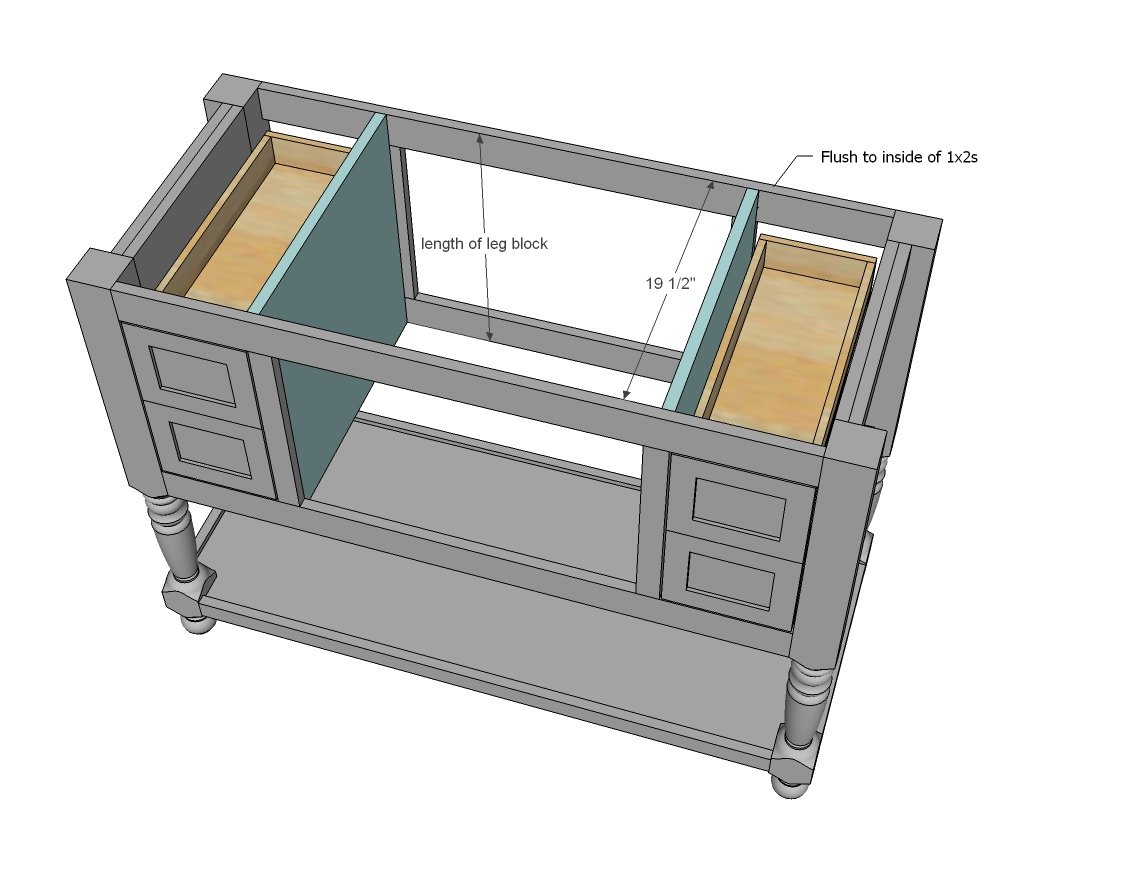
The partitions keep contents seperated and also support the end of the center shelf. We ended up not going all the way to the top with ours just because we opted for the pull out drawers and didn't feel it was necessary. We used 3/4" plywood scraps but could have used a 1x3 or 1x4.
This also gave use better access to installing the pullout drawer slides later on.
Again, just attached with 3/4" pocket holes and 1 1/4" pocket hole screws.
Step 7
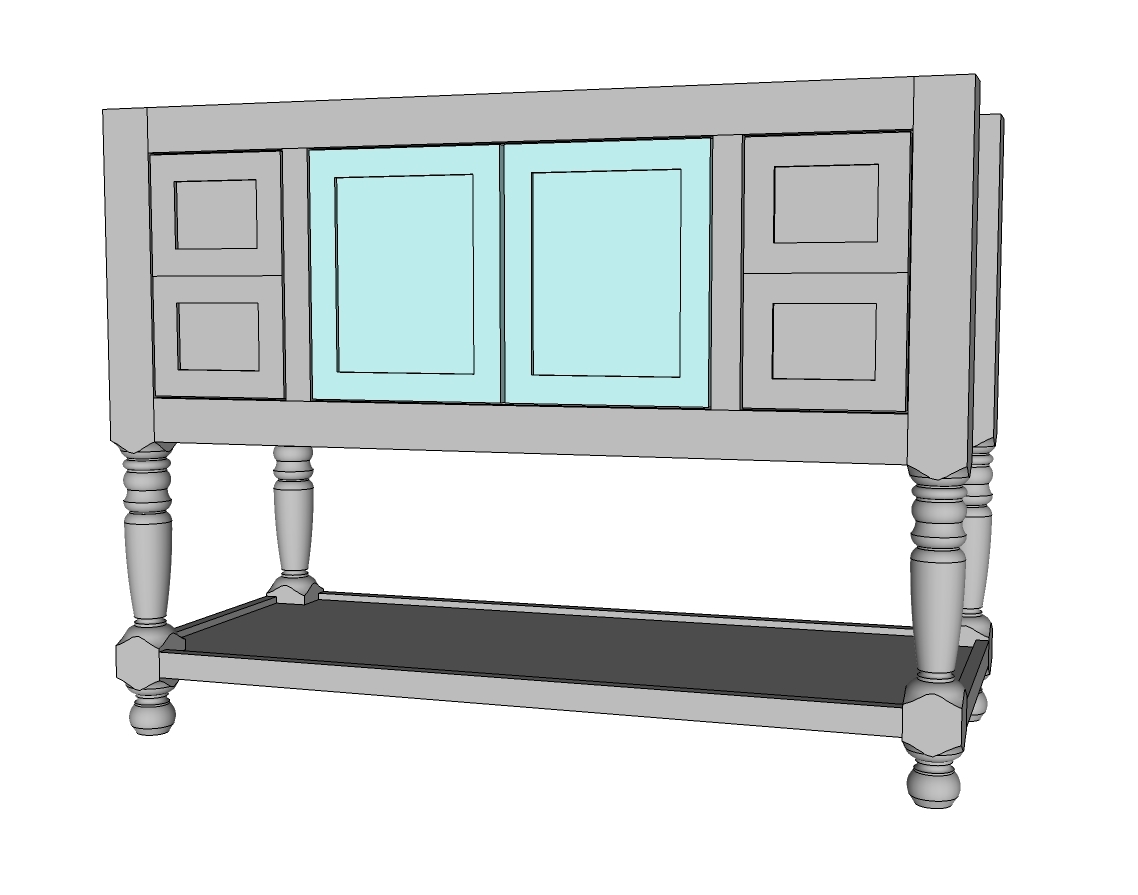
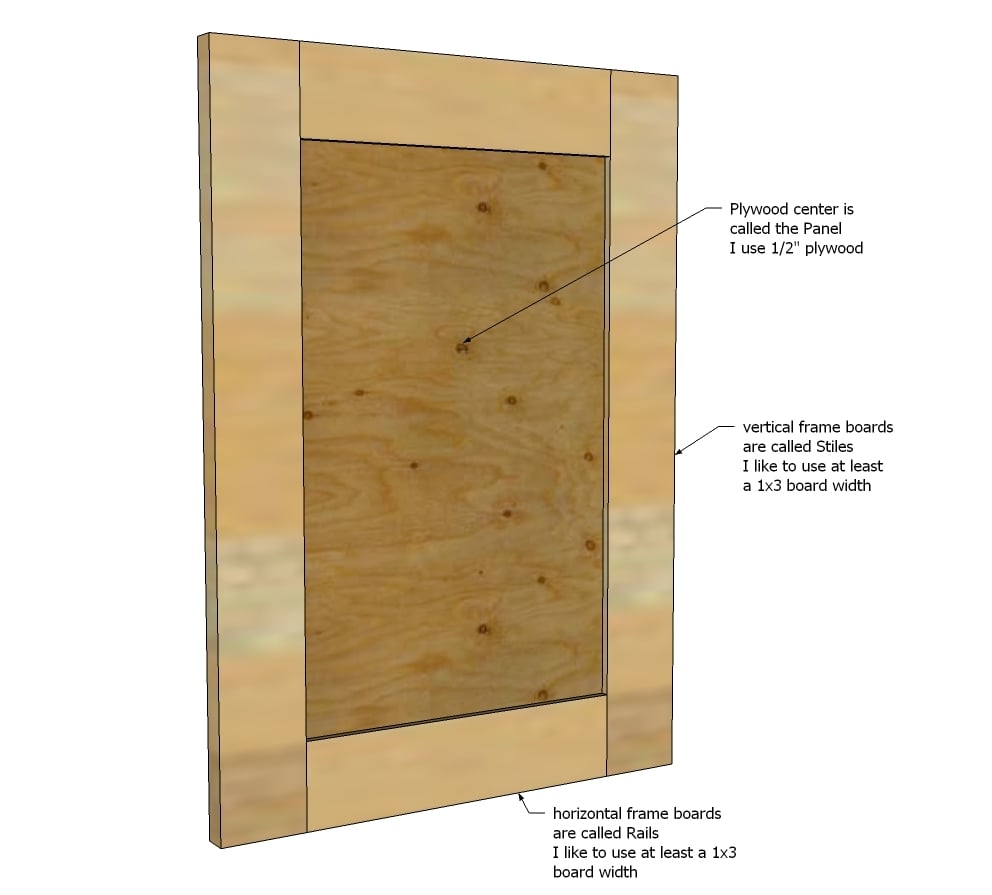
For the doors, we used 1/2" plywood pocket holes to frames made of 1x3s. We measured the openings and built the doors to leave an 1/8" gap around all sides. I will do a full tutorial on how to build these drawers shortly.
Step 8

We opted for a low maintenance all in one sink/vanity top made of a solid surface material. As much as we'd have loved to DIY a tile topped vanity, I bet on this solid surface one with seamless sink to last longer and be easier to clean for Mom. Crazy how the top cost more than the vanity itself!
When we do the plumbing (hopefully soon!) I'll share how we attach the top.
It is always recommended to apply a test coat on a hidden area or scrap piece to ensure color evenness and adhesion. Use primer or wood conditioner as needed.

Comments
tracysmith
Tue, 09/10/2013 - 12:08
Wow! That looks amazing!
Wow! That looks amazing! Makes me want to redo the vanities in my house!!!
JoanneS
Tue, 09/10/2013 - 14:59
Spectacular!
Oh.My.Goodness! This is fabulous! All the details and styling are just beautiful, I love it!
lscrandall
Tue, 09/10/2013 - 15:30
Vanity
That is beautiful! Wow, can this be done to a double vanity by adding drawers in the center? I love the clean elegant look - great job!
casamaia
Tue, 09/15/2015 - 07:39
Hi, Did you get a response
Hi, Did you get a response regarding the double vanity?
aclosetalker
Sat, 02/15/2014 - 14:25
hardware for vanity
Could you share what kind of hinges you used to attach the doors to this project? I've never attached a cabinet door before so I am completely clueless as to what types of hinges work for which doors! Thank you so much!
casamaia
Tue, 09/15/2015 - 07:38
width
Hi, I was wondering if this design would hold an 80" instead 48"? Would it need an extra support. I have a 30" window and wanted to build a 24" sink on each side of the window. then i would have a 30" space in the middle, so i thought this design would be good for it. Place a sink at each end. Spaced out 30" in the middle?
B
Shuzog
Sun, 10/25/2015 - 10:52
Length conversion ?
Can you share how the plan would need to be modified for a 60ish" double vanity? (For a not-yet-too-diy-savvy builder!) Thanks so much!
tarakimmel
Mon, 04/20/2020 - 10:17
Average cost on this plan?
Average cost on this plan?