

21" wall kitchen cabinet plans from ana-white.com


So I have a just terrible confession to make ...
When we got to the wall cabinets for the Momplex Vanilla Kitchen, I got so busy with the building part .... that I neglected the photographing part. I am so so so sorry ... they just were so easy to make and went so fast, before we knew it, they were all done! And not a single building photo to share with you.
It's a good thing we have another kitchen to build on the other side, and I promise, I'll take some construction photos.
So we are cool? I'm forgiven?
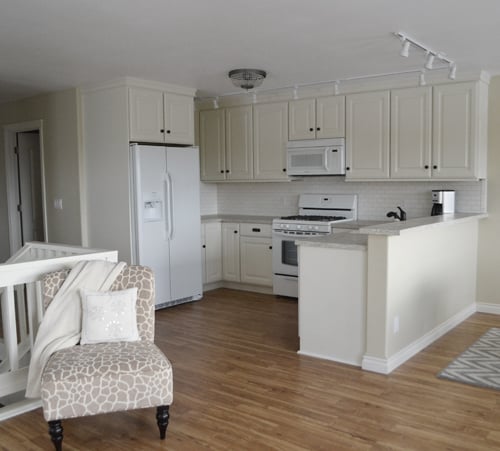
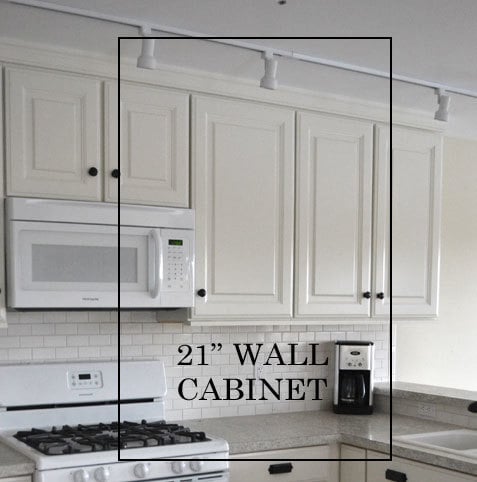
We kept things simple for the Momplex Vanilla Kitchen wall cabinets. The wall cabinets are two 36" double door cabinets, an above the range cabinet and the two 21" wide wall cabinets (plans for these guys follow).
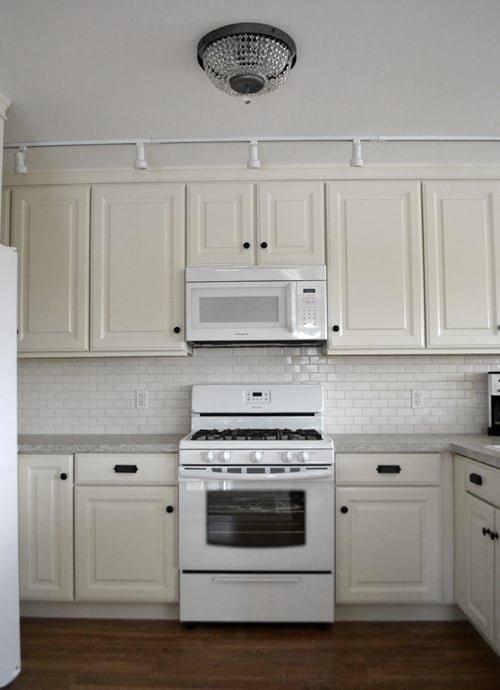
We ordered the doors from Cabinet Now, but other than that, these wall cabinets are just a simple box with a face frame, screwed to the wall. You will be shocked at how easy wall cabinets are to build!

Plans for the 21" wall cabinet follow - check them out!
Hope you and yours have a wonderful Holiday!
XO The Whites

Preparation
8 feet of 1x2s for face frame
3/4" plywood ripped into strips 10-1/4" wide
1x4 or plywood scrap for the back support
1/4" plywood for back
1-1/4" pocket hole screws
3/4" finish nails for attaching back
edge banding for finishing shelf fronts
shelf pins for adding shelves
DOOR and 1-1/4" concealed hinges for FACE FRAMES
2 - 3/4" plywood @ 10-1/4" x 30" (Sides)
2 - 3/4" plywood @ 10-1/4" x 19" (Top/Bottom)
1 - 3/4" plwyood OR 1x4 @ 19" (Back Top Support)
1 - 1/4" plywood @ 30" x 20-1/2" (Back)
2 - 1x2 @ 30" (Face Frame)
2 - 1x2 @ 18" (Face Frame(
Shelves should be cut to fit depending on attaching and if you use edge banding
FULL OVERLAY DOOR SIZE 20-1/2" x 29"


Please read through the entire plan and all comments before beginning this project. It is also advisable to review the Getting Started Section. Take all necessary precautions to build safely and smartly. Work on a clean level surface, free of imperfections or debris. Always use straight boards. Check for square after each step. Always predrill holes before attaching with screws. Use glue with finish nails for a stronger hold. Wipe excess glue off bare wood for stained projects, as dried glue will not take stain. Be safe, have fun, and ask for help if you need it. Good luck!
Instructions
Step 1

First, make up your sides by drilling shelf pin holes on the insides for adjustable shelves (I use a Kreg Shelf Pin Jig) - it's much easier to do this now than after assembly - and drill 3/4" pocket holes facing the front for attaching face frames in later steps (I use a Kreg Jig for drilling pocket holes).
For taller shelves, you would simply just cut the sides taller. For deeper shelves, you would simply adjust your plywood rip width.
Step 2

Next attach the two sides together with the top and bottom.
NOTE: Also drill 3/4" pocket holes facing forward for attaching face frames on top and bottom.
Step 3

The back support is very important because you will use it to hang the wall cabinets on the wall. We used prefinished plywood for the plywood, and simply used the scrap leftover for the back support (it ended up being about 3" wide). A 1x4 would also do the trick but just don't forget, you will be able to see this board when the cabinet is open.
TIP: For especially wide cabinets or cabinets with expected heavy loads, a second bottom support is recommended for additional attachment to studs in walls.
Step 4

The back is attached with glue and 3/4" finish nails to all fixed shelves, sides, top and bottom, and back support.
Step 5

Step 6

We cut all of our shelves 1/4" less in width and depth than the top and bottom to allow for shelf pins and adding edge banding.
You can see how we added edge banding here.
Step 7

For the doors, we opted for full overlays with concealed face frame hinges. The end goal of the cabinets with full overlay doors is a 1/2" reveal of the face frames when done. So this means 1/2" gap to bottom and top and 1/4" side to side (since a neighboring cabinet will also have a 1/4" gap).
I'll be sharing a post soon on how we hung the cabinets - so stay tuned for that!
It is always recommended to apply a test coat on a hidden area or scrap piece to ensure color evenness and adhesion. Use primer or wood conditioner as needed.


Comments
sharshar1960
Tue, 12/24/2013 - 12:15
Cabinet Door Material
I am so inspired to build my own cabinets for a much needed kitchen remodel! Can you share what kind of wood you chose for the doors you ordered and how happy you are with the results?
In reply to Cabinet Door Material by sharshar1960
Ana White
Tue, 12/24/2013 - 12:38
Hi and thank you! Of course
Hi and thank you!
Of course - we choose a paint grade mixed hardwood frame (less expensive because they use scraps up) with an MDF raised panel - the doors were very reasonable - about $700 for the entire kitchen - for raised panel high quality doors. I'll be putting a post out on the doors in the next bit.
Happy Holidays!
Ana
jvos
Thu, 07/16/2015 - 08:00
Cabinet measurements
I am making this cabinet to add to my existing cabinets so I wanted to make sure the measurements matched. You indicate the depth on this cabinet is 12" but when I look at the various components, it doesn't add up. The box is 10.25" plus the 1/4" back plus the 3/4" face frame equals 11 1/4". Should I add 3/4" to the box to make it 12"?
Thank you for all the time you put into these plans for us!
walter.lastinger
Thu, 07/16/2015 - 11:47
the door of the cabinet
the door of the cabinet accounts for the other 3/4" for a total of 12 inches deep.
In reply to the door of the cabinet by walter.lastinger
jvos
Thu, 07/16/2015 - 13:21
existing cabinets
Well my existing cabinets are 12" deep without the door so I think my plan to add 3/4" to the box is going to make them match.
Vazquez19u4
Tue, 07/28/2015 - 09:55
wood and size
Hi ya. Just curious. I was looking at another post for a base drawer you did. are the upper and base all out of 3/4 thick plywood or are they different for upper and lower? Also on the upper cabinets did you paint the bottom of the cabinets? i know you did not paint the inside but what about the bottom of the uppers? thank you. I love these. I am looking forward to tackling this kind of project.
Thomas001
Thu, 03/23/2017 - 12:40
wall cabinets
Hello, I do appreciate your work however, the measurments you provided for the cut list for the walls cabinets make these cabinets almost uslless. The depth should be 12 " then the face frame, and the door. Accroding to your cut list the 10 1/4 becomes 9.5 " on the bottom ( after the nailing strip ) and then yoiu need to subtract another 1/2 inch if you were going to rout a grove for the backing board. Great for storing glasses but not much else.