Hi everyone!
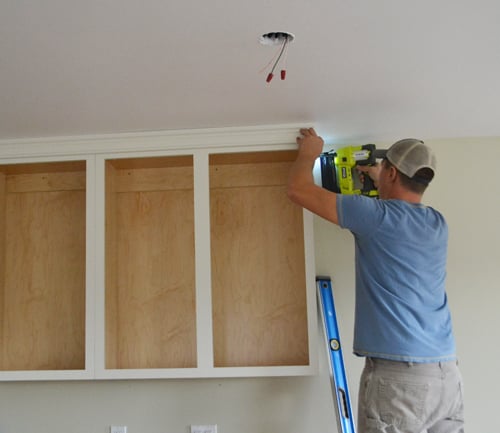
I'm really excited today to share with you how we installed crown moulding on top of the wall kitchen cabinets - finishing out the seam between the top of the cabinets and the ceiling.
But before we get to that - don't forget - today's the day!
The Home Depot Do-It Herself Workshop - featuring a storage trunk plan designed by me (it super simple so very beginner friendly) is happening tonight!!!

You can register here to attend your local Do-It-Herself Workshop at your local Home Depot! Have fun tonight! And please - if you instagram or tweet - use hashtag #DIHWORKSHOP so we can all see your pictures!!!
Now for that crown moulding ...

One thing to note is we did modify the height of our kitchen cabinets to fill the space between the 54" standard bottom height and our ceiling height, and also leave room for the crown moulding we used.

Originally, we planned on just nailing the crown moulding to the top of the face frame, but this gives us just 3/4" to support nailing the crown to the face frame. It probably would have been fine, but we worried the crown (which in our case does not get attached to the ceiling as well) would eventually fall forward and the corner mitered joints would start to open up.
So we decided to build up the top of the cabinet with 2x2 scrap boards. This will give us more to nail into, and better support the crown.

We just cut the 2x2s about an inch or so shorter than the overall cabinet width, and predrilled holes in the top,

And then drove 2-1/2" cabinet screws through the 2x2s into the tops of the cabinets.

Here's the above the fridge cabinet with the extra support on top.
For the moulding, we used header moulding (the same as our doors and windows)
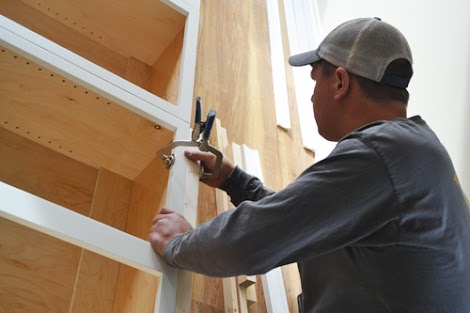
For mitered corners, we took pieces just a little long and held them in place and marked the short point of the miter,

Doing this on both sides, and then cutting the miter cuts at 45 degree bevels, and nailing those two side pieces up.

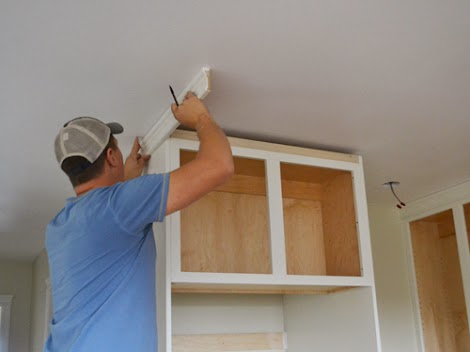
Then we took a measurement of the front, cut it a little long, fit it, shaved a tiny bit off, fit it again, and repeated until the front was just right,

And then we nailed the front crown on.
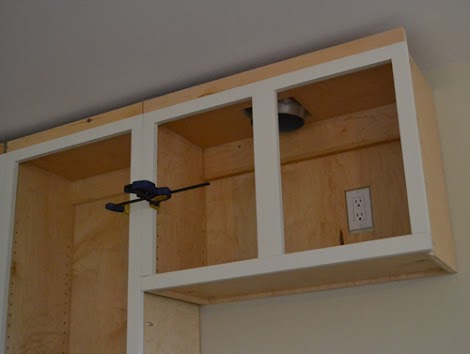
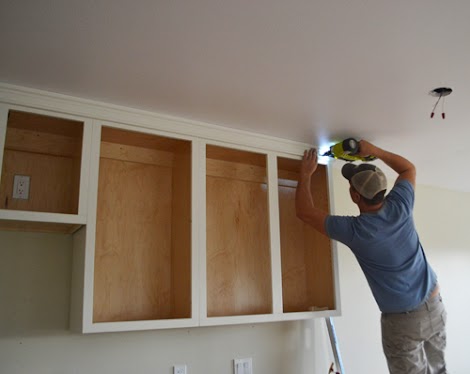
The main wall cabinets have the blocking on top too,

But the span is greater than the length of our moulding, so we start with a piece about 4 feet long (leaving a little less than 8 feet), cutting the end at a 45 degree bevel.

And then we nailed that piece up.

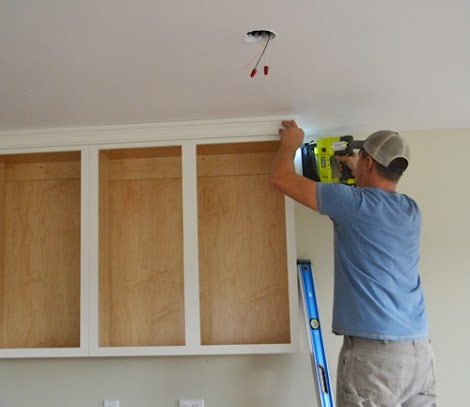
By placing the smaller piece in the corner, and beveling away from the line of sight, this joint will be hard to pick out when the kitchen is fully finished (and it is).
Next up, the longer piece is nailed in place,
And then we added the final end piece to the wall cabinets, nailing it in place.
Of course, we went back and filled nail holes with wood filler, did touch up painting, siliconed the joints .... a lot of little things to get to here:
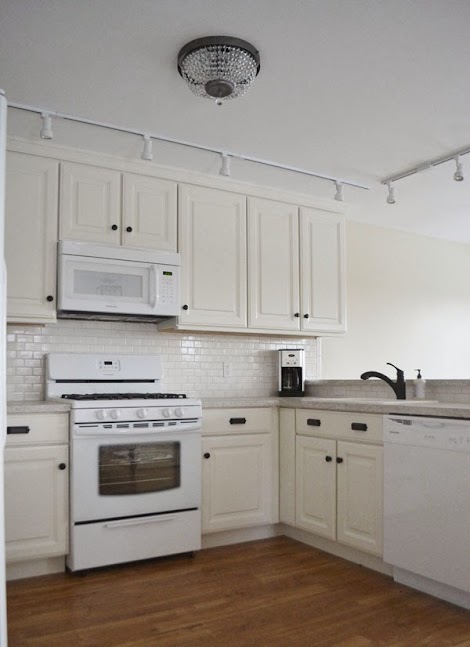
Doesn't the added crown really help finish things out? And no more wondering how much grease and dust is collecting on top of the cabinets for this kitchen!
Next up, we'll get to the countertops, backsplash and the little finishing details to polish up a DIY kitchen!
Thanks for reading!
XO Ana + Family
Comments
jmphifer
Tue, 06/24/2014 - 04:51
Shaving the length