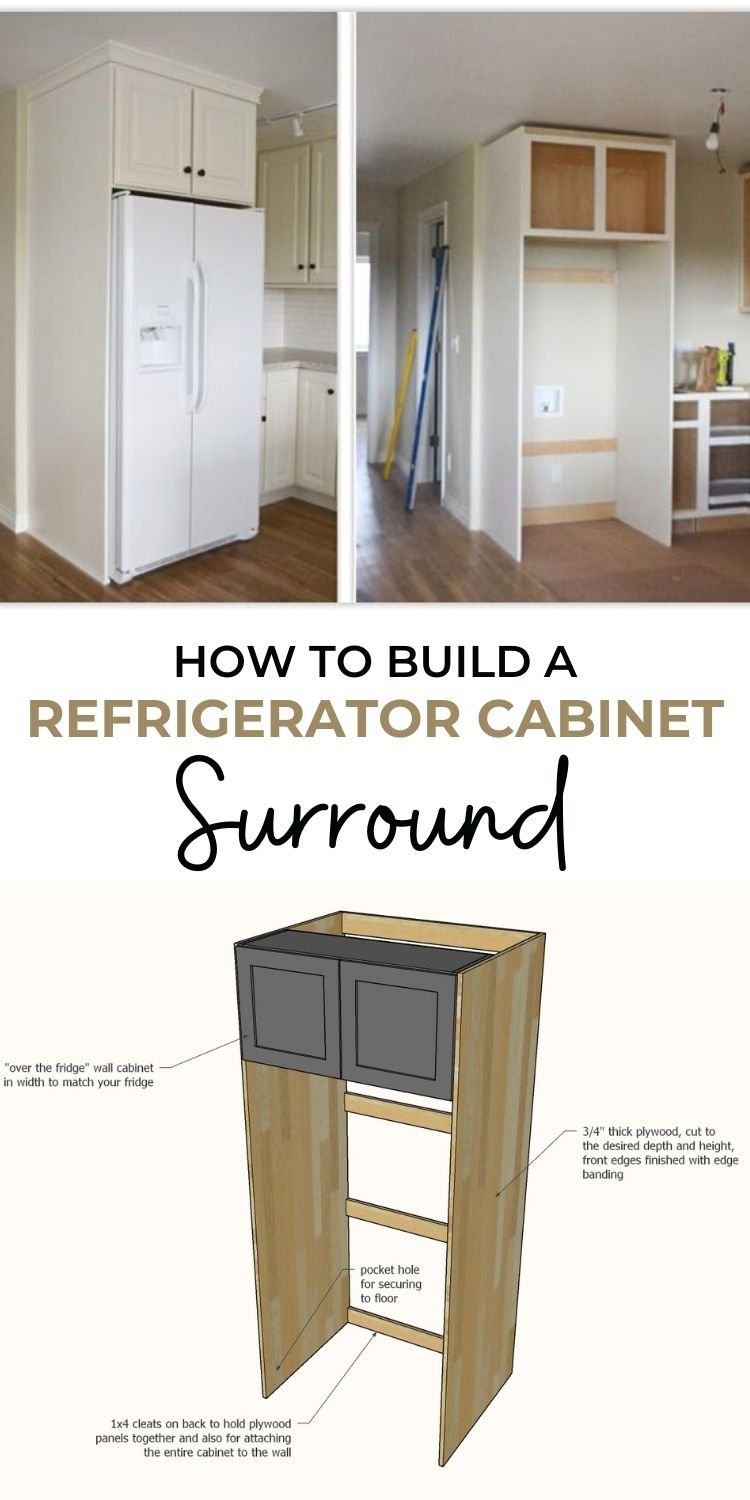
Fridge cabinets can make a kitchen look custom and finished. They are also great options for ending cabinetry and creating a balanced kitchen cabinetry layout.
The good news is you can build your own fridge cabinet without spending a ton of time or money. We do it all the time.
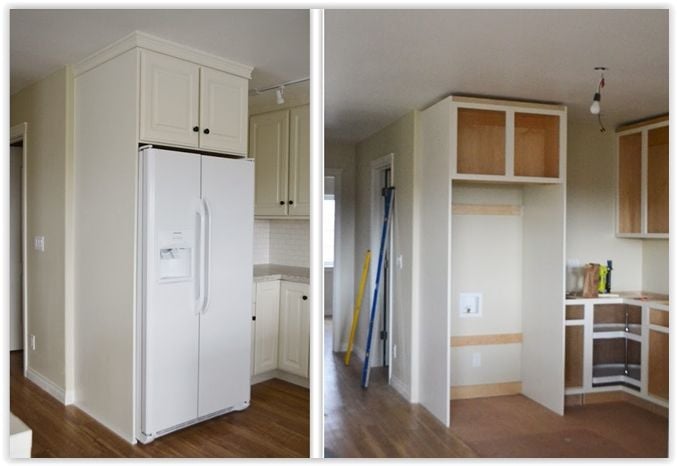
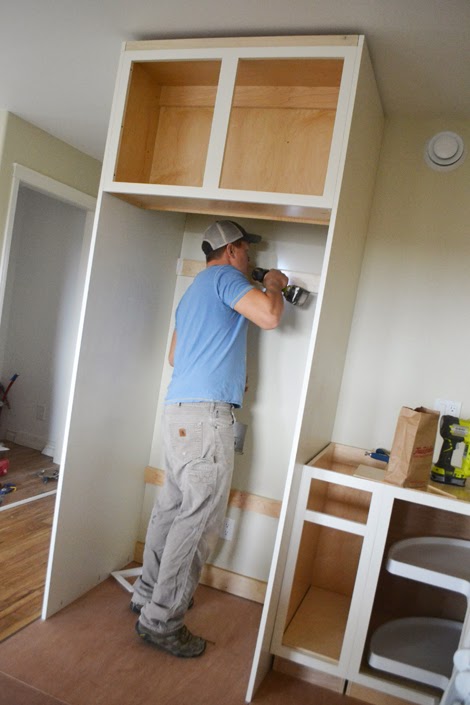
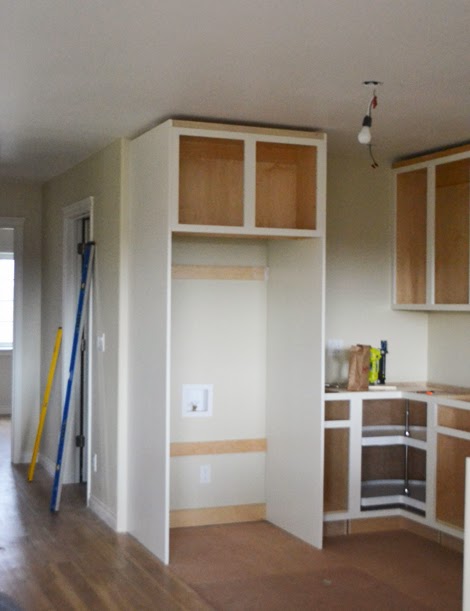
Here's one of the cabinets we've made:
Let's demystify this -
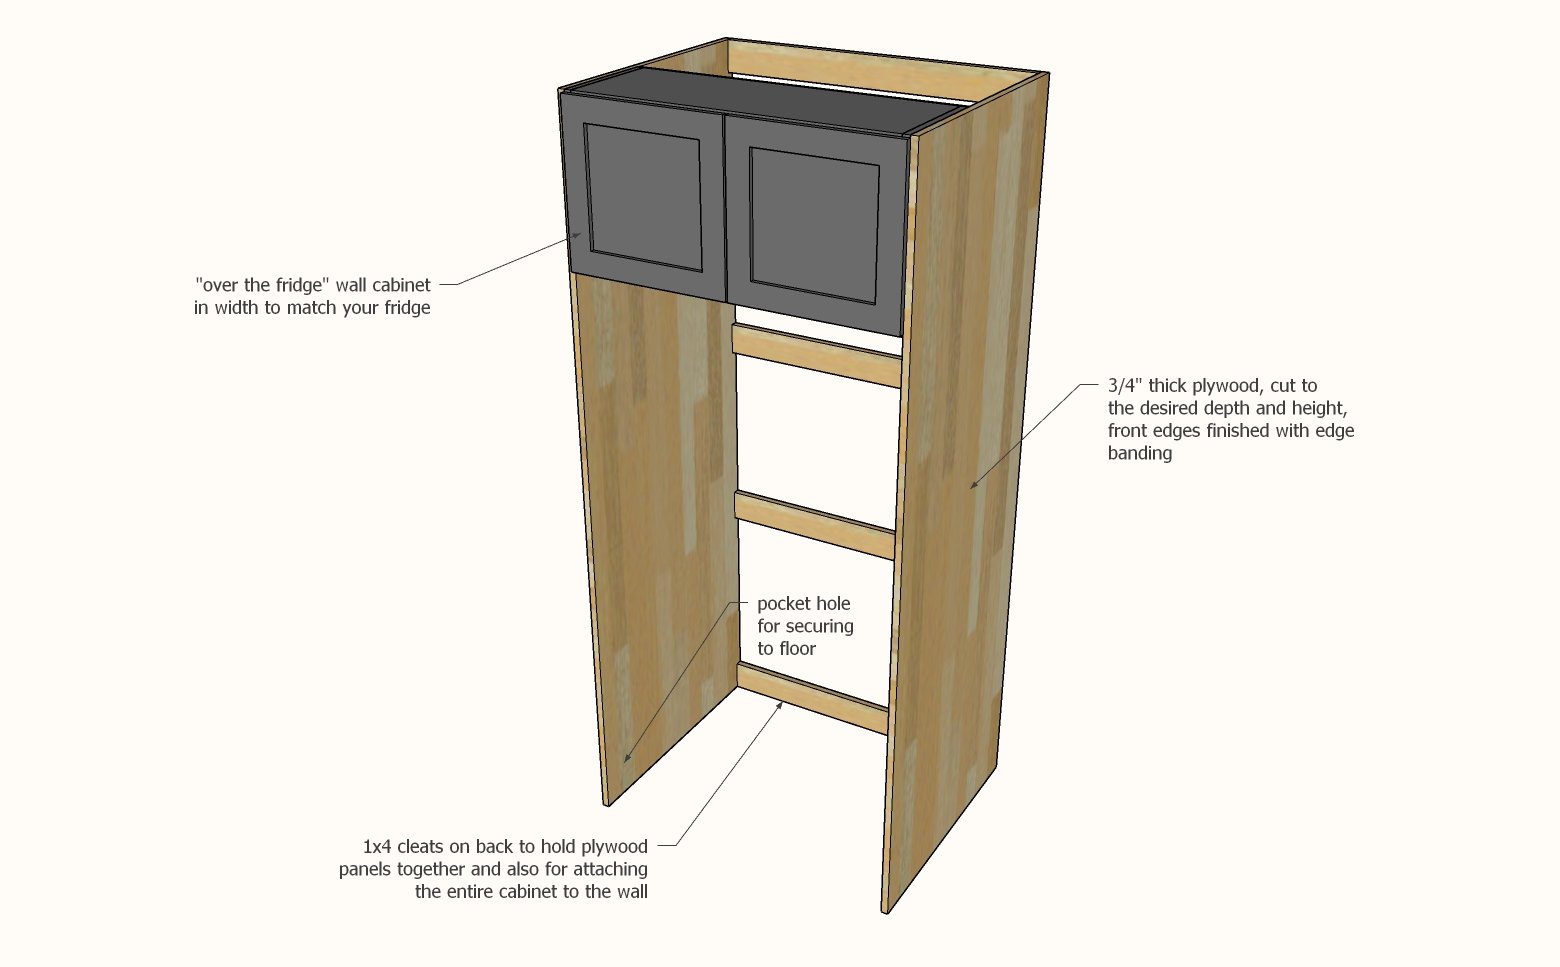
It's two pieces of cabinet-grade plywood, held together on the back with some 1x4s, with an "over the fridge" cabinet at the top front.
How to Build a Refrigerator Cabinet Surround
Here's the basic steps we take to build our own refrigerator cabinet surrounds.
How Big Are the Plywood Panels?
Height: The standard heights for the panels are 84" (matches wall cabinet heights), 90" (for a little taller) and 96" for a full height to ceiling. You'll need to do some figuring to get it right - consider the height of your refrigerator, the height of your "over the fridge" wall cabinet, and also the height of your ceiling, you don't want the panel too tall so it damages the ceiling. For this cabinet that extends to the ceiling, I went with 95". The gap then gets covered with crown moulding later.
Depth: We measured the fridge to the doors, so the doors could still freely swing open, and added 1" to allow for the back cleats that we add to attach to the wall. I went with a 30" depth.
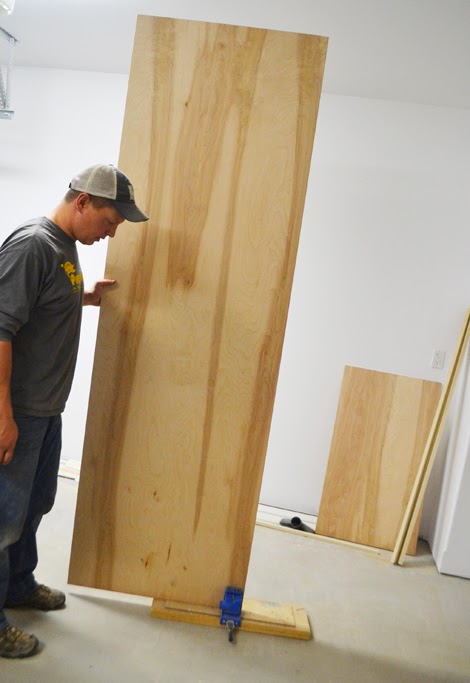
Plywood Panel Prep
Cut the plwyood panels using a tablesaw or track saw. It is important to get a straight, clean cut.
Inspect the plywood and determine what side is the front, and what sides are exposed on the outsides (best sides). Mark with a pencil.
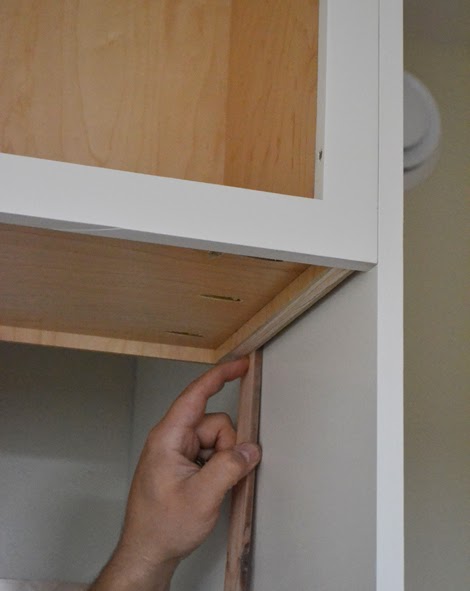
If you want to attach to the floor with a pocket hole at the front, drill on the inside (see image above) bottom.
The front edges need to be finished.
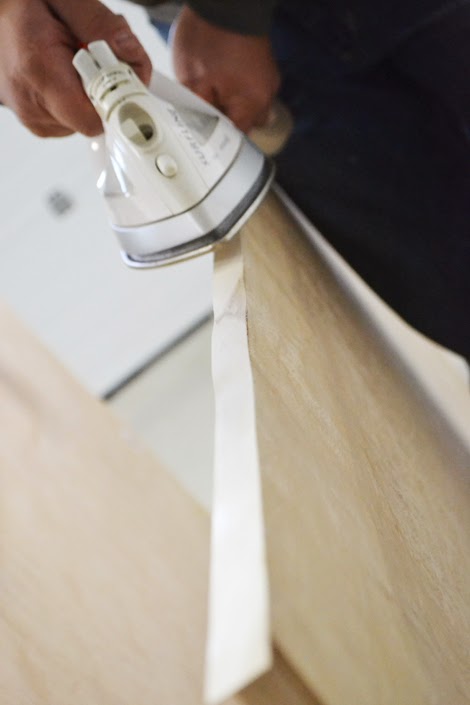
On the front edge of the plywood, iron on edge banding,

And then trim the edge banding down with a edge bander tool or a knife.

And then lightly sanded the edge banding to remove any sharp edges.
Finishing the Panels
Color match your cabinety for paint color. Also match the sheen.
Sand lightly the panels with 150 grit sandpaper. Then a light sanding of 220 sandpaper.
Remove all sanding residue with a soft bristled brush on a vacuum.

Apply primer and let dry.
Then apply paint. Allow to dry and lightly sand with the 220 grid sandpaper.
Apply additional coats as needed.

Building the Refrigerator Surround
Cut 1x4s to match your "over the fridge" cabinet width - should be 30" or 36".
Drill two pocket holes on each end of the 1x4s.
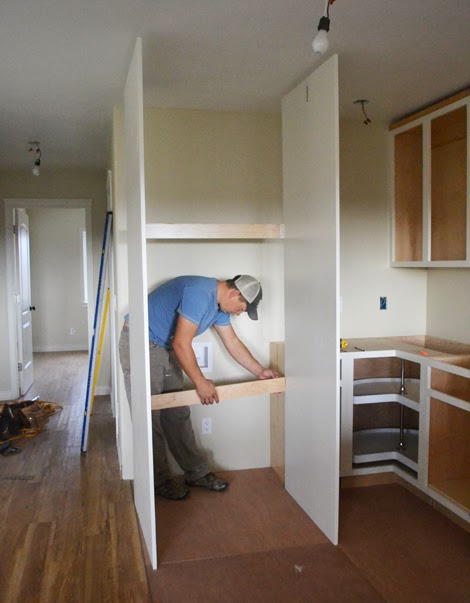
Attach to the back of the side panels, with 1-1/4" pocket hole screws, pocket holes on the back.
Position away from any electrical or plumbing.

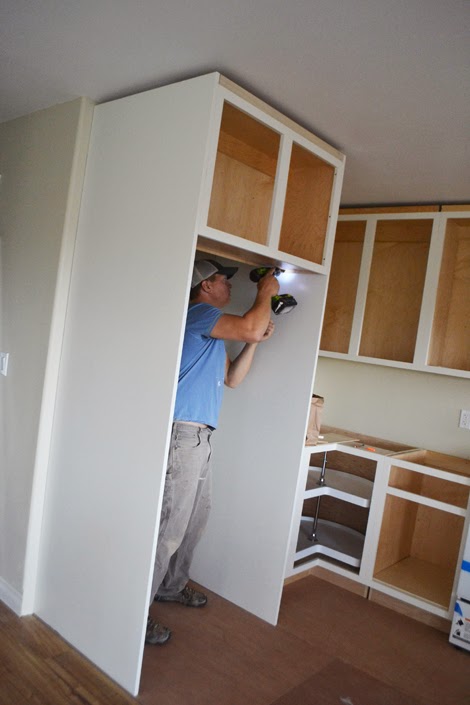
Adding the Over the Fridge Cabinet
With the panels secured to the back cleats, it's time to add the over the fridge cabinet to the top front.
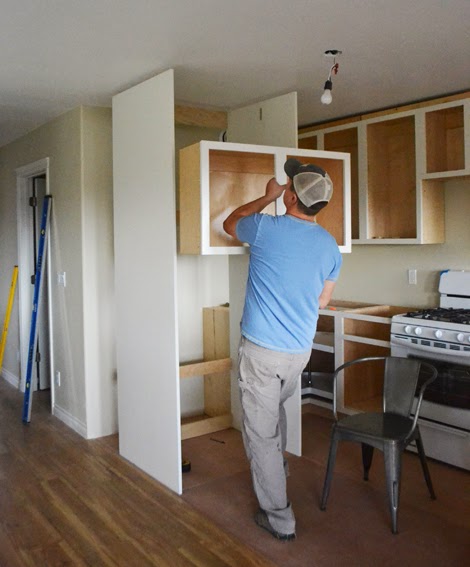
Clamp in place at the desired install location. Notice that we held this cabinet down to allow for crown moulding at the top.
Screw from inside to the plywood panels. You can use the 1-1/4" pocket hole screws. At least four screws per side are recommended.

You may have a face frame on your over the fridge cabinet that requires shims to fill in the overhang of the face frame.
Since the face frame overextends the cabinet by 1/4", we filled with 1/4" thick plywood scraps.
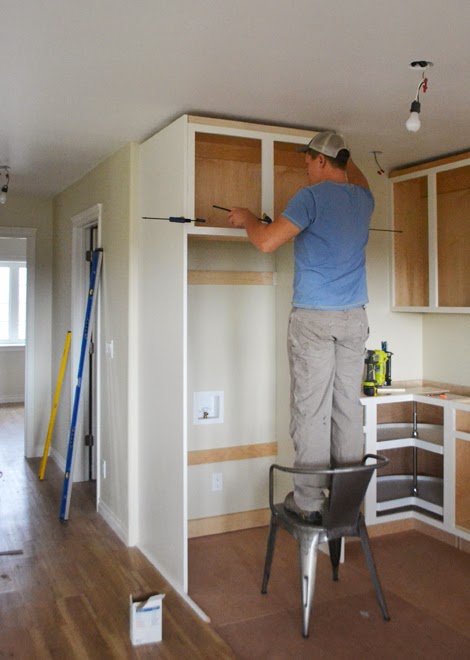
Installing the Refrigerator Surround Cabinet
With the cabinet itself complete, it's time to install in the kitchen.
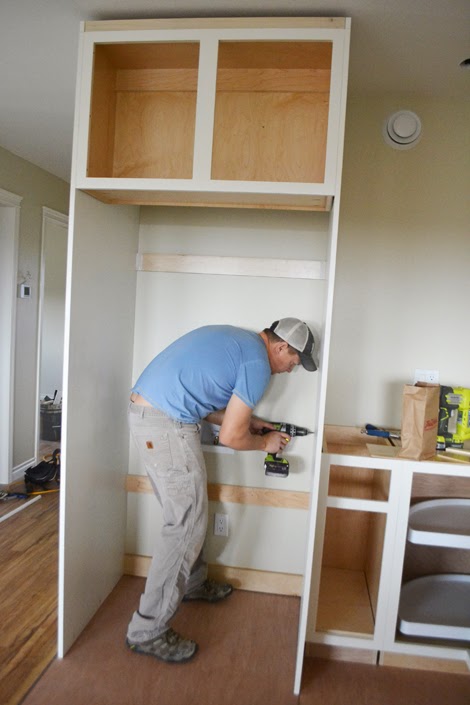
Screw to neighboring cabinet with cabinet screws in the appropriate length.
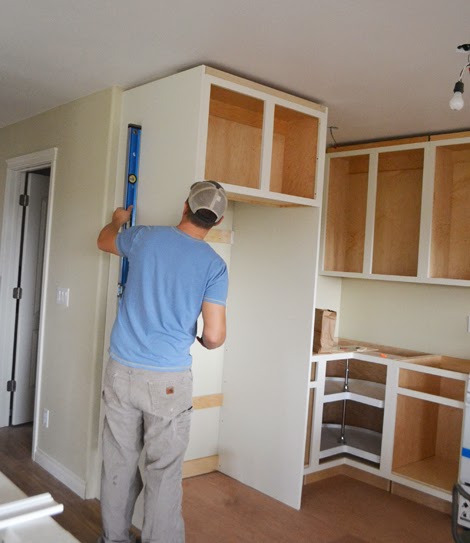
Adjust the cabinet for level.
Screw through the back cleats into studs in the wall.

And attached the panels through the pocket holes drilled at the beginning to the floor. You could also use a metal L bracket here.
NOTE: We installed flooring around the cabinets as the floor is floating and finished out the base in quarter round moulding.

We dressed up the top with crown moulding.
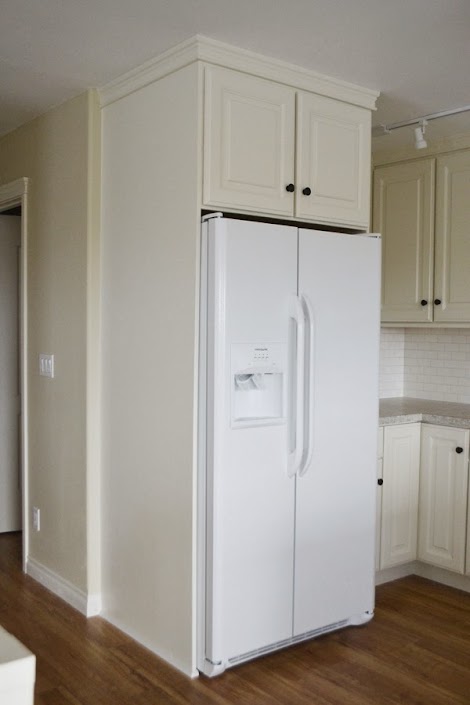
Here's with the doors on and the refrigerator in place.
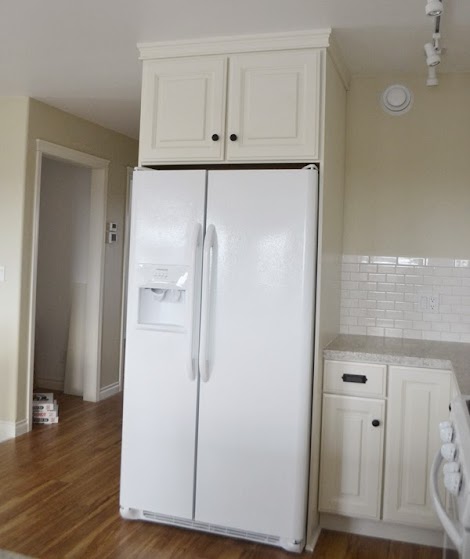
This is a great way to finish on the end of a kitchen, and make the fridge look built-in and beautiful.
There's so many ways that you can customize this project and make it your own.
If you use this tutorial to build your own refrigerator surround cabinet, please take a second to let us know how it turned out by adding a brag post. Thank you for using our plans and tutorials.
Pin for Later!
Comments
birdsandsoap
Thu, 01/09/2014 - 15:50
This looks so nice and
Jake
Fri, 01/10/2014 - 04:36
Proper Step Please!
Thyri
Sat, 01/11/2014 - 17:25
Ventilation?
astrayan
Sat, 03/26/2016 - 00:00
Yeah, any fridge needs at least 2 inches of space around it
Fridges dissipate heat on their sides. Old fridges used to have black heat grill on the back, but this is embedded in the walls of modern fridges. I feel that a fridge boxed the way this one is illustrated, would use about 2-3 times the energy to power, and seriously damage the compressor.
35yrsofappliances
Thu, 02/17/2022 - 15:03
I'm sorry to disagree with…
I'm sorry to disagree with you. The "heat grill" as you refer to it is NOT embedded in the walls. Most manufacturers will specify 1/8" to 1/4" additional space on sides. Heat from the compressor is vent out the bottom and back on most new refrigerators. They do generally specify an additional 1" to 1 1/2" behind the refrigerator.
Liberty B4 and…
Mon, 09/07/2020 - 20:59
I can't imagine paying $1500…
I can't imagine paying $1500 as you described! It's great to see how to build your own!