After a couple of weeks of building kitchen cabinets and finishing them, I can't tell you how excited and eager I was for this day to come ... Kitchen cabinet installation day!!!

Yep, this blank space is going to be a kitchen after today!
We are going to do the wall cabinets first.

First, we mark the height of the bottom of the wall cabinets. Standard height is 54".
But we can't just mark 54" and pull a string line, because we can't guarantee with 100% certainty that the floor is perfectly level all the way across. It's darn close. But there's a better way to accurately level the cabinets on the wall.
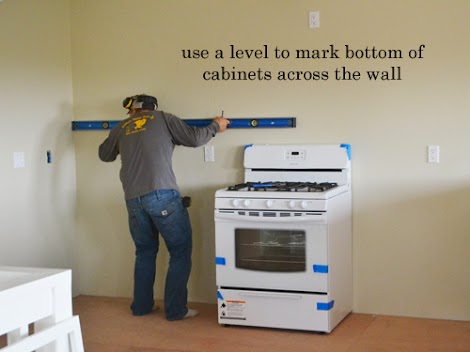
So from the center mark, we use a level to draw a line across the wall where the kitchen cabinets are going to be hung.
Now if I hadn't been preggers, the Ram probably would have just muscled a cabinet in place and hollered at me to screw it to a stud in the wall. Or maybe we are just getting smarter with age instead of stronger.
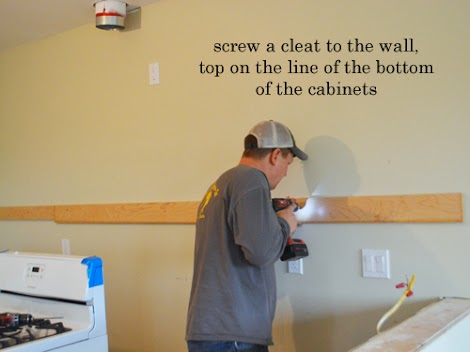
So we attached plywood scrap pieces (that were ripped very square) to the wall at the height of the cabinets.

And then double checked one more time for level all the way down.
We'll rest the cabinets on top of this cleat while screwing them to the wall.
But first, there's one more thing we are going to do to make this process even easier. First we find the first stud in the wall and measure how far it is from the wall.
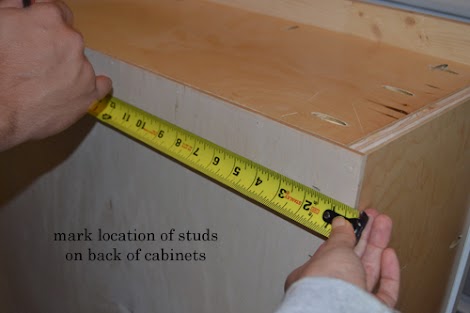
Then we mark this location on the back of the cabinet,
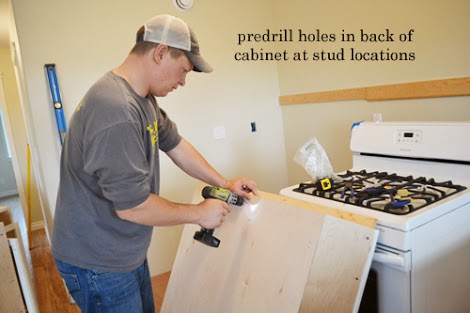
And predrilled holes all the way through the back of the cabinet at the stud locations. That way when we go to hang the cabinets, we don't have to locate studs or predrill holes. All we have to do is drive a screw through the predrilled holes.
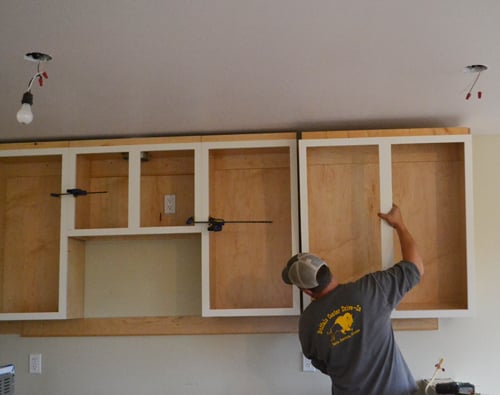
Finally, we are ready to start hanging wall cabinets!
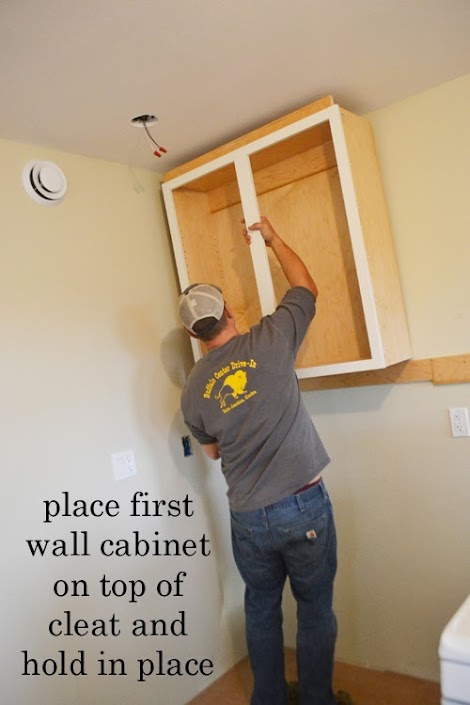
And it does require a muscling it in place, but once it's up there,
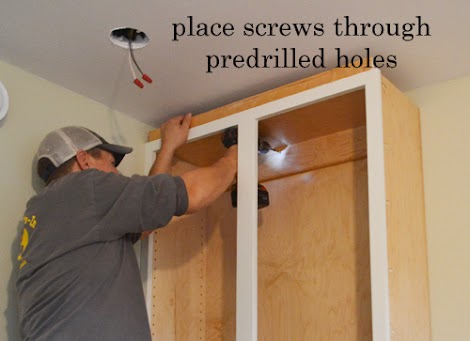
I can hold the cabinet in place - even being preggers - while the Ram places screws through the top cleat into studs in the wall.
NOTE: We also placed screws through the bottom into studs in the wall.
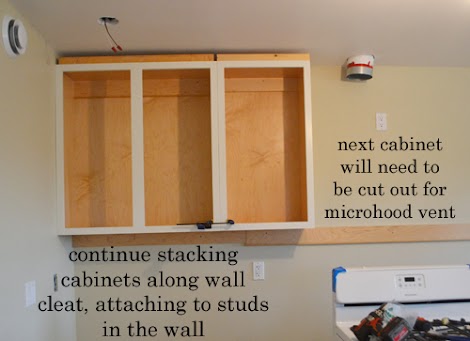
Then we just worked our way over. But the next cabinet is above the microhood so we have a few utility openings to cut out.

We cut the utility openings out with a jigsaw,
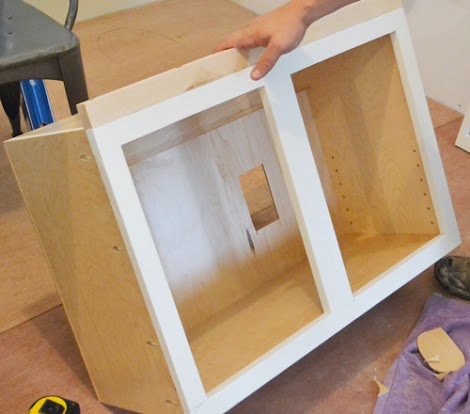
And the microhood cabinet is ready for installation.
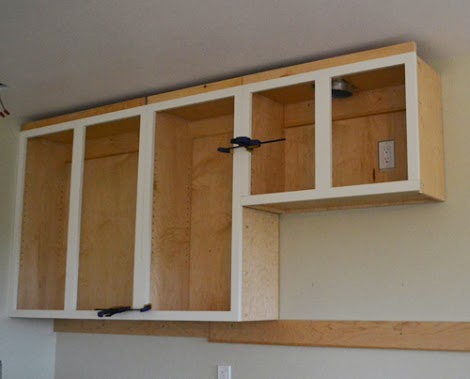
It was definitely a little trickier getting this little guy hung without the cleat to rest it on, but we managed,

And then we got back to the easy cabinets, resting them on the cleats and screwing in place.
NOTE: We also screwed through the face frames and neighboring cabinets to attach cabinets together side to side (as we do below for the base cabinets).
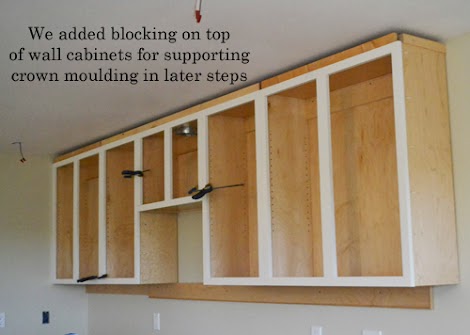
Wall cabinets are hung!!!!
Now on to the base cabinets.

We started with the lazy susan in the corner,

And started stacking cabinets out from the corner.
Then we move to the other corner,
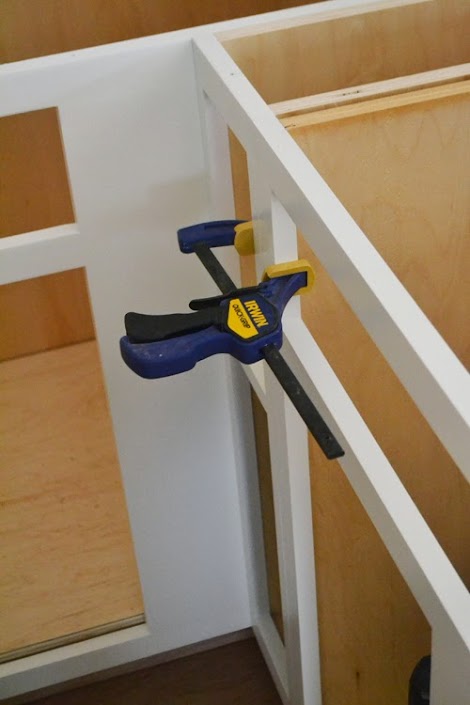
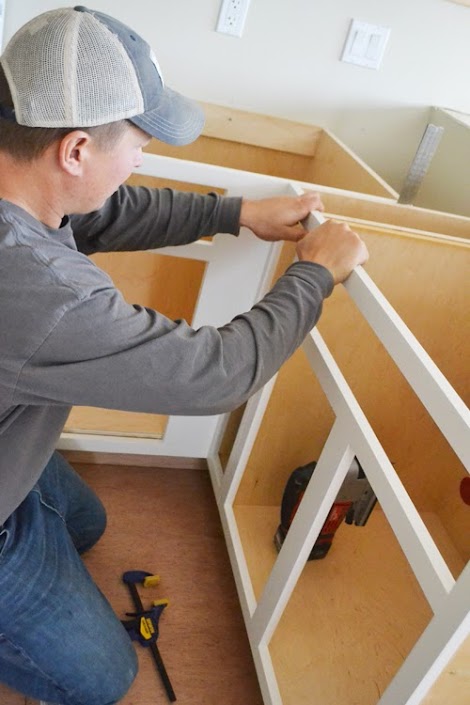
To secure the cabinets together, we clamped the face frames,
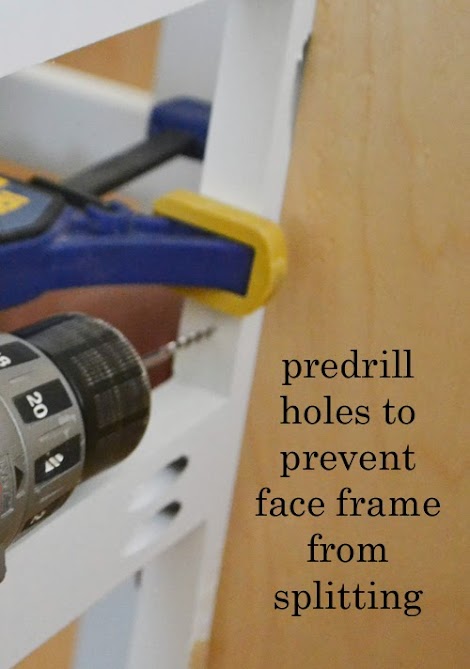
And then predrilled holes through the face frame into the neighboring cabinet (inside view here) using a pilot bit,
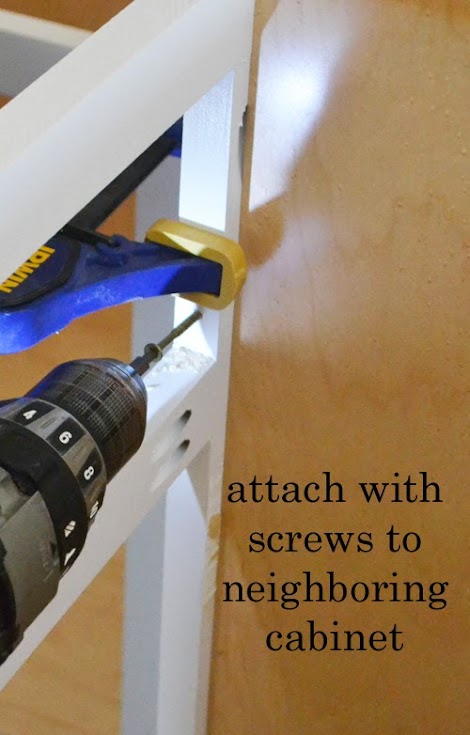
And then used cabinet screws to attach through the predrilled holes the face frames of cabinets together.

This secures two cabinets together at the front, and minimizes any gaps between the face frames.
Remember that the face frames overextend the cabinet by 1/4" on each side? We do this so you can line the cabinets face frames up, regardless of whether or not the sides line up (for example you have a crooked wall and your cabinets need to be installed slightly concave).
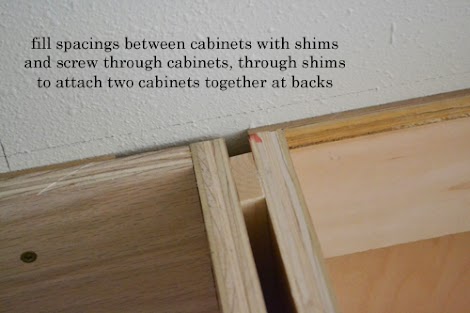
To secure cabinets together at the backs we use shims to fill the gap and then place screws through the side, shim, and into the neighboring cabinet's side.
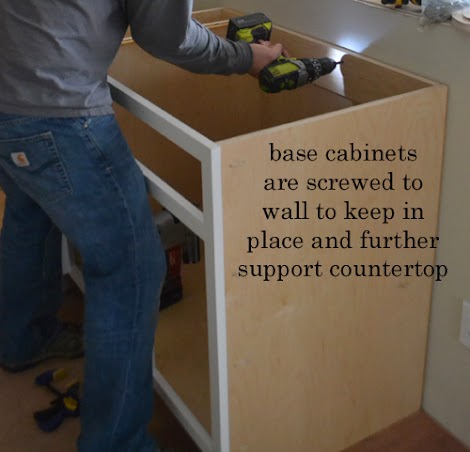
To keep the cabinets in place and also further support countertops, we screw the cabinets to studs in the wall behind the cabinets.
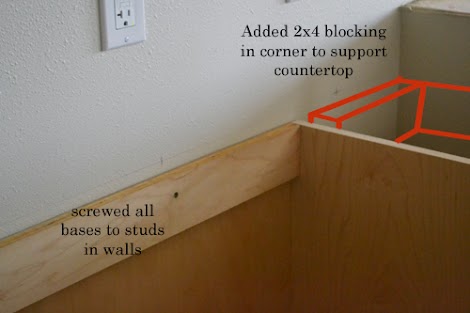
And finally, we finish off the countertop supports by attaching cleats to the wall in the blind corner.
NOTE: Can you see the faint line above the cabinets? We drew lines on the wall for top of countertop and used this line to make sure our base cabinets are level. We ended up not having to shim under cabinets, but make sure you check cabinets for level and shim if you need to.
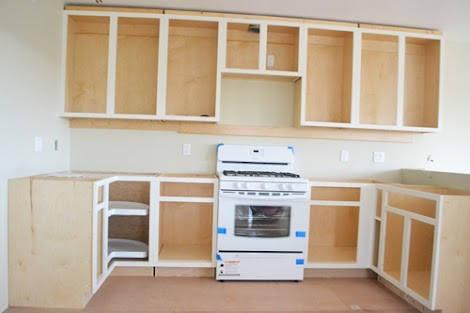
We also added a boxed in fridge and dishwasher end panel - so next up is .... countertops!!!!!
Have you installed kitchen cabinets? Did you do anything differently? We'd love to hear your tips and tricks too!
XO Ana + Family
Comments
eledyce
Wed, 01/15/2014 - 09:24
cabinets
skippysg
Wed, 01/15/2014 - 22:00
Something I did for a cleaner