

build your own kitchen cabinets with plans by Ana-White.com
We've been trucking along on kitchen number 2 ... when baby number 2 allows - so things have been a little slow going. But just in case on your end, things are moving a little faster, I want to keep you supplied with kitchen cabinet plans - at least in all the standard sizes. You can take a peek at all the kitchen cabinet posts for the Momplex Vanilla Kitchen right here.
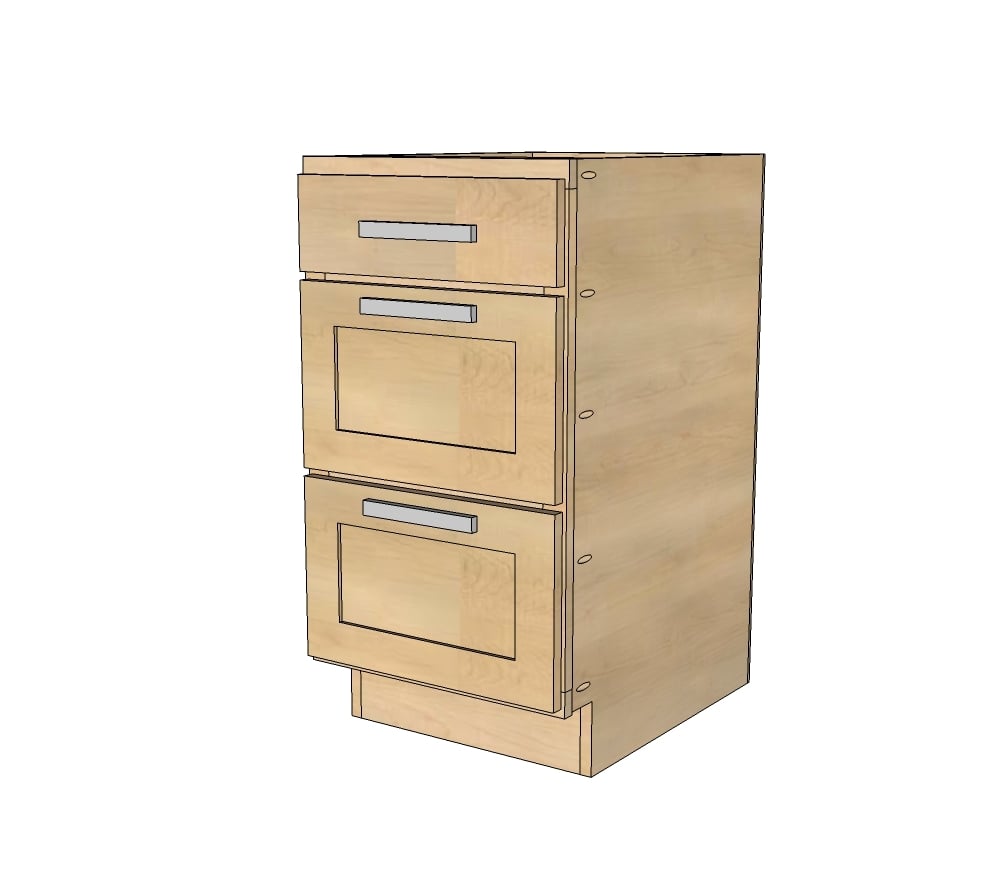
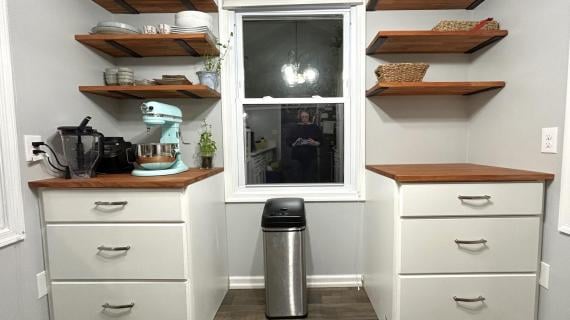
We didn't have the right spot for a drawer base cabinet (although we really wanted to put one in!) :( so here's hoping you do - plans for an 18" drawer base cabinet follow.
XO Ana + Fam
PS - Check out this video for building the carcass and this video on building face frames, and this post on installing drawers.
IMPORTANT: There are many different cabinet plans on this site - make sure you use the same family of plans if you are building cabinets. This plan belongs with the Momplex Vanilla Kitchen Cabinet Plans.

Preparation
3/4" plywood ripped into strips 22 1/4" long (for sides and shelves)
3/4" plywood scrap from ripping sides and shelves about 3" wide (for top supports)
3/4" plywood ripped into strips 5" long (for base supports - use cheaper plywood here)
1x2s for face frames
1/4" plywood (for backs)
1-1/4" pocket hole screws
3/4" finish nails
3 sets of drawer slides with interior max length of 21-1/2" if attached to top support, 22-1/4" if attached to sides or back plywood (we used metaboxes)
CARCASS
2 - 3/4" plywood @ 22 1/4" x 34 1/2" (side panels)
1 - 3/4" plywood @ 22 1/4" x 16" (bottom shelf)
2 - 3/4" plywood @ 5" x 16" (bottom supports)
2 - 3/4" plywood @ 3 1/2" (can vary) x 16" (top supports)
1 - 1/4" plywood @ 32" x 17 1/2" (back)
FACE FRAME
2 - 1x2 @ 27"
2 - 1x2 @ 18"
2 - 1x2 @ 15"
DOOR/DRAWER FACE for FULL OVERLAY (1-1/4")
5 1/2" x 17 1/2" (drawer face)
11" x 17-1/2" (large drawer faces - you'll need 2)


Please read through the entire plan and all comments before beginning this project. It is also advisable to review the Getting Started Section. Take all necessary precautions to build safely and smartly. Work on a clean level surface, free of imperfections or debris. Always use straight boards. Check for square after each step. Always predrill holes before attaching with screws. Use glue with finish nails for a stronger hold. Wipe excess glue off bare wood for stained projects, as dried glue will not take stain. Be safe, have fun, and ask for help if you need it. Good luck!
Instructions
Step 1

Before you begin building - we highly recommend watching this video on making base kitchen cabinets:
Start by ripping your plywood down to size - for the side panels, we choose to rip at 22-1/4" wide for a finished cabinet, back to door front of 24". This width can vary - just make sure all of your cabinets are made the same depth.
Cut toekicks out with a jigsaw - we made a toekick pattern block and used it to cut out all the sides.
Drill 3/4" pocket holes along OUTSIDES of side panels - remember the two panels are in mirror - for attaching face frame in later steps.
Step 2

Attach the two base supports to one side panel - pocket holes on side panel are on OUTSIDE.
Step 3

Then attach bottom shelf to bottom supports and first side panel.
Step 4

Next, attach remaining side panel to bottom supports and shelf.
Step 5

Step 6

Add the back with glue and finish nails or staples.
Step 7
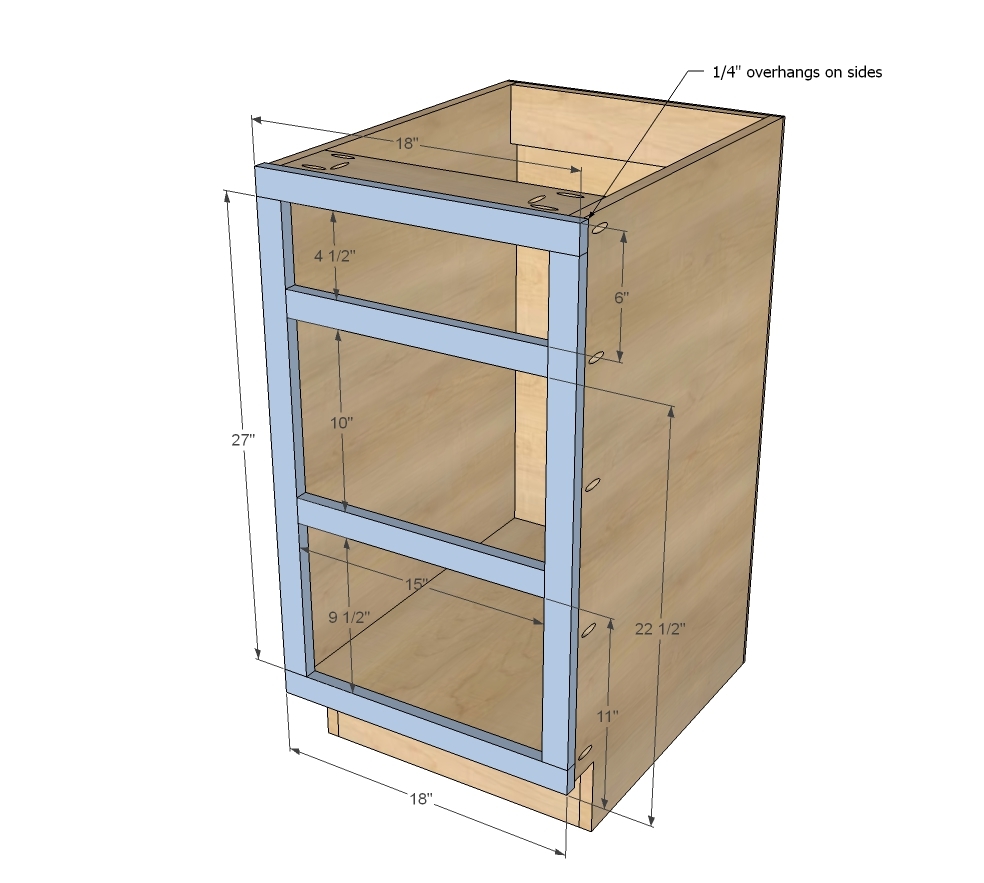
Build your face frame separately, and then attach to front of cabinet with 3/4" pocket holes. One drawer opening is slightly bigger than the other - this is done on purpose so the drawer facess are the same size, with the bottom 1x2 rail centered between the drawers.
Check this video out on building and attaching face frames:
Step 8

For our cabinets, we choose to use Metabox drawer slides, but it's really the same process as using standard drawer slides - you can check out how we built drawers here.
Build your drawers to fit your openings and drawer slides, and install drawers. Then attach drawer faces - shown above for full overlay doors/drawers - to the drawers.
It is always recommended to apply a test coat on a hidden area or scrap piece to ensure color evenness and adhesion. Use primer or wood conditioner as needed.

Comments
DecorSanity
Tue, 02/11/2014 - 15:11
This is a such great plan..
...because base drawer cabinets are so useful...but I feel like such a cheater. I just ordered cabinets for my new kitchen (most of the bases look exactly like your plan). Good news is I bought them from a sponsor I saw on your site, Cliq Cabinetry. I just knew I couldn't get them all done by myself in a timely manner and we can't live w/o a kitchen indefinitely! However I am using all of my new-found skills I learned from you to build the range hood, island surround, open shelving, trim pieces, and 2 bathroom vanities (it's a huge reno). I'll post pictures as I finish projects! Thank you so much for all of your inspiration, I check the site daily and am constantly looking for plans, tips and tricks! XO Jen
David Brown
Sat, 06/28/2014 - 23:02
Lower drawer design
I'm building this now as I'm remodeling my kitchen. I've decided to go with 4 same-size drawers though. I'll also be changing the design to have a full 3/4 inch plywood back. As it's shown, there is nothing to connect the lower drawer slides to except the 1/4 inch backing.
rasnas
Mon, 10/13/2014 - 18:26
Clarification Please!!
Hi,
I am carefully studying this plan (& the videos) as I am prepping to make this cabinet very soon. My question is: Am I supposed to put 7 pocket holes (like in the plan) in the face frame and toe-kick plates? There aren't any instructions for that part.
Thanks,
Nas
Kasfbar
Mon, 05/18/2015 - 08:19
candy craft rooms
candy craft rooms
Efm270
Mon, 01/22/2018 - 07:03
Pocket screws leave huge gap
I tried this build and it's my first time using pocket screws. I clamp the pieces together firmly but when I drive the screw in, the torque pushes the pieces out of place in spite of the clamp and I'm left with a 1/8" gap between my plywood! In the video on attaching the face, they don't even use a clamp, just the weight of the cabinet. When I try it, my entire cabinet lifts off the ground so I still have a visable gap between the carcass and the frame. Why is this happening to me? I'm using 3/4" holes with 1 1/4" screws as recommended.
In reply to Pocket screws leave huge gap by Efm270
bunnyslippers
Sat, 09/28/2019 - 17:56
pocket gap
I know this is an older question, but maybe this will help someone else. I couldn't get the pocket hole screws to not leave a gap either until I got the clamp from Rockler. It works perfectly. I can't understand how Kreg doesn't have one like this. https://www.rockler.com/pock-it-hole-clamp-with-quick-release
Rolando Arroyos
Thu, 03/26/2020 - 06:15
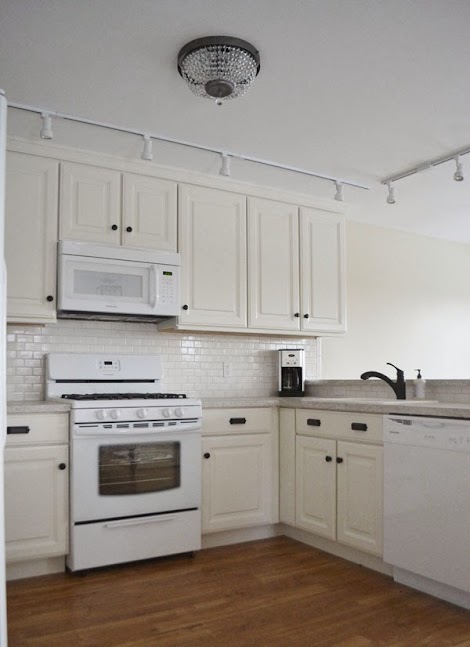
Paint color used
Just want to say i love the plans you post, but in the finishing instructions I have yet to see what color or stain you used to produce the finished product. You probably leave it out so that we can decide what colors/stain we want to use, but having that information would be a great place to start for someone like myself. Obviously from the picture the cabinets are white, however, have you ever walked in to a Home Center and seen all the different shades of white. Its Insane! Never new there was a bazillion shades of white that all seem to look the same.