
Hi everyone! Happy Friday!
Do you remember back when we built this railing for Momplex Unit B?

We absolutely LOVE how it turned out. And we love that not only does it protect the stair opening, but it's so substantial, it's almost like a long console table that you can lean on.
So when it came time for me to design a railing for Momplex Unit B, I wanted to keep the same substantialness, but add a modern twist to match the rest of Momplex Unit A's trendier interior.
So we decided to skip the 2x2 balusters and use cable railing instead!
Here's how it turned out:
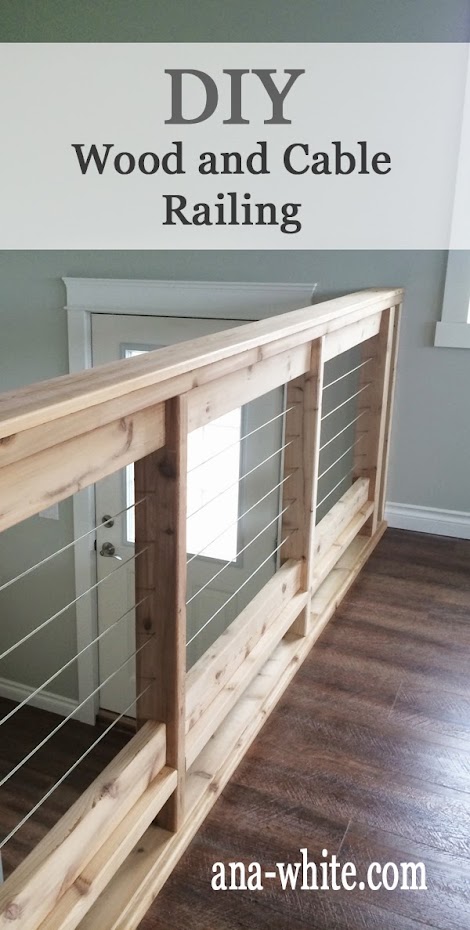


We love the mix of wood and stainless steel!
To make this wood railing, we basically followed this plan - but without the wood balusters.

We used our Rigid compound miter saw to make all the cuts.

To build the railing, we attached from the tops and bottoms only. Later on, we will cap the top in a 1x board, to hide all the screw holes in the top.
The lower portion we used a pocket hole jig to attach to the 4x4 posts.
Once the basic framework was built in the garage, we moved it upstairs...

And cut the flooring back (we ran the flooring long because we had originally intended to attach the railing to the inside of the railing, instead of on top of the floor).
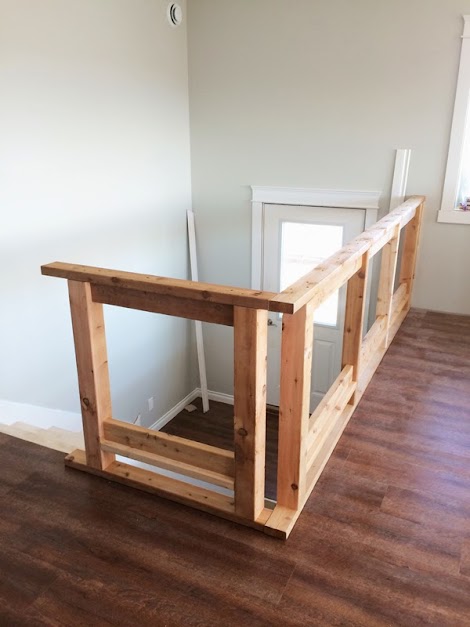
And then we attached the prebuilt railing frames to the floor and each other.
Note that the corners are double posted because the cable railing can't bend at a 90 degree angle. You have to either start/stop (which costs alot in hardware) or make corners at 45 degrees as we are doing.
Once we got the main upstairs railing in place, we placed our posts for the stairs.

And then we just ran a string line down at the stair angle, and chopped the tops off the posts,

And then capped the tops of the posts with a 2x4 board. Then we filled in the spaces underneath to match the upstairs railing.
For more information on scribing stair railings check this post out.
Once we had the basic framework for the railing built and installed, it's time to run the cabling!
First, I decided how many rows of railing we would need (code requires less than a 4" gap, but since the railing may "give" a little, I went closer to 3-1/2") and evenly spaced them. Then I made up a jig with a piece of plywood, marked where each cable needs to be drilled out -

And then drilled out the pattern in the plywood,

And then stapled plywood to either side of the pattern piece to hold it in place on the posts -

Ready to drill!!!

For the 2x4 posts, we just used a standard drill bit. But for the 4x4 posts, we got a really long drill bit -

And drilled those out.
I was pretty impressed with Jacob's ability to drill through so square -

Especially at an angle, 5 rows running parallel.
This is no easy task, but we found having a second person to spot how parallel the drill bit is to the wood framing really helped. Another thing you can do is place a magnetic level on the drill bit, but this only works for the straight passes.
Once all the holes were drilled, we started running the cables. This of course is the quick and easy part.
We used a system called Ultra-Tec. The cabling itself is pretty cheap. It's the hardware that costs - about $30 per start/stop.
We started on the stair landing post.

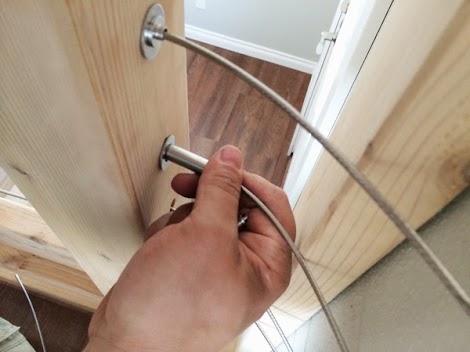
You thread the parts on,

And then push the entire piece inside the 4x4 post.
From there, we threaded the cable up through the stair railing,

Made the corners at 45 degrees (notice the hardware in the posts at the cable? This is to keep the cable from wearing the post down and protects the cable from snapping)

And then threaded the cable through the last post and added the end fittings.
Those fittings are also pushed inside the post,

And then you just trim the ends off with wire cutters,
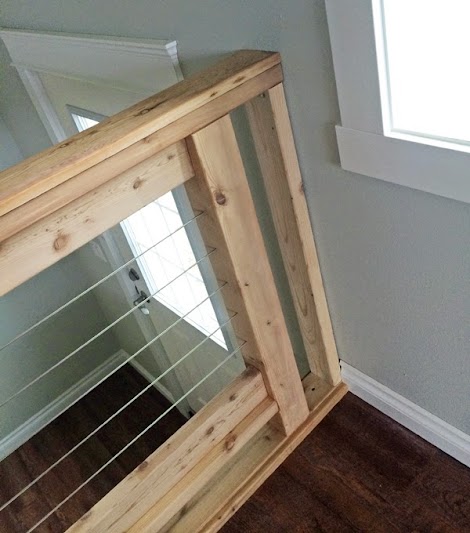
That's why we ended up leaving a small gap at the end - to finish the wire runs. Also, this gives up a chance to attach the railing to the wall through the end 2x4.

One last thing we did was trim the ends off the posts on the downstairs side to remove any hard corners at a 45 degree angle.
I love how it looks!
Finally, we capped the top with a 1x board to cover the screw holes in the top and give the top a finished look.
I love how the stainless steel is easier to see through, adds a modern edge, but doesn't take away from the substantialness of this railing. I'd feel safe having my kiddos lean up against this!
What a fun project! We are thinking we'll do the same railing for the exterior decks too!
Have you done cable railing? What do you think? We'd love to hear your side too!
XO Ana + Family
Disclosure - this post is not sponsored by UltraTec - It's just the brand that is sold at our local home improvement store and we are happy with the product.
Comments
dmcarwin
Sun, 03/08/2015 - 19:37
Wow!
Very cool indeed! I love it!
tbotello
Thu, 07/02/2015 - 09:24
Hardware used at 90 degree corners?
Ana, what hardware did you use in the 90 degree corner to keep the post and wire from wearing? I tried seeing if it was available on ultra-tec's site but couldn't find it. I'm currently doing a u-shaped banister around our stairs going up to a 2nd story bonus room. My wife and I love this easy design.
teresad2297
Fri, 07/21/2017 - 13:33
Plans for vertical cabling?
Love the look of this railing. I'd love to see a design incorporating vertical cabling to discourage climbers. We're looking for ideas for an inexpensive, attractive pool surround.
Maybe the cable could be 'woven' up and down in a frame to limit the number of start/stops needed.
Thanks, Teresa