
Hello and Happy Monday!!!
For those of you new here or haven't been following along, from mid May to mid June of this year, we built a cabin in remote Alaska for DIY Network. Now that we have completed the cabin, and aren't working such extreme hours, we have been sharing the build process here on the blog. You can read all the posts here.
We wanted our cabin to be special and unique, so we decided to integate a timberframe roof system into a conventionally framed wall system. We've got the main walls framed, and we precut the timberframe ourselves earlier in the spring at home.
So finally, after months of prepping, it's time to start adding the timbers to the cabin!
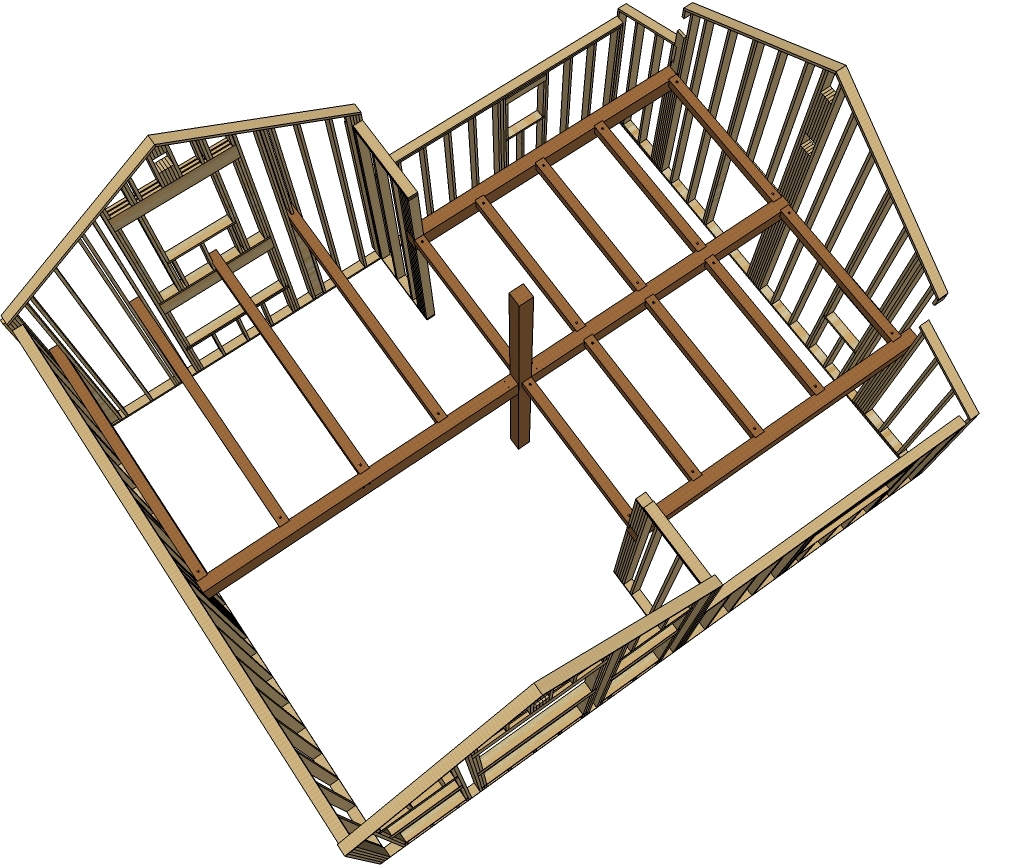
The first portion of timbers will be the floor framing for the upstairs loft. If you look closely, you can see little brown dots on tops of the beams - this is how the timbers are attached with screws, and will be hidden by the upstairs floor.

We already hauled all the timbers in on sleds, pulled by snow machines. This is much more ideal than using an ATV for a couple of reasons - snow is much smoother and cleaner than a dirt trail. For those of you with eagle eyes, the beams on this sled are the valley rafters, to be installed when we do the roof system.

This here is the floor package, all ready to be installed. We've got everything numbered and organized, so hopefully things go like Lincoln logs.

Except these Lincoln logs weigh hundreds of pounds.

We had everything staged on the frozen lake. To get the timbers to the cabin, we pulled them up with the snow machine sled as close as we could get, and then manually carried them inside the cabin.
When we framed up the cabin walls, we placed pockets in the framing for the timbers to sit in the walls.

A crane or boom truck would have been nice here, but since we are remote, this is how we put the timbers up.

Once side at a time,

One beam at a time. This is the very first beam for the cabin in! This beam will support the upstairs loft floor.

To tie all the beams in, we have a center "pole" that goes all the way up to the main ridge. It's close to 16 feet tall.

This one wasn't so much as heavy as it was awkward and top heavy.

Thanks goodness for a calm day. Since this beam is a finished product, we did not want to nail bracing to it - as that nail hole would be there forever. There was a certain amount of stress as we hurried to get the other loft floor timbers in to tie in the main pole. If that main pole went, the walls are just tied in with bracing at this point, so it could do major damage to the cabin. Or set us back weeks if we damage the beam itself and have to re-cut a replacement. And we won't even discuss someone getting injured while working remote.

Back home when we precut the timbers, we had debated whether or not to predrill the fastening holes (hidden on the unexposed sides of the beams). We should have, because we stood there and held up the main support pole, while the beams were predrilled first with a larger bit (sized for the timber screw heads),

And then a smaller sized bit, but much longer for passing through the timber.

The floor beam rafter sits in pockets on the side beam and the pole,

And then gets screwed in with a timber screw, sized anywhere from 8" to 16" long, depending on the size of the beams.

Once we got two of the beams up, we can breath a little sign of relief, but the pole is only held in place with the two screws, on the two beams. It could definitely fall to either unsupported side without too much convincing. So despite it getting late, we are forced to get the two other beams in tonight before leaving the job site.
While Jacob tied in the second beam, Matt and Ross are already working on the third beam.

The third beam was heavy, but manageable, but just wouldn't go in. We tried the sledge hammer, but since the walls aren't fully tied in yet, that didn't work - the entire cabin structure would just move every time you hit it. Then we tried ratchet straps - which did help - but in the end, we had to trim a little off the tenon to get it to fit in.
This is our first time working with a timber frame, so we learned alot, and the old saying is true - education is not cheap.
Now we just have the fourth beam to tie in.

I was adamant in the design to not have a post support under the main beam, wanting the cabin to be open from the living area to the dining area. But this meant we had to integrate a large glulam beam into the timbers for structural support.
This beam is a beast.

I tried to pick up my end just to manuever it back at the garage. I couldn't even budge just one end to scoot it over.

These guys are quite a bit stronger than me though. But you knew that.

This one is a little tricky because not only do you have to lift it, but you have to pull it into the main pole, and line up the tenon with the mortise cut into the main pole.

Whew!
Big sign of relief.
Until we realized we'd need to take a little off the tenon to get the beam to fit in it's pocket.

I think this beam we only did twice. Next time, when it's a big heavy beam, we'll definitly be cutting the tenon a little smaller to make fitting just a little easier.

It was a very exciting moment to have the entire first floor loft framing done! The view from up in the loft is incredible, and the beams were stunning from underneath. Although putting this floor system in was anyting but easy, it was definitely worth it. You do get what you pay for, don't you?
Thanks for reading and being part of our cabin build! Will be sharing next how we put lights in the beams and then we are on to getting that roof system done!
XO Ana + Crew
Comments
Lady Goats
Mon, 06/29/2015 - 10:58
I'm tired just from reading this.
The beams look ahhhhmaaaaziiiiing just at this step! But holy cow, I think i need a nap just from reading this!! Great job, guys! Well, great job EVERYONE, but the muscles definitely deserve special praise..! ;-)
BrianWinter22
Sat, 09/14/2024 - 03:28
Building a cabin with timber…
Building a cabin with timber framing for an upstairs loft sounds like an exciting project! It’s impressive to see how everything comes together step by step. With the right guidance, like Personal Coaching, you can get the support needed to tackle big projects like this one. A personal coach can help you stay focused and organized throughout the process.