

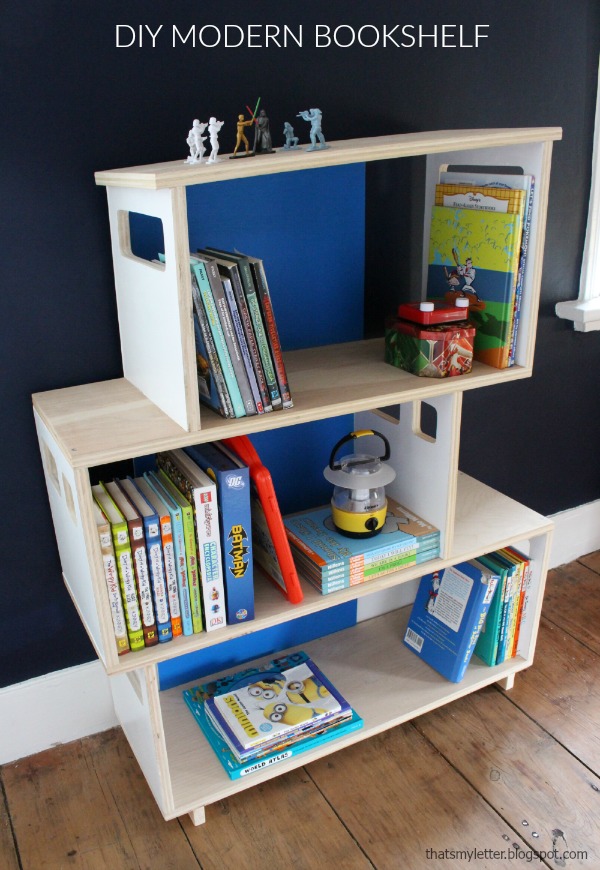
The dollhouse bookshelf gets a midcentury modern makeover! Free plans by ana-white.com
The Inspiration - Our Original Dollhouse Bookshelf
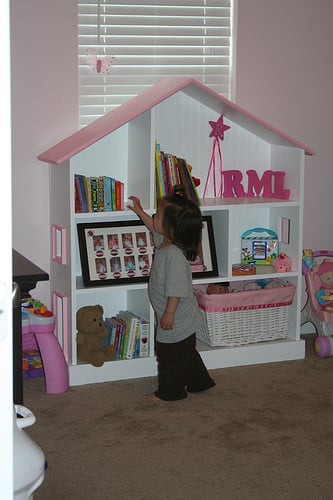
We love this tradditional dollhouse bookshelf (you can get the plans here) and are so happy to see so many people have used and enjoyed those plans.
And especially love seeing all the custom versions that you have come up with from the original plans.
So this year, we wanted to do a more modern shape to give you more options, and perhaps provide plans for a house shaped bookshelf a little less on the girly side.
Sooooo .... after lots of thought and many emails back and forth ... Jaime and I came up with this!
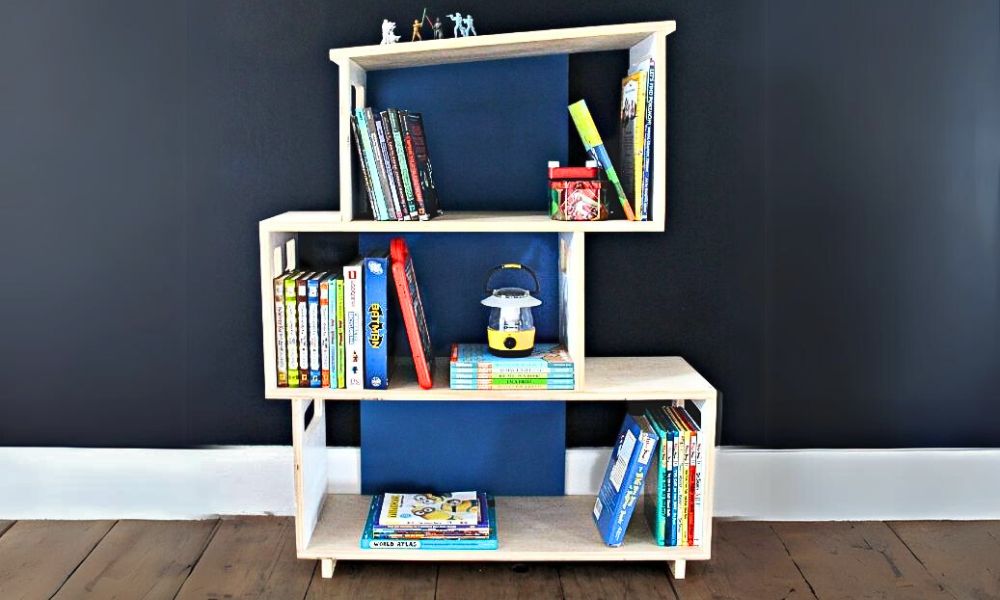
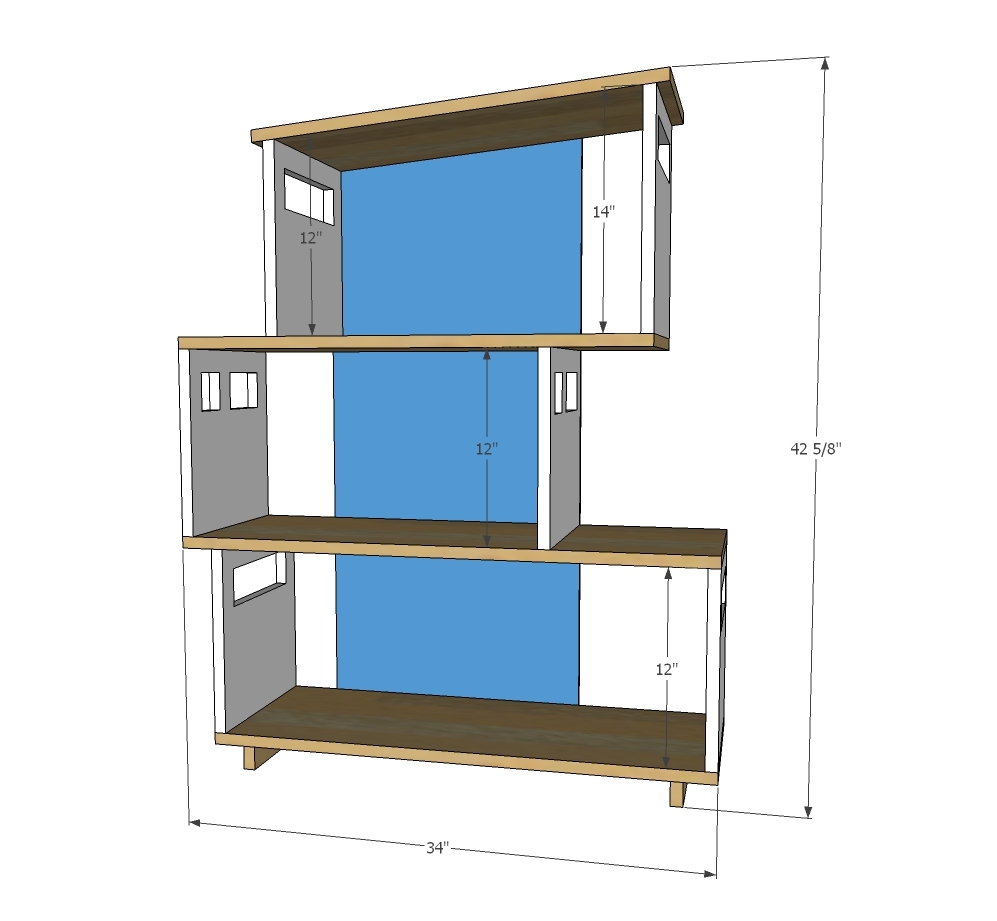
A modern style dollhouse bookshelf!
What do you think? I am so happy with how this project turned out!
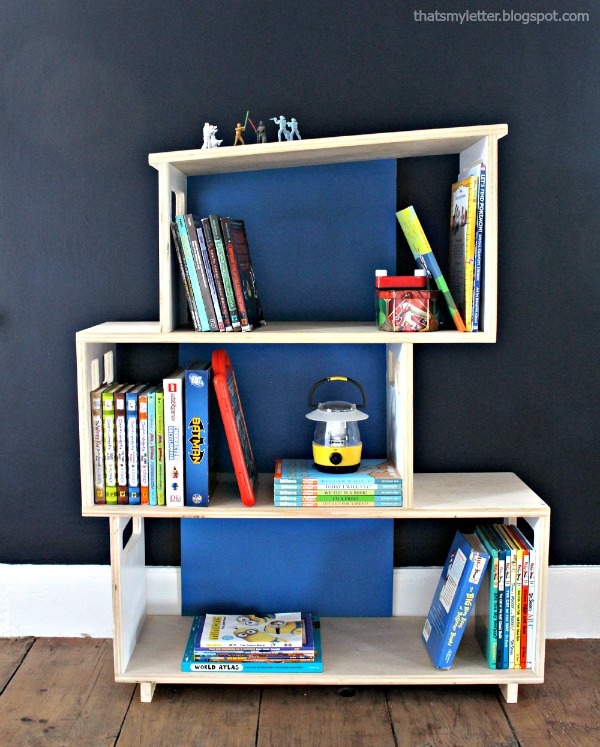
More Photos and Build Post
You can build your own - the plans are simple, the steps are easy. Just follow along in the tutorial below. But before you get to the plans, please take a quick second to check out Jaime's building post, and see LOTS more photos and building steps!
CLICK HERE FOR JAIME'S BUILDING POST AND MORE PHOTOS
Free Plans for Midcentury Modern Dollhouse Bookshelf
Preparation
- 2 - 1x12 @ 10 feet long (you'll need about 17 board feet)
- 1 - 2x4' 1/4" thick plywood panel
- 1 - 1x2 @ 50" long
- 1-1/4" pocket hole screws
- 3/4" brad nails or staples
- 1 - 1x12 @ 32"
- 4 - 1x12 @ 12"
- 1 - 1x12 @ 34"
- 1 - 1x12 @ 30"
- 1 - 1x12 @ 12" - longest point measurement, one end cut at 5 degrees bevel off square
- 1 - 1x12 @ 14" - longest point measurement, one end cut at 5 degrees bevel off square
- 1 - 1x12 @ 25-5/8" - long point to short point measurement, both ends cut at 5 degrees bevel off square
- 2 - 1x2 @ 11-1/4"
- 1 - 1x2 @ 26-1/2"
- 1 - 1/4" plywood @ 18" x 42"


Please read through the entire plan and all comments before beginning this project. It is also advisable to review the Getting Started Section. Take all necessary precautions to build safely and smartly. Work on a clean level surface, free of imperfections or debris. Always use straight boards. Check for square after each step. Always predrill holes before attaching with screws. Use glue with finish nails for a stronger hold. Wipe excess glue off bare wood for stained projects, as dried glue will not take stain. Be safe, have fun, and ask for help if you need it. Good luck!
Instructions
Step 1

Cut out all windows on the wall pieces first.
Attach the two lower walls with the lowest floor and the second floor. Jaime just used 2" wood screws (try SPAX for no predrilling) to attach through the top, but you could also use a Kreg Jig to attach.
Step 2

Attach next story, using same building method as lower story.
Step 3

Attach top story. A 1x scrap can help guide placing the roof overhangs.
Step 4

Attach base to bottom using glue and 1-1/4" to 2" nails or 2" screws through top.
Step 5

It is always recommended to apply a test coat on a hidden area or scrap piece to ensure color evenness and adhesion. Use primer or wood conditioner as needed.
Comments
Pam the Goatherd
Tue, 11/17/2015 - 09:44
I love this! Forget about
I love this! Forget about using it as a bookshelf. I would want to use this for a dollhouse.