
It just started snowing.

Wall Anchoring
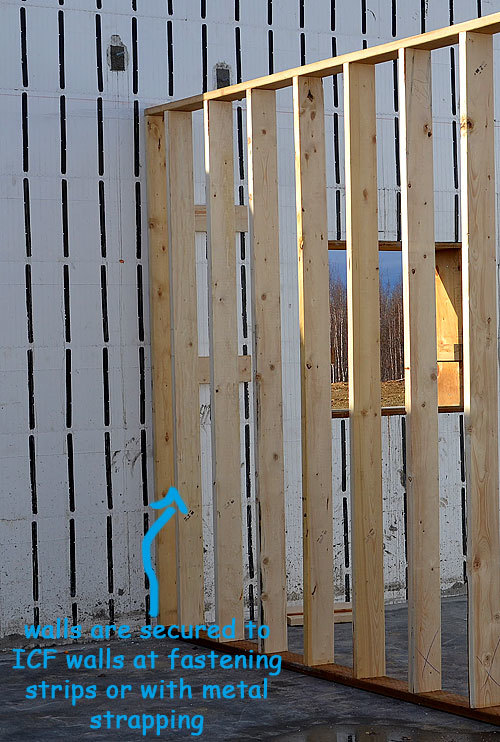
Exterior Wall Attachment
<h1>Interior Walls to Interior Walls</h1><div>The interior walls need to be nailed together. We make sure all the walls are plumb, square, and on the line.
</div><div><br></div><div><img src="http://ana-white.com/sites/default/files/imagecache/Full/framing-stud-w…; alt="" align="none"></div><div><br></div><div>Remember the blocking we put in the walls? This blocking is used where interior walls meet up. Not only does this give you a spot to nail walls together, it also gives us a spot to screw our drywall to when we go to hang drywall.</div><div><br></div>

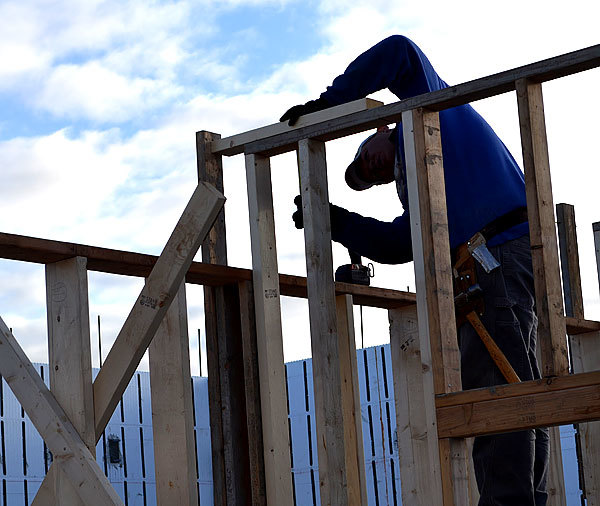
<h1>Top Plates
</h1><div>Top plates are handed up and nailed to the tops of the walls, overlapping wall joints.</div>
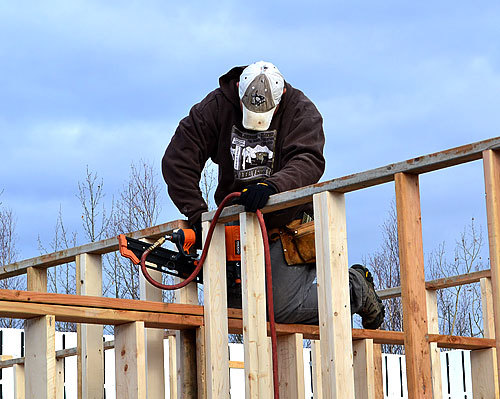
<h1>Framing Nailer</h1><div>We just purchased a framing nailer for $199 and man has it been a time and sanity saver! There's nothing wrong with a hammer and nails, but having a framing nailer sure helps out! The top plates are nailed to the tops of the walls. Notice how this top plate extends beyond the center wall for extra support.</div>
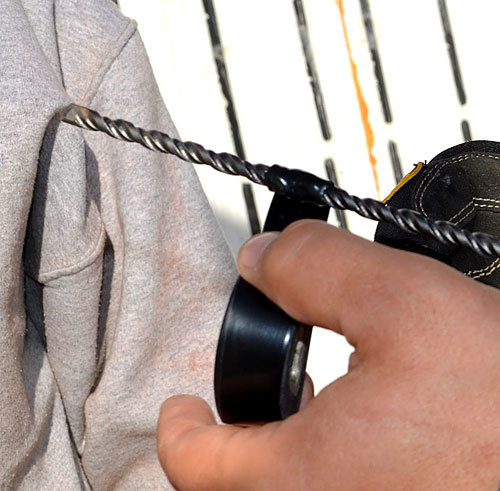
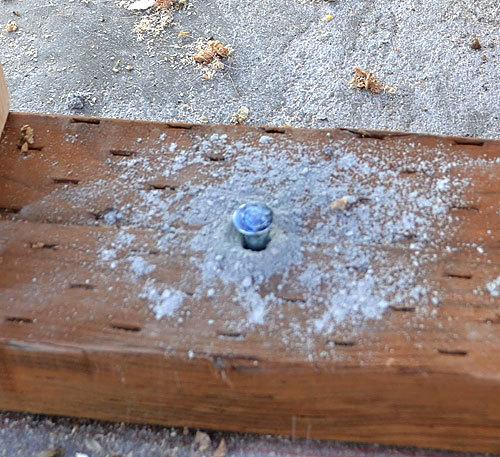
<h1>Concrete Anchor Holes
</h1><div>Finally, the interior framed walls need to be anchored to the concrete slab. But remember, we have <a href="http://ana-white.com/2011/09/momplex/heated-slab-installation" title="" target="_blank">radiant heat tubes in the slab,</a> and have to be very careful about not drilling into the heat tubes. So the concrete drill bit is measured and taped off for the depth we can safely drill to.</div><div><br></div><div><br></div>

<h1>Drilling Holes</h1><div>I did the drilling, and let me tell you, I was nervous. Drilling into a heat tube would be catastrophic.</div>
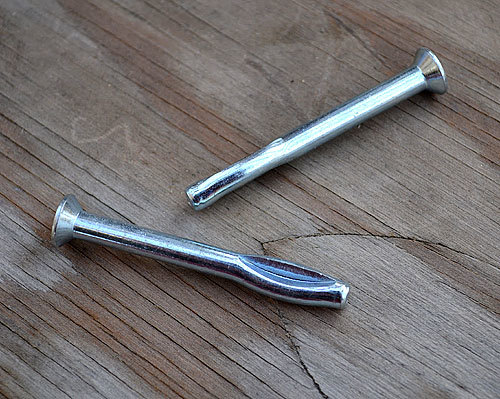
<h1>Concrete Anchors</h1><div>Aren't these strange looking nails? Once they are pounded into the concrete, they will keep the walls from moving or shifting.</div>
It's easy to pound these in ...
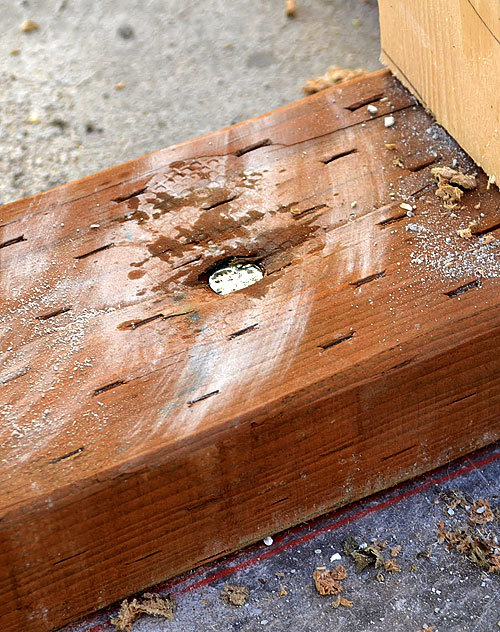
But the last little bit get's tough. Maybe I was too cautious in drilling my pilot holes, but thank goodness, we didn't see any pieces of heat pipes in the sawdust!<div><br></div><div><img src="http://ana-white.com/sites/default/files/imagecache/Full/framing-stud-w…; alt="" align="none"></div><div><br></div><div>And our walls are secured! </div><div><br></div><div>Now that our interior basement walls are in place, we can start working on putting the upper level floor in and building stairs! Can't wait to share our progress with you. Thanks for reading and keeping us encouraged and inspired! </div><div><br></div><div>Happy Building, Ana</div>
Comments
PghMommaof3 (not verified)
Tue, 10/04/2011 - 12:26
Go Anna (and family), go!
emmarosemc
Tue, 10/04/2011 - 16:12
So when will the second floor
In reply to So when will the second floor by emmarosemc
Ana White
Tue, 10/04/2011 - 16:23
Hi Emma! We actually are
In reply to Hi Emma! We actually are by Ana White
emmarosemc
Wed, 10/05/2011 - 18:01
Ok, I went back and dissected
S J (not verified)
Tue, 10/04/2011 - 18:47
Fingers are crossed for
loniwolfe
Tue, 10/04/2011 - 20:55
Wow. Thank you again for
FrontierTater (not verified)
Wed, 10/05/2011 - 18:09
I'm watching the "termination