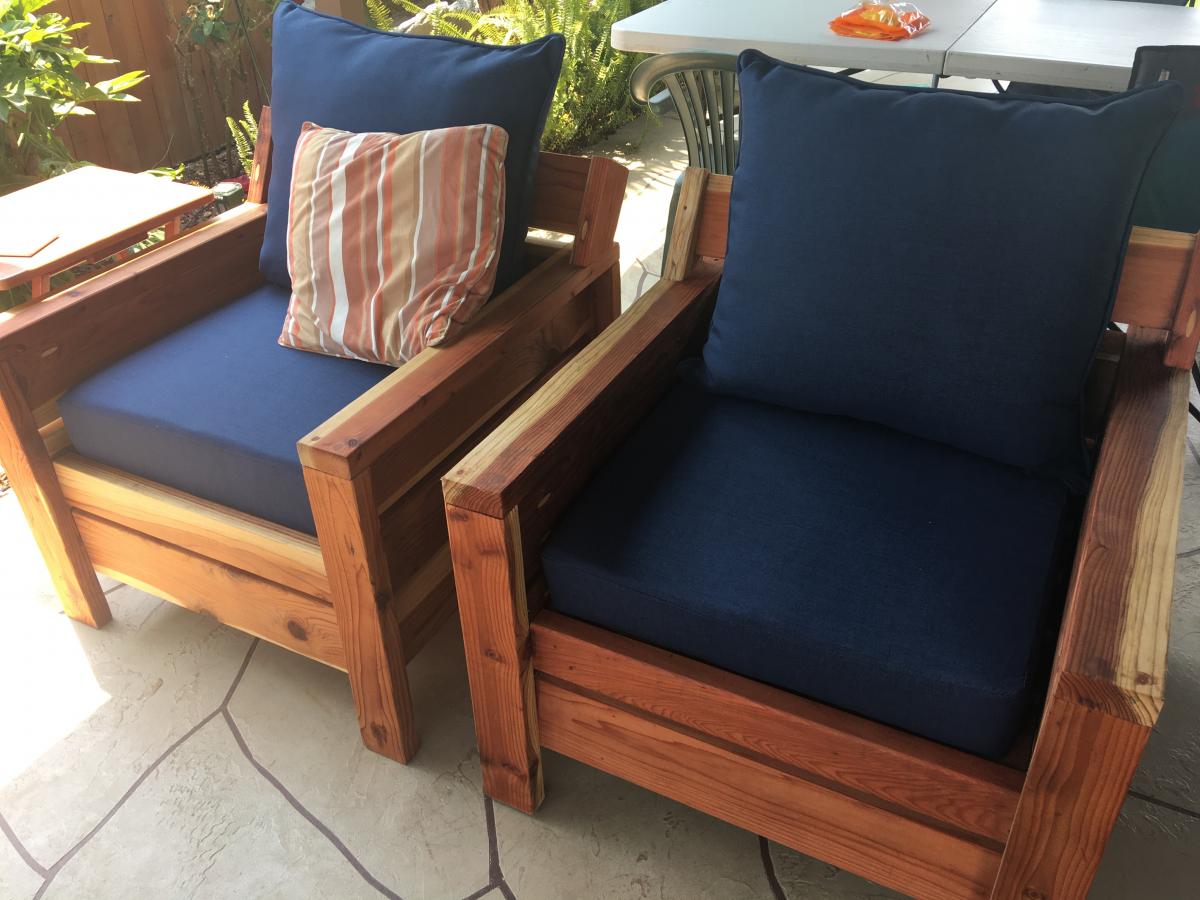
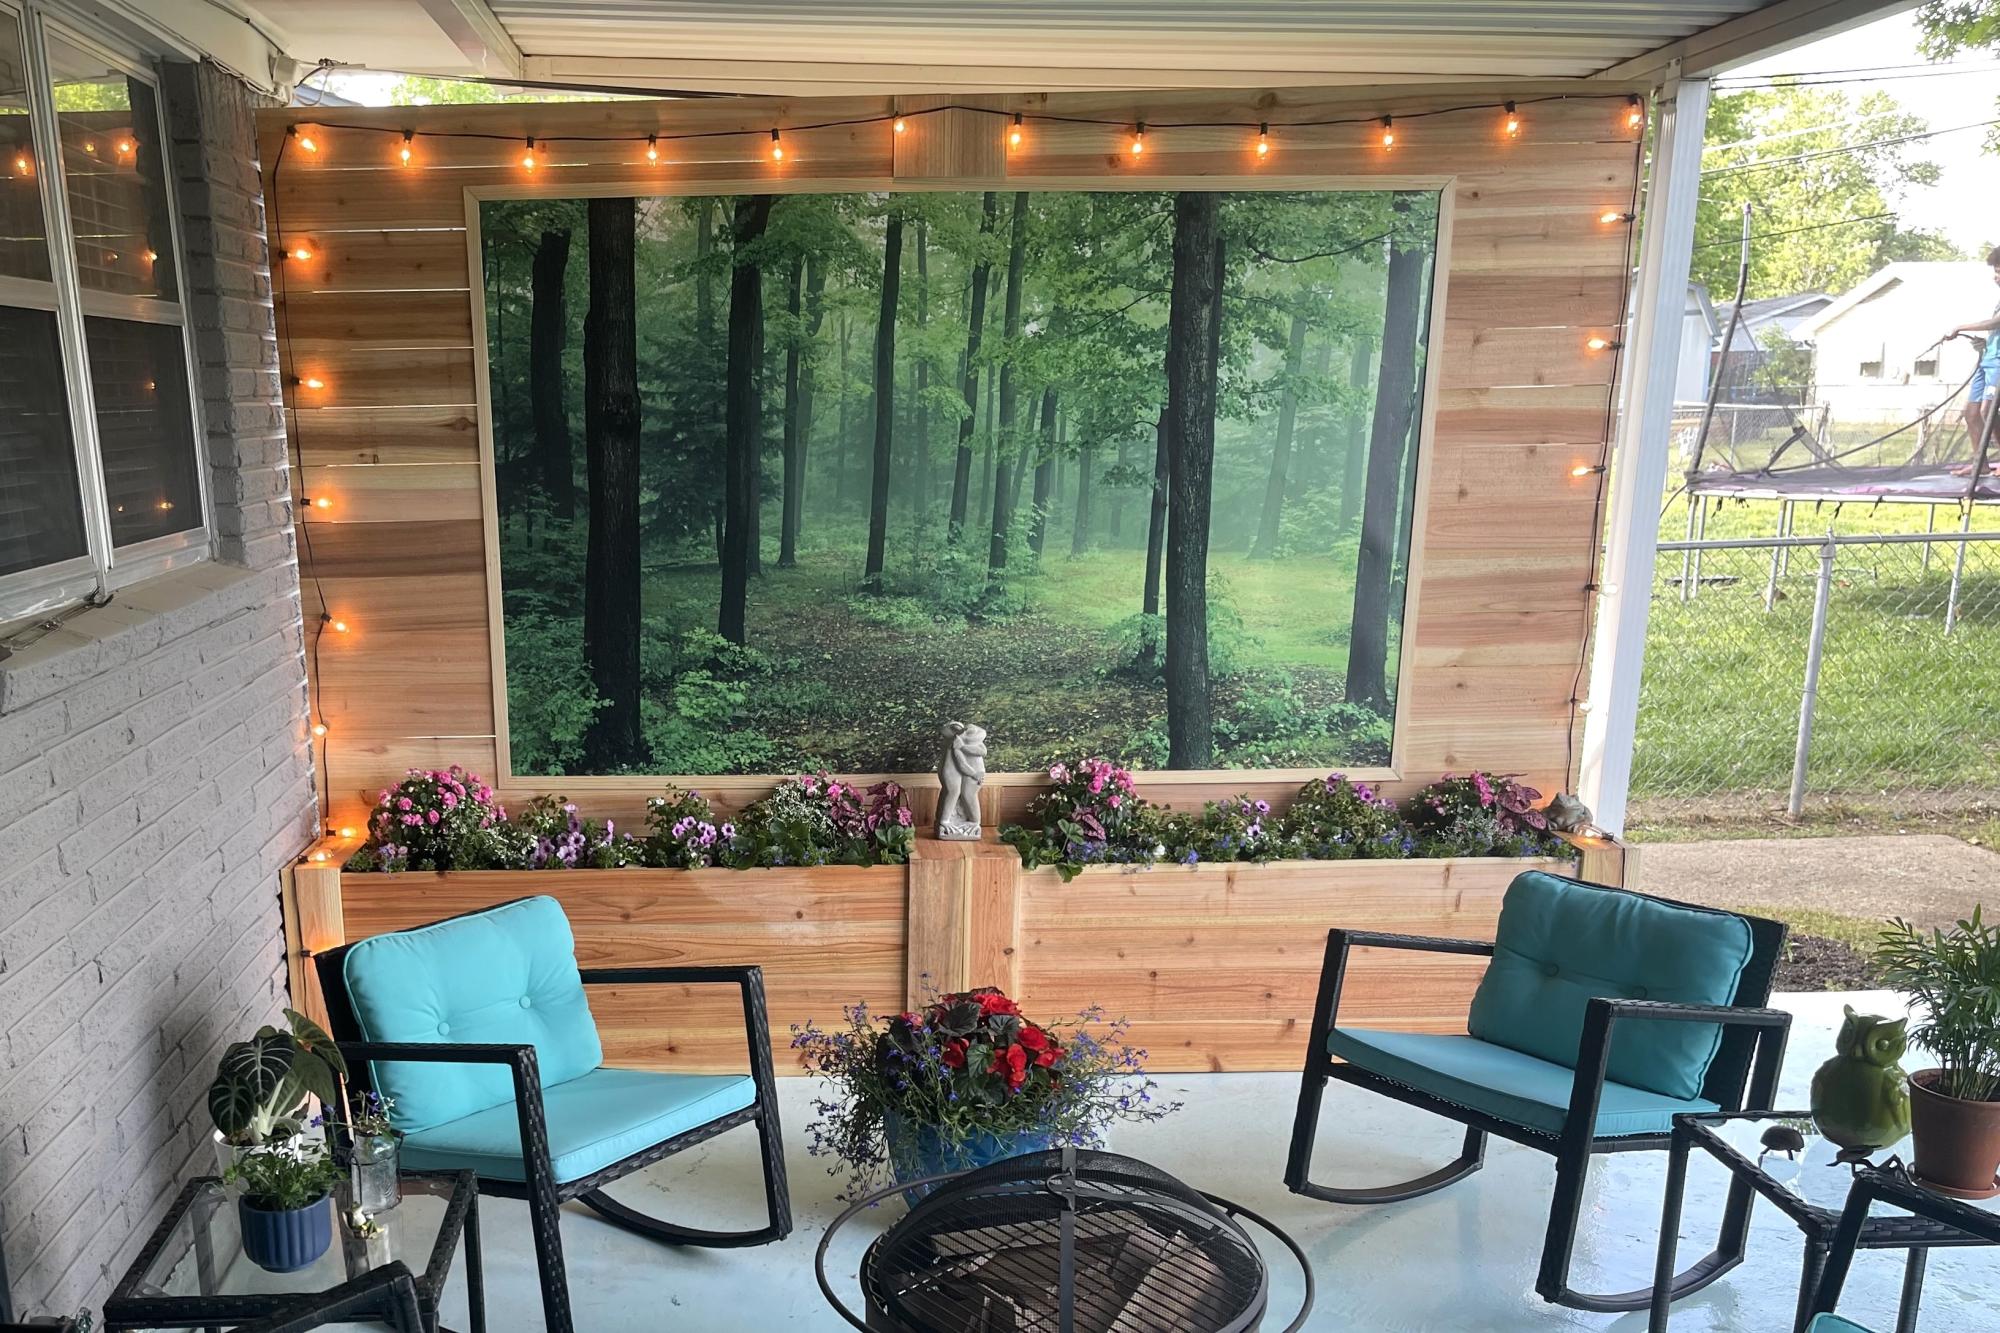
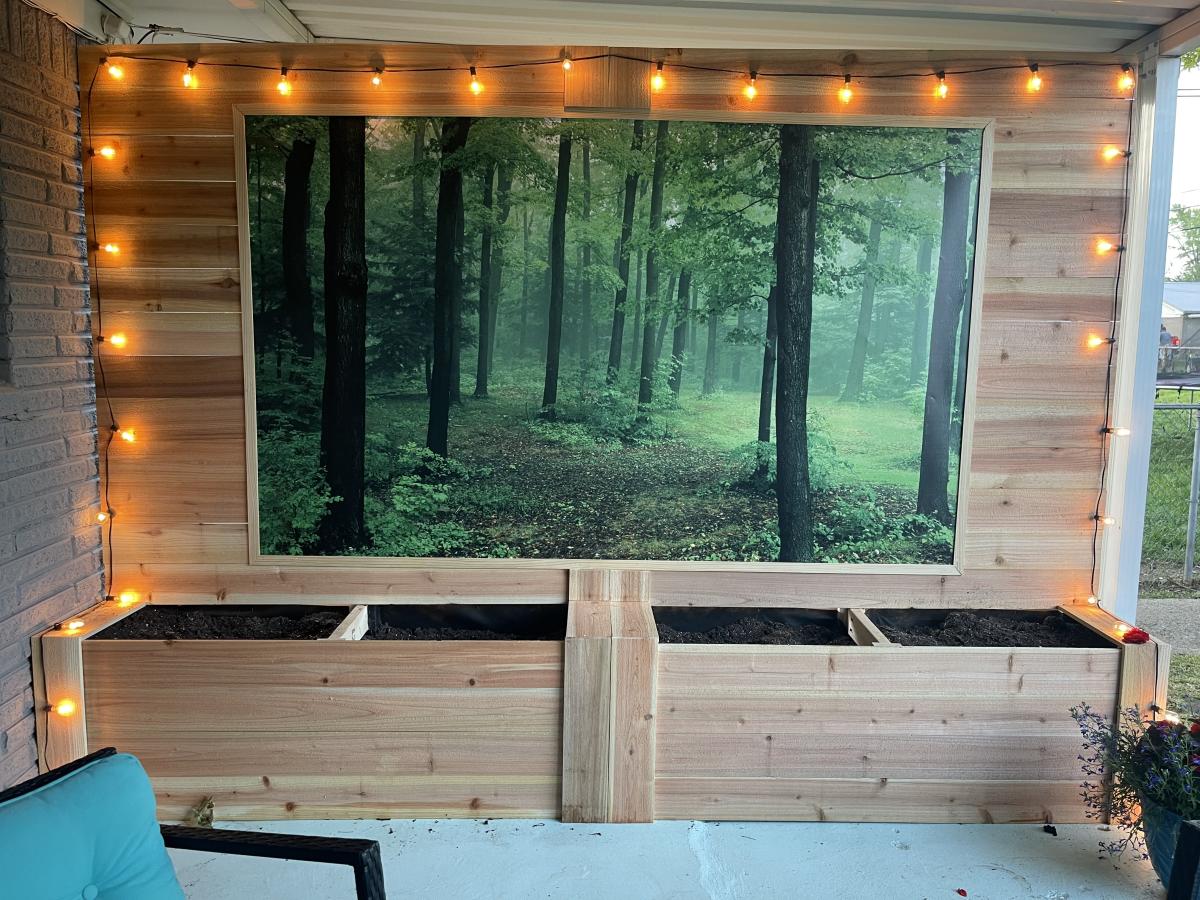
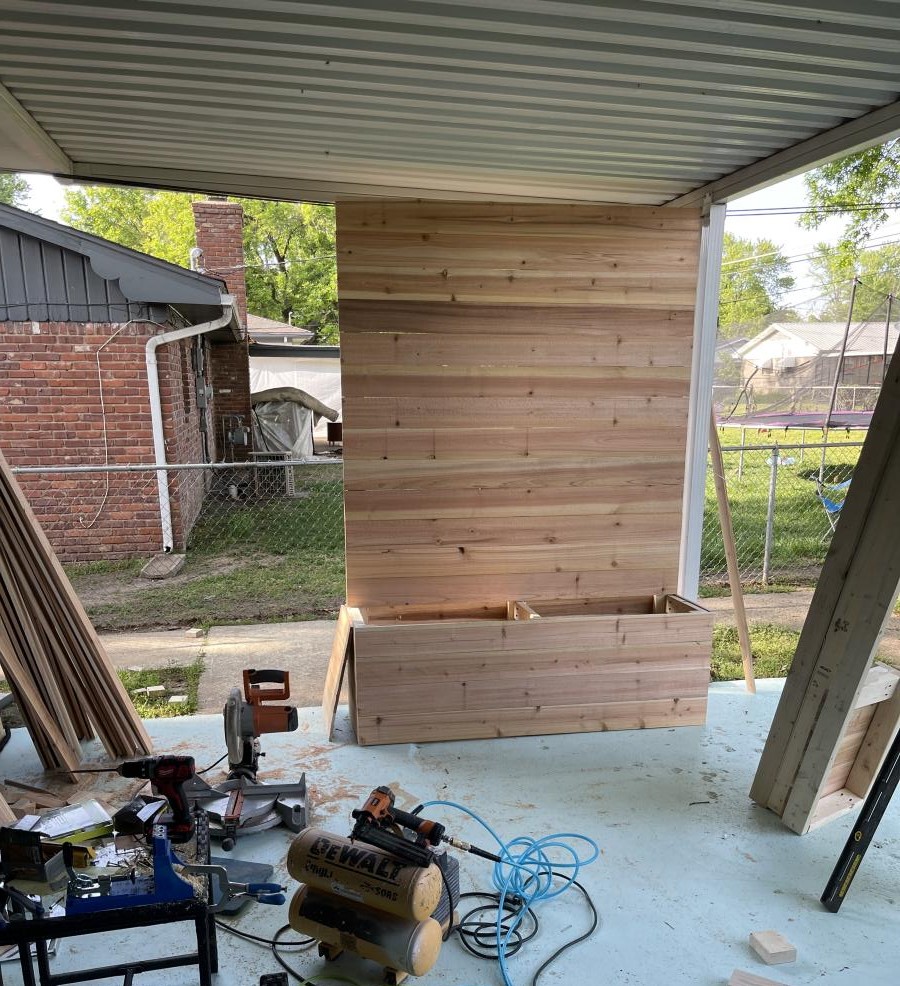
Patio furniture
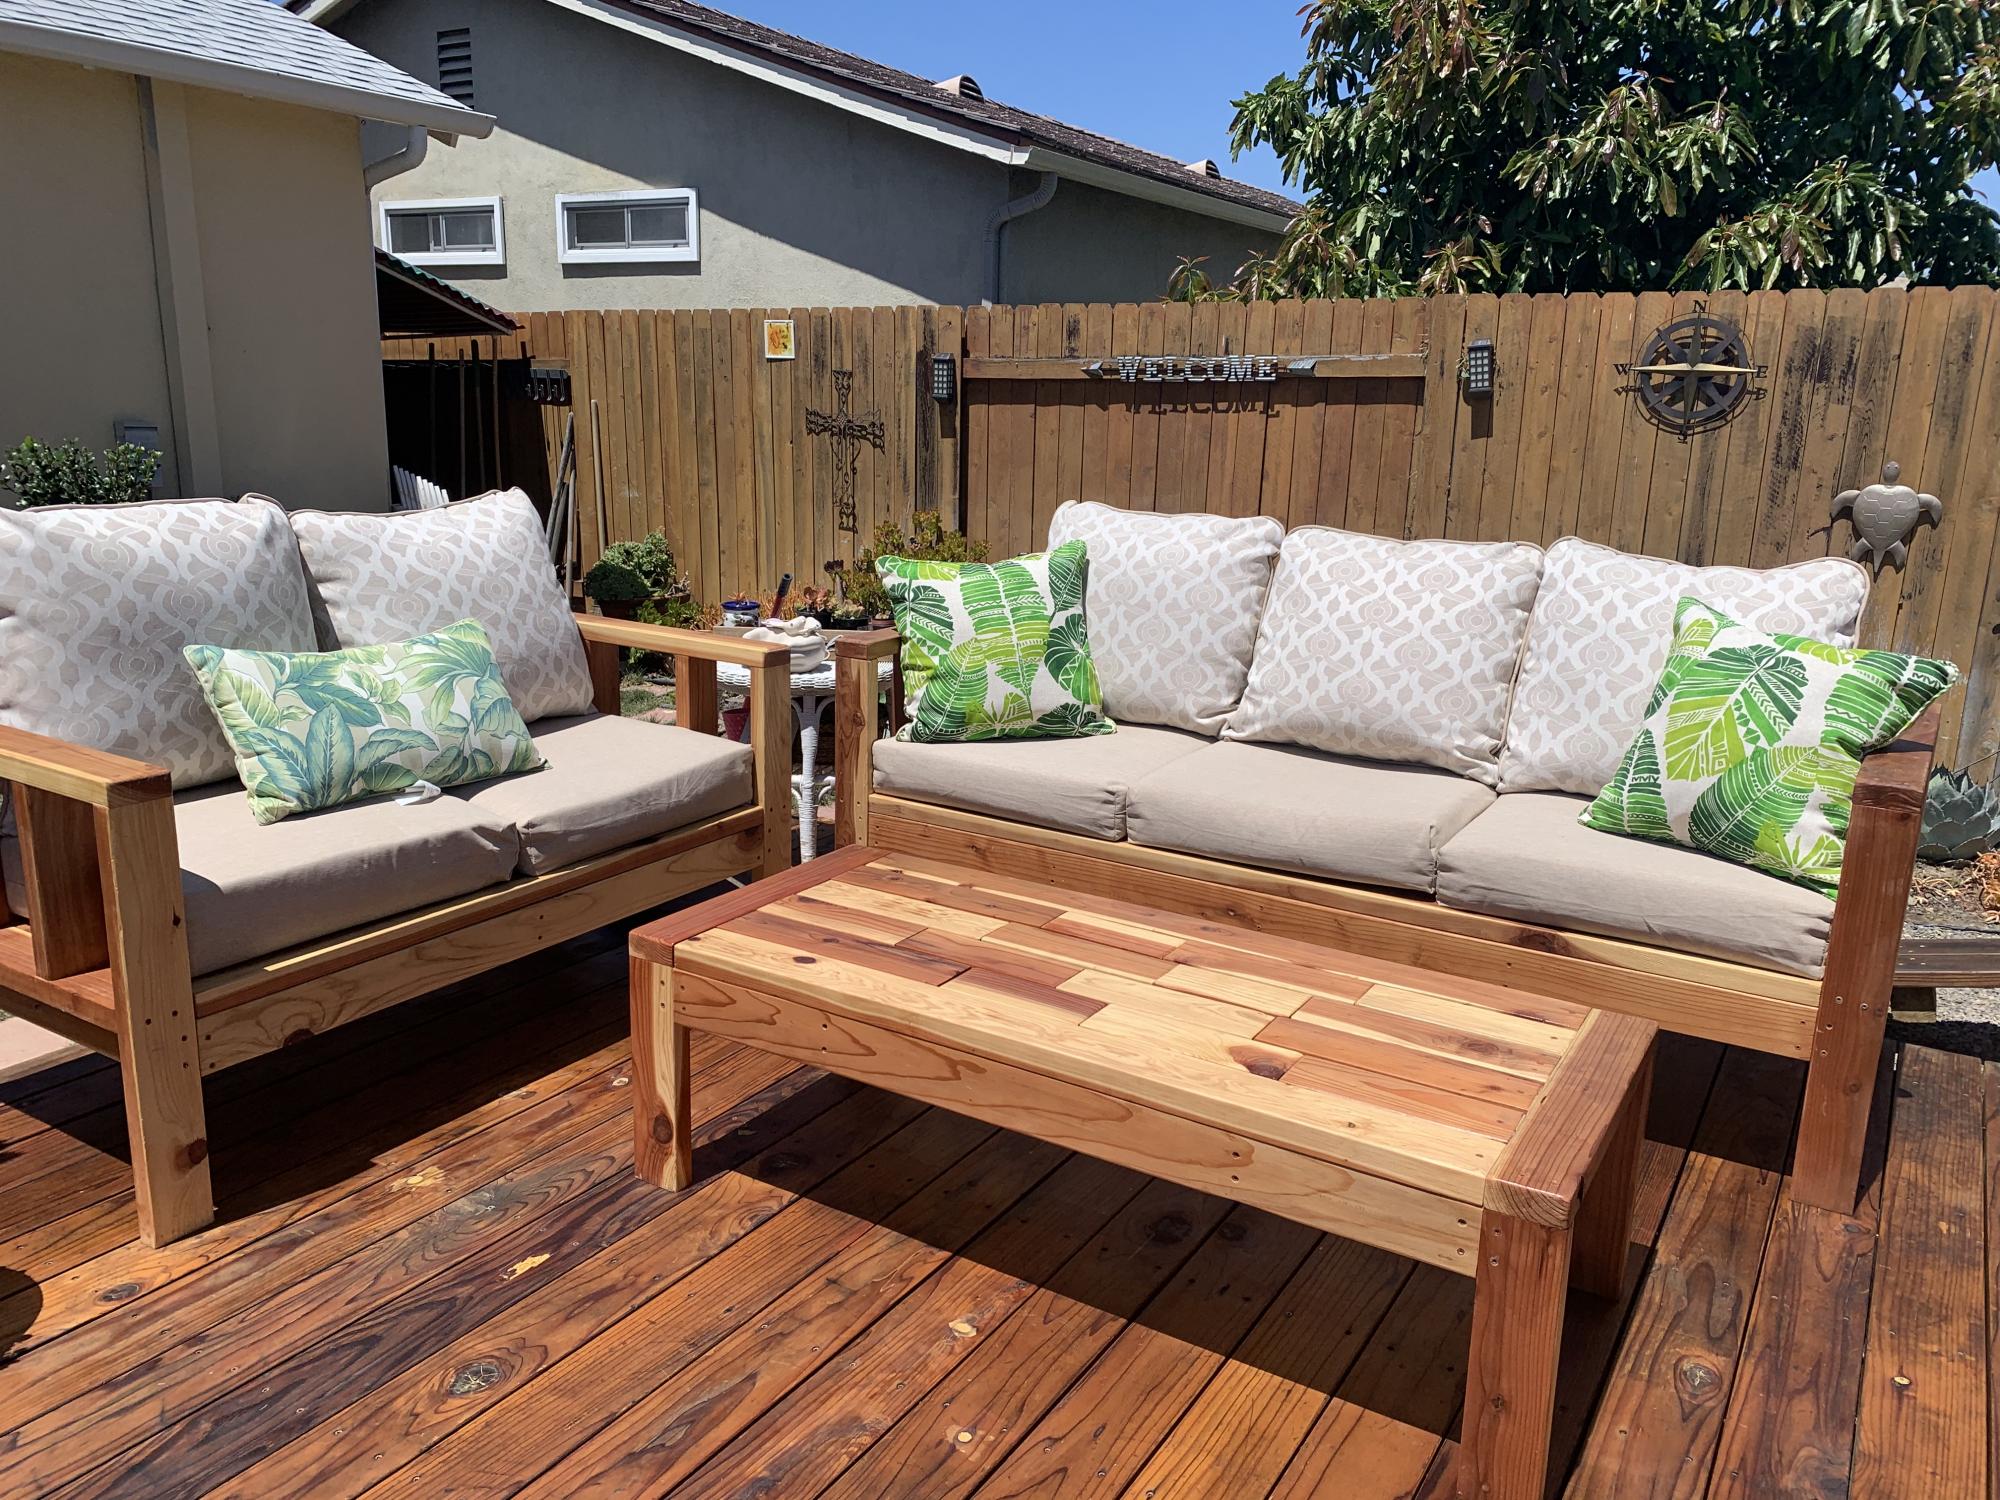
Followed Ana’s plans, very easy to follow. Chose two different sizes, different woods, and different cushions. Very pleased with outcome.
Built from Plan(s)
Followed Ana’s plans, very easy to follow. Chose two different sizes, different woods, and different cushions. Very pleased with outcome.
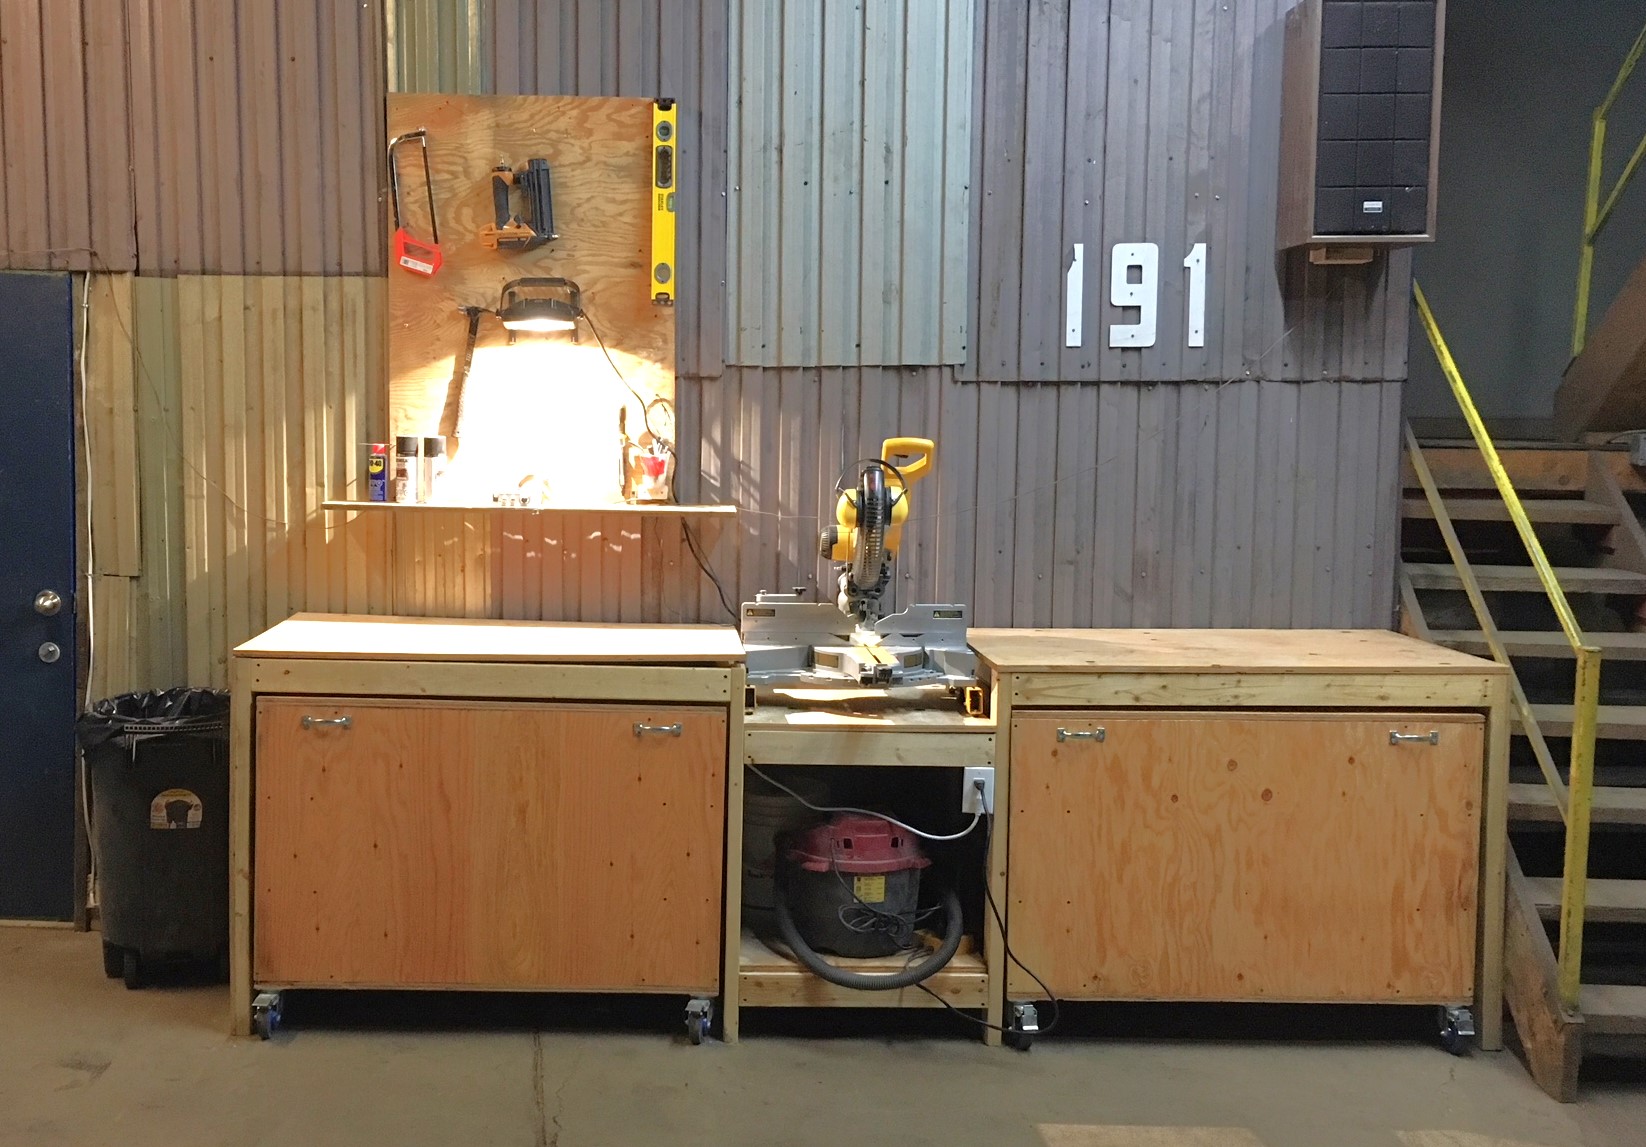
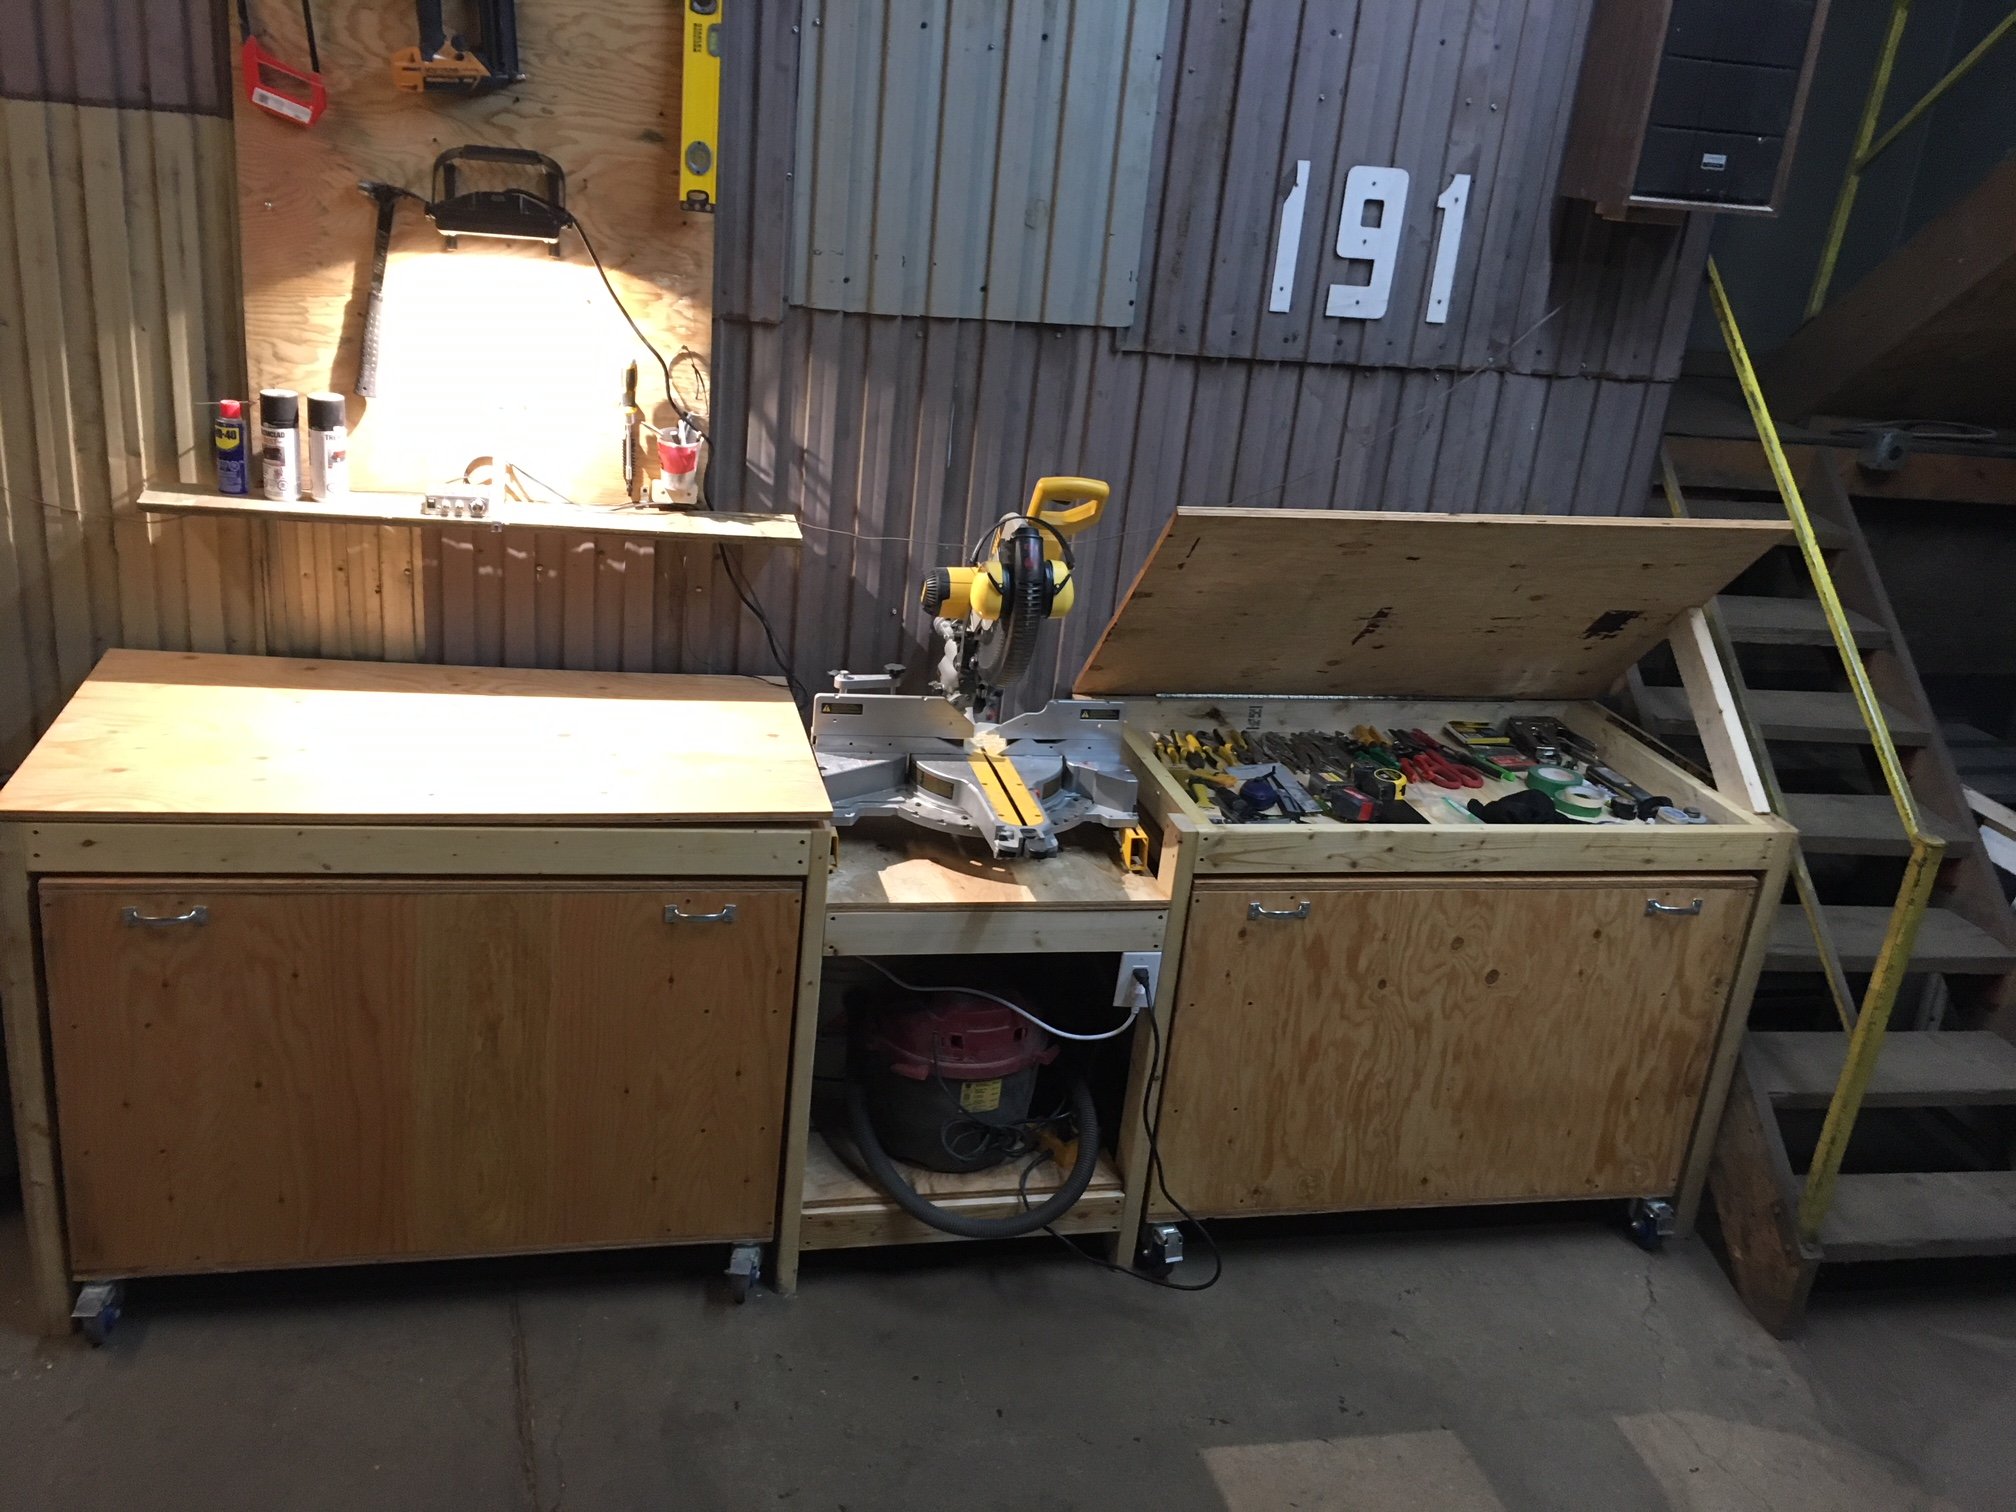
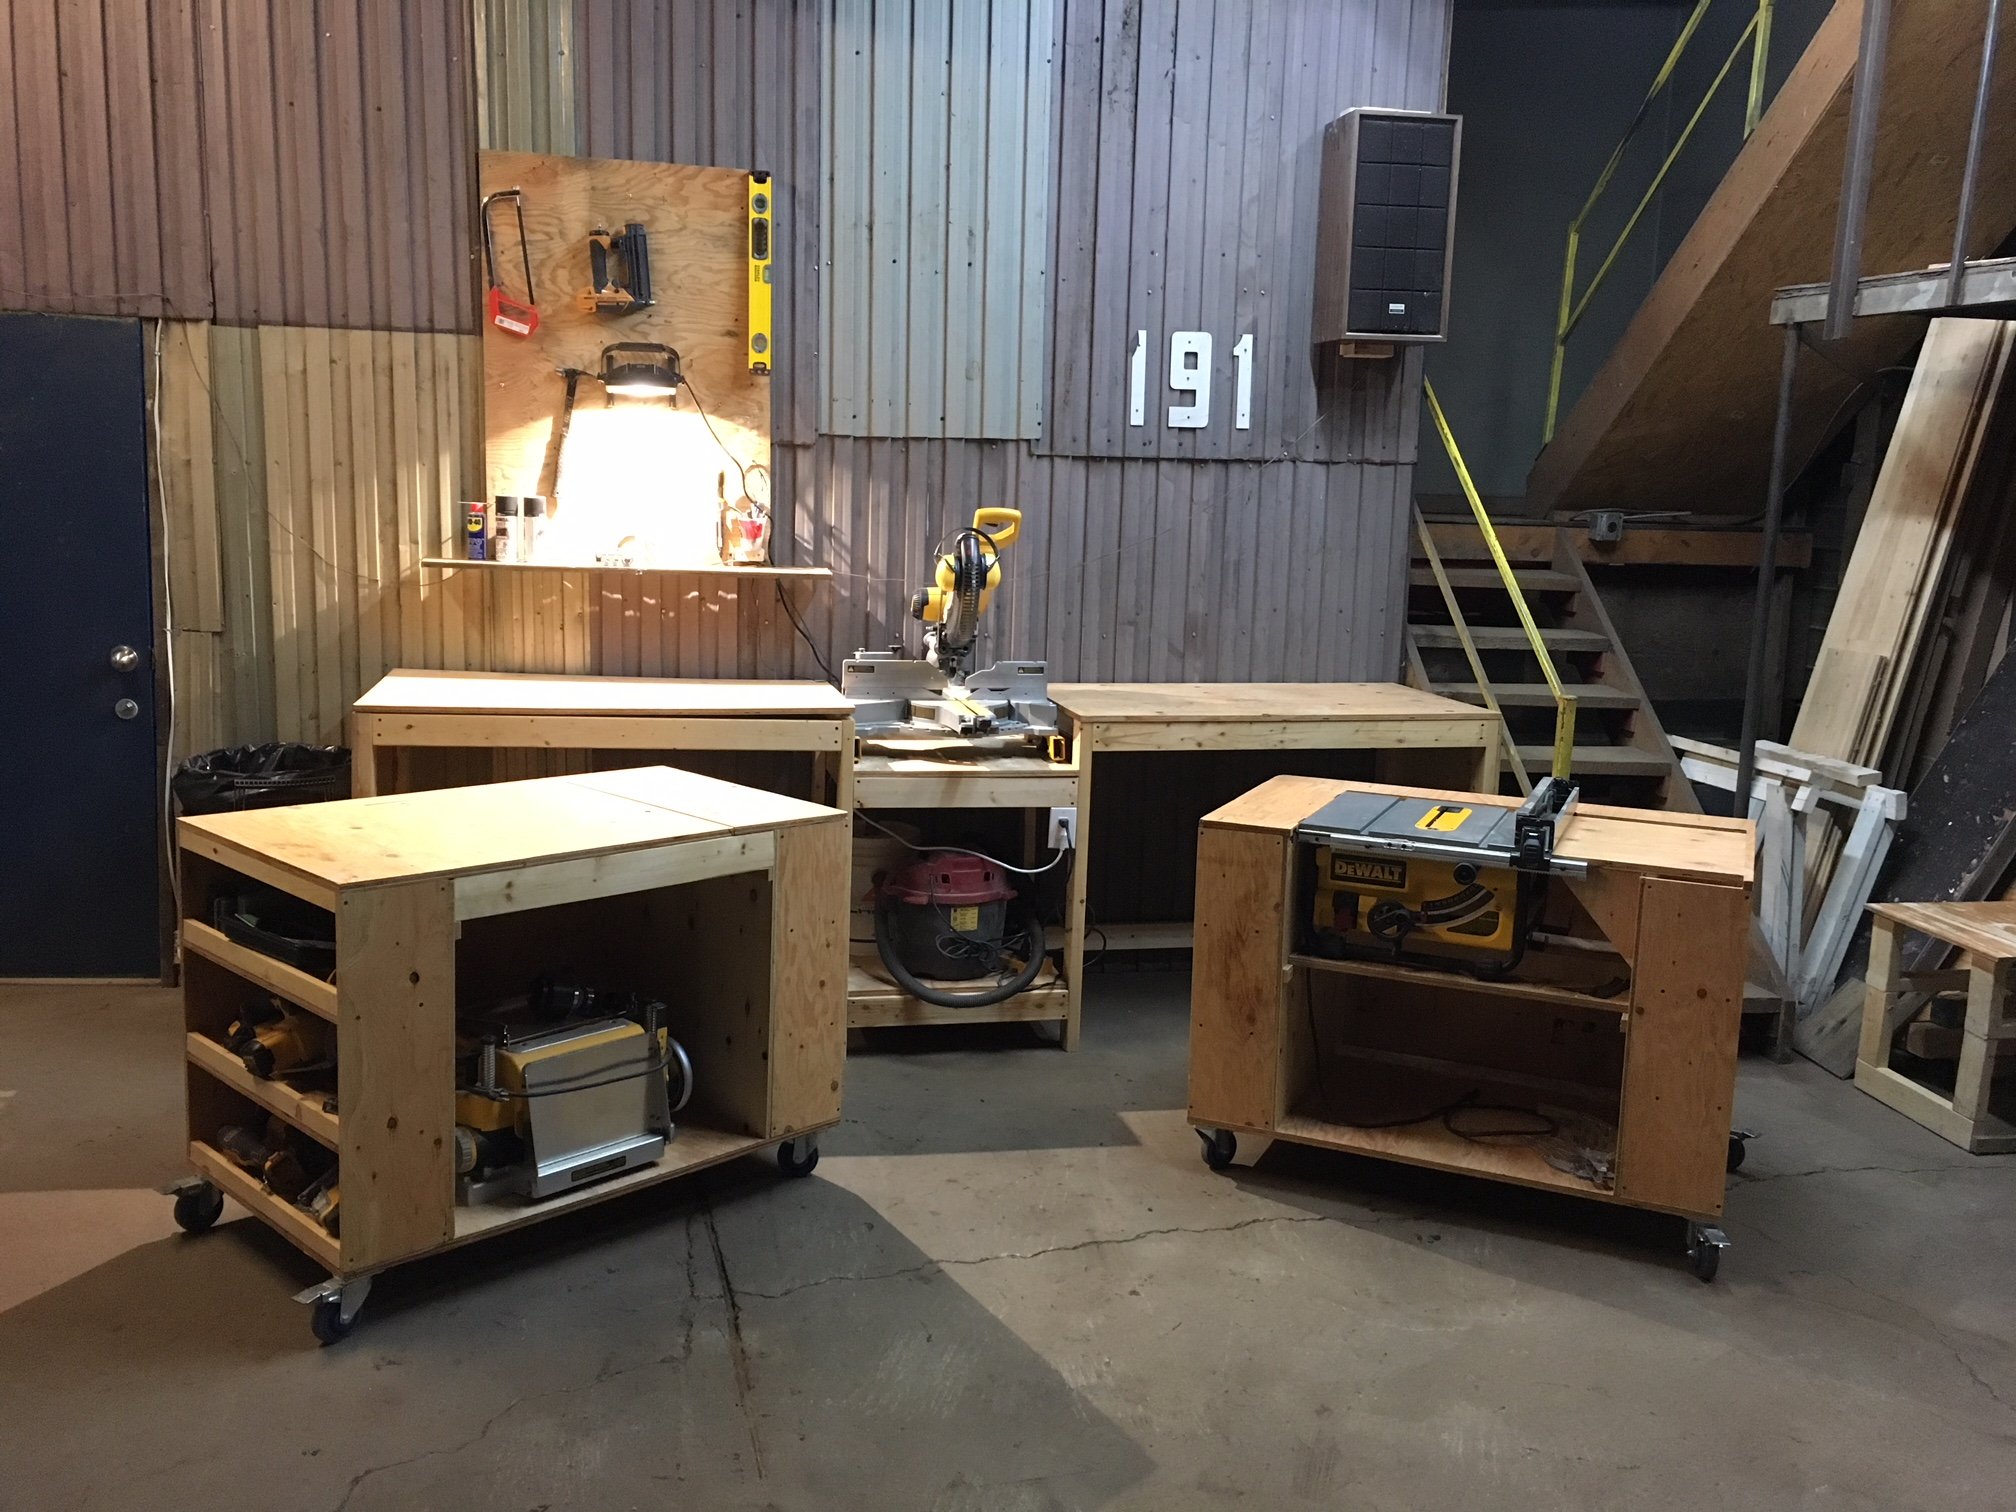
This is the perfect workbench for my needs.
I upgraded the casters to bigger ones as my shop's floor is in rough shape.
I also added storage under the two work surface next to the miter saw. This was just a matter of closing under the 2X4 frame and making the two sections on casters a little shorter. The only downside for that mod is that the plywood can bend a bit since it is not screwed to the frame. I don't mind since it falls flat as soon as there is weight on it. Also, this mod makes it hard to include fence system (it would need to be removable, like fixed with dowels only, no glue) and almost impossible to include a precise fence system since it would need to be removable. In my case, I do rough, non-repetitive cuts, so there is no need.
TIP : Pay a little extra for smooth plywood. I lost a lot of time sanding mine :(
Tue, 02/04/2020 - 08:21
Awesome! Do you have pictures/info for the cart that has the Dewalt table saw? I have the same one and would love to build the cart for it.
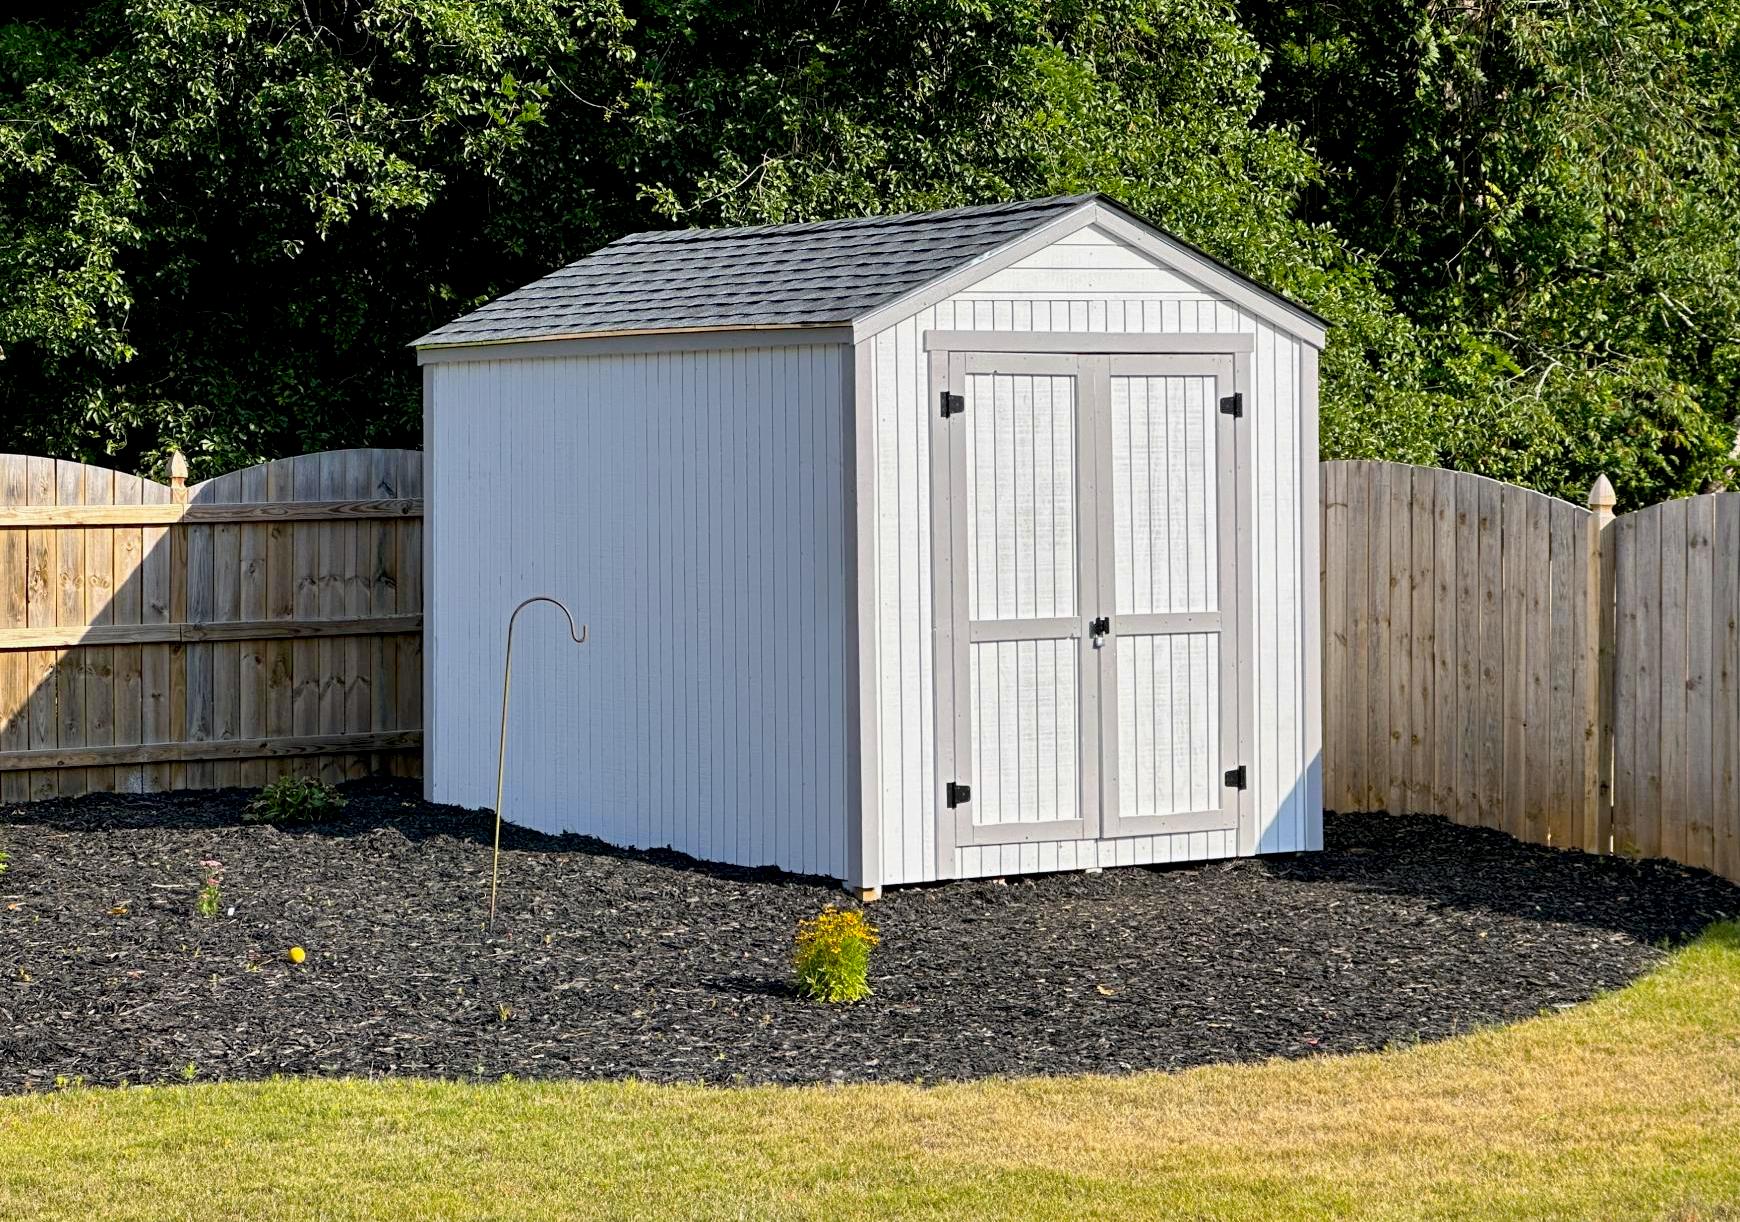
My new garden shed built from your premium plans! I'm 62, never built a shed before, and worked mostly alone. My sons helped with some of the wall and roof sheathing. In the end, I did everything except for the shingling. I painted it to match my house main color and trim.
The video is very helpful - I watched it several times. My major change to the plans was using Simpson Strong Ties and hurricane ties to secure the rafters to the ridge pole and the top plates. Otherwise, I used all other methods. I recommend cutting the front wall sheathing before cutting the panels for the doors. I do not have a trim saw and thought my standard circular saw was too heavy for me to make the cuts like Jacob did.
Tue, 06/13/2023 - 13:57
Really impressive, thank you so much for sharing and good for you to just go for it!!!
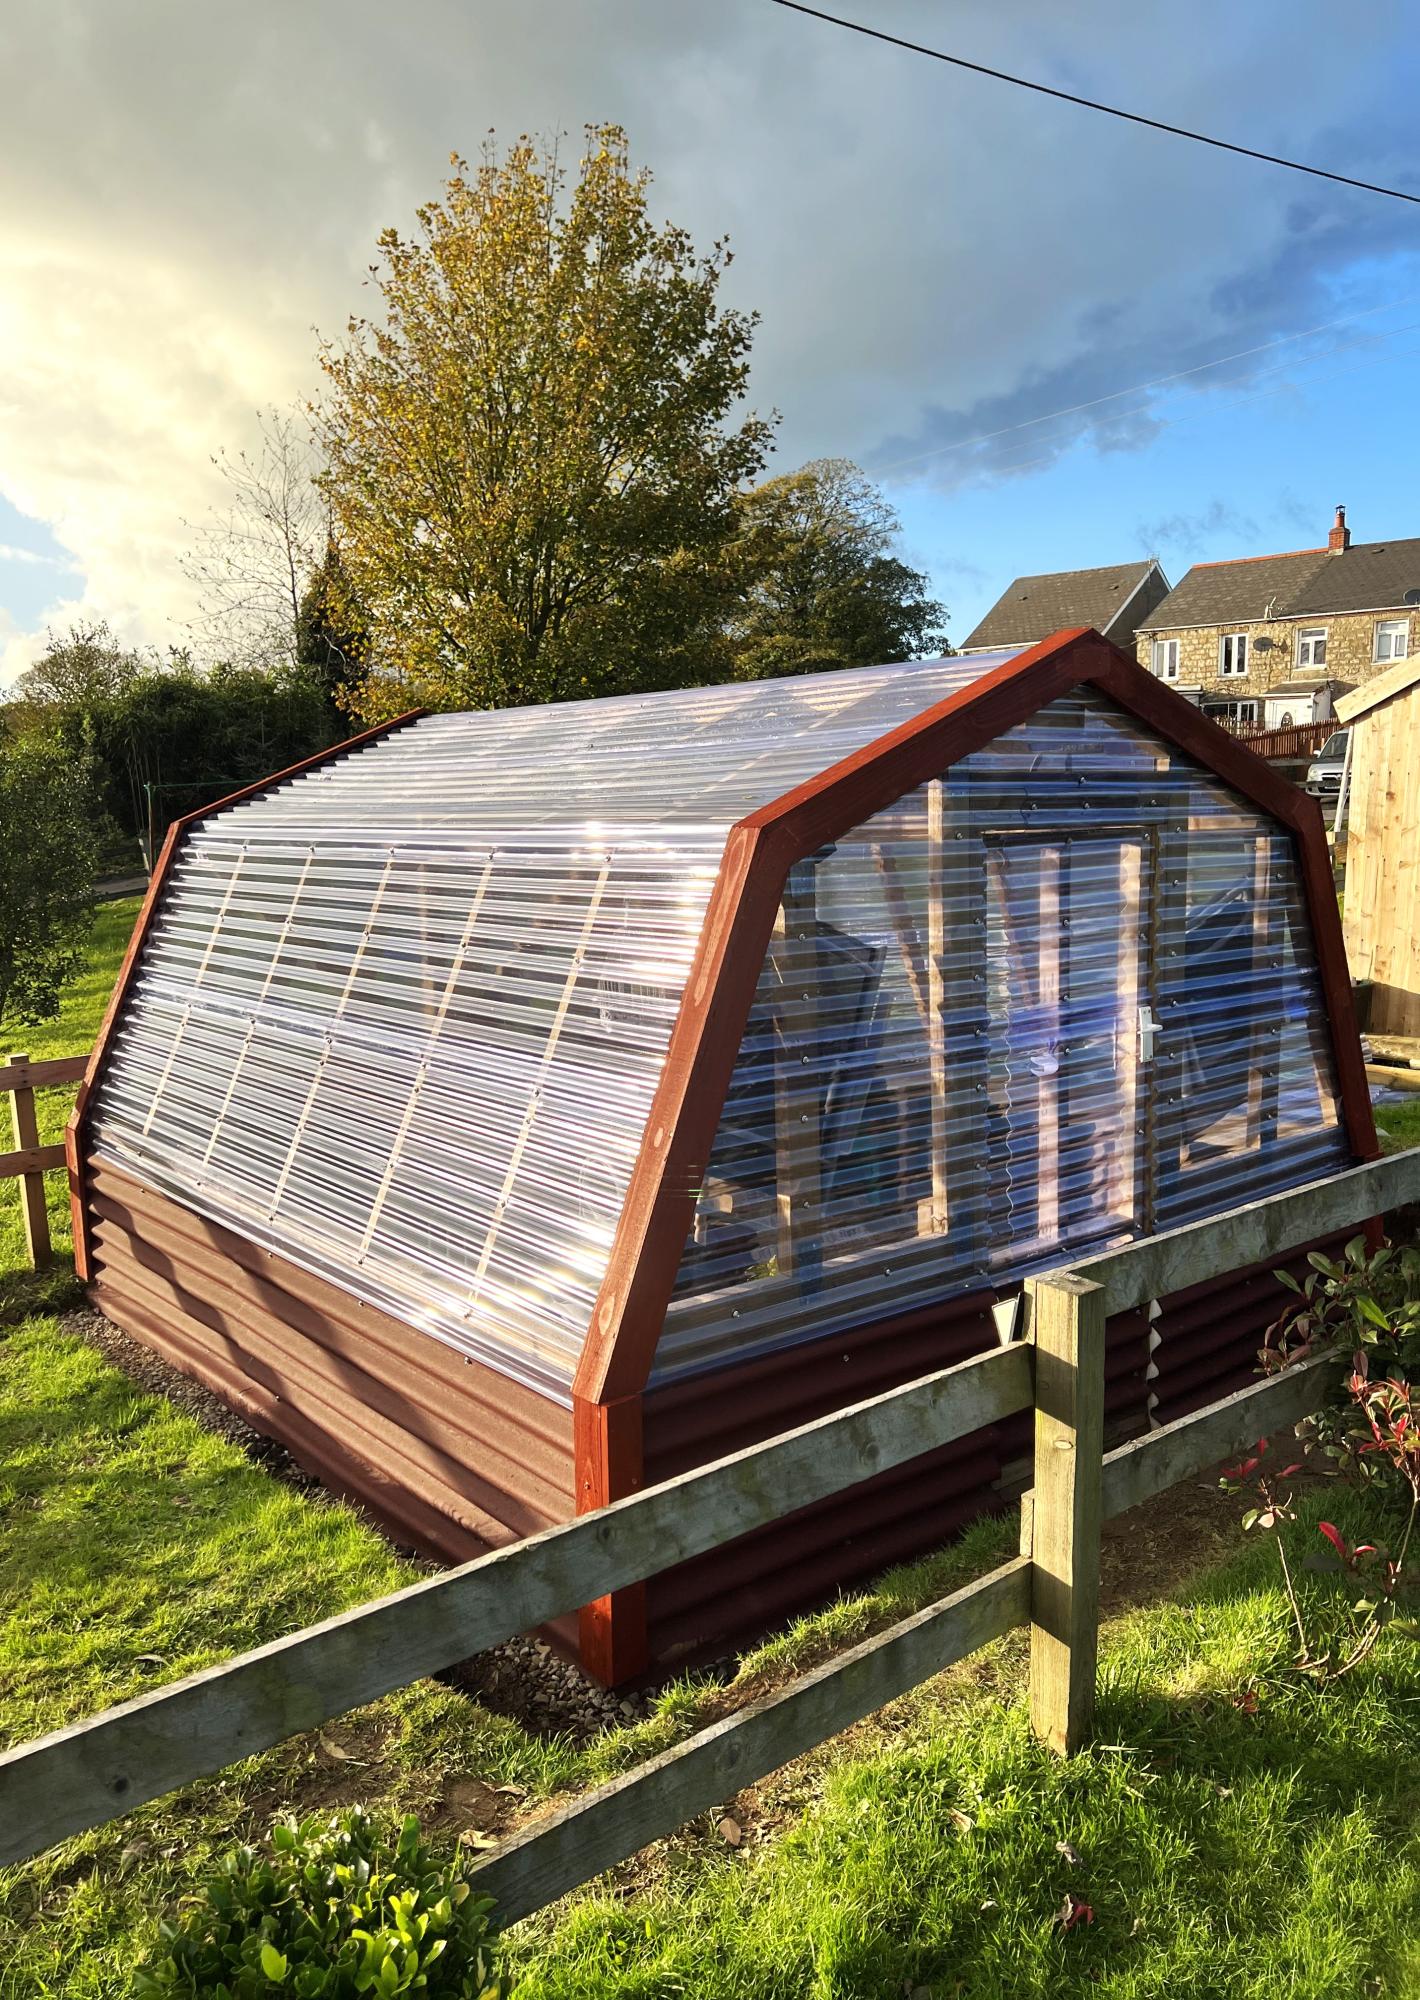
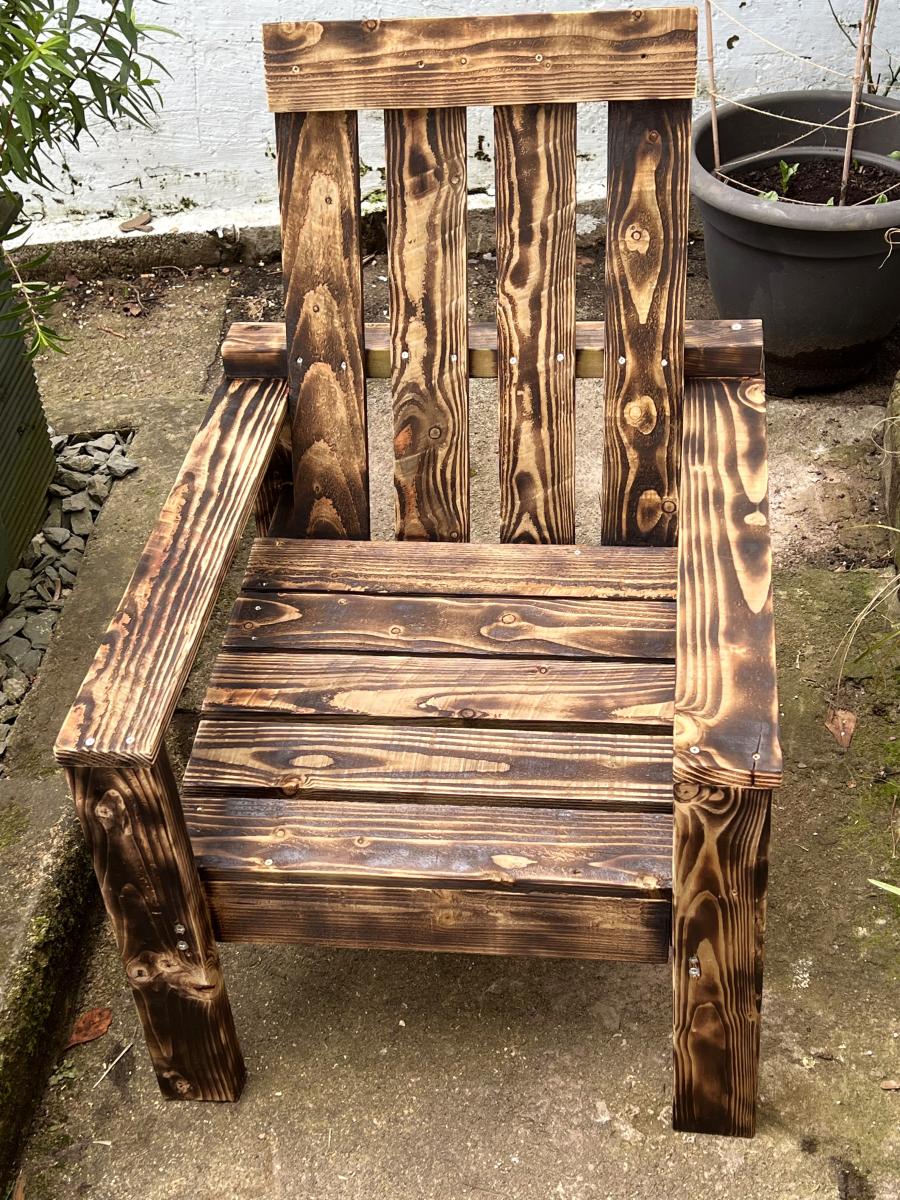
Made to the basic design for the outside patio chair. With a few modifications due to utilizing all the scrap wood from the greenhouse.
Welshsmoker
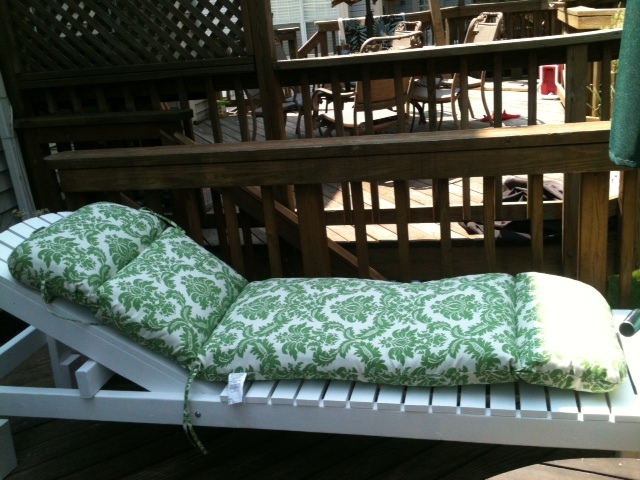
This cost me $55 for wood (pine), nails, and bolts. Additional $7 in paint. It's very sturdy and very comfy with a lounge chair cushion (Walmart had a great price--cheaper than I would have spent to make one myself). This will also serve as bench seating for my deck (I love multi-use furniture). Thanks Brook and Ana for this great plan!
Fri, 05/20/2016 - 11:32
I have my lounge completed except for the slots. It looks great and I am very happy with the results. But, in looking at your finished photos, I notice the 2 X 4 in the horizontal slot is not seated into the space completely. And, melbooker's photo shows the board sitting on top of the rail. So, I'm a bit confused about cutting in the slots. Any advice would be very helpful! Thanks
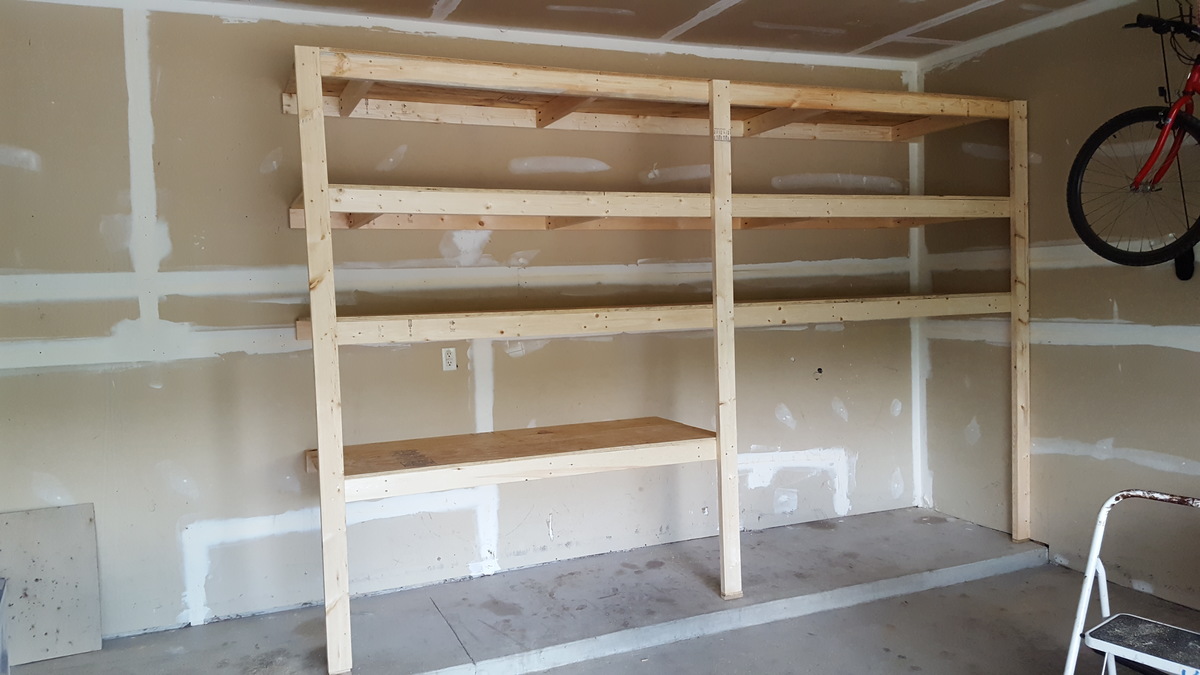
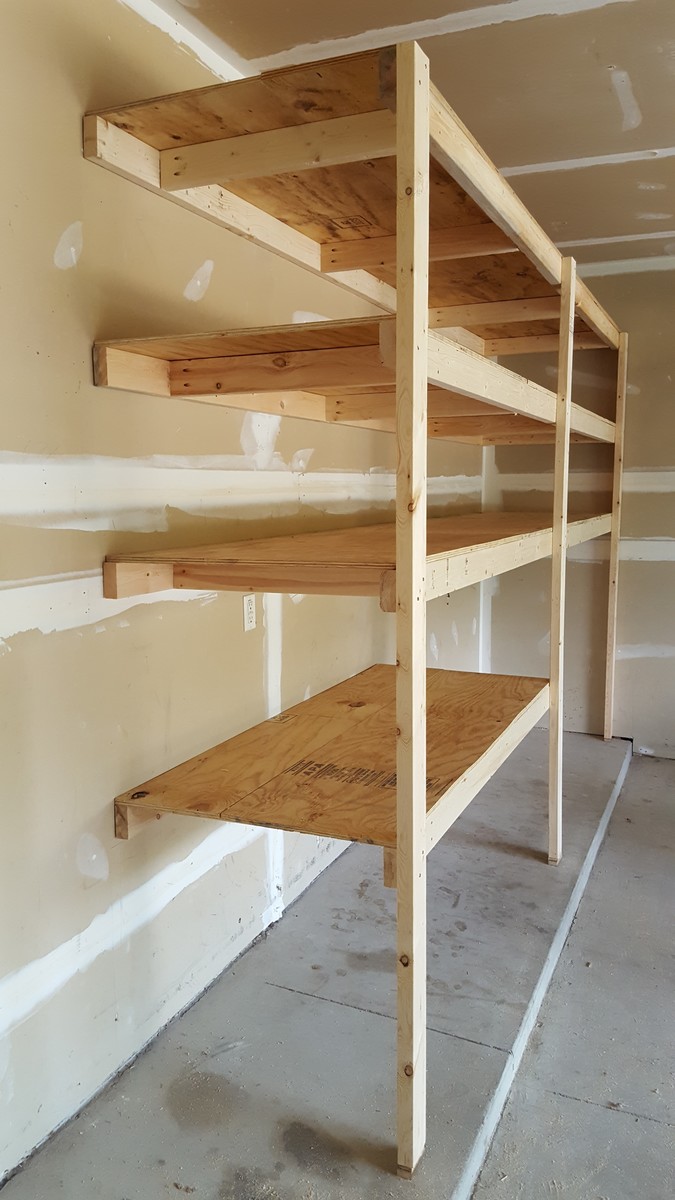
My husband and I built these shelves in our garage this past weekend. This is one of our first diy projects and we are very happy with how it turned out. The shelves are 30" deep, around 8 feet tall and 12 feet long. This was also our first time using the Kreg jig, which we loved!
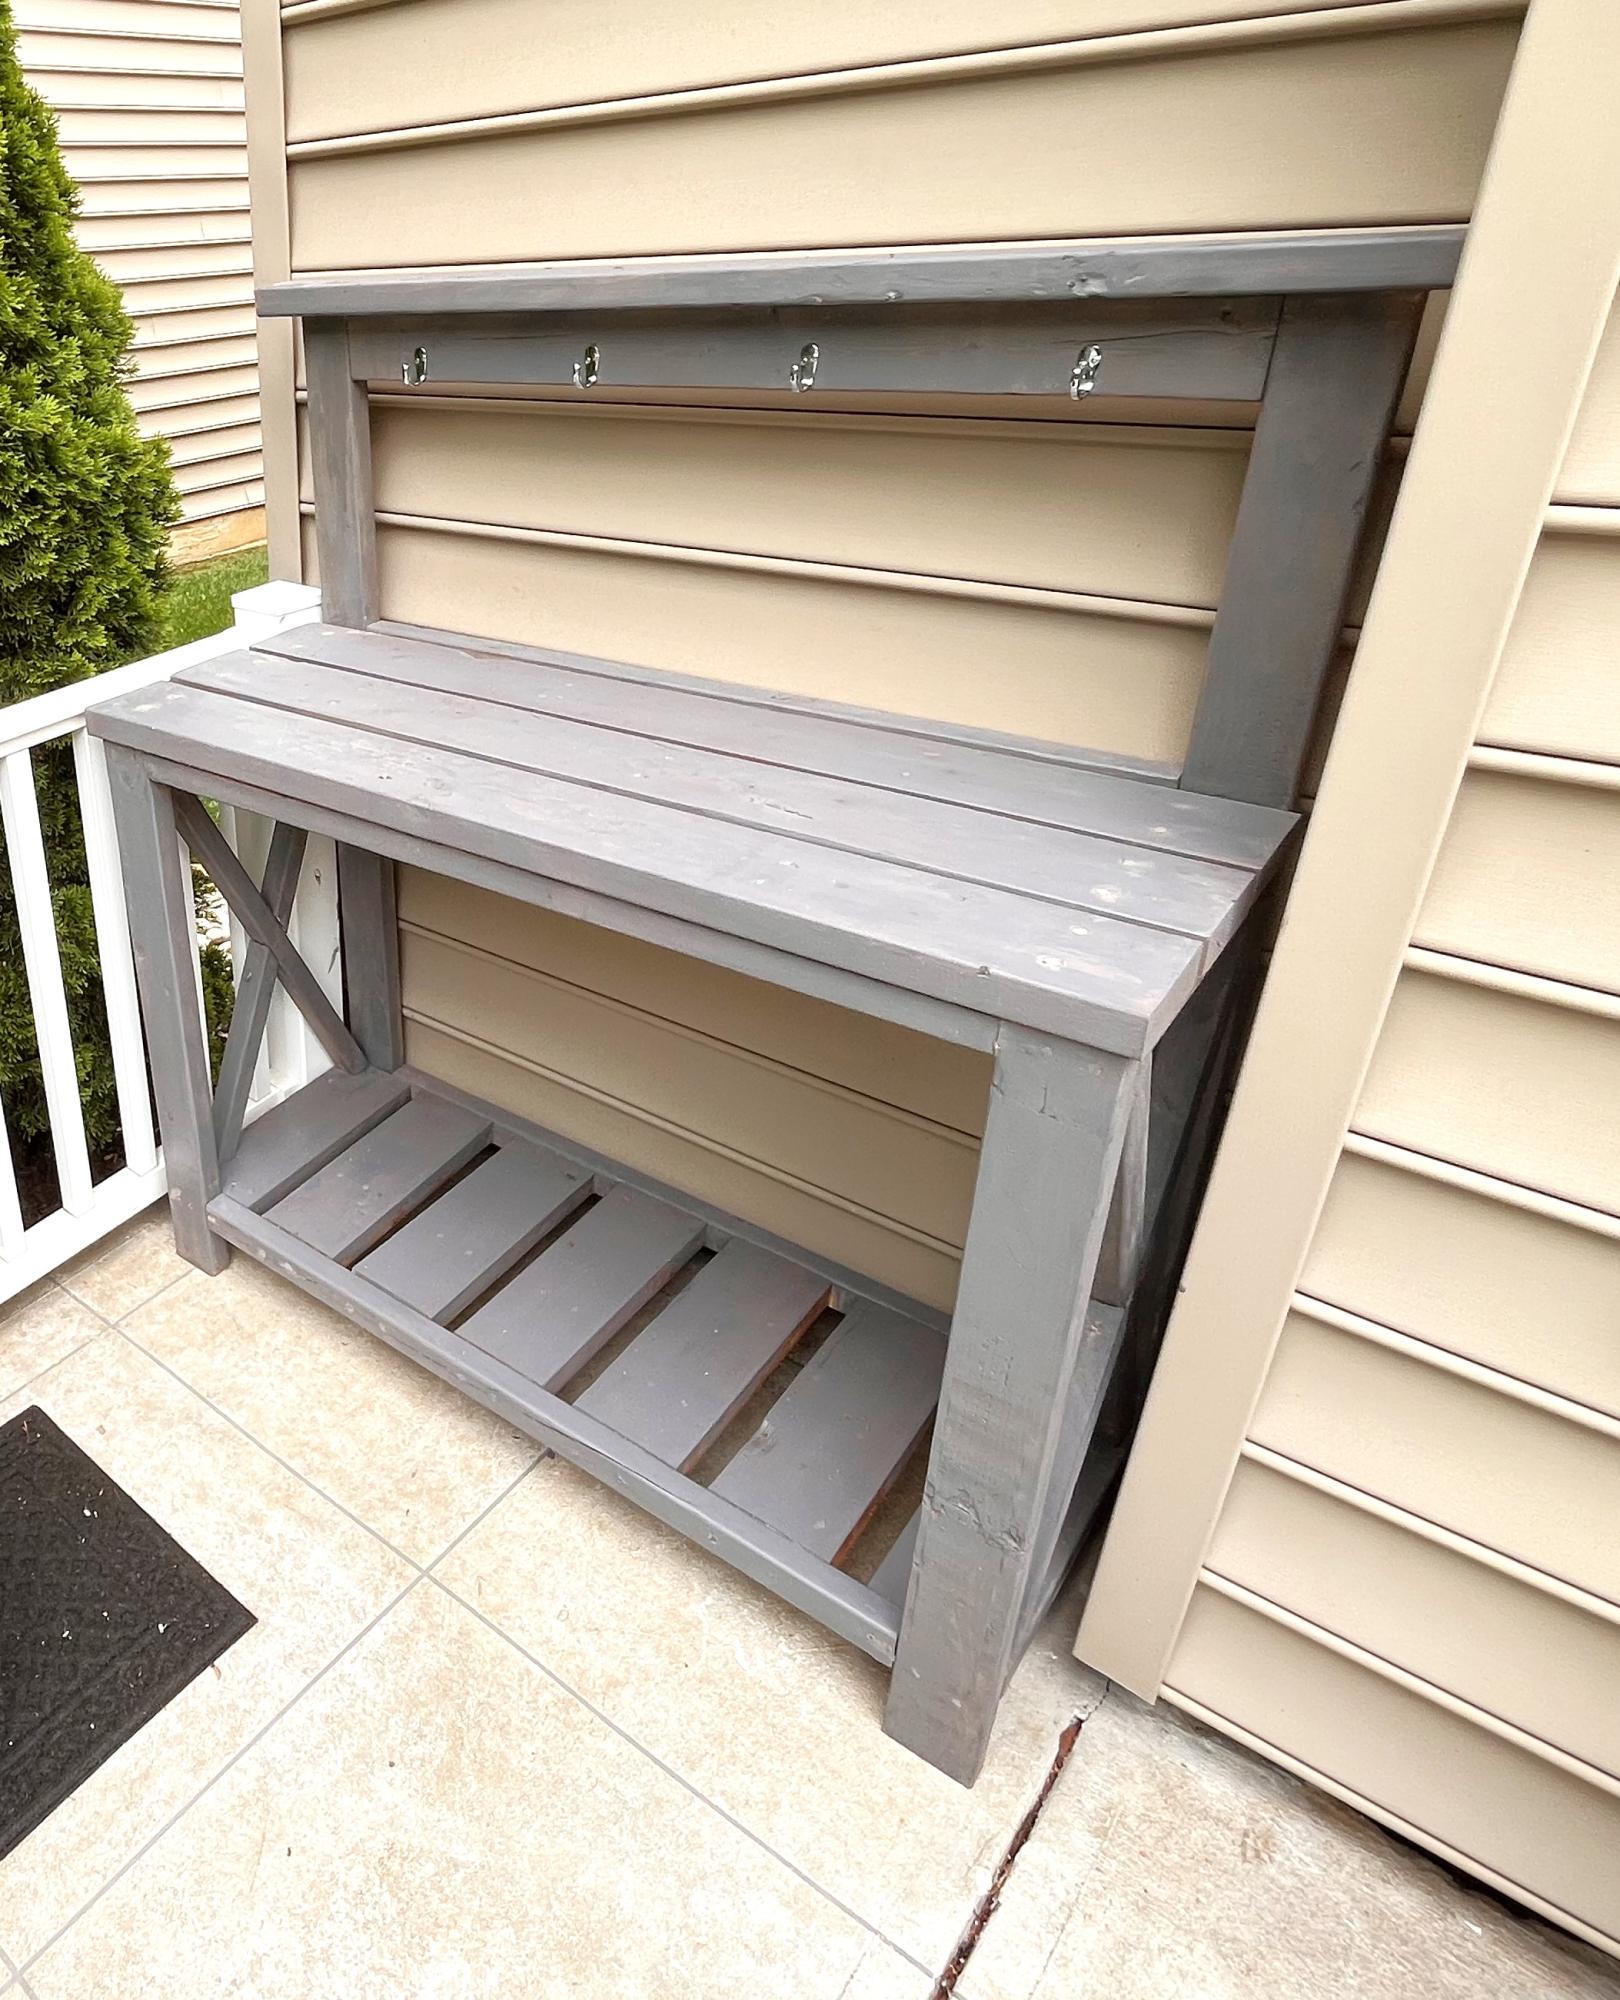
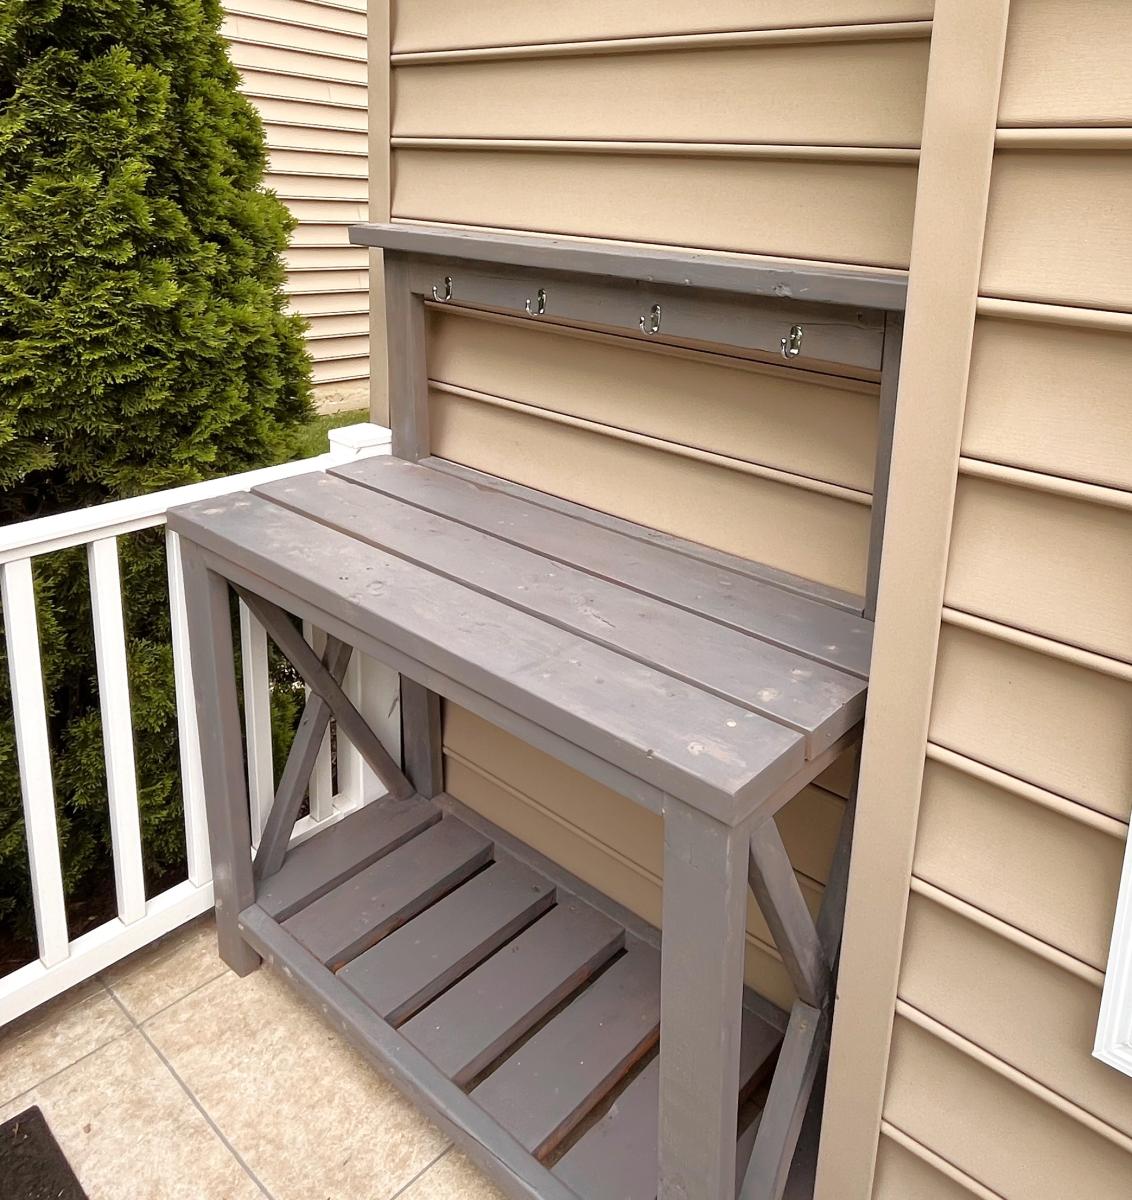
Enjoyed making the potting bench
Thanks for the plans.
Tom Schoeninger
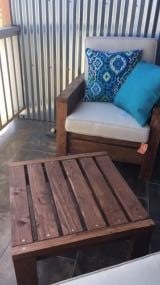
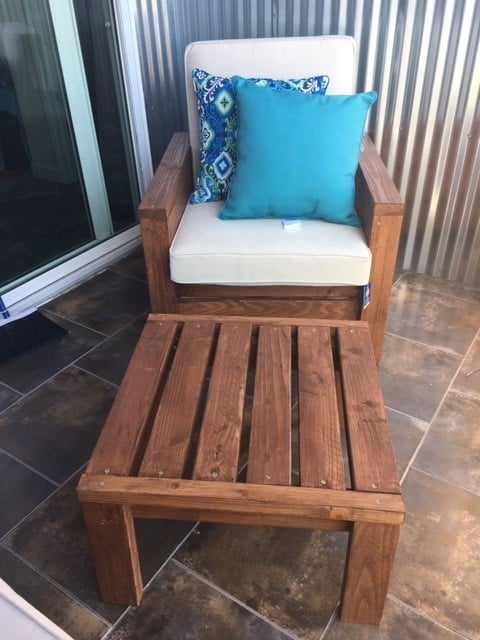
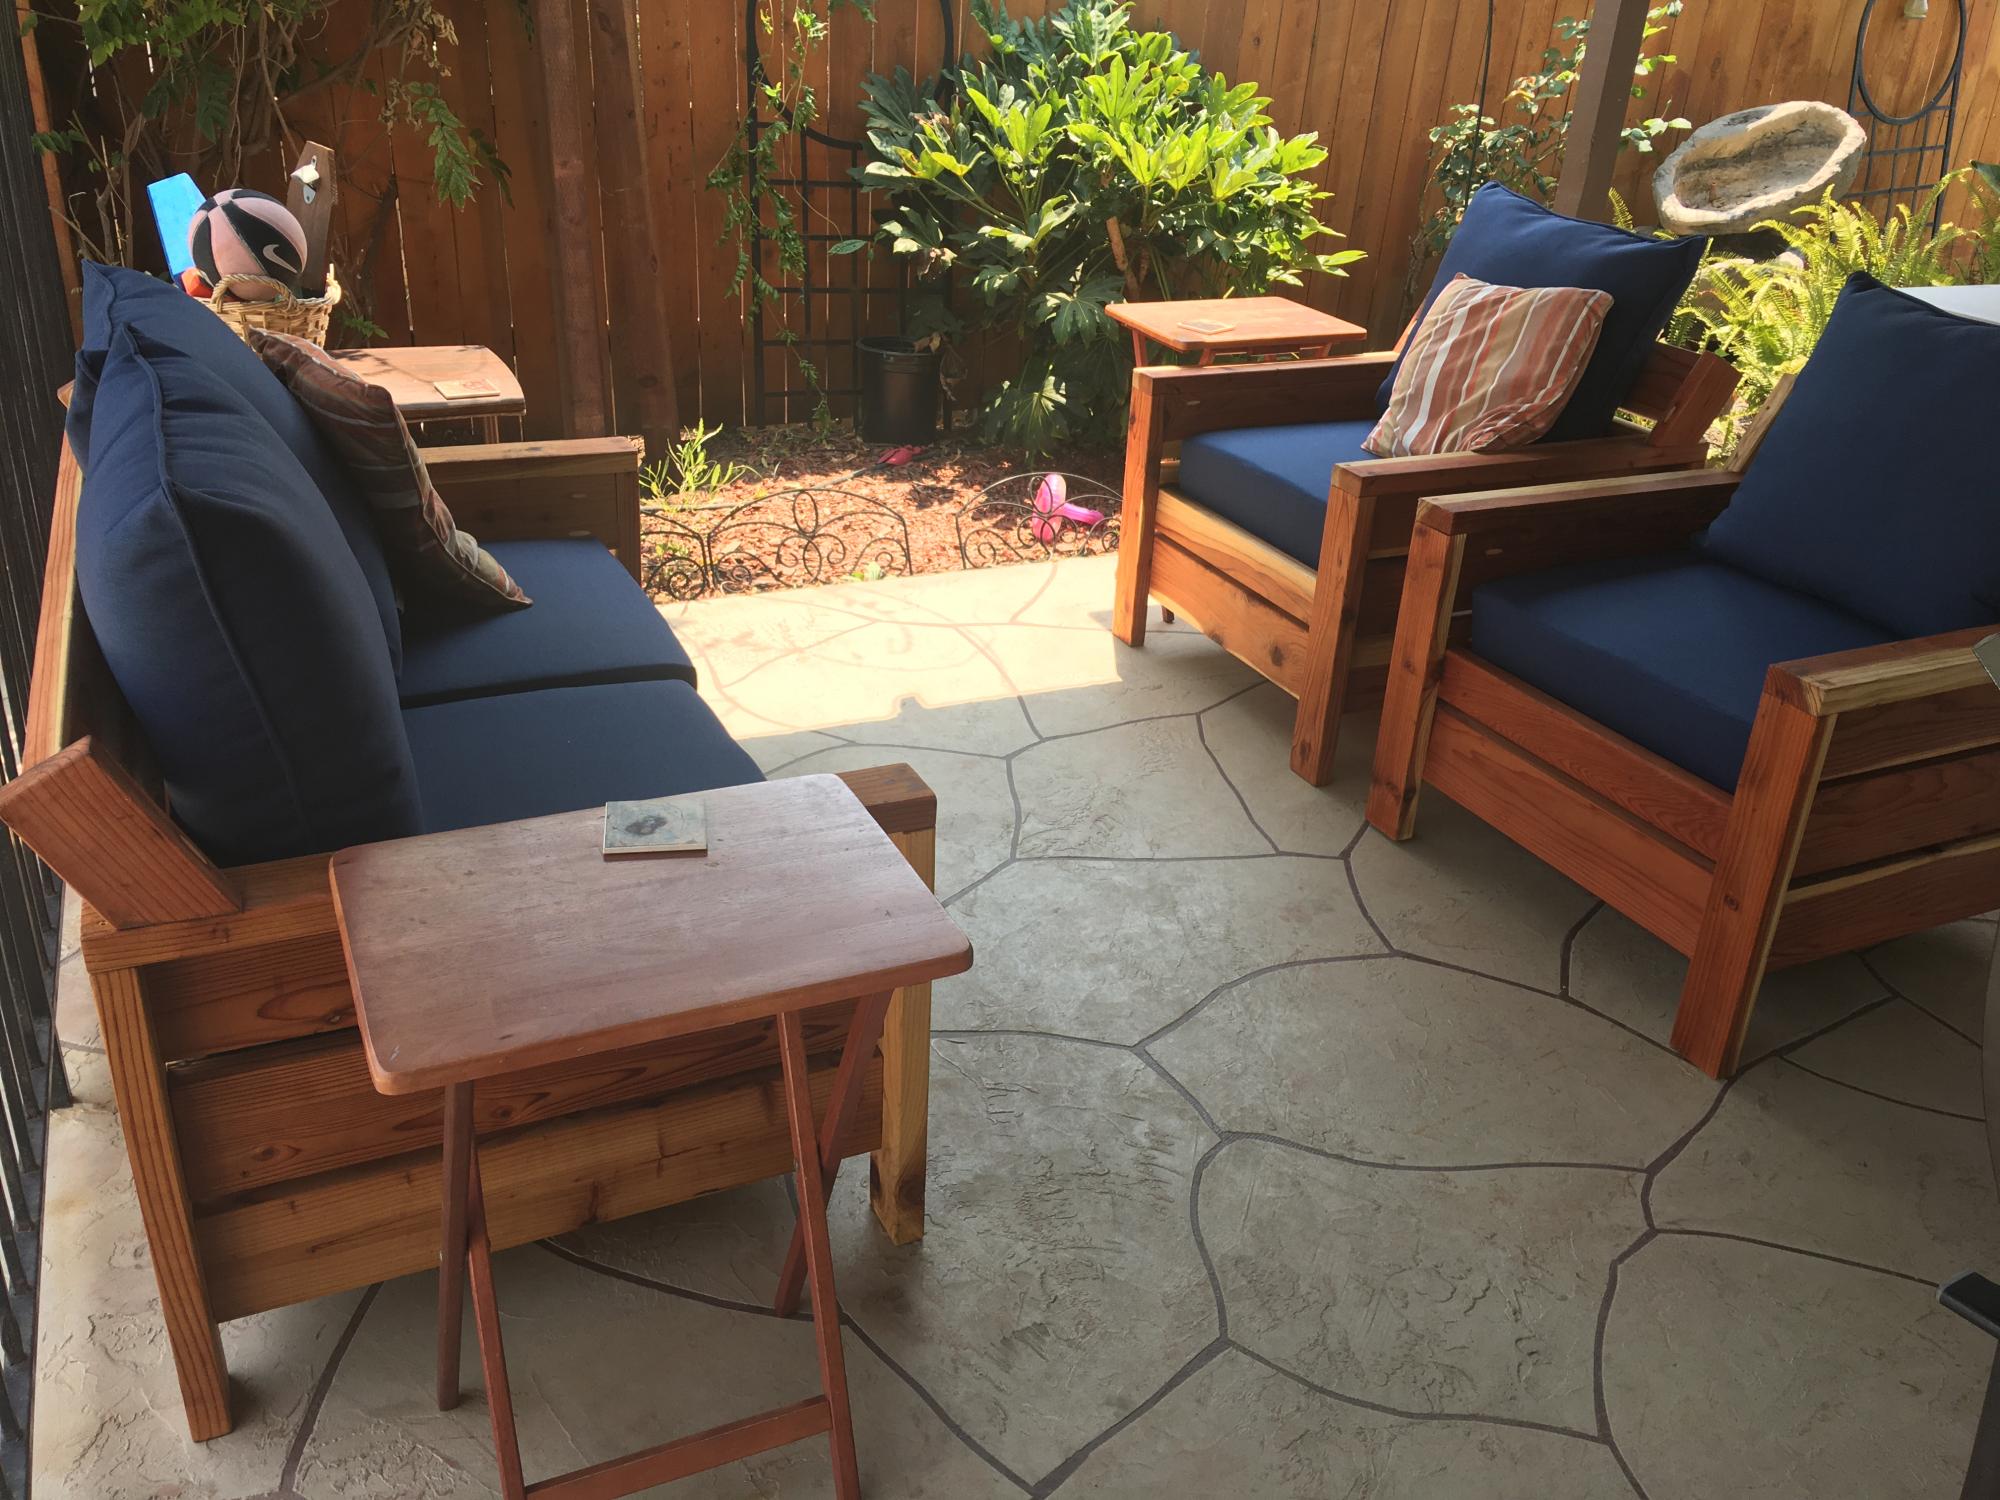
The chairs were my first project ever and they came out great! I even made the ottoman/side table because the chairs looked so good. Ana, your plans were fantastic and easy for a beginner. I learned so much from this first project and I'm already working on another project from your site! The cushions were definitely the most expensive part of the chair.
Our first project!
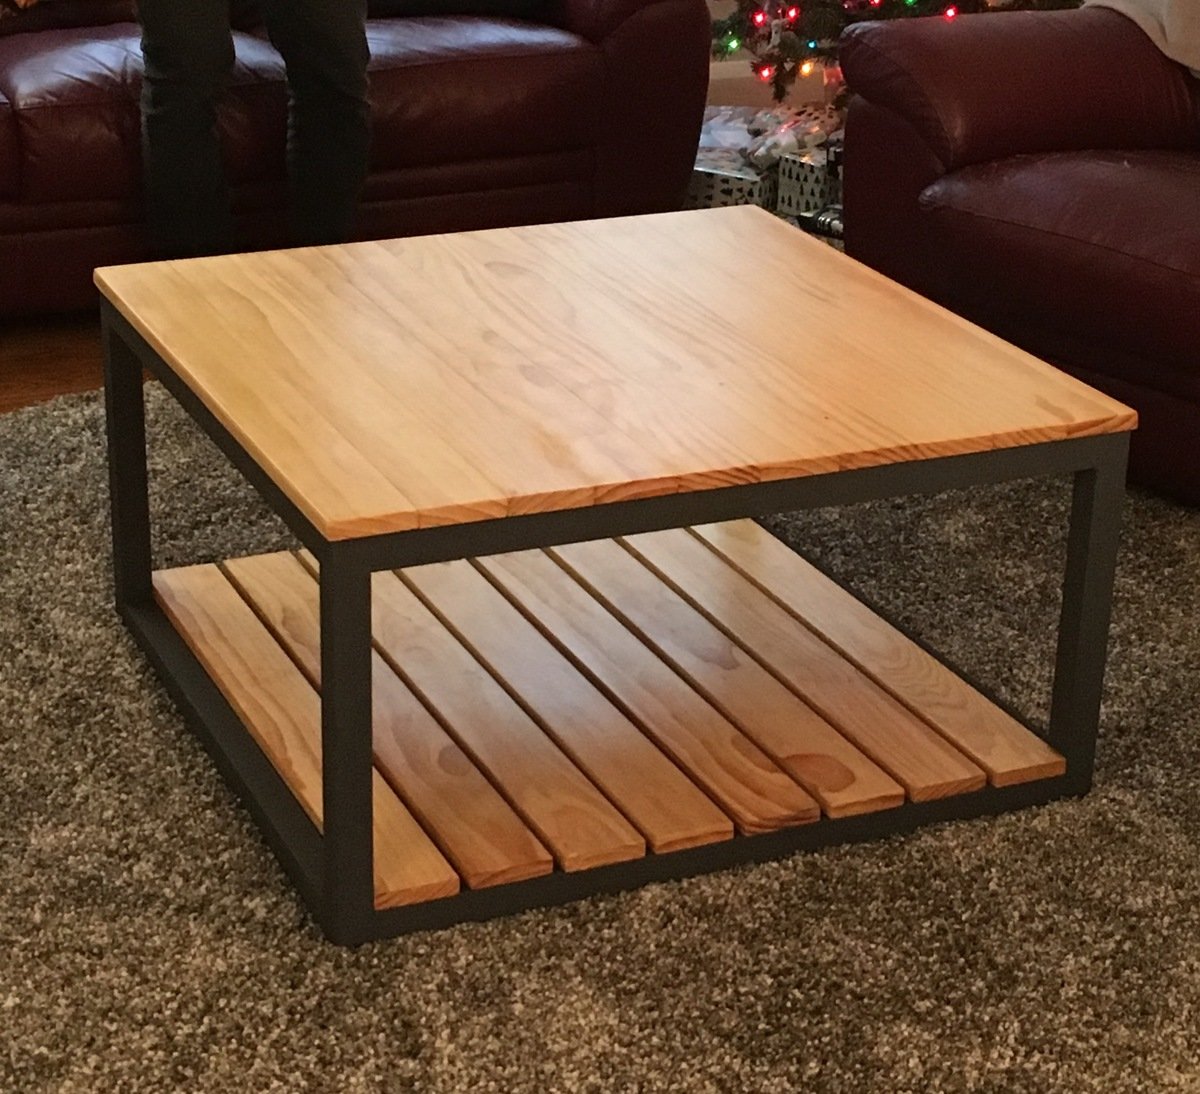
We used the "Industrial Style Coffee Table as seen on DIY Network" plans and simply added a bottom shelf. This required an extra 2x2 bracer (same cut as top bracer) and 8 more 1x4s, cut slightly smaller than the top 1x4s in order to have them sit flush with the bottom 2x2s. The table is all pine.
We spaced the bottom shelf boards roughly a half inch apart (give or take - it's "rustic"!) and screwed in from the bottom just like the top boards.
On the top shelf, we used 3 coats of Minwax Natural stain, and followed up with 3 coats of Minwax Satin Poly. We sanded these after attaching to the frame in order to achieve a level surface. We started with 80 grit, then 120, then 150. We then used 220 in between coats of poly. The result is a smooth, but not store-bought smooth surface, which we think works well.
We didn't spend as much time on the bottom shelf since they'll be mostly storing items, giving them just a quick 150 sand prior to 2 coats of stain and 2 coats of poly. Finally, we nailed in some plastic feet to keep it about a half inch off the floor.
All in all, being our first project, and going beyond what the original plans called for, it took us a few weeks to complete, working on it mostly on weekends and here and there in the evenings after work. We love the finished project and it works really well in our living room!
-Dan and Beth
Thanks ANA for the plans!!
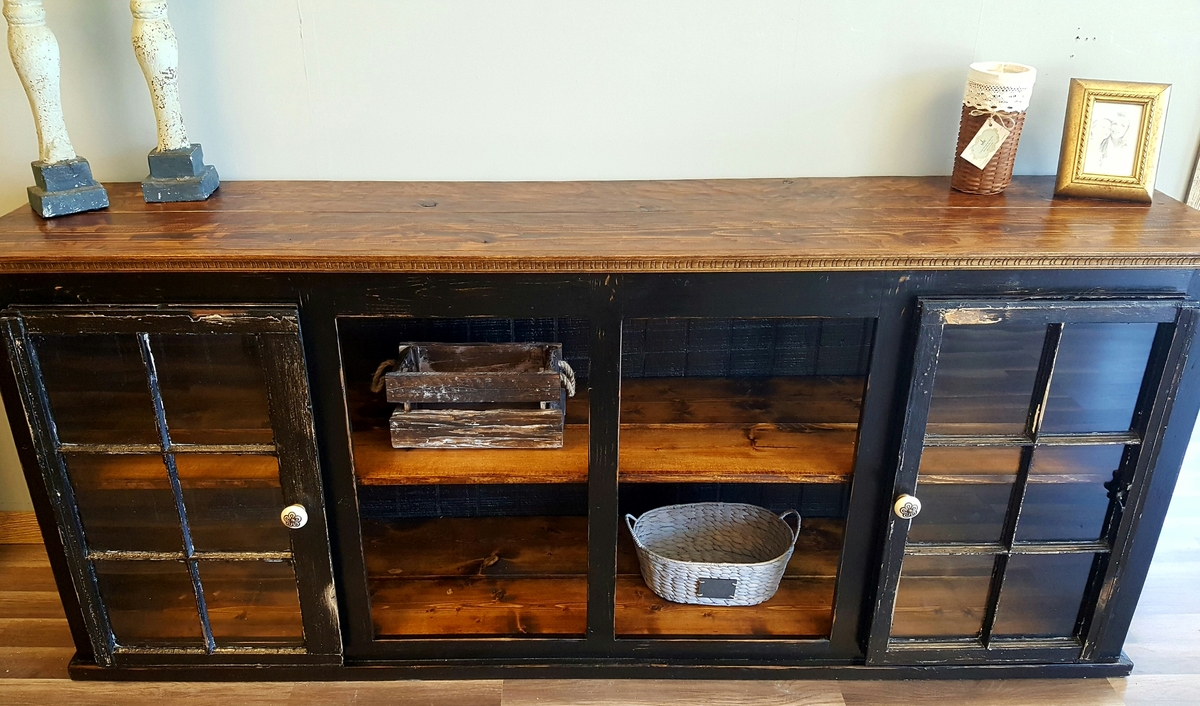
I took a different direction on the doors instead of using the barn doors I used old wooden windows in place of them.
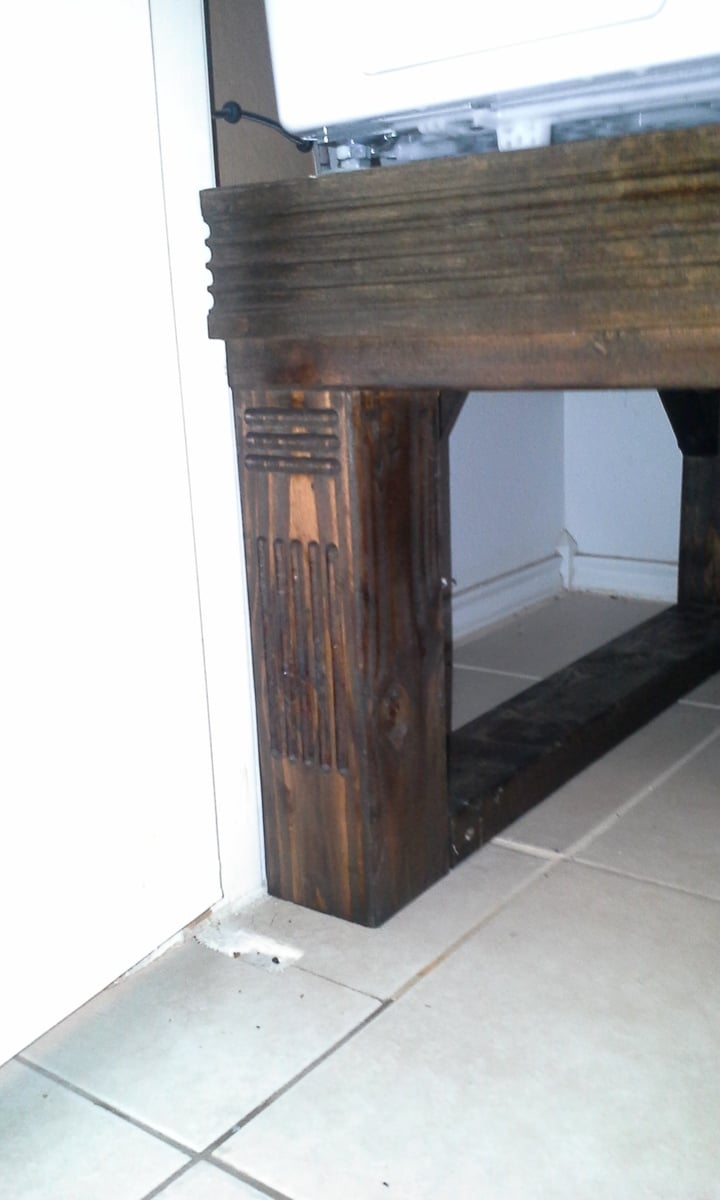
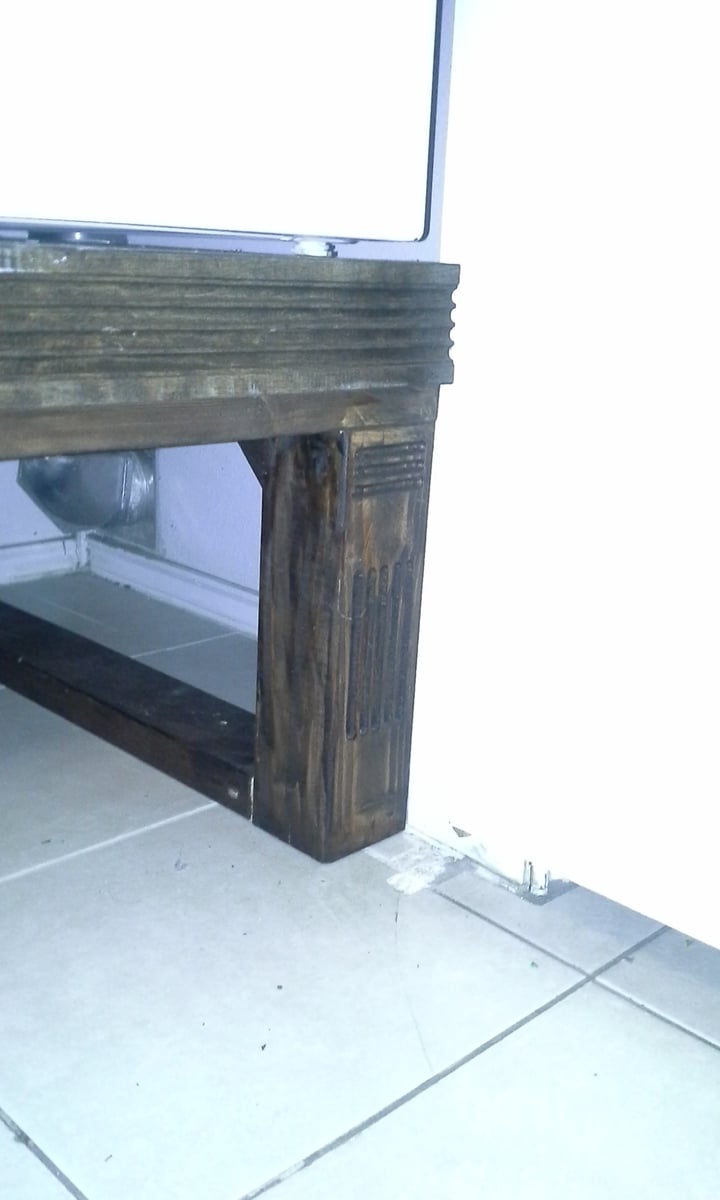
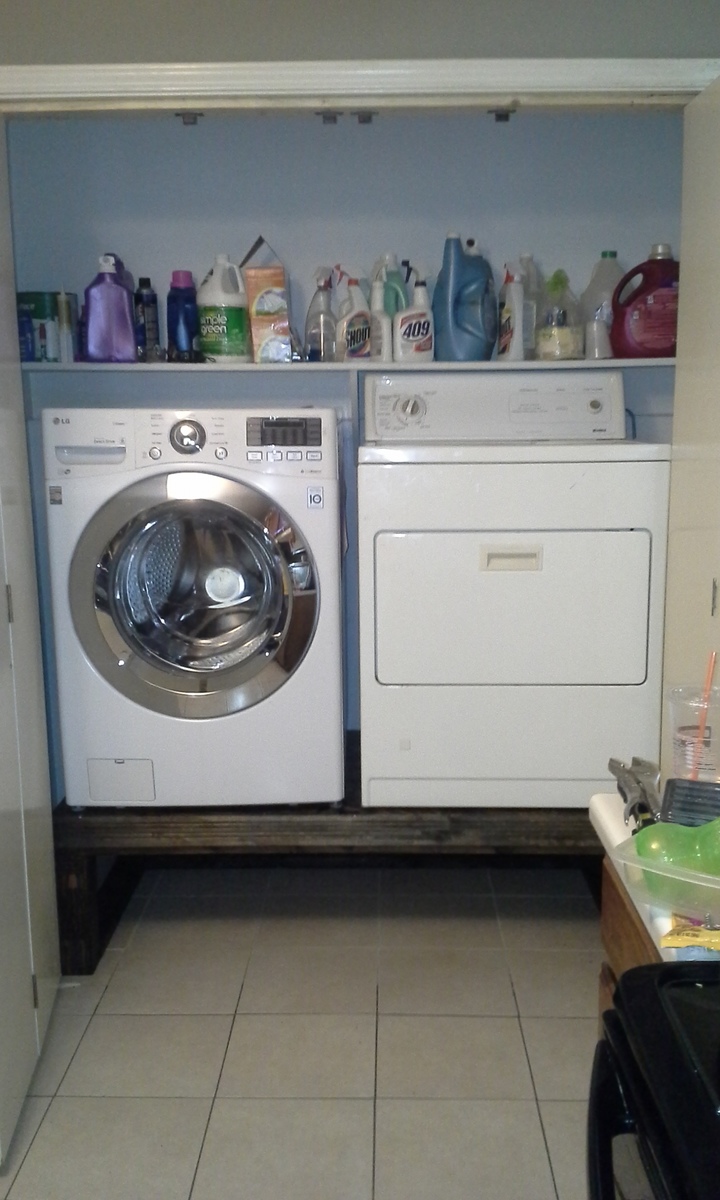
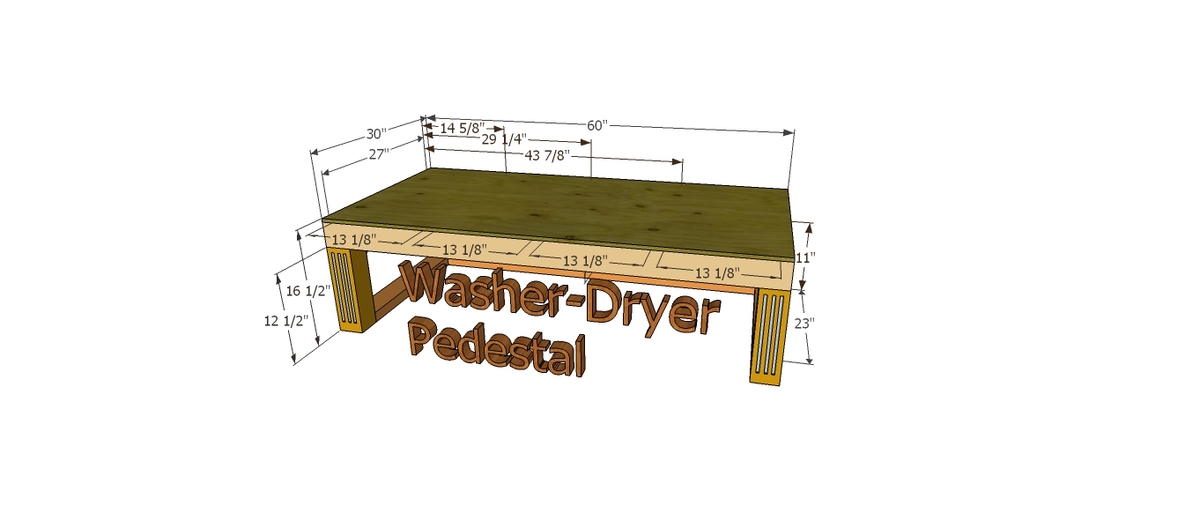
I had worked on this project a while ago, but did not had time to add my brag post. I actually modified the dimensions to fit my needs. I enjoyed making this pedestal along with my son.
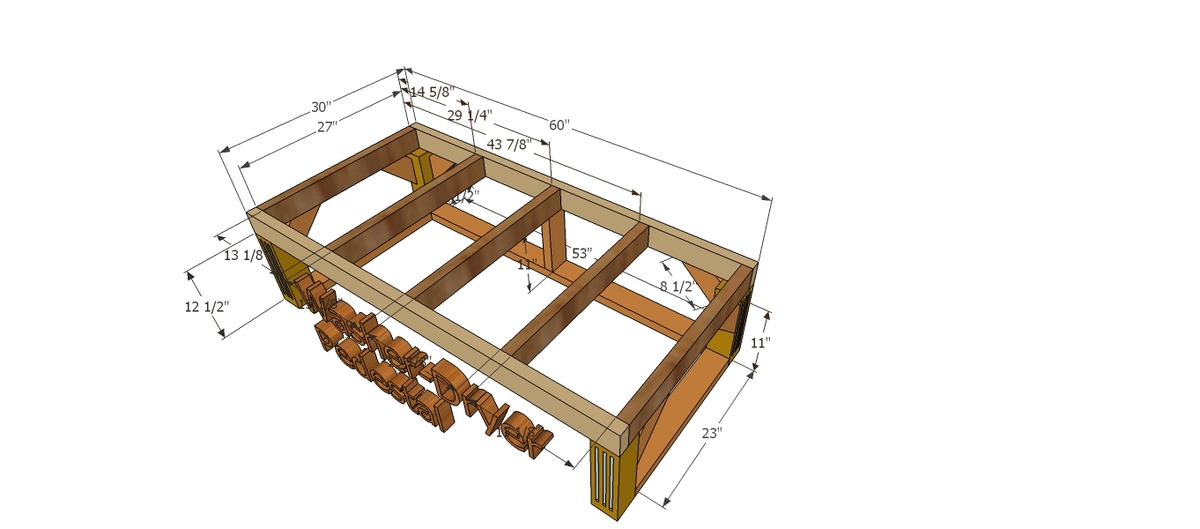
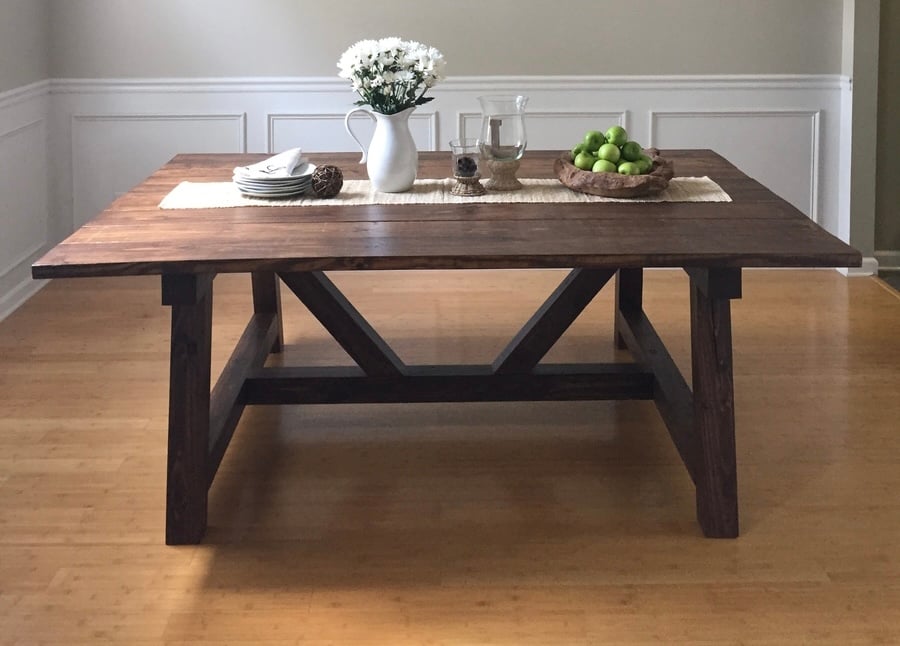
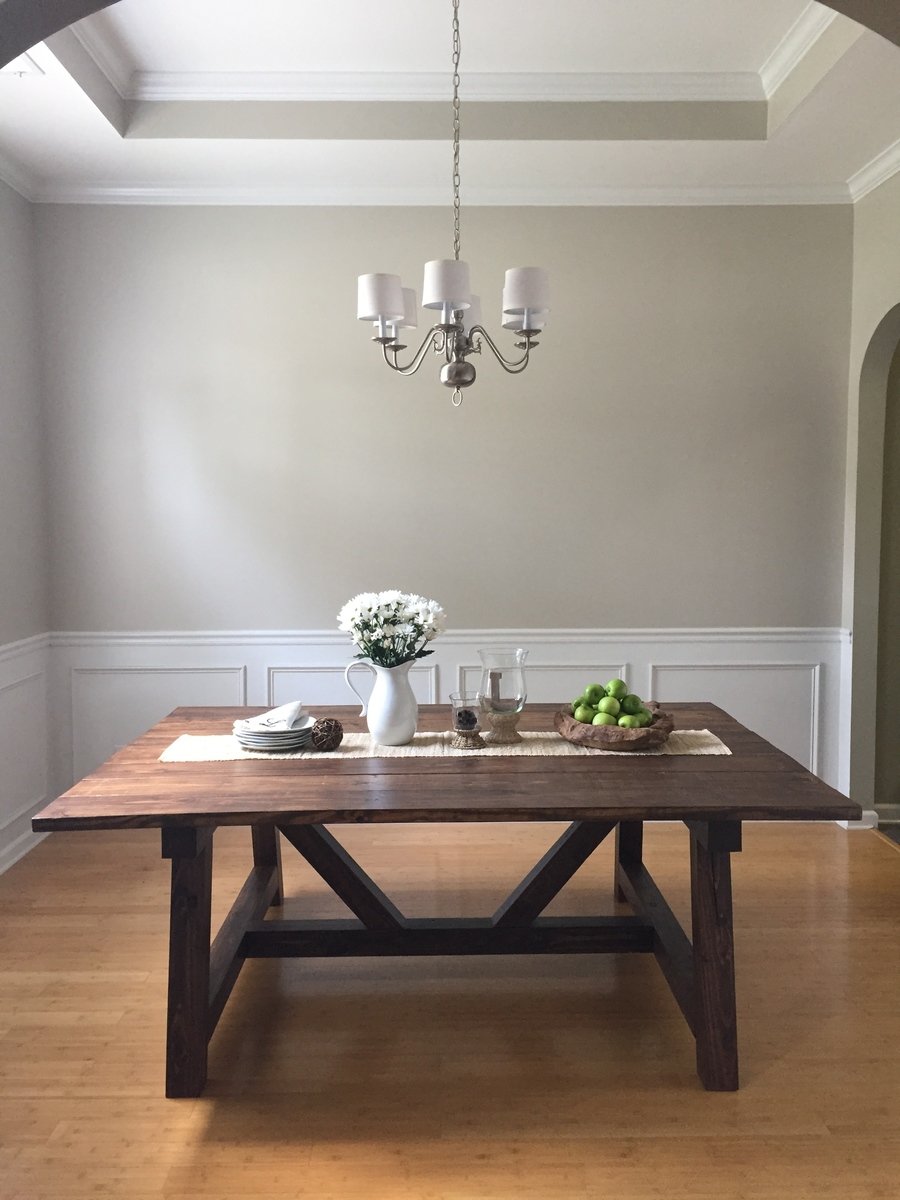
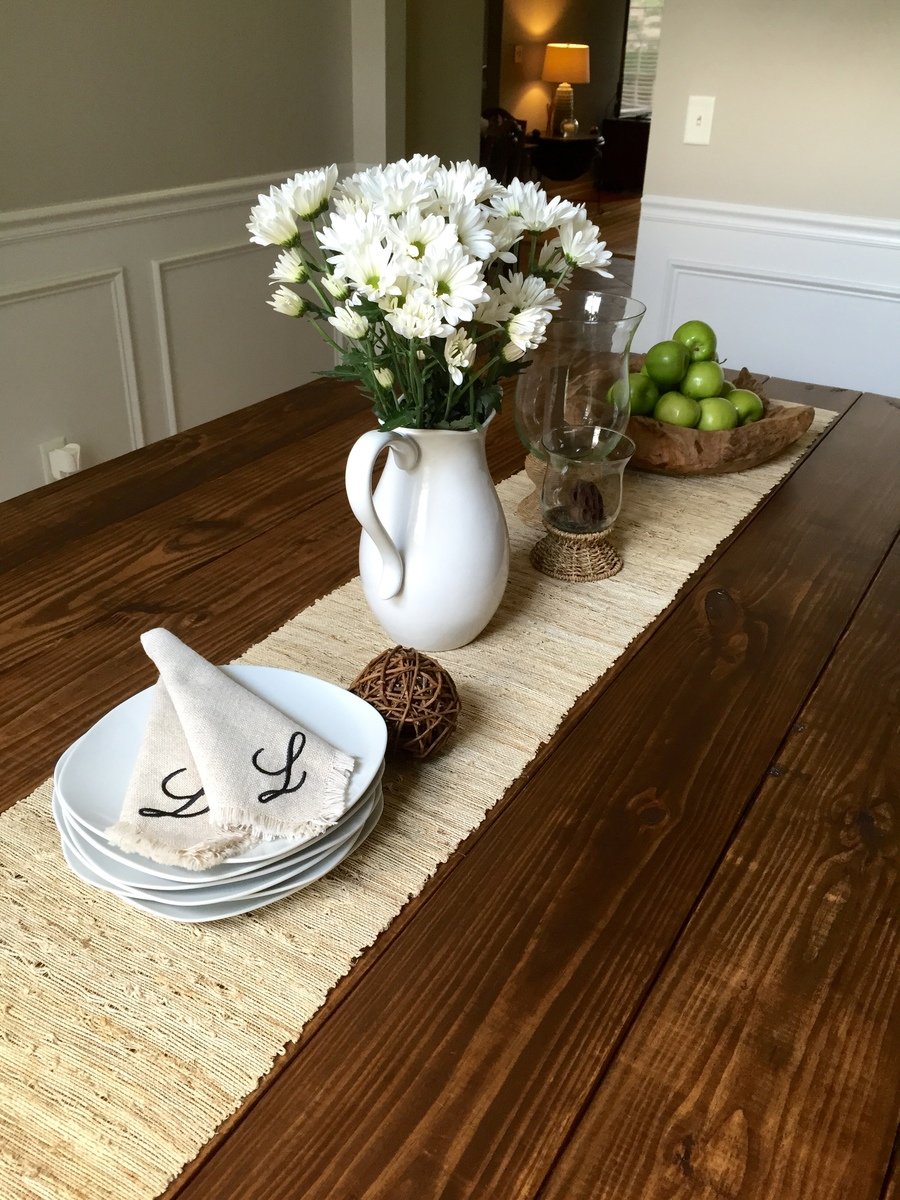
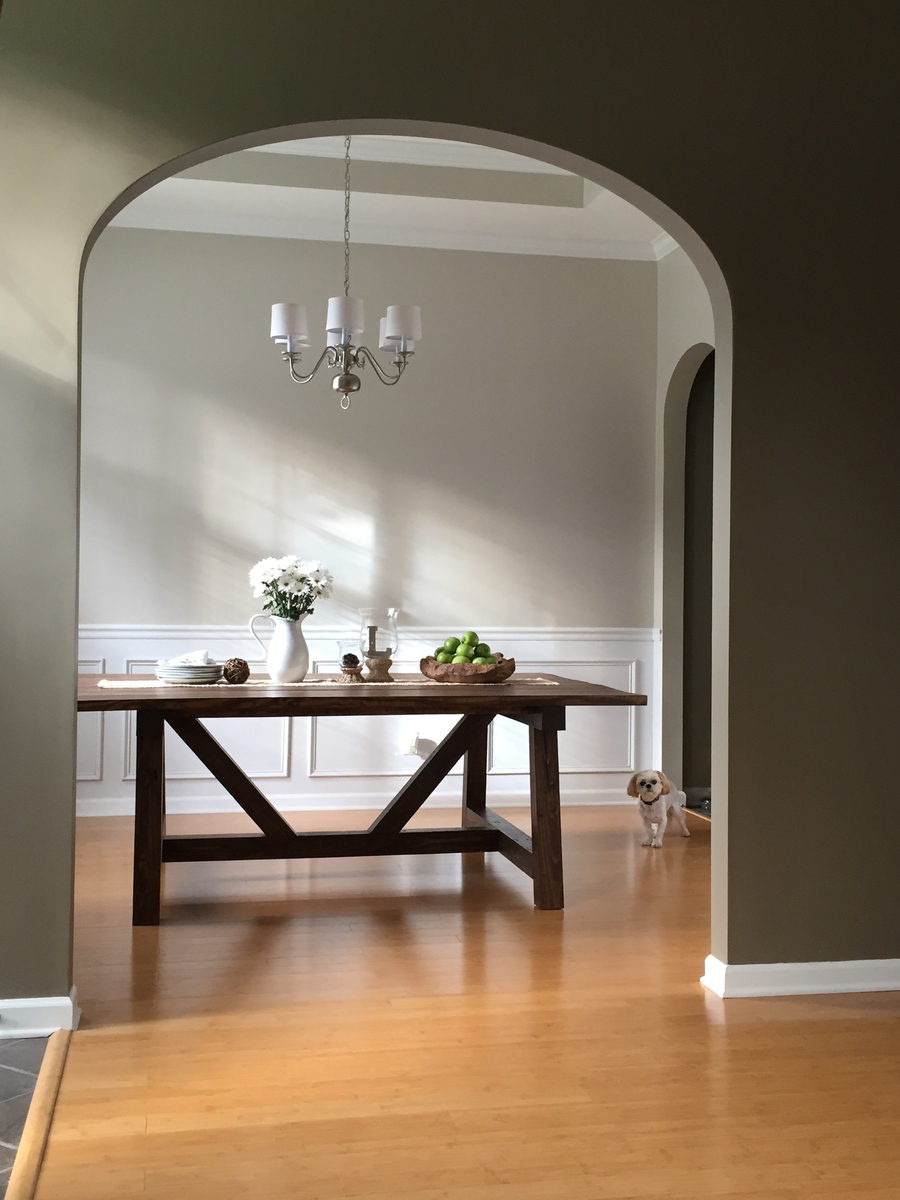
My husband and I moved in to our new house last fall and we needed a dining table that would seat at least 8. We picked this plan from Ana's site because I love the look of the 4x4 beams. I used Adobe Illustrator and my math skills to modify the size and scale to fit our dining room with exact spacing all the way around. We had difficulty finding untreated 4x4 beams but were able to special order some for a reasonable price from a local lumber company. It is more expensive than combing 2x4s but I did not like the pieced together look of the 2x4s. We stained with Rustoleum Dark Walnut and Matte Poly just like the blog post from Ana's site. We also used the Kreg Jig HD which is SO AWESOME! We love the table. Now we just need to decide: chairs vs. benches. I hate to block the beautiful truss design of the base. Its so gorgeous!
Mon, 08/31/2015 - 14:18
I love this table. The finish came out great by the looks. My wife and I are moving into a house soon and I think this is going to be the design for our table as well.
Mon, 09/07/2015 - 06:21
What a beautiful table! Is this table square? We are also looking to build a table to sit 8 and love the look of yours. Could you share your cut list or dimensions?
Mon, 08/29/2016 - 06:08
Thank you for all the kind comments! I did not know that I had gotten any and had not checked back over the past year. The jump drive with my dimensions on it got damaged last year shortly after the build and I lost all of my home decor files including the AI with my cut list and dimensions. I know it had been a while since several of your comments but I will see if my husband can help me measure the table and figure out what the dimensions are and post them on here for you. Happy Woodworking!
Tue, 11/15/2016 - 18:01
This table really looks great! I'm about to start making one and would love to know the dimensions you used. I also noticed that you didnt use the bread boards on either end. How many people does this table fit?
Thanks!
Mon, 02/27/2017 - 08:51
No, we did not use bread boards. It seats 8 with plenty of room.
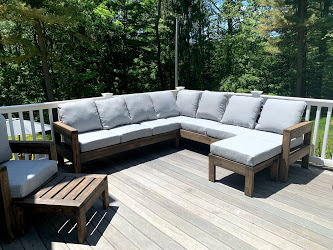
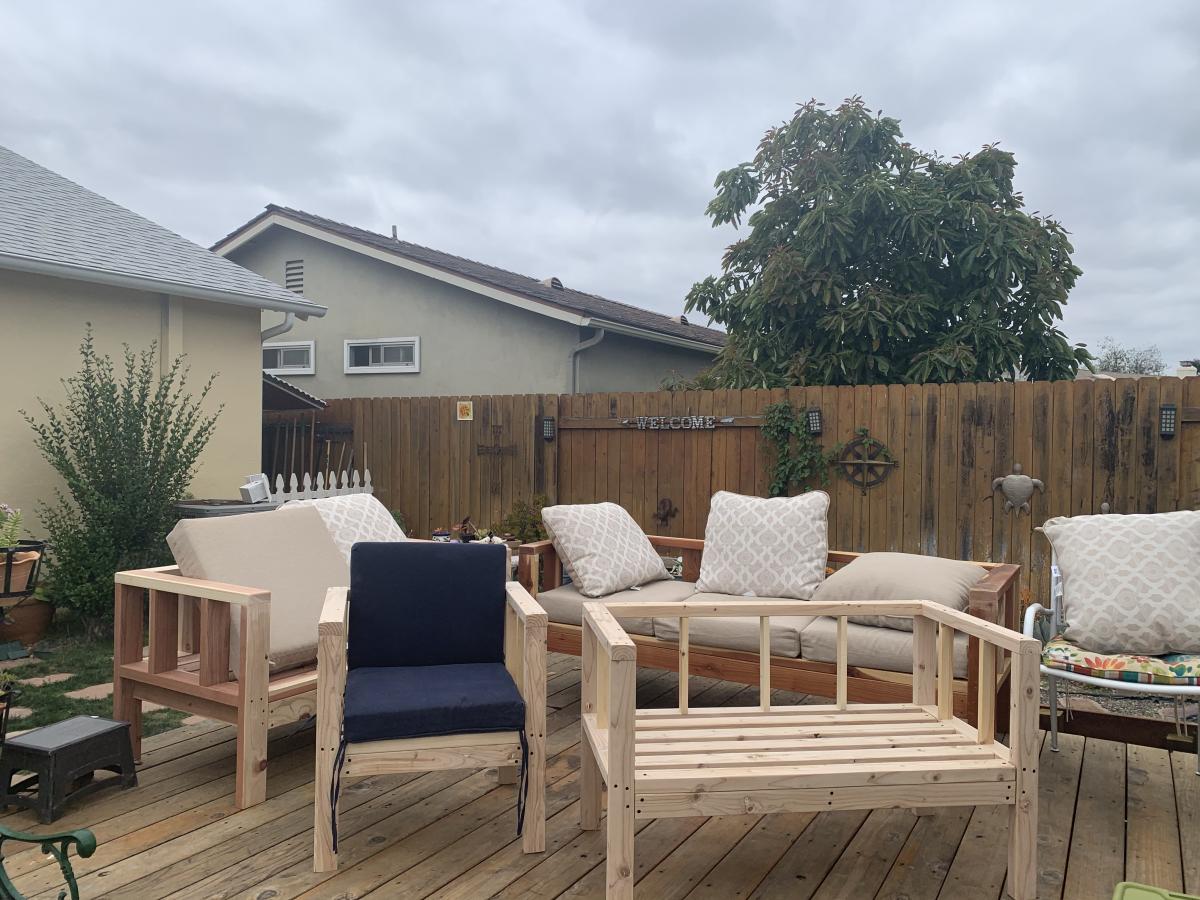
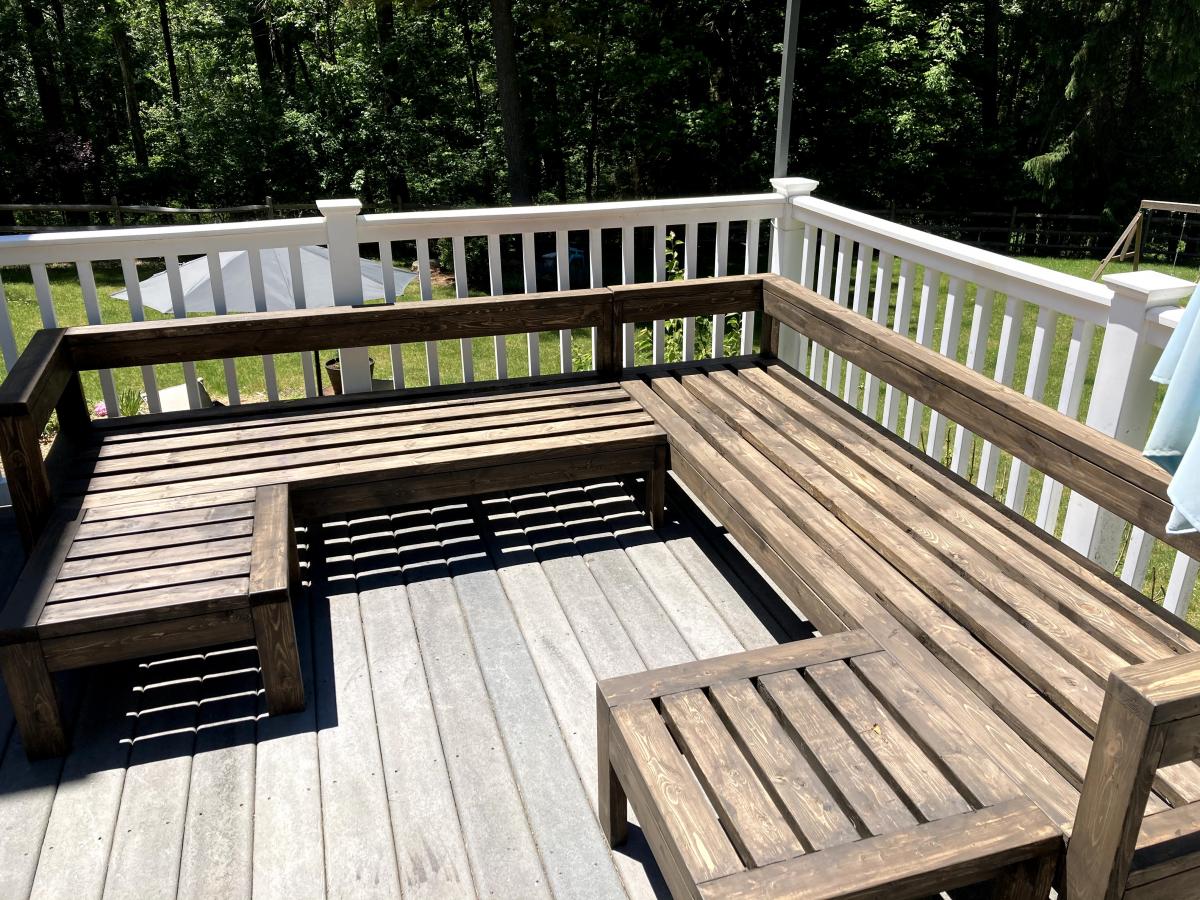
We were looking for outdoor furniture for our deck, and for the size and amount we needed it would have cost us at least $2000. We really like the idea of having an outdoor sectional that we can also use for dining, and we had trouble finding a set we liked. We found Ana's plans for the 2x4 Outdoor Sectional, and i loved the look. After seeing what others have done with the plans, I thought I would be able to modify it to get everything we needed for much less cost than buying a set.
We ended up extending the size of the 2x4 outdoor sofa by one 24" section, for a total length of 96". I then used the same design to make two outdoor chairs, just reduced the length to 24". I modified the 2x4 outdoor coffee table plans to create two ottoman's that can be moved around to make the seating more lounge style Finally, I modified the coffee table plans to make a 5 foot outdoor dining table. All in all, it took about a week and I couldn't be happier with how it turned out!


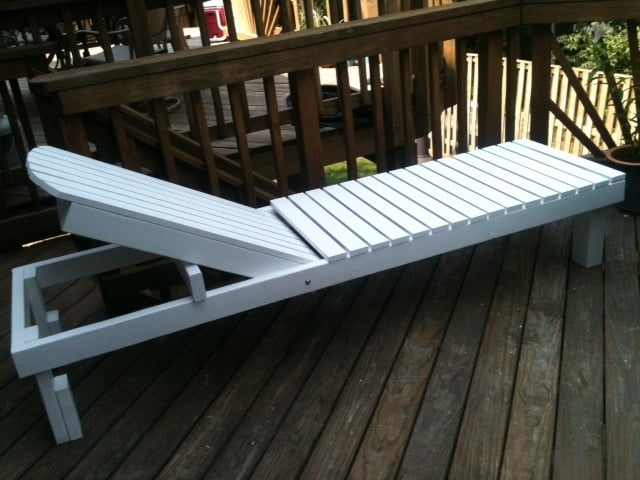
Saw some of the other brags which includes a raised backrest so I incorporated that into my build. There's a 30 degree angle on the backrest (two 2X4's and one 2X6)
Address Sign
Not much to say, just a quick project to use up some scrap lumber. Better to use it than burn it.
I recently built this for a fundraiser for a friend, who suffered from a stroke, people loved it.
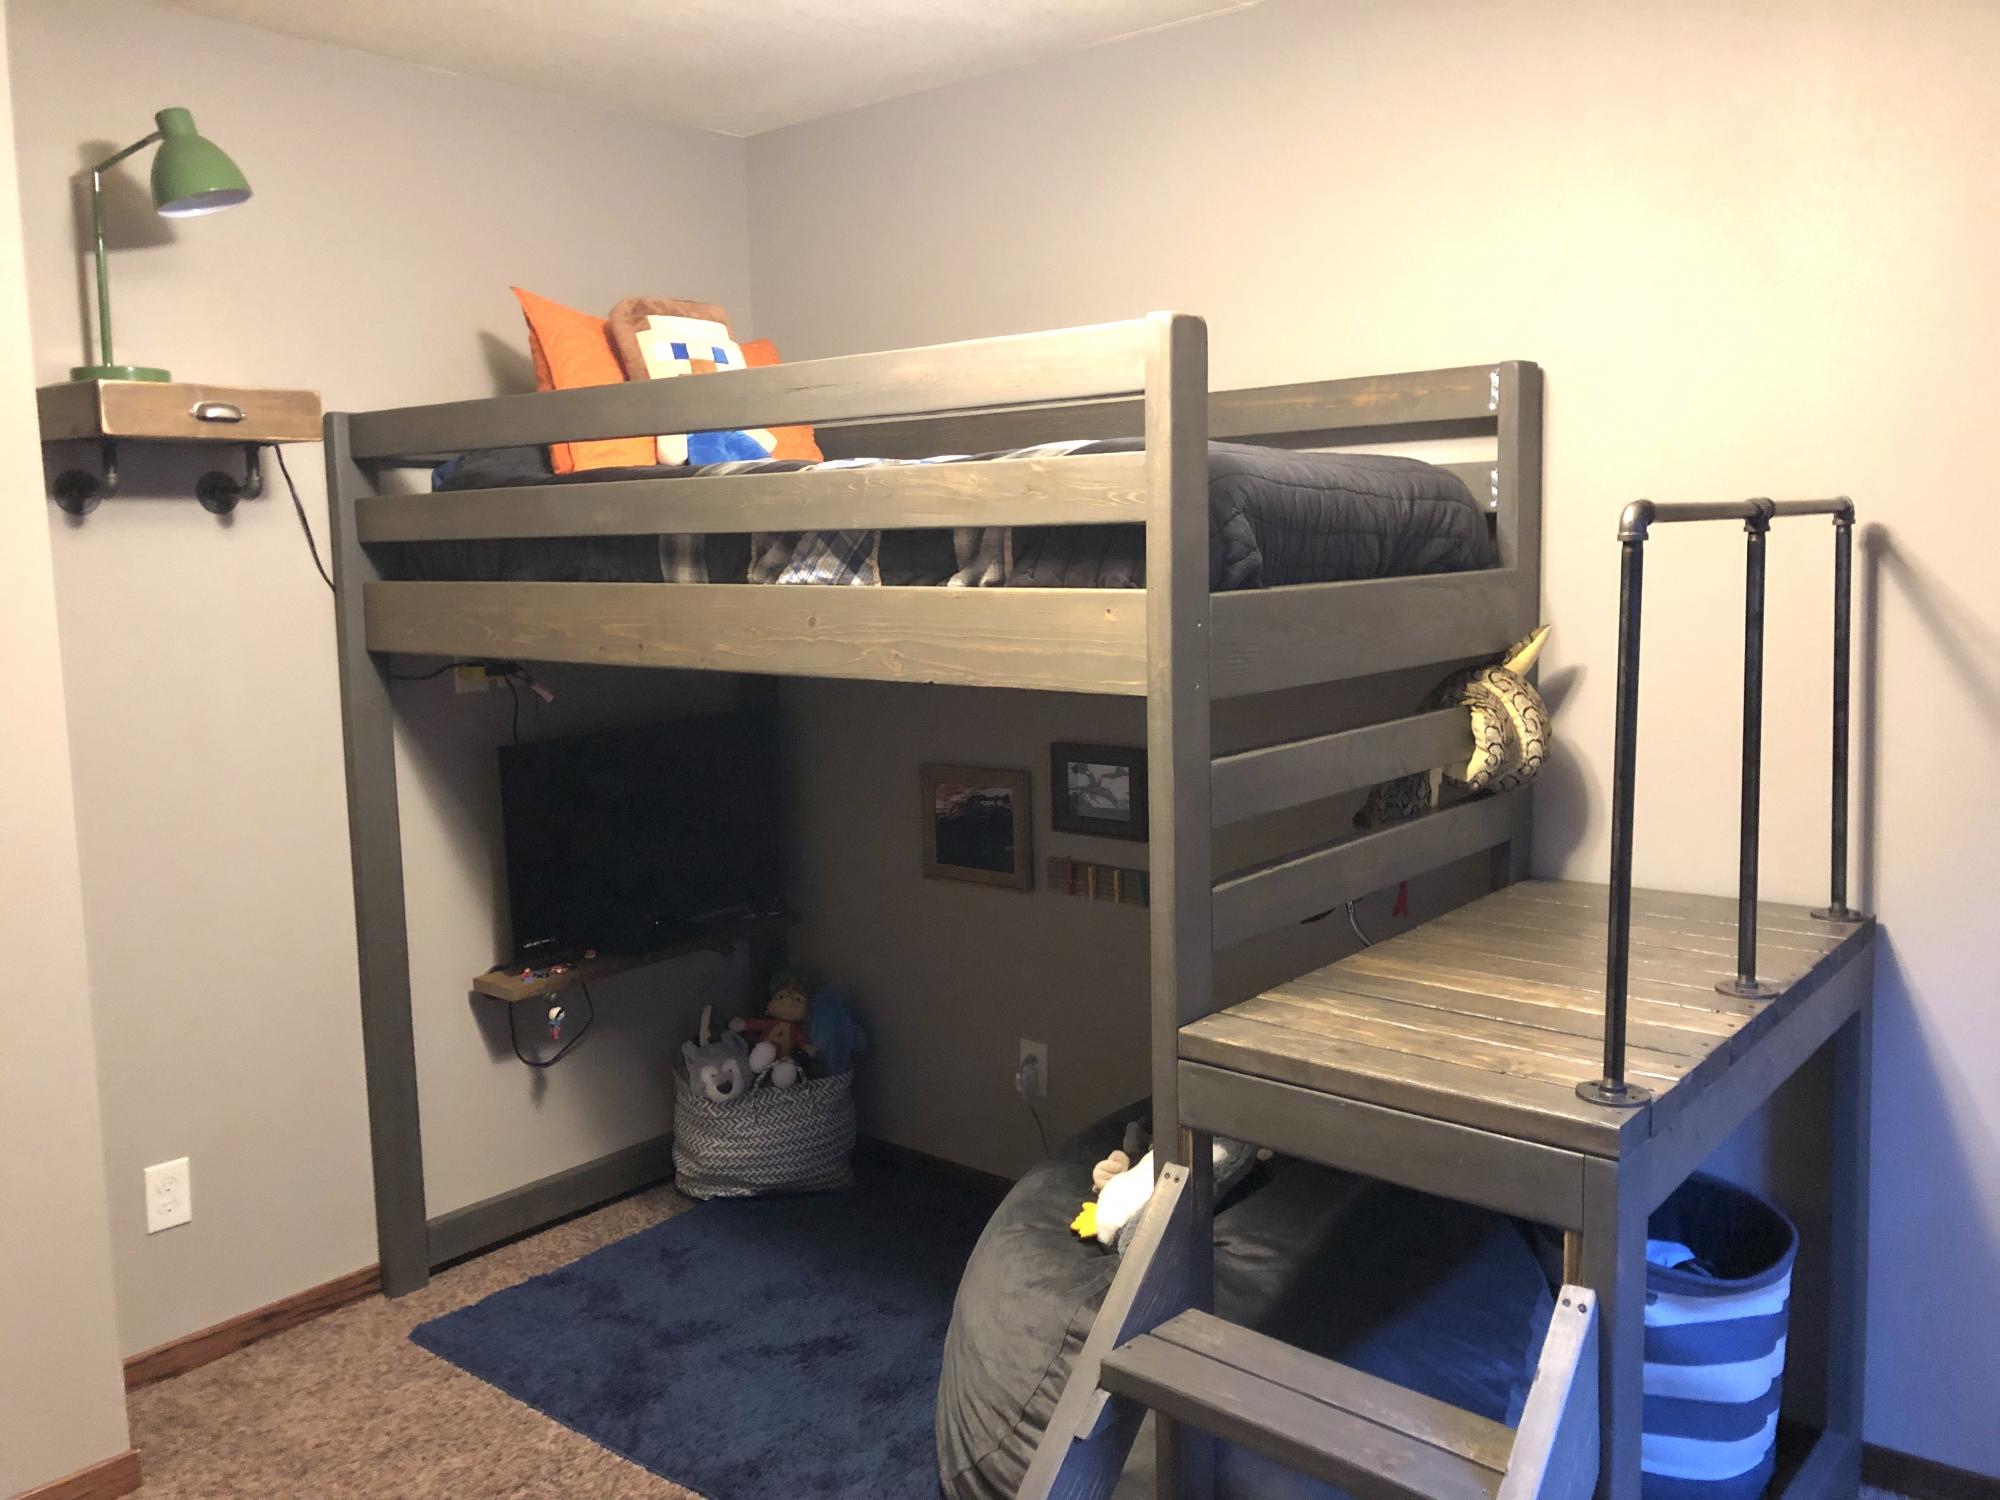
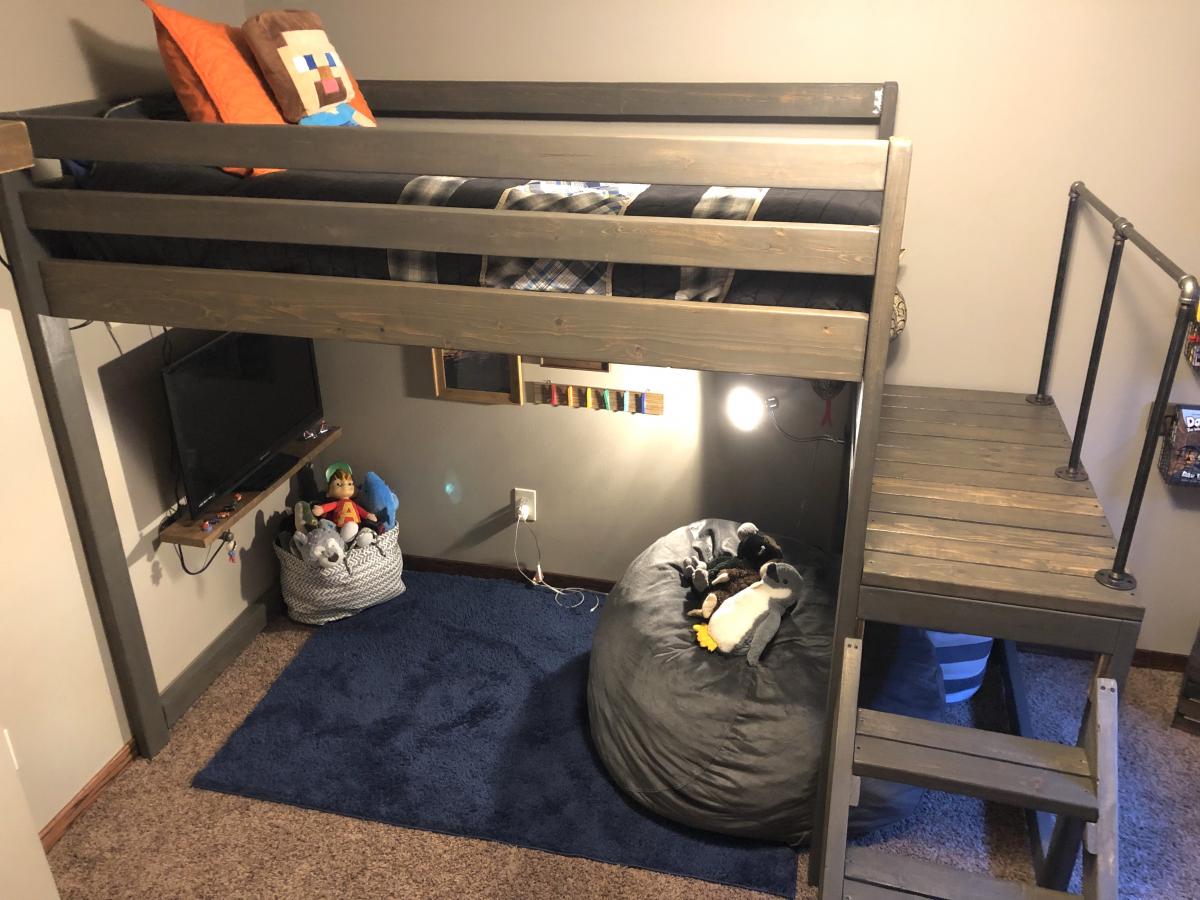
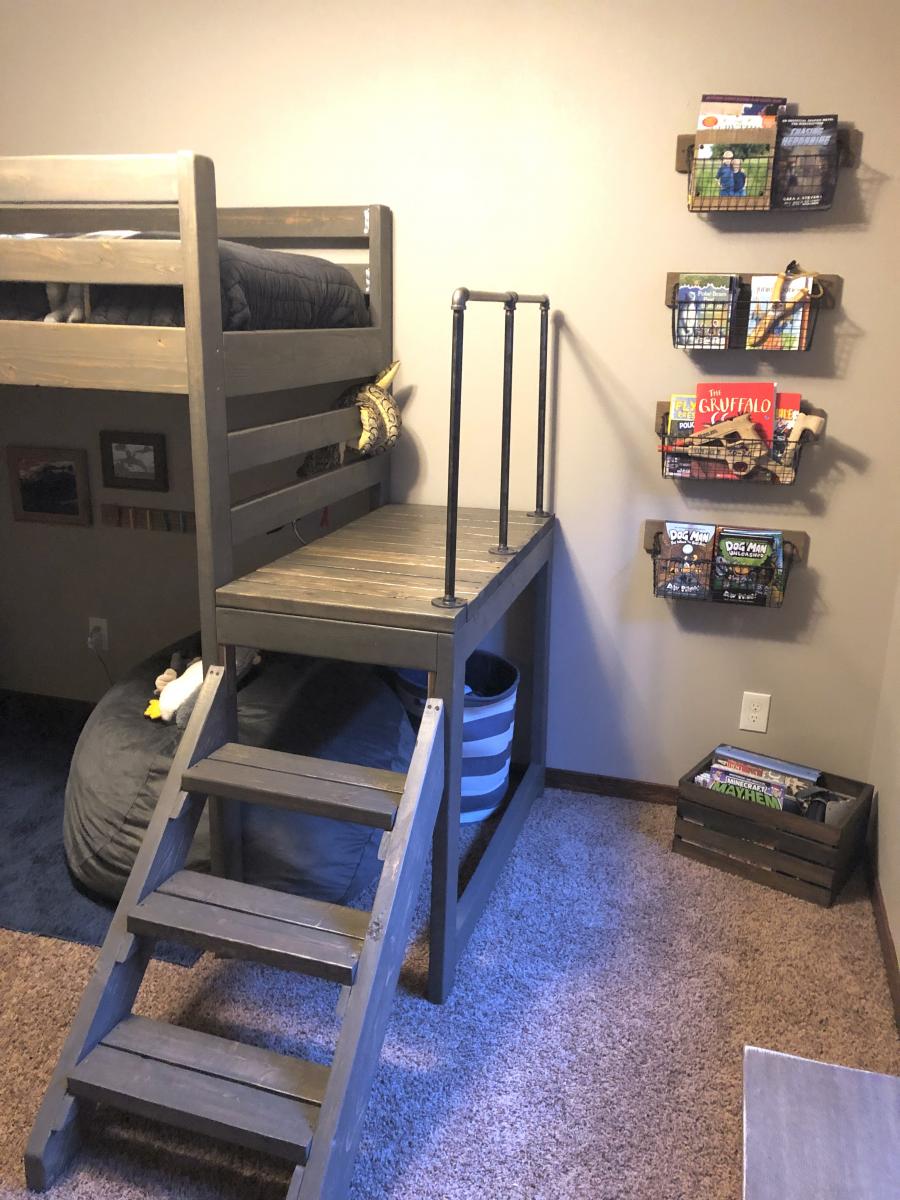
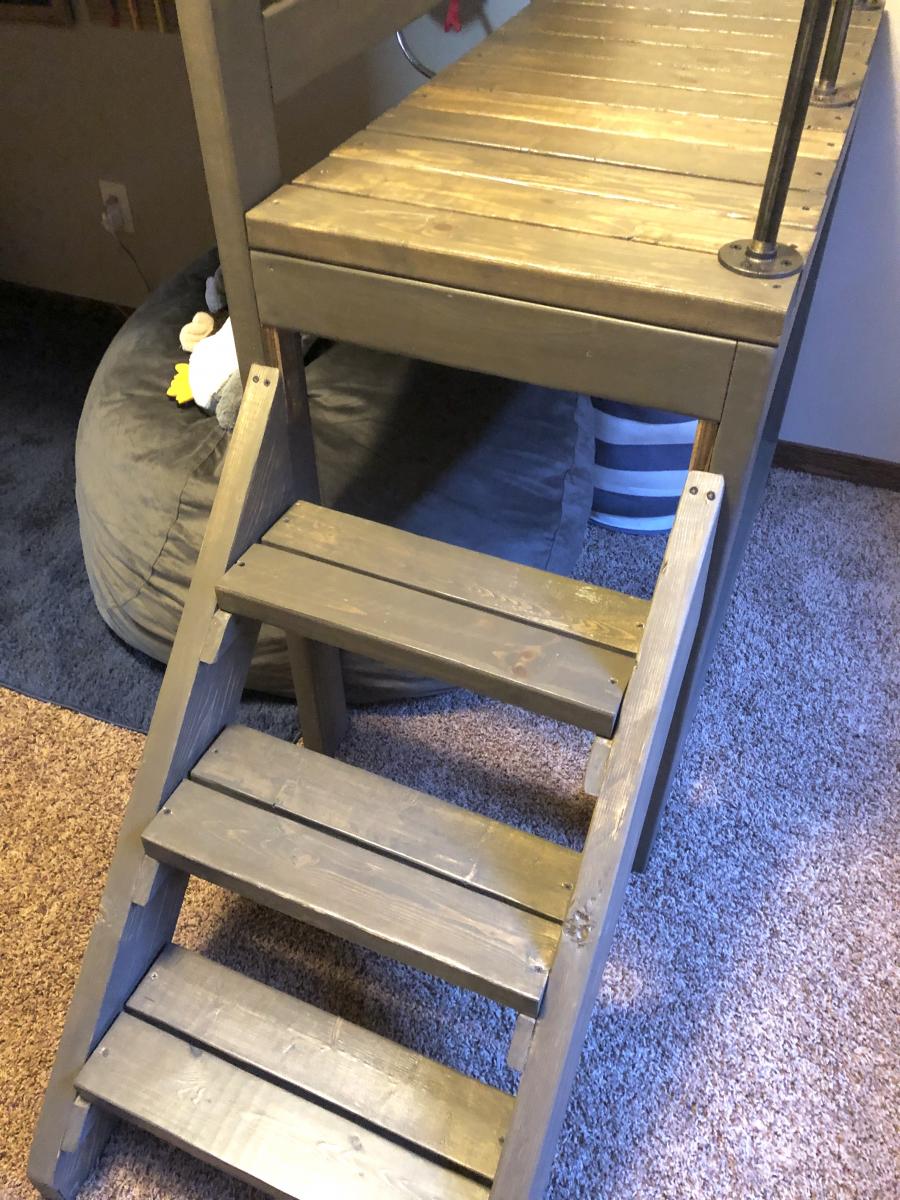
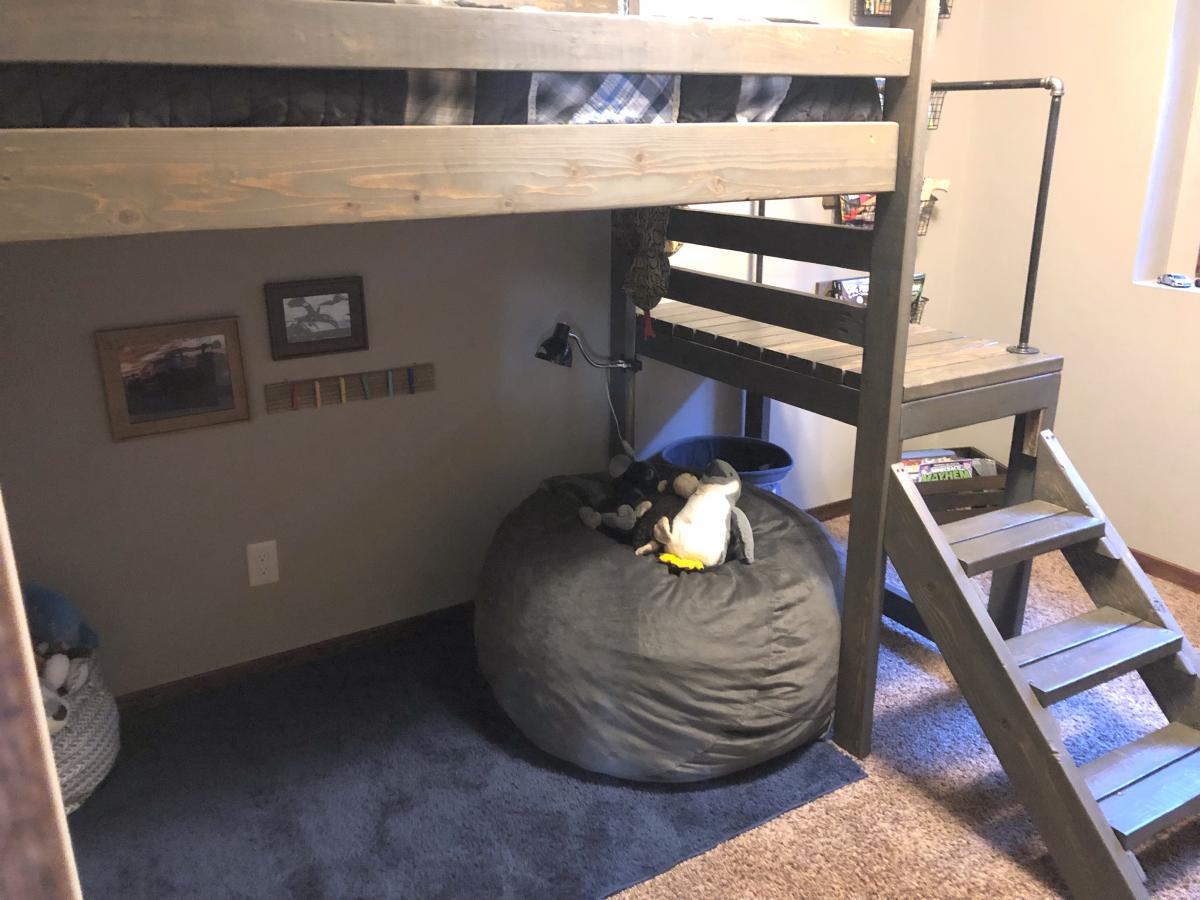
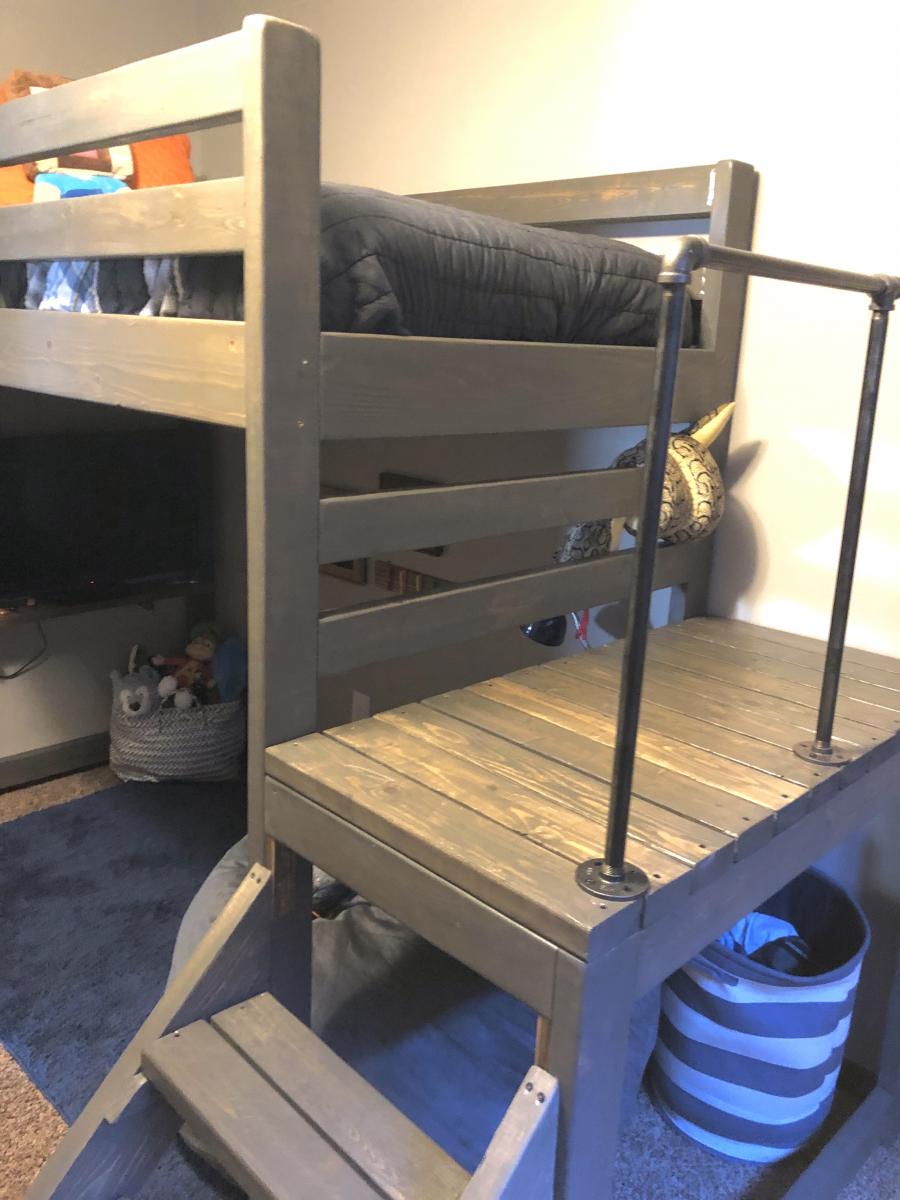
I built this bed for my 8 year old son's room "face lift." His only request was to have a place to hang out, but being his room was so small, that was a struggle! The loft bed allowed us to make a cozy little hangout - the poor guy can't get rid of his siblings now!
I added a few extra inches to the height of the Camp Loft plan, I also added the pipe hand rail for additional safety and give his room a little older boy vibe! It was a very easy build, the staining/sealing took the longest. The stairs make it much easier to change sheets and getting up and down for those of us who aren't 8 year olds :).


Comments
Ana White Admin
Tue, 10/05/2021 - 09:46
Great set!
Very nice, love the different colors of wood! Thank you for sharing~