Community Brag Posts
Small Raised Planter
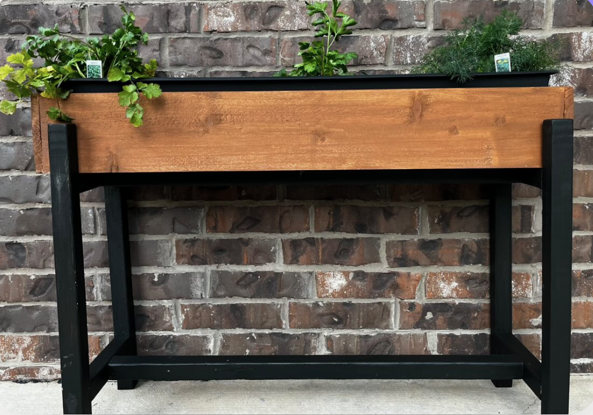
"Here's a pic of the planter I made! I modified it to fit a 36" planter. I LOVE it. Thanks!!"
Built from Plan(s)
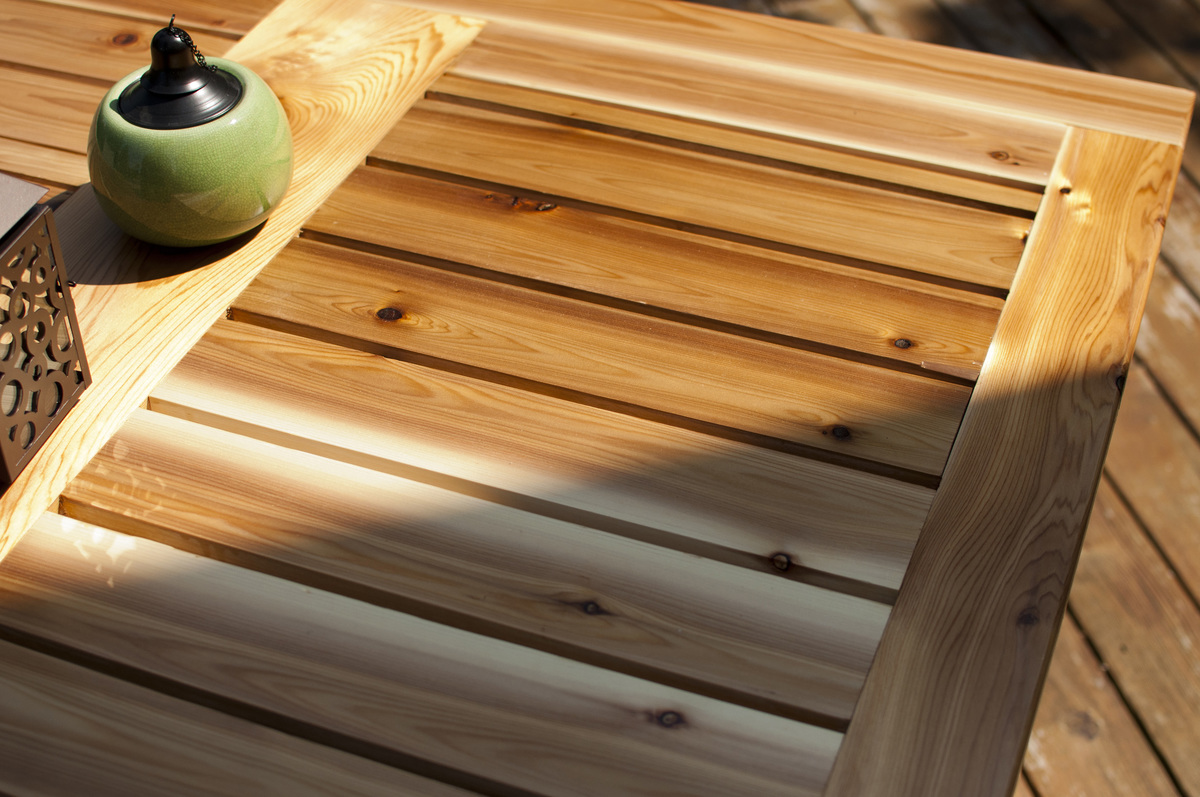
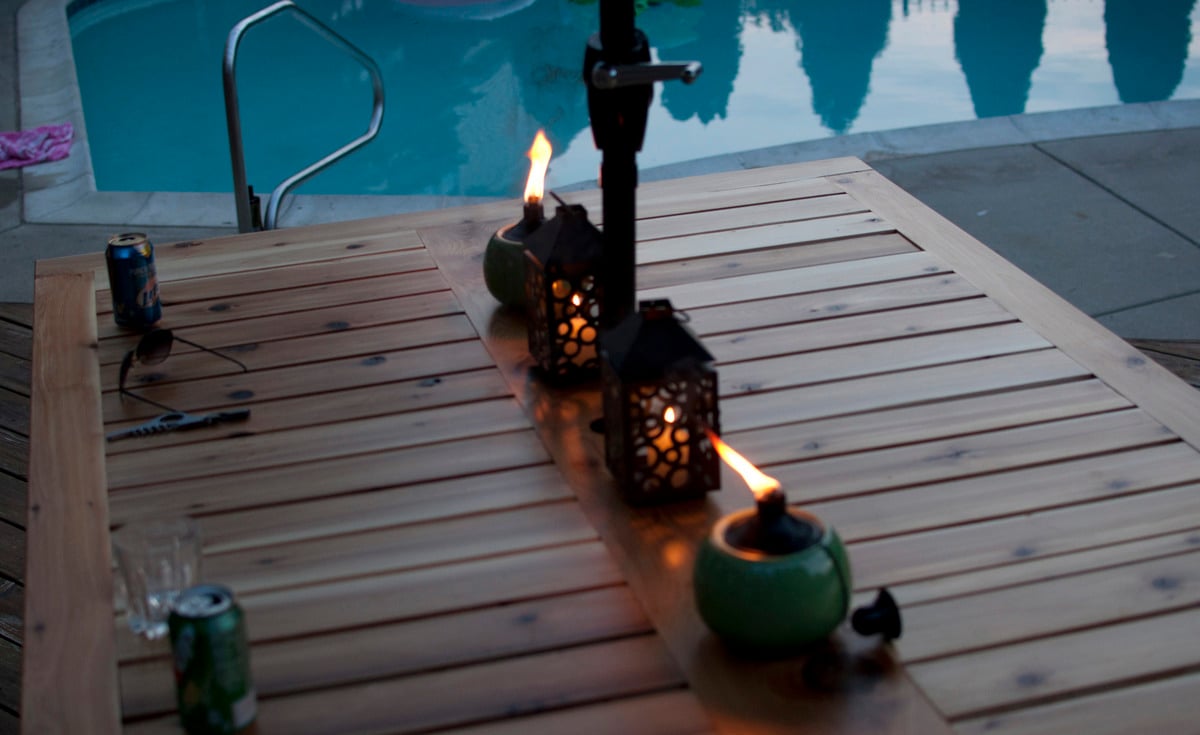
Simple Outdoor Dining Table
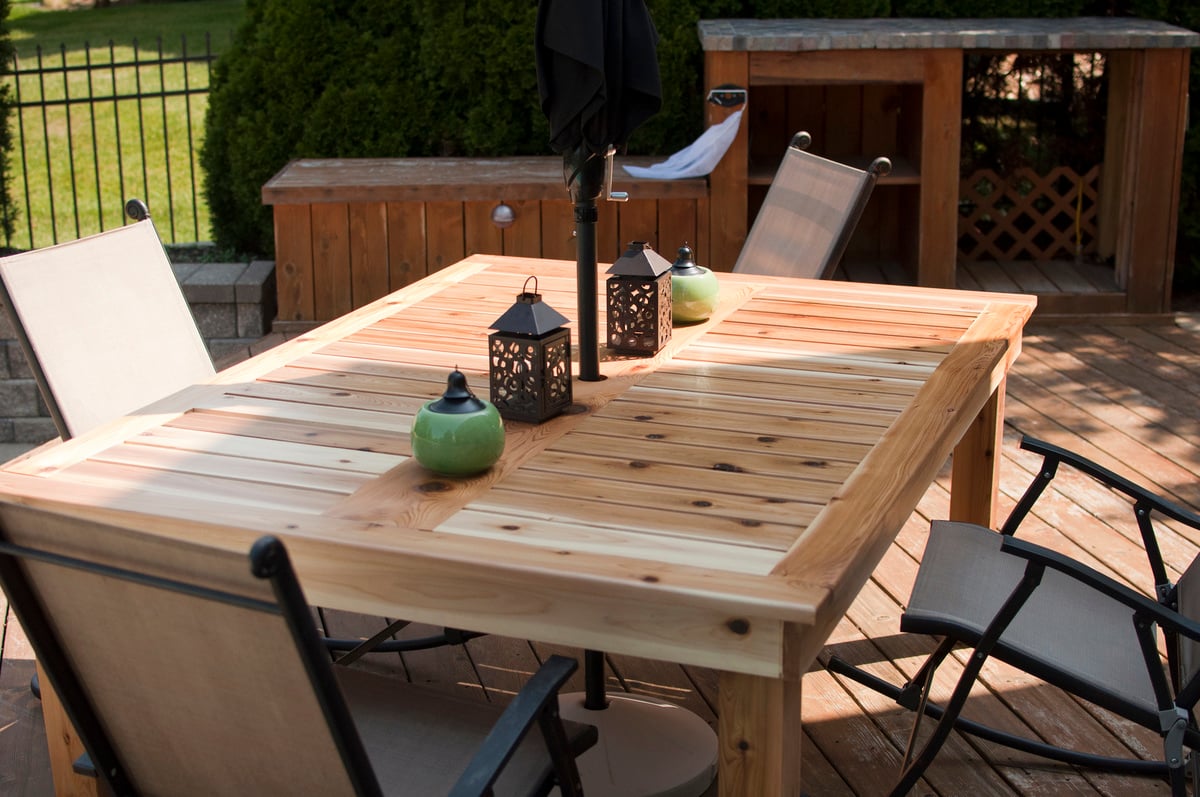
This table was made with Cedar but the base was pressure treated wood. The legs were Cedar 4x4s and very sturdy. I used a mix of designs and altered each to fit my needs. Getting the lumber from a lumber yard vs. big box cut my costs in half. Used stainless steel finish screws, Kreg Weather Treated Screws, and Deck Screws.
Built from Plan(s)
Estimated Cost
170
Estimated Time Investment
Weekend Project (10-20 Hours)
Finish Used
Clear Urethane
Recommended Skill Level
Beginner
Comments

Sun, 03/17/2013 - 16:23
Beautiful table!
I love this! I'm planning on starting this project once the weather warms up and I was wondering if you could tell me how you attached the legs to the table top without visible bolts.
Sun, 08/11/2013 - 22:45
Absolutely Gorgeous! The
Absolutely Gorgeous! The photography is stunning as well! Great make!
Tue, 07/08/2014 - 17:02
Great table - What size?
Very nice looking table. I'm looking to make similar. What are your dimensions? I like the plank in the middle. Tks.
Basic Wooden Desk Chair

Practically to spec. (When I make a mistake I adjust to accommodate :) if possible)
Ana's plan was exactly what I was looking for. Love the result. Love pocket hole screws!
Built from Plan(s)
Estimated Cost
under $40
Estimated Time Investment
Day Project (6-9 Hours)
Finish Used
Minwax American Chestnut Stain & Minwax Polycrylic Clear Satin
Recommended Skill Level
Beginner
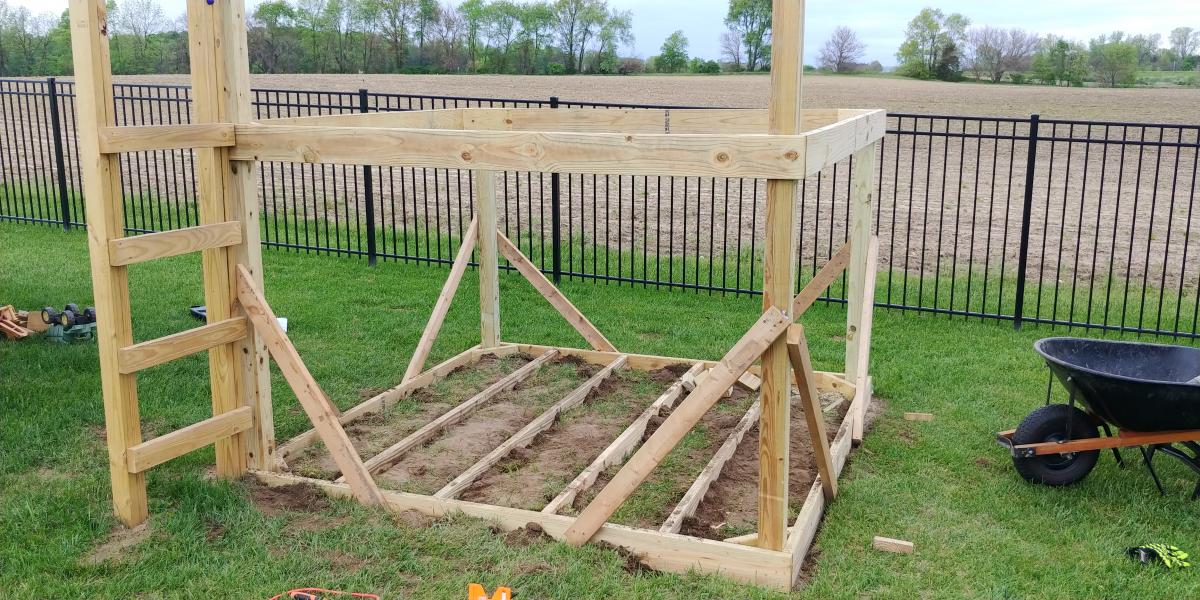
Playset Addition
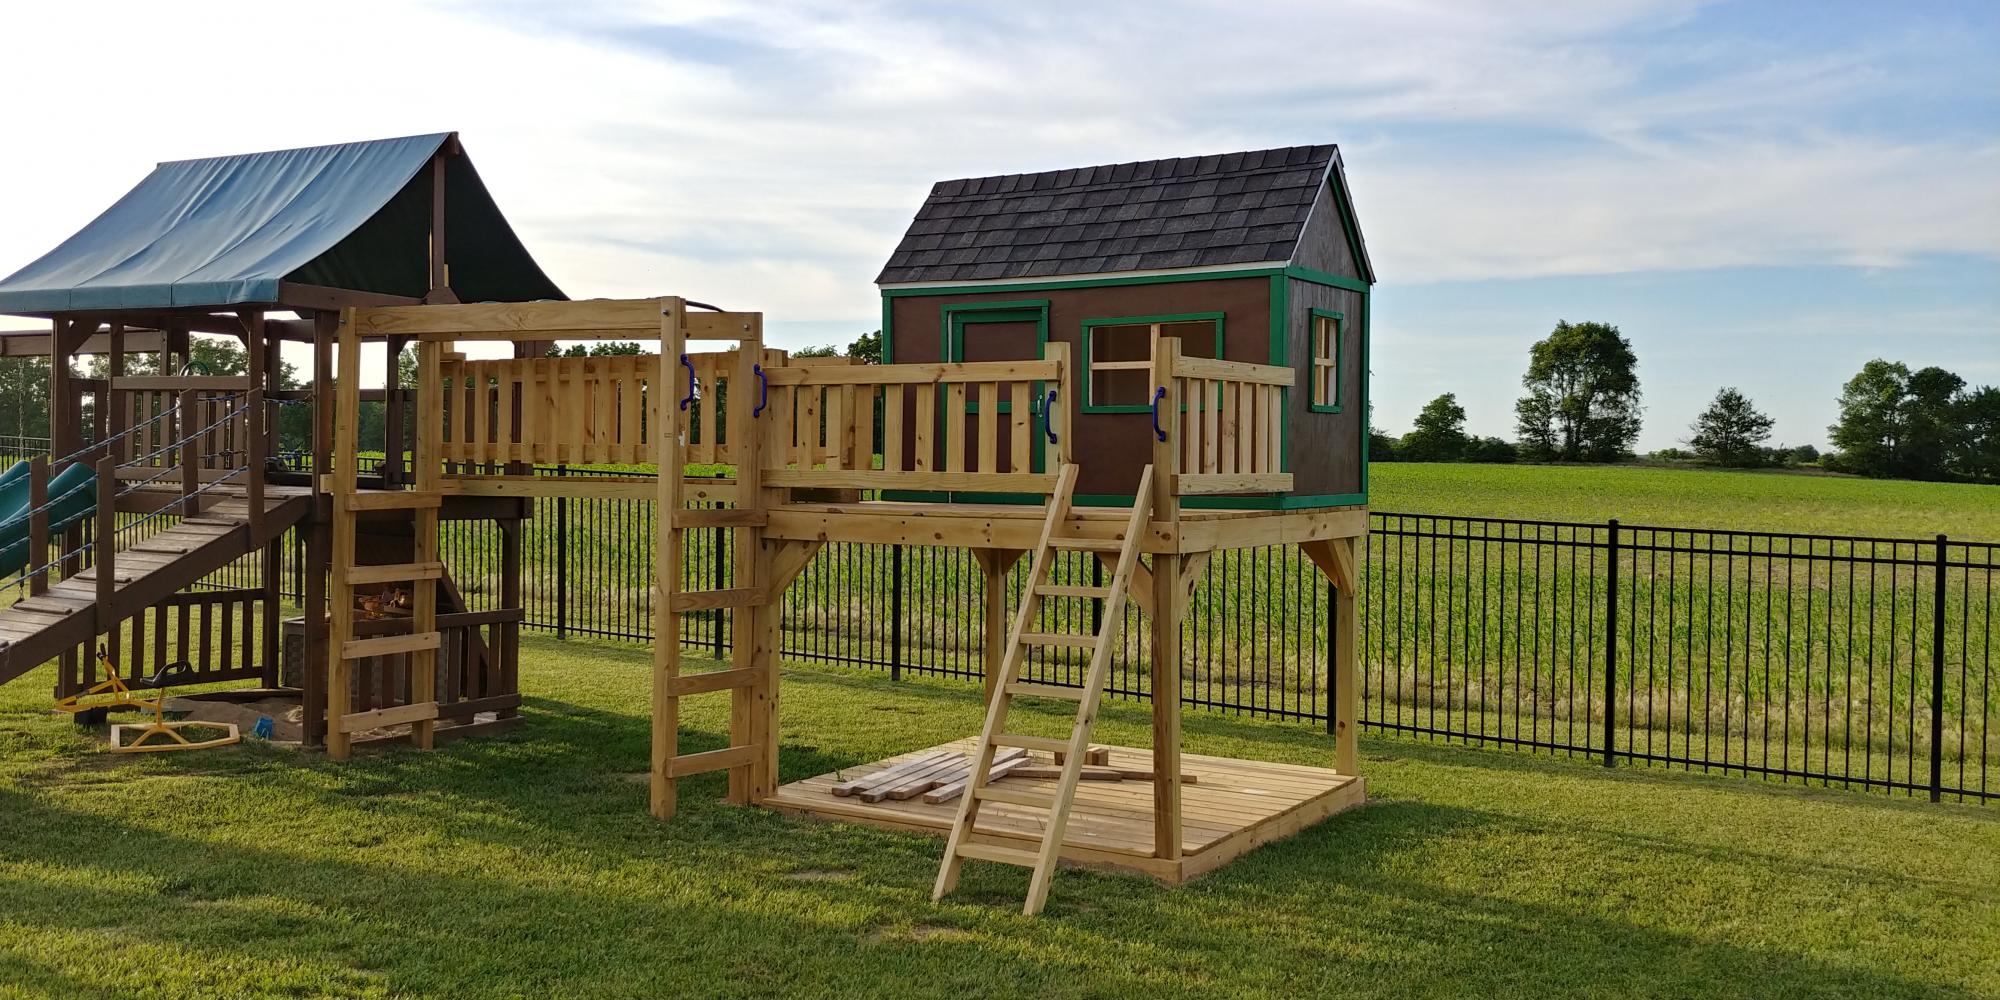
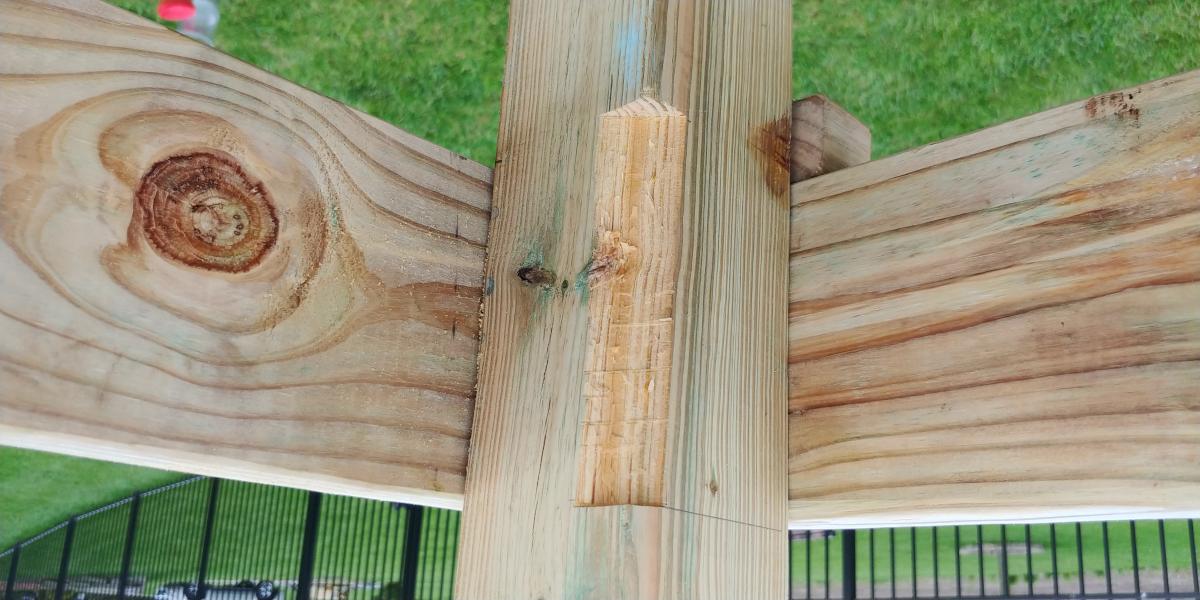
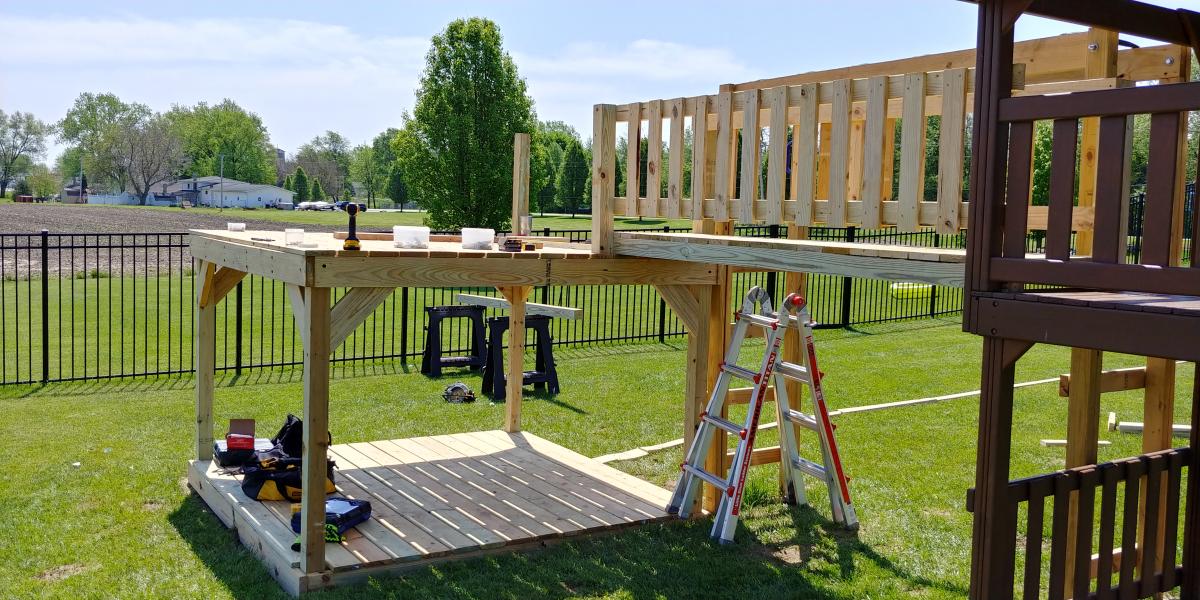
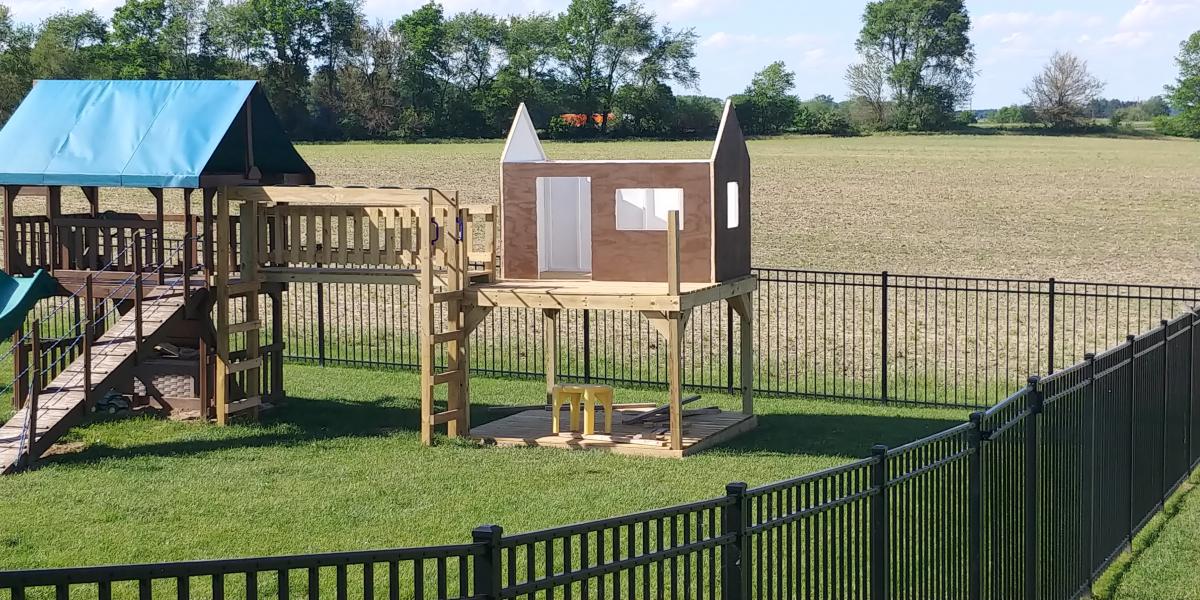
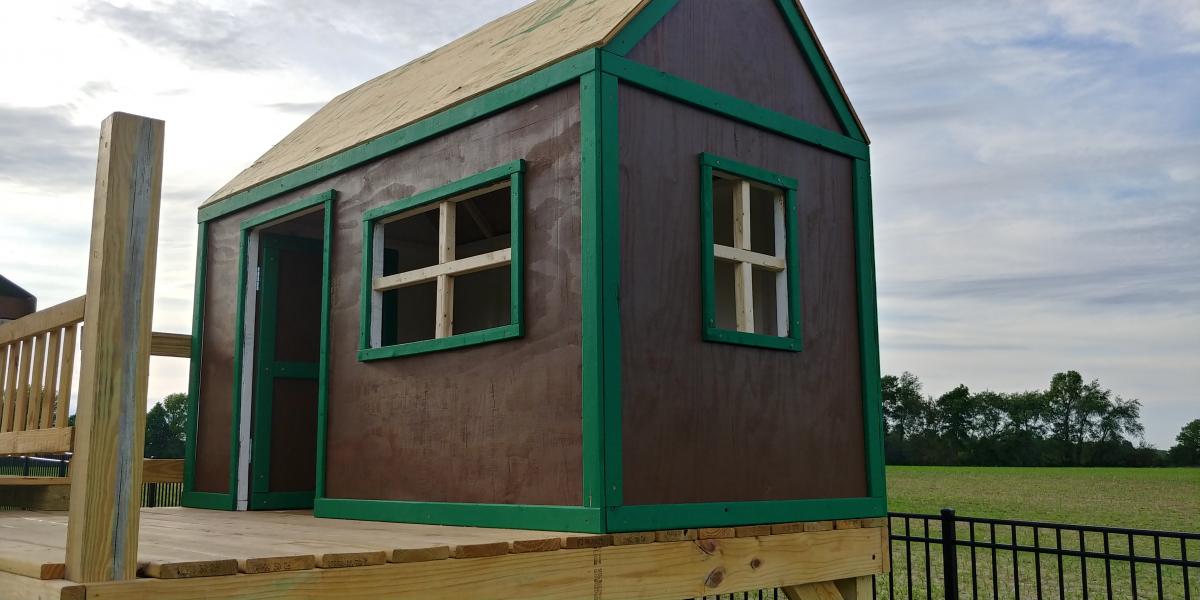
Decided our old play set needed an addition, landed on these plans of Ana's. Sat on them and mulled them over for months. Once the wife said something about adding on to it I made the purchases needed. Connected the two platforms with a bridge. I used 4"x4"x10' for the runners, same boards as the decking for the platform of the bridge(5/4"x6"), 2x4's and 1x4's for the railing. If you look at the 3rd photo, I had to chisel out the 4x4 post to get the 2"x6"x12" support to fit correctly. This should measure 2"x6"x13". Another change I made was to cut the bottom and top trim pieces longer on the front and back sections so that the trim would cover the framing of the gable end walls (see last photo). my son wanted windows so I faked in some windows with scrap 2x2's. I used 2x6's as supports from the 4x4's to the 2x6 framing (see photo 3) I added the monkey bars about a month before deciding to do the platform/deck and playhouse. The ladder is based loosely off of a couple of plans I found online. I was able to do all of this work myself except for the roof. Need my dads help to lift the plywood, he then helped me with the rest of the roof.
Built from Plan(s)
Estimated Cost
$1000
Estimated Time Investment
Week Long Project (20 Hours or More)
Finish Used
I used a dark wood stain fore the house, green exterior paint for the trim and white exterior paint for the interior of the house.
Recommended Skill Level
Intermediate
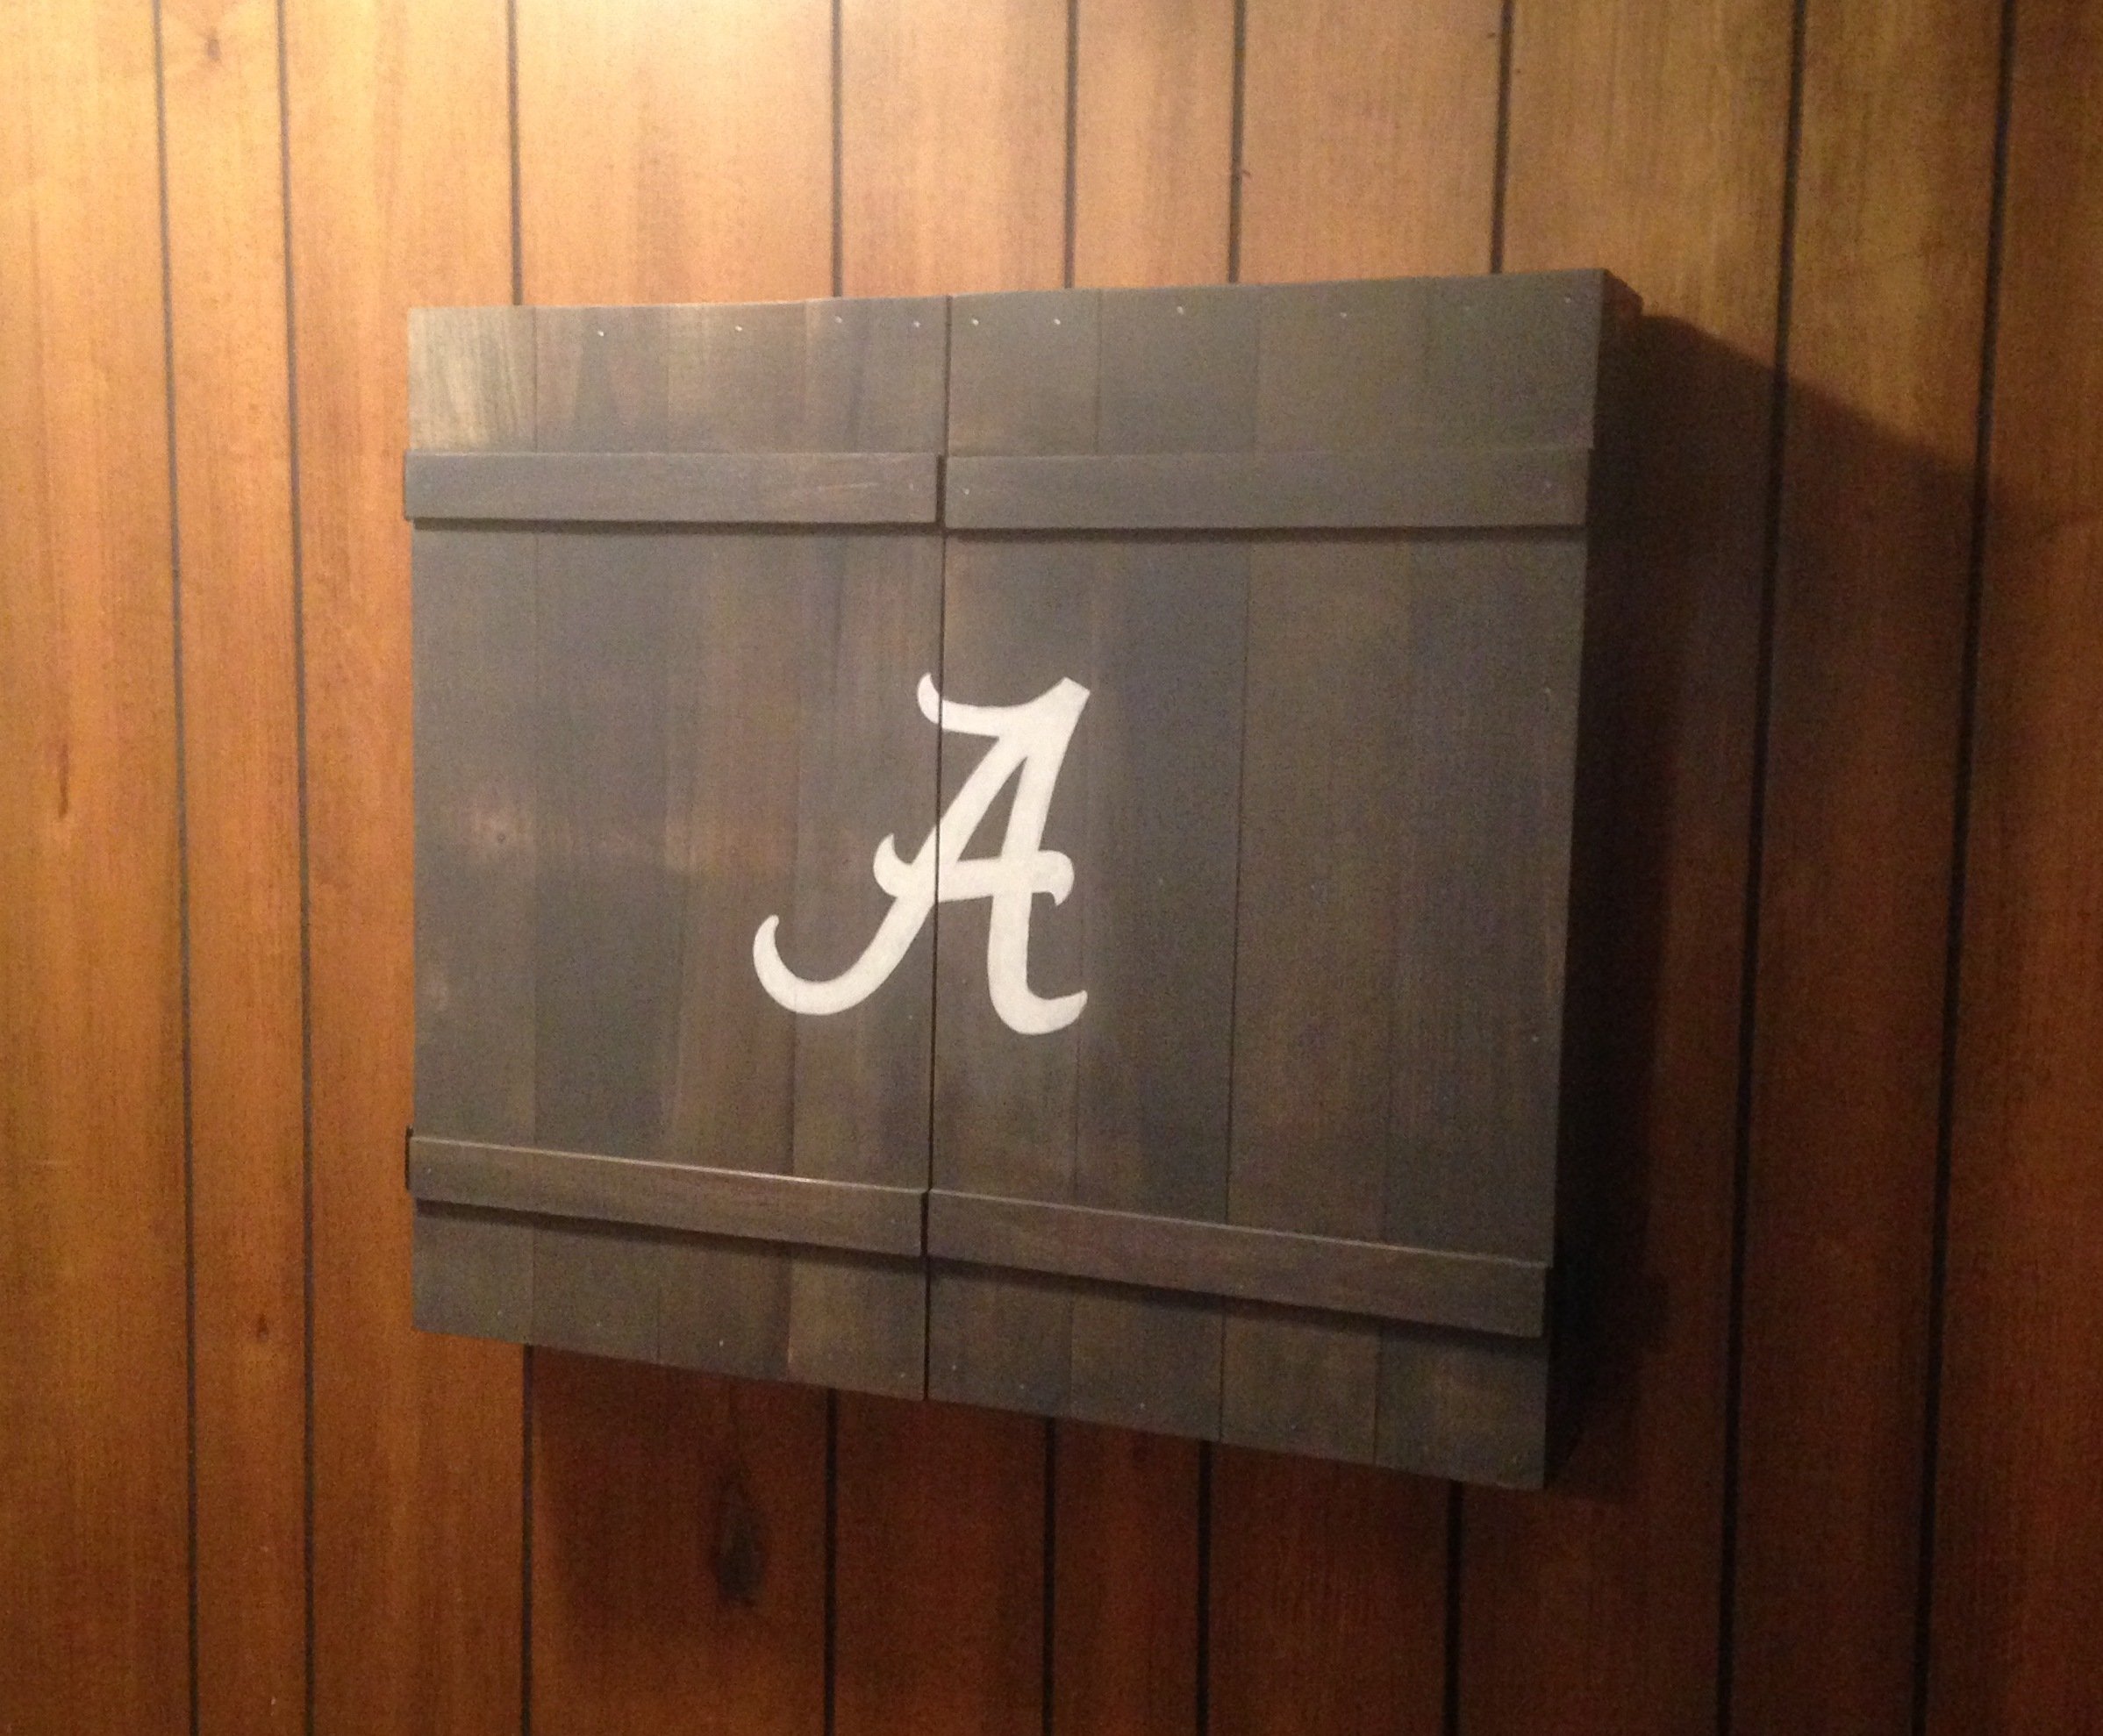
Dartboard Cabinet
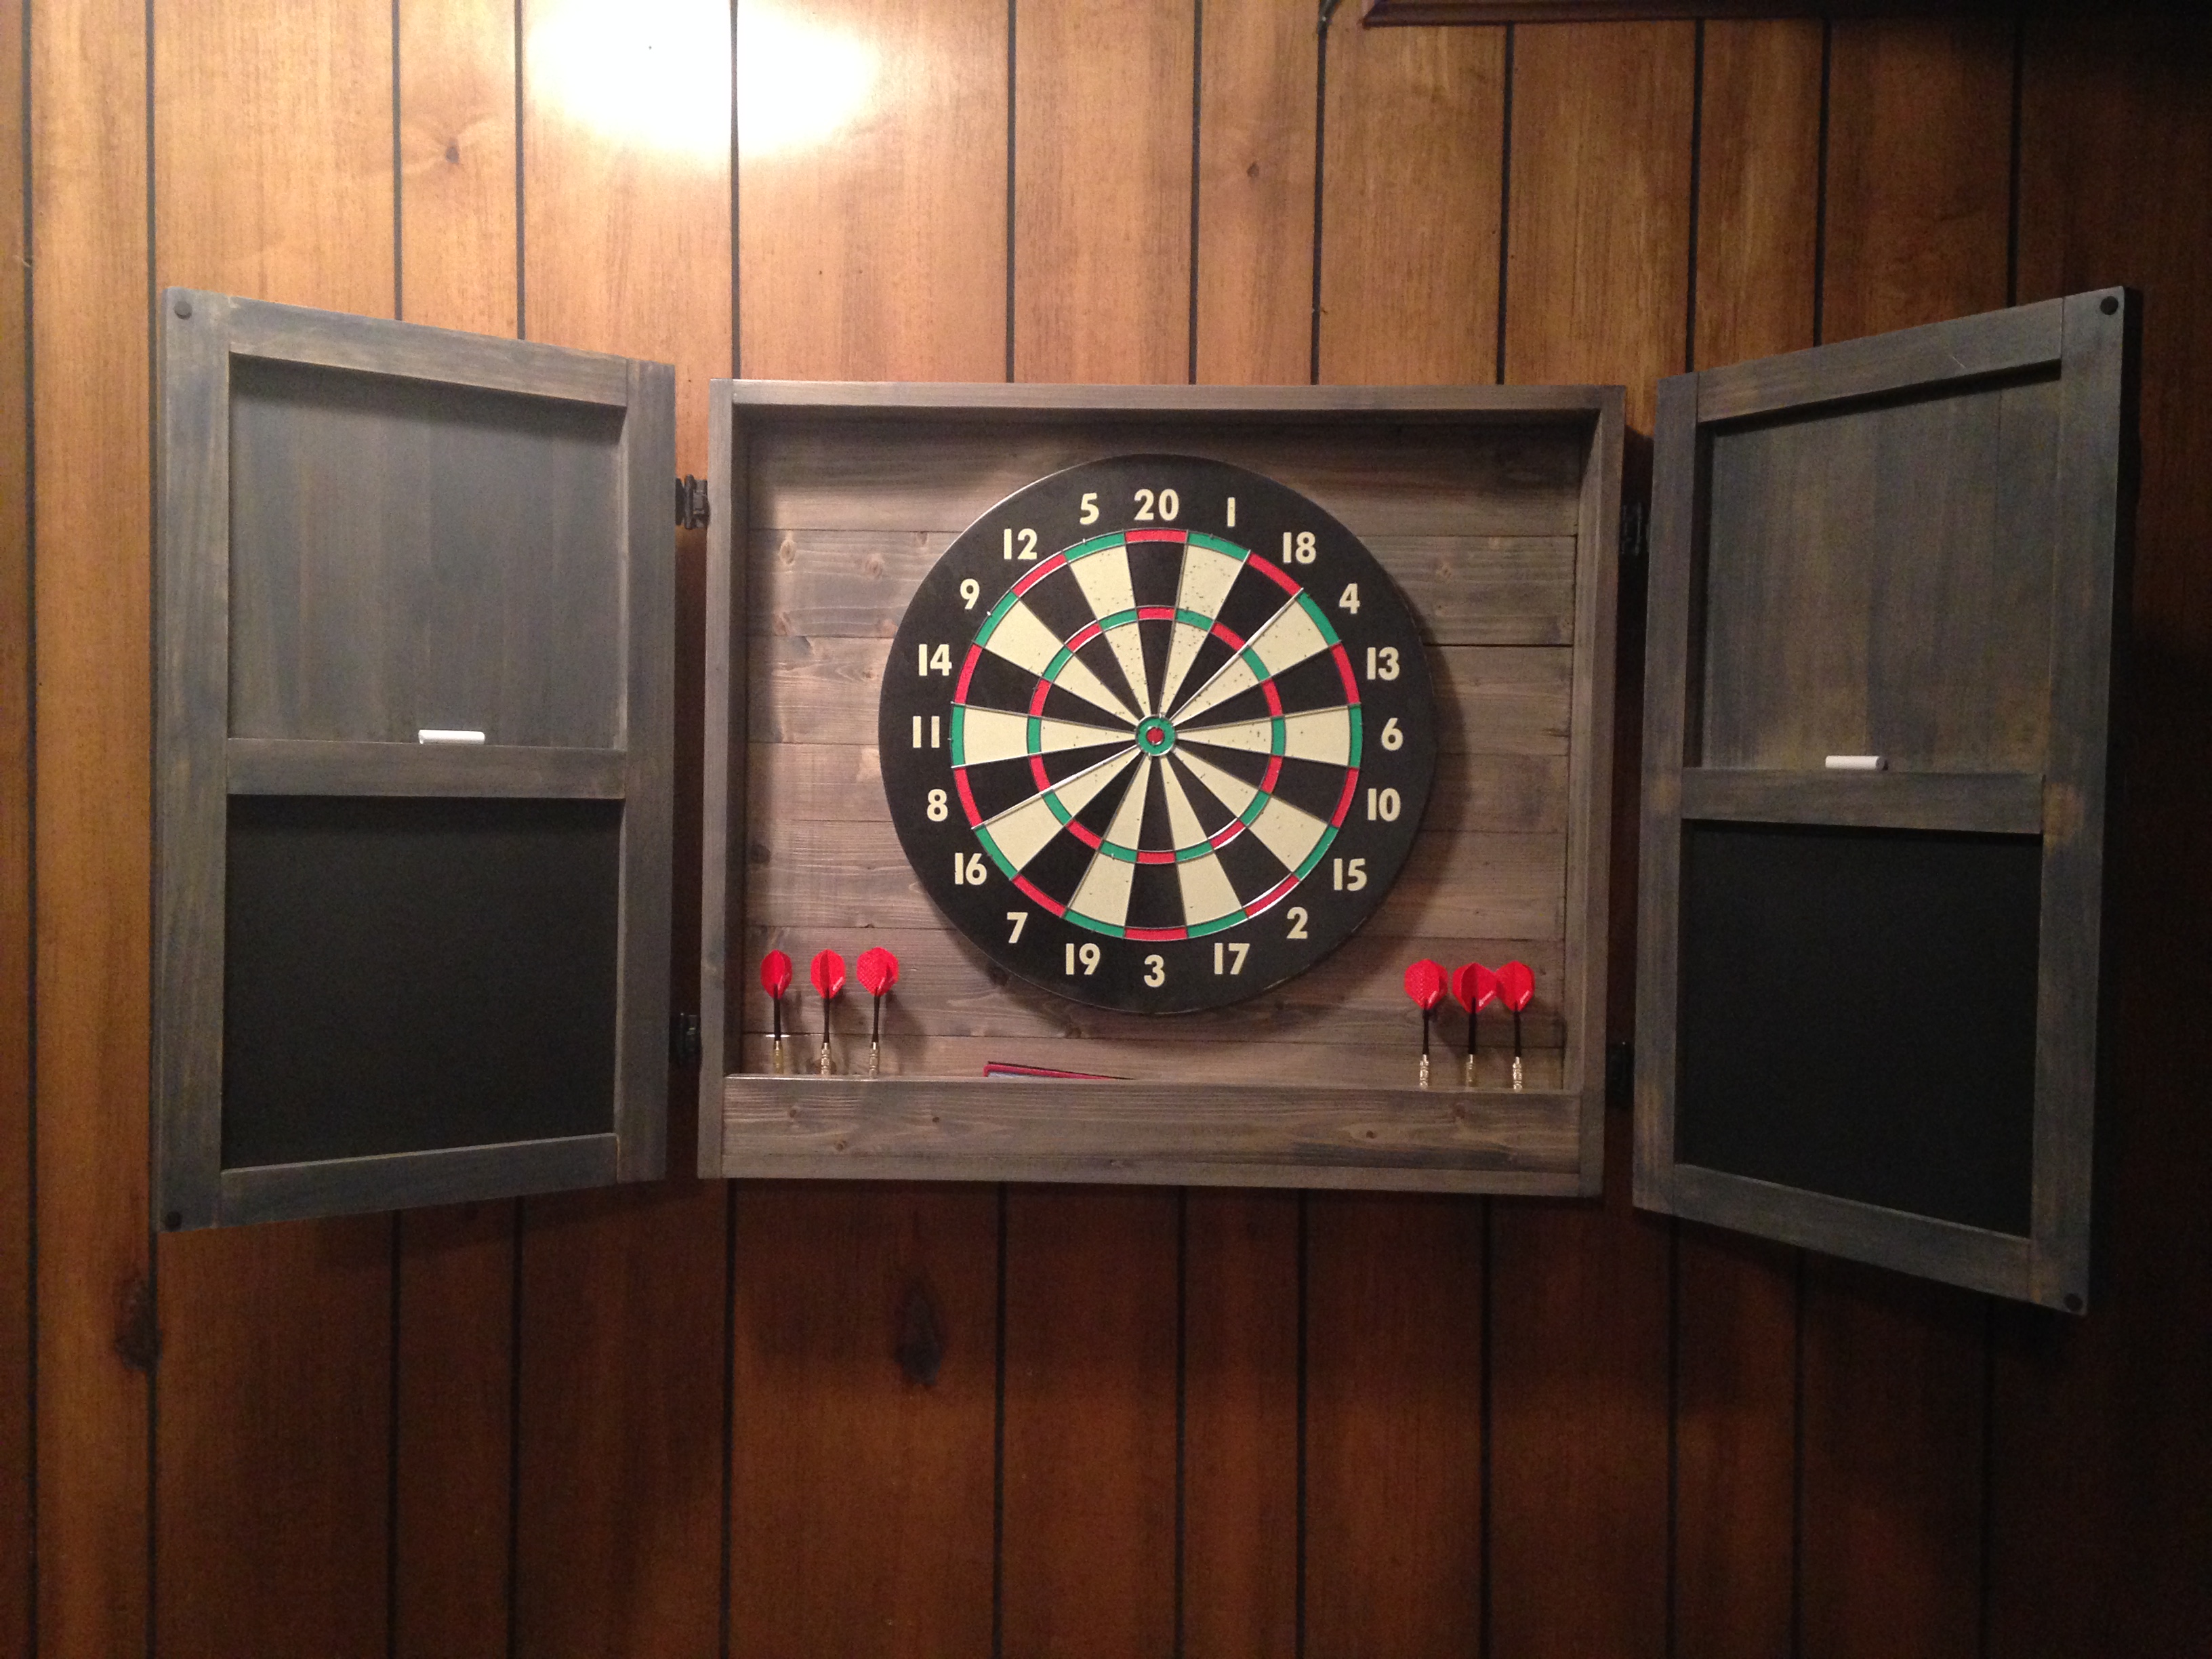
I had a big empty wall in my den/man cave, so I decided to build a dartboard cabinet instead of just hanging a dartboard on the wall. No plans for this, I just made it up as I went. Measured twice, sketched it out and cut as I went.
I use pine 1x4's for the frame and back. 1x3's for the accessory box, 1x2's for the door frame, and poplar strips for the doors and door braces. The darts are held by 6" long 2x2's with holes drilled.
Wood screws, finish nails, and small brads were used to hold everything together.
The chalkboards are simple MDF's cut and sprayed with chalkboard paint. Overlay hinges are used for the doors, and the dartbord is held on with screws from the back so it can be replaced when needed.
The Alabama A is hand-painted.
Estimated Time Investment
Day Project (6-9 Hours)
Finish Used
Minwax Classic Gray with light coats of spray glosscoat.
Recommended Skill Level
Beginner
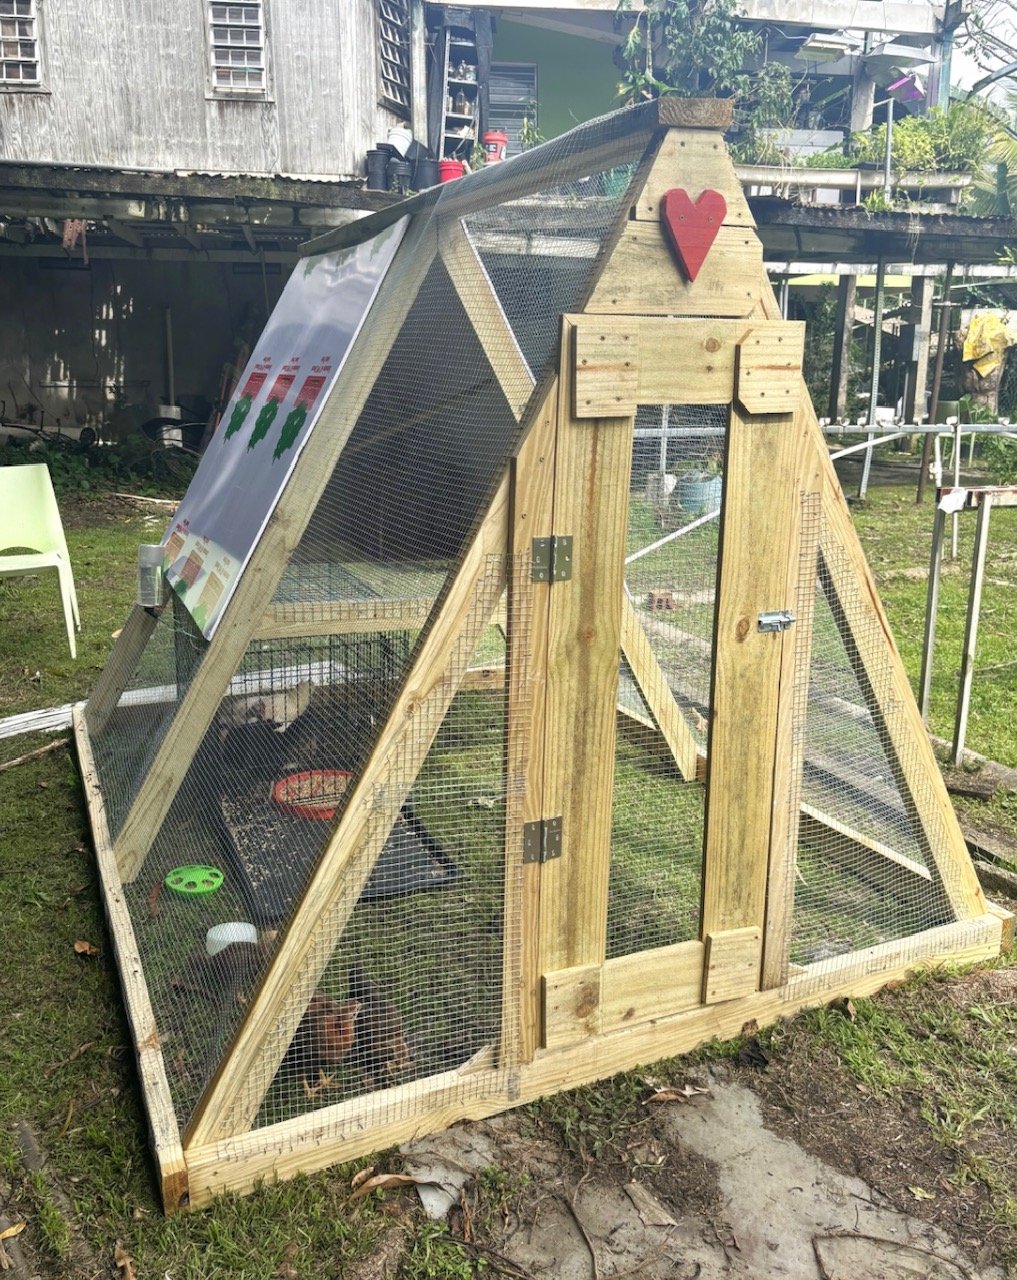
A-Frame Chicken Coop - Easy to Clean

Thanks for the free plans. I did have to make modifications for the doors. i hid the hinges to give it a clean look. i used cedar for the trim and Plywood Siding Panel T1-11 4 IN OC (Common: 19/32 in. x 4 ft. x 8 ft.; Actual: 0.563 in. x 48 in. x 96 in.) for the doors. i used a metal flashing for the roof so it will vent.


Built from Plan(s)
Estimated Cost
$250
Estimated Time Investment
Week Long Project (20 Hours or More)
Finish Used
BEHR Transparent waterproofing finish (Cedar Natural Tone) NO 501
Recommended Skill Level
Intermediate
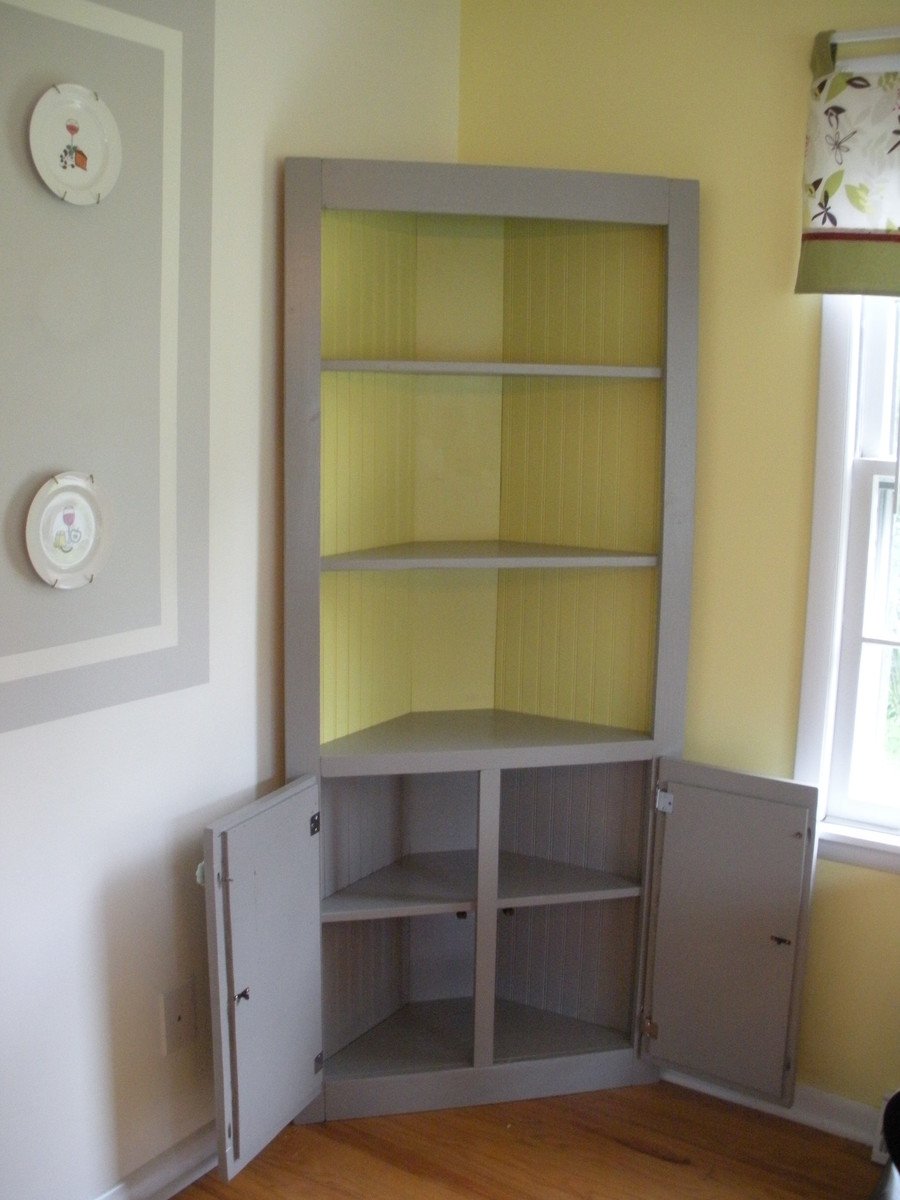
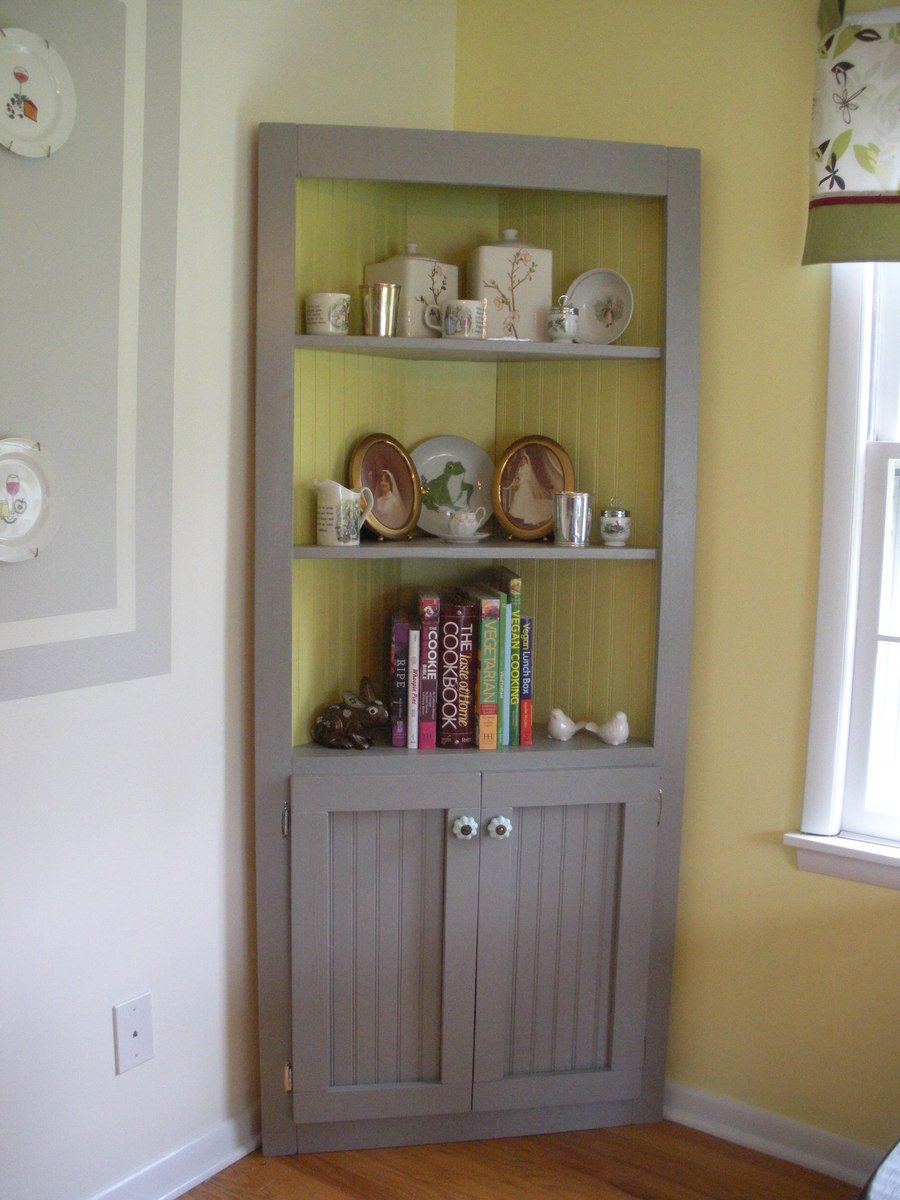
Cute corner cabinet!
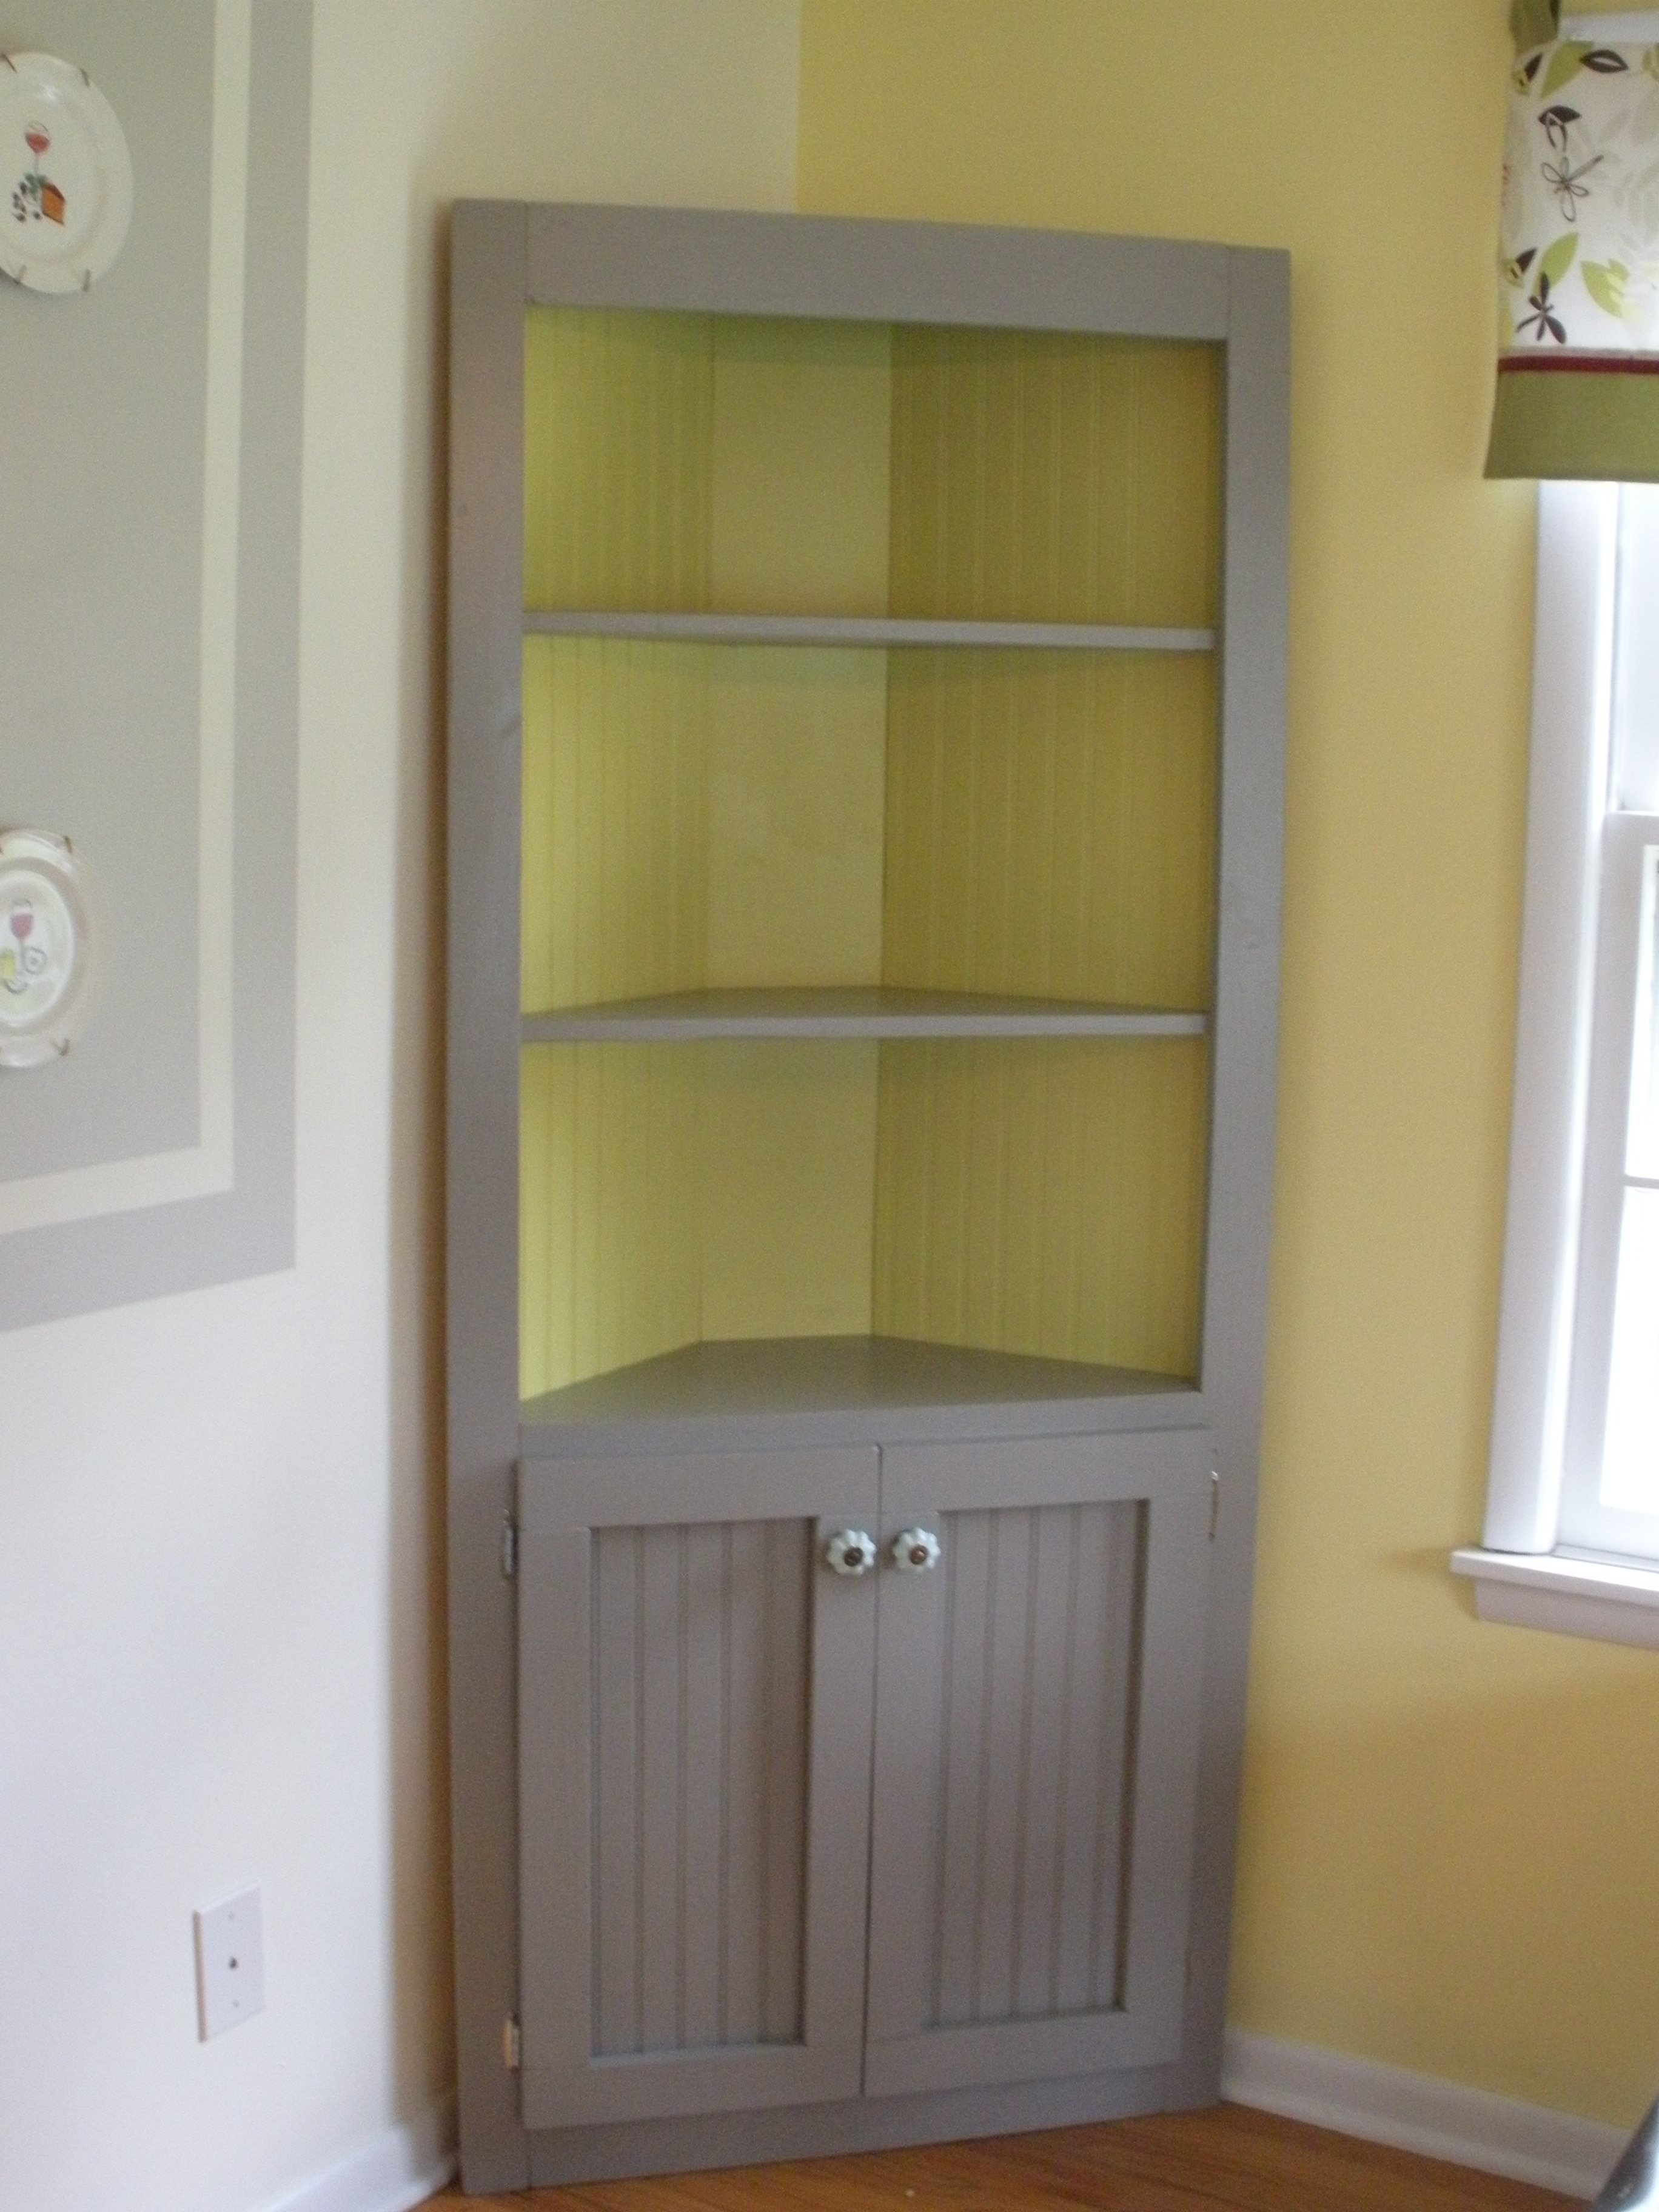
This project took me the majority of a three-day weekend to complete, but it was well worth it! I had the lumber store cut the beadboard panel for me so that it would fit in my car. This was also the first time I built something with doors on it, which was a bit of a learning curve, but came out alright in the end. I used pocket holes to build the face frame, and attached the shelves to the frame first before attaching them to the 1x8 back. I used 1 1/4" pocket hole screws and 2" wood screws. I left off the trim at the top and didn't bother to cut out the footer, but I think it still looks pretty cute.
Built from Plan(s)
Estimated Cost
$110
Estimated Time Investment
Weekend Project (10-20 Hours)
Finish Used
Accent color: Appletini from Valspar
Main color: Earthy Mushroom Taupe from Glidden
Everything was given a good sanding and a healthy dose of primer before painting.
Main color: Earthy Mushroom Taupe from Glidden
Everything was given a good sanding and a healthy dose of primer before painting.
Recommended Skill Level
Beginner
Comments
Shoe dresser

I didn't build this shoe dresser because I particularly needed one, but it looked so lovely that I couldn't resist.
- I modified the plans by building 3 bins instead of 2 so it could hold more shoes.
- I decided against the dowel stick and opted for hinges instead, which were surprisingly not too difficult to assemble. I found that I didn't even need the magnets after installing the hinges as the doors stay closed.
- I used 7" chains on both sides of each bin instead of a belt to make it extra sturdy.
- I added two back legs.
Et voila! This is the end result. I'm very pleased.
PS. Those flopping bins are a pain when you're trying to build!! An extra pair of hands is definitely recommended.


Built from Plan(s)
Estimated Cost
$150 (with extra bin)
Estimated Time Investment
Weekend Project (10-20 Hours)
Finish Used
Walnut (can't remember the exact name of the stain, but it's the one Shanty 2 Chic always uses!)
Recommended Skill Level
Intermediate
Comments
Fri, 07/05/2013 - 22:49
Nice Job
Pretty :) Good Job. Now if I only had the space for one thats 10 rows high :P I like the stain color too. Shanty 2 Chic always uses Rust-o-leum. I think its called dark walnut. Dont quote me though. I love the stain and spray paint combo colors they use.
~Melody
In reply to Nice Job by SoCaliforniaMel
Sat, 07/06/2013 - 20:00
Thanks!
Rust-o-leum, that's the one!
Yes, if only every woman could own a 10-row cabinet for all her shoes! :)
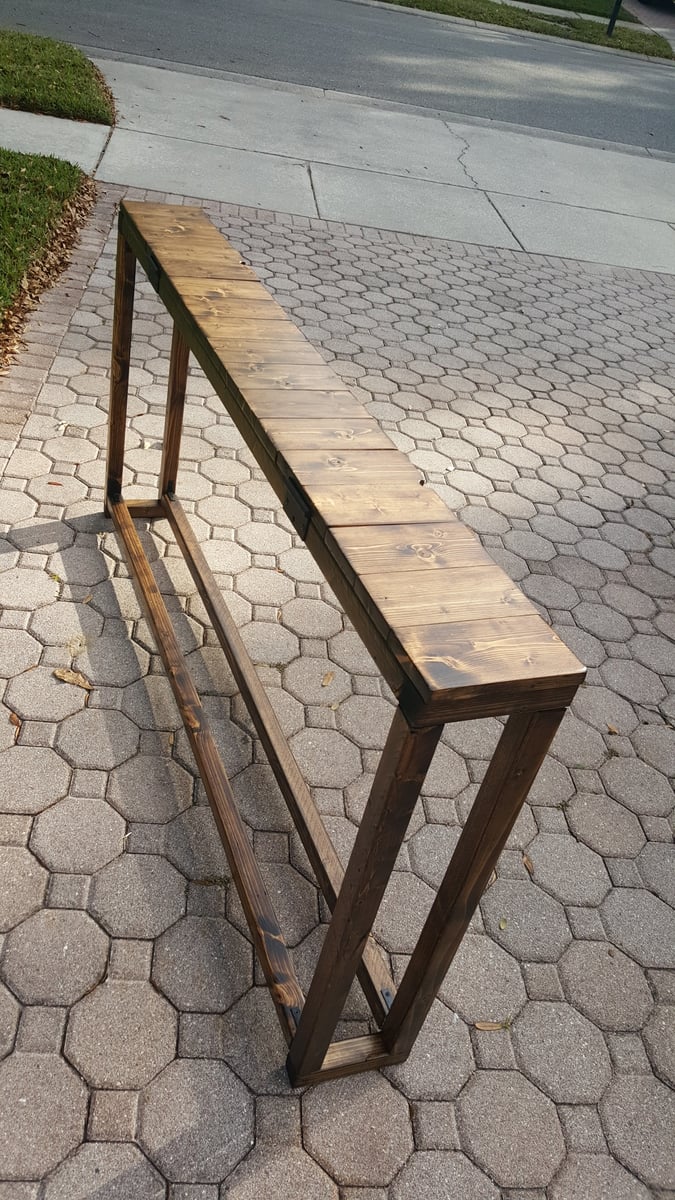
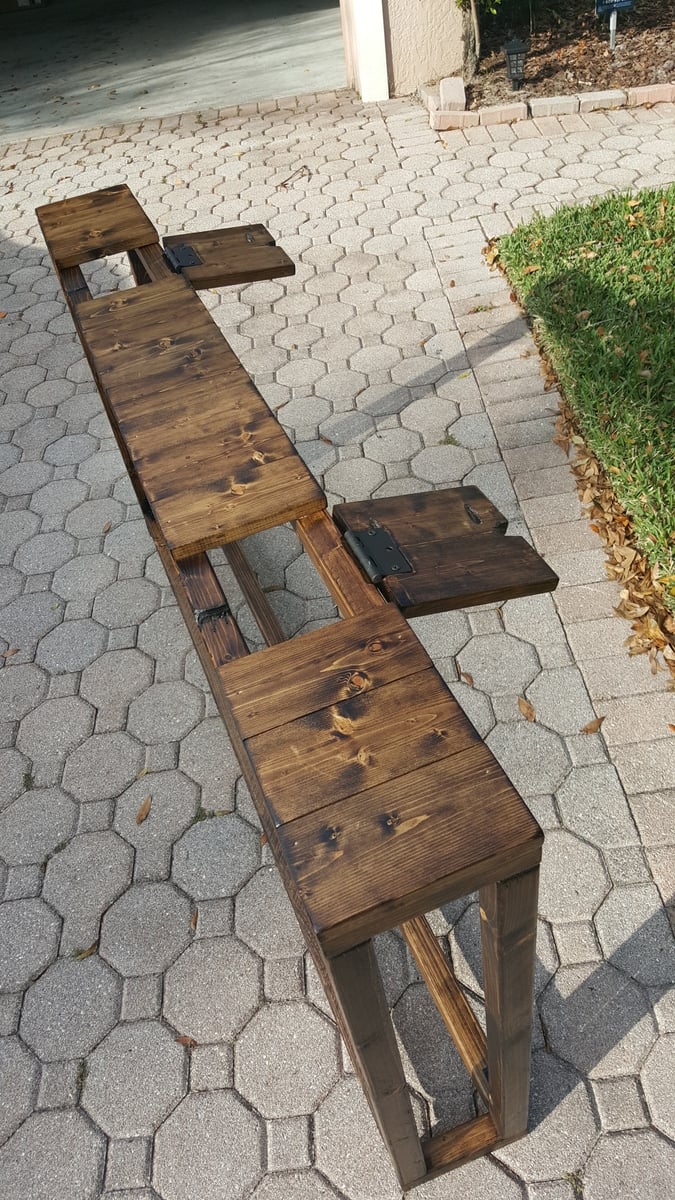
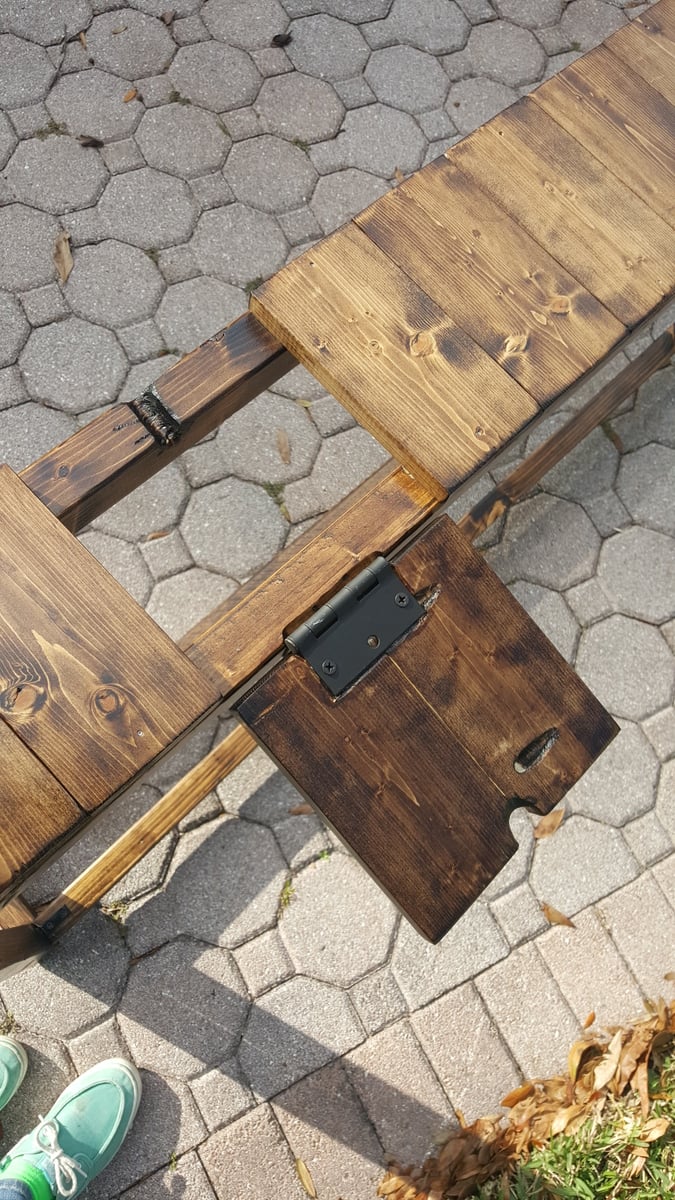
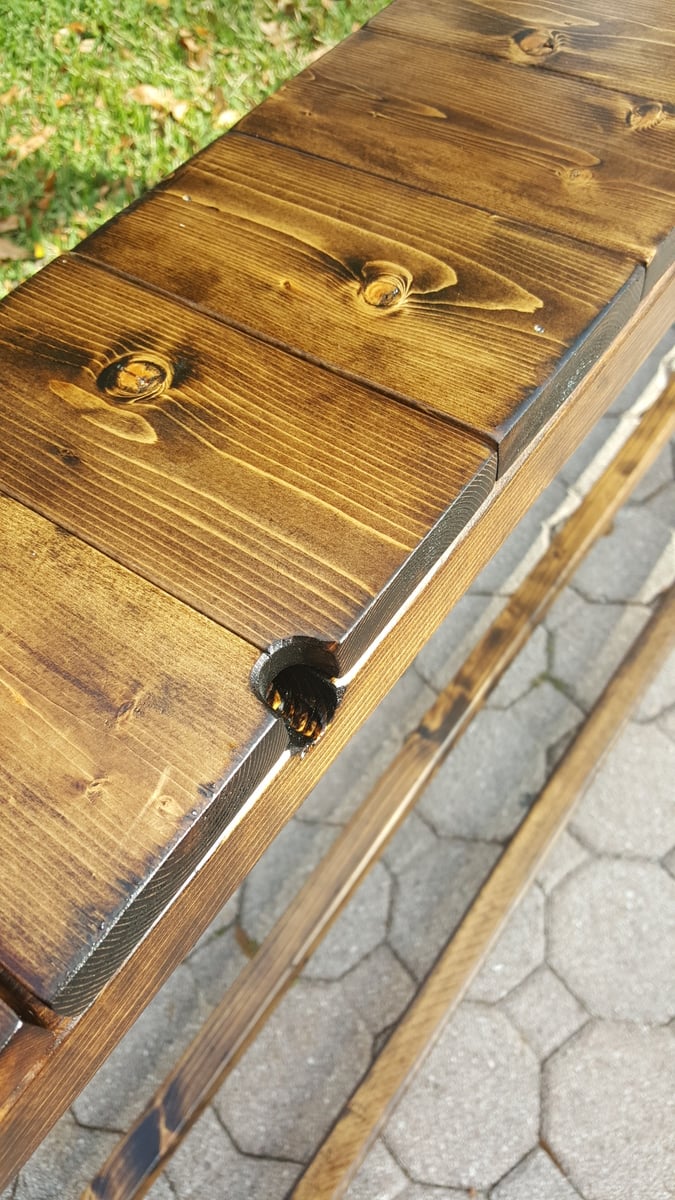
Slatted Sofa Table
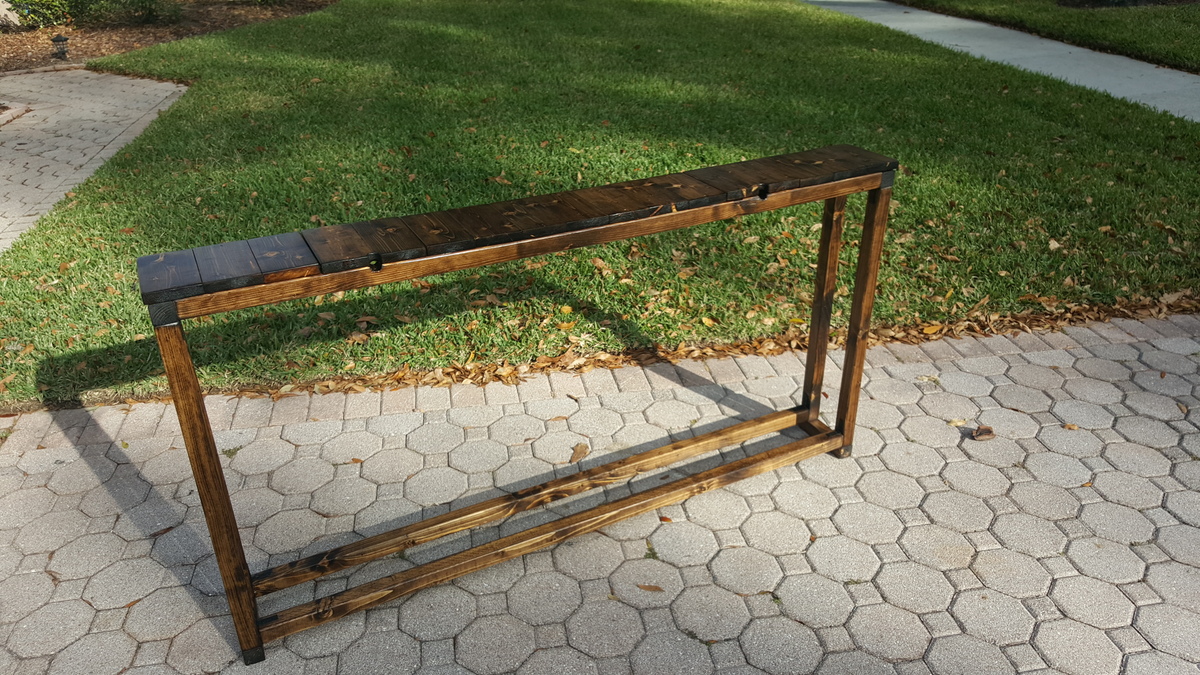
I based this design of the simple Sofa Table by Jenna Sue. Instead of a 2x8 across the top, I opted to use 1x4s side by side. This slatted look matched some of the other items in the house and to allowed me to create two hinged sections. These sections allow for easy access to wall plugs and include small notch for the cables to come through.

Built from Plan(s)
Estimated Cost
$35
Estimated Time Investment
Weekend Project (10-20 Hours)
Finish Used
Minwax Wodd Finish Dark Walnut Stain with Minwax Clear Satin Polyeurethane
Recommended Skill Level
Beginner
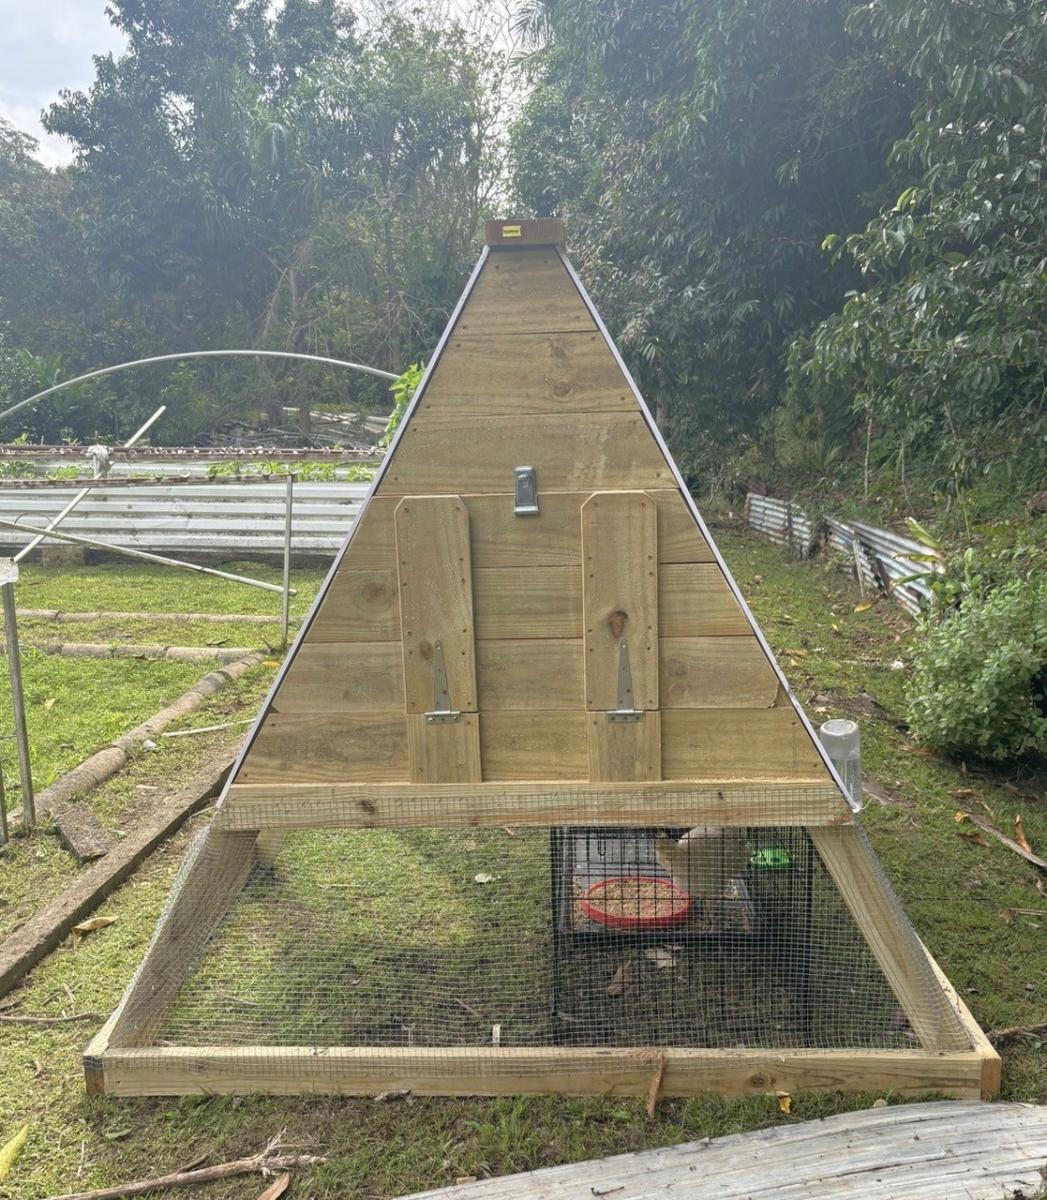
Wood A Frame Coop
A shape chicken coop built in just two days about 9 hours east to do. But heavy to move but everyone is loving it!!!!
Cecilamor
Built from Plan(s)
X Leg table
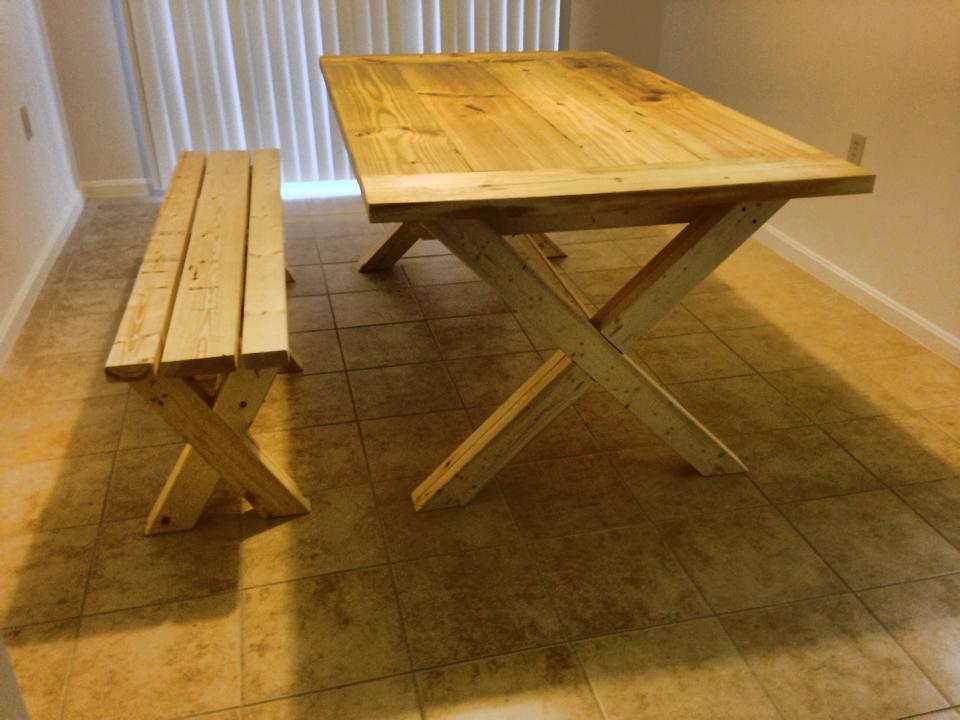
this is my intro to woodworking by myself and i think the table turned out ok. ana's website sure helped allot.
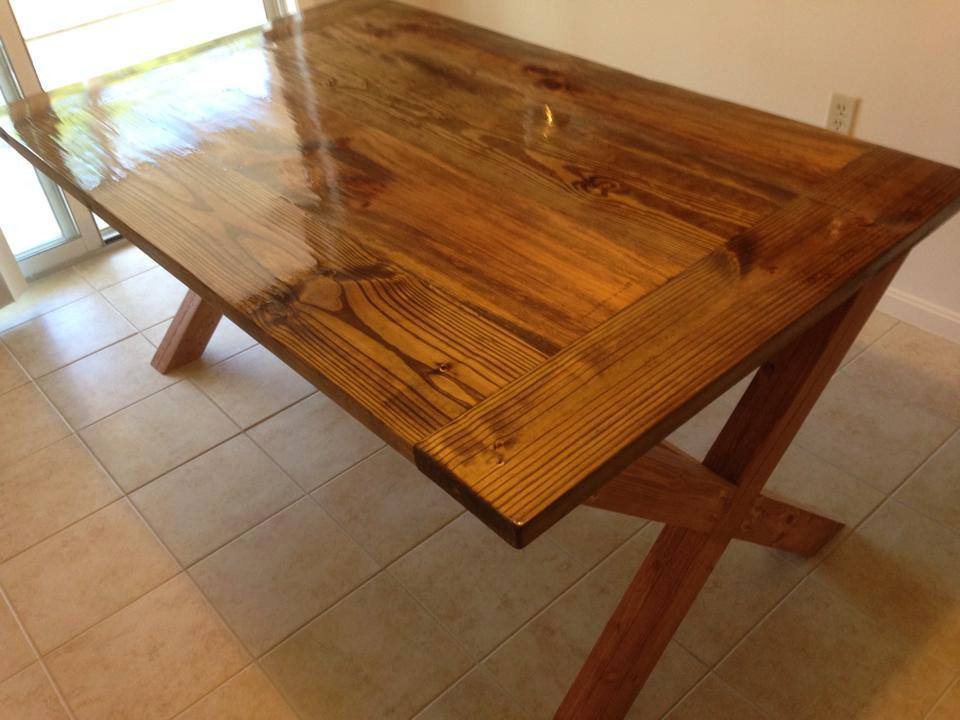
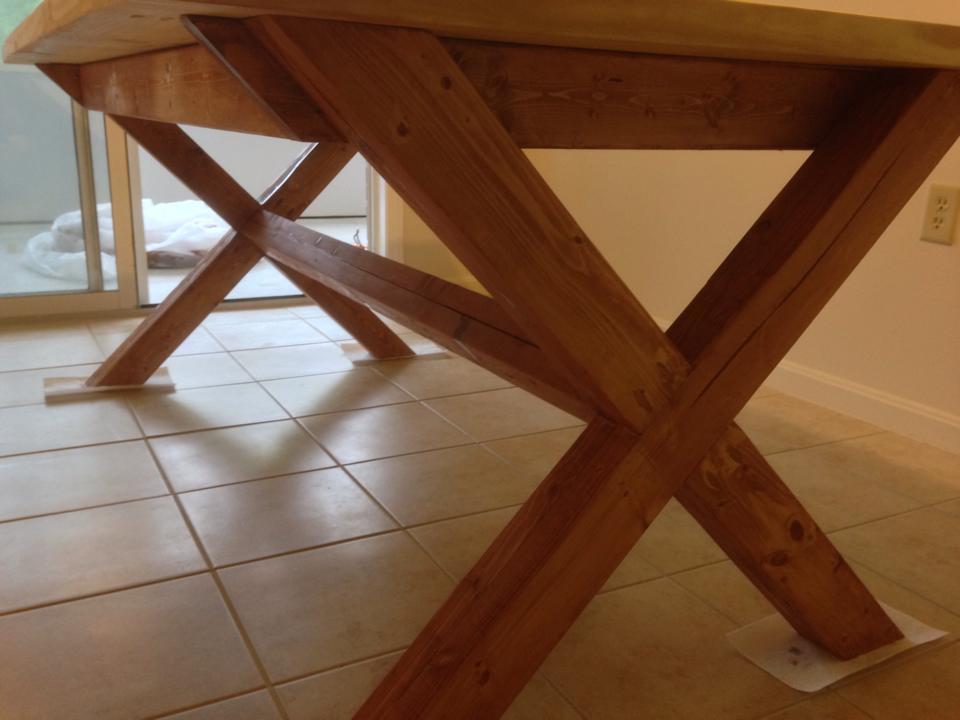
Built from Plan(s)
Estimated Time Investment
Weekend Project (10-20 Hours)
Recommended Skill Level
Beginner
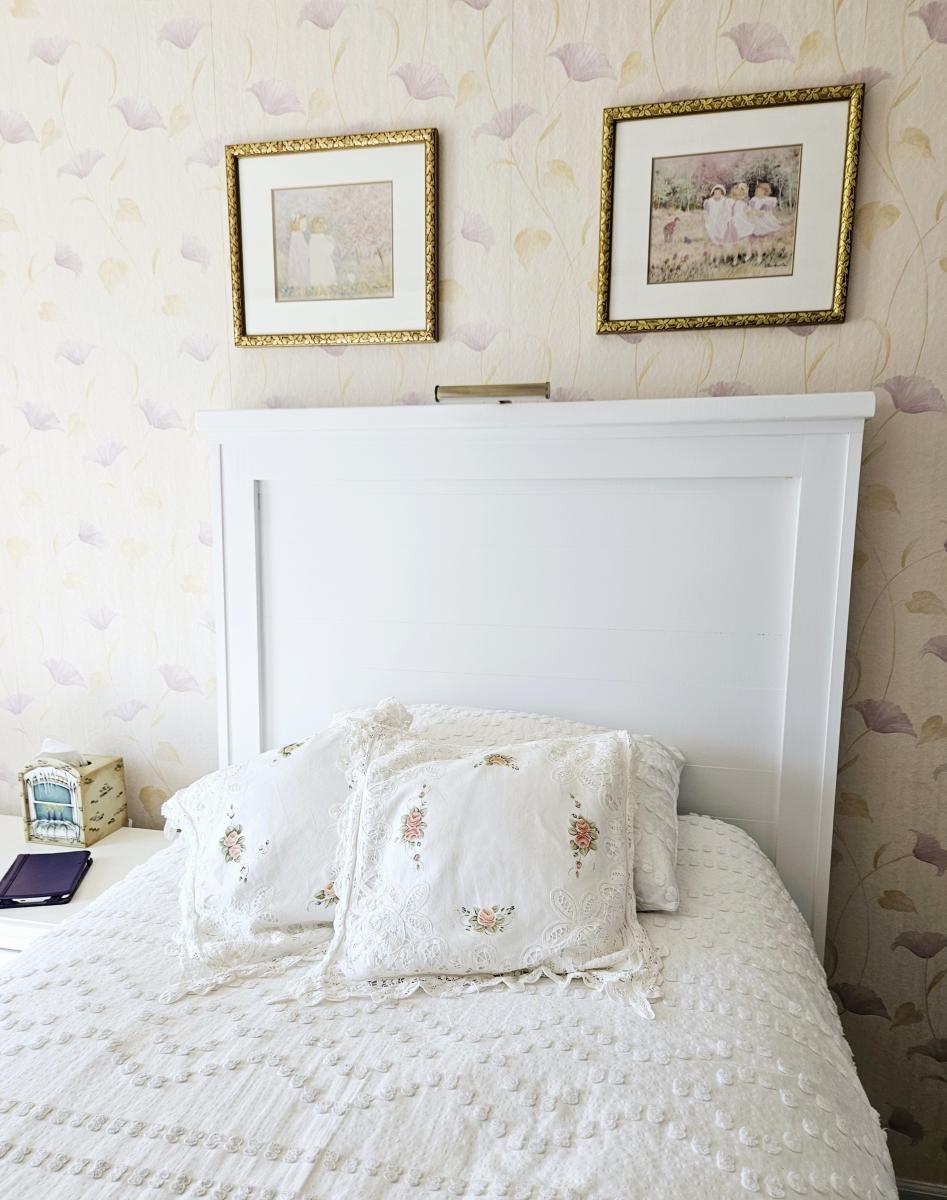
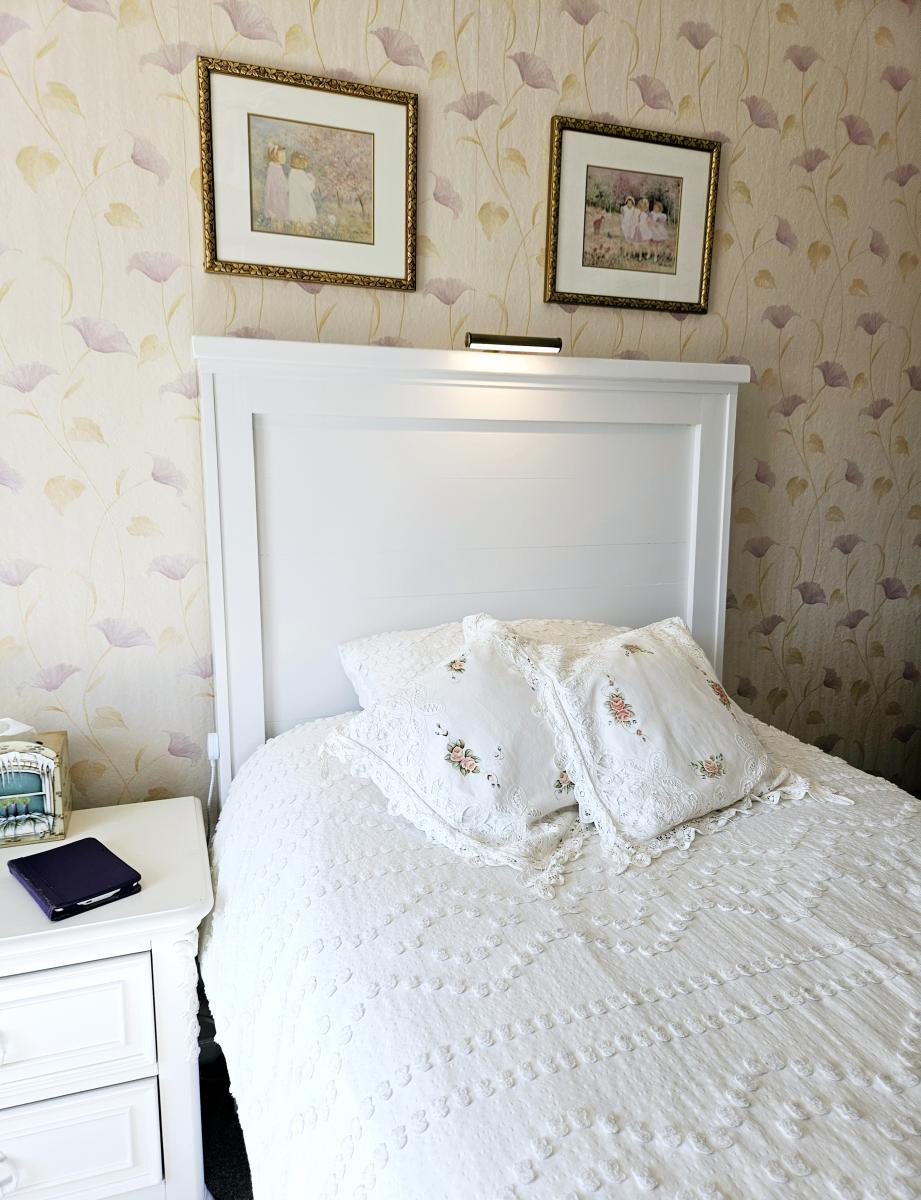
Tall Farmhouse Headboard
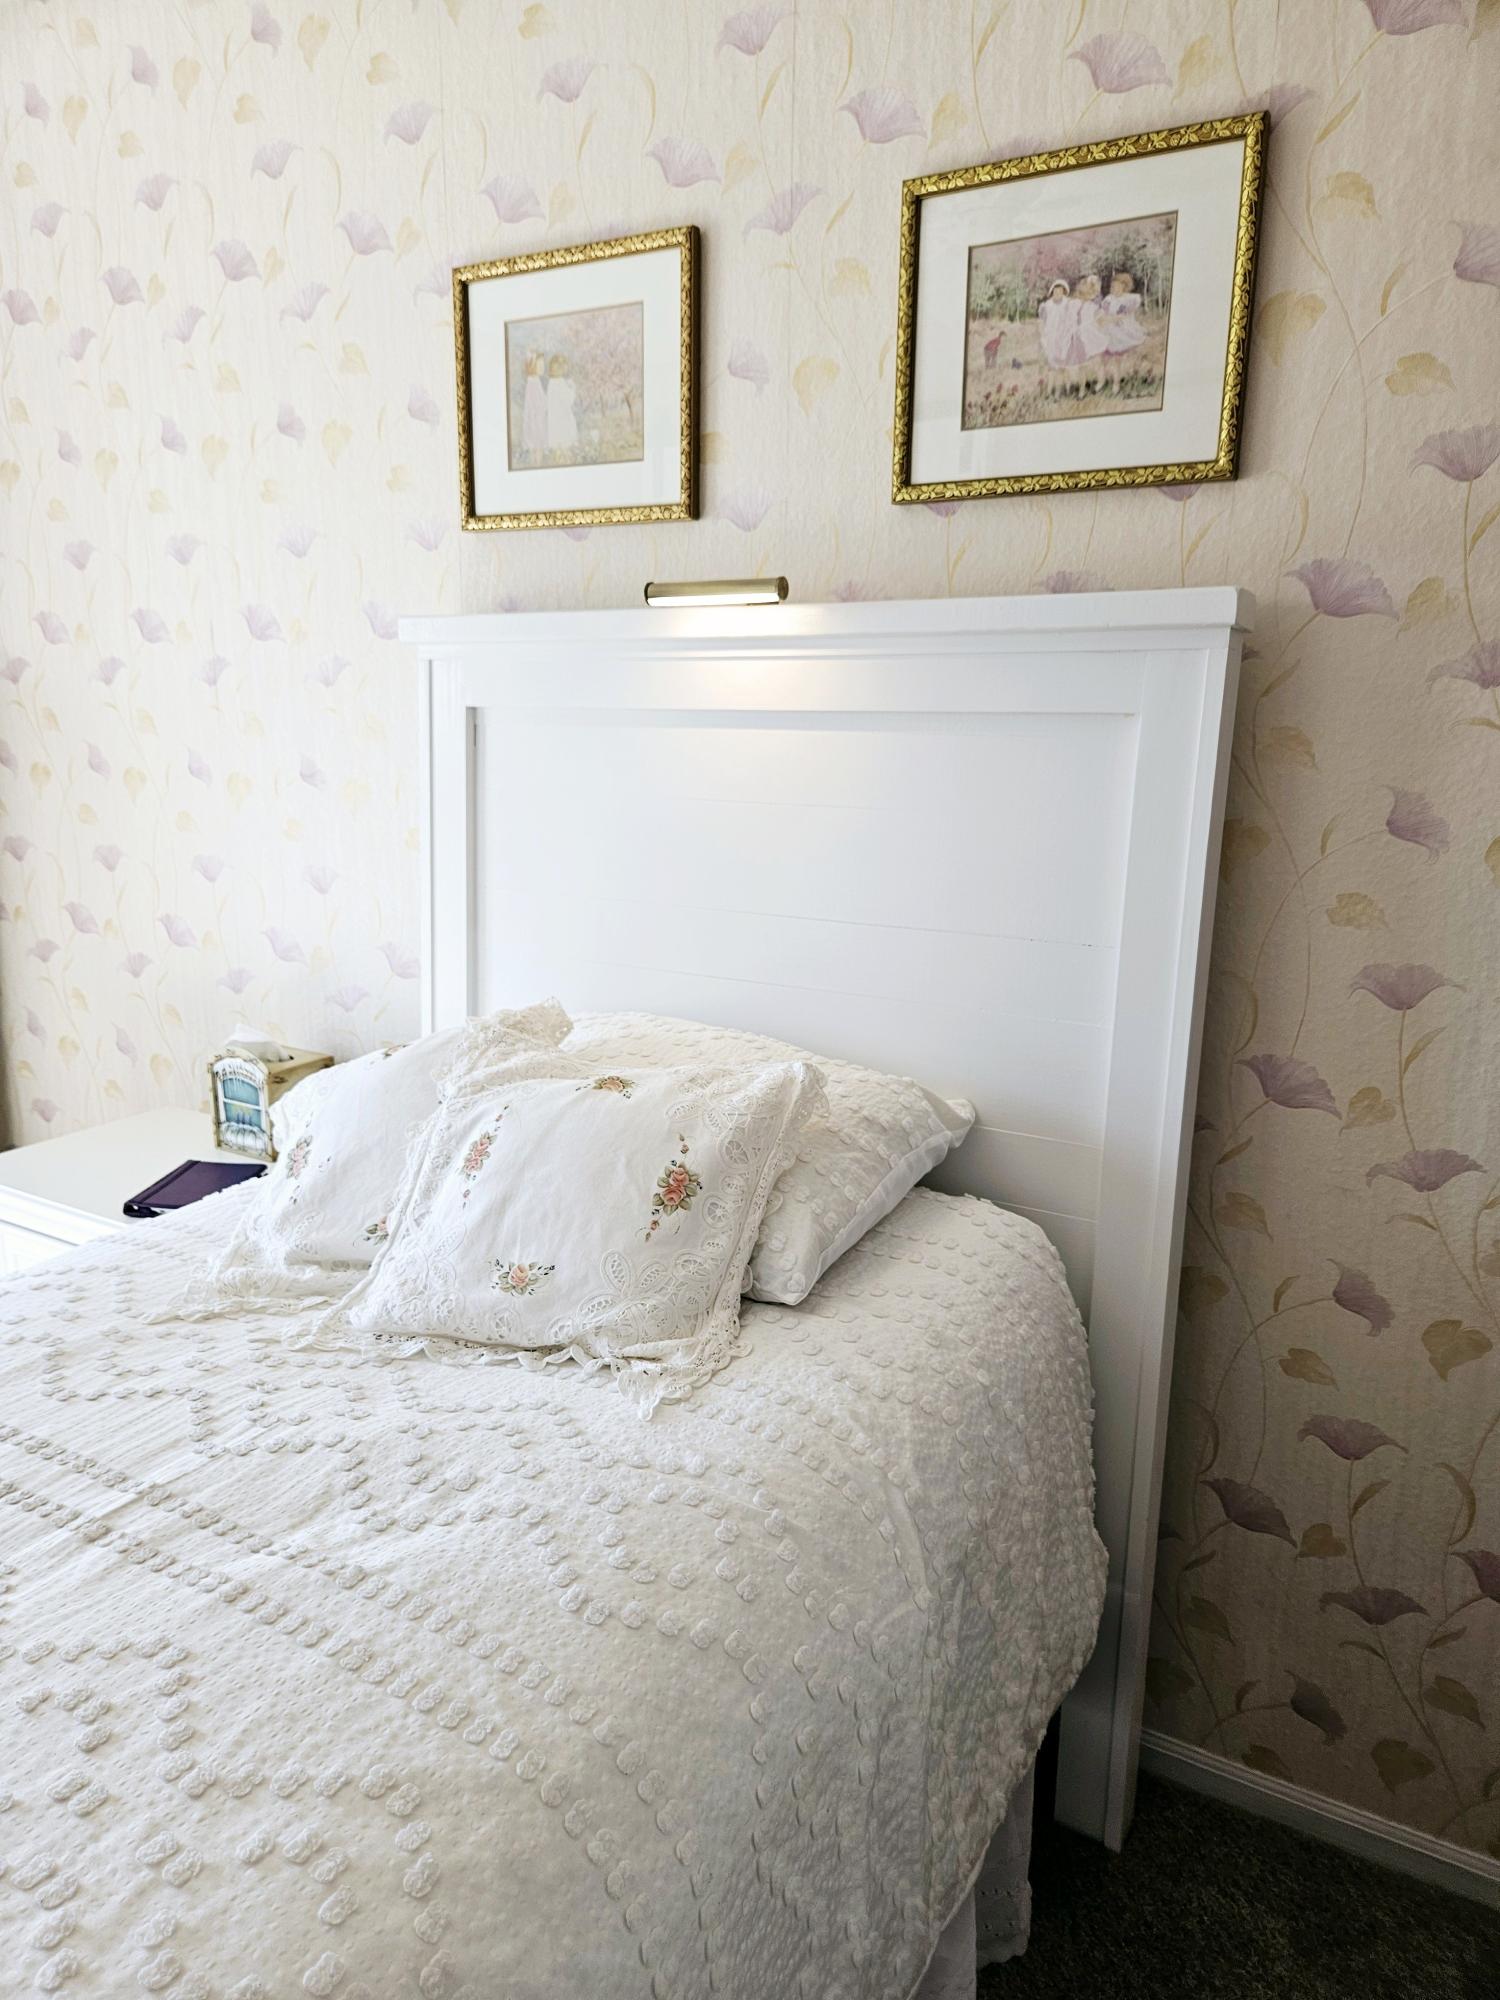
am thrilled with my new headboard. The plans made every thing about this project FUN and DOABLE. I'm a 70 year old Granma who loves to DIY. SO fun to show my photos of what I did ALL BY MYSELF! THANK YOU FOR YOUR WONDERFUL PLANS! With out them my pretty new headboard would never have happened. WHAT FUN. I mounted an LED picture light fixture on the top for reading in bed and mounted the corded on off extension cord switch to the side of the leg for easy on off ! Again, THANK YOU!
Cheryl King
Built from Plan(s)
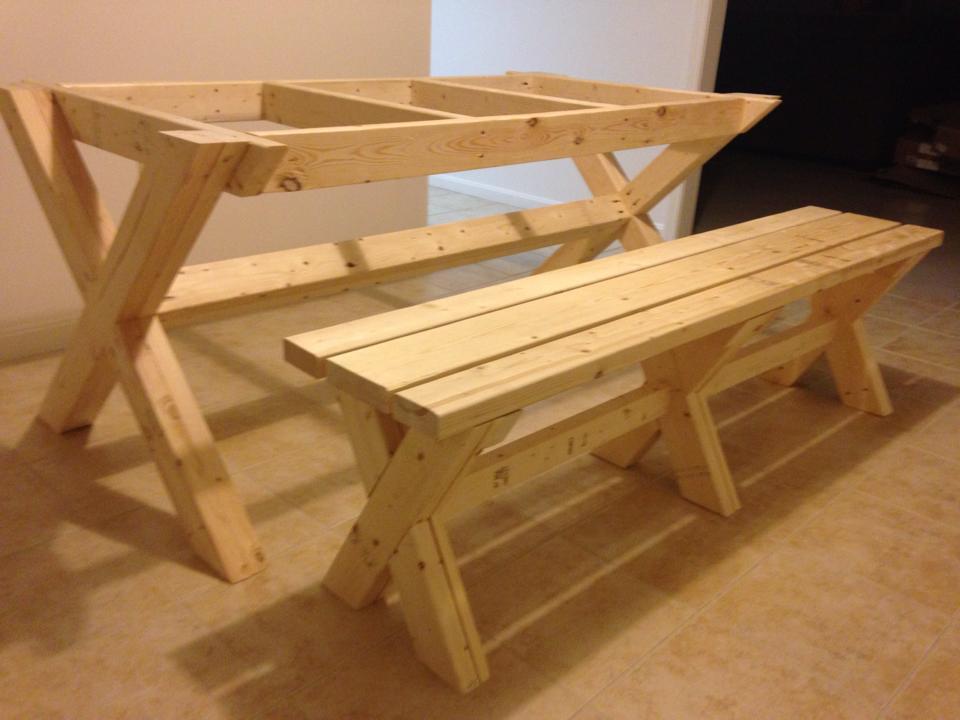
Love this!!! Thank you!!!

This was a fun family project! Thank you!!
Built from Plan(s)
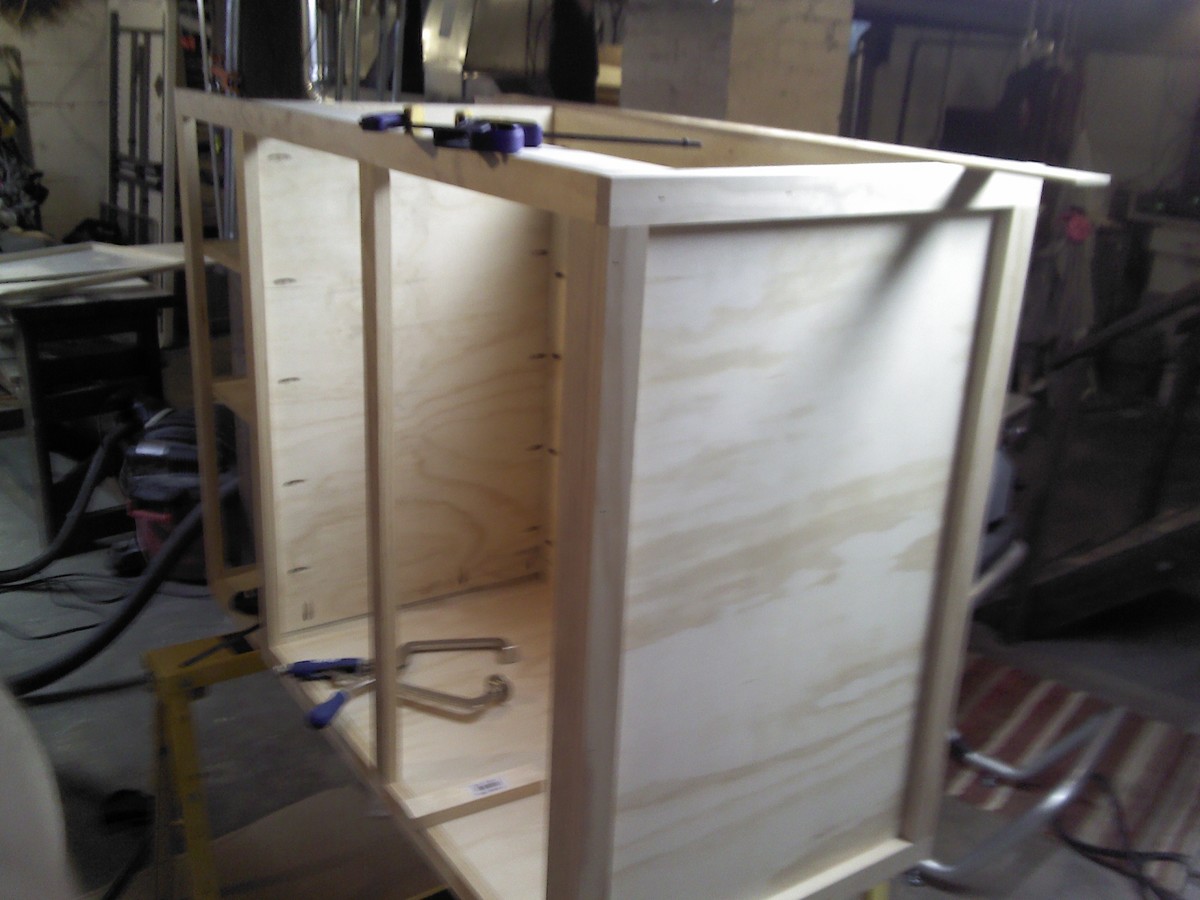
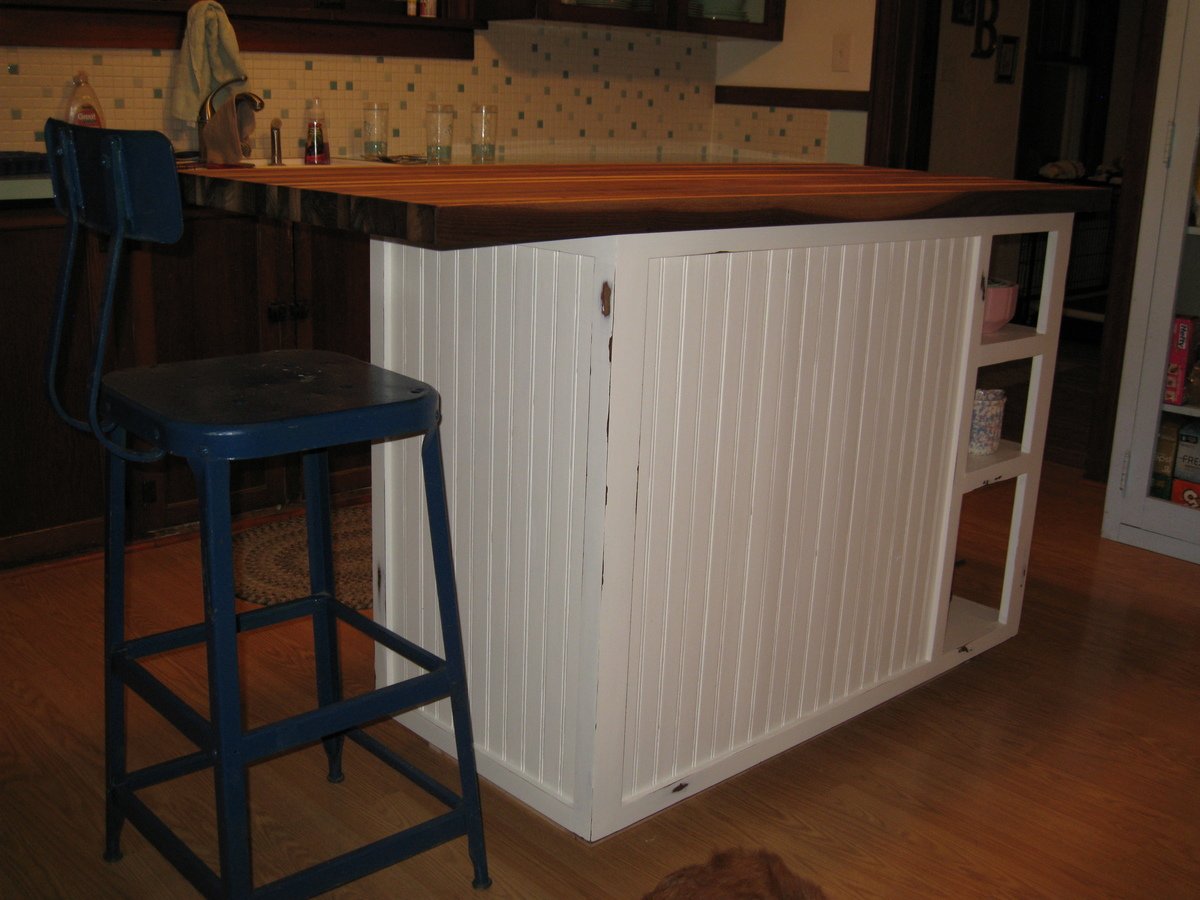
Kitchen Island
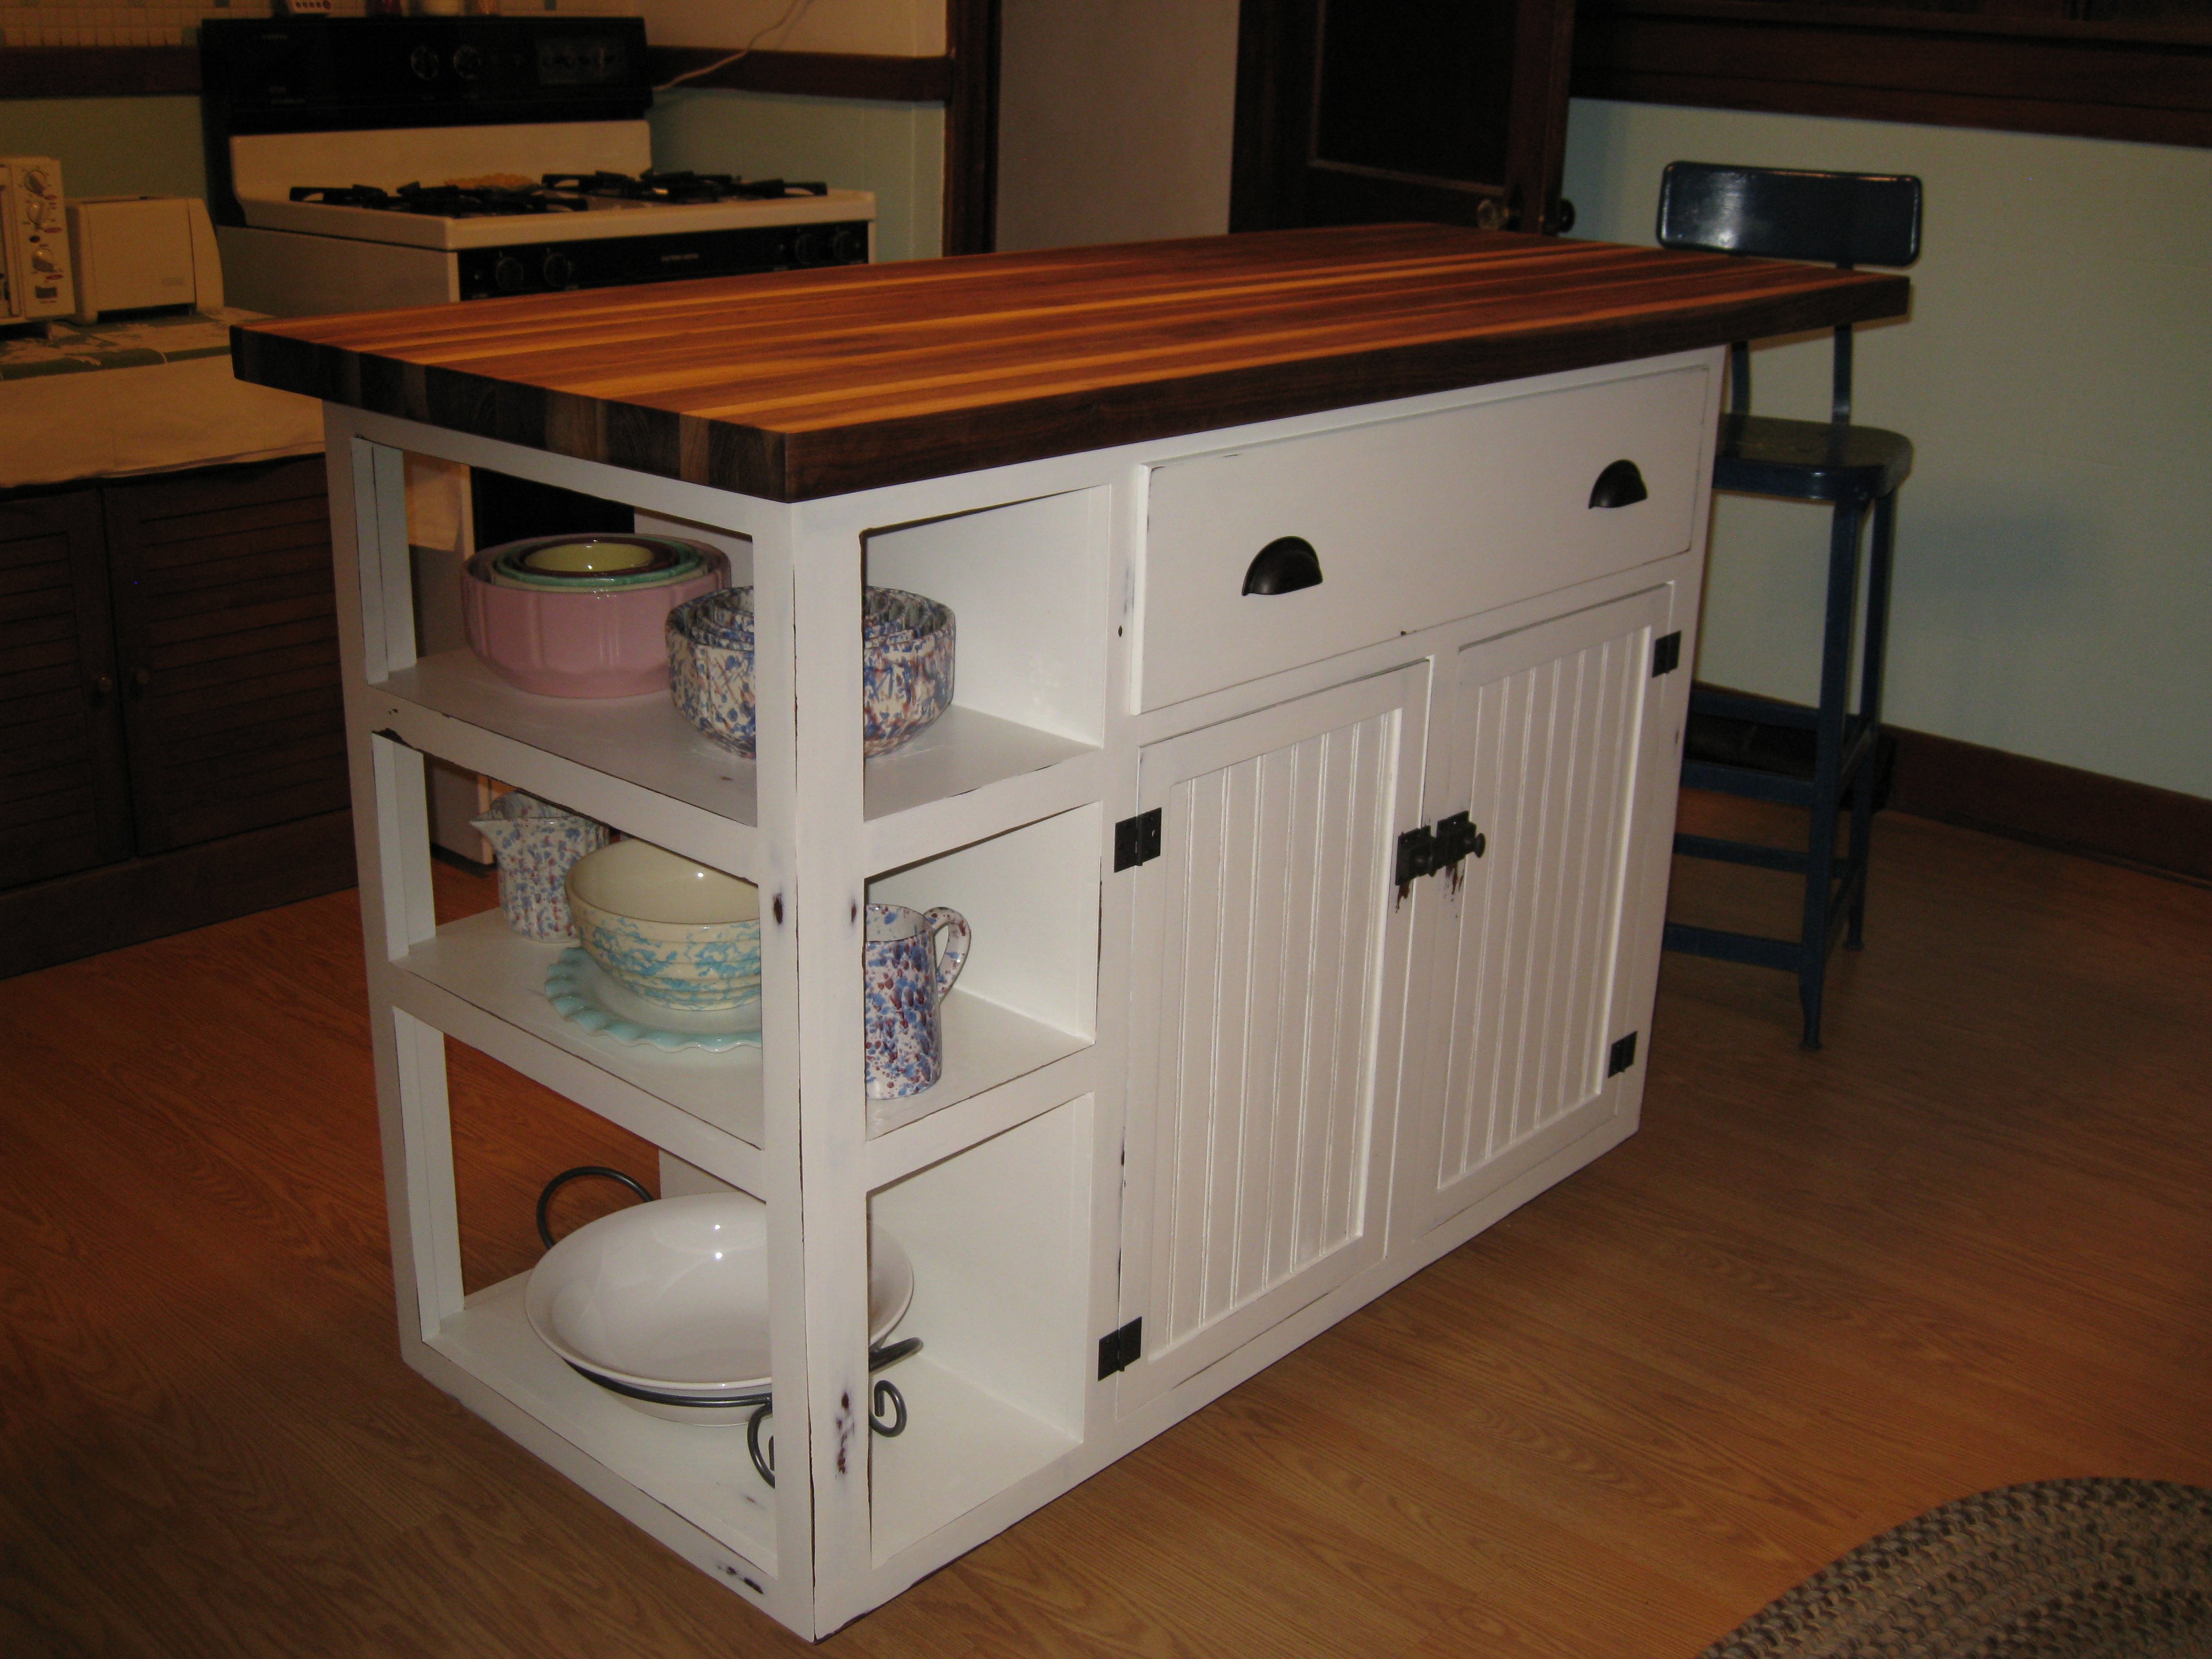
I built this island using Ana's base cabinet plans. I simply added a face frame to all the sides because they are all visible. My wife drew up the plan that includes open storage at one end and an overhang at the other to provide room for a stool. We bought the butcher block top online. It comes unfinished, so we had to sand it down smooth and treat it with mineral oil.


Built from Plan(s)
Estimated Cost
Approx. $500
Estimated Time Investment
Week Long Project (20 Hours or More)
Finish Used
Danish Oil + Shellac + Latex + Minwax Polycrylic
Recommended Skill Level
Intermediate
Comments
Wed, 09/05/2012 - 09:55
I'm in love....this is
I'm in love....this is gorgeous! You both should be very proud of how it turned out. Now, if only my kitchen weren't so small that I can touch both opposite countertops with my arms spread out.....I would build this in a heartbeat! :P
Thu, 11/06/2014 - 09:25
This is wonderful
As Kathy in Pittsburgh said, .."this is gorgeous!" I too would be building this if my kitchen were nearly large enough to accommodate it.
Thanks for posting this, it gives me inspiration.
Mark in Portland, OR
Outdoor rolling bar top

We had some leftover granite from an outdoor kitchen build and wanted to maximize the use of it. We loved the look of a rustic table from Pottery Barn and set out to find something that was asking the same aesthetic. I came across the Jilly and Mia workbench console and thought it would work great with some minor modifications. I shortened the overall length and height, went with some heavy duty casters to support the weight of the granite, and reinforced the cross beams that would support the 3/4" plywood sheet and granite. I went with cedar for this build since it was outdoors and I'll finish it with a clear sealant.

Built from Plan(s)
Estimated Cost
$300
Estimated Time Investment
Day Project (6-9 Hours)
Recommended Skill Level
Intermediate
Comments
Scrap wood mirror with hooks
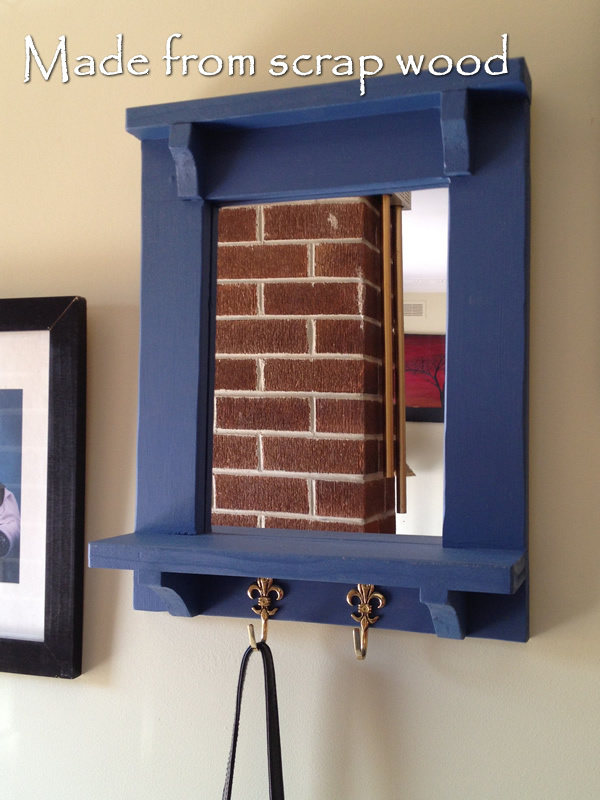
This was made from scrap wood, a cheap $5.00 mirror and some hooks. This hangs near my front door and I hang scarves and bags on it. Always good to have a mirror to double check yourself before you leave the house. It was based on Ana White's Craftsman Frame.
Built from Plan(s)
Estimated Time Investment
An Hour or Two (0-2 Hours)
Recommended Skill Level
Starter Project
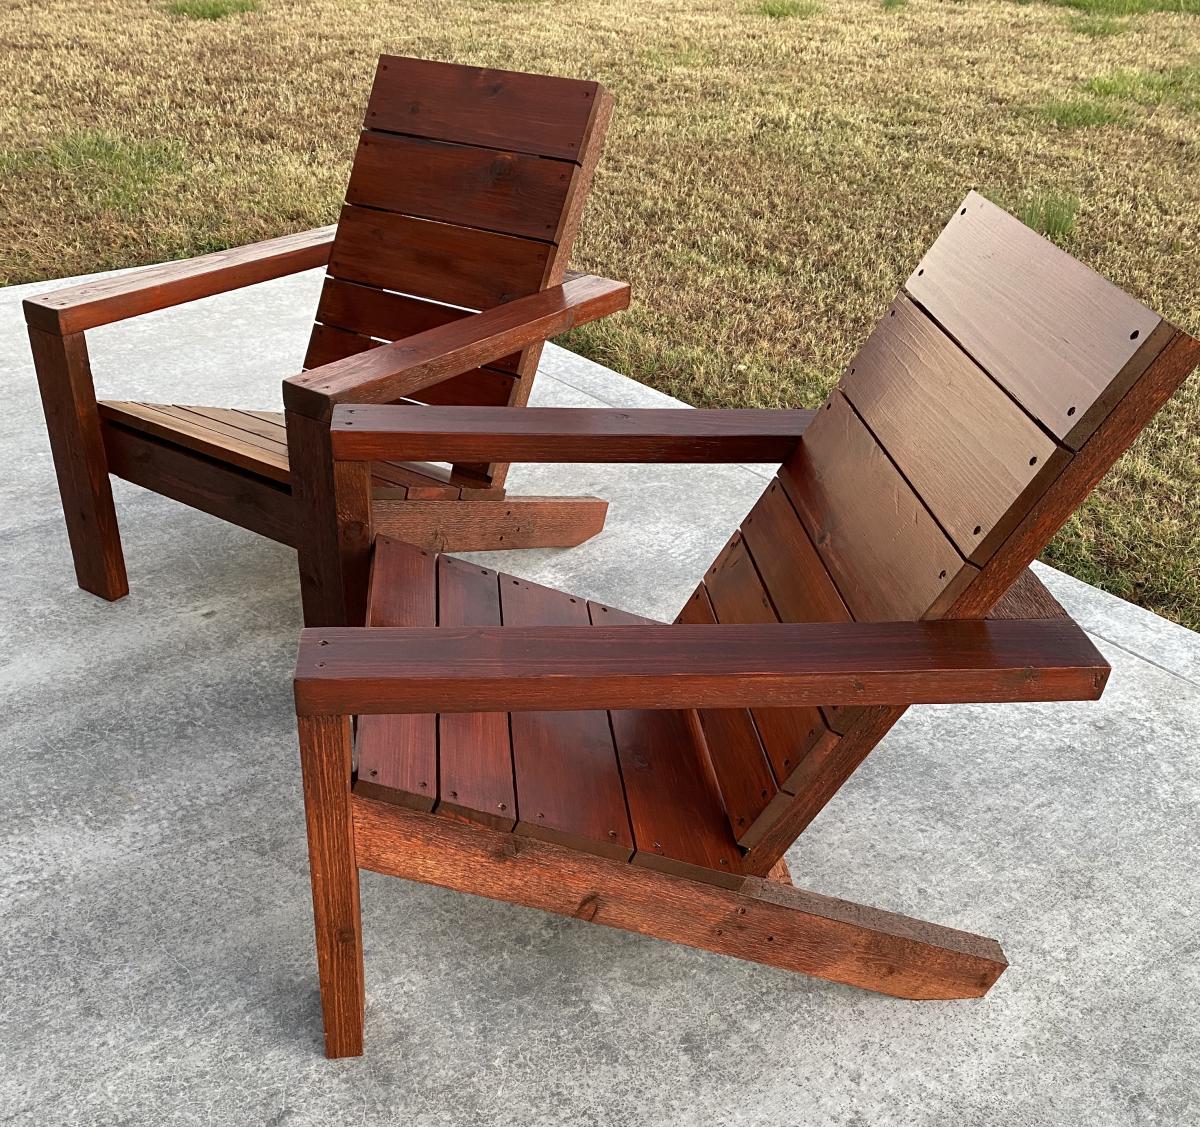
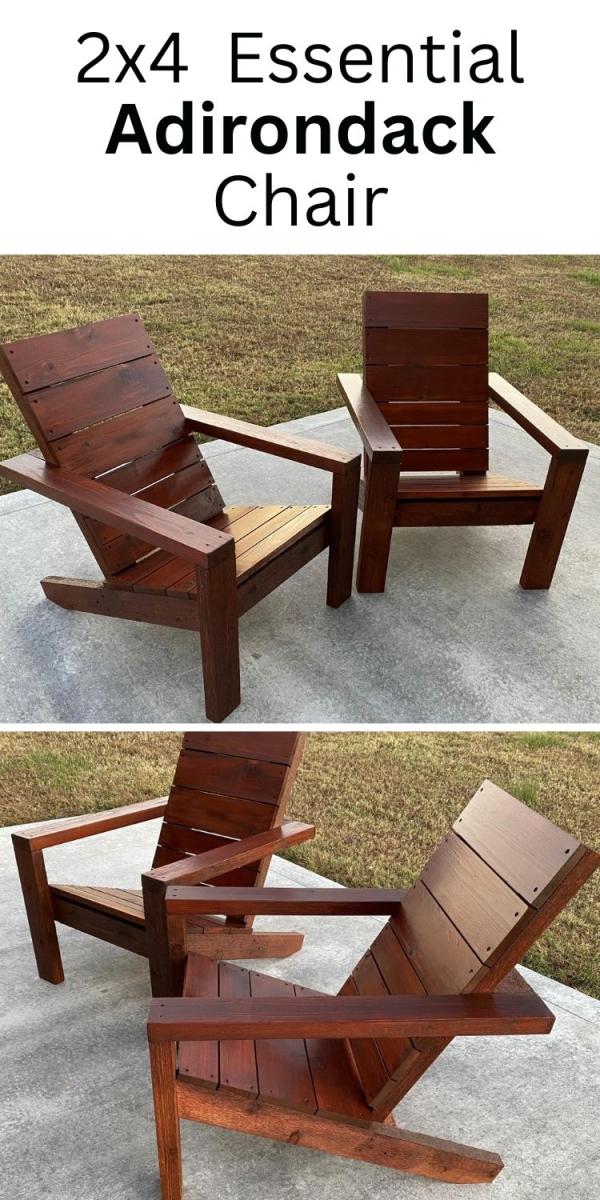
2x4 Essential Adirondack Chair
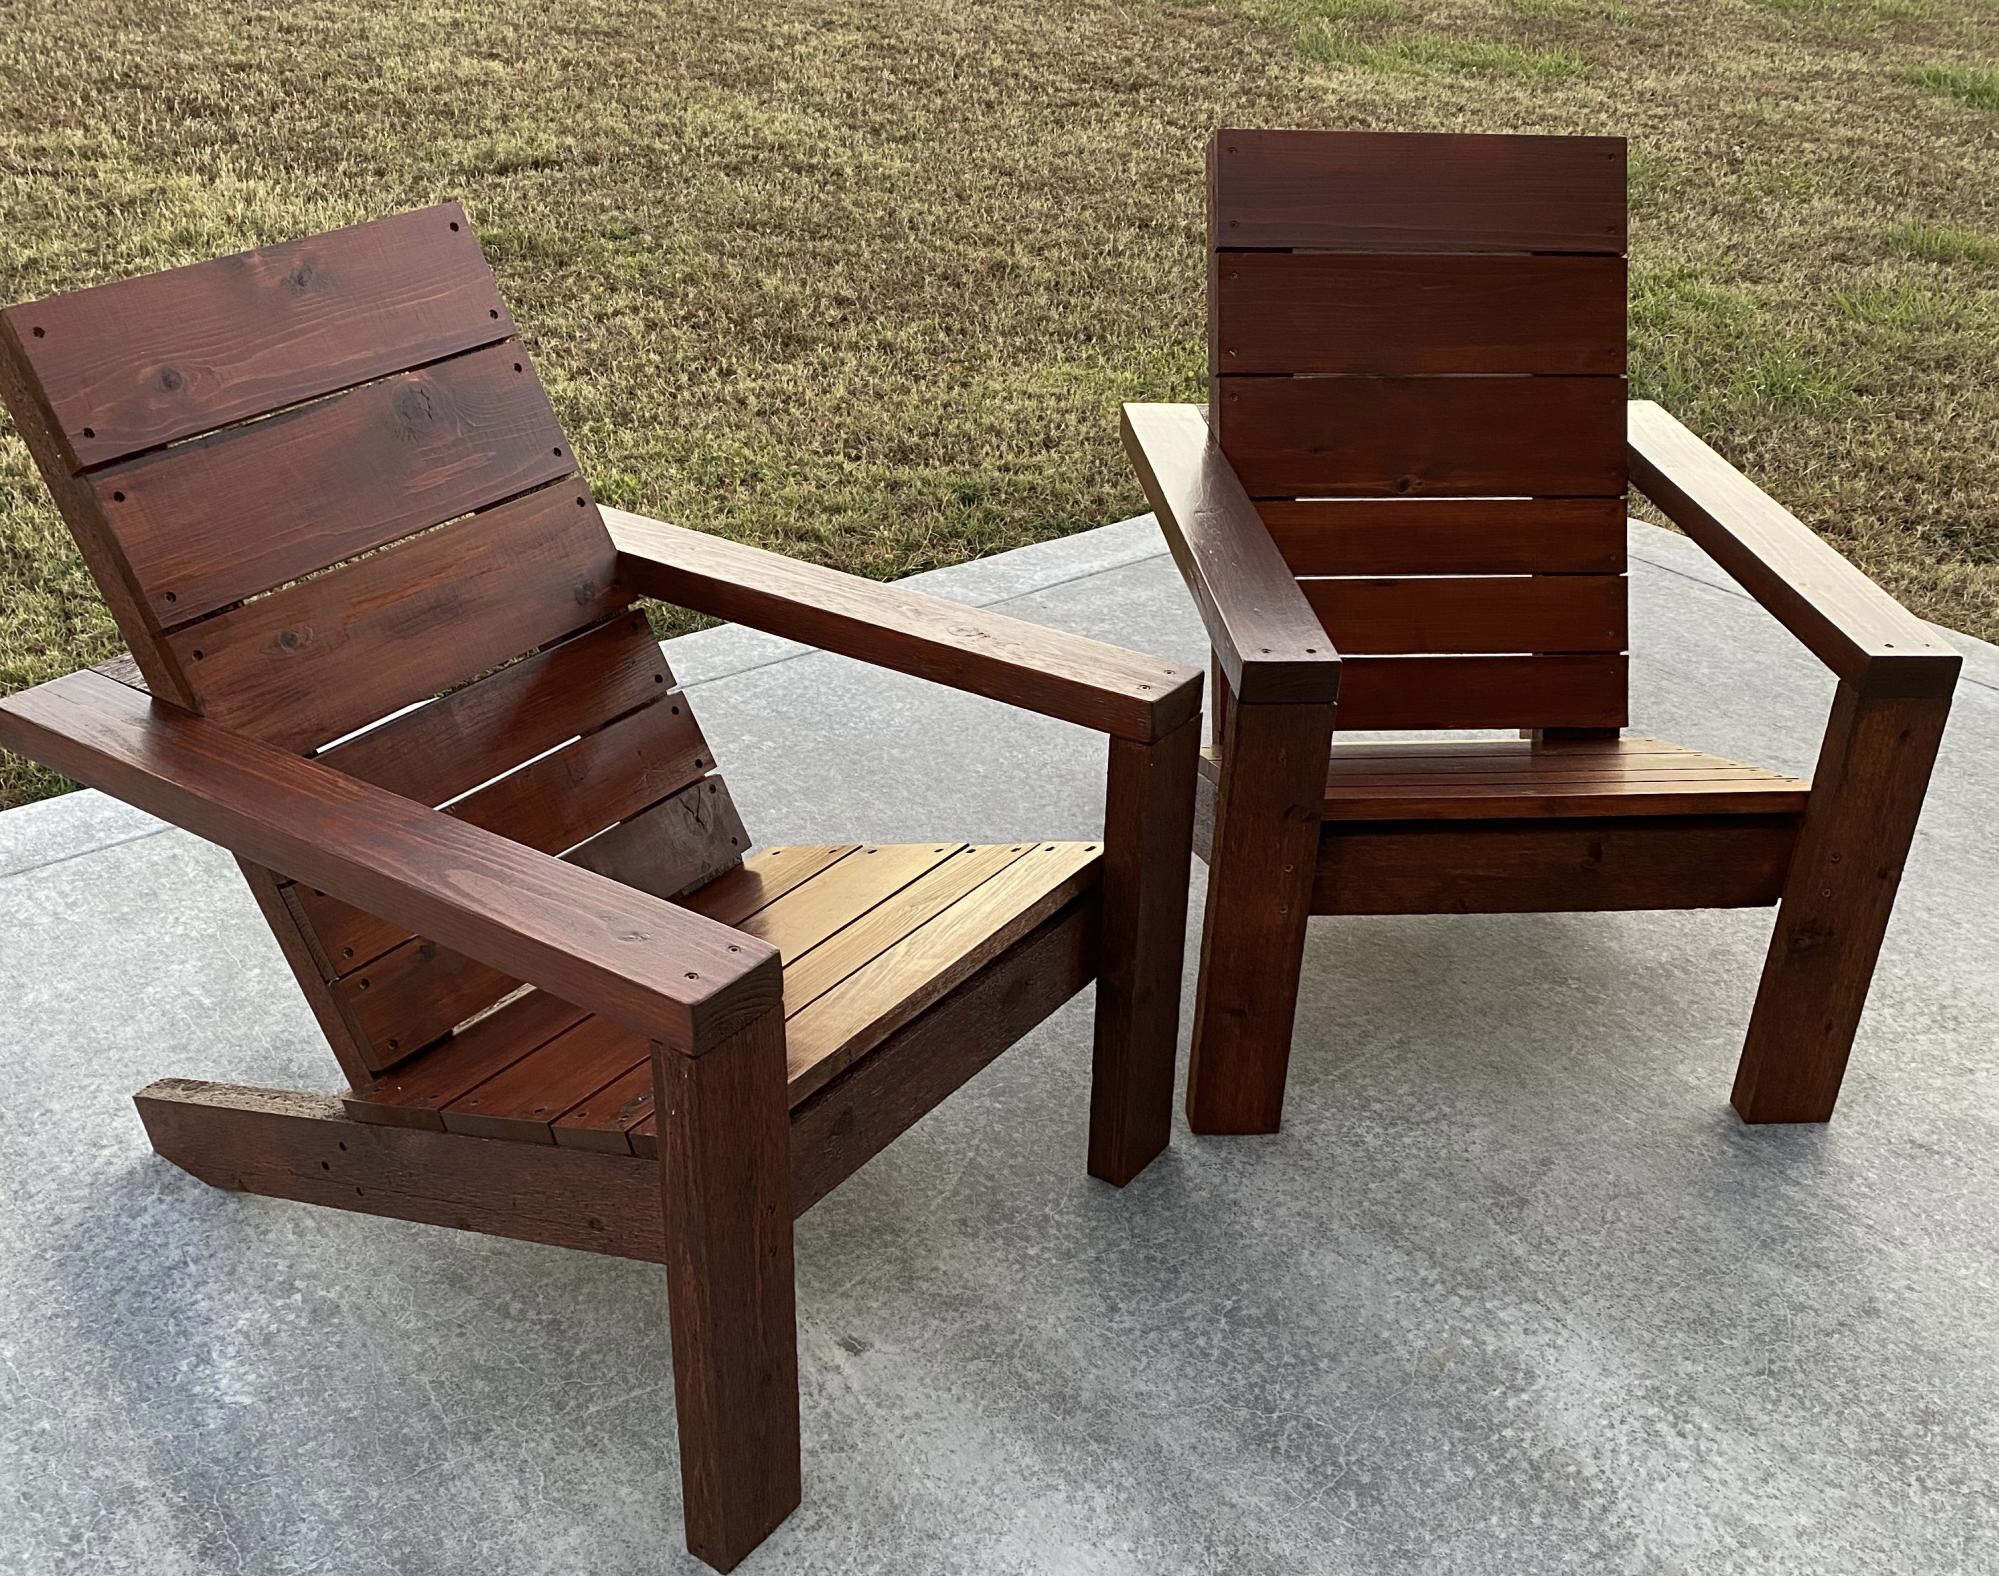
I used Western red cedar to build my chairs. The build was a little more expensive but well worth it. The chairs were stained with Cabot’s Australian Timber Oil ( Jarrah Brown). Thanks for the plans Ana, your site is awesome and you do a great job! Mark
Built from Plan(s)
Comments
Mon, 11/16/2020 - 12:31
Very beautiful!
Thanks for sharing Mark, definitely worth the extra investment!
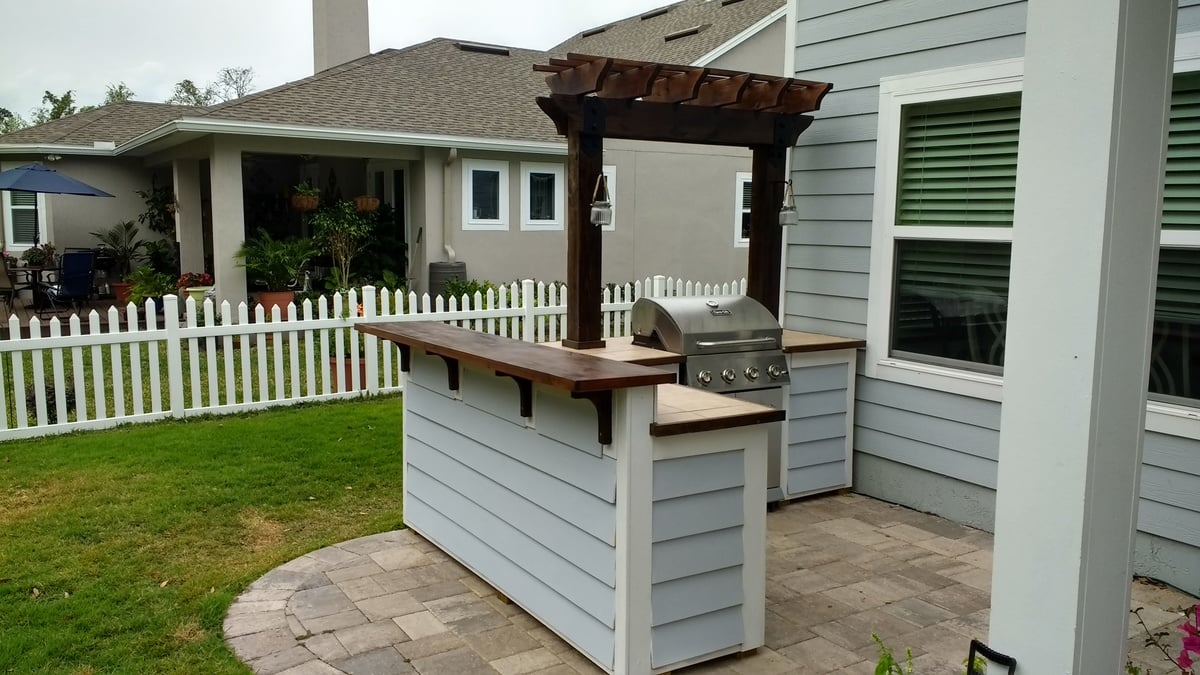
Outdoor bar grill surround with 2 post pergola
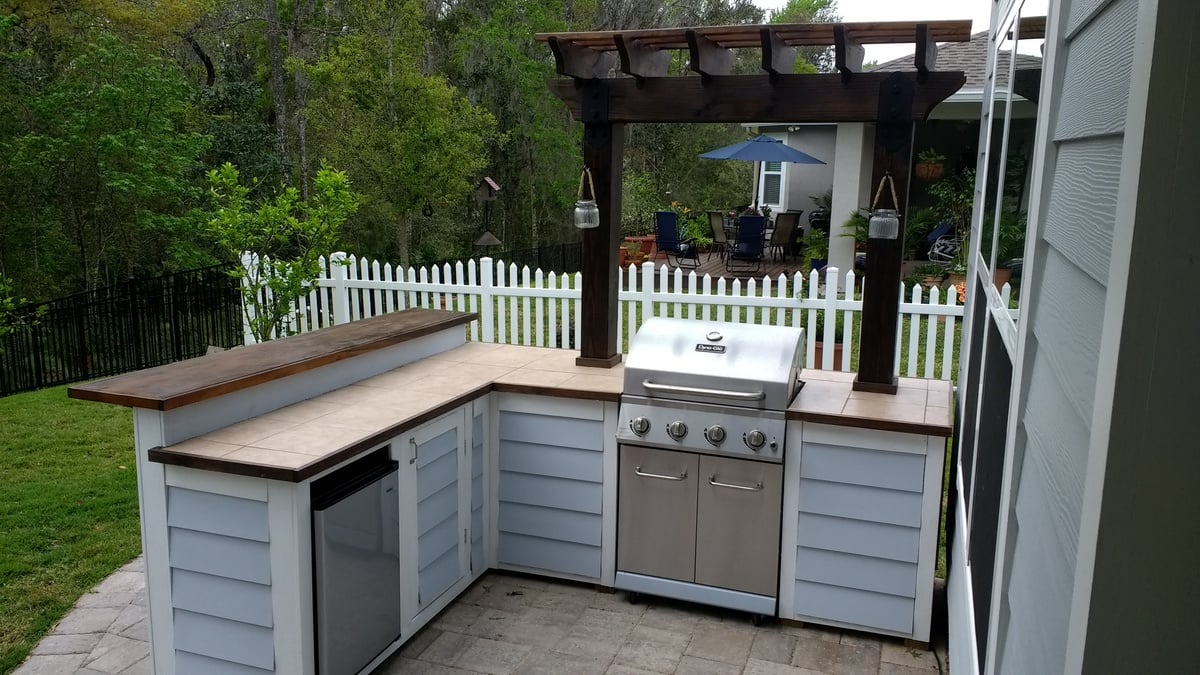
I wanted to build an L shaped outdoor bar with a 2 post pergola over the grill. I couldn't find any plans online that would fit the space I had, so I decided to build it myself with custom dimensions. The top bar is approx. 7'3" across, and 15" wide, while the distance from the right edge (next to the house) to the end of the bar is approx. 9'1".
I framed it with PT lumber and the 2 pergola posts are sitting on top of the pavers and supported internally within some of the framing studs. Since the pavers sit on top of concrete, I didn't feel the need to dig up the existing pavers and achor them in the ground.
I used hardiboard for the exterior and tiled the lower section of the bar.
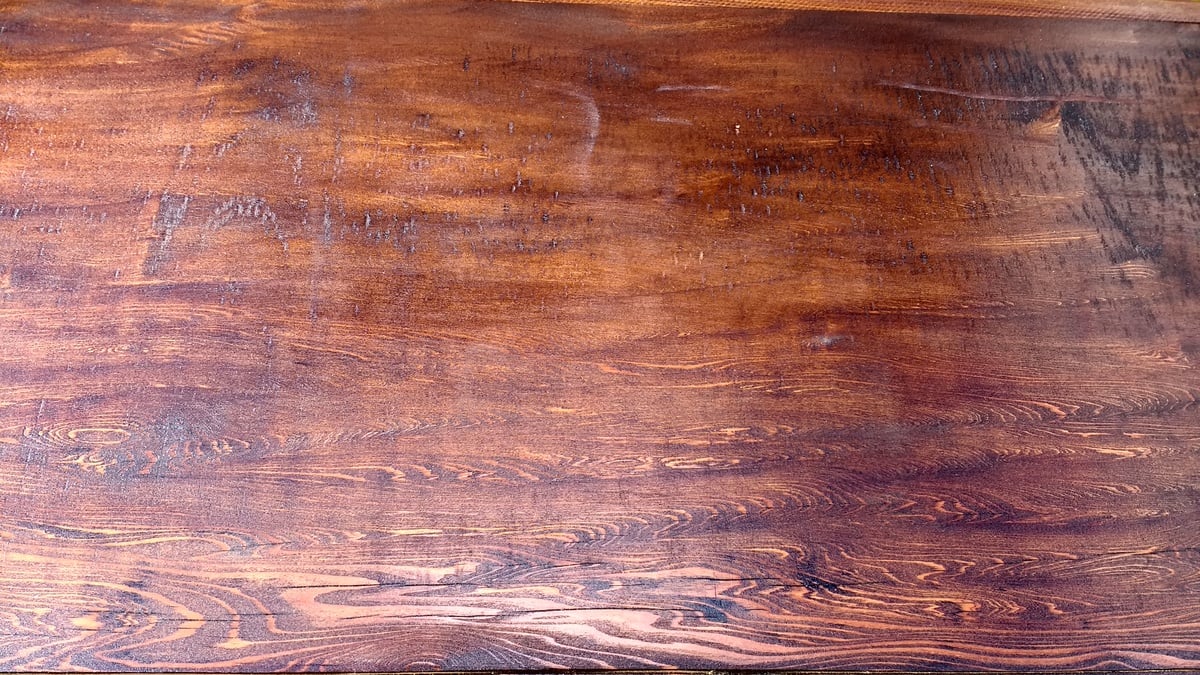
For the actual high bar top, I wanted to do something unique, and found a 900 year old scrap slab of Cypress at a local lumber yard. One side was smooth, but underneath was gouged out from different saw cuts and very uneven. I screwed a piece of 3/4" PT plywood underneath and trimmed it with 1-1/2" Cypress. I stained the whole thing with a dark honey colored stain and put a generous amount of poly on it once it was dry. There are a few cracks and nicks on it, but once it was stained, it looked awesome.

Estimated Cost
I lost track after a while, but I would say $600-700.
Estimated Time Investment
Week Long Project (20 Hours or More)
Finish Used
Minwax honey colored stain for the bar top. Minwax provincial stain for the pergola and minwax dark walnut stain for the oak trim.
Recommended Skill Level
Intermediate
Comments
Wed, 06/19/2019 - 13:23
Looks awesome. I have been…
Looks awesome. I have been wanting something like this for a while now. Where can we can plans for this?
Lawnmower Shed

Modified the design to allow me to roll lawnmower directly in the end. Fun project.
Built from Plan(s)
Recommended Skill Level
Intermediate
Comments
Bookshelf Hidden Doors Over Closet

Hidden door bookshelves hide a furnace closet. Built by Kraig Faulkner
Built from Plan(s)
Recommended Skill Level
Advanced
Comments
Thu, 01/23/2020 - 07:05
Great idea! Do the…
Great idea! Do the bookshelves swing freely when weighed down with books? What type of hinges did you use?
Thu, 09/17/2020 - 08:01
Looks Awesome + Safety Note
I'm currently working on a basement renovation project. I'm probably going to incorporate a feature like this for my mechanicals, too.
One important safety note for anyone who wants to do this: It's recommended that your furnace be a minimum of 30" away from any combustible materials. That includes walls and partitions. The image of this project displayed is right next to the furnace, which is not a good idea.
Comments
CUJO1366
Wed, 09/16/2015 - 21:44
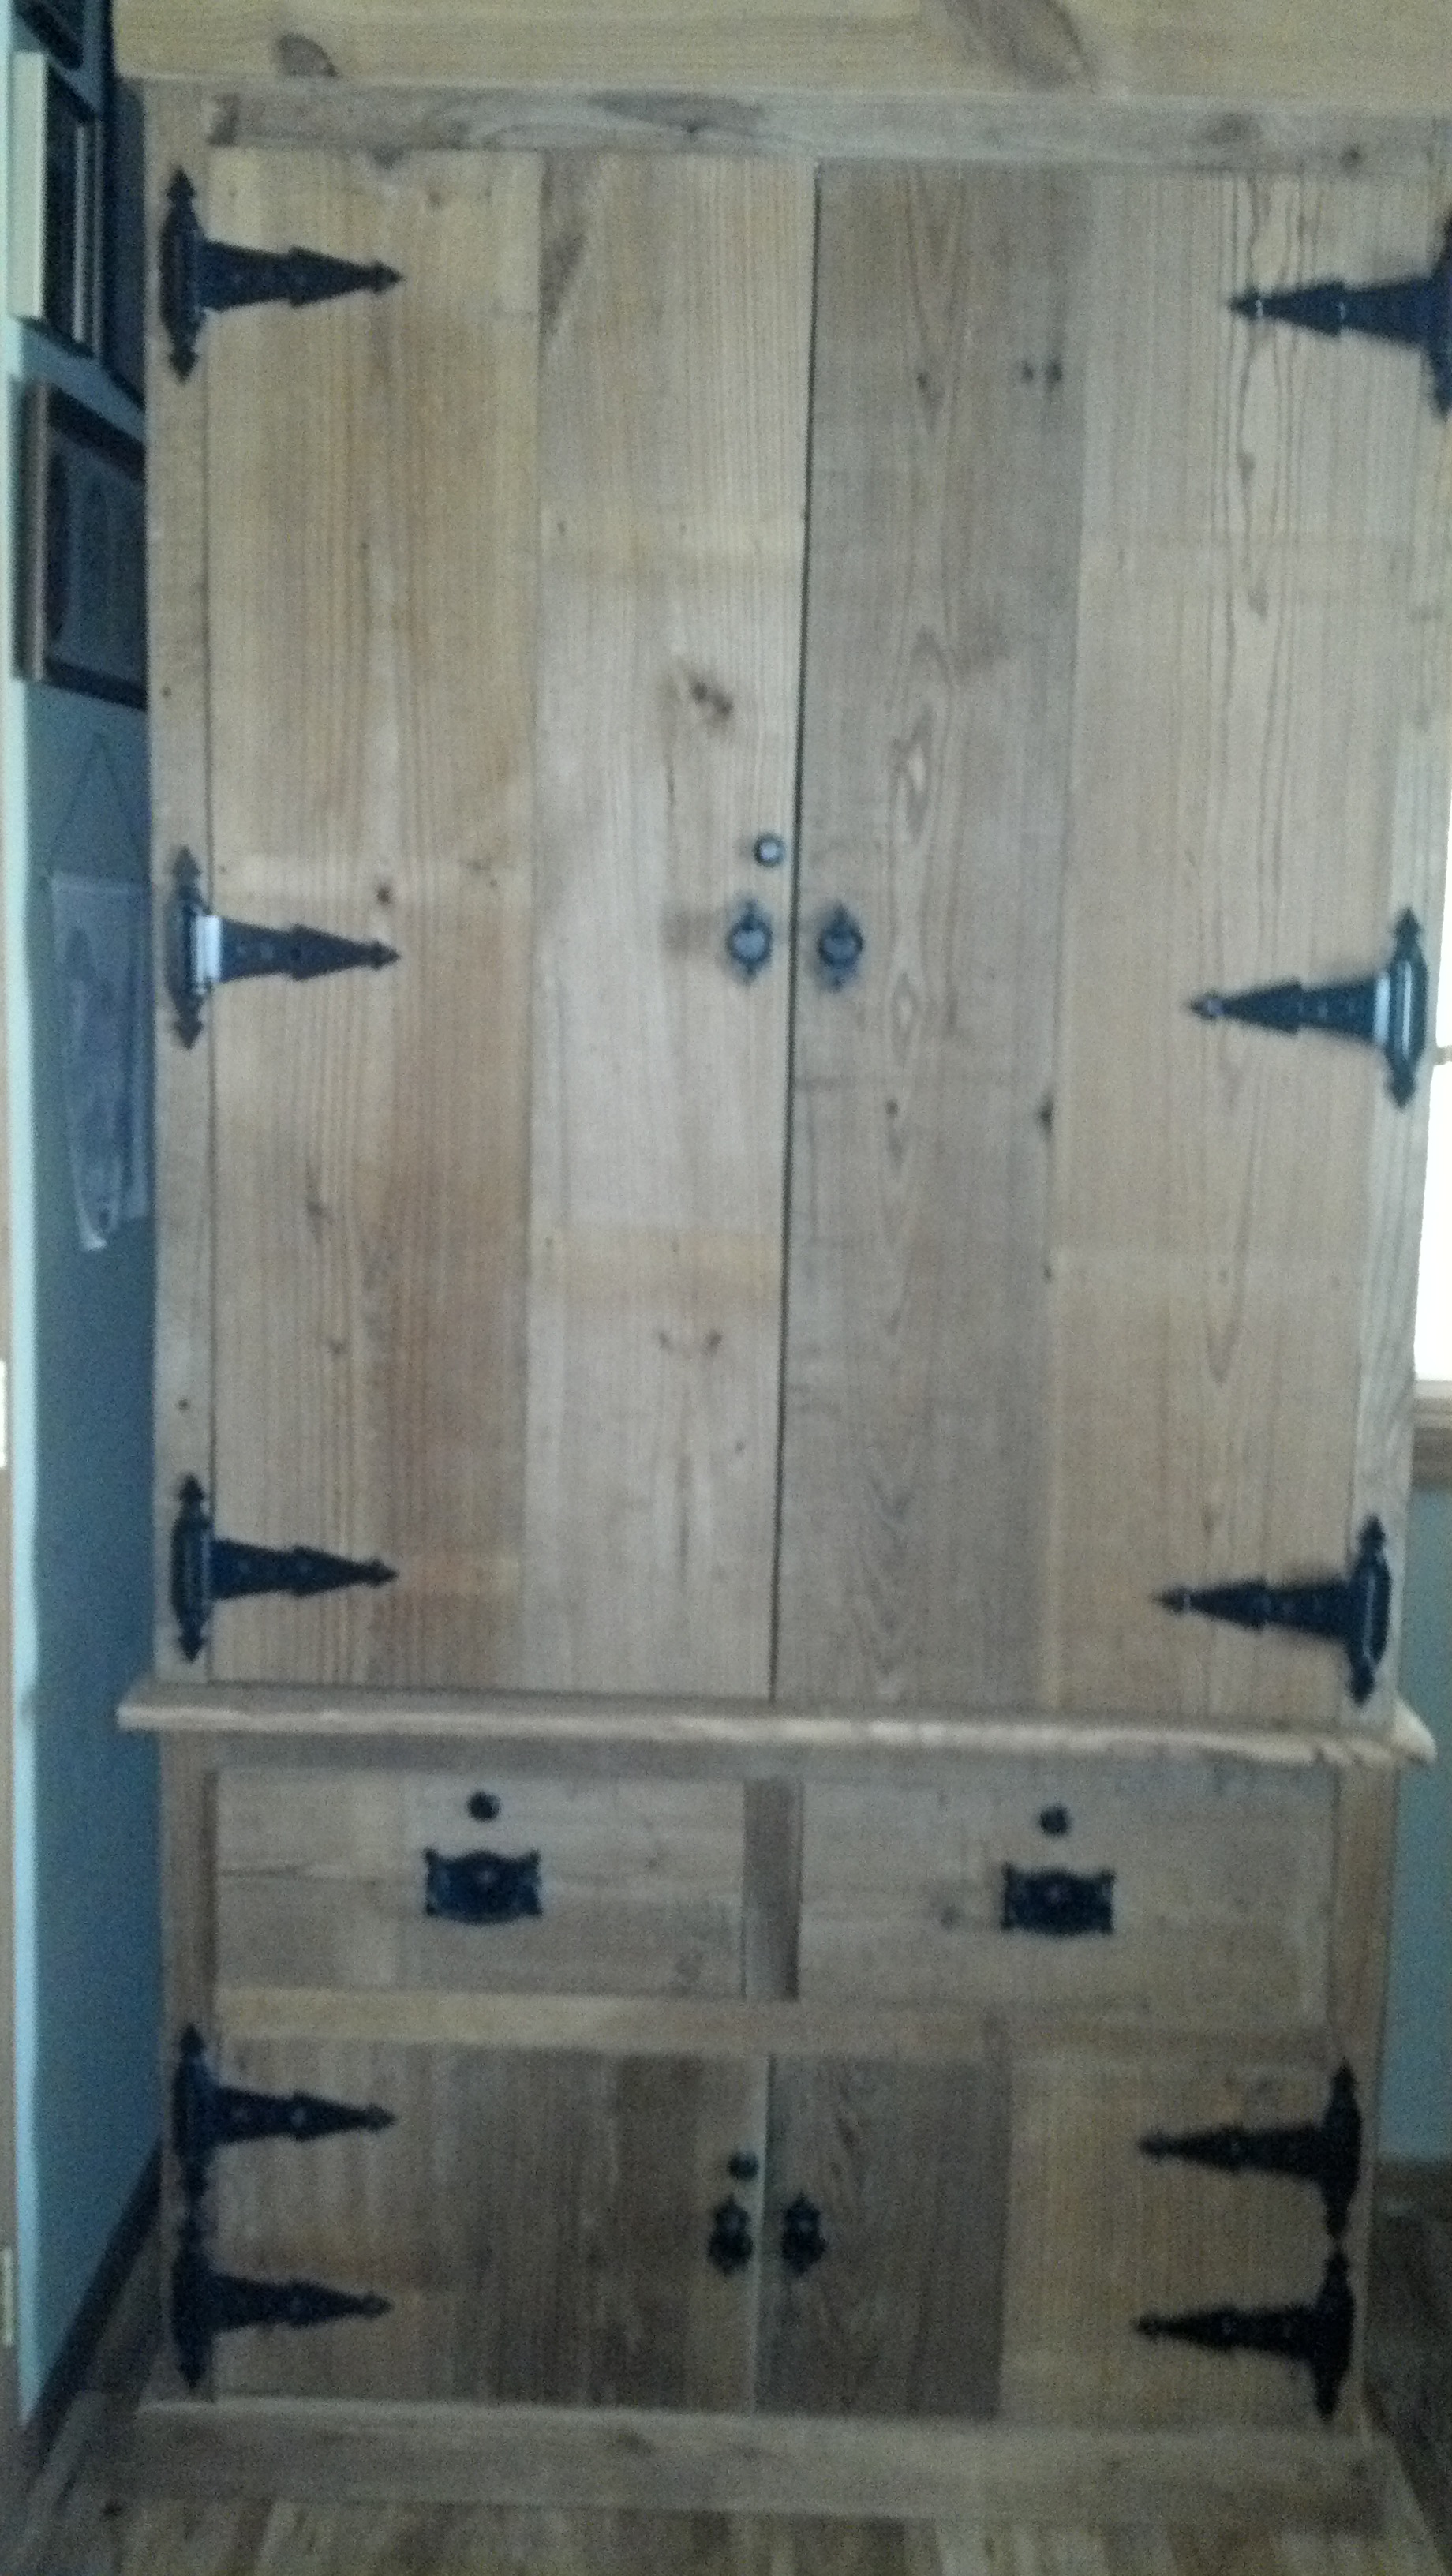
gun cabinet
I would love the plans for this
Joshua_kubinski
Wed, 12/02/2015 - 20:47
Plans
I would love to get plans for this. I have been trying to come up with my own but I'm not very good at it. Thanks love your work.
Joshua
doyle.saylor
Wed, 12/14/2016 - 08:25
Plans
How can I get the plans for this?
doyle.saylor
Wed, 12/14/2016 - 08:27
Plans
How can I get the plans for this?
John Prom
Wed, 12/21/2016 - 12:33
Hi
Hi
jhouseholder
Wed, 12/09/2020 - 07:43
How do I get the plans for…
How do I get the plans for the gun cabinet?