First Ever Furniture Build - Outdoor Sofa
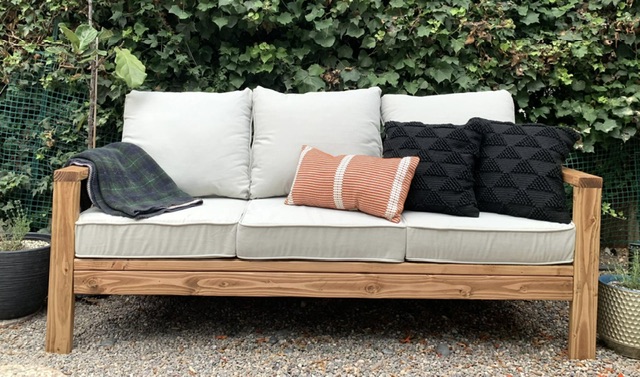
This was my first ever piece of furniture that I made and it was so much fun! I’ve got the furniture making bug now!
Melissa Pilcher
Built from Plan(s)
This was my first ever piece of furniture that I made and it was so much fun! I’ve got the furniture making bug now!
Melissa Pilcher
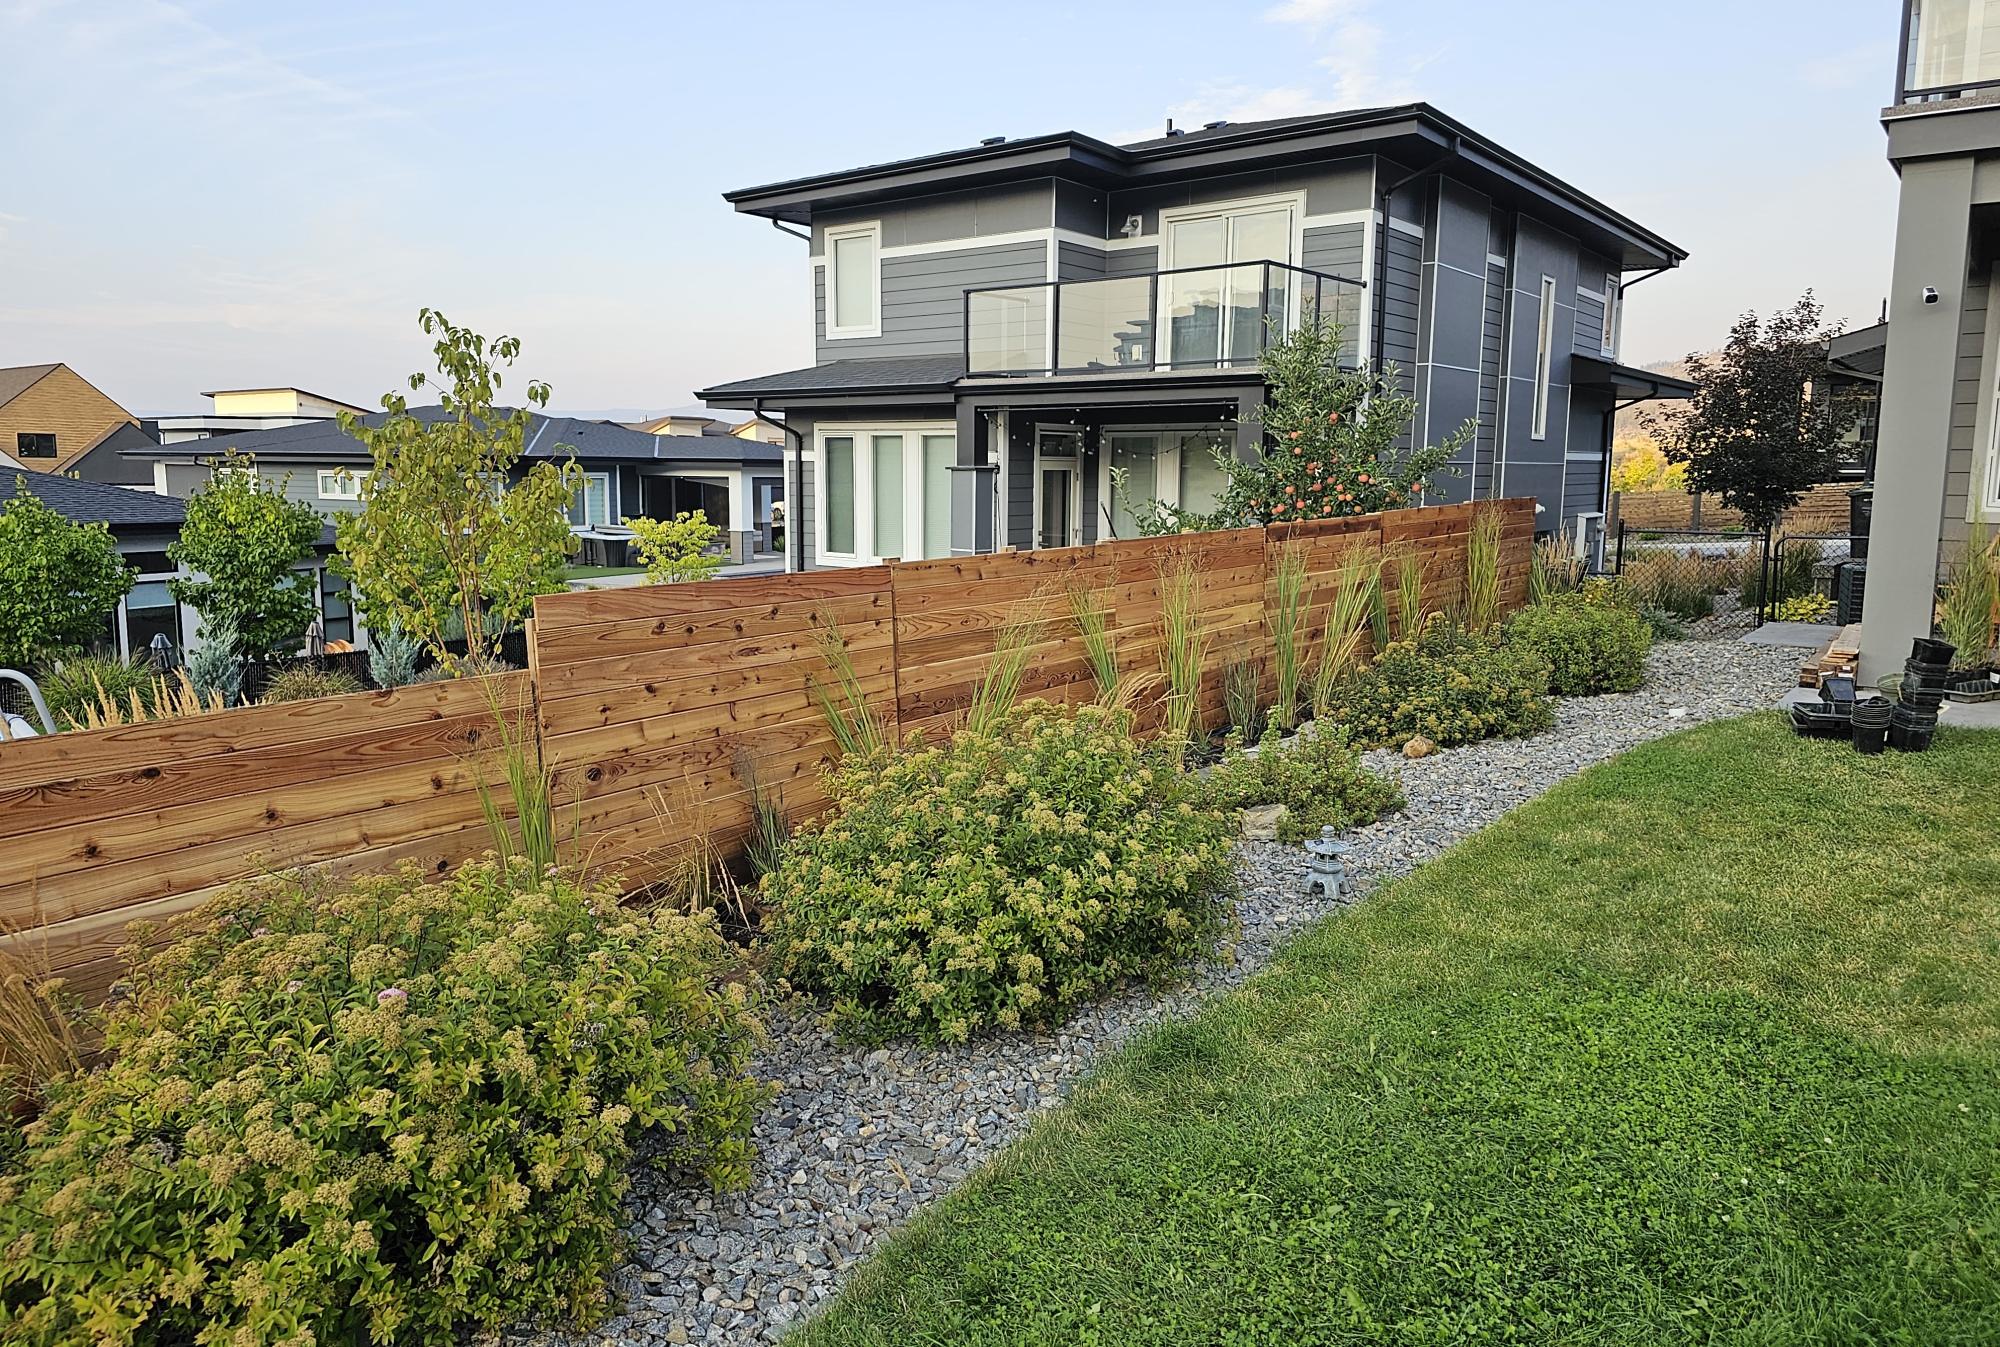
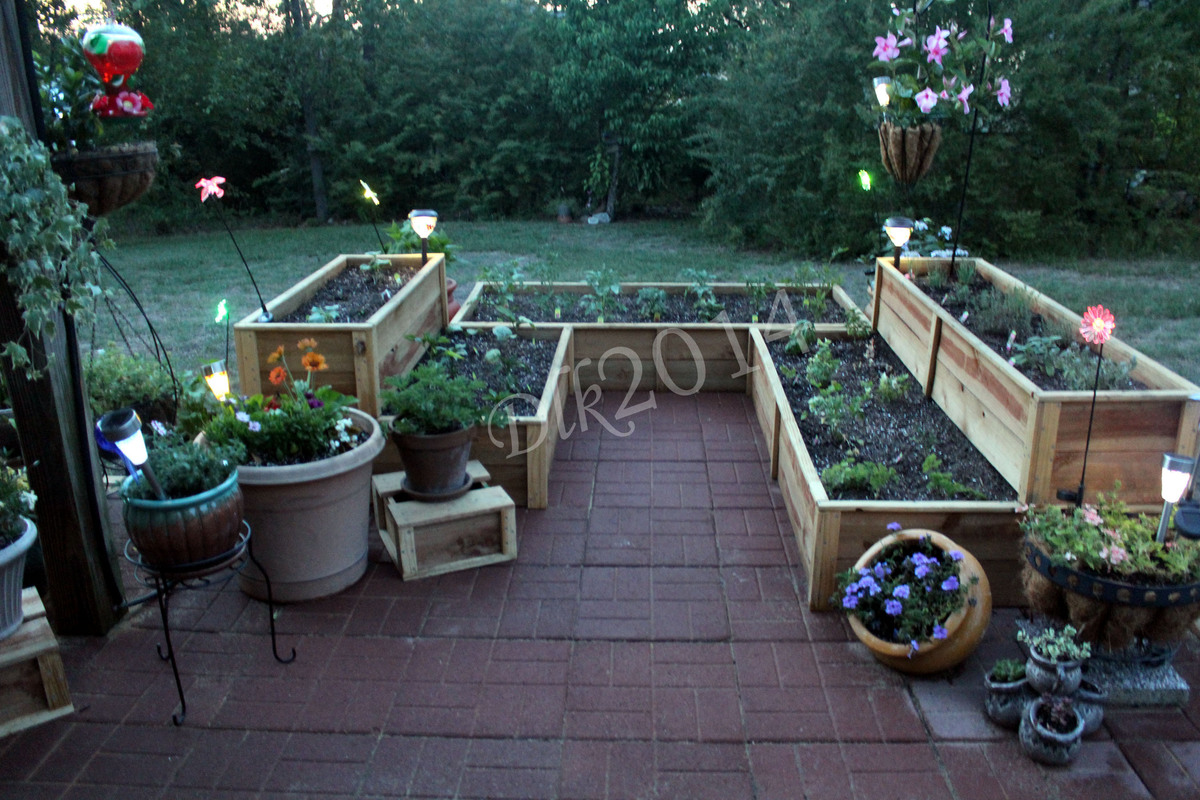
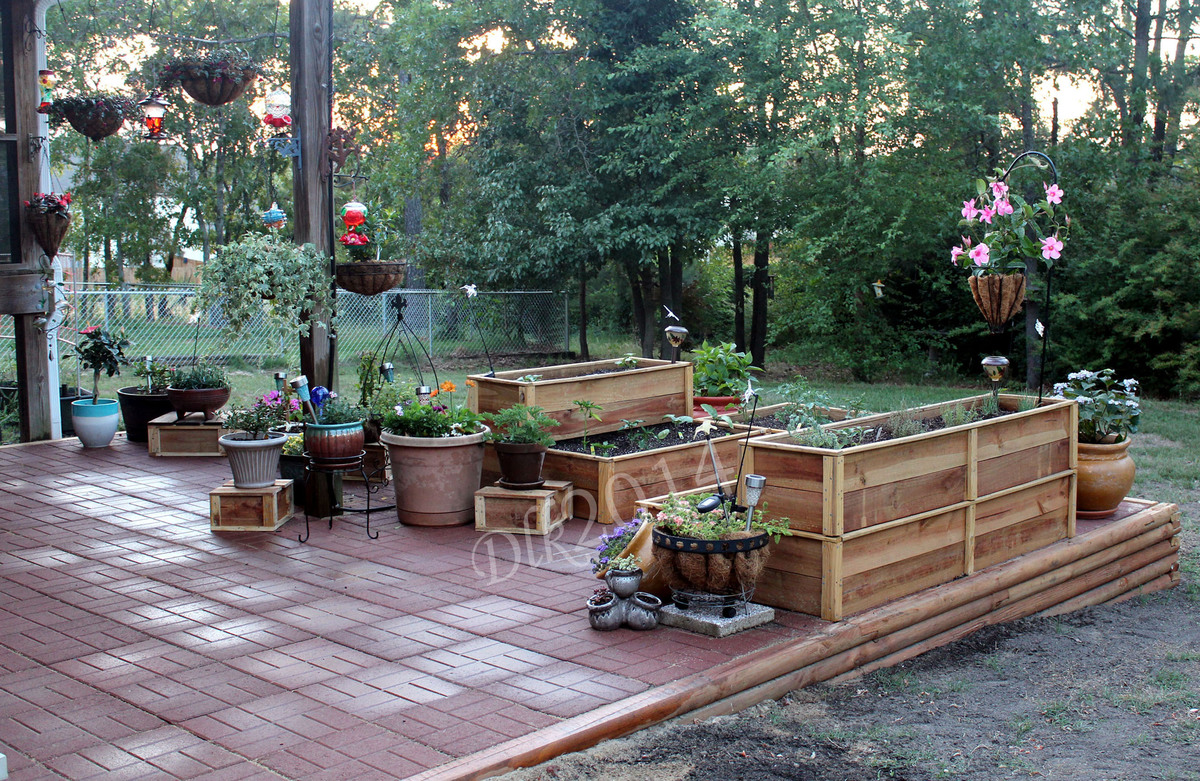
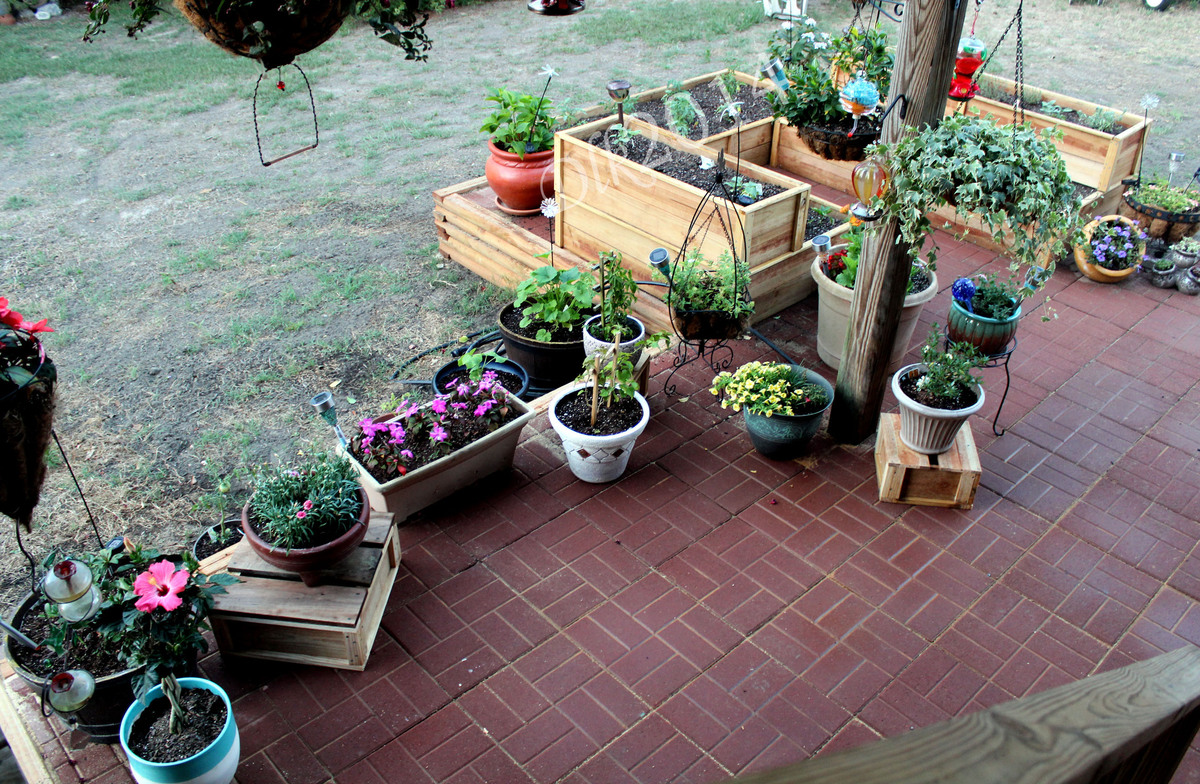
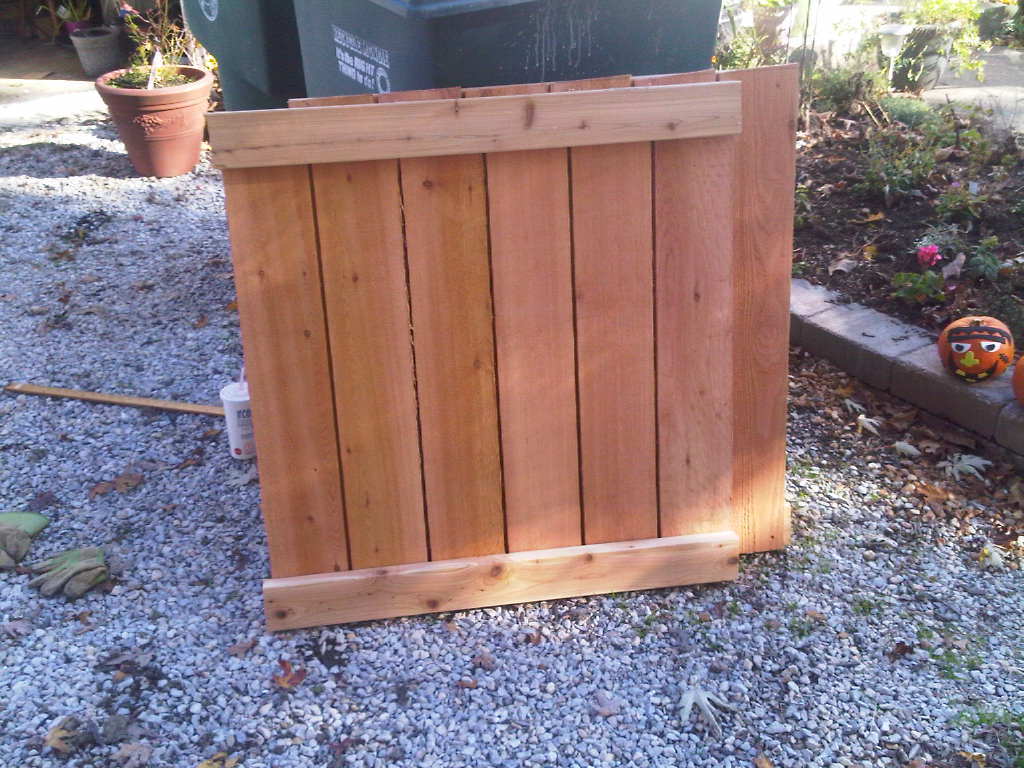
Created a privacy planter fence, using multiple planters. Most of the bases were custom sizes due to the existing rock wall. Tongue and groove cedar utilized and coated with linseed oil. I ensured the frames were square and plumb which the directions omit for some reason. Great week long project!
Kyle
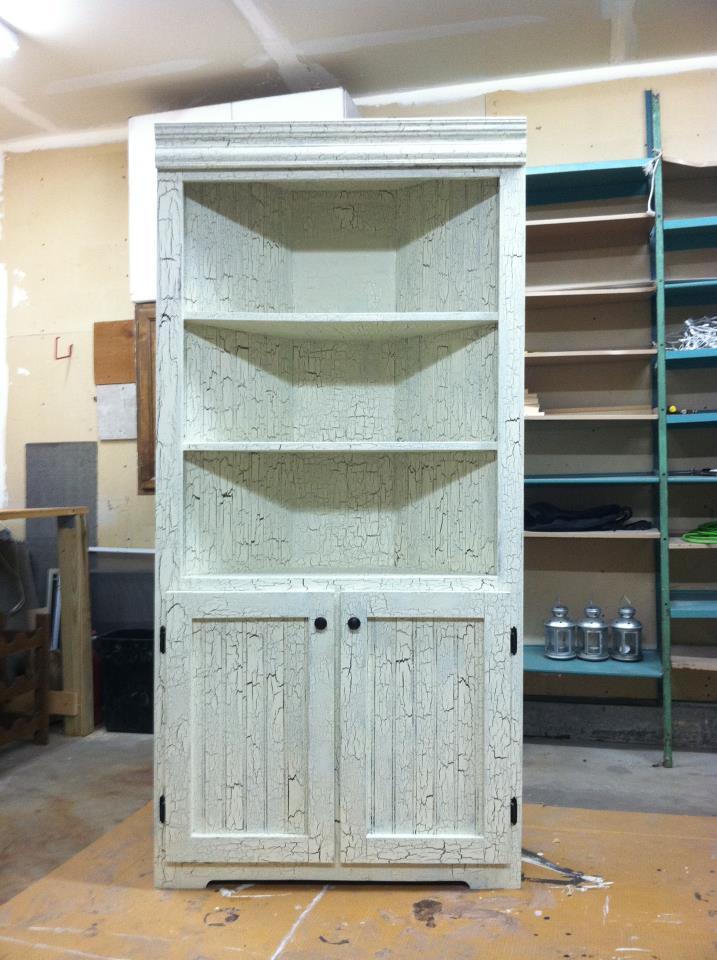
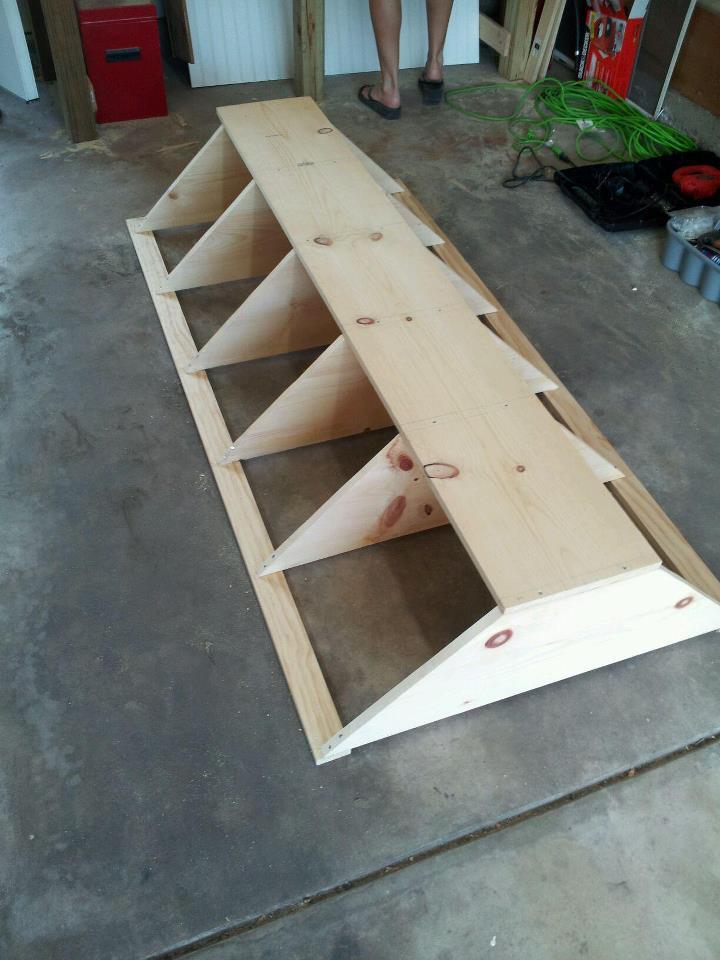
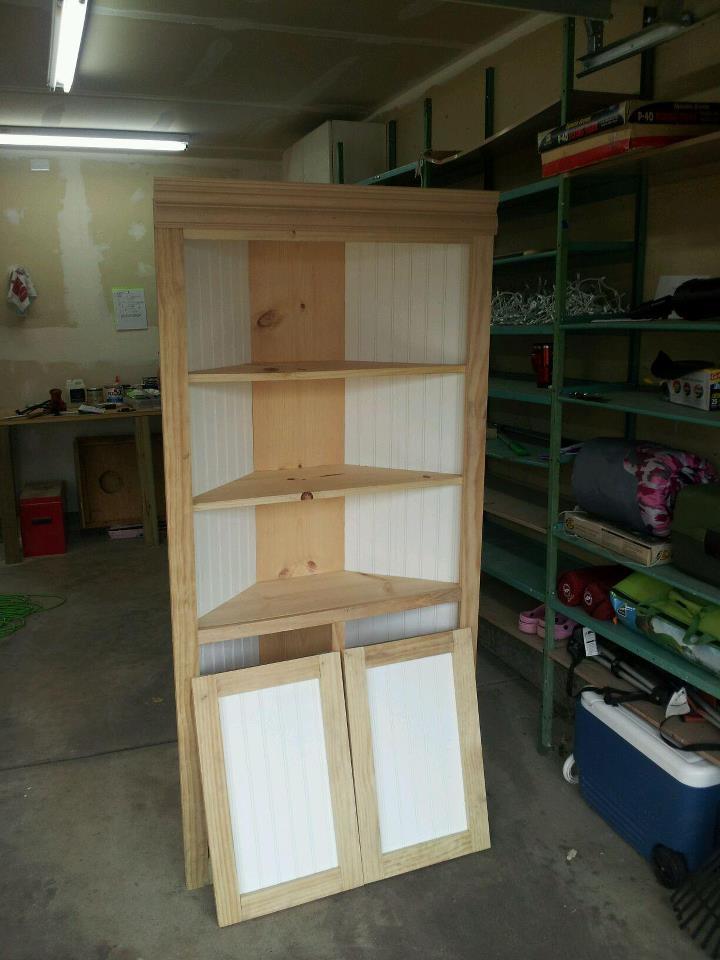
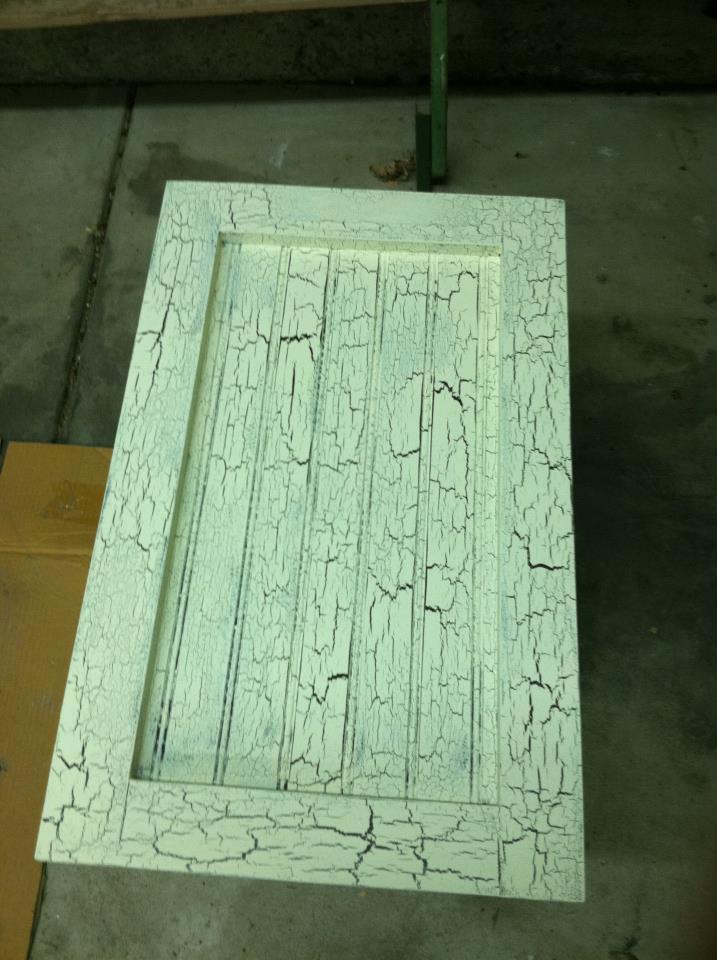
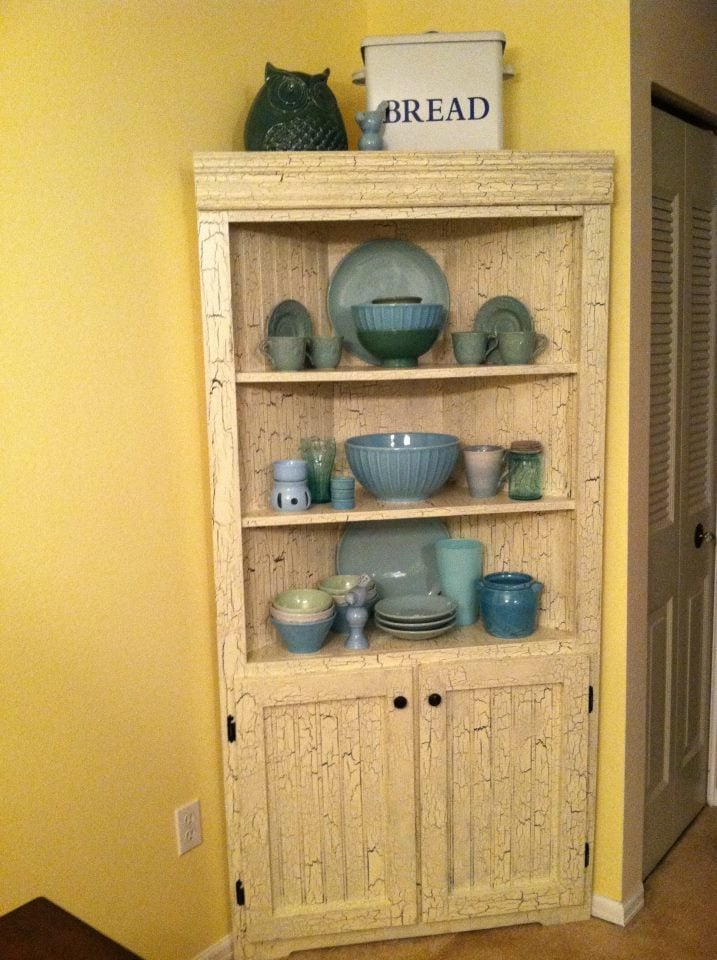
This was my first project. It took me a weekend to build and prime. Since I chose to use a crackle finish, waiting time between coats extended the total time to one full week. My husband and I were supposed to make this hutch together, but I became obsessed and did most of it alone! I adjusted the size a bit to make it larger, so I could fit big pieces on shelves and in cabinets. Thanks for the plan Ana!!

Fri, 04/13/2012 - 14:47
Wow, this is sooo beautiful! The finish is just awesome. My Hubby hates to paint, and he saw this multi-step finish and said you must have the patience of a saint! :) Congrats on such a stunning first project!
Mon, 10/01/2012 - 23:33
Very Nice! What did you do to make it "bigger"...did you make it deeper or wider? Just curious, because I would like to try and make a bigger version as well. Did you still cut the shelves on each side at a 45 degree angle? Thanks!
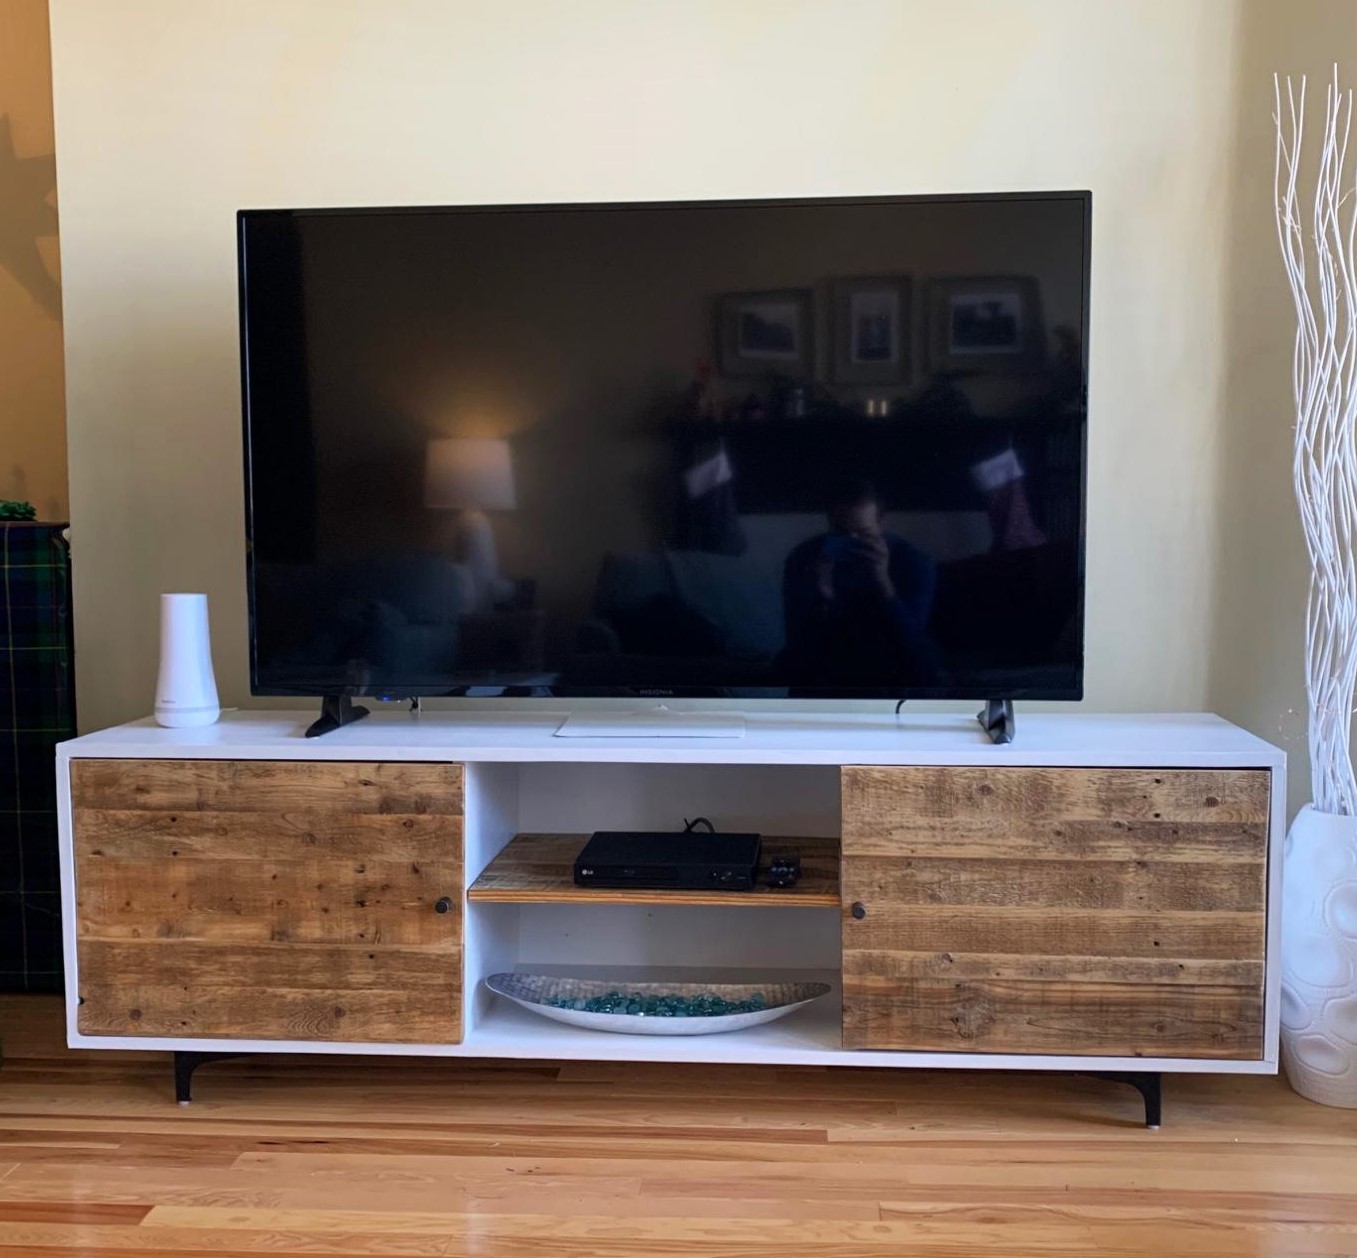
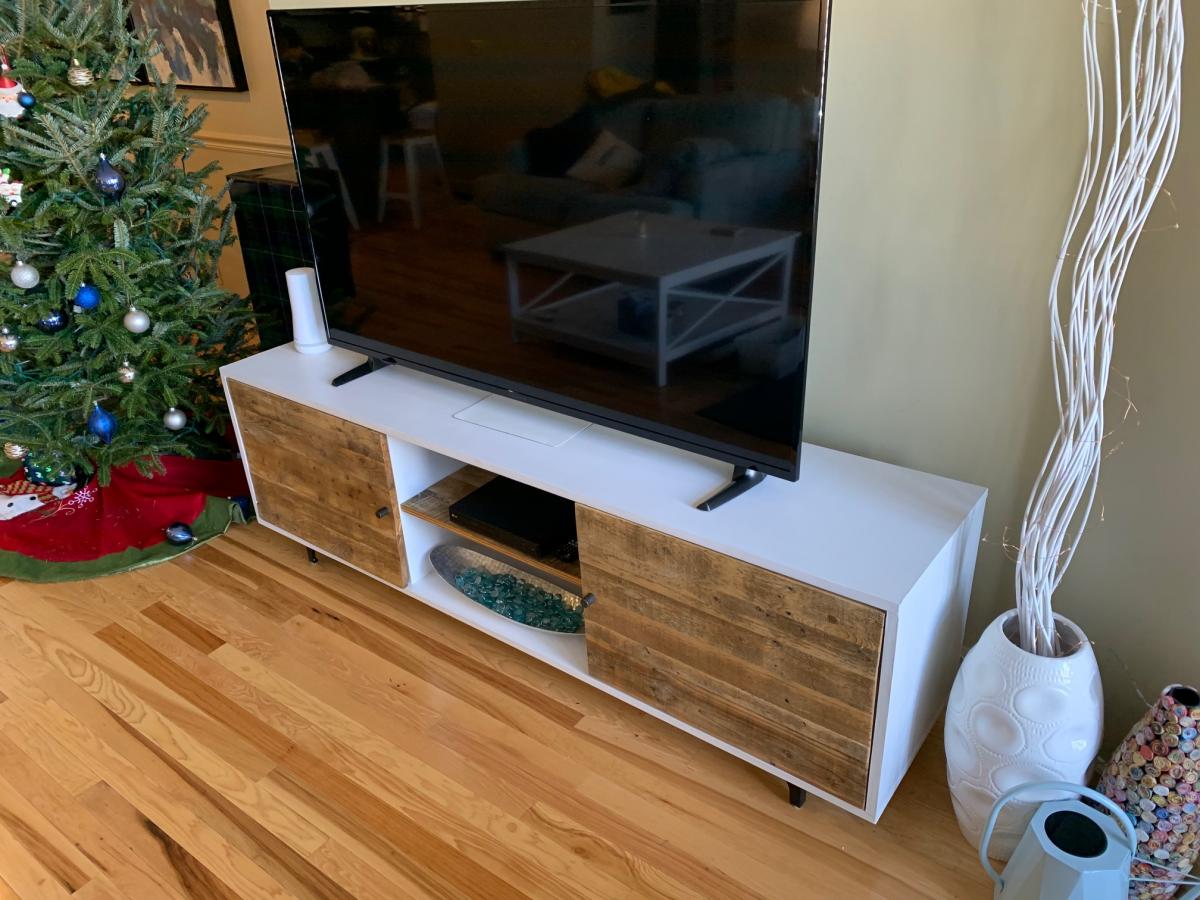
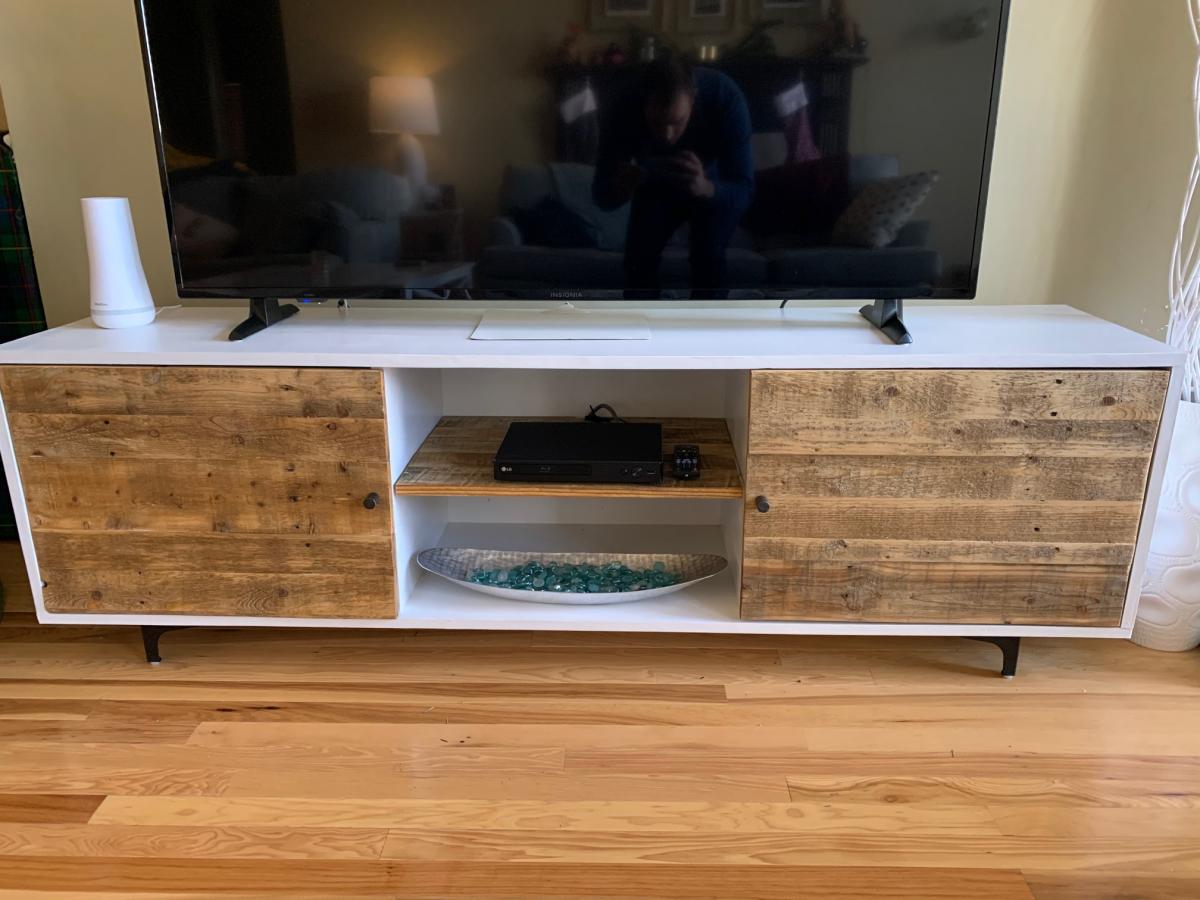
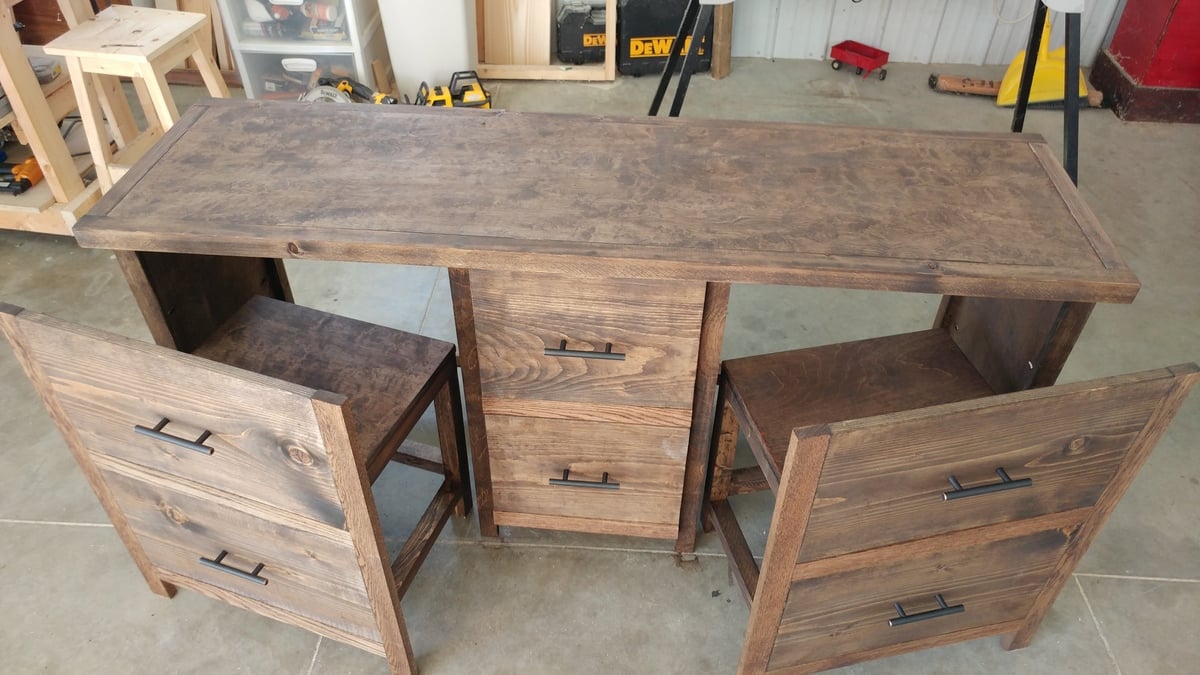
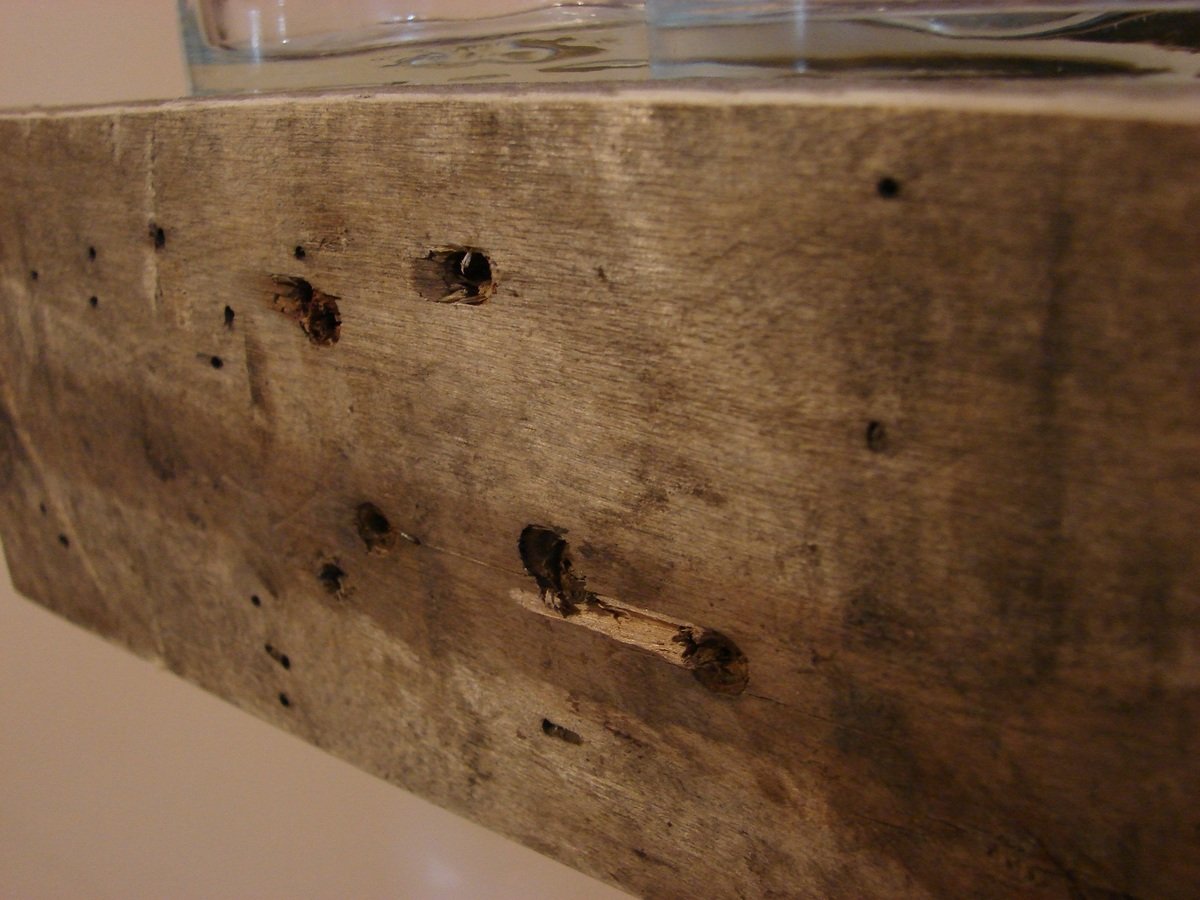
This project was a Christmas present for my girlfriend. I modified these plans a little bit to put the open shelf in the middle and used the pallet wood for this instead of it being white. The pallet wood was such a pain to cut up in to usable strips but after cutting them down, gluing them up, and sanding them down (for ages) I couldn't be more pleased with how they turned out. I used Watco Danish in medium walnut for the finish and I think it brought out the imperfections in the wood beautifully. I just used some pre-made legs from Amazon instead of the base out of laziness.
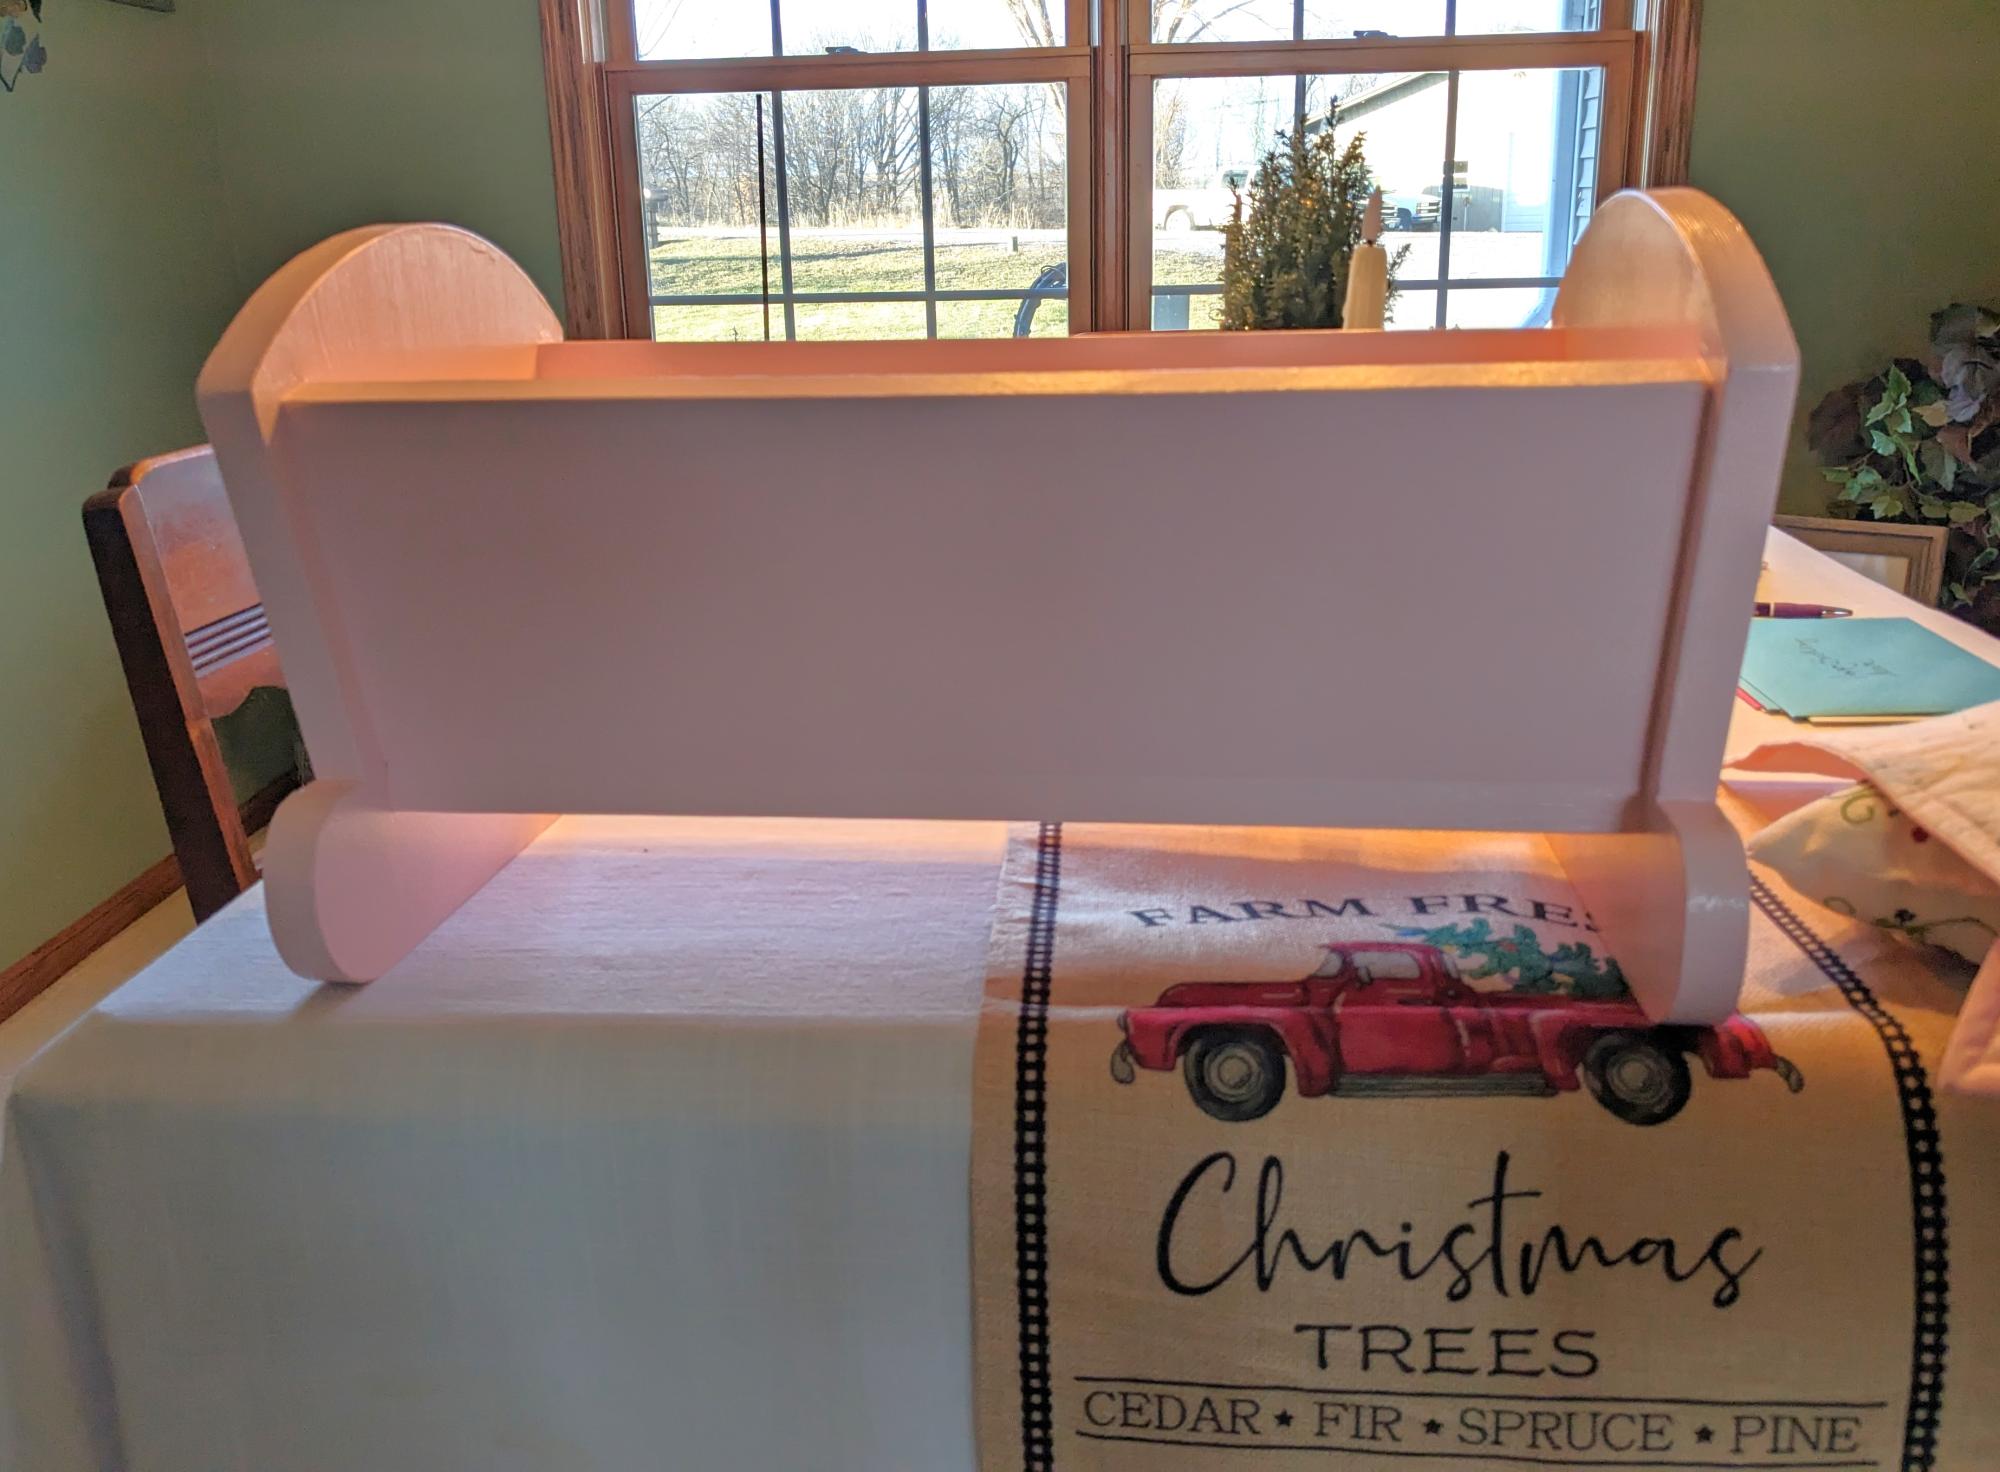
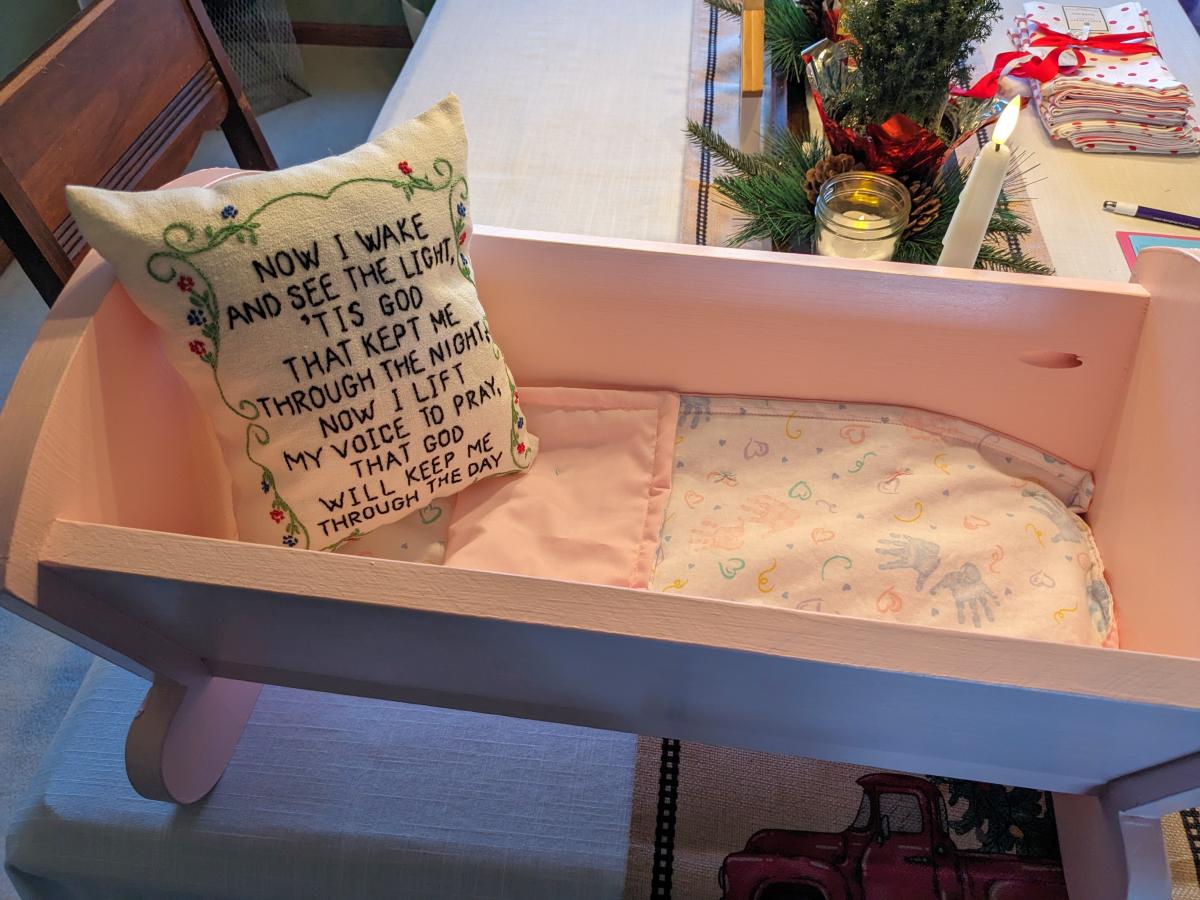
I am not a carpenter by any means, but my husband is. And I wanted to make something very special for my 2 year old granddaughter, and found your plans for this doll cradle. I took a piece of foam and covered it and then sewed a fitted sheet and made a little blanket from material I got after my mother passed away. She did the embroidery work, so I made the pillow.
Carol

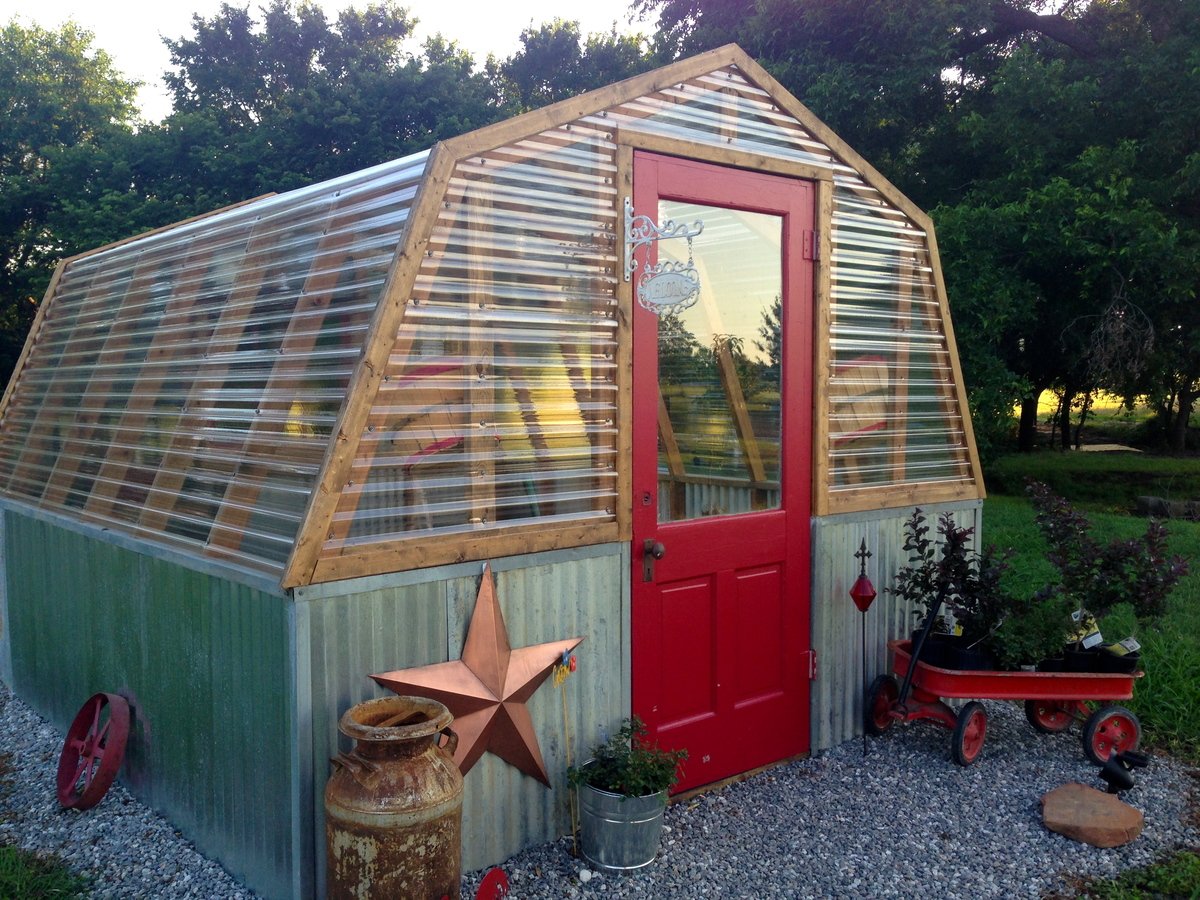
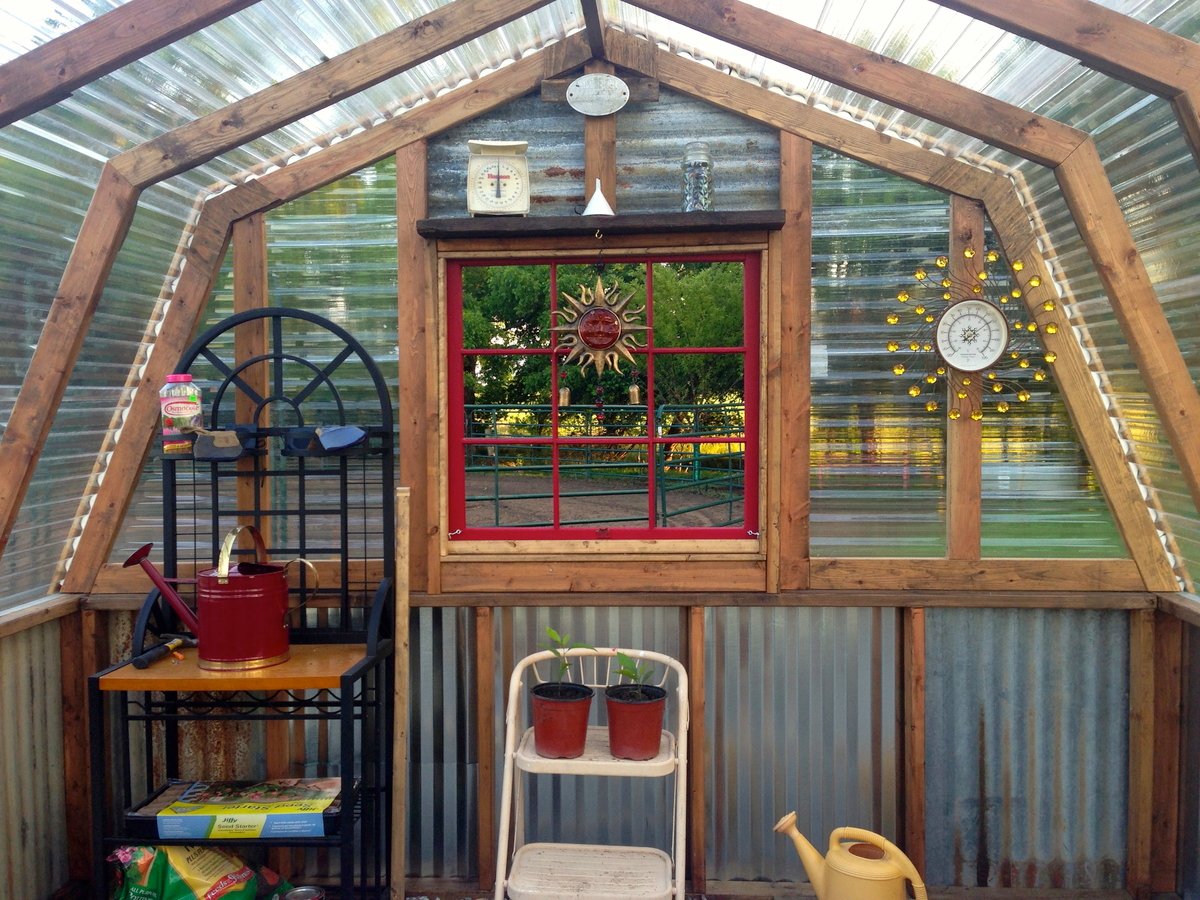
Cluckingham Cottage wasn’t built in a day, but it WAS built by a DAME!
A-frame instructions were pretty helpful considering the builder knows nothing about construction. I made a few modifications to accommodate my 5 chooks + 2 bantams . Sturdy and tight structure.
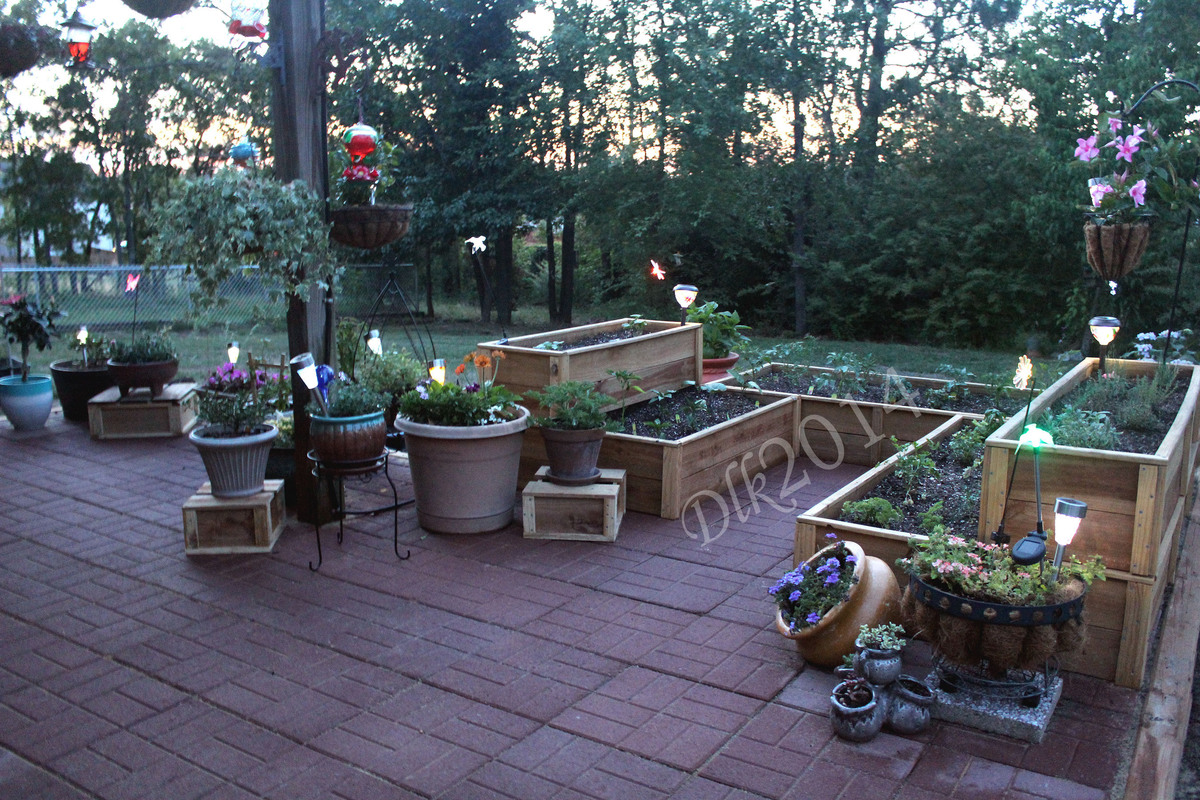
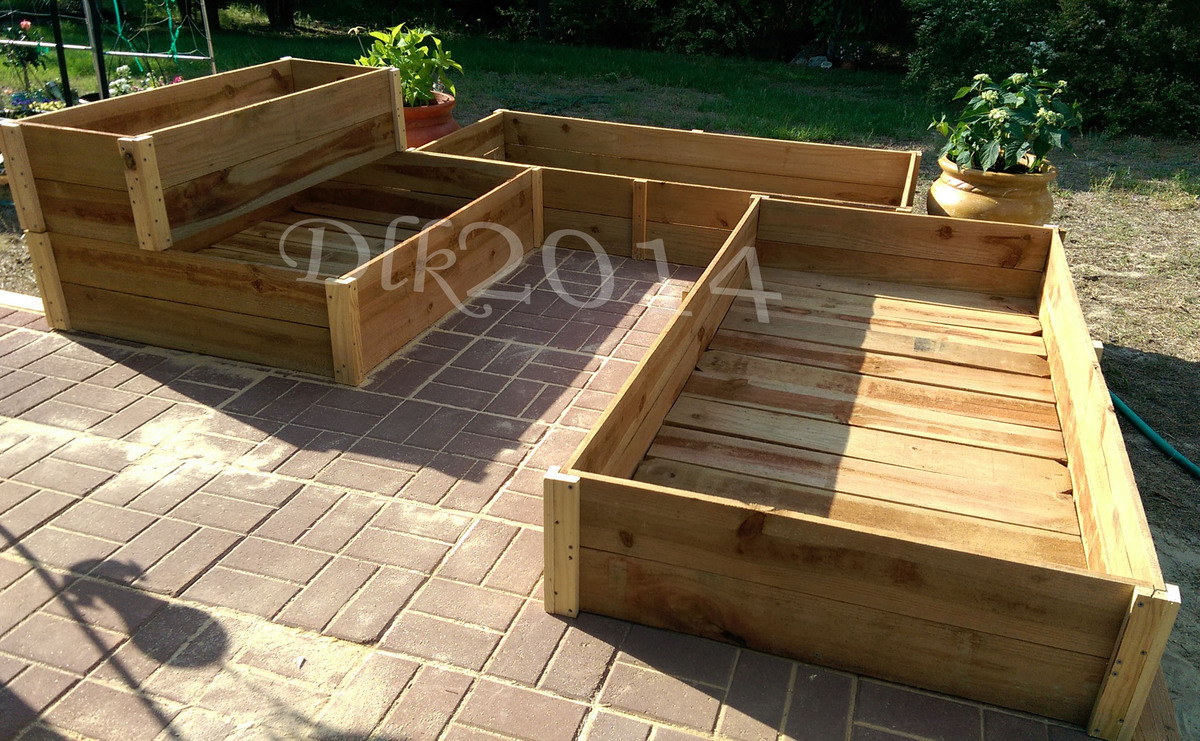
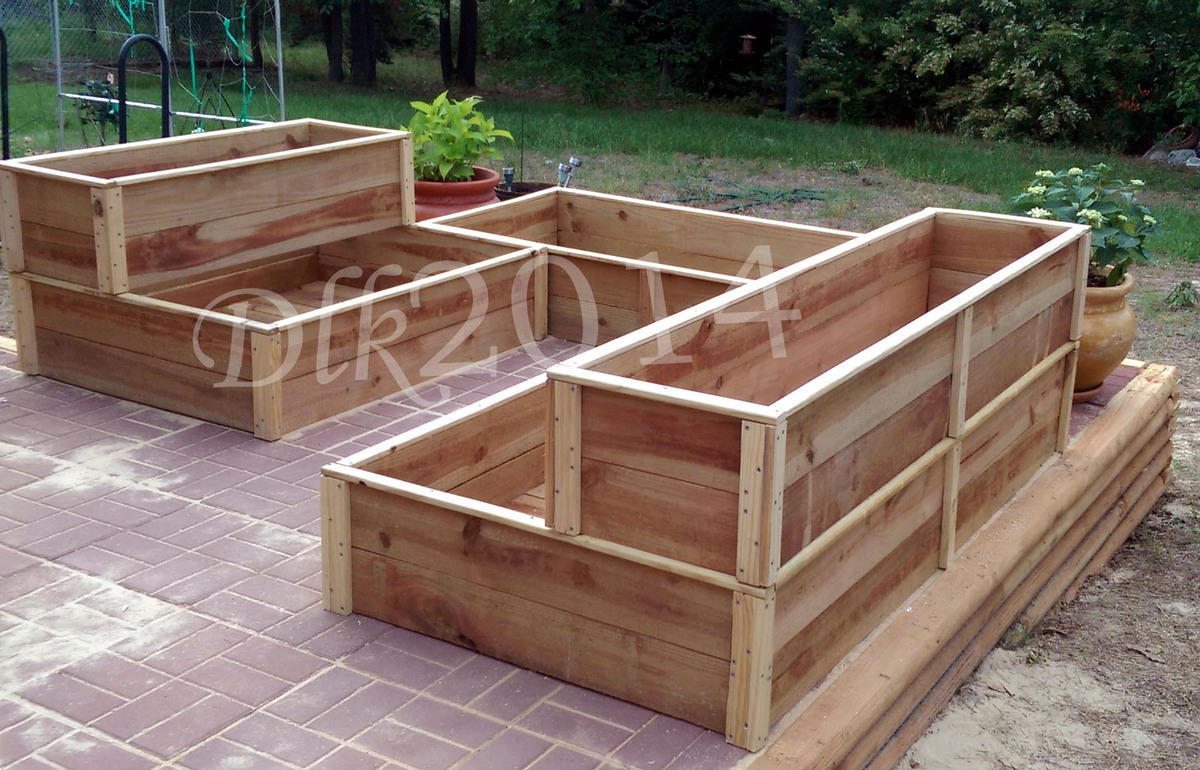
I used the basic Raised cedar garden bed plans with a few alterations. I made them different sizes, stacked one on top of the other for some dimension in my garden and secured them together from in inside.
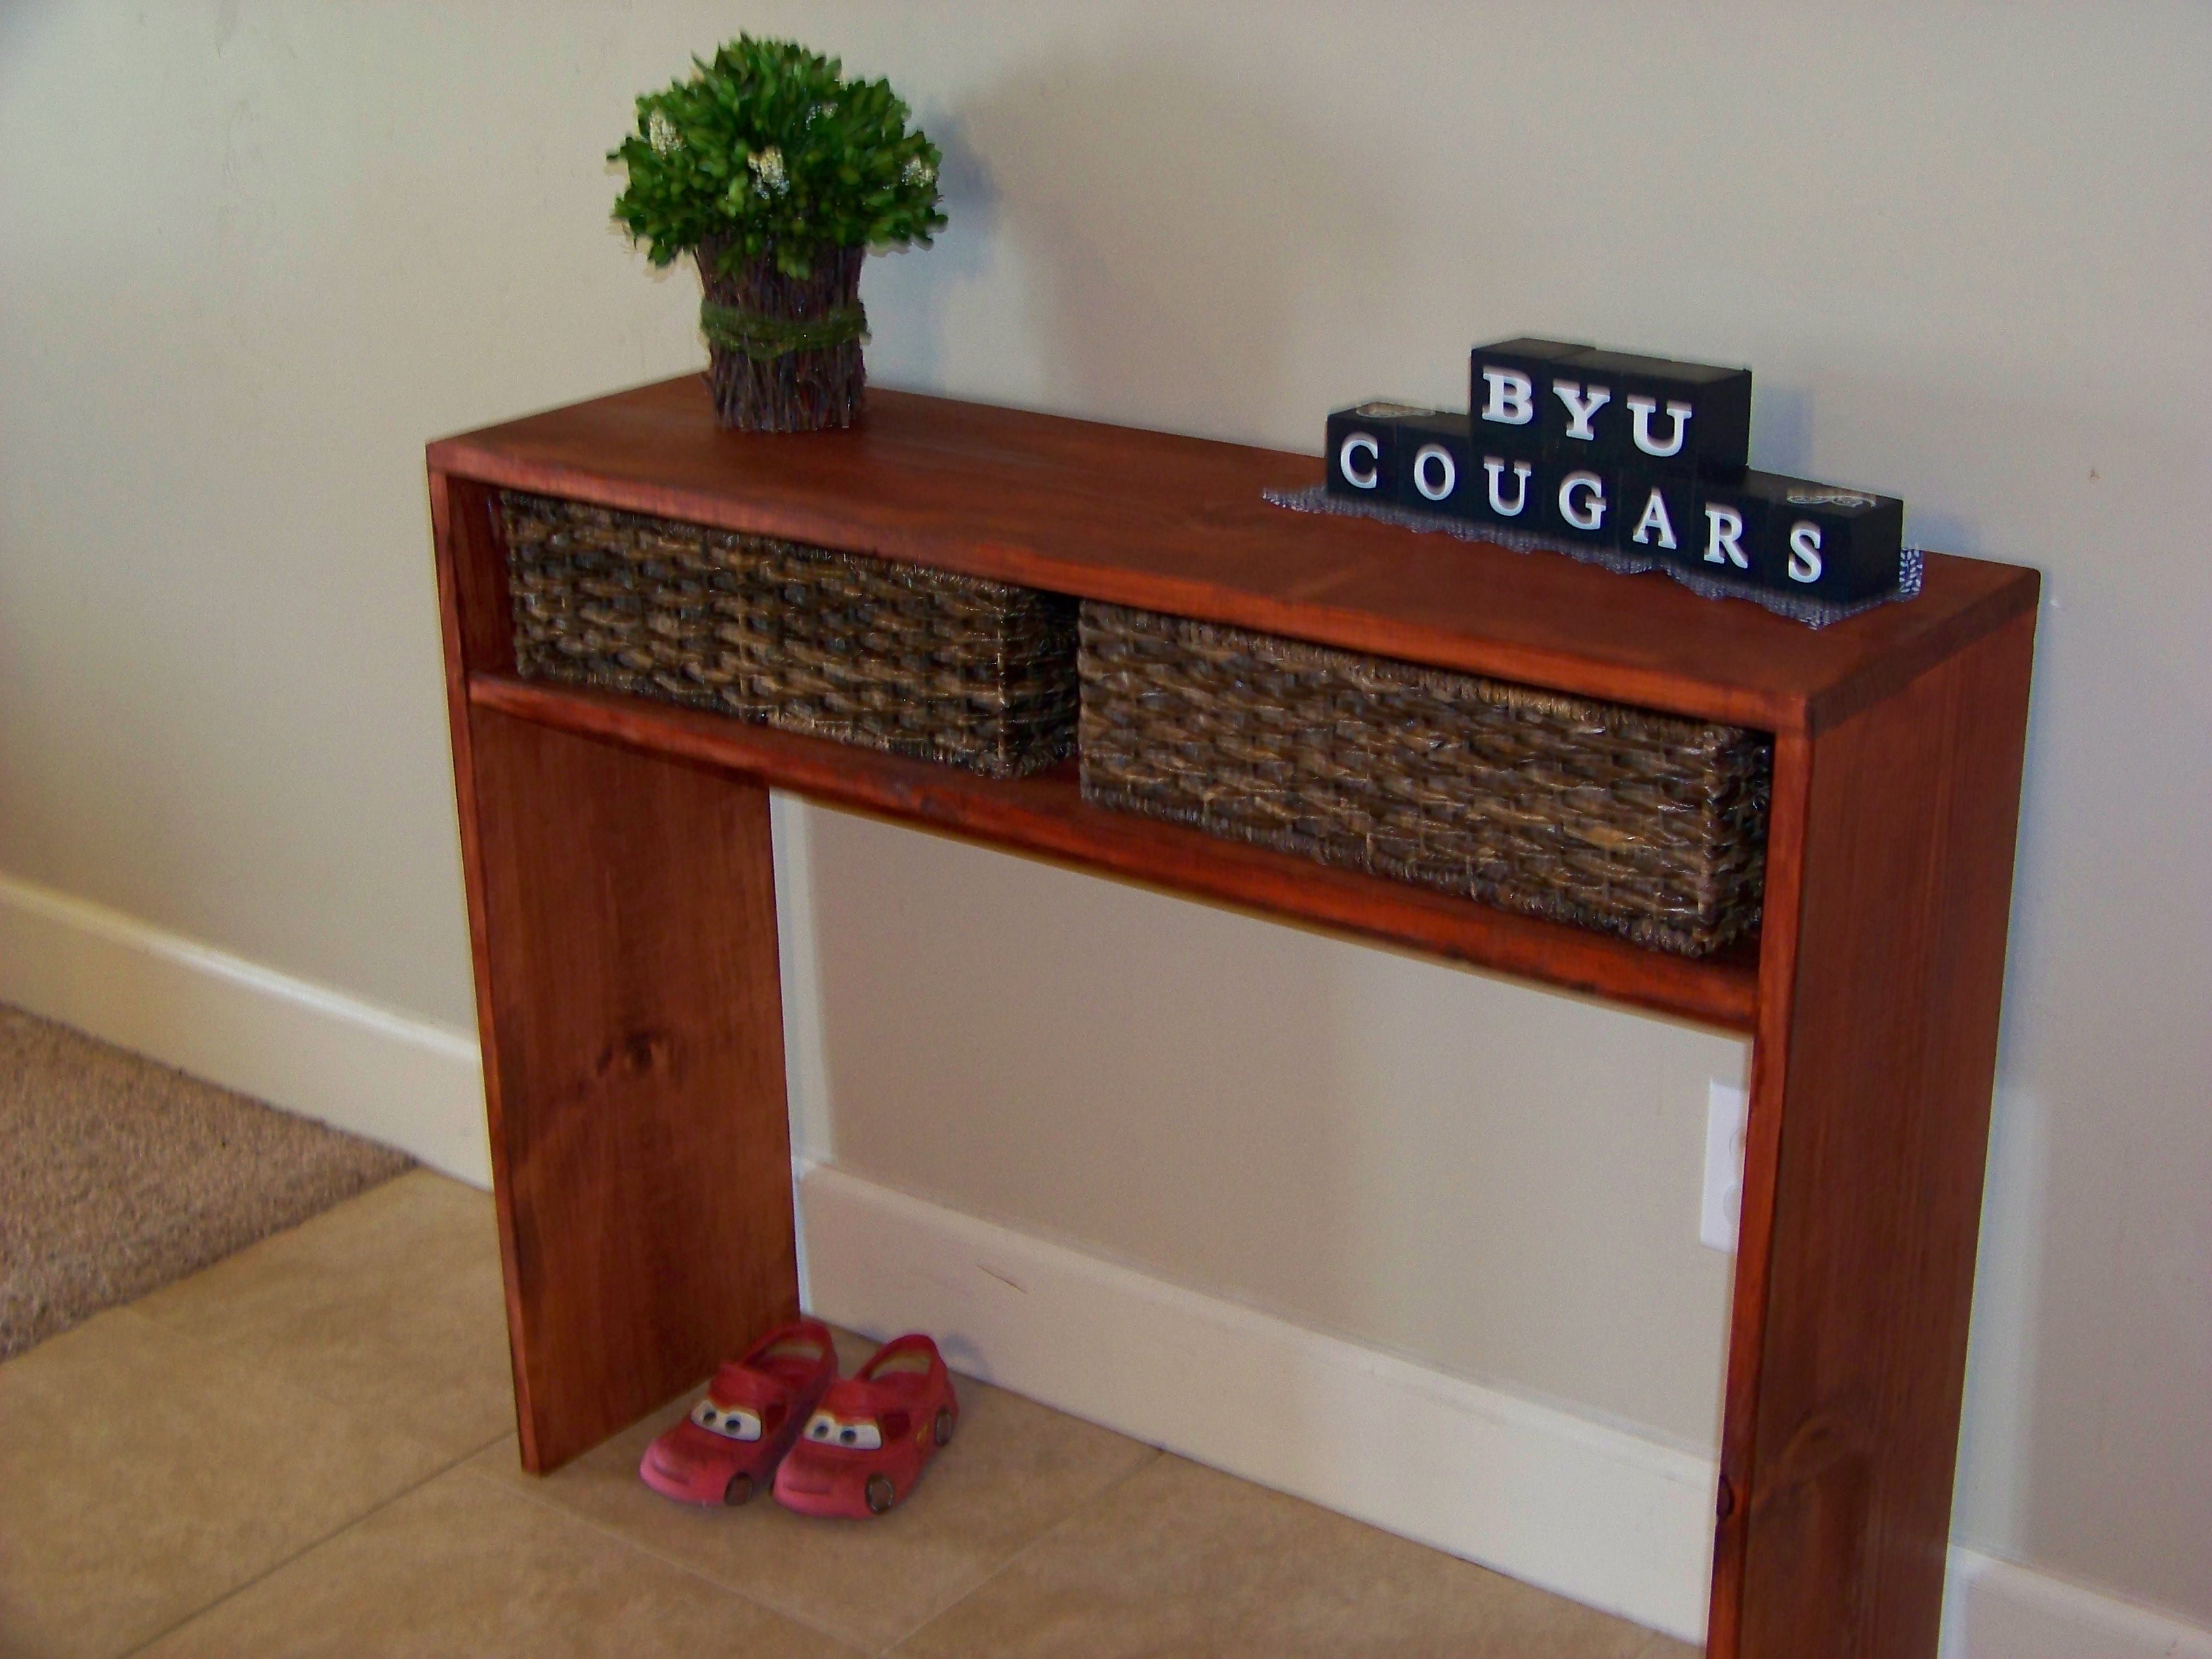
I had been looking for a small table for our small entry space. When I was searching, I was hoping to buy a table but couldn't find something I liked. I found this plan but it scared me because I had NEVER built anything. After researching on this site, I decided to jump in and try it. I made it much smaller to match our space. I added the shelf higher than recommended because I wanted to be able to use it as a homework spot when the kitchen table is covered by a project. I don't like the finish, but it will stay for a while because others like it.
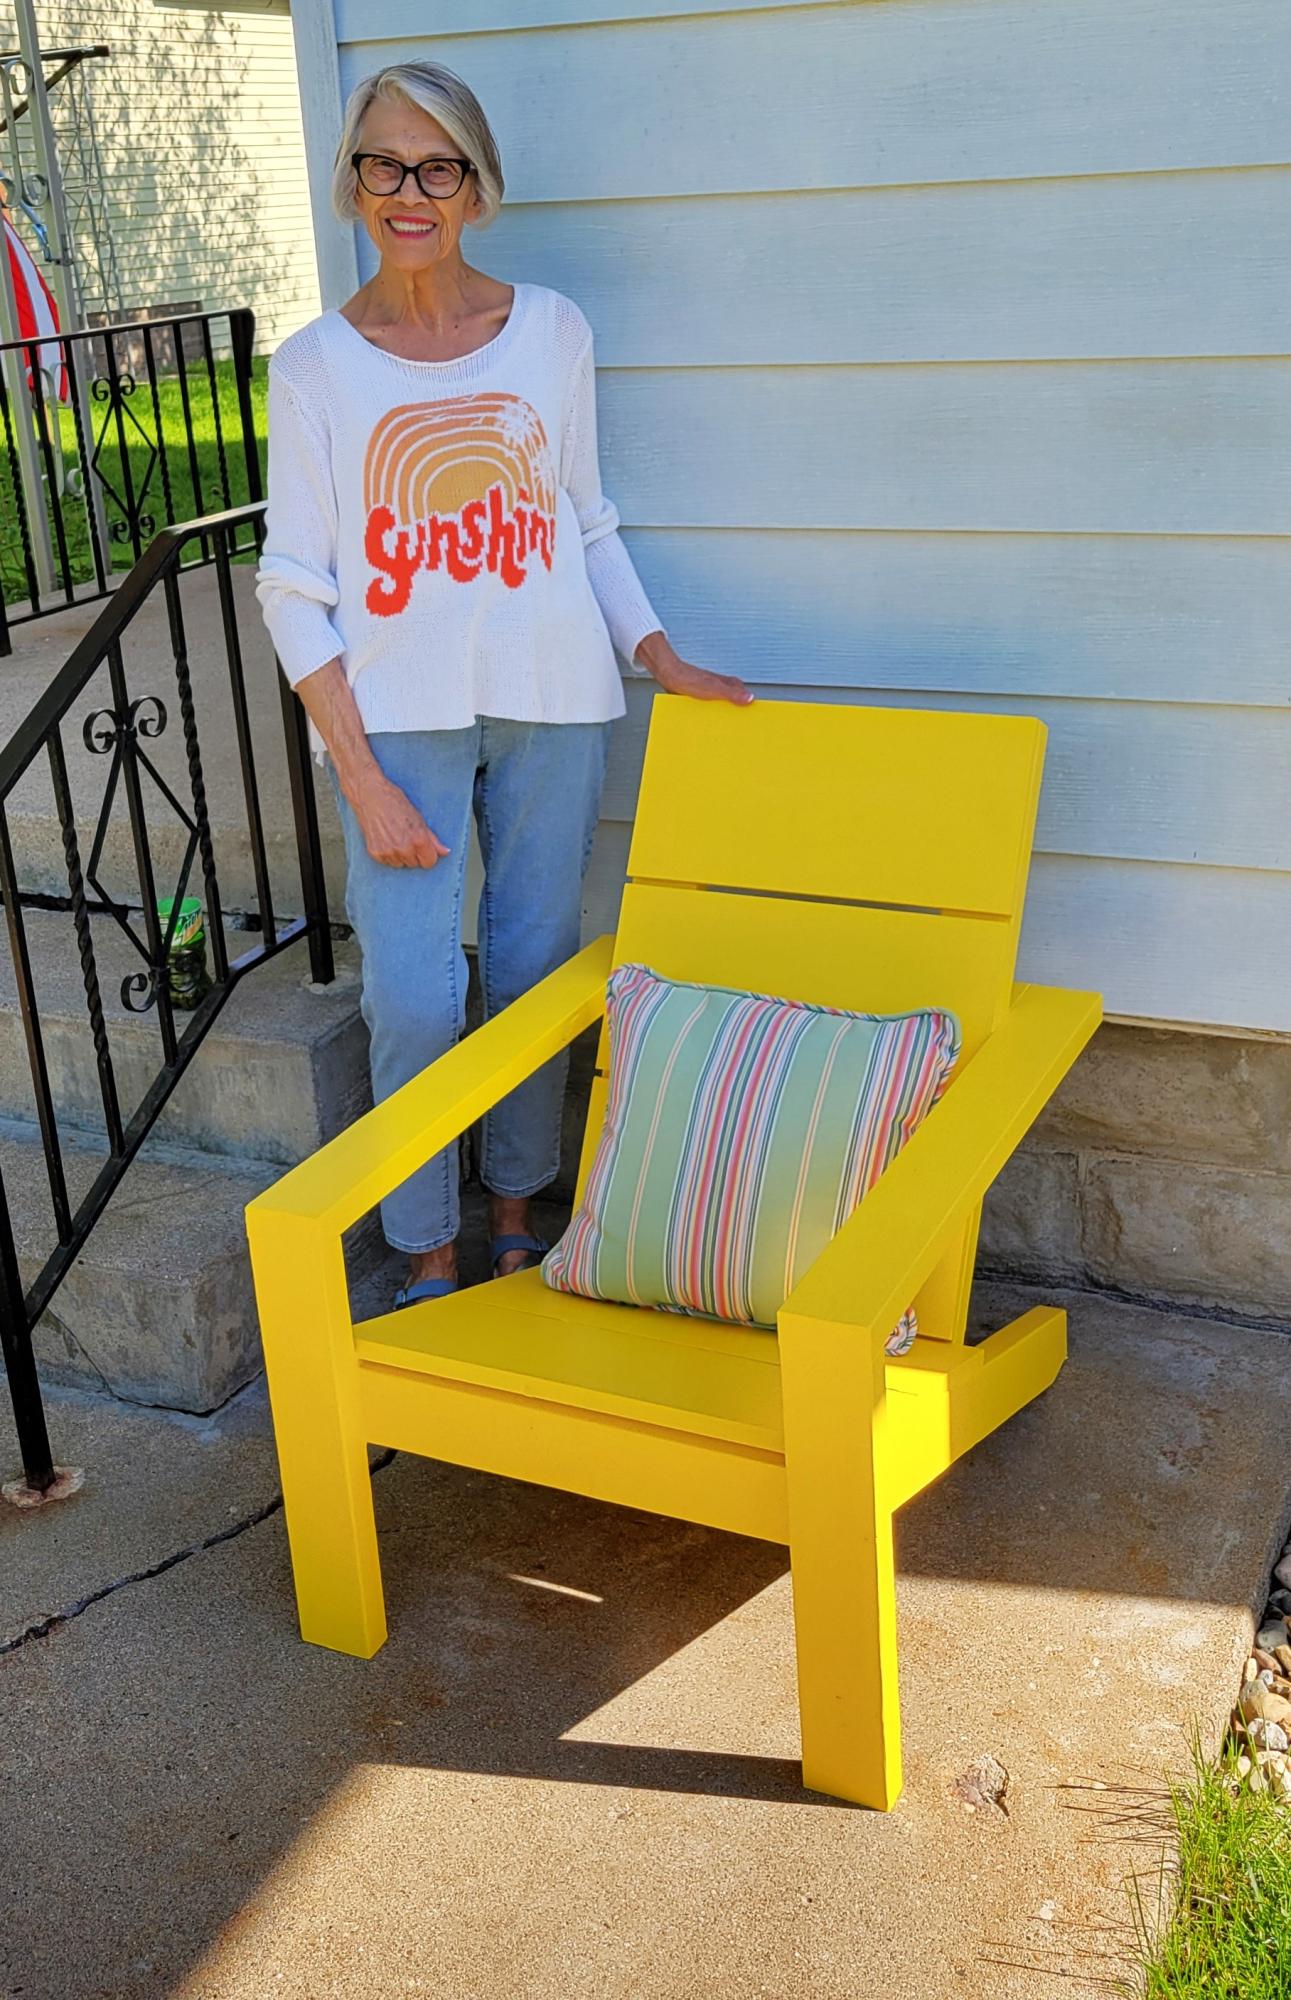
I made this chair for my mom on mothers day. She loves it and I was able to use some lumber from my dad's garage stash, who passed over Thanksgiving. So there was a special link for her to this chair. Loved the easy to follow plans, thank you.
cgauley.cg
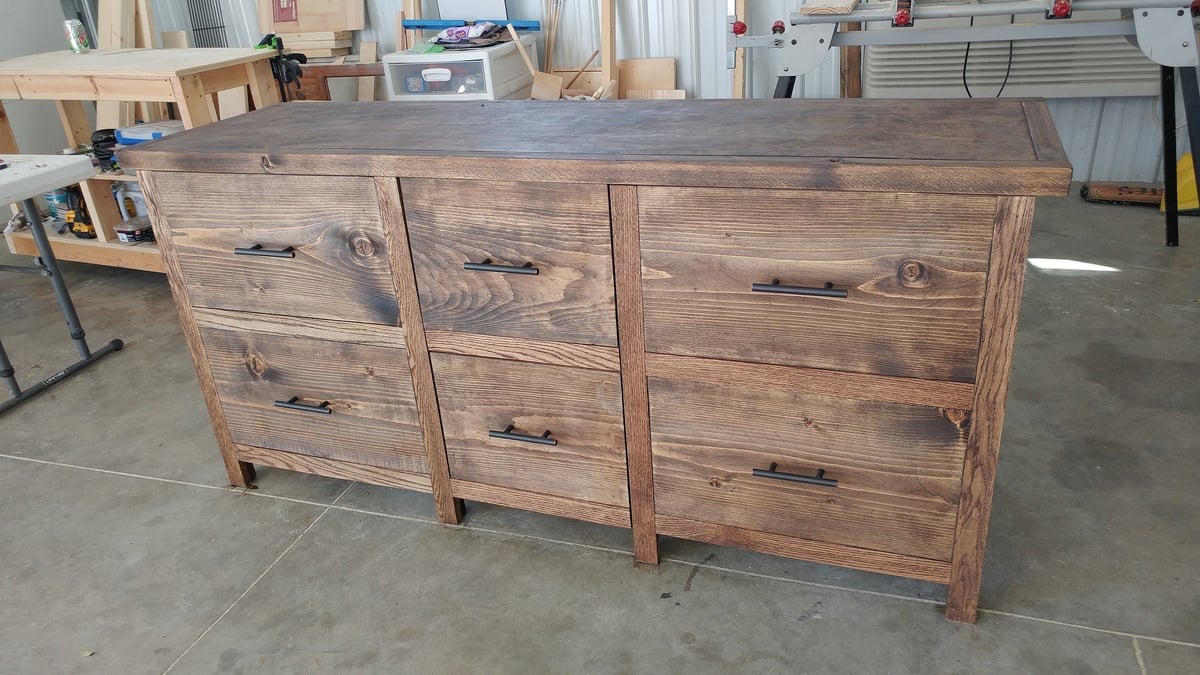
I shrunk the size and dumbed down the plans to fit my skill level.

Mon, 10/10/2016 - 09:08
I love what you did! It looks so great! I prefer this style, which is more simplistic than the other. Great work!!

Mon, 10/10/2016 - 10:28
Love how this turned out - the simpler drawers is just as (if not more) beautiful!
Tue, 10/11/2016 - 14:56
Thanks! I wish I would of set up an account before I posted so I could get notifications. I honestly didn't think anyone would notice it :)
Tue, 10/11/2016 - 14:58
I am so excited that people noticed this :) Is there any way of putting this under my account? I didnt make an account until today and I would like to get notifications. I have my project on my facebook page and can prove that I made it with other pictures. Thanks!
Mon, 01/20/2020 - 07:44
I would love to see this in a farm-house (rather than rustic) aesthetic along with drawers under the seats for extra storage. Maybe on casters with a fold up extension on the other side? So many ideas running through my head with this!
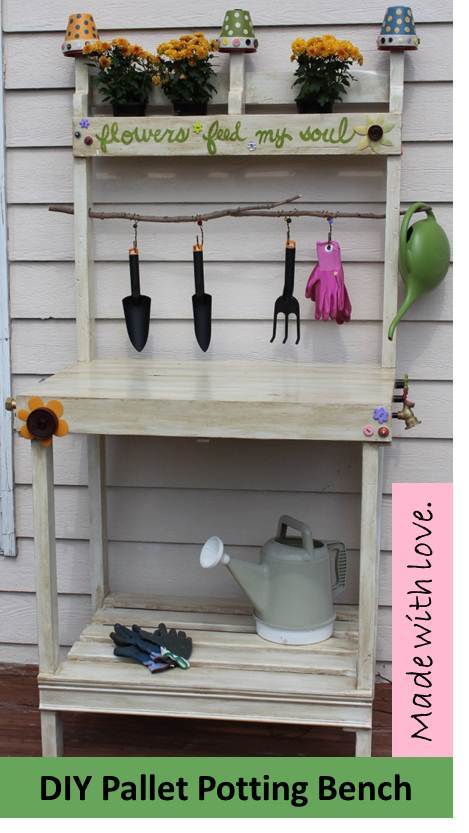
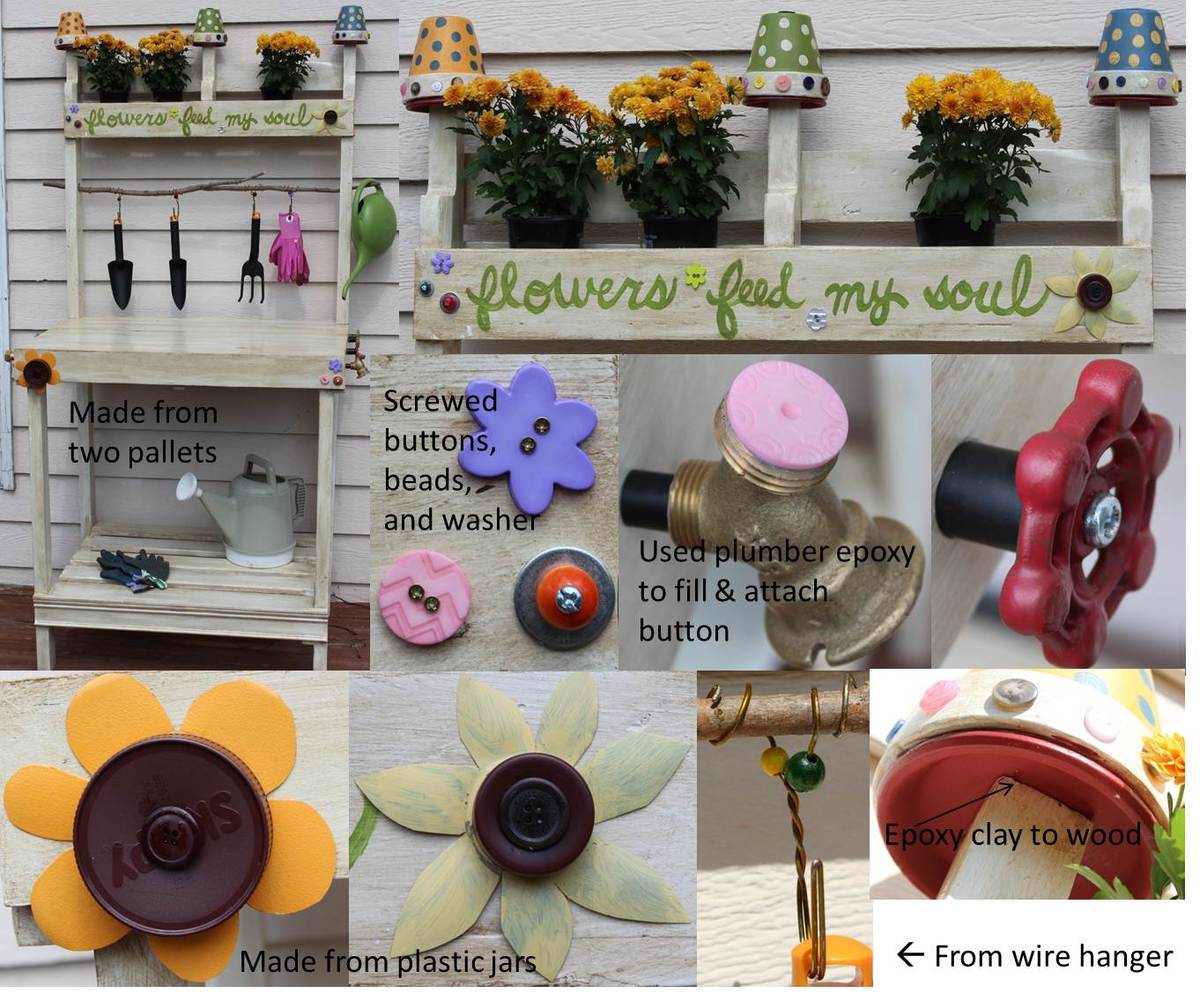
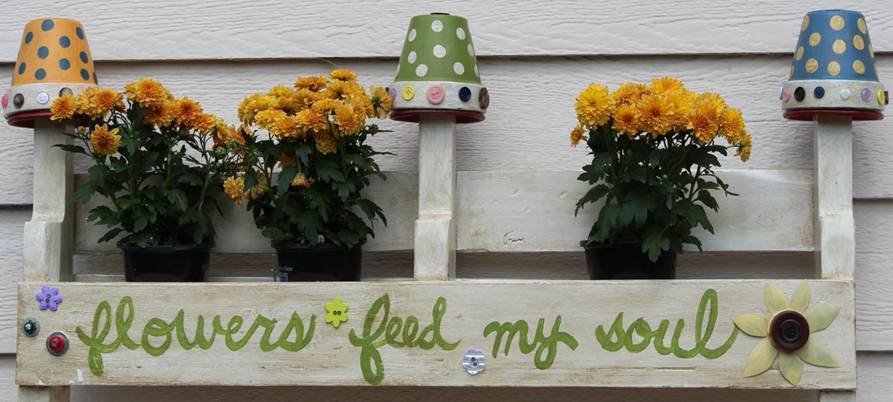
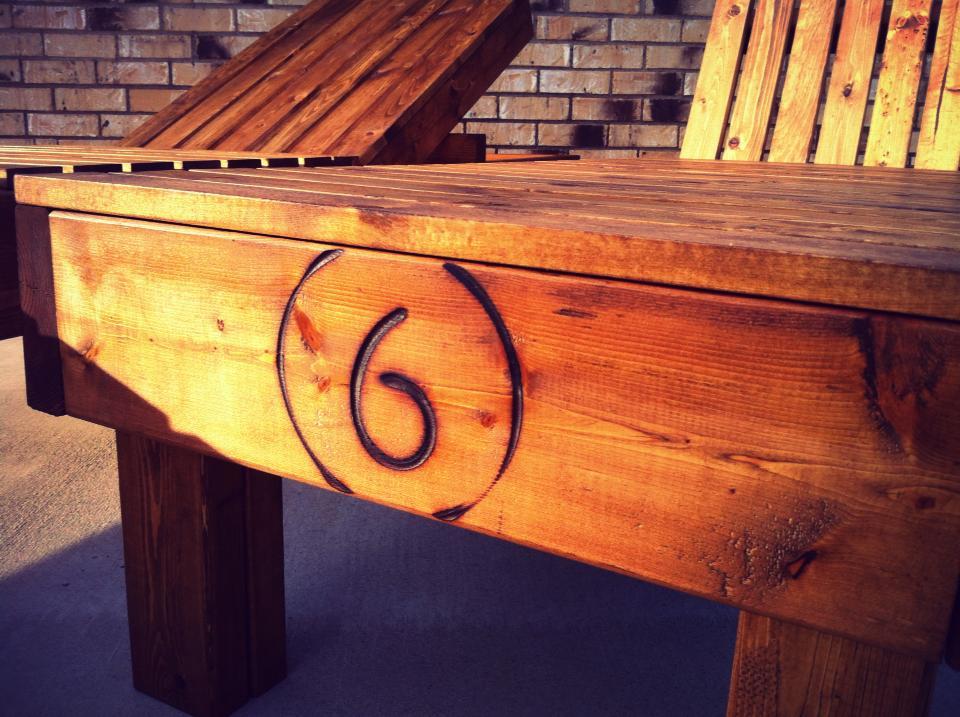
Made from 2 pallets, 2 x 6 x 8, leftover trim from my house, wood branch from my backyard. Attached shelf with pocket holes.
Accents:
-Handpainted lettering; painted prior to glazing entire piece
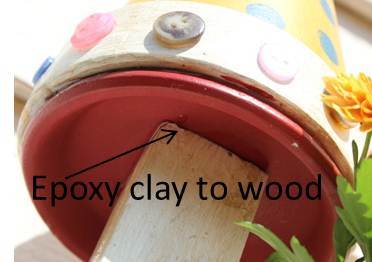
-Finials made from 4.25 inch spray painted and glazed clay pots and saucers coated with Valspar clear finish and attached together with epoxy; buttons attached to pots with E6000 adhesive
-Buttons attached mostly with small screws; a few with holes too small for screws were attached with epoxy
-Plastic flowers made from mayo and water bottles and lids; sanded, primed, spray painted, coated with Valspar clear coating; attached with screws
-Faucet knobs sanded, spray painted, glazed and attached with screws
-Plumbing pipe filled with plumber epoxy puttty; insert screw into putty before it hardened, then screwed into wood
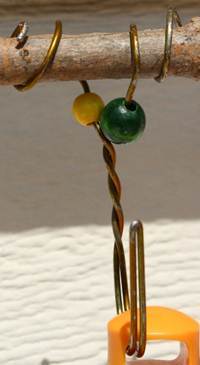
-Gardening tool hooks made from pant wire hangers with a few beads attached; wire simply wrapped around tree branch
Not sure that I will use pallet wood again since difficult to pull apart pallets, uneven and some split boards could not be used, and required tons of sanding for those boards that could be used. I think I paid more for orbital sanding pads than the cost of buying new wood. Will use pallet wood for other non-furniture projects not requiring a perfect finish.

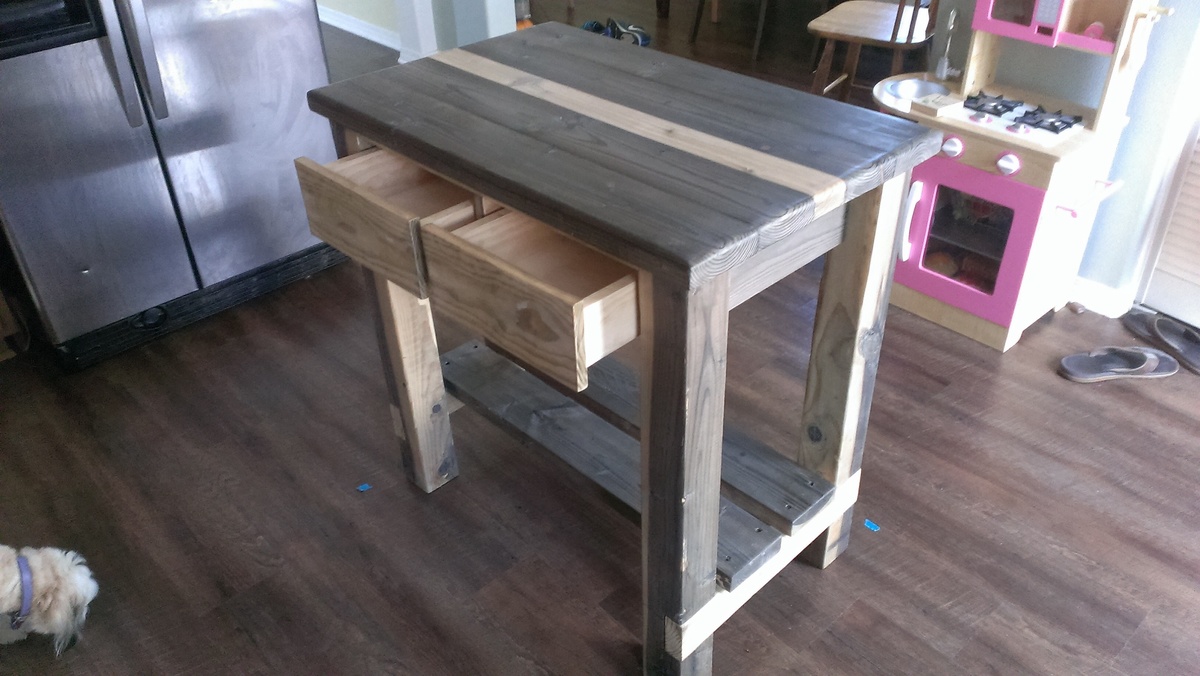
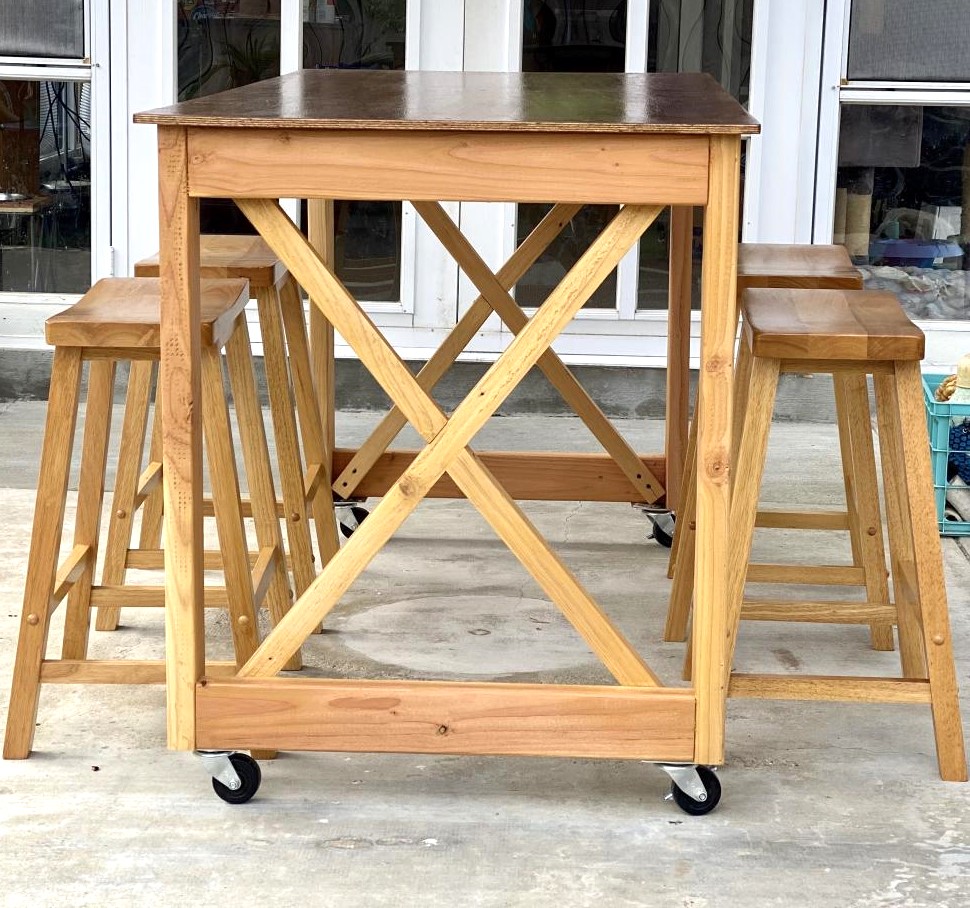
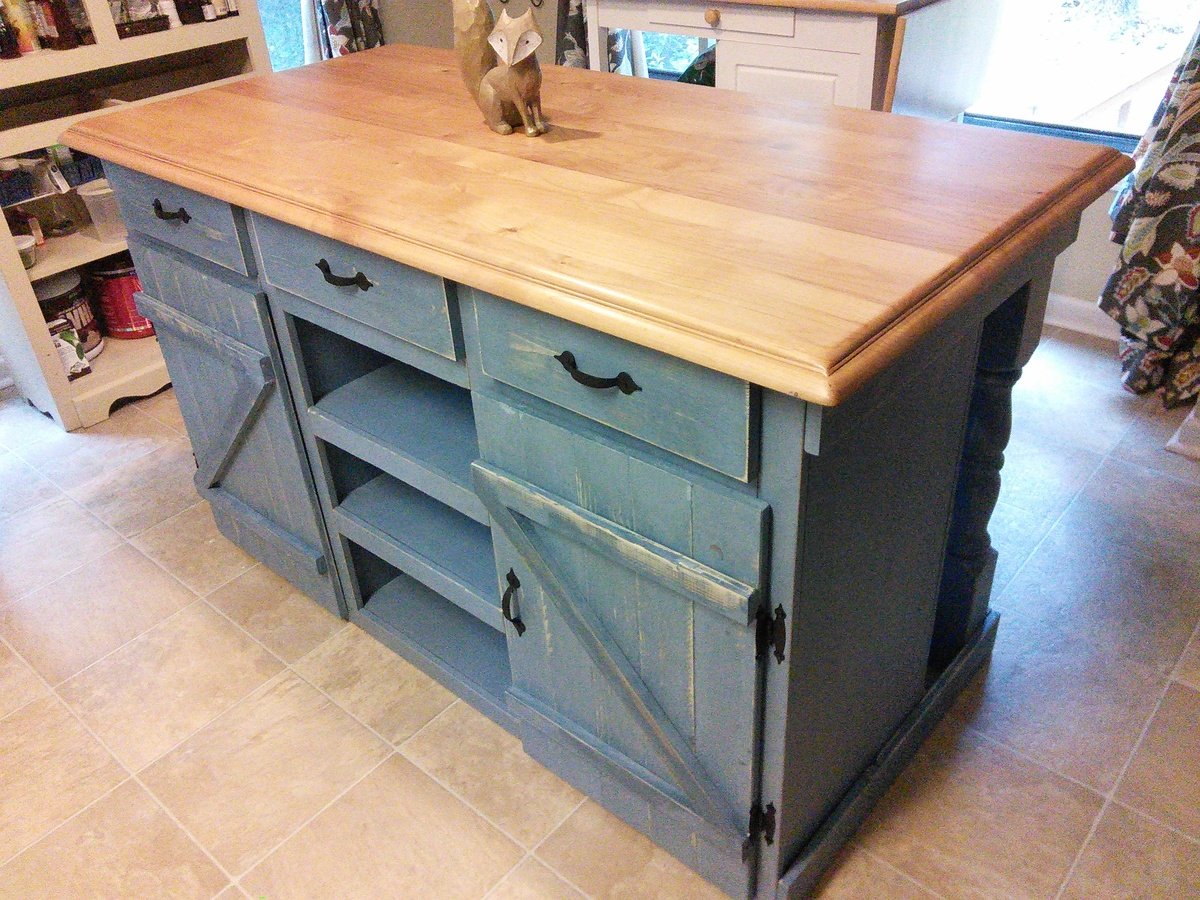
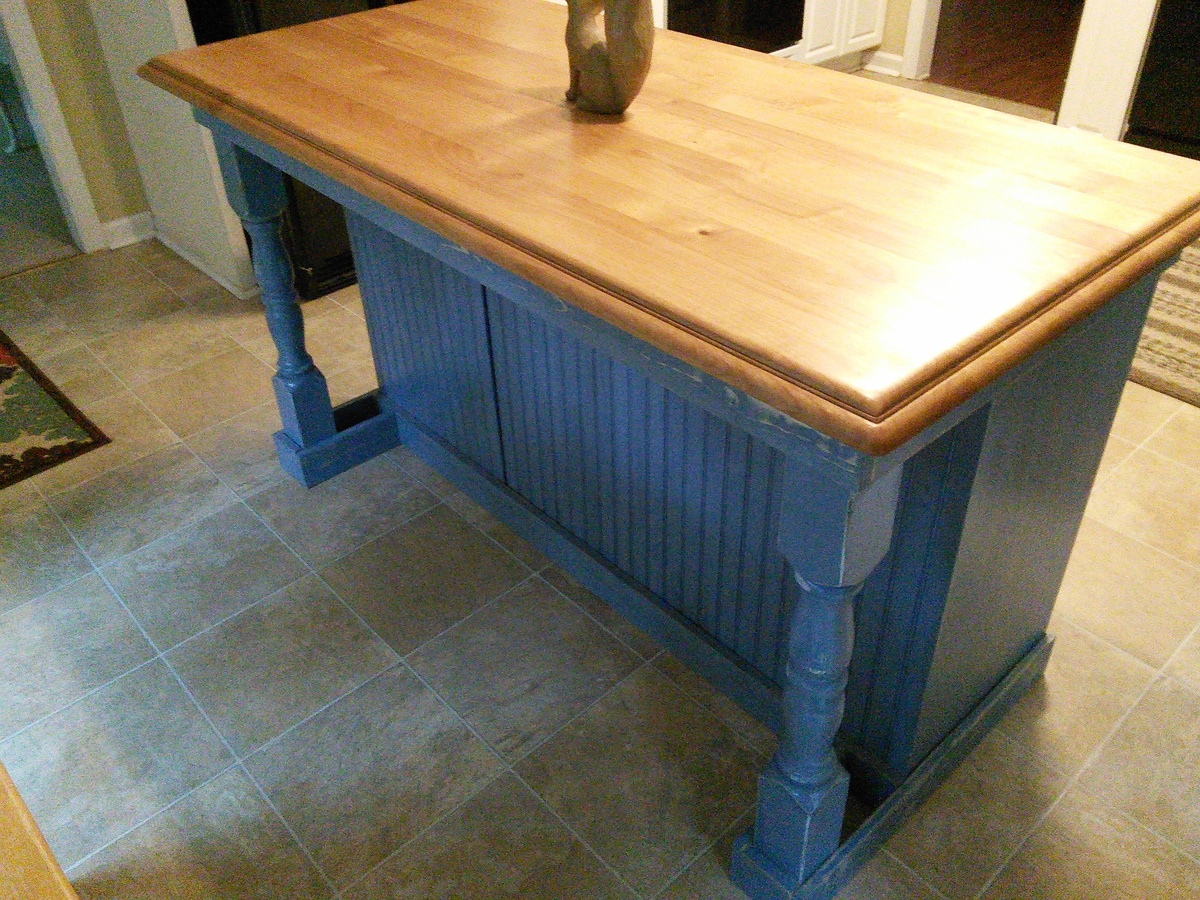
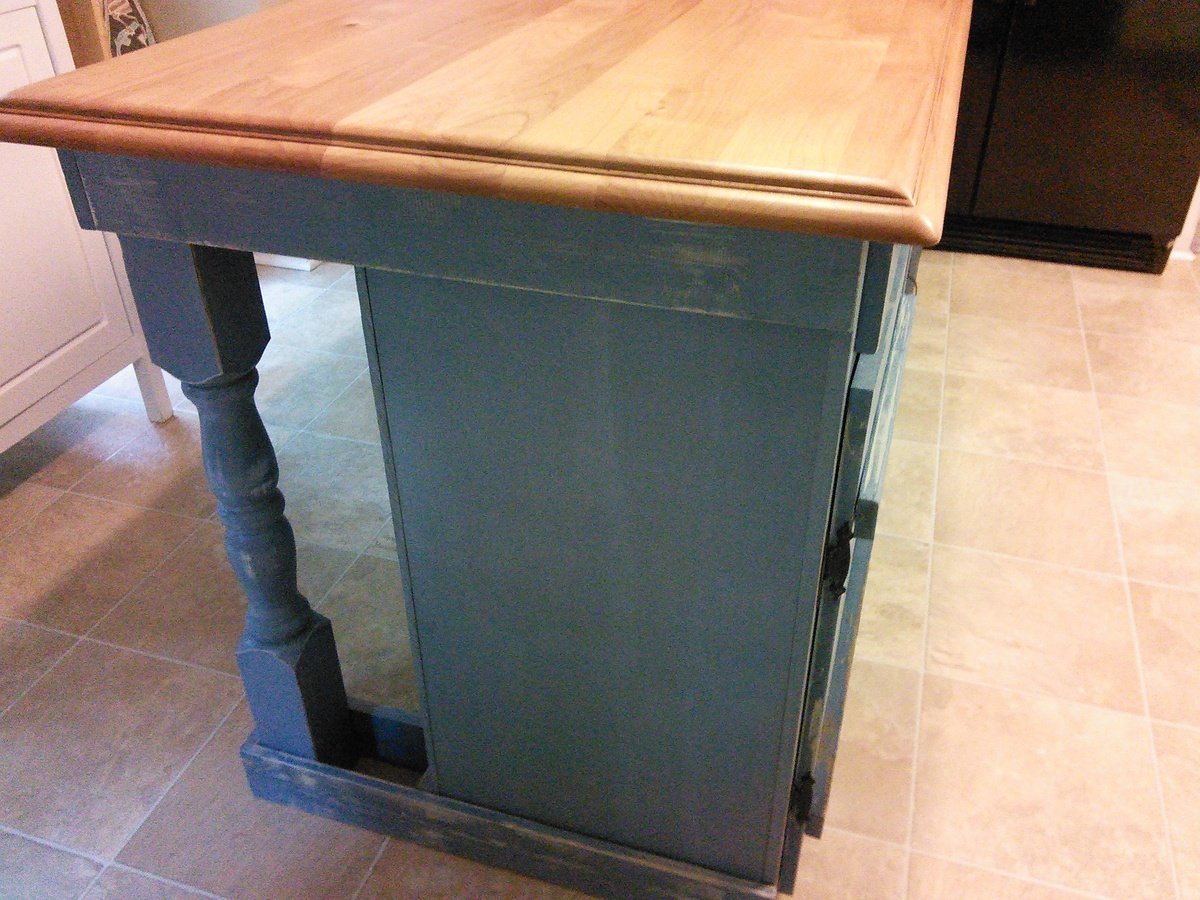
I used Ana's Gaby Kitchen Island plans and shortened the island to fit our small kitchen. I did not have reclaimed wood, so I used a vinegar and steel wool solution to transform the fir and pine into a completely unexpected look. For the top, I trimmed the edges of the 2 x 6s with my table saw to get a smoother top surface, then routered the edges with a 1/2 inch round over bit (thanks Steve Ramsey). I used white pine down the middle to make up for the edges I removed which looks like a cool custom stripe. (I also used the white pine for the side supports so hopefully there's some cohesion.)
Thank you Ana for the inspiration and great project! Can't wait for the next one :)

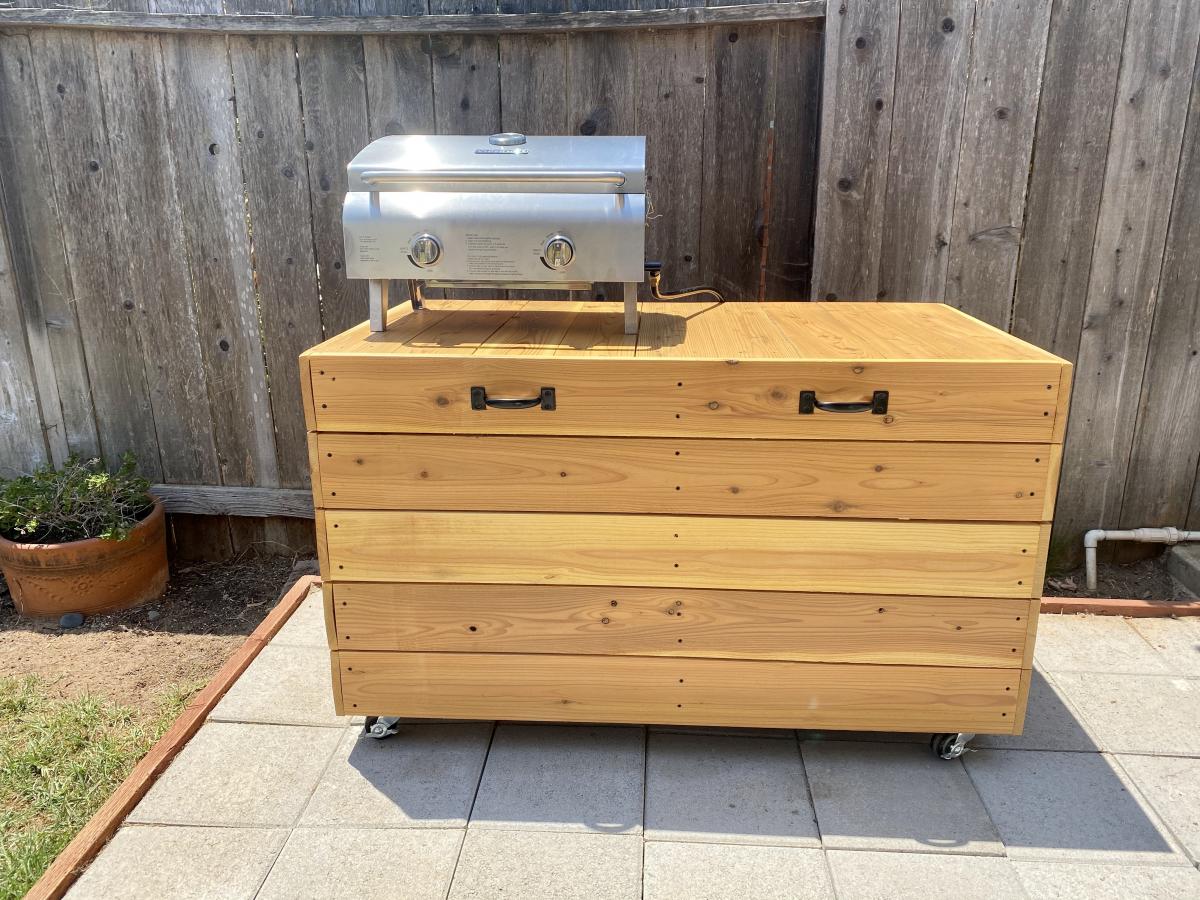
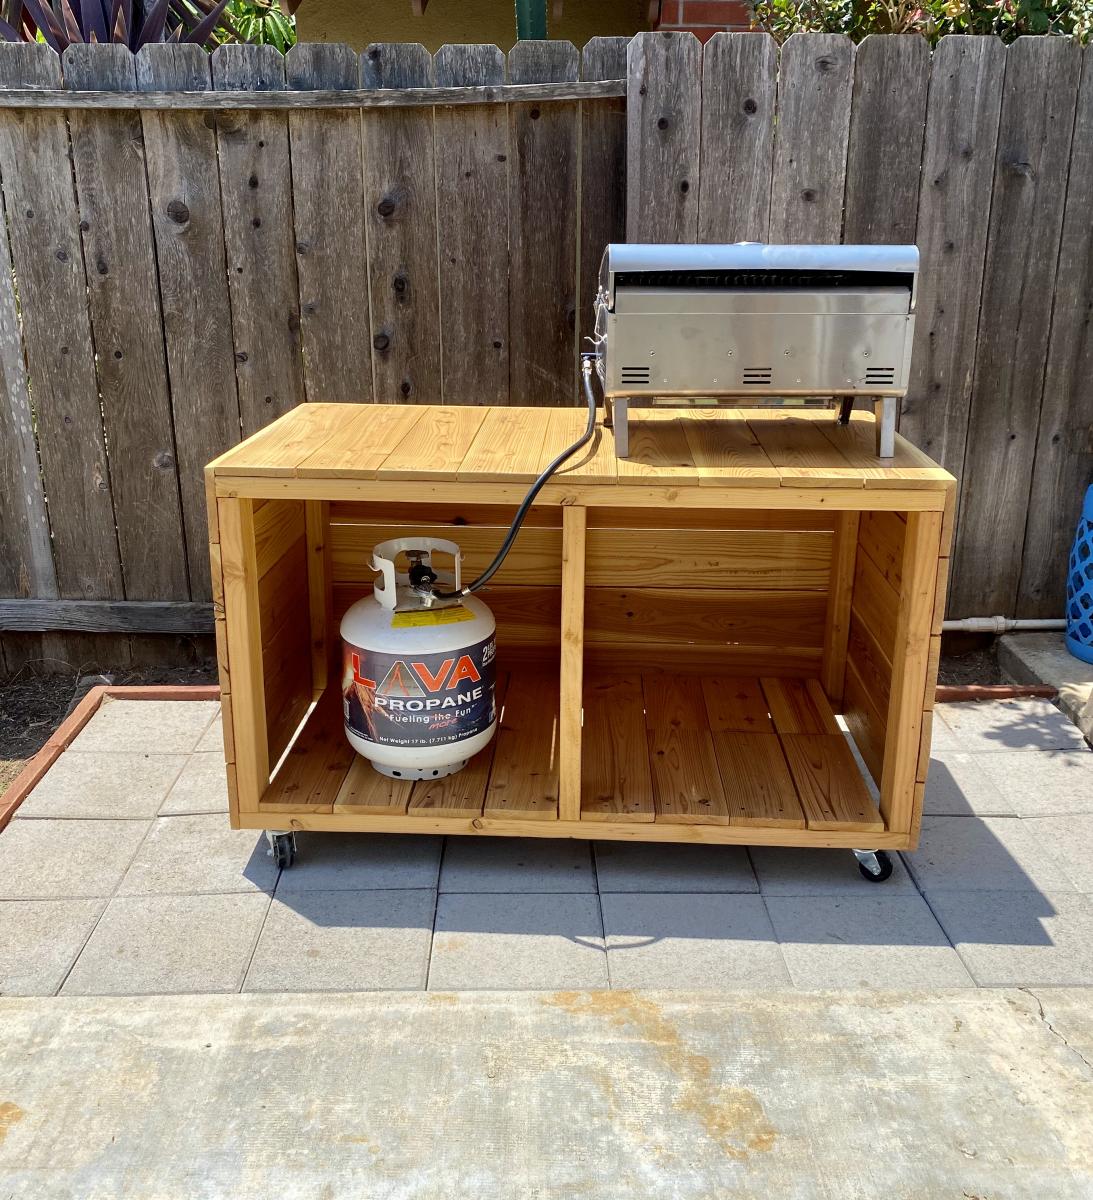
My husband and I built this Grill Station. We made the table top wider and out of 1 solid piece of mahogany. I wanted a wider table so we made it 30 inches wide. We sealed the table top with marine grade sealer and the rest with exterior clear sealer.
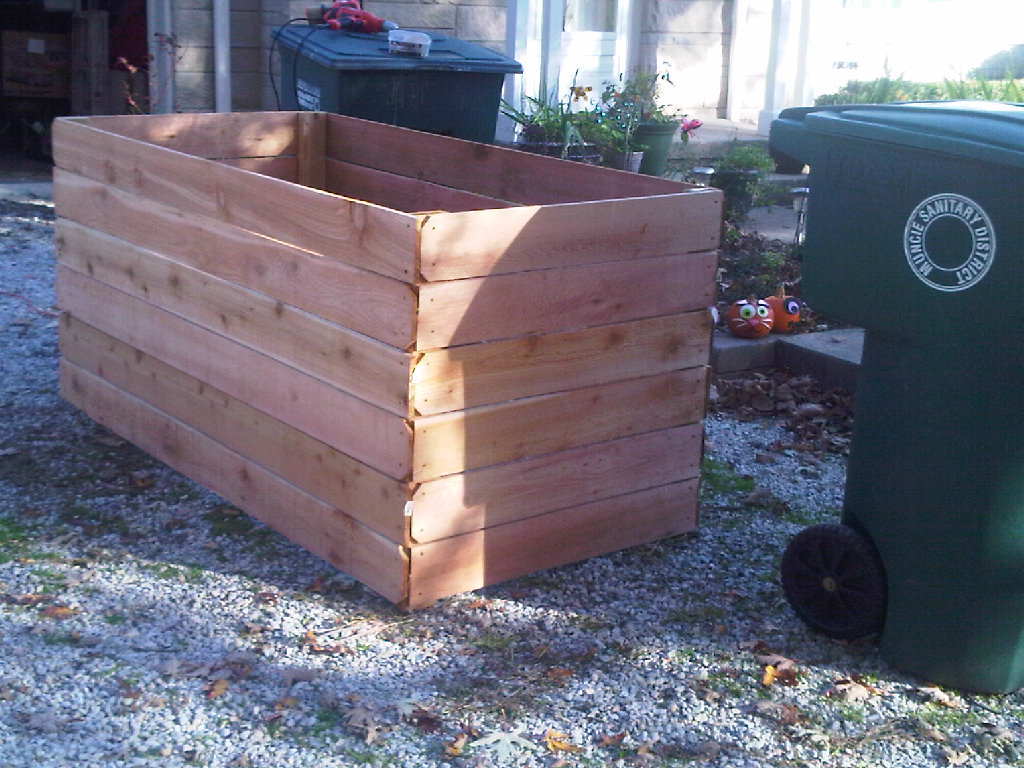
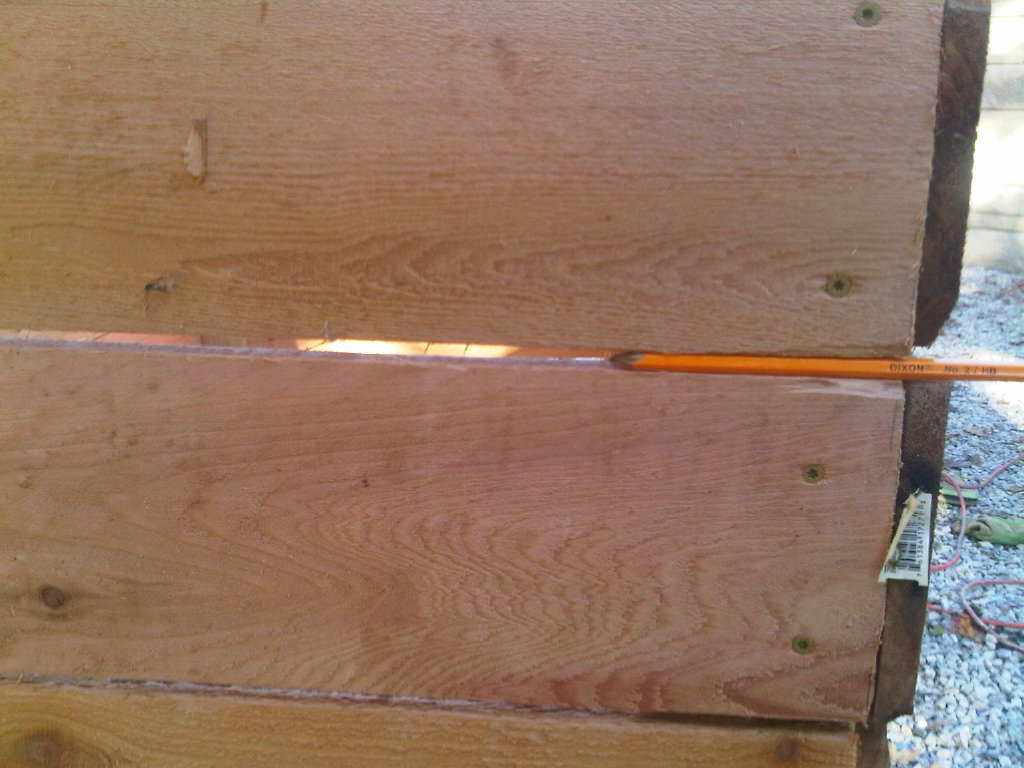
For this project, I used 6 foot cedar fence posts and 8 foot cedar 2x4s. I used a pencil to space the boards and allow extra air flow. More space between boards is acceptable - even to the extent of dropping off one full board and putting an inch between each side rail.
Another option is to make your sides interlocking layers, one or two boards high - http://cedarstackingcompostbin.blogspot.com/
Since I am composting large amounts of leaves and grass clippings, mine is made in one piece. I don't turn my pile often - when I do, I can either lift the whole thing up or move the pile from side to side. I cut the 2x8x8 posts - cut a 3 foot length off of each end. Save the 2 foot center piece to brace the long sides. Affix your 1/2 (3 foot side) and full fence (6 foot side) boards to the 2x4, leaving the desired gap between each board. Affix each board with 2 weather proof screws - I used coated deck screws.
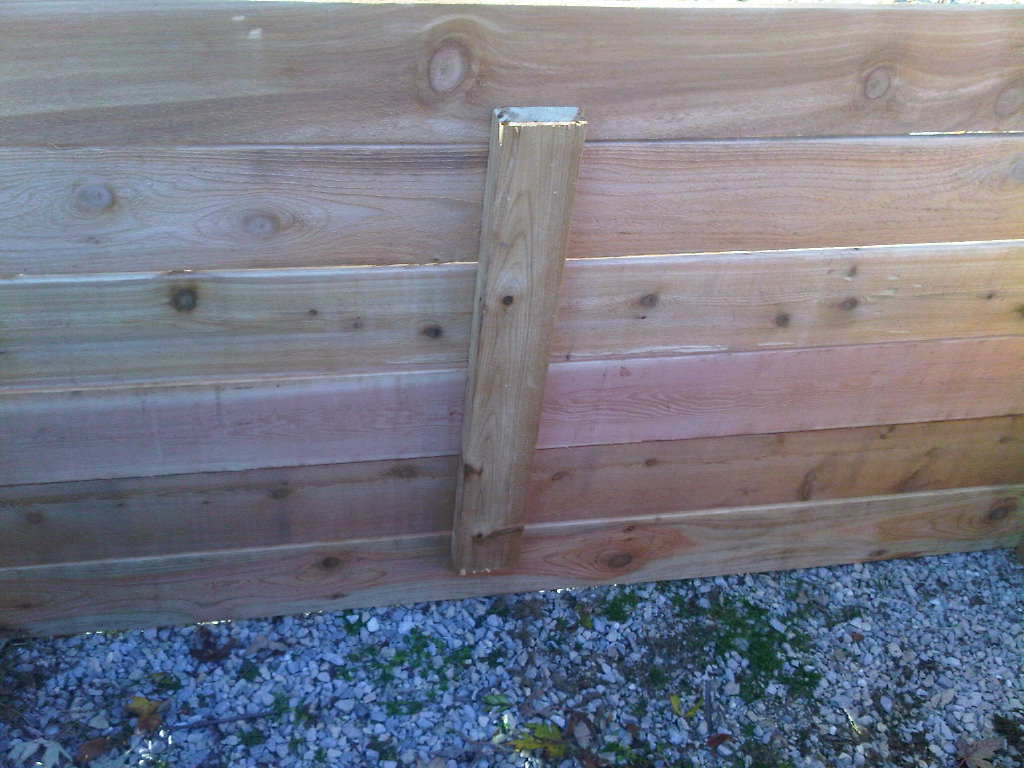
Attach the vertical posts to the inside of the cedar fence boards, including the short 2 foot boards that are just long enough to brace the long sides. I alternated the dog eared sides, so that each corner had one flat and one notched board.
I used 24 cedar fence posts and 16 feet of cedar 2x4. Note, I was able to do this all along. The trash cans acted as supports - no clamps or saw horses needed.
Fri, 12/07/2012 - 18:43
This is a little heavy when finished. I can easily flip it over to turn the compost, but after building it and tiring my arms out with the cutting and drilling, it was a long haul to the back yard to position it. You might be happy with a 3x3 bin, in which case, I suggest making it 1 board shorter and leaving wider spaces - if you think through the math, you can probably get it down to 10-12 cedar fence posts and 1 longer 2x4. Cost would be about $35 that way - cheaper than most compost bins.
I used the Ana White "Country Kitchen Island" plans to build. The only changes I made was the table top, bead board instead of pine planks, three drawers, and mostly 3/4" plywood. For the island top, i used the top of a maple desk and applied butcher block oil. To make things easier I used plywood to keep everything square and used bead board (very easy to install) instead of having to join boards together. After putting the shelves together I just used pine boards to cover the edges of the plywood. I also installed three drawers for convenient storage.
Wed, 10/26/2016 - 13:48
Do you have more details on how you did the drawers? demensions, etc? Did you just extend the divider vertical bards that are inside all the way up? Or did you build cut 3 holes out of the front facing horizontal board? If you did that were you able to add tracks?

Calling myself an amateur builder is a colossal overstatement. I’ve never actually built anything, by hand, using wood. I’m quite crafty and very good at hacking things inspired by others {thank you all other bloggers and Pinterest for your continued inspiration}, but to actually build something from the ground up just hasn’t been added to the curriculum vitae…until now.
I actually hail from a family of handy builders. My grandpa used to build everything, from decorative shelves and stools to more utilitarian items, like bookcases and kitchen cabinets. My father, too, is quite handy; he’s the build-a-back-deck weekend warrior type.
This was my first Weekend Warrior project. My deadline: Thanksgiving dinner! I had no other table option. I either built this table or my friends and family were eating on the floor.
Thu, 01/10/2013 - 12:56
Just wanted to say (apart from "i love the table") that your story has inspired me to finally jump in. i too am like you, never physically built anything with wood, but have done some revamps and have done a ton of other crafts (i too would like to thank pinterest). reading what you said has just given me that finally push!!! Thanku
Thu, 01/10/2013 - 17:14
Hi Juanita! Yay, I'm so glad. It really was a fun and empowering project. I can't tell you how many people looked at me like I was crazy, but a little patience and elbow grease can go a long, long way! Good luck and I can't wait to see the finished project.

Fri, 01/11/2013 - 08:37
You did a great job! I'll bet your friends and family were impressed!

Sat, 01/19/2013 - 04:53
You did a great job! I love the finish you chose. Isn't it amazing when you think you can't do something and then when you finish it, you're like wow I did that! Ana's site has inspired me so much and I love to see that she has inspired so many others and to see the beautiful things they are making with their own two hands. Again awesome job and beautiful table!
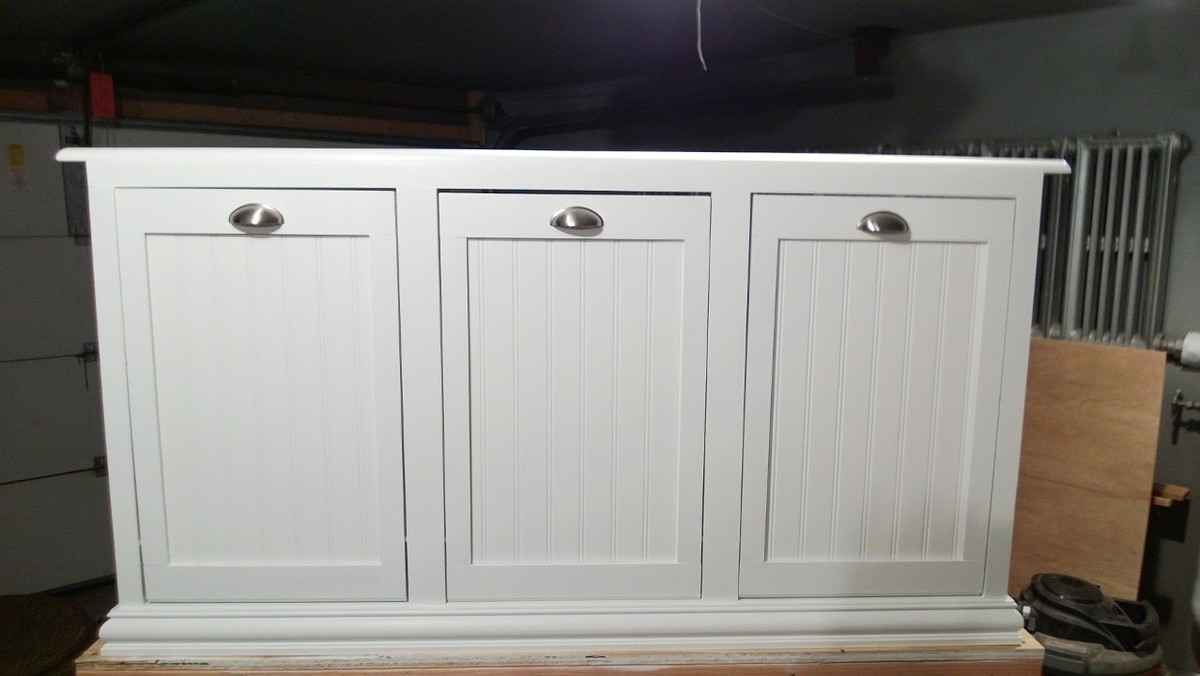
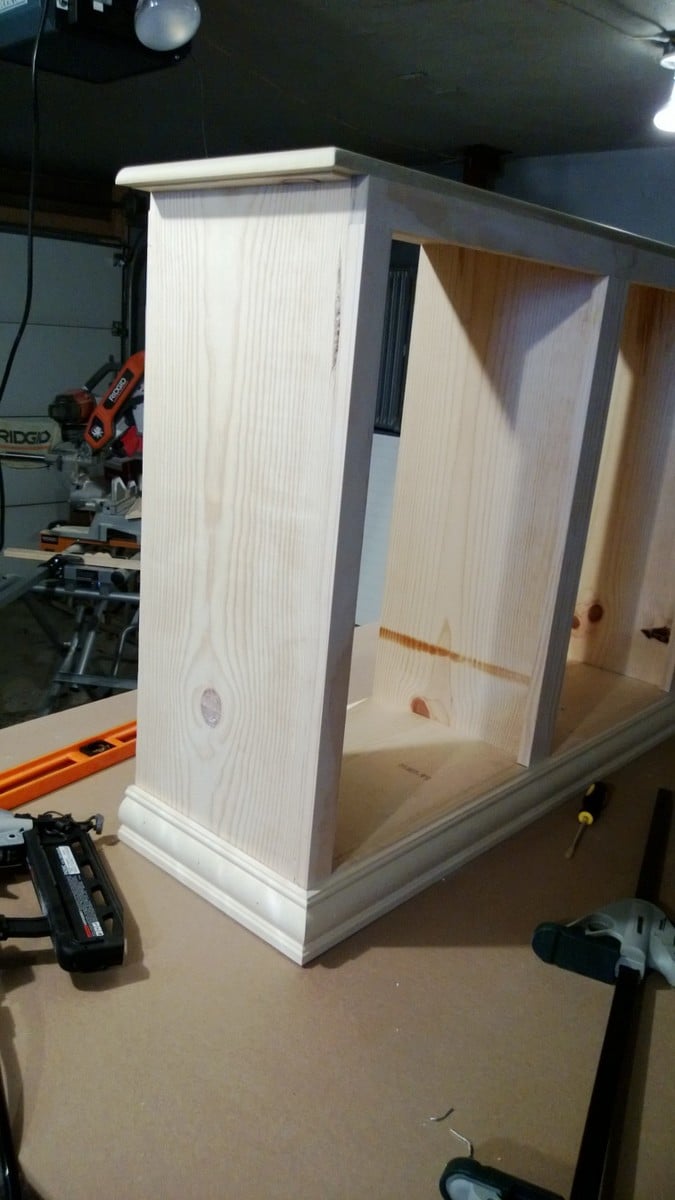
Modified the original plan to meet our needs of a laundry sorter. Had problems with the hinges so ditched them. I used dowels with a combination of a chamfer cut on the bottom of the door. Dado-ed the trim on the doors and slide the bead board panels in. The face frame is all held together with pocket hole screws, which I highly recommend because it eliminates nail holes and keeps the face frame square. This was my first wood working project, took me a little long to get it done. Thanks for looking.
Modified January 28
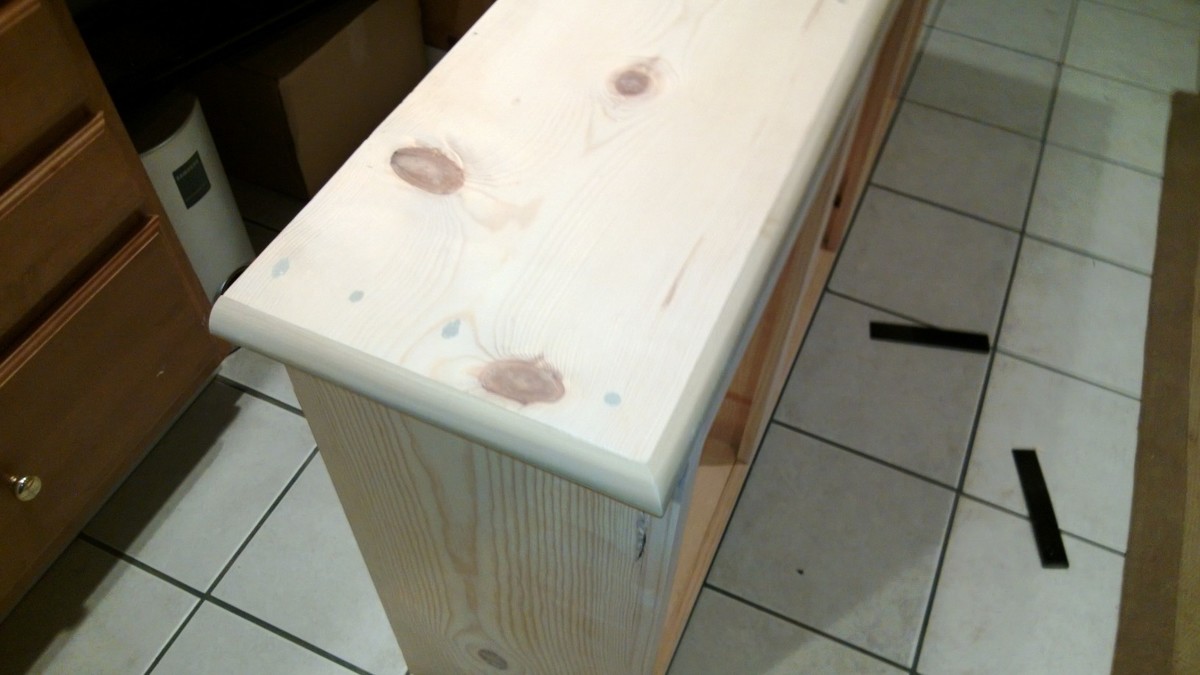
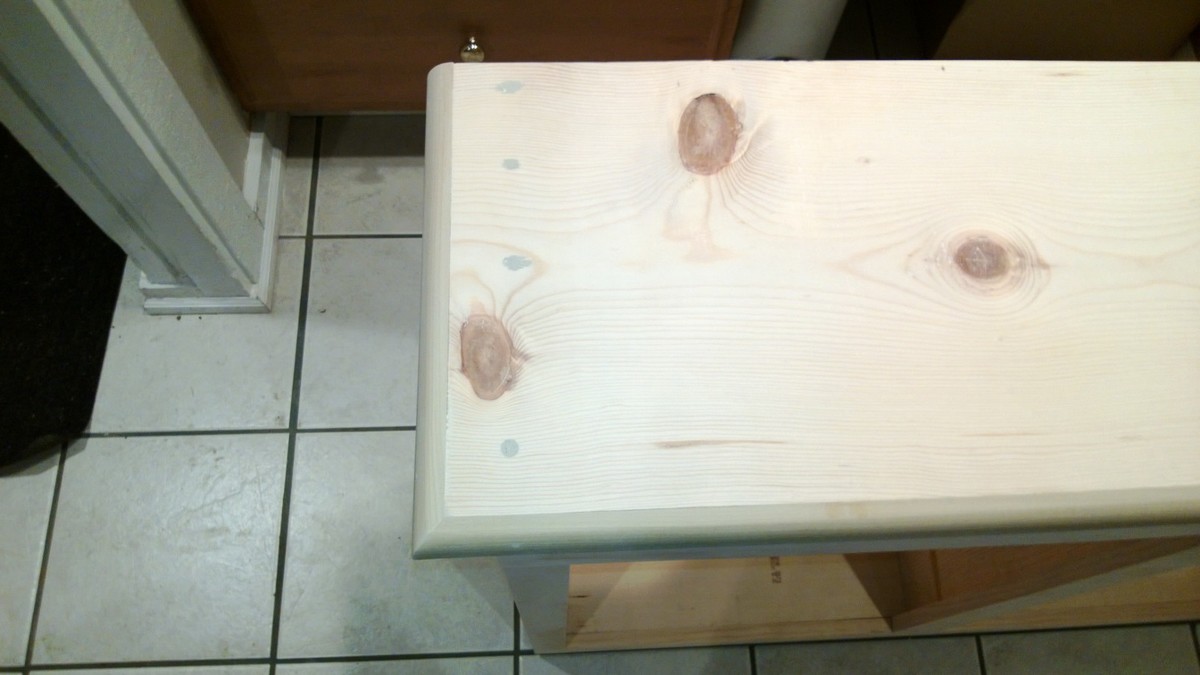
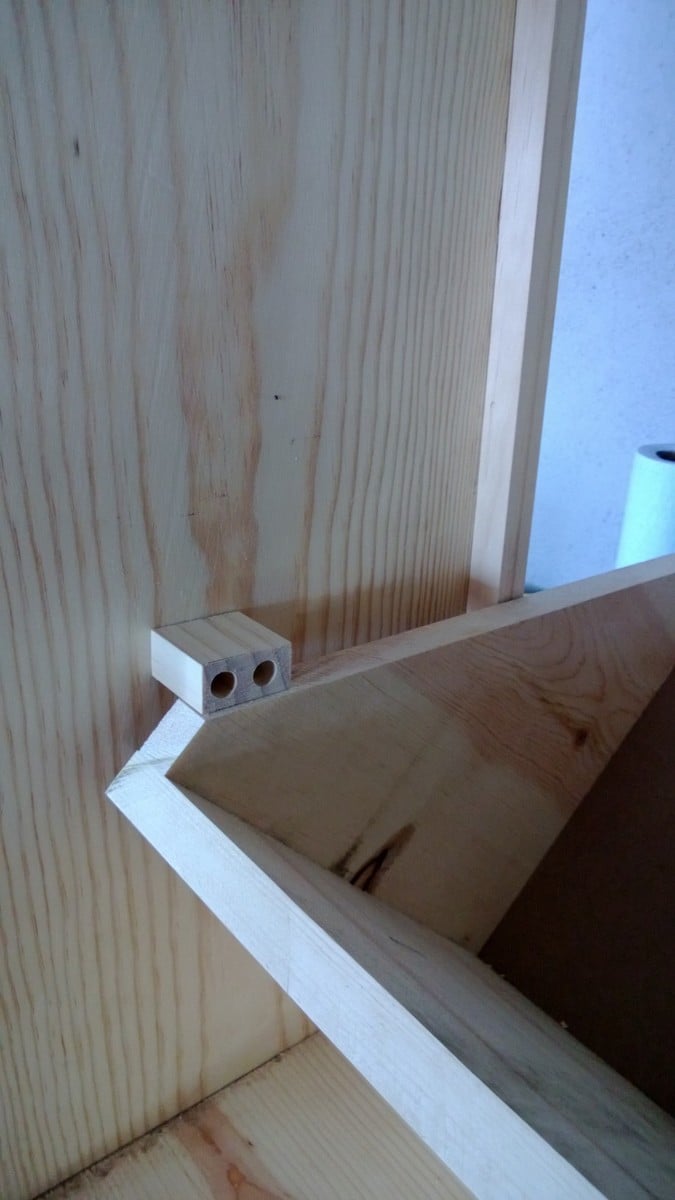
So here are some more pictures of my project. I don't really have any good pictures of the dowels. But what I can tell you is, I drilled holes through the sides of the face frame and the trim pieces and then measured where the holes would be in relation to the "drawer". I then drilled holes in the drawers at those measurements, I was careful to not go to deep. I think I went in half an inch. After that I started at one end and placed the dowels in, then put each drawer in. It wasn't easy but with a little patience it worked. The key is to wax the dowels so they will last longer as well. I also am including pictures of the top and bottom trim. On the top the original plans called for an overhang piece and I didn't like the way that looked. I ran the top board an inch long on each side and then wrapped it in quarter round trim. I did this because I plan on adding the Mimi Hutch Top. The bottom was built per the plan, but I ran into a problem with my bottom trim not being level and you could tell. So I raised the whole unit on 1 1/2 legs then placed it on a level surface and again wrapped it in a decorative trim. The key on both trims was a nice miter joint. Last picture I added was of my stoppers. I took scrap from the 1x2 trim and cut them to an inch and a half or two (can't really remember), then using the Kreg Jig drill bit drilled recessed holes. I then opened the doors until the side 45s were level then mounted the blocks on each side. I feel that it is better than a chain or string catch. Again thanks for looking and I hope I answered all of your questions.

Tue, 01/22/2013 - 11:29
Dowels! What a great idea! Would you mind sharing how you did it? Could you possibly add some pictures showing the dowels? You did a great job. It looks beautiful.
In reply to Dowels! What a great idea! by moosmani
Tue, 01/22/2013 - 20:11
Yes I will send you the info you requested, I'll try to get it out to you tomorrow or Thursday.
Wed, 02/15/2017 - 11:05
Can you send the plans to me?!?! I need this for my new home! [email protected]
Thu, 01/24/2013 - 09:27
I love what you have made! Could you post pictures of the top and the bottom trim? I'm very impressed that this is your first project!
Sat, 11/16/2013 - 18:23
I am a little confused. I love the three bin laundry sorter, but everyone is mentioning plans. I am not finding plans for it on the site. Also, what goes in to hold the clothes? There may be obvious answers, but I am not seeing them. I'd appreciate any help you could give.
Tue, 12/02/2014 - 02:58
I've been thinking of working up one very similar to this, also with 3 bins, but I didn't want to use chain either. Those stoppers will be ideal - do you put them on both sides or is one enough? Thanks for the share!
Sat, 01/24/2015 - 11:29
Hi-
Im not sure if you still have the plans to this awesome project, but if you do, would you be able to share them with me? Ive been looking to make something like this forever, but just couldnt find any help!
thanks,
karah
[email protected]
Wed, 02/25/2015 - 12:35
If you still have these plans, could you please send them to me? [email protected]
THANK YOU!
Wed, 02/25/2015 - 16:45
I am searching for the plans for the gray corner entertainment center. Does anyone still have them that could email it to me….
Tue, 01/19/2016 - 17:43
Hi there! If you still have the plans for this I would love to have them! Thanks a lot
Tue, 04/12/2016 - 18:51
I would love to have the plans for the laundry bin if they are still available, Thank you!
Wed, 02/15/2017 - 07:16
Can i also have the plans! This is perfect for what we want to do in our laundry room
Wed, 02/15/2017 - 11:24
Can you please send me the plans! [email protected]
Mon, 07/10/2017 - 04:19
I absolutely LOVE your laundry sorter!!!! You did a fabulous job and the TRIM, WOW amazing!!!! I've searched Ana's website and cant find the plans' could you please email me the plans to [email protected]. I started building my own furinture back in October 2016 and the reward is amazing... Keep up the good work.
Happy Building,
Lisa
Tue, 01/16/2018 - 19:55
Love this! Can you email the plans to [email protected] please?
Thank you
Tue, 01/16/2018 - 22:18
I'm too new at woodworking to be able to tackle this right now, but would love to download the plans for future. My most successful project so far is a pretty standard bookshelf. I got a free plan, with lots of guidelines and explanations, at https://tinyurl.com/ydeup8lo -- it came with a 440 page guide, "The Art of Woodworking" that has tips and techniques, and am plowing through that right now.
Wed, 02/28/2018 - 12:53
This is amazing. I am very new to woodworking. Could you send me the plans please? I would be most appreciatative
Wed, 03/11/2020 - 23:27
I would love to have the plans for the three bin laundry sorter to build for my laundry room. Are the plans available? Awesome work!
Thu, 07/16/2020 - 14:14
Looks amazing!! I want to build one just like that, can you please email me the plans, thanks!! [email protected]

Tue, 01/12/2021 - 06:26
This looks like something I can build. Would you please e-mail me the plans? The address is [email protected]
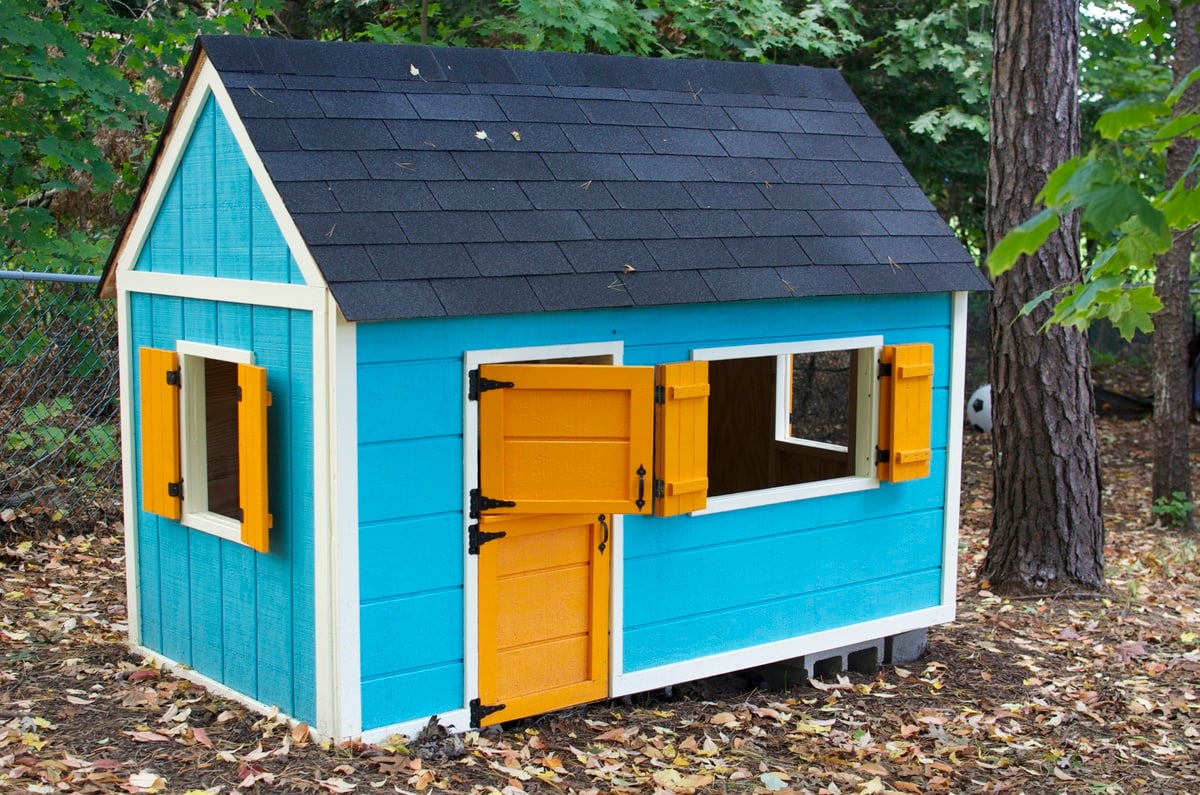
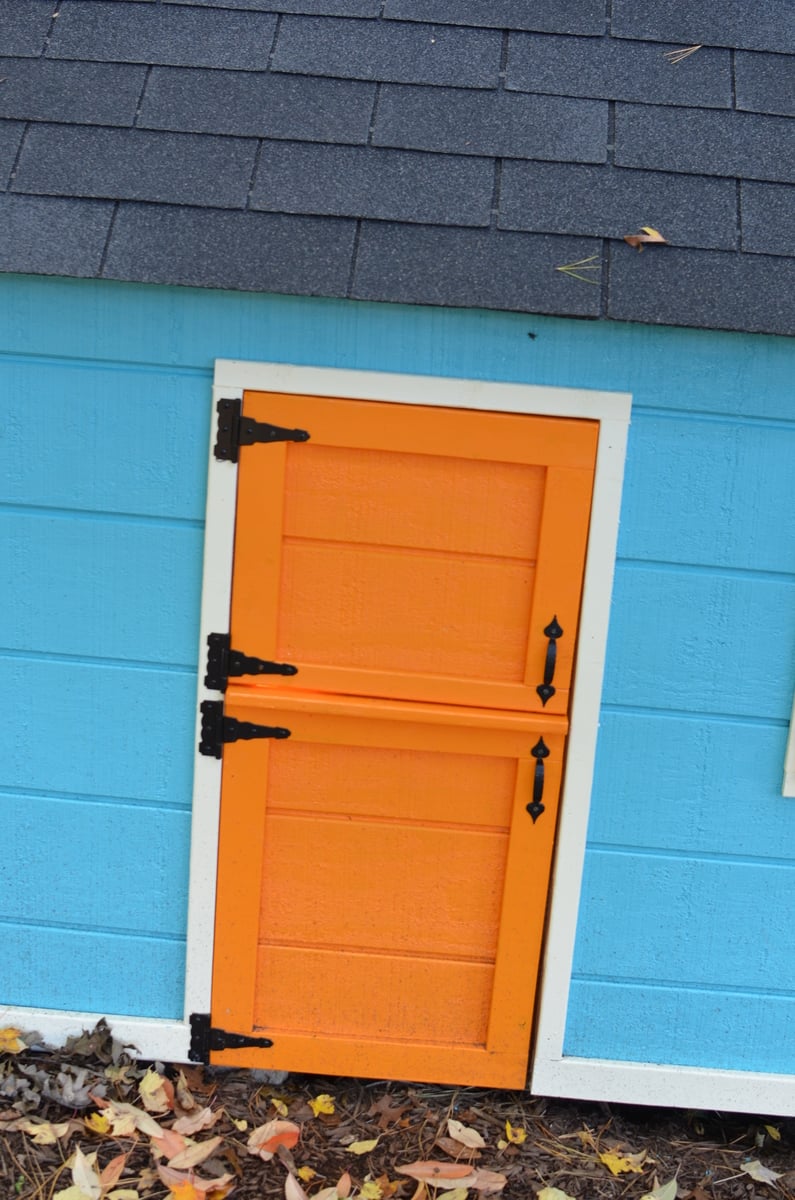
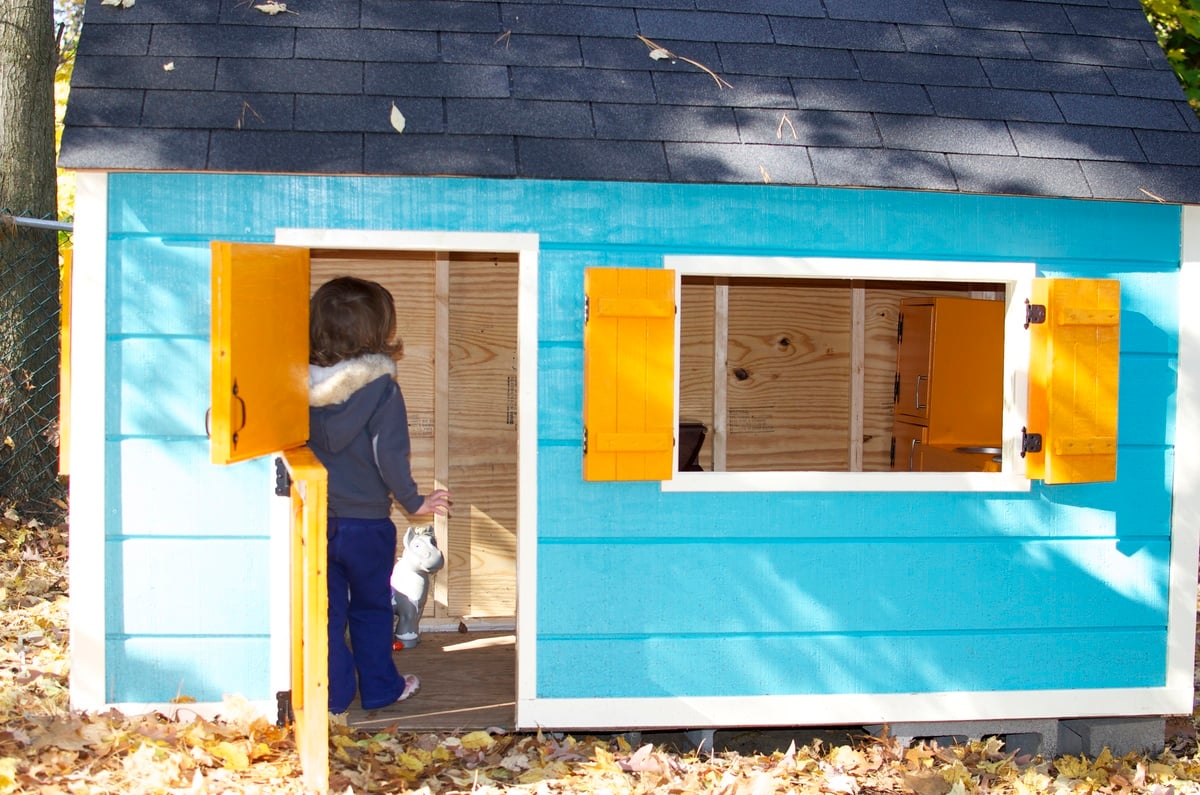
Olivia's Playhouse, built by mommy and daddy, though she did "help." Super-thankful to Ana for her awesome plans and making all this possible for our Little One. Modified the door to make it "barn style" which opens top/bottom. In the spring, plan on adding a small front porch/deck and railing.
Mon, 03/23/2015 - 13:15
Loving all the little details! Great job, thanks for sharing!
Sat, 05/14/2016 - 08:02
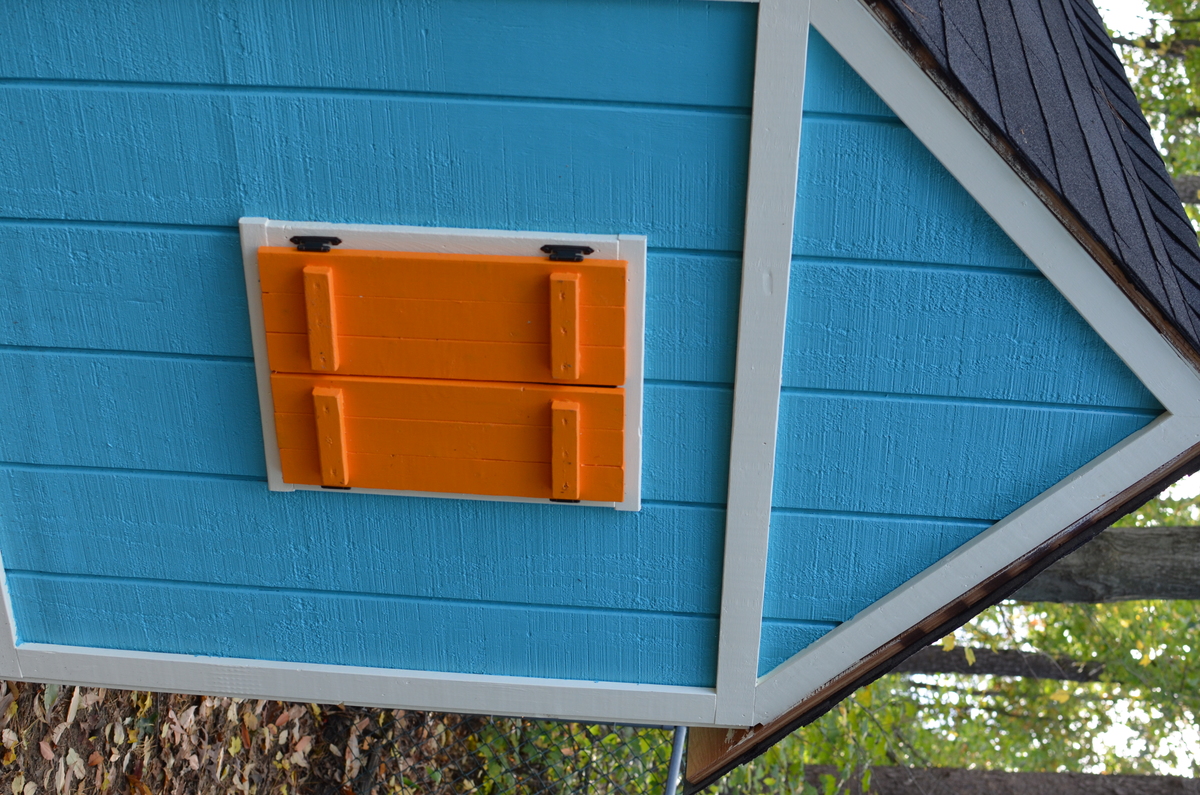
I love your playhouse. Would you happen to have the dimensions for the shutters? They look amazing! [email protected]
Sat, 05/14/2016 - 08:02
I love your playhouse. Would you happen to have the dimensions for the shutters? They look amazing! [email protected]
Sat, 05/14/2016 - 08:02
I love your playhouse. Would you happen to have the dimensions for the shutters? They look amazing! [email protected]
Sat, 05/14/2016 - 08:02
I love your playhouse. Would you happen to have the dimensions for the shutters? They look amazing! [email protected]
Sat, 05/14/2016 - 08:03
I love your playhouse. Would you happen to have the dimensions for the shutters? They look amazing! [email protected]
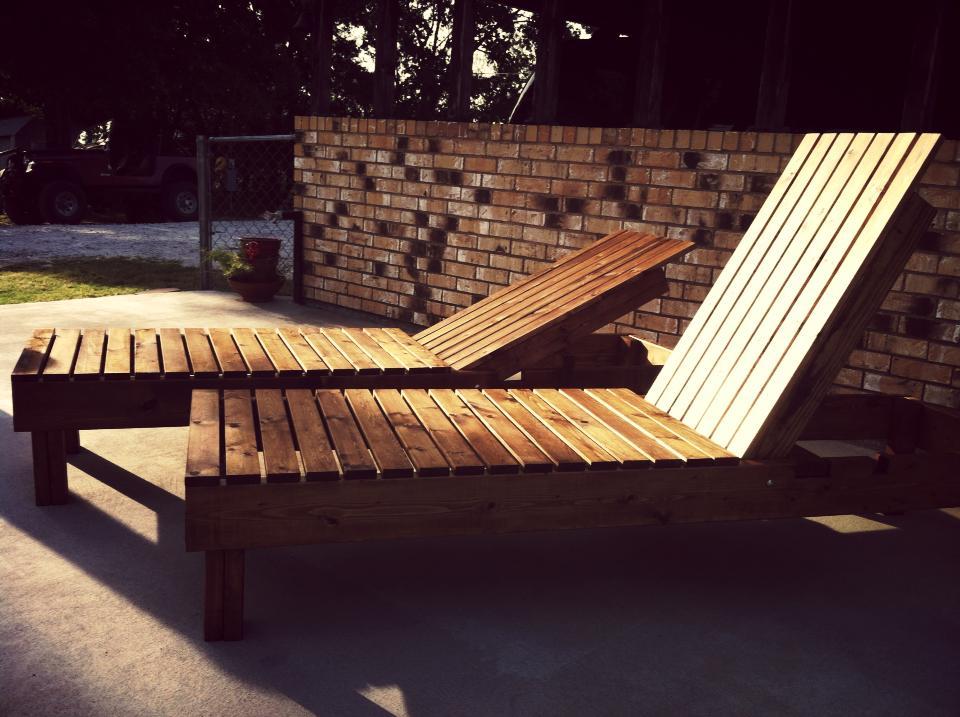
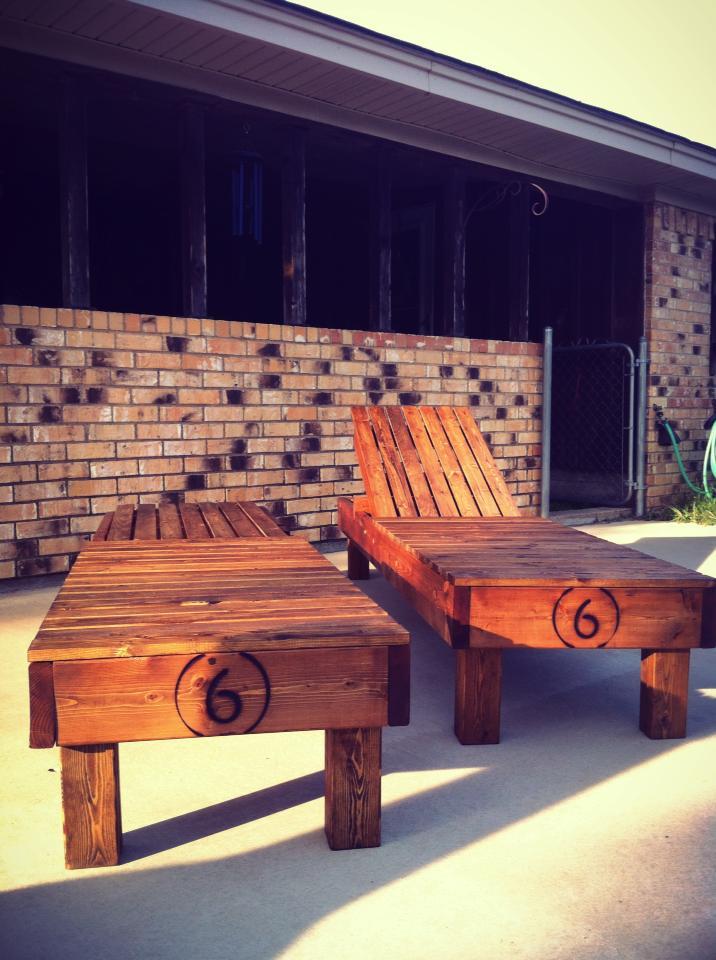
I used the plans for Ana's $35 Wood Chaise Lounge plans, but changed the frame to the 2x6 boards to match a loveseat & two chairs that I've previously built. My husband helped me with the notches, but now I think I can do them on my own. The chairs are so comfortable, even without cushions.
Sun, 05/17/2020 - 15:00
How did you get the stop block to fit using the updated 2x6 plans?
Your plans made this project so much easier. We love it and have gotten a lot of compliments for it.

Fri, 06/12/2020 - 11:05
LOVE the attention to decorating details! This is beautiful. Thank you for sharing!
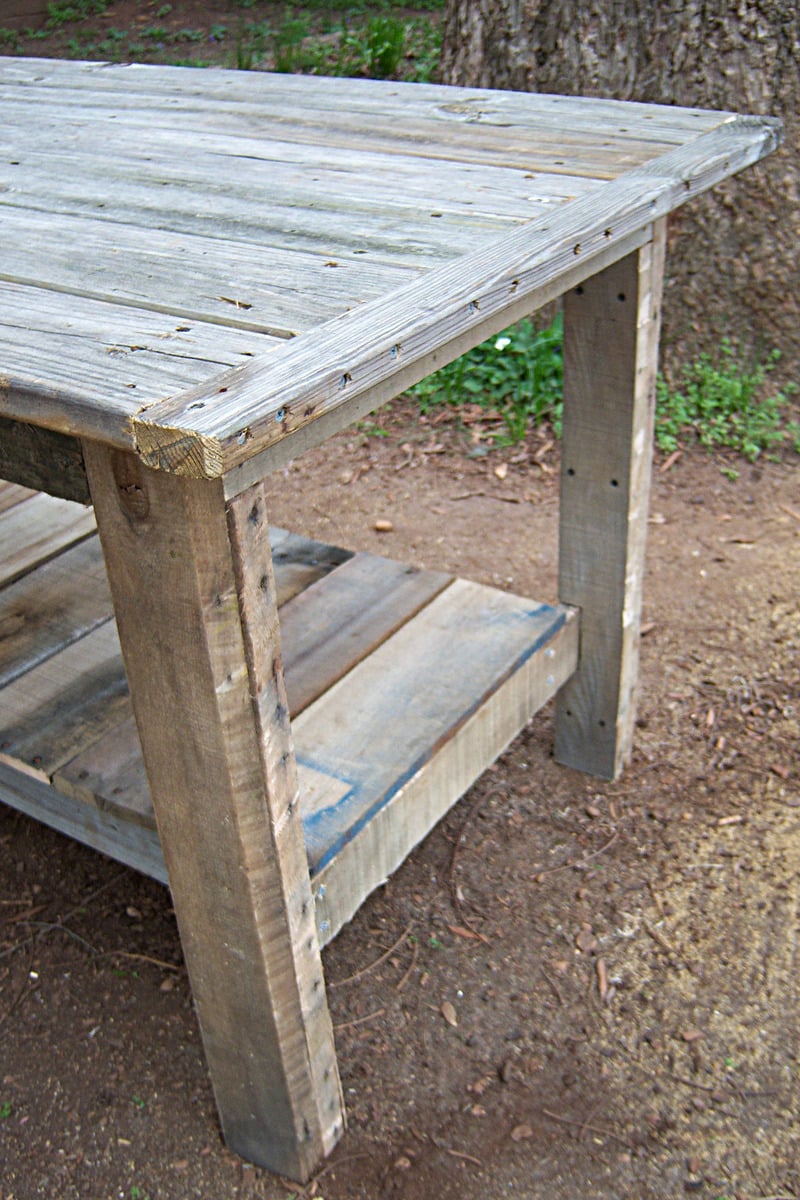
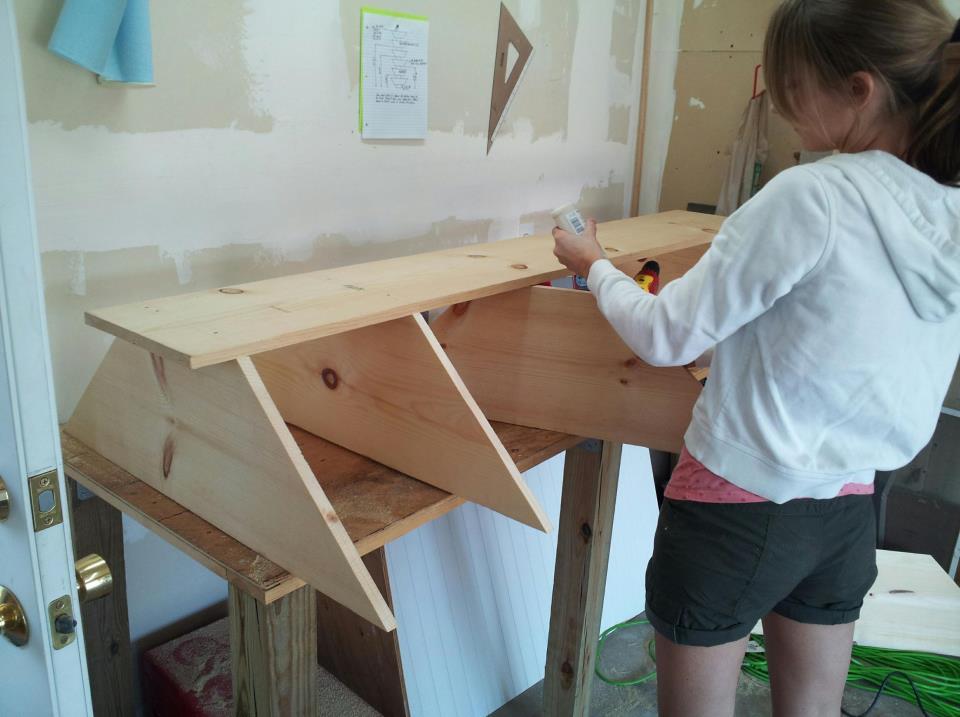
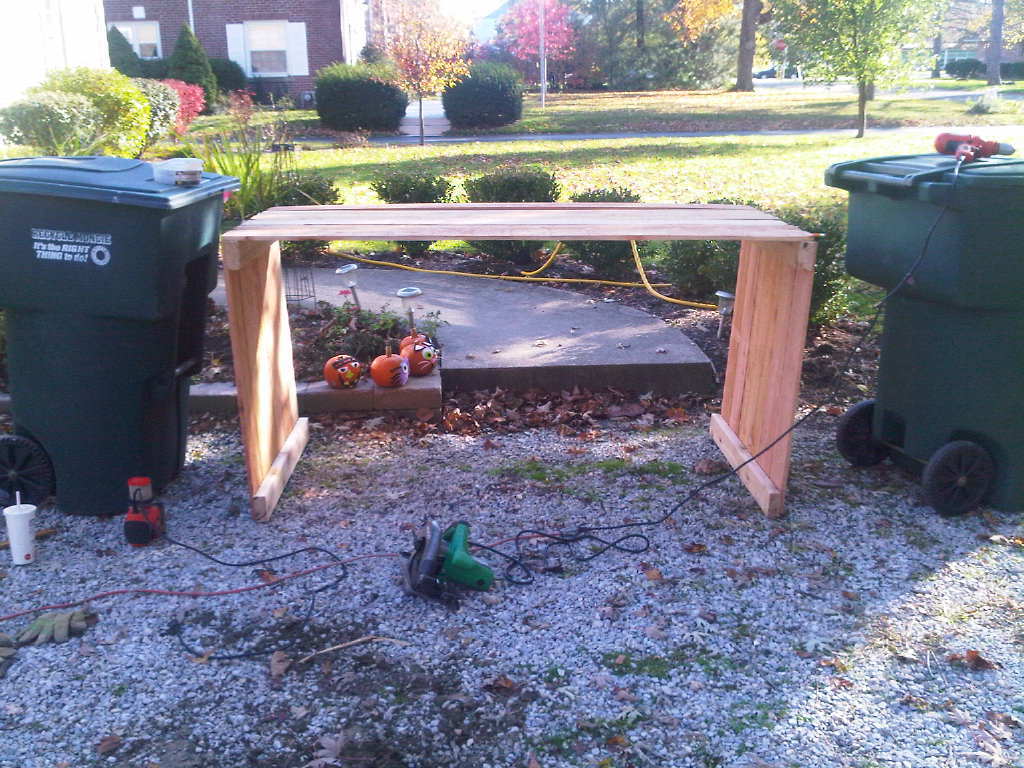
I am starting to work on more and more projects and I'm limited with space. I needed a worktable that could double as a backyard dining table (should the occasion arise). We have been planning to build the farmhouse table for a while now, so this was a great opportunity to build a prototype. I did some repair work for a friends deck and she gave me the leftover decking material. This became my table top. I purchased 4 2x4's at our local Habitat for Humanity ReStore for 50 cents each (this was the only money spent on this project). While I was at the ReStore I also picked up 4 pallets (they are free). After cutting them apart, the 2x4s from the pallets became the table legs and the 1x4's & 1x5's from the pallets became the shelf underneath. The shelf has been great for holding extra tools while I'm working on projects. My daughter likes to stack her toys on it too! This was a super quick and easy build. My wife even suggested we just refinish it and bring this one inside!
As always, I have to give thanks to Ana for such great plans!


Comments
Ana White Admin
Wed, 08/02/2023 - 10:42
Superb first project!
Thank you for sharing, so happy you went for it! Can't wait to see what you build next.