Community Brag Posts

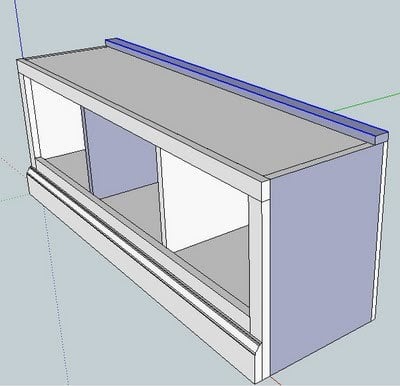
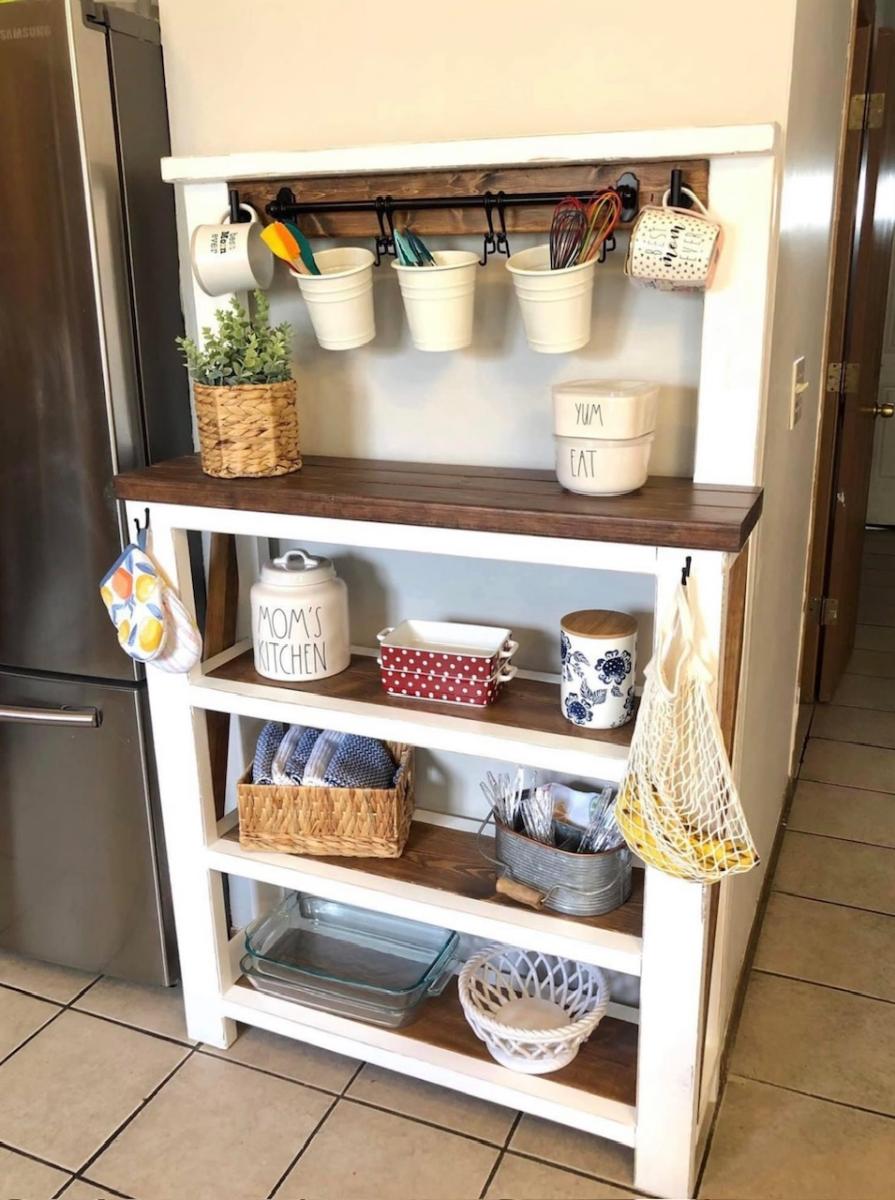
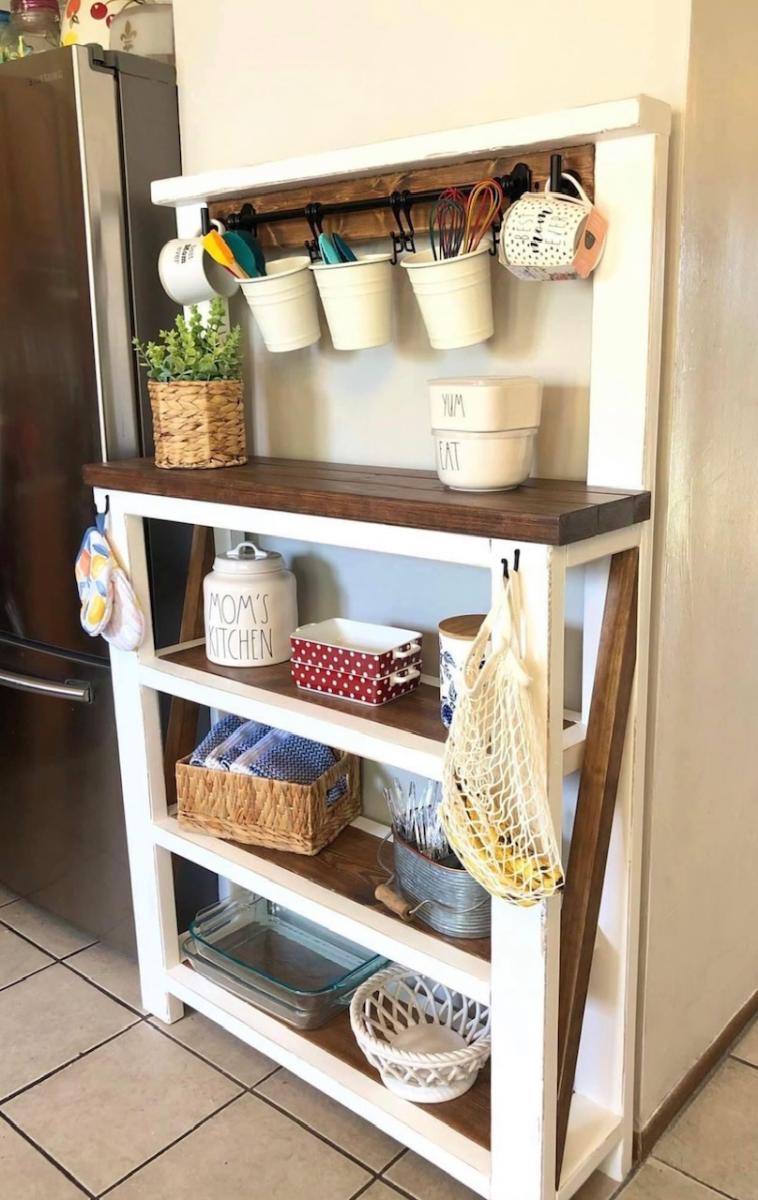
Ultimate Work Bench using Ana's plans

Submitted by Wendy KT on Mon, 08/31/2020 - 08:30

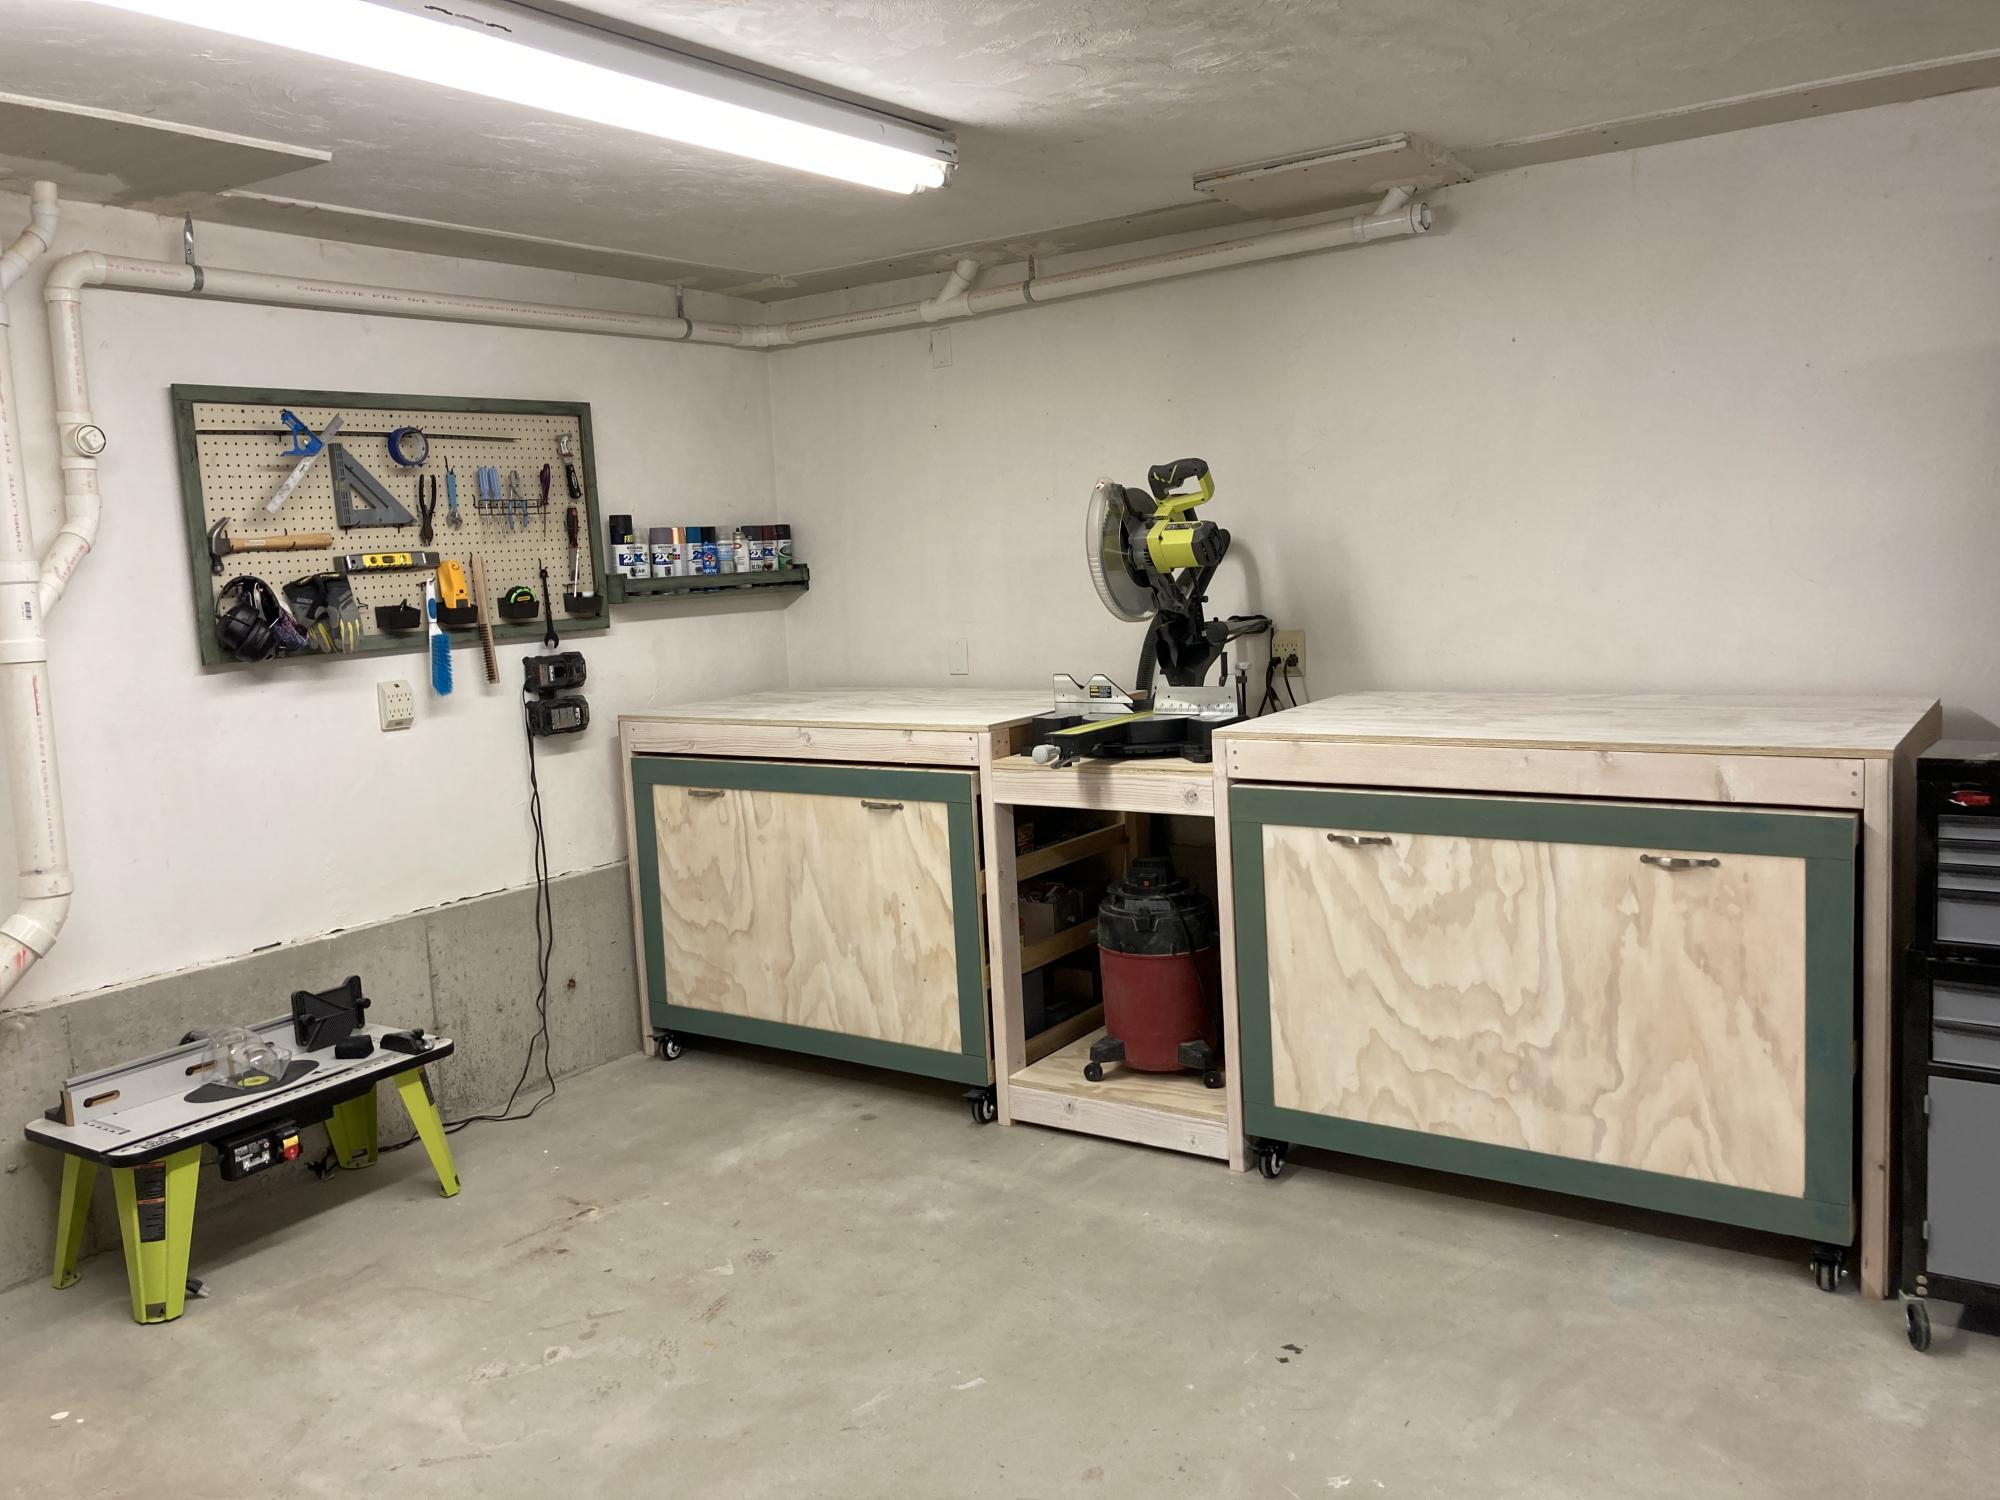
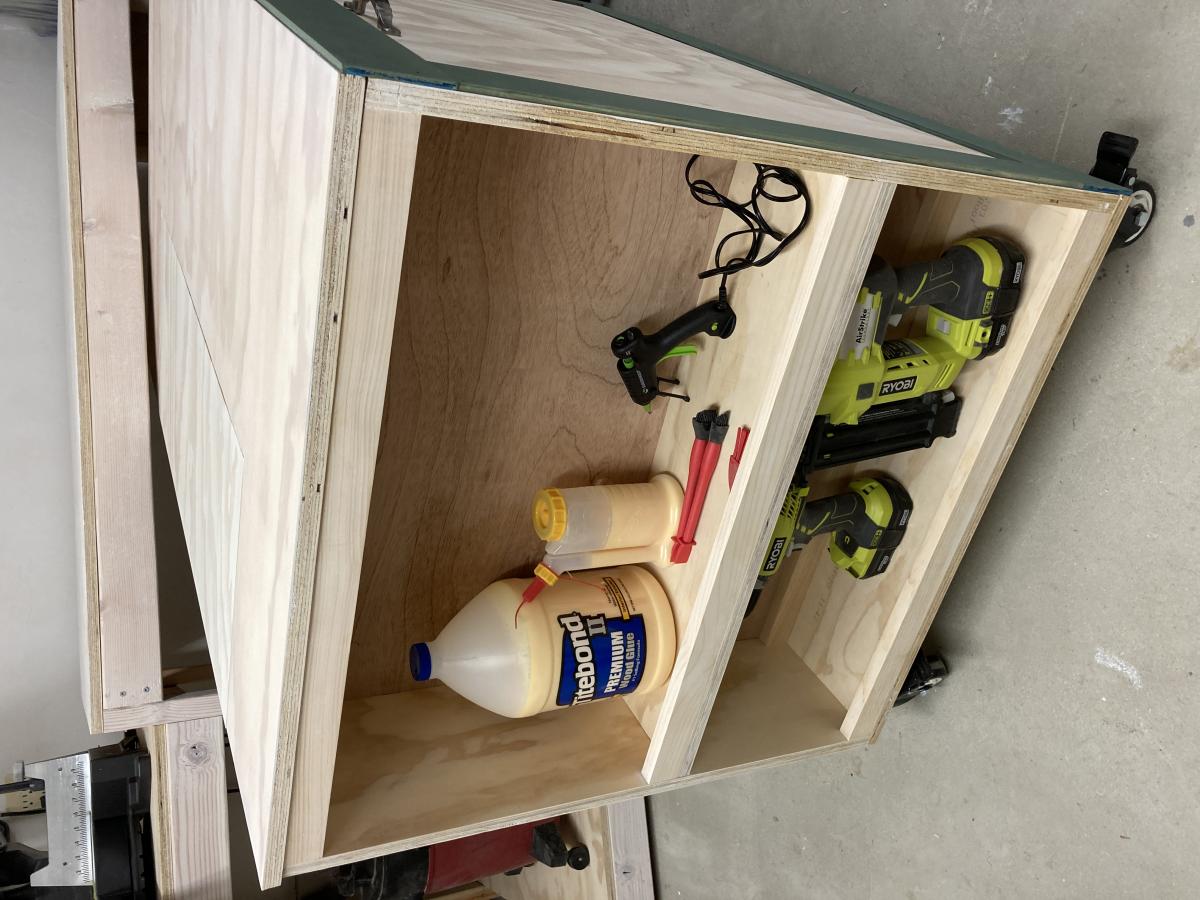
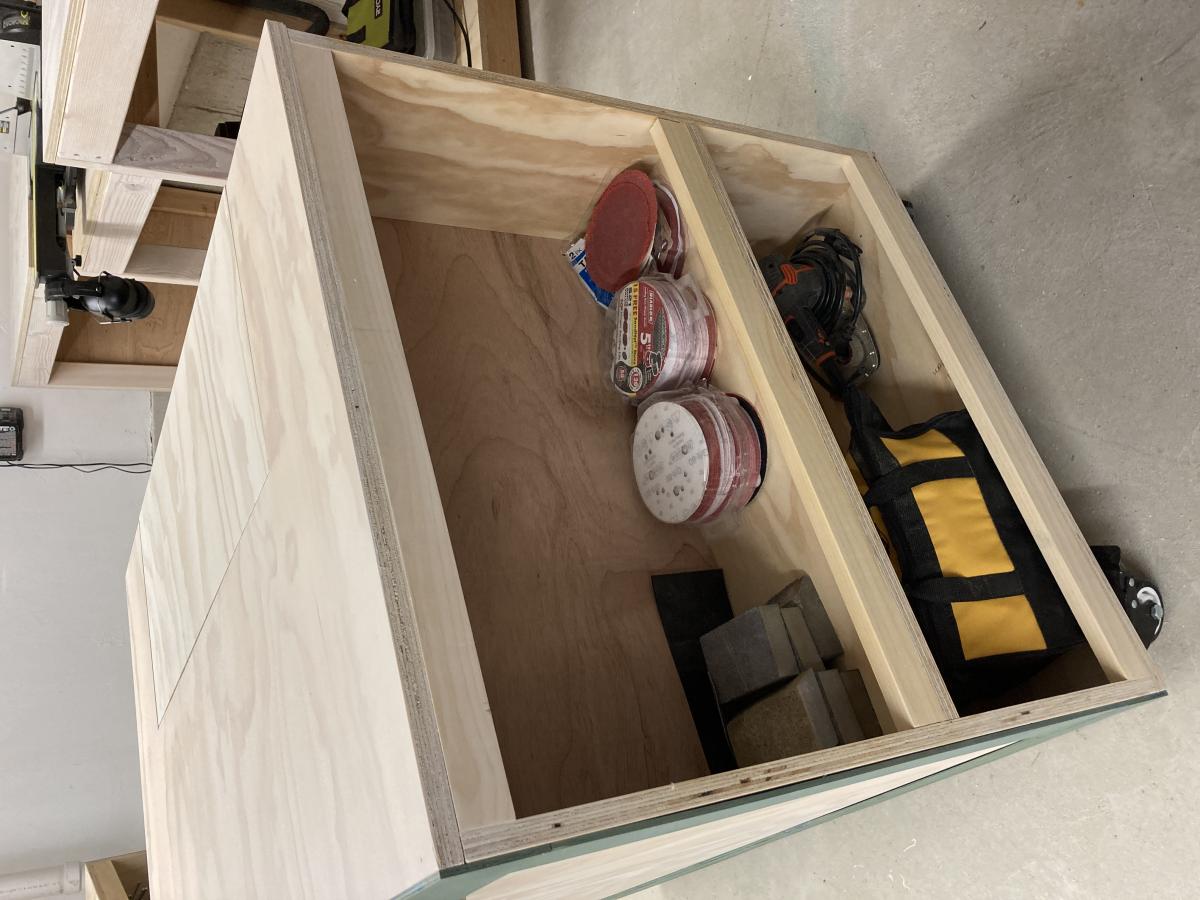
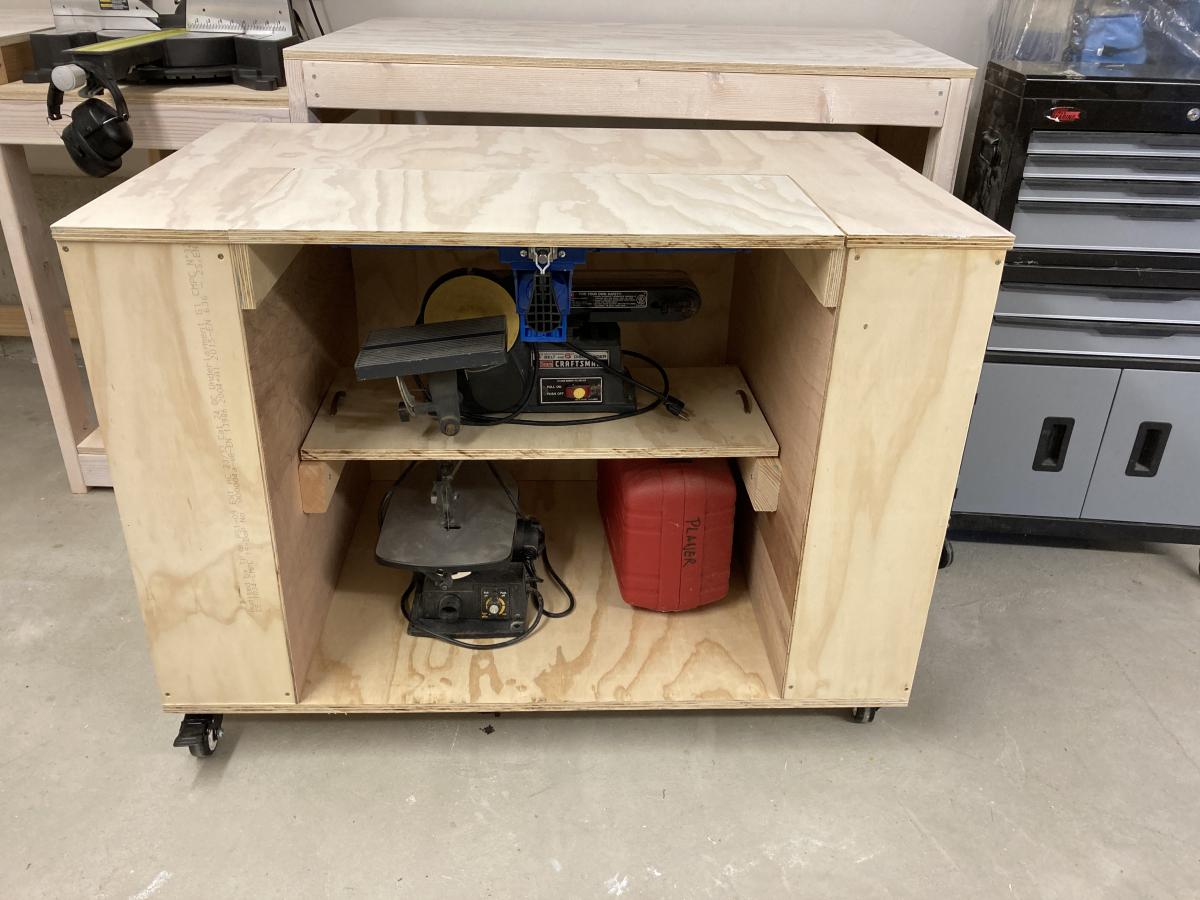
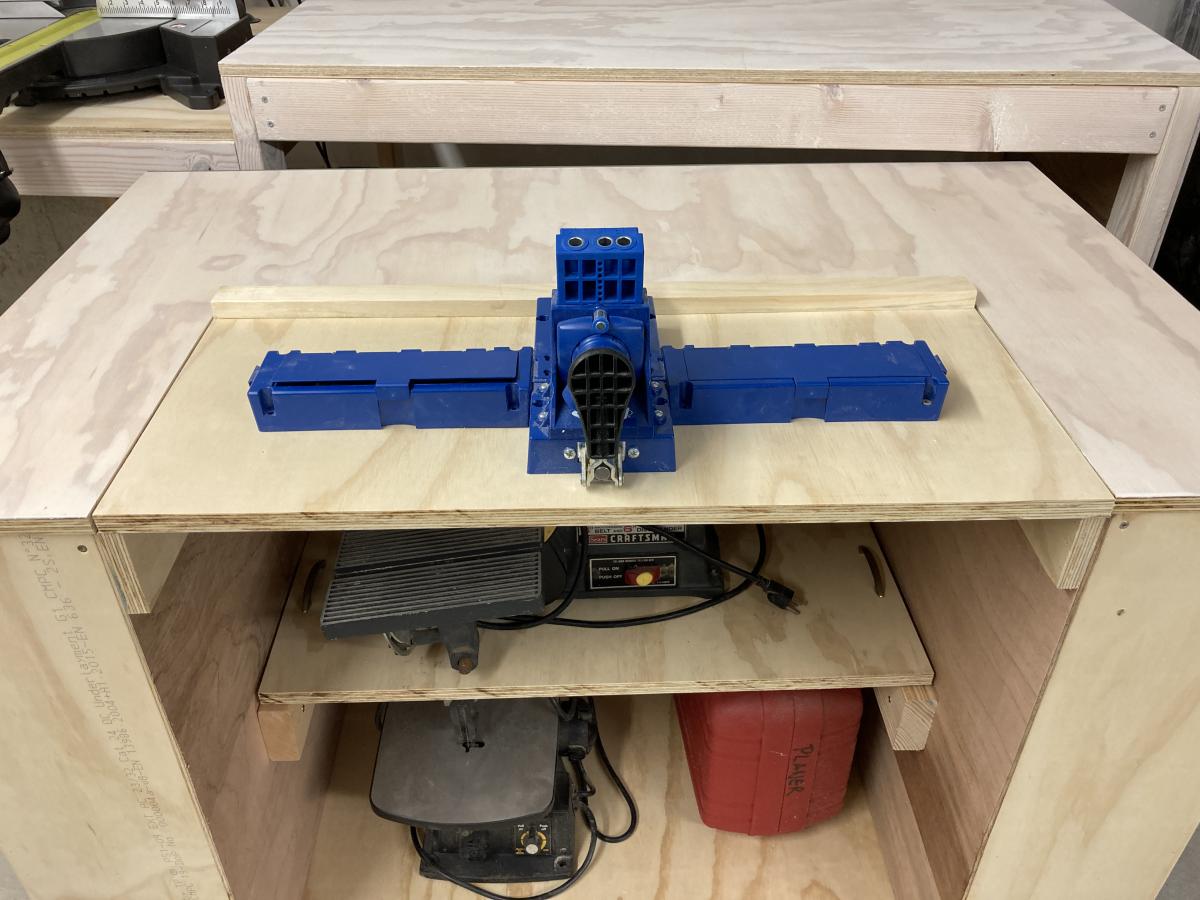
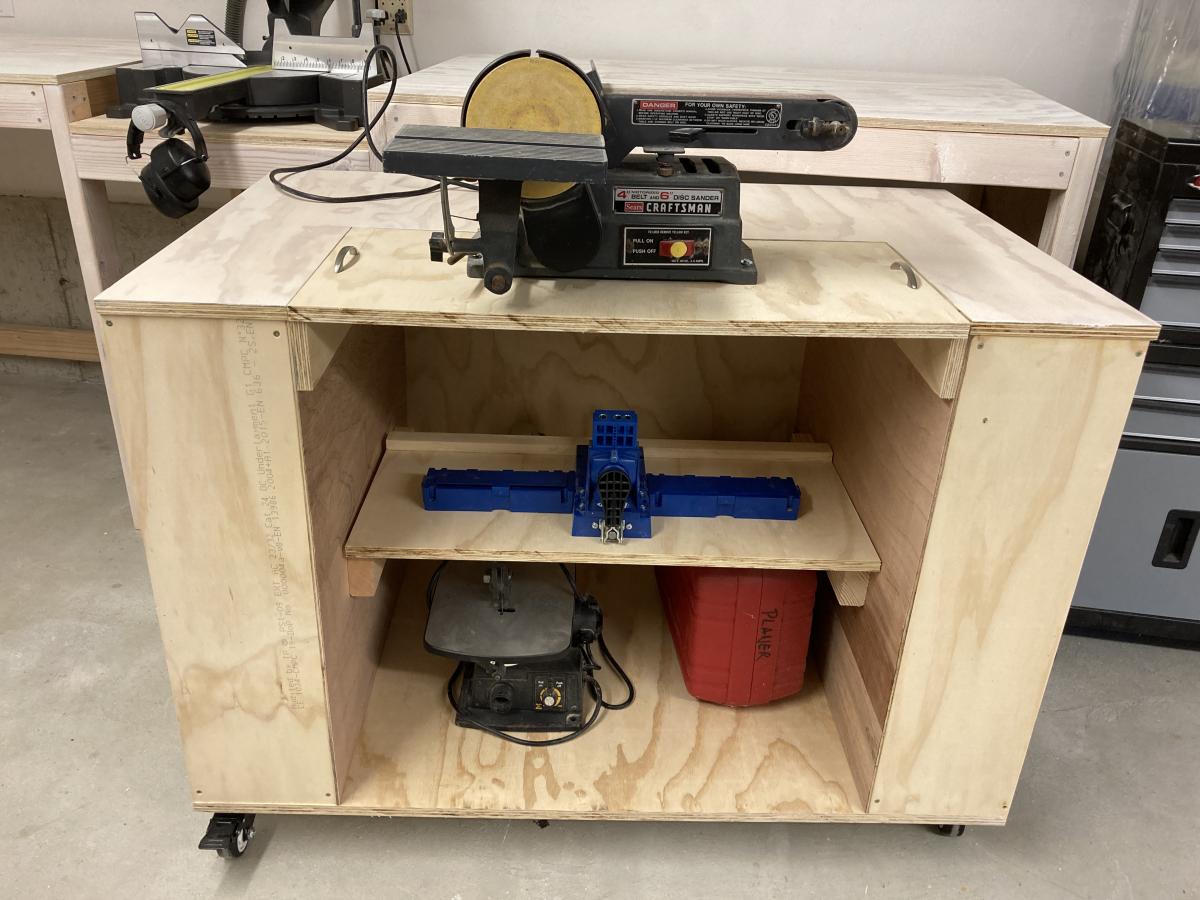
When I first saw Ana's Ultimate Work Bench I was blown away. I *had* to make this. I love how neat the garage looks when everything is put away.

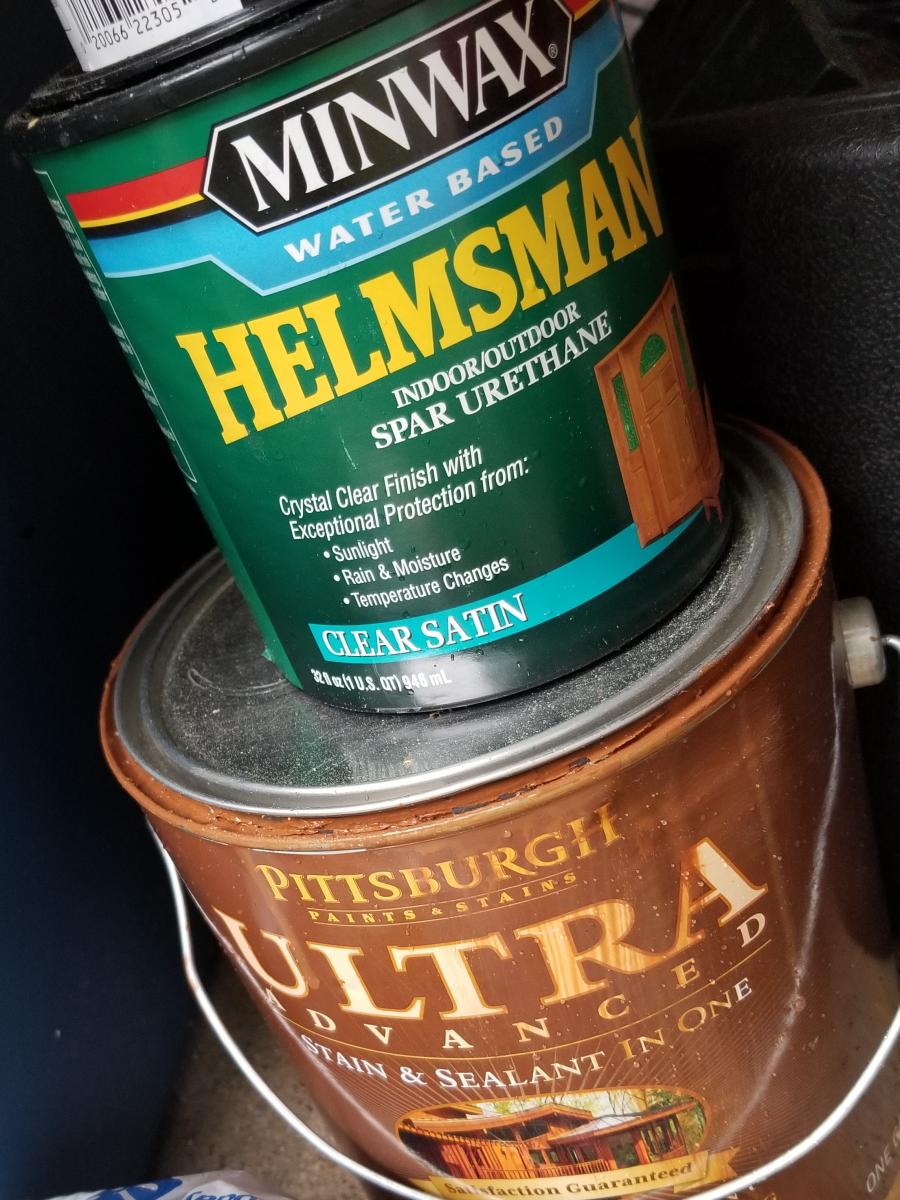
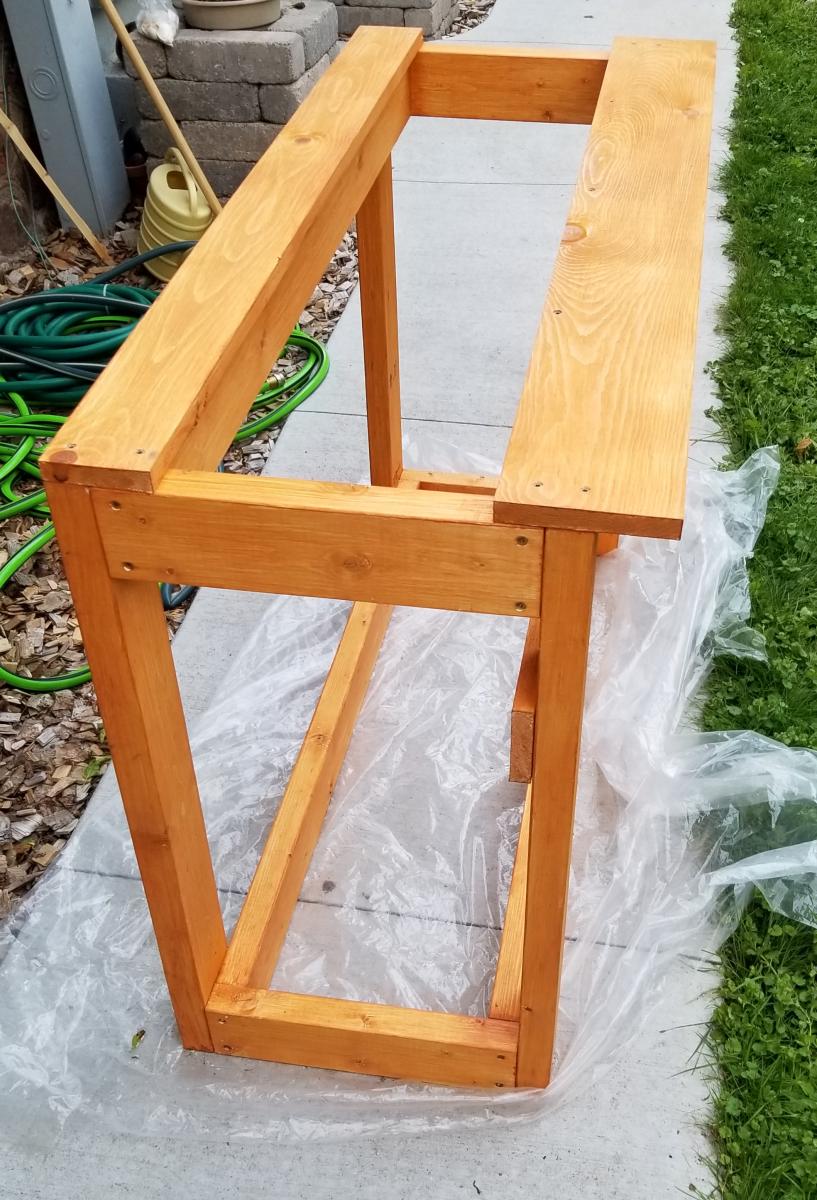
I had to make a few extra cuts in order to allow room for my table saw fence, but other than that the only thing I did differently was to pretty it up using a white gel wood stain that I sealed with finishing paste. I also added trim using the leftover 1/4 inch plywood.

Thank you for being such an inspiration, Ana. I love your plans!

Estimated Cost
$375
Estimated Time Investment
Week Long Project (20 Hours or More)
Recommended Skill Level
Beginner

Basement Storage

Submitted by Anonymous (not verified) on Tue, 12/27/2016 - 11:44

Thanks for the instructions! Here's my version. I haven't built much of anything before, but I needed it in my basement to handle kids' stuff. My version is 18 feet long. I combined a 12-foot and 6-foot 2x4 to get that length, which meant less cutting, which I had done at Lowe's (for free). I used the 6-foot 2x4s throughout the shelf to ensure it was strong (in other words, I didn't want a 12-foot "section" and a weaker 6-foot "section" added on).


I was able to get everything in my car but the ride home was slow. I also had to use my egress window to get the 12-foot boards in the basement.


Total cost for me was about $170 including a couple boxes of screws and wood glue. I could've easily spent double the cost on store-bought shelving. Thanks for the plans!

Estimated Cost
$170
Estimated Time Investment
Day Project (6-9 Hours)
Finish Used
None
Recommended Skill Level
Starter Project

Coffee table

Submitted by Anonymous (not verified) on Thu, 01/21/2021 - 16:59

My second ever project my wife said I could do followed your plans are use pocket hose after asking about using them and you sent me a link on how to use it. I did not use the X instead my wife wanted me to Make a cross so it would go with the crosses in our living room thanks for the plans.

Built from Plan(s)
Estimated Cost
$56.00
Estimated Time Investment
Weekend Project (10-20 Hours)
Finish Used
Are used a minwax would finish and then I use up oil based polyurethane semi gloss from Behr
Recommended Skill Level
Beginner

Comments

Adirondack Chairs

Submitted by Anonymous (not verified) on Tue, 02/09/2021 - 08:09

I wanted to buy Adirondack for comfortable lounge chairs but they are so expensive! Came across these plans and it took a little bit of trial and error but they turned out great! Completed 6 chairs total and they are super comfortable and look great!

Estimated Cost
$70 per chair
Estimated Time Investment
An Hour or Two (0-2 Hours)
Finish Used
Stain
Recommended Skill Level
Starter Project

Comments

Seasonal And Holiday

Modern Adirondack Chairs and Adirondack Table

Submitted by jer727 on Mon, 08/30/2021 - 12:18

This is one of my first wood working projects I have accomplished and these two plans were some that I really enjoyed making.

Comments

Seasonal And Holiday

Firehouse Playset

Submitted by vic b on Fri, 05/03/2013 - 19:03

I love making thing for our son. i document most of it at http://madeatthisplace.blogspot.com.au/

Our son has a lot of Lego, especially fire engine Lego.
It was spread out everywhere and we needed to contain it.

This fire station playhouse was perfect.

I added a ramp so the cars and trucks could get up to the top level and garage doors on one side as our house is more like a garage then a fire station.

I used scrapbooking paper on the upper level walls and painted a H on the roof for the helicopter. (or in our case a plane).

Built from Plan(s)
Estimated Cost
$20
Estimated Time Investment
An Hour or Two (0-2 Hours)
Recommended Skill Level
Beginner

Comments

rhonit

Mon, 05/06/2013 - 04:31

Awesome job!!! I don't see much built for boys and this is just an awesome playset, I will defiantly be doing something like this for my grandson. I especial like that it's up off of the floor.

How to Build Simple Raised Garden Beds

Starting with Ana's simple $10 raised garden plans, we built ours to be part of our experiment: Growing Vegetables in Our Driveway. Because our boxes are visible from the street, we made them a bit fancier and sturdier than we would have if they were hidden away in the backyard. An easy, afternoon project - with delicious results!

Estimated Time Investment
An Hour or Two (0-2 Hours)
Finish Used
none
Recommended Skill Level
Starter Project
Seasonal And Holiday

She Shed - Guest Room, Craft Room, Office

Submitted by Chriss45 on Tue, 01/23/2018 - 08:18

I needed an office and also a guest room so i built a she shed and all the furniture.

Recommended Skill Level
Advanced

Comments

junesummer21

Thu, 01/25/2018 - 06:27

I love your murphy bed idea and would love to have plans for it. I too am looking for a guest bedroom and craft area and I know this would work in my space.

Chriss45

Mon, 02/05/2018 - 16:20

I didnt really have a plan when I was building my Murphy bed, I can do a sketchup plan for you if you would like. I used boat chair swivels instead of hinges and there is a YouTube video on how to do this. 

Chris

Nurserene62

Thu, 06/24/2021 - 23:11

Hi Chris! I would love to have a copy of the sketch up of this. I have a small she shed/guest cottage I would live to duplicate this in. Thanks in advance.

cgself12

Mon, 11/08/2021 - 14:18

Hi Chris!
I know I'm coming late to this party but I just found your shed and I adore it. You did an amazing job and I cannot express how impressed I am! I would also like a sketchup plan of both the murphy bed and the adjoining side cabinets. Great job!

Kim Daigle

Thu, 06/06/2019 - 10:59

I absolutely love everything about this she shed!!  I would be interested in a sketch up of the murphy bed as well as the cabinets next to it.  I would at least like to know what the dimensions of it all is.  You did an amazing job!  It's so beautiful!

mcocooper11

Tue, 06/25/2019 - 15:14

Me too!! I built a horizontal Murphy bed so I have that part done but I would like to see the plans for the cabinets on either side with the pull out desk!

so very cute!

Octagon Picnic Table

Submitted by Anonymous (not verified) on Sat, 04/09/2022 - 10:23

I just finished this octagon picnic table as per your plans
the 2x6 are all clear Western Red Cedar and the skeleton is
Douglas Fir. I think it turned out astonishingly excellent.

Thanks for the inspiration Ana.

Seasonal And Holiday

Princess Play Loft Bed

Submitted by fsmumford on Wed, 06/22/2011 - 09:26

I love the play loft bed, but wanted to add a princess twist for my 5 year old's birthday. I found melamine plywood, which helped in the finishing since it was already white. It was a lot of work, but so worth it! I think the kid's favorite feature so far is the slide, which has seen a ton of use :) My favorite feature is all the storage! Thanks so much Ana! If it wasn't for you, there is no way I would have had the courage to tackle a project like this!

Built from Plan(s)
Estimated Cost
$350
Estimated Time Investment
Week Long Project (20 Hours or More)
Finish Used
The plywood was already white, but after filling the holes I went ahead and painted the whole thing white so that it would all be the same color.
Recommended Skill Level
Intermediate

Comments

Ari Z (not verified)

Thu, 06/23/2011 - 11:12

What a fantastic design for your daughter! She must pretend she's Rapunzel every time she gets into bed. The little cubbies to store toys were an excellent idea.

fsmumford

Mon, 07/11/2011 - 19:32

I started out by building the back and outer walls just like the stairs, just slightly narrower to fit my space and the side walls longer, coming out into the room more since the slide sticks out into the room farther. I then also did the top platform of the slide like the top step, having the top stair trim, cleats, and plywood support underneath the front of the platform. Then, I did some calculating to figure out how long to make the slide and what angle to use. I wanted it to come out into the room farther than the rest of the bed so that the slide wasn’t too fast, but I didn’t want it to stick out too far. So I used a piece of melamine board (nice and slick wood) that was 56” long. At the bottom of the slide, I put a piece of plywood that went from the ground up about 8 inches, so that the end of the slide would be up off the ground. So the slide ended up dropping a total of 34”, from the platform down to the plywood 8 inches off the ground. This made a fairly quick slide, but perfectly doable for my little ones. Then, before mounting the slide, I attached 1x2’s to each of the sides of the slide under where the slide was to be to support the slide from beneath. Then, I used a kreg jig to attach the slide to the sides and then screwed the slide into the supports. This made a very stable slide. If you have any more questions, I would be happy to try and help. I hope I’ve made sense ☺

Guest (not verified)

Sat, 07/16/2011 - 15:45

Hello Slide! My daughter screamed when she saw this bed...can you please tell me how to build it all? I would love it if you could share...

fsmumford

Sat, 07/16/2011 - 20:54

I'll try :) I started by building the towers. It was just deciding how wide I wanted them (I did one narrower and one wider to use like a window seat). Each tower is essentially three sides of plywood with one having shelves in it and the other having one shelf to make a seat. I also put a shelf at the bed's height so that my daughter can use it to put things when she is in bed, such as her alarm clock. Then I knew how long I needed the bed to be and how wide each of the towers were, and I made the middle front section to be the remaining width. The rest of the bed is very similar to the Play loft bed with storage steps, but instead of making the steps storage, I just attached them down and then cut out on the inside underneath the stairs to allow access for storage from within the castle. I used a jig saw to cut out the window. The top pink parts of the tower are just decoration, so I bought a thin piece of plywood and used a jigsaw to cut the up and down cuts. And then on another post I talked about making the slide. I hope I helped some :) If you have any more questions, feel free to ask and I will try and help.

Guest (not verified)

Sat, 10/01/2011 - 12:53

*I'm willing to pay you for your help*

I wish to start making this bed, but need some help. I'm novice and need more instructions. If I were to email you measurements, could you elaborate more in depth?

Please respond.

Thank you for your consideration.

fsmumford

Thu, 10/06/2011 - 10:04

I would love to help in any way I can (free of course!) I have wanted to do the plans on the computer, but haven't been able to figure out the program :( So feel free to ask away and I'll try and help. You can post questions here, or email me at [email protected].

jkcd513 (not verified)

Tue, 07/19/2011 - 13:01

I was wondering what the dimension for your room are (especially the wall the bed is against. Just trying to figure out if the slide idea would work in our little room. Also would you mind telling me how wide the the n_n_n (That is my attempt to show the part of the castle that has the little rectangles/squares and then a space and another rectangle/square (the pink and purple parts of the bed) I have been drawing some trying to get spacing right and they never seem to look right, but your spacing looks great. And is the purple part that has the shield painted on it a seperate piece from the rest or is it cut out with the main part of the bed- if it's seperate how wide across and length down is it? We are in the process of attempting a similar bed for our little one and I have been playing around with ideas and so far yours looks like what I have been trying to show my husband in my drawings, only yours looks a lot closer to what I had in my mind than what I have on paper. Any help would be appreciated.

fsmumford

Mon, 07/25/2011 - 09:27

The wall the bed is against is 125.25", so a little over 10'. I still have a few inches of wall left and wish I had made the slide a little wider (the slide I made is 14.5" wide), but thought I would be tighter on space. For the pink on top of the tower, I first used 1 x 3 that I attached to the front of the tower. Then I used 1/8" plywood for the part that I cut the up and down parts. It is 6.5" tall, but part of it sits behind the 1x3, so only 5" is visible. I then cut the plywood 3" down, 3" across, 3" up, 3" over, etc. to make that up and down look at the top of the towers. And the purple part with the shield is separate. It is again just a thin piece of plywood that I nailed to the bed. When I put this up, part of the shield thing was sticking above the bed and I didn't think anything of it until someone broke off part of it. So now I've added a piece of wood behind the shield (the same width of the shield) so that it keeps the shield from being broken. The shield's overall size is 23.25" wide x 27" high. I hope this helps :) If there is anything else I can help with, please just ask. Good luck with your adventure :) !

Guest (not verified)

Sun, 08/21/2011 - 22:19

I am incredibly curious to know if I can get plans for this bed. I have looked extensively throughout various internet pages for a bed/playhouse like this. I would like to make it with a queen mattress on top. I have look through your posts and haven't gathered enough information to proceed. I am willing to pay for the plans.

Is there anything different you would do, if you did this project again?

Thank You,

Guest

Guest (not verified)

Tue, 10/18/2011 - 08:43

Hello:
First of all I have to say THANK YOU. I found the plans for the playhouse (which are fabulous) are there plans available for the princess castle?

fsmumford

Tue, 10/18/2011 - 19:54

Hey all, I added the plans for this under the plans section of this website. Please let me know if you have any questions, and have fun building!

CherylBella (not verified)

Thu, 04/05/2012 - 15:40

I would love your directions or plans to build this my little princess. Thanks for any help. Just love this bed!

Finally Built a Platform Bed!

Submitted by Anonymous (not verified) on Mon, 07/25/2022 - 10:39

I've been wanting to build this bed for awhile and finally got around to it. I made a few small changes to the plans:

-I used 2x8's instead of 2x6s, so it wouldn't be so low to the ground.
-I ripped 3/8" off of the 2x8 supports in the middle so the mattress would nest inside the frame and not slide around
-I didn't add the headboard because it seemed a bit chunky/rustic for my taste. I will come back and do something else for the headboard. Maybe a cool paneled wall with built in sconces? We'll see!

Love these plans though, appreciate it!

Comments

Reclaimed TV console

Submitted by Anonymous (not verified) on Thu, 01/21/2016 - 10:24

Built this TV console from reclaimed pallet wood. Added some tiny hairpin legs for more of an industrial look.

Estimated Cost
$150.00
Estimated Time Investment
Weekend Project (10-20 Hours)
Finish Used
Hand rubbed clear wax
Recommended Skill Level
Advanced

Kitchen Storage Shelf

Thanks to you we were able to build my mom a shelf for her kitchen with a combination of two of your plans! My mom loved the top of the “Farmhouse Potting Bench” but also wanted shelves like the “Rustic X Console Table”. We combined the two and adjusted measurements to fit our wall space. We didn’t do a complete X on the side because we wanted it with one slant, but loved how it turned out over all! 

Kayla

Cedar Garden Bed

I made this garden bed in one evening. I love it! I bought 6 6' cedar fence pickets and two cedar 1x2s. I don't have a table saw, and they wouldn't rip a fence picket for me at the store, so I had to buy the cedar 1x2's but the project was still very affordable. I wanted it a little wider than the original plan, so I just cut the 6' pickets in half for the sides.
It is 6' x 3' and I didn't bother to cut the dogears off. You probably wouldn't even be able to tell they are there. I didn't trim the top out because that would add on about $6, and I like it just the way it is.
Now, lets see if I can actually grow some plants in it!!
I'm a beginner, and this project was really easy.

Estimated Cost
$20
Estimated Time Investment
Afternoon Project (3-6 Hours)
Recommended Skill Level
Starter Project

Comments

Lisa P (not verified)

Tue, 04/03/2012 - 08:08

This is exactly how I was going to modify Ana's plans as well. Have you started growing anything yet? Looks great!

Tara Kirkland

Tue, 04/17/2012 - 20:55

Yes, I've started "trying" to grow a few things. I don't usually have much luck, but maybe.... just MAYBE this will be the year!! :)

Lindyer0523 (not verified)

Mon, 04/23/2012 - 07:13

What would you have used for the top trim?

DIY Kids Seesaw on the Cheap!

The seesaw is like a dinosaur: the extinct relic of the playground, still held in awe by kids the world over. No longer available to the public in its original form, the original seesaw is the perfect DIY project. My older daughter had been asking for one for a couple of years, and after finding the plans on Ana White’s website I was able to build one cheaply for about $50 in wood and screws. This was the perfect weekend project, and I was able to use up some leftover paint and fabric to create this nice addition to our yard.

Check out my blog post about this seesaw here:
http://sandiegocountypropertymanagement.com/diy-kids-seesaw/

Built from Plan(s)
Estimated Cost
$50-$75
Estimated Time Investment
Weekend Project (10-20 Hours)
Finish Used
Behr exterior flat paints.
Recommended Skill Level
Intermediate

Comments

Skiki Bar

Submitted by pArtpunk on Sat, 06/20/2020 - 09:15

I'm calling this a Skiki Bar which is a word play on Tiki bar. It is based on the Simple Rolling Cart design. I used my own dimensions according to the width of cross-country skis. I have a large number of these old skis for projects. They are sold for very cheap at garage sales, etc. The top of the bar is made from boards that I had removed from an Adirondack chair set, which I had made Ski chairs with. So those were already stained and they matched the stain I used on the pine 2x4 frame of this Skiki Bar. I already had a pair of wheels laying around so I only had to buy 2 more of the same size. The pictures were taken before I installed a shelf on the bottom with some scrap plywood I had in my garage.

I estimated the time to factor in how long it takes to stain all the boards and let them dry.

On the left edge I installed a Ski bottle opener I made.

I estimated my cost on what I bought that I didn't already have. I bought the pine 2x4's (also a 1x4, 1x6), Construction Screws, Stainless Steel Screws (For attaching skis), and 2 wheels.

I already had: Skis, Bar top boards, 2 wheels, deck screws (attaching the bar top boards from underneath), stain, clear coat, wood glue and tools.

My next project is to make Ski bar stools. Thanks for having a look at my design!

Estimated Cost
30
Estimated Time Investment
Weekend Project (10-20 Hours)
Finish Used
Pittsburgh Paints & Stains Ultra Advanced Stain & Sealant in One for the pine 2x4s and shelf. For the bar top boards that were already stained I applied a coat of Minwax Helmsman Indoor/Outdoor Spar Urethane.
Recommended Skill Level
Intermediate

Bright Potting Bench

Submitted by Anonymous (not verified) on Wed, 07/08/2020 - 15:37

This was my first Ana White build and I love it! Built all by myself in 4.5 hours. Decided to paint it to match the plaster in our pool since it will be located close by. I am very pleased with how quickly it came together and how sturdy it is. I did an an additional 2x4 brace in the center of each top to help keep the 1x4's straight and hopefully prevent sagging.

Estimated Cost
$100
Estimated Time Investment
Afternoon Project (3-6 Hours)
Finish Used
Exterior grade latex paint.
Recommended Skill Level
Beginner
Back