Community Brag Posts

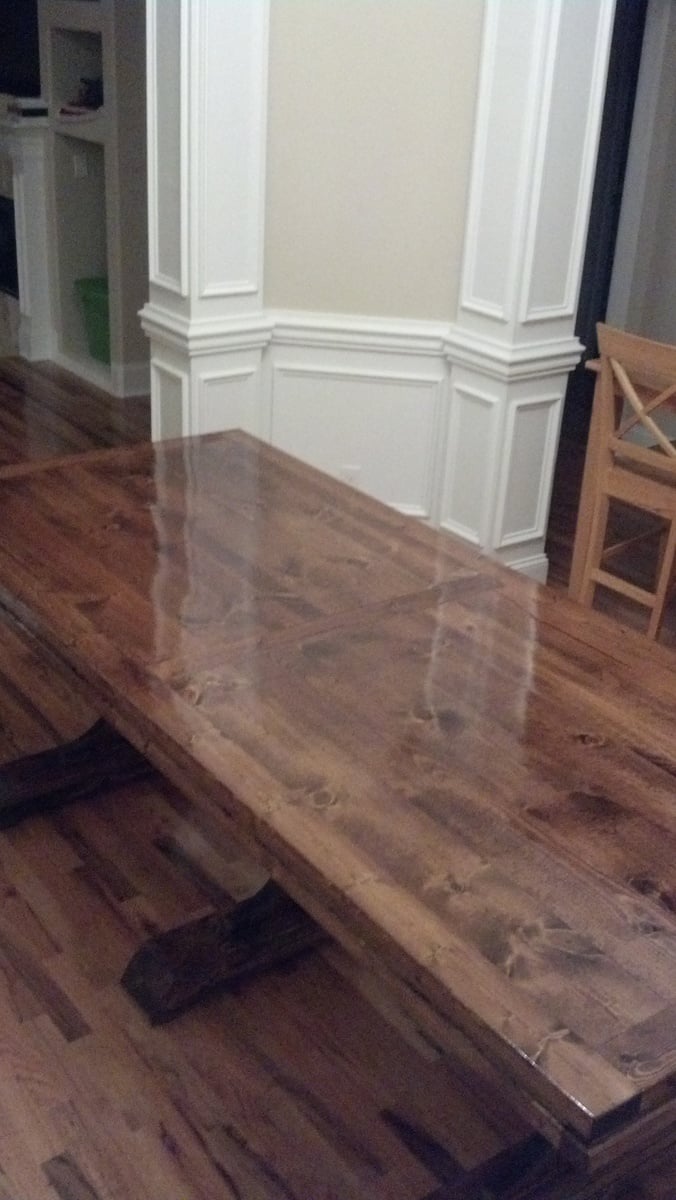
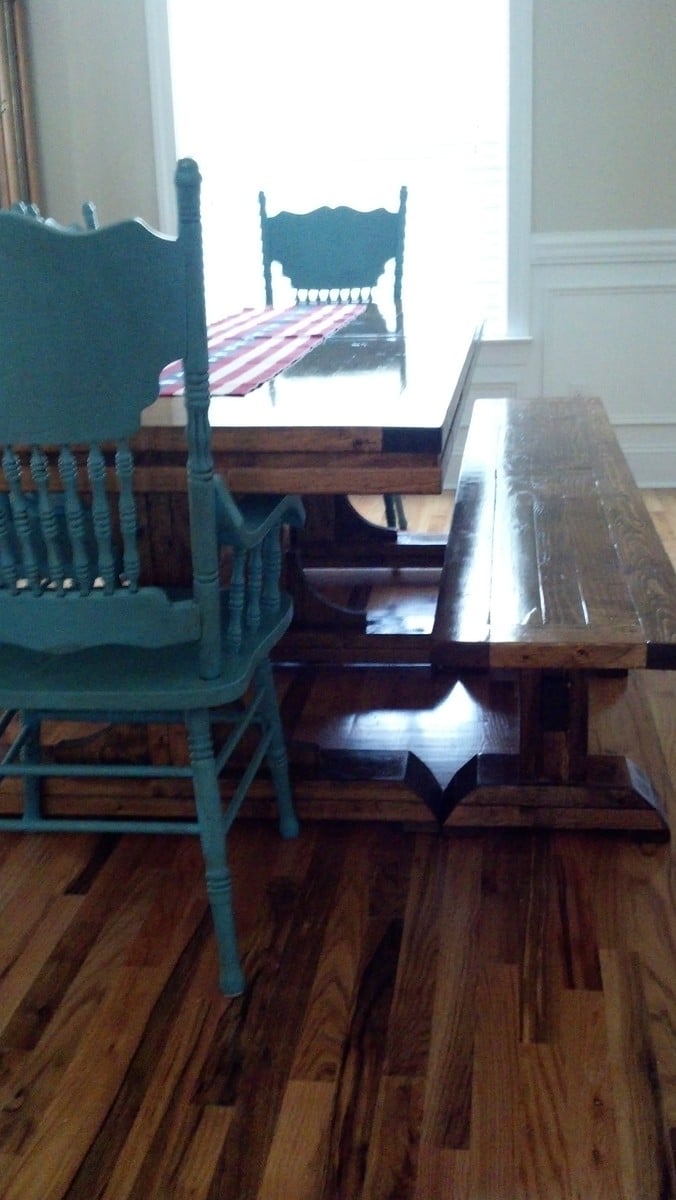
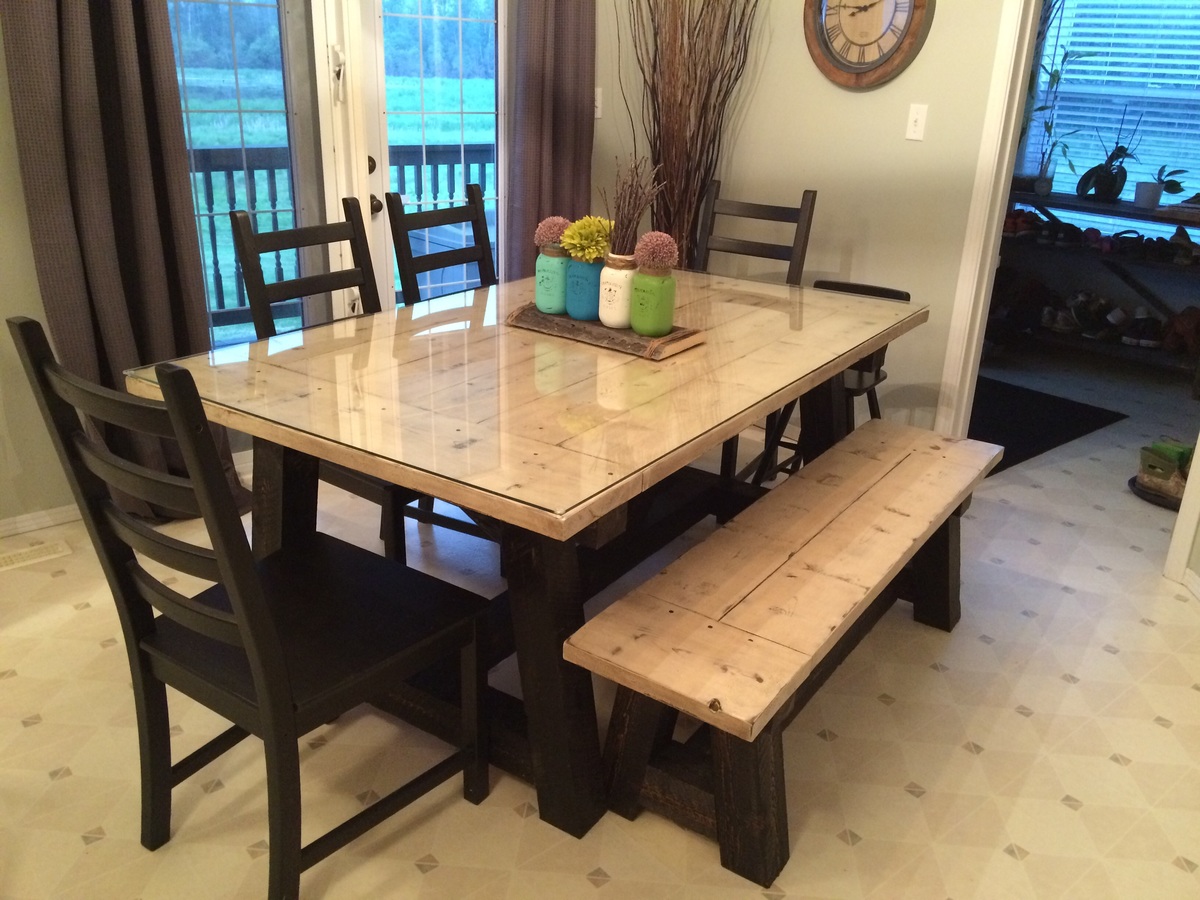
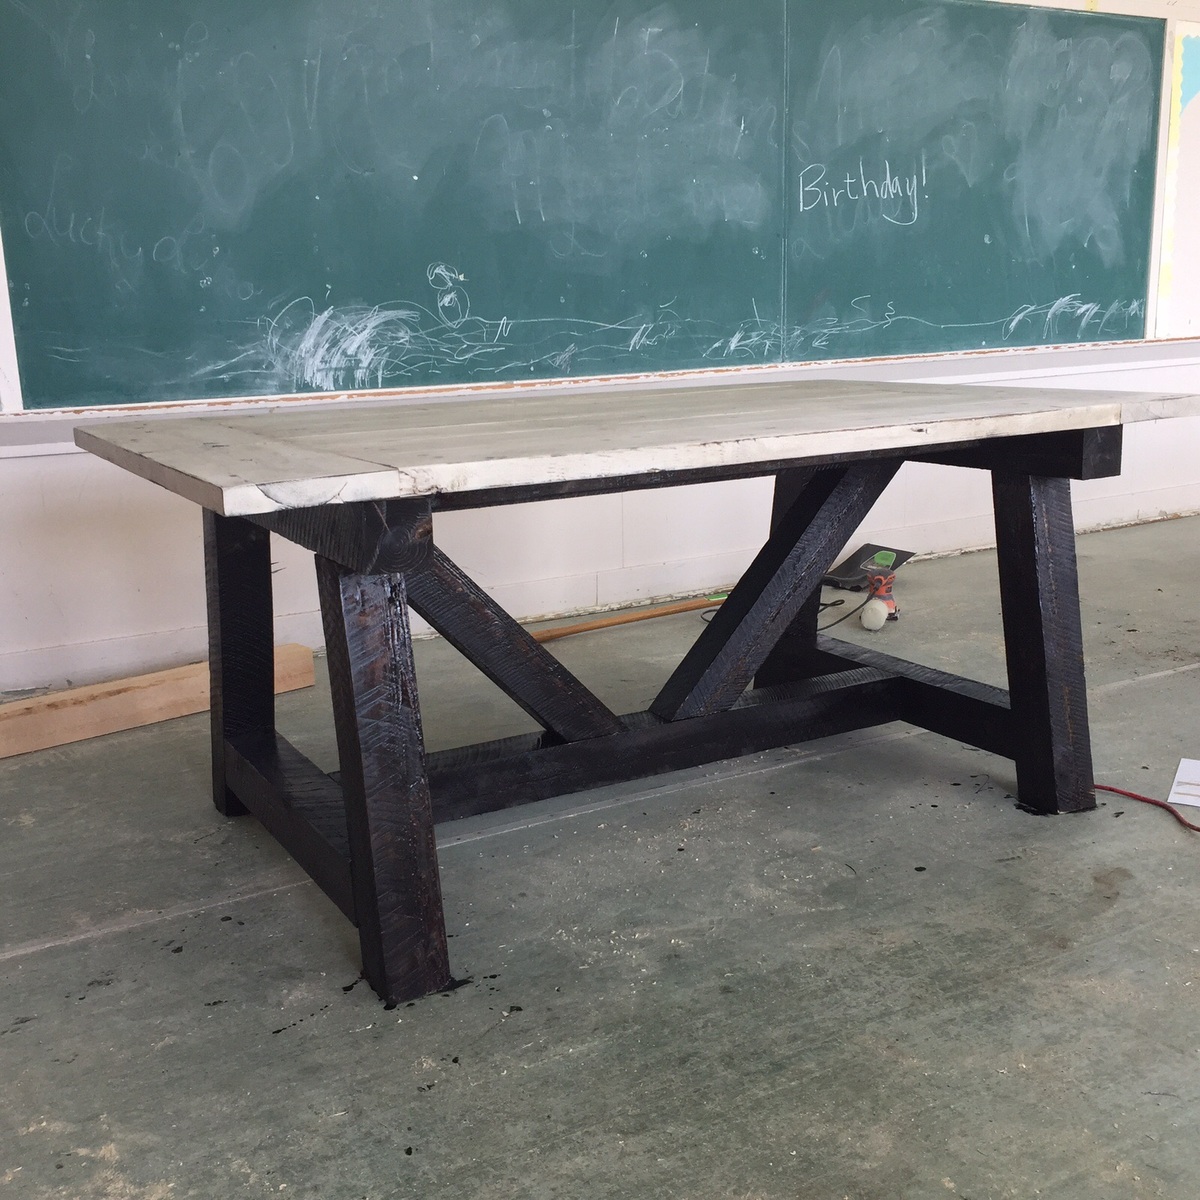
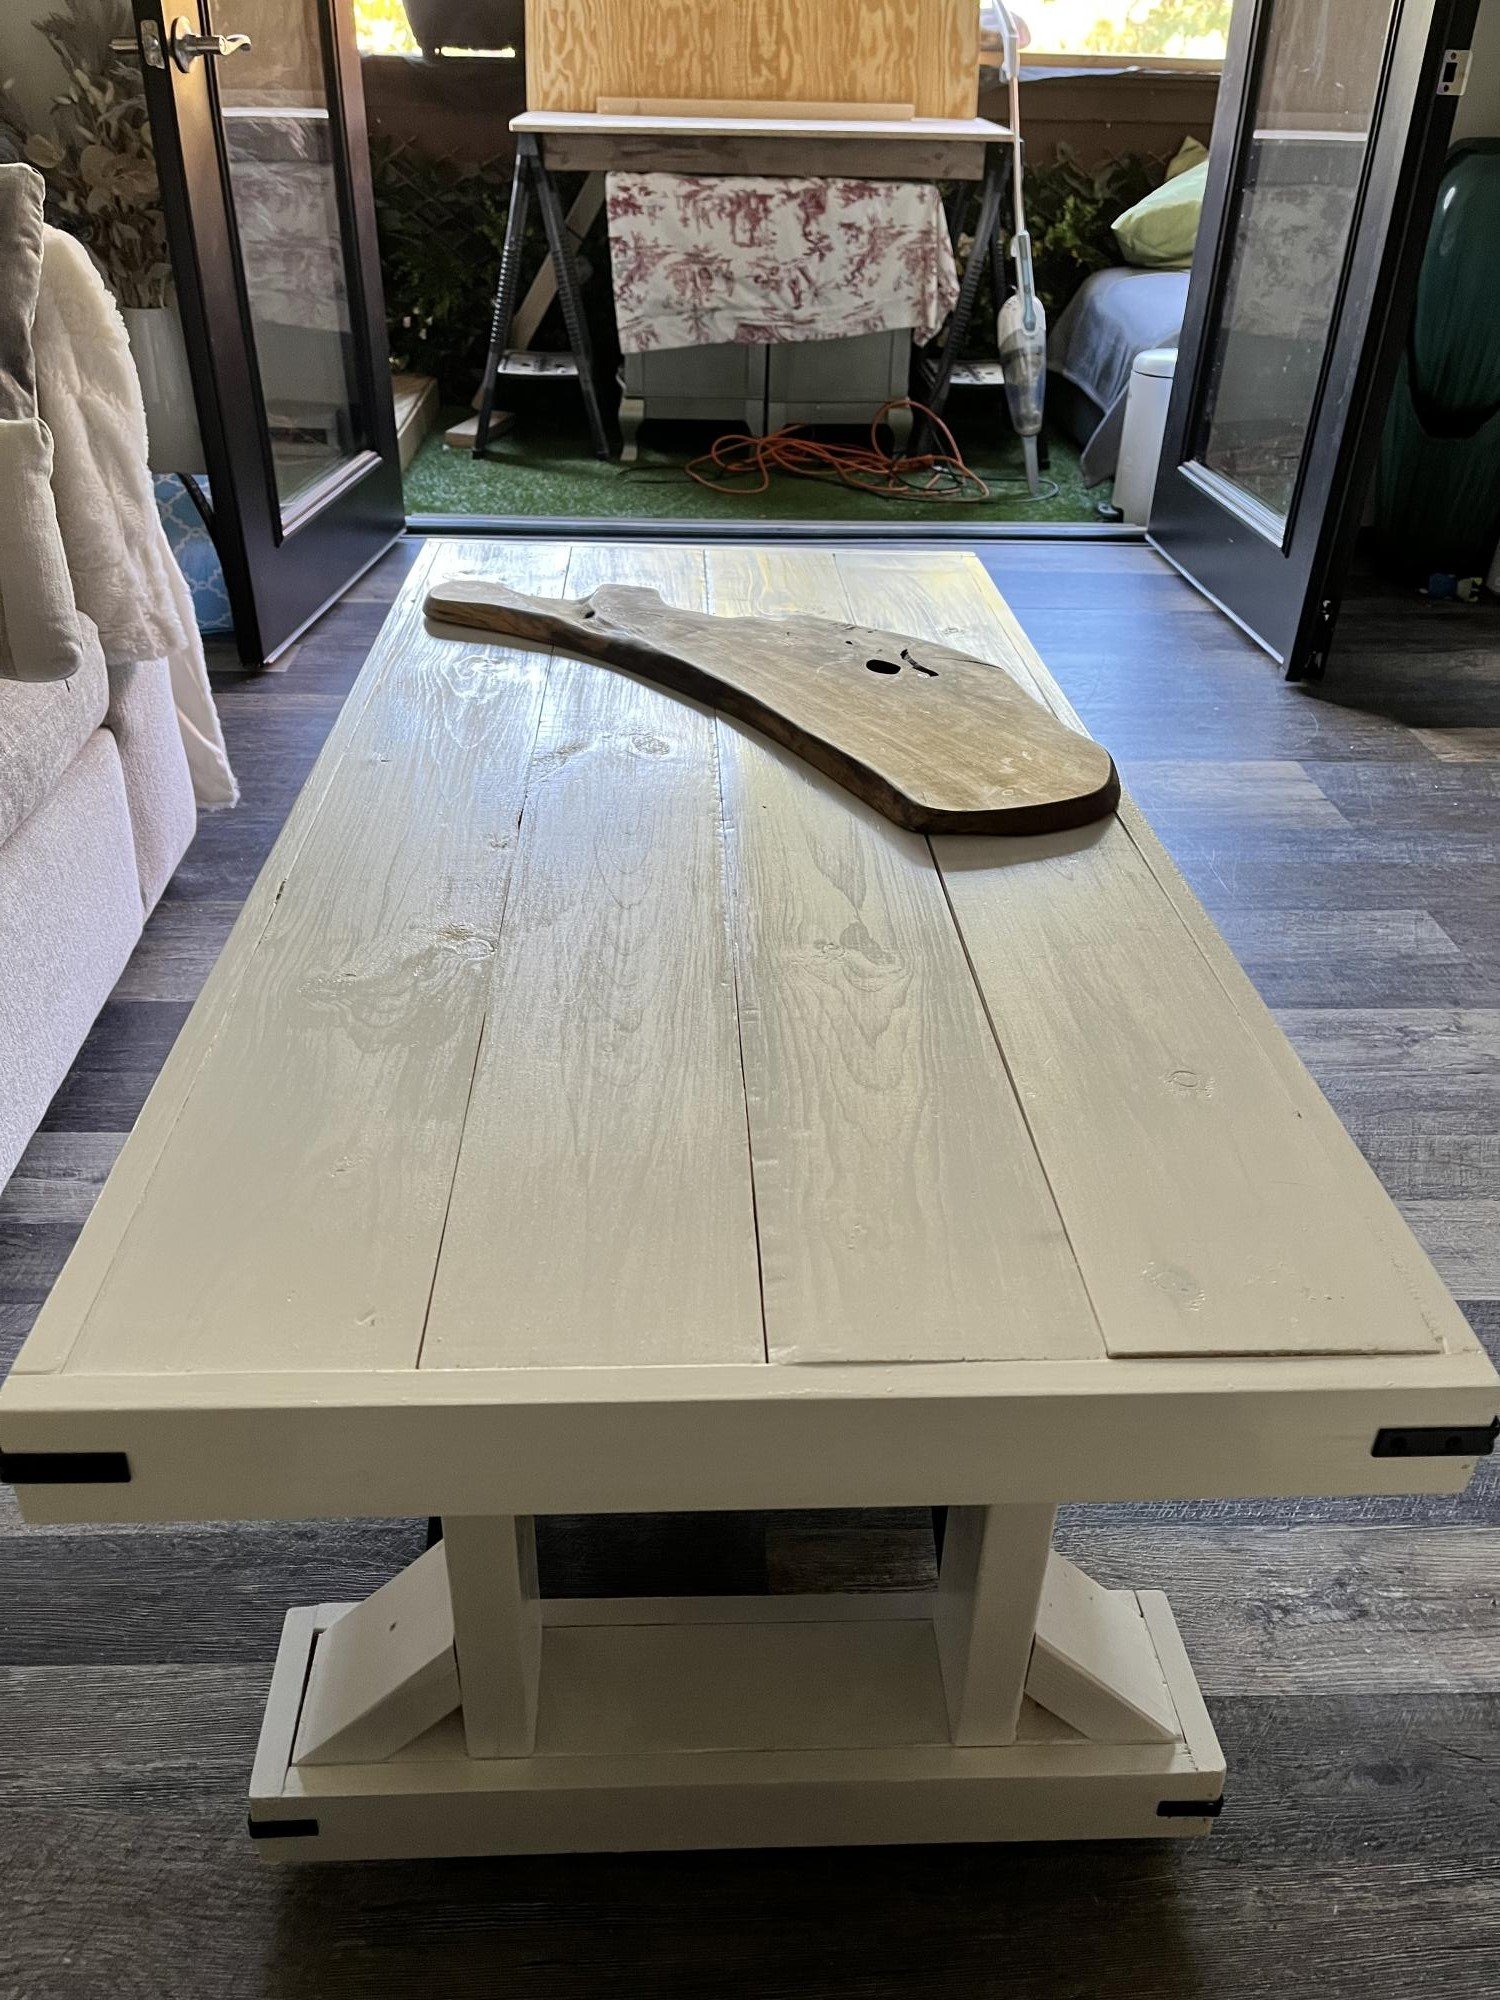
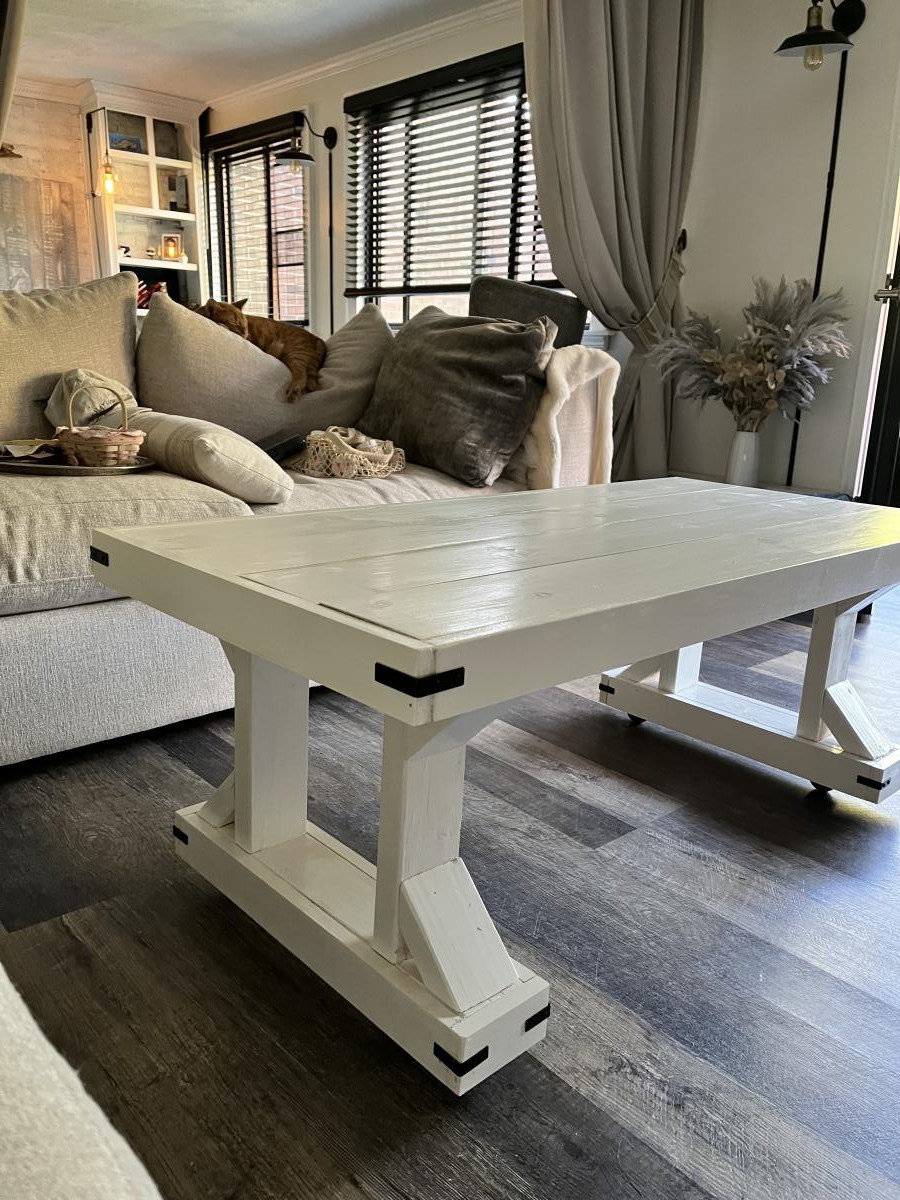
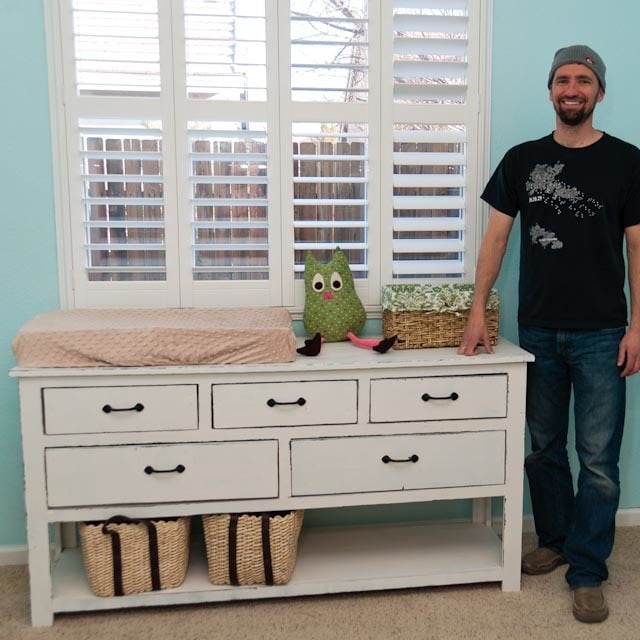
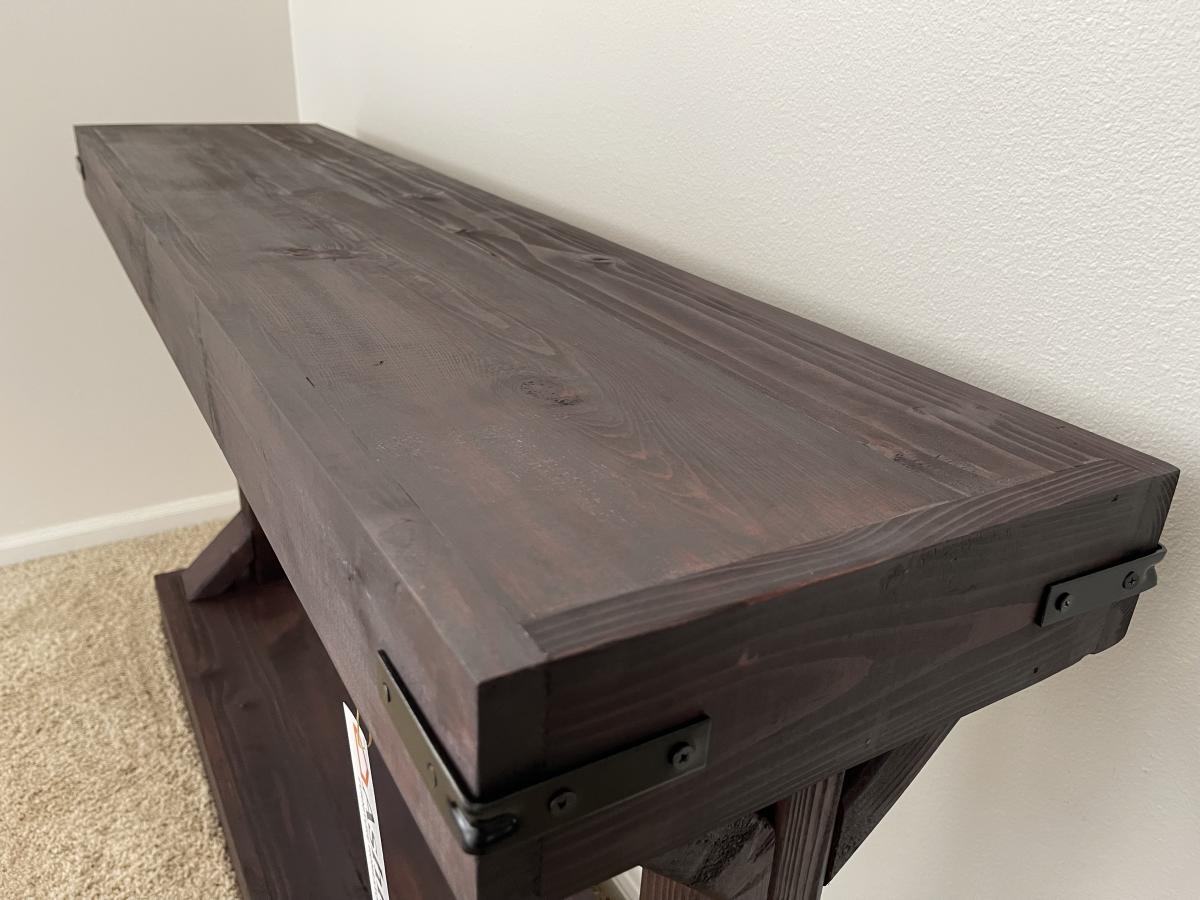
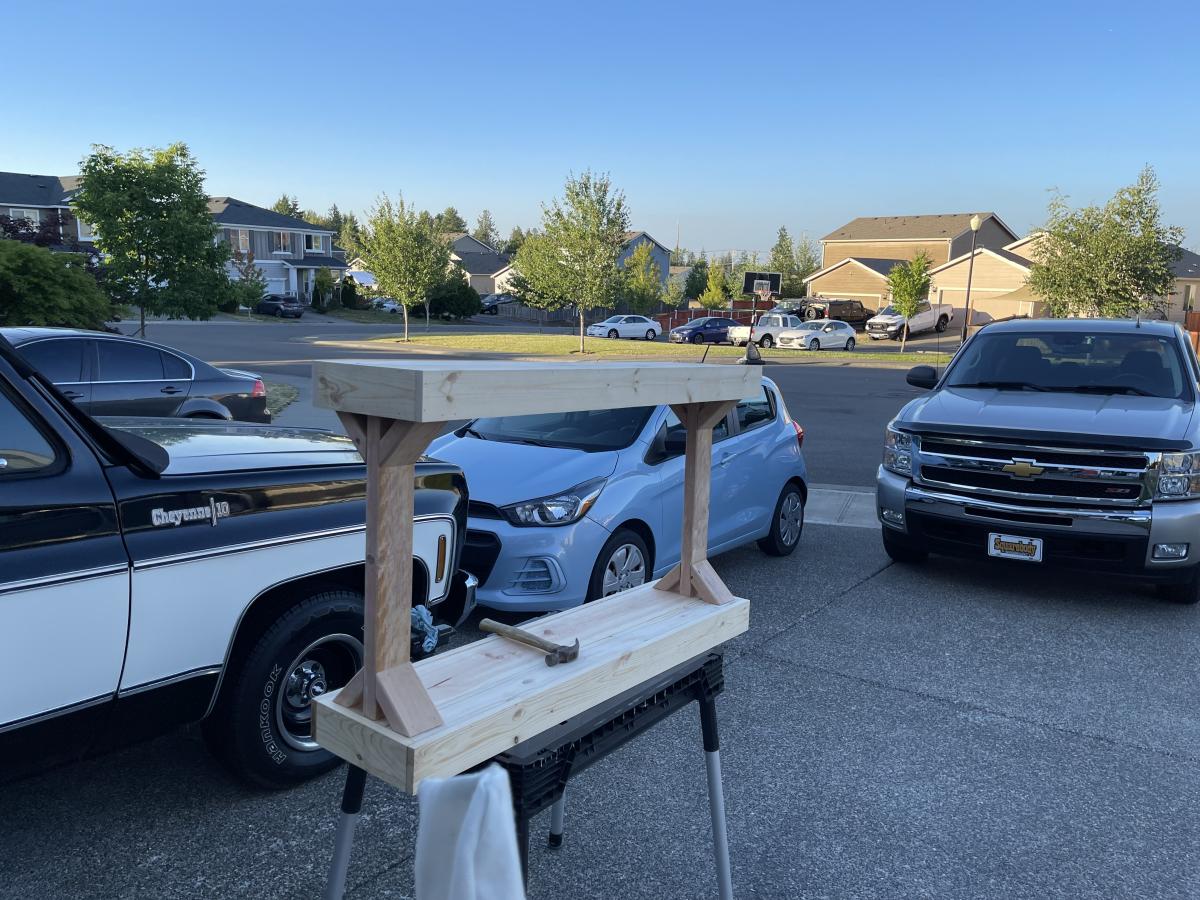
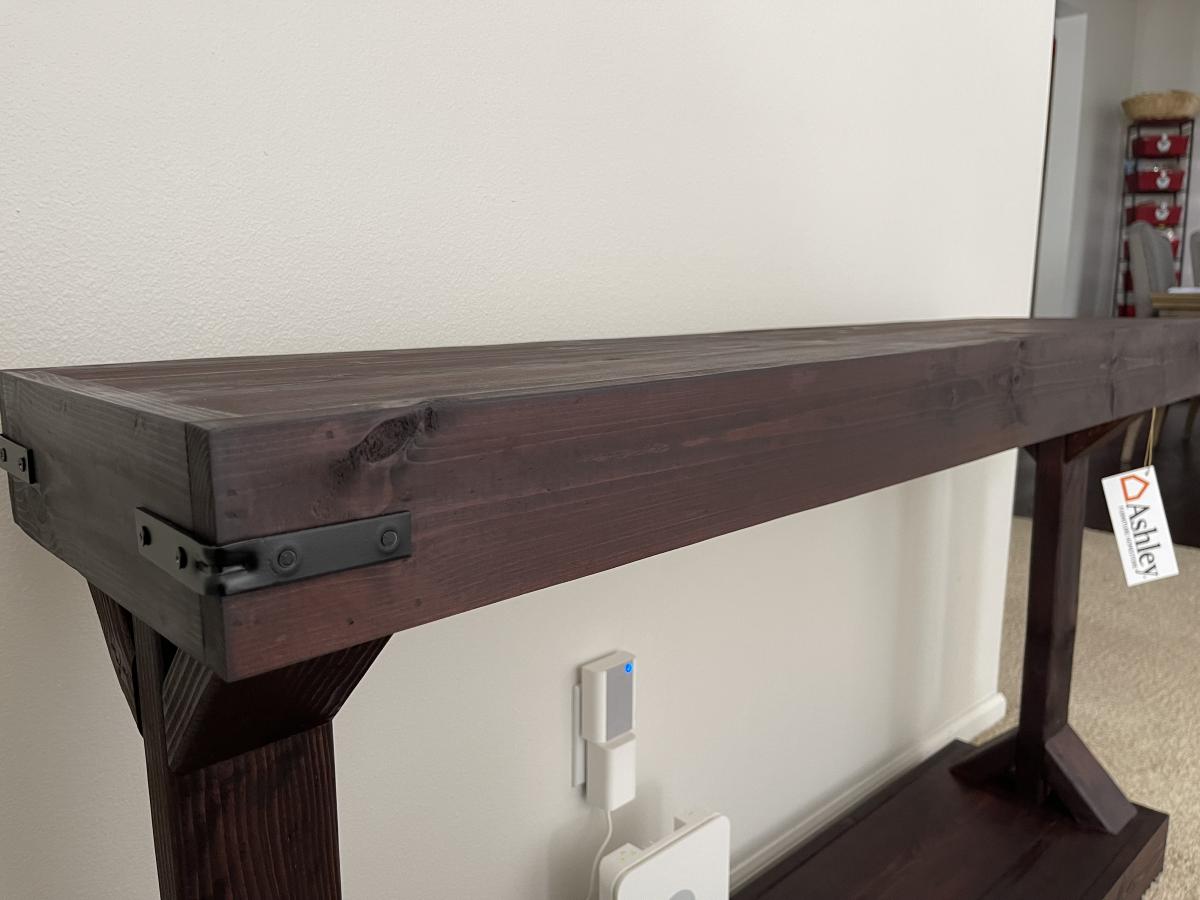
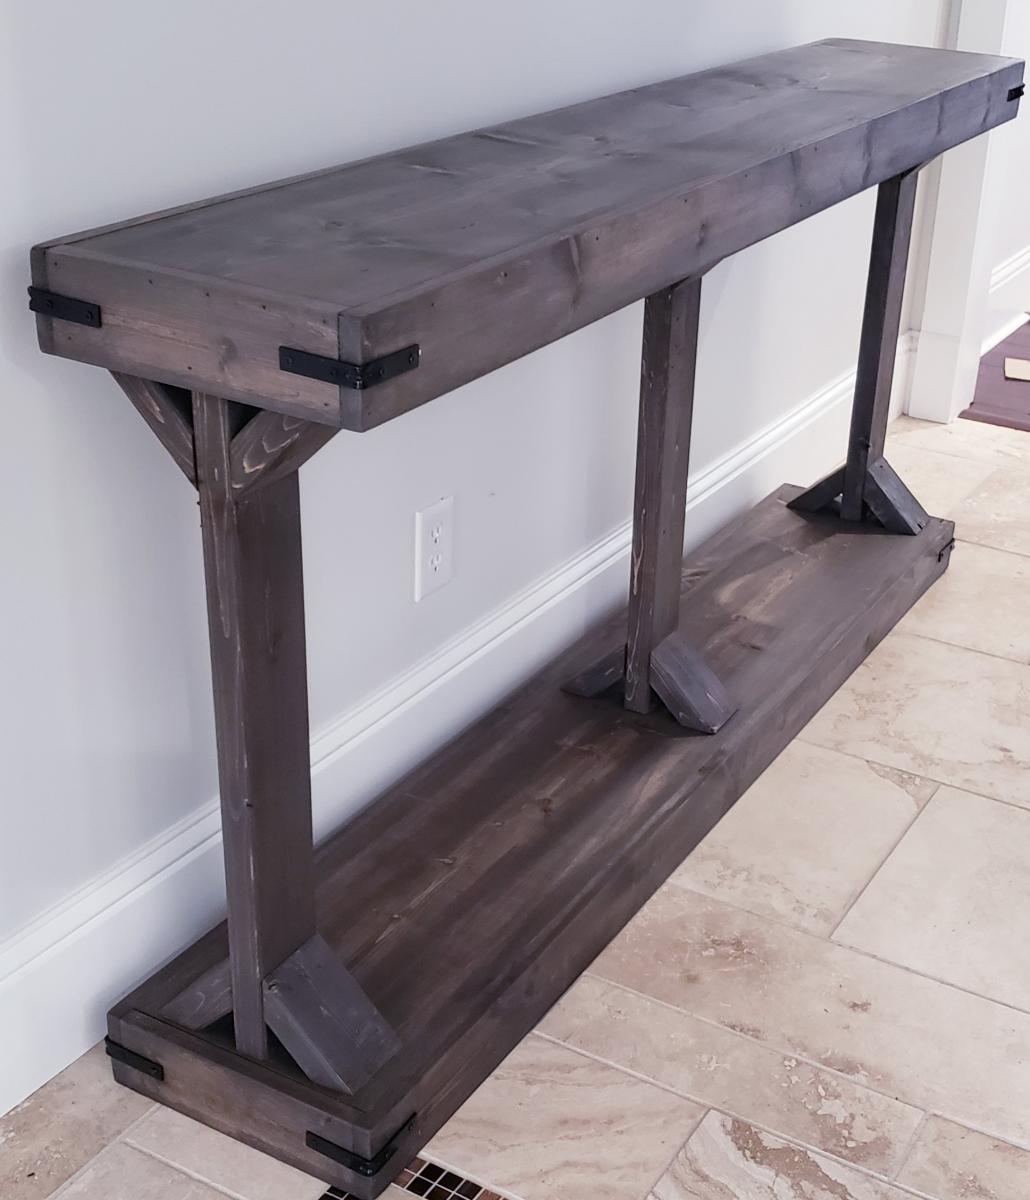
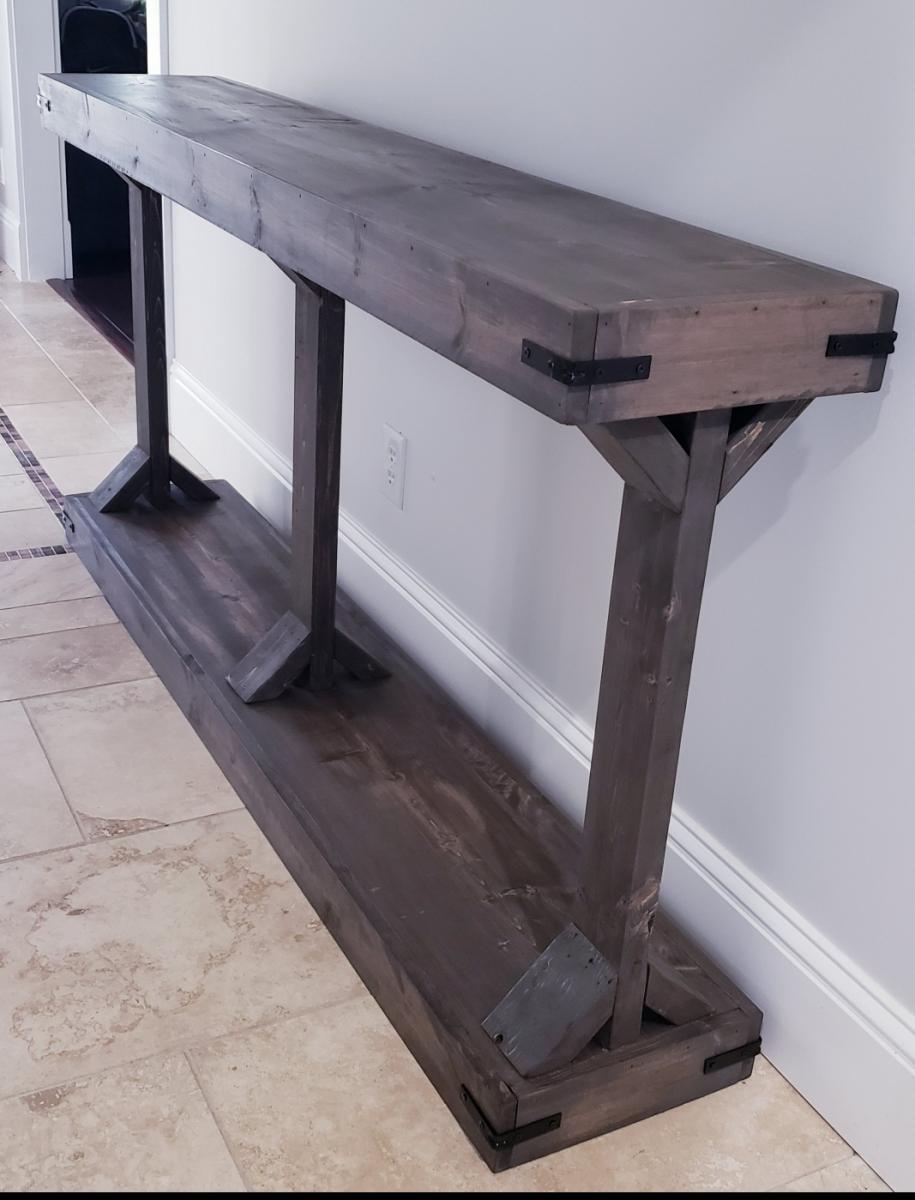
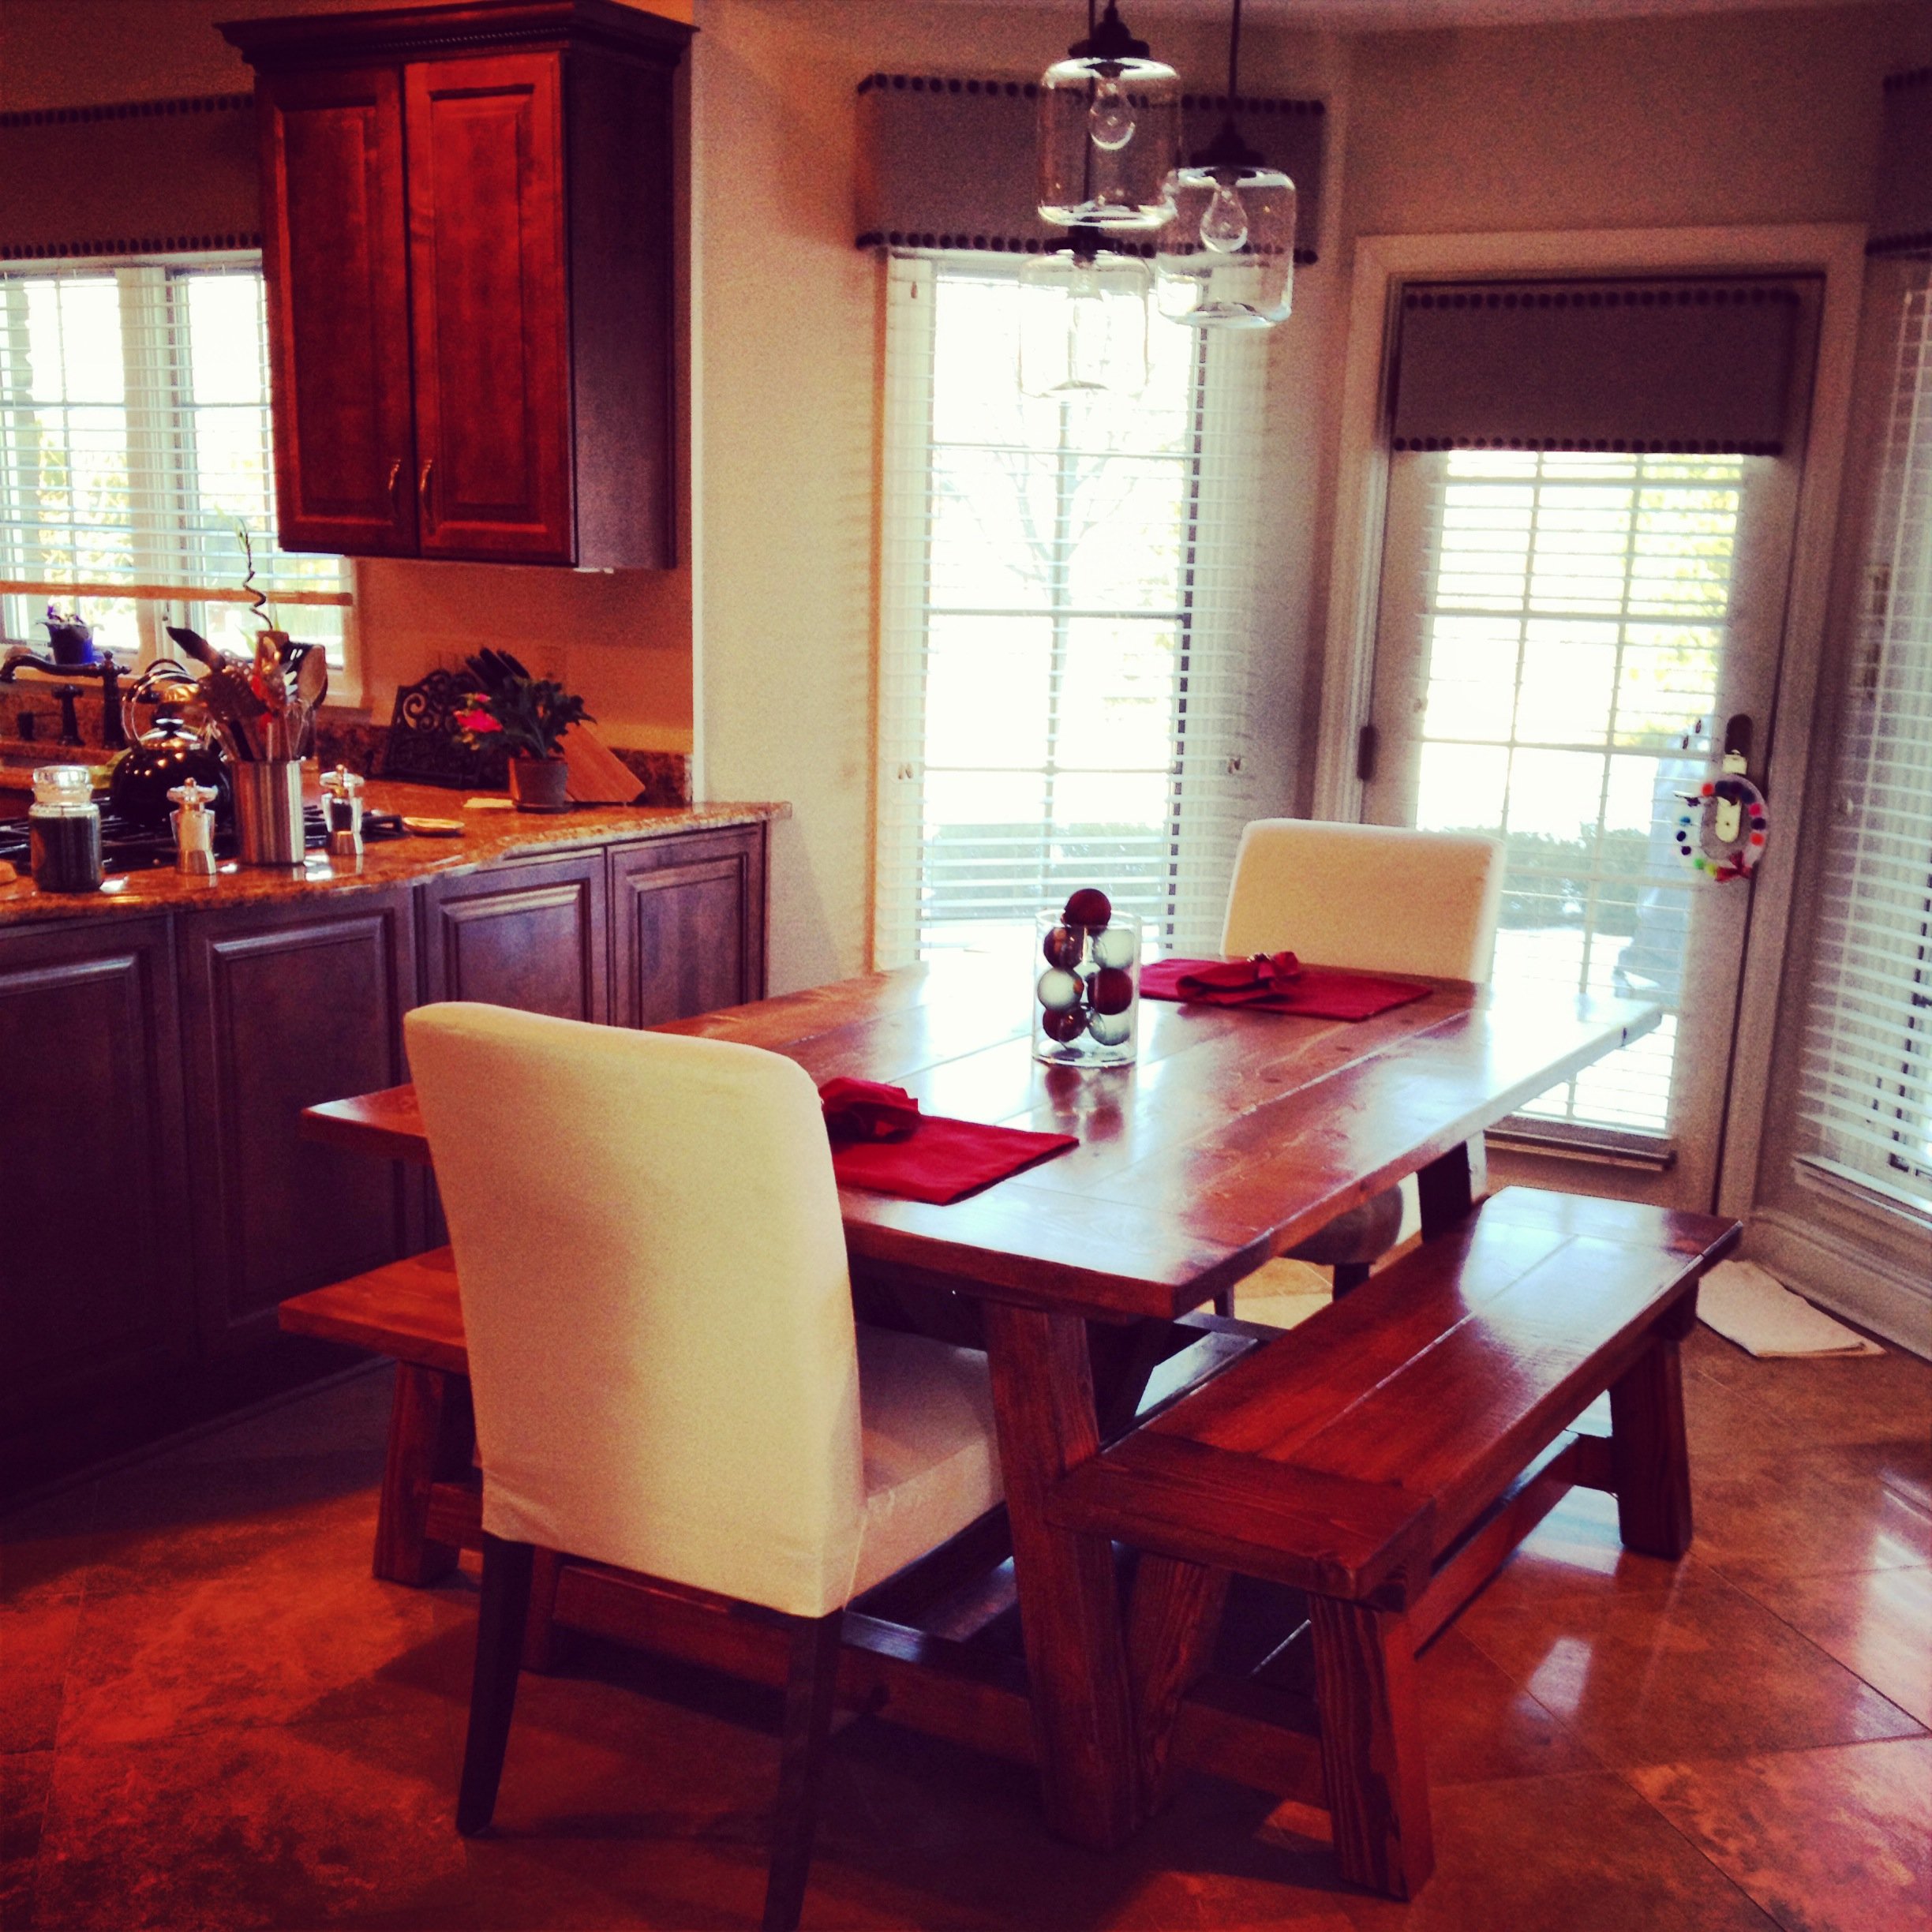
Triple Pedestal Farmhouse Table & Bench

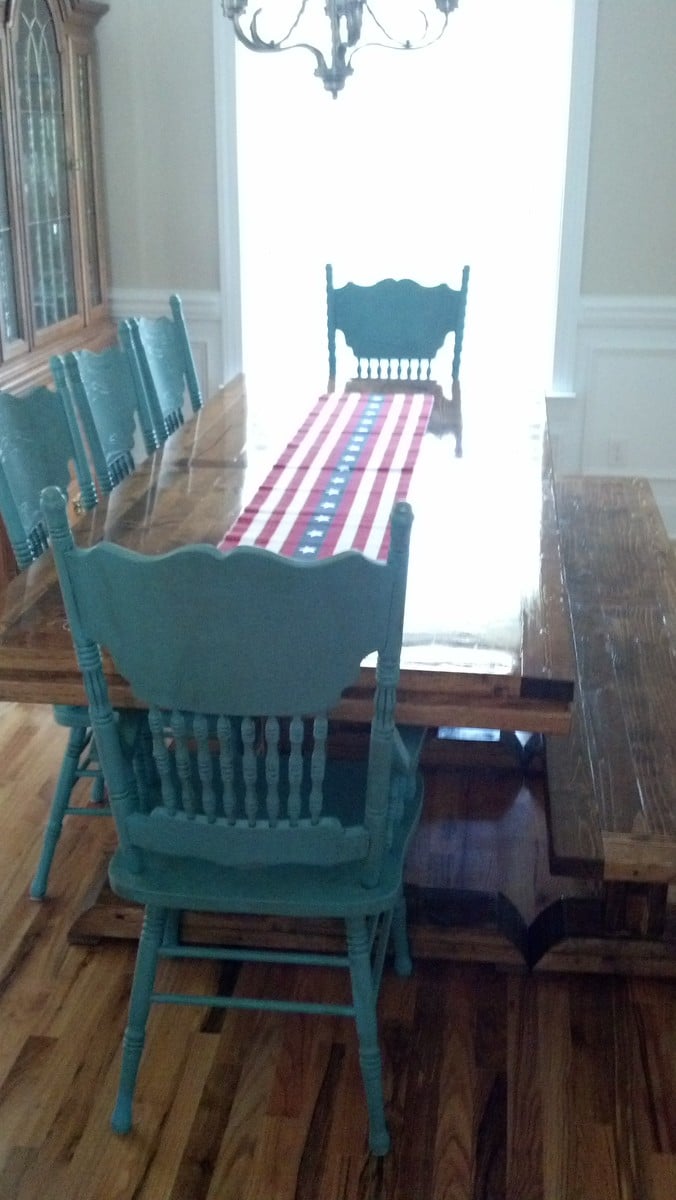
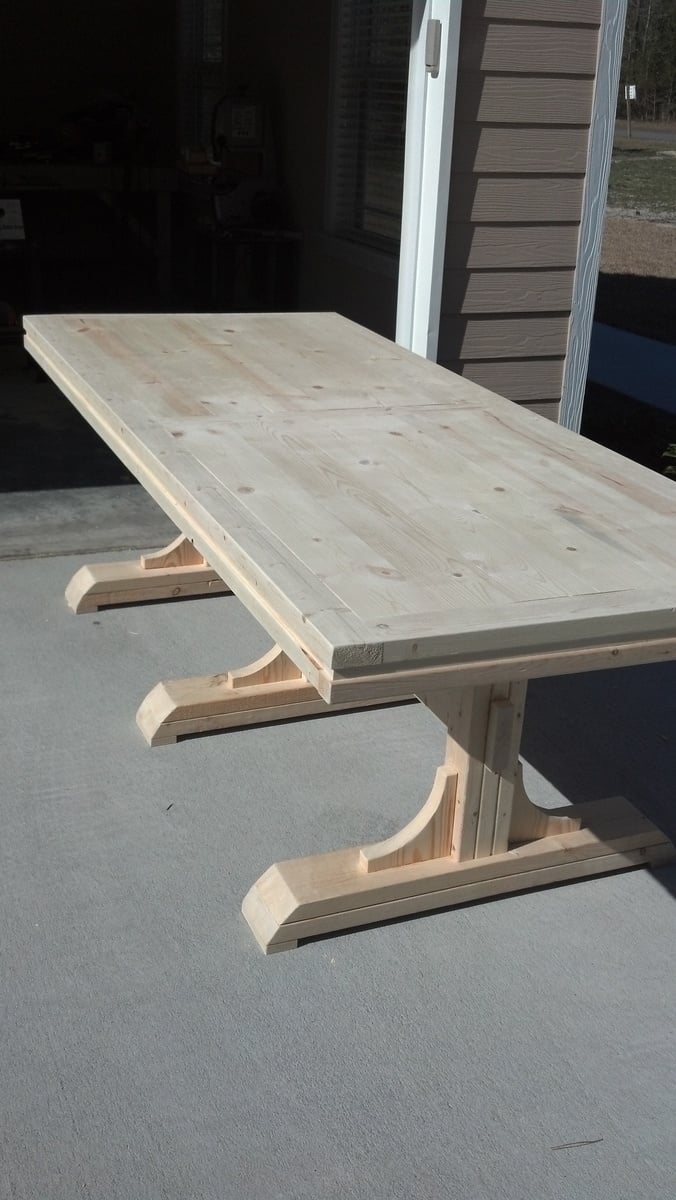
When my wife and I bought our new house, our little apartment-size table looked dumb in our new dining room. With the help of Ana White's plans, my first ever building project was a great success. The project took some extra time because I was doing it by myself in the afternoons and whenever I found the chance. The plans were for a 9ft table and matching bench, but our dining room wasn't quite that big. I shaved about 14 inches off the length and planed the boards for a flat surface (making the table and bench slightly narrower.) As an absolute amateur, I cannot stress how important the use of the Kreg Jig was for this project! With a little bit of patience, love, and faith in yourself, you can do anything you put your mind to. I am so honored to have built the table at which my children will grow up sitting. Thank you, Ana White!

Estimated Cost
$300 + necessary tools
Estimated Time Investment
Week Long Project (20 Hours or More)
Finish Used
Minwax Brand, Early American Stain and Minwax Brand Polyurethane
Recommended Skill Level
Beginner

Comments

Building for six

Wed, 08/21/2013 - 12:26
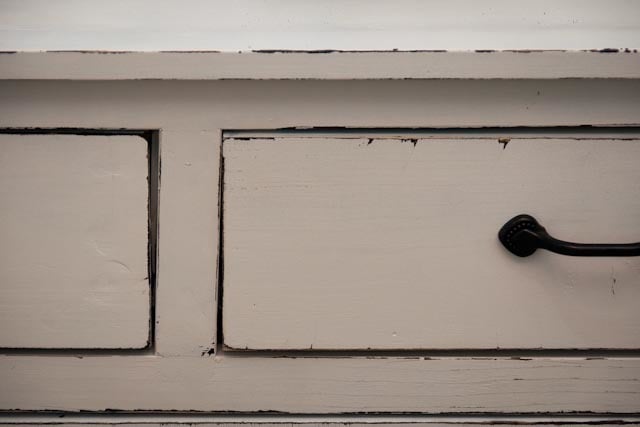
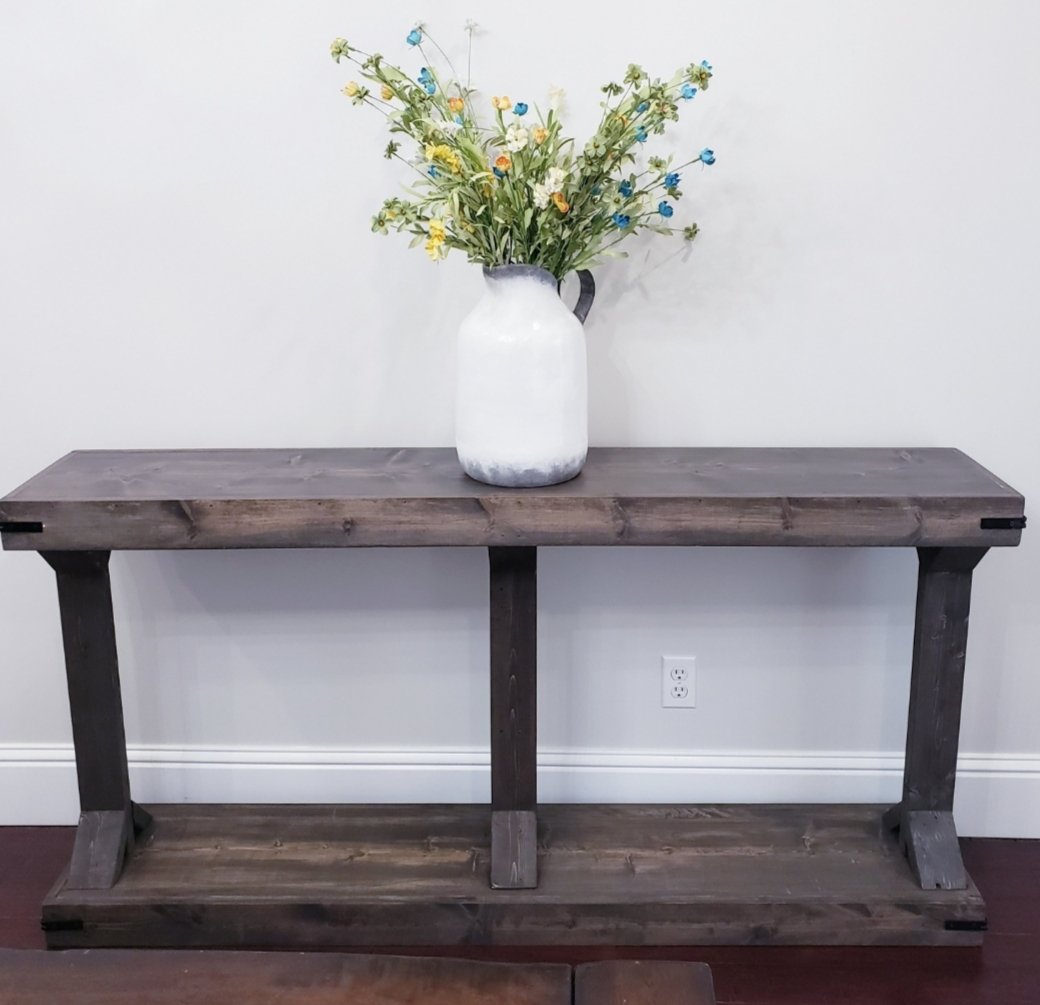
I love how smooth your tabletop looks! I grew-up with a kitchen table with a grove all the way around it and can't imagine dealing with that again. Can you go into more detail about how you planed the boards and how difficult the process was? I have built a couple pieces from Ana's site but am still new to all of this...any advice would be greatly appreciated.

Thanks,
Sarah

Adirondack Chair (Home Depot Version)

Followed the new home depot plans, only change I made was using 2x4 instead of 2x2. Getting ready to build another one, but this time will also change the arms to be wider on the ends to accommodate wine holder on one arm and cup holder on other arm. :0)

Estimated Cost
$60
Estimated Time Investment
Afternoon Project (3-6 Hours)
Finish Used
Going to use English chesnut stain and then marine spar varnish for protection
Recommended Skill Level
Beginner

Comments

acer211

Fri, 11/13/2015 - 20:36

Hi Ana,


Thanks for all your free sharing and advice.  I'd like to return the favor (hopefully)...  

Just wanted to say (as I am a painter) that it is best to avoid using any sort of "clear" varnish (such as poly, or spar, etc...) on anything that sits outdoor (such as furniture, doors, decks), because UV rays from the sun will break-down the varnish and cause them to fail.  

Instead, it is best to use a stain that is suited for decks, like Cabots Semi-Transparent, or semi-solid, etc,,

best regards,

Aaron

c3663b

Wed, 03/02/2016 - 12:21

The plans for this adirondack chair are no longer available on the Home Depot website. Where can I get them? Does anyone have them to share?

$2 Farmhouse Table

Submitted by Handy Andy on Tue, 04/19/2011 - 14:29

I am starting to work on more and more projects and I'm limited with space. I needed a worktable that could double as a backyard dining table (should the occasion arise). We have been planning to build the farmhouse table for a while now, so this was a great opportunity to build a prototype. I did some repair work for a friends deck and she gave me the leftover decking material. This became my table top. I purchased 4 2x4's at our local Habitat for Humanity ReStore for 50 cents each (this was the only money spent on this project). While I was at the ReStore I also picked up 4 pallets (they are free). After cutting them apart, the 2x4s from the pallets became the table legs and the 1x4's & 1x5's from the pallets became the shelf underneath. The shelf has been great for holding extra tools while I'm working on projects. My daughter likes to stack her toys on it too! This was a super quick and easy build. My wife even suggested we just refinish it and bring this one inside!

As always, I have to give thanks to Ana for such great plans!

Estimated Cost
$2
Estimated Time Investment
Afternoon Project (3-6 Hours)
Finish Used
We haven't yet decided on the finish, we might just use a clear coat and call it done!
Recommended Skill Level
Beginner

Farmhouse table

Submitted by Camberjak on Tue, 06/30/2015 - 20:23

First large wood working project my husband and I completed. In love with Projects and plans by Ana white !

Built from Plan(s)
Estimated Cost
150 dollars
Estimated Time Investment
Weekend Project (10-20 Hours)
Finish Used
Minwax dark walnut and table top was pure white and sanded down and minwax dark walnut was rubbed on with a rag
Recommended Skill Level
Beginner

Comments

Nicole’s Garden

Submitted by Anonymous (not verified) on Sat, 05/07/2022 - 14:27

A vegetable garden with an outside ring to plant marigolds to keep deer away.

Built from Plan(s)

Comments

Small Bathroom Shelf

Submitted by vendo on Mon, 09/26/2022 - 10:05

We had an existing cabinet in our small bathroom, so I build this small "bookshelf" to fit perfectly under it for more storage. Always inspired by Ana, this is just a bookshelf made with 1x8 boards with a 1x2 face frame. Quick, easy and functional, that's how I like it.

Built from Plan(s)

trundle Bed

Submitted by TrayScates on Mon, 10/03/2022 - 19:06

Revised plans to fit smaller mattress, removed side, and simplified head board and footboard.

Built from Plan(s)

Comments

Custom made easy. Thank you!

Submitted by Anonymous (not verified) on Mon, 10/17/2022 - 12:59

Wanted something that could accommodate two foot stools so I made a couple of changes to the bottom construction and added casters. My version is a bit rough and ready (first time building a piece of furniture) but your plan was easy to follow and it's perfect for our space. Thank you for making these plans available and your comprehensive videos! My husband wants to know when I'm starting my next project.

Comments

Nursery Changing Table Dresser

Submitted by dianajune on Tue, 02/07/2023 - 10:39

Had fun watching husband figure this out. Drawers were tough and trying to antique something for the first time was too. But I am so thankful for it!

Comments

IKEA Hack 6" Tray Cabinet

Submitted by Matty3481 on Thu, 01/07/2016 - 16:30

I'm happy to share with everyone my IKEA hack 6" tray cabinet.

I found a 24" cabinet box in IKEA's As-Is section and took it home for half price ($23)!  I would have preferred plywood, but my table saw is a little small and cutting large sheets of plywood is a little scary.  When I deconstructed the cabinet, it sustained some damage (as its particleboard), so if you try this at home, be careful!  I ended up changing the depth to 22" in order to cut off the damaged piece, but that shouldnt be noticeable with average trays and cutting boards.  

I used Ana's 6" tray cabinet plan and modified the dimensions a little for my planned space.  It still needs the back, face frame and door (which will be a replacement drawer front from the cabinet manufacturer).  I plan on building the face frame at the time the cabinets are installed, since this will go in between the 36" corner easy-reach and the 36" sink base.  Once its done, I'll post updated pics!

Estimated Cost
$30 (cabinet and an aluminum straight edge tool to help me cut straight lines with my Dremel).
Estimated Time Investment
Afternoon Project (3-6 Hours)
Finish Used
Face frame will be painted to match factory cabinets
Recommended Skill Level
Intermediate

Chartreuse Moving Double Pull Out Trash Can

Submitted by pjfessier on Thu, 05/02/2019 - 17:25

I replaced all of the drawers in our 1960's kitchen with custom built new drawers that have full extension slides.  I can't afford a complete remodel, but the new drawers allow the kitchen to function much better. The old drawers had wood slides that would allow you to pull them out about 2/3 of the way. Any more than that and the whole drawer would slide out and go crashing to the floor. 

I had wanted to build a cabinet like this, but I couldn't figure out how to pull it off. I'm an amateur with basic tools working out of my garage. I found Ana's plan and combined it with my experience making drawers to make this cabinet. I use Blum soft close slides and the cabinet is working great so far. 

The butcher block top is left over from countertops I put in the kitchen. The project basically started with me wanting to put that last bit to good use. It's 1 1/2 in thick acacia. I wish I'd have gone for maple but the acacia is okay. 

I don't know if you can see it in the photo, but it has locking casters on the feet so that we can move it around when we need to clean the kitchen floor, but it doesn't move when you pull on the drawer. I guess it can also double as a little island when we have dinner parties. 

Estimated Cost
$100.00 I'm really not sure. The slides and paint were pretty expensive. Of course I didn't use all the paint so if something else needs to be chartreuse I have more. The wood was poplar and some high quality plywood. It's 3/4 ply on the slides but only 1/4 on the back. The drawer is made with left over baltic birch 1/2 in ply that I had left over from my other drawer projects. I guess you could consider the varnish and nail free too as I already had those. Building the drawer is really a whole separate project that takes as long as the cabinet. And the Shaker door is also its own little project.
Estimated Time Investment
Week Long Project (20 Hours or More)
Recommended Skill Level
Beginner

Comments

Kamado table

Submitted by lmarco191 on Sun, 05/16/2021 - 14:47

The table assembly was Inspired by farm table and workbench plans. It was built from construction grade untreated 4x4 and 2x6 and assembled using Kreg pocket screws and glue. Finish is semi-transparent wood stain. Rather heavy, the table have locking wheels to help move it. The lower shelf is used to store accessories.

The small kamado is just the right size for two people. I added a large ceramic tile under the firebox plus a small inlay next to the grill. That was the top of a small patio table. A few hooks were added as a final touch.

We built it last year; it gets a lot of use as a grill, smoker, bread and pizza oven.

We are very satisfied with the outcome. Many thanks for the plans and inspiration.

Built from Plan(s)
Estimated Time Investment
Week Long Project (20 Hours or More)
Finish Used
Semi transparent wood stain
Recommended Skill Level
Intermediate

Comments

Jacob1234

Mon, 08/02/2021 - 23:34

Your grill is very beautiful, but I prefer cooking in the kitchen, I will explain why, I recently read a lot of Kitchenotic.com here, what connects me and the kitchen most of all is the answers to my any questions, no matter how stupid they are and the answers were always correct

Kids' Playhouse (under stairs)

Submitted by kdins31 on Sun, 12/18/2011 - 09:22

Had the perfect space for a little playhouse under the stairs in the basement and it's been our plan for 4 years to do something. Finally, we did something. Wanted depth so I added the roof and portico. Also added cedar shingles that I picked up for $7 at HD. Inside I had extra laminate flooring so I put that down and added beadboard, chair rail and crown molding. There's also a small transom window above the small kitchen area. The kids love the barnhouse doors with old fashioned doorbell, mailslot and window. The bookshelf under the stairs was the final touch. I didn't use any plans from this awesome site but did, as always, get a bunch of tips and inspiration!

Pin for Later!

Kids' Playhouse (under stairs)

Estimated Time Investment
Week Long Project (20 Hours or More)
Finish Used
Dark walnut stain on cedar shingles.
Recommended Skill Level
Intermediate

Comments

Cindy from Indiana (not verified)

Sun, 12/18/2011 - 19:00

Wow! That is awesome!

You really did a great job on that! So imaginative, too. WTG!

Guest (not verified)

Sun, 12/18/2011 - 19:58

That is so stinkin' adorable! Fantastic job. I love everything about it. Your kids (and grandkids) will remember the playhouse under that stairs forever!

spiceylg

Mon, 12/19/2011 - 06:54

Wow, this is too cool! They are going to love love love this! Can't wait to see the kitchen reveal!

bhoppy

Mon, 12/19/2011 - 08:43

LOVE LOVE LOVE this!!!! It looks amazing! Makes me want to buy a new house with stairs. LOL

birdsandsoap

Sat, 12/31/2011 - 18:26

You did an amazing job on this. I'm planning a bunkbed with a similar facade. I love how cozy it looks without having to make an actual pitched roof. The shingles are such a nice touch that I may have to copy you! And it's wired for lights; you've really outdone yourself.

Guest (not verified)

Mon, 02/27/2012 - 21:14

I love this playroom you created. We are currently in the process of building a playroom under the stairs for our girls. Where did you find the door...it is exactly what I am looking for! What a wonderful job you did!!!

kdins31

Mon, 03/19/2012 - 14:26

Thanks to all of you for the nice comments! Re: the door, I just cut a plain 18x80 door slab ($21 from orange) and trimmed it out. I still need to put the window grille over the open space, and was hoping to find a cool 'speak easy' grille that fits the space.

Thanks again!

megan_m

Fri, 04/27/2012 - 09:07

this is such an amazing little space! great work!

MicheleInAlabama (not verified)

Thu, 05/03/2012 - 23:38

This has to be one of the most adorable things I've ever seen! What an awesome idea......how cool is that for the kids??! Love the lighting and the laminate (or is it hardwood) flooring inside. Even the stove is gorgeous! Such fond memories will be made there and remembered forever. Kudos!!

Amanda Rhoads (not verified)

Wed, 12/05/2012 - 15:34

Oh my goodness this is such an inspiration! However, as a beginning tool user, I don't think I could get my finishes so nice. How much experience had you had at this kind of stuff before? Was the area closed in before this project or did you do that too? I've got an open stairway into our basement and would be starting from scratch with ceiling, walls, etc. and have no experience hanging drywall or anything. I think it would take me a year. Great job, and thanks for sharing!

maggieasselin

Sat, 06/21/2014 - 12:51

Hi there!

I was just wondering how you made the door for your play house? We're basically stuck at this level in ours right now... ;) Thanks for any tips!!!

MITER SAW CART

Great Miter saw cart plans! Absolutely love how mobile my miter saw is now. I added adjustable shelves and drawers for a ton of storage.

Built from Plan(s)

Comments

Pantry Cabinet

Submitted by JoanneS on Mon, 03/05/2012 - 16:57

Pantry cabinet, with lots of room, Ana-inspired. We combined ideas from the Momplex kitchen, simple armoire, and benchmark storage, and we are super pleased with how this turned out. We built it in 2 pieces, attached together and then secured to the base and wall studs so it’s a ‘built-in’. Then we added lots of trim and painted to match the dining room. The opening at the left is large enough to fit pretty much any size microwave, and there’s a dedicated outlet behind it in the opening. The shelves are spaced wide enough apart for tall cereal boxes, tall bottles, and chip bags to stand upright. Overall finished cabinet size is 48" wide and 95 3/4" tall. This took us several days to complete. Since the doors are tall and kind of heavy, we added the Blum cabinet door dampeners from Rockler (these things really work!). Ana, thank you so much for the inspiration. I don’t think we would have tried this if it wasn’t for you. We love our new pantry!

Estimated Cost
$600
Estimated Time Investment
Week Long Project (20 Hours or More)
Finish Used
Ace Royal semi-gloss in Wishbone (front and bottom side), and in Crushed Peanut (upper side). We did 3 coats, sanding in between coats.
Recommended Skill Level
Intermediate

Comments

Debi_G (not verified)

Wed, 03/07/2012 - 00:05

Fantastic!

yogashell

Sat, 07/21/2012 - 07:44

It looks amazing! What a great idea to add it as a built-in. Nice modification for the microwave.

Narrow Console Table (Modern Farmhouse)

Submitted by kwildman on Tue, 12/03/2019 - 18:03

This is a beautiful console table built using the Narrow Console Table (Modern Farmhouse) plan.  This is modified to be slightly wider, longer, and taller than the original plan.  The dimensions are 68" long, 34" high, and 12.75" wide.   The plan was very easy to follow and it was simple to adjust the measurements.

I used Varathane Dark Walnut Stain and once that was dry, I went over that lightly with Varathane Classic Gray stain.   The final finish is Minwax Dark Wax and buffed.   

More photos available on my facebook wood shop page at the link below.

Estimated Cost
75
Estimated Time Investment
Day Project (6-9 Hours)
Finish Used
Varathane dark walnut fast drying stain with Varathane gray classic wiped lightly over the dark walnut after it dried. A final coat of Minwax dark wax and buffed.
Recommended Skill Level
Beginner

Comments

ladybug'13

Thu, 12/05/2019 - 12:06

Beautiful! I really like the finish you did on this table, thanks for sharing the details. I may need to try this myself. 

4x4 Truss Beam Table and Benches

Submitted by MakinDust on Sat, 01/18/2014 - 08:36

Table and benches were made to plan, except I shortened the overall length and added another 2x10 to the top to give it some additional width. The benches were also shortened slightly so the legs of the benches slide between the legs of the table; which allows the benches to be pushed further under the table when not in use. Avoid my rookie furniture making mistake and go to a specialty lumber store that sells wood that is already aged (dry). Most everything you find at the big box stores will still be wet and shrink/warp on you if not completely dry first.

Built from Plan(s)
Estimated Time Investment
Week Long Project (20 Hours or More)
Finish Used
MinWax English Chestnut Stain and 3 coats of MinWax Satin Poly
Recommended Skill Level
Beginner

Comments

MakinDust

Tue, 05/20/2014 - 16:23

Appreciate the compliments. Sorry for the delayed response, but the final dimensions turned out 72" x 46". Let me know if you have any other questions.

Back