Lawnmower Shed

Modified the design to allow me to roll lawnmower directly in the end. Fun project.
Built from Plan(s)
Recommended Skill Level
Intermediate
Modified the design to allow me to roll lawnmower directly in the end. Fun project.
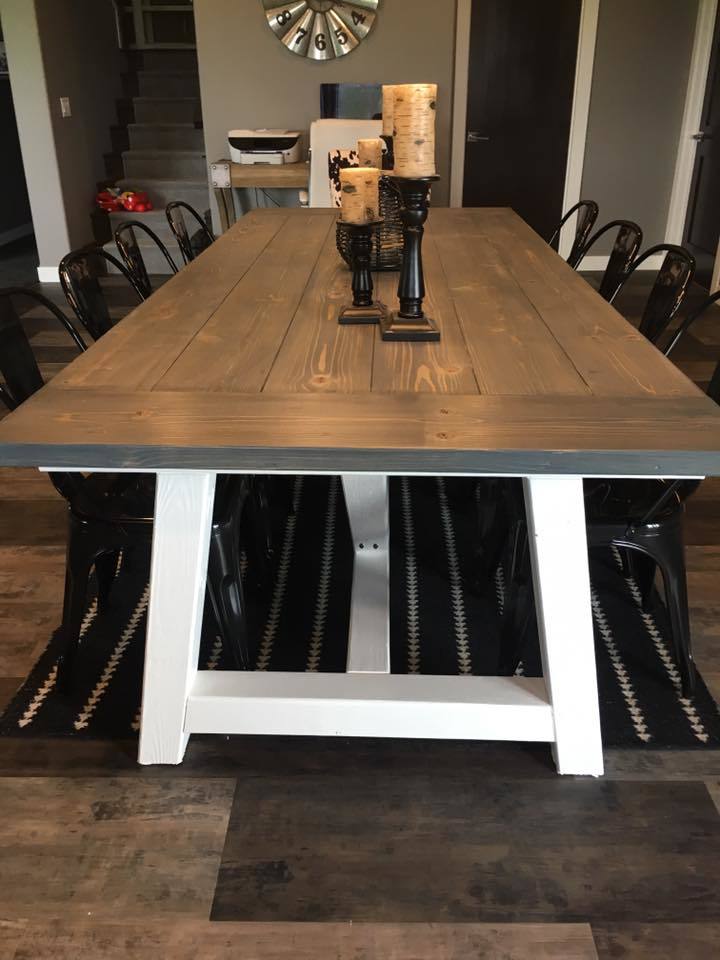
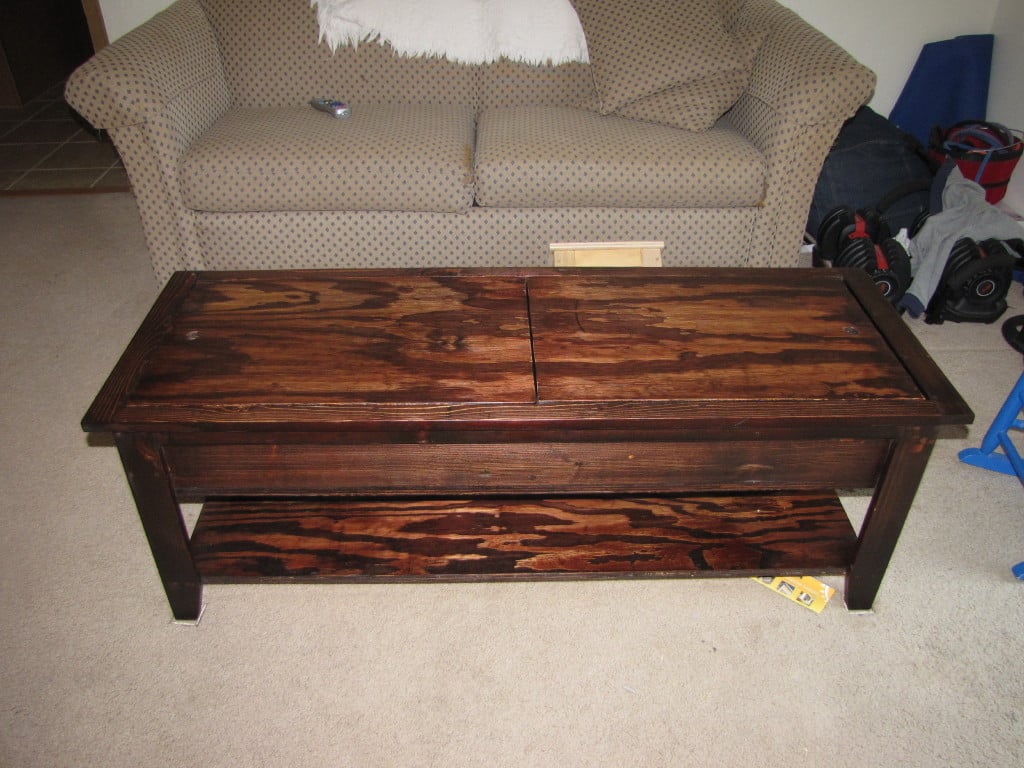
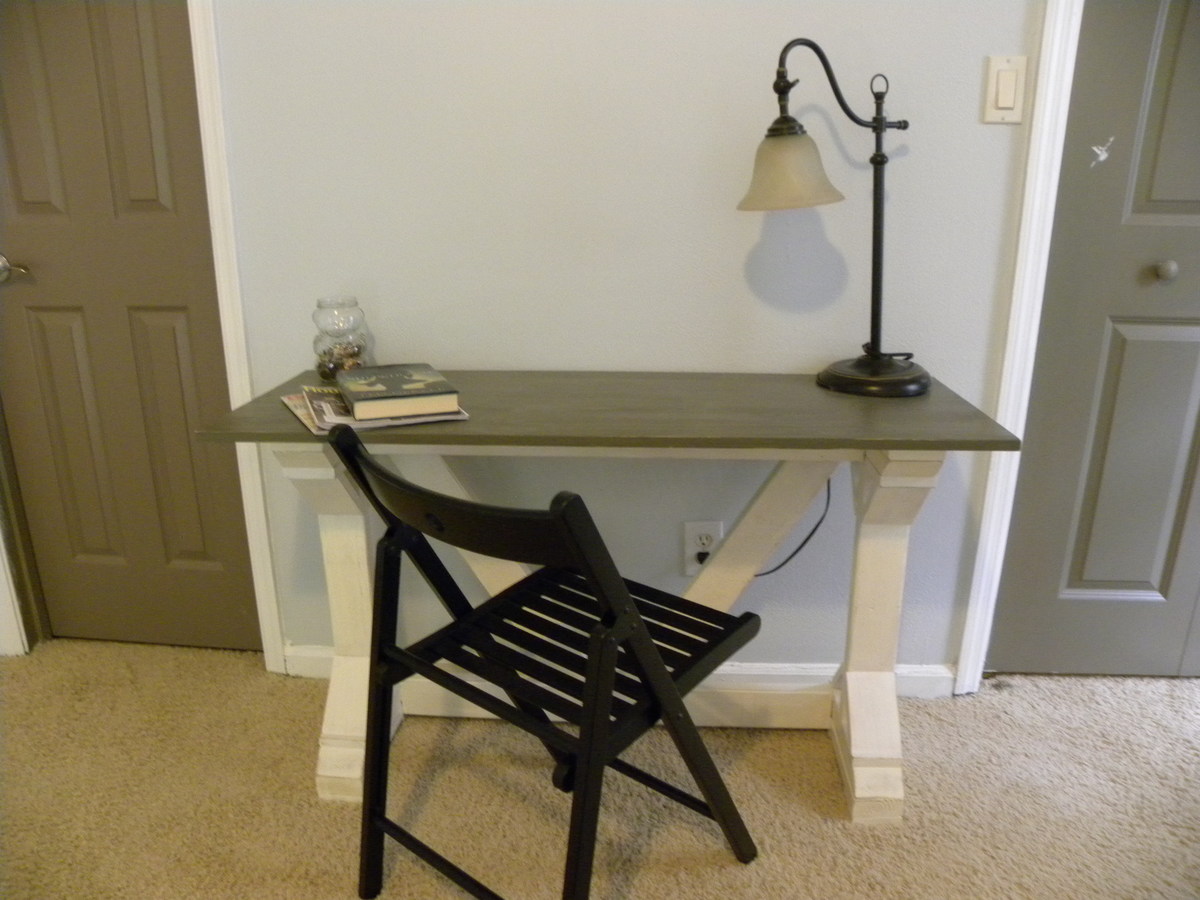
This was the first table that I built and turned out great.
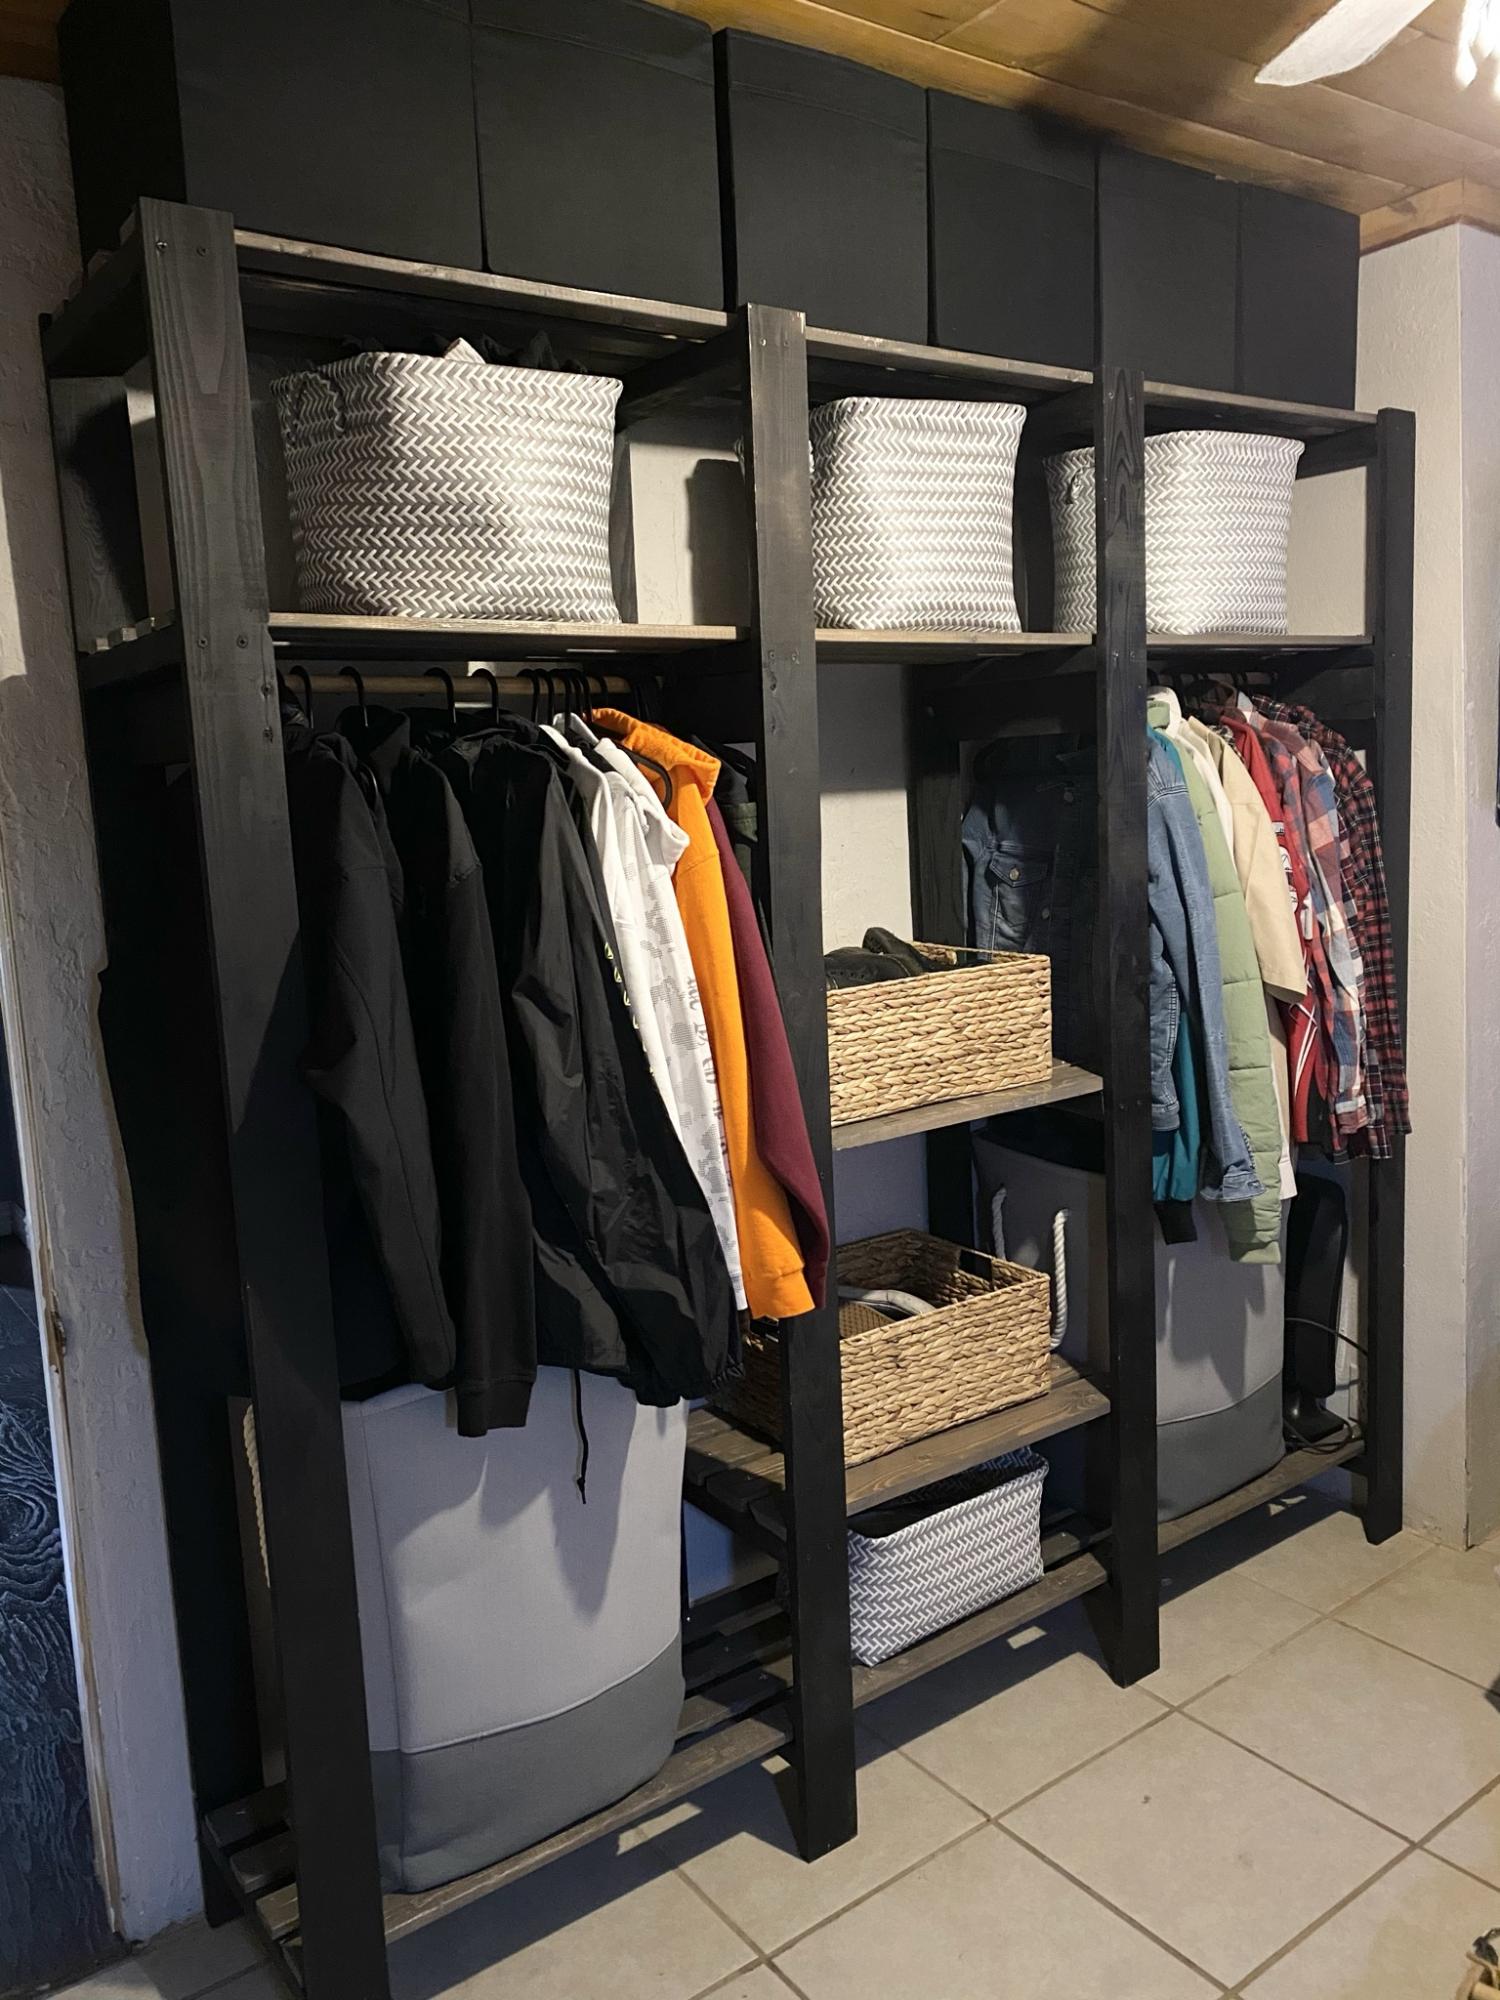
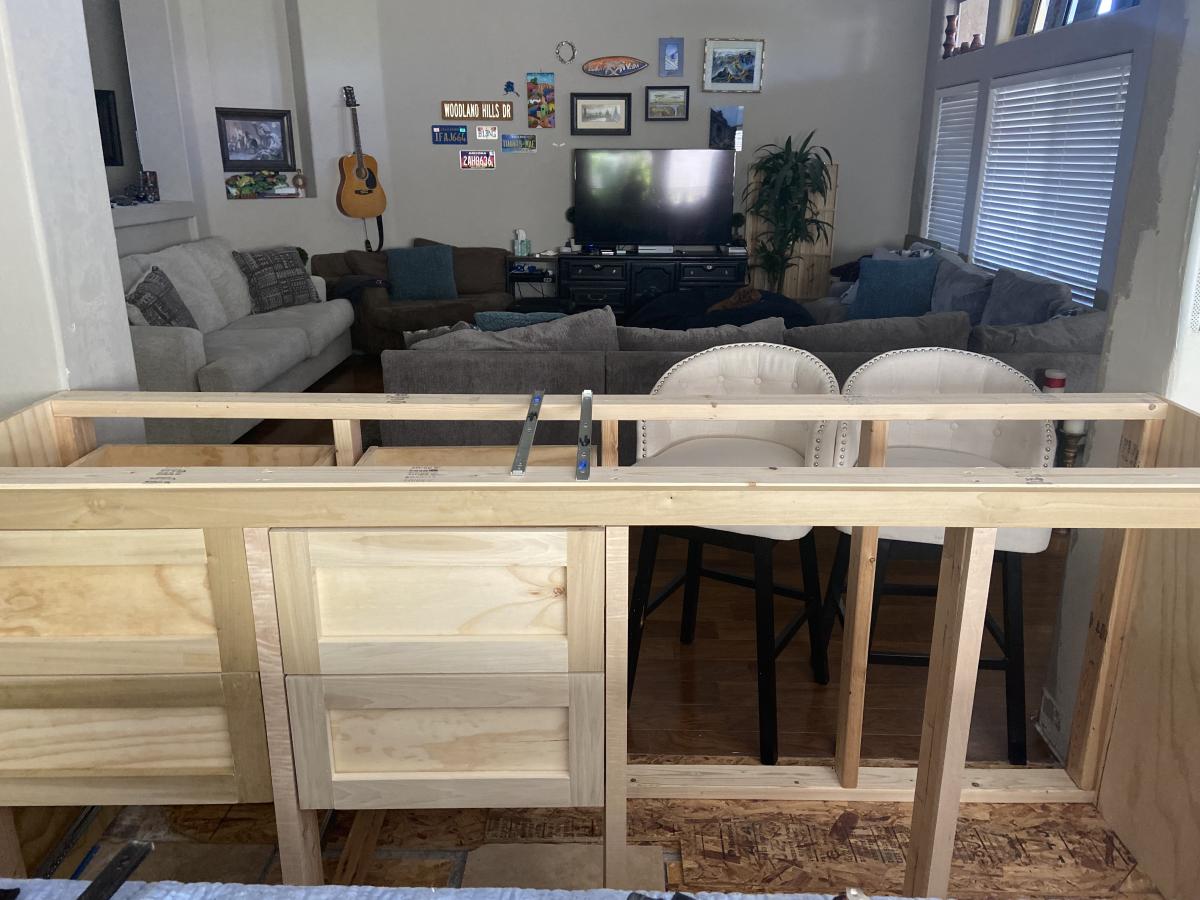
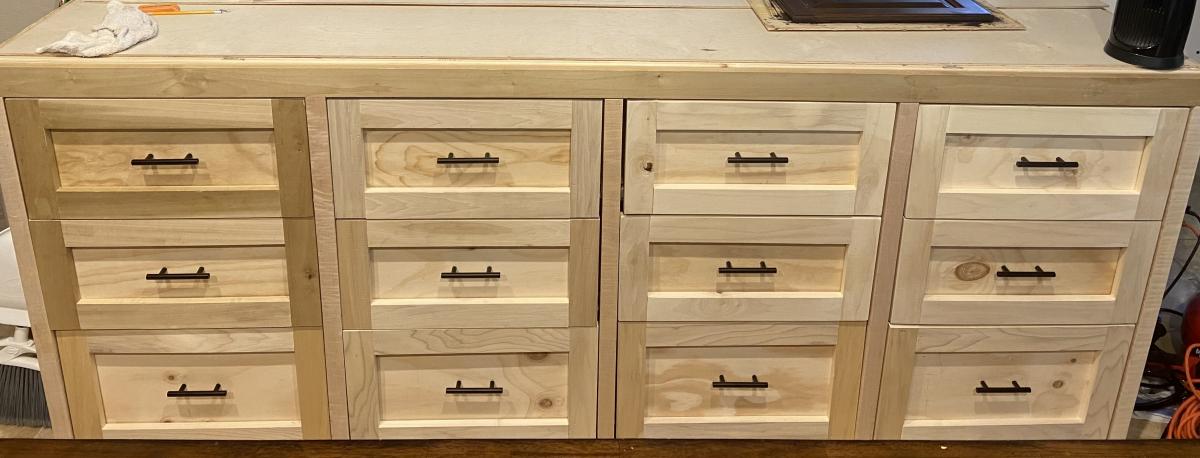
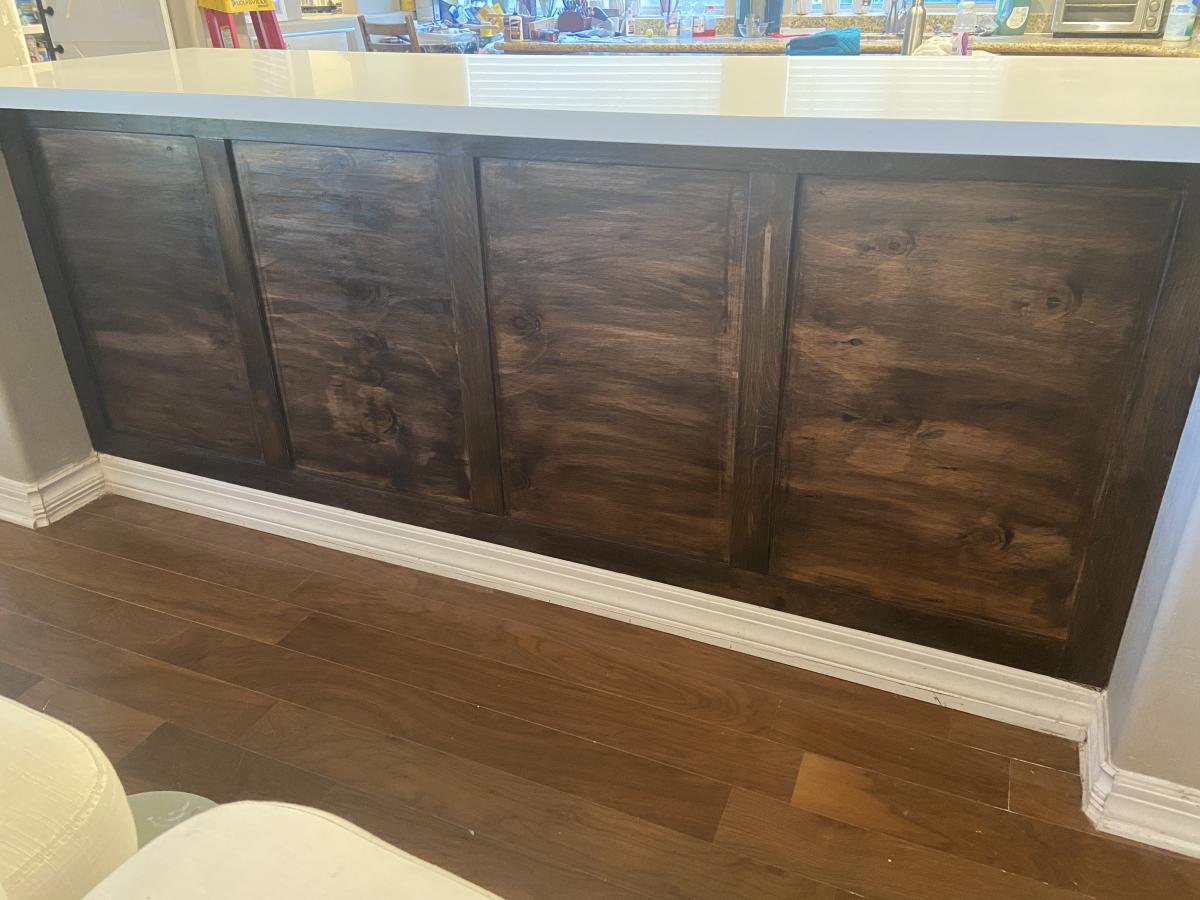
Closet
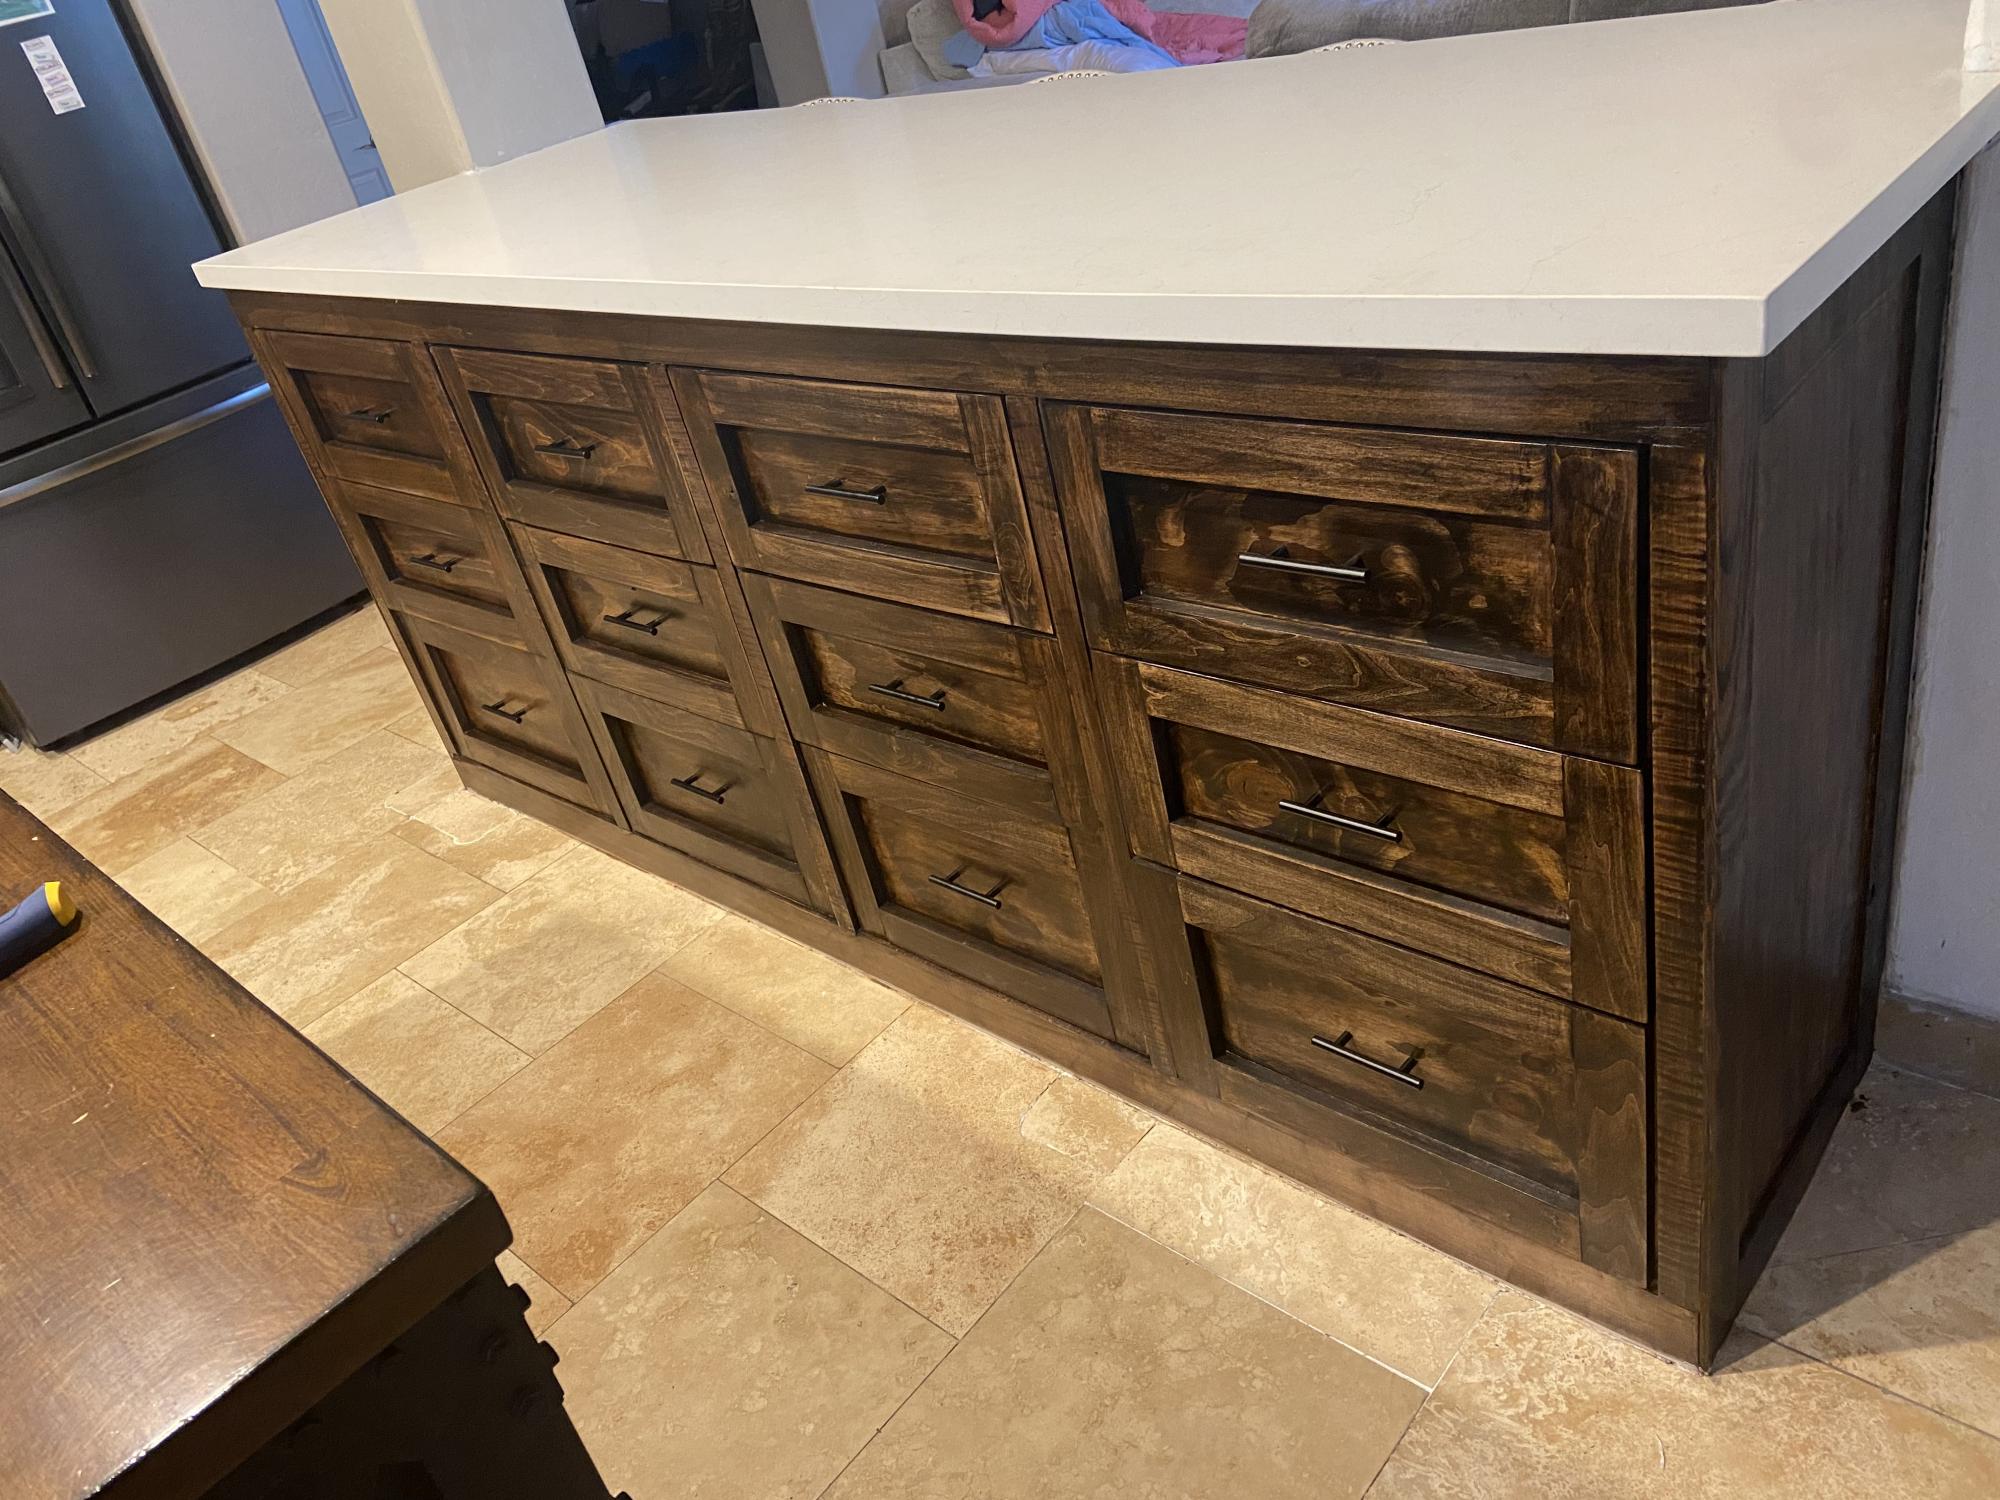
I decided to demo our old pantry and build a counter height bar in its place. I used Ana’s mudroom bench plans and added an additional drawer to the length and 2 more drawers to the height, making a total of 12 drawers. I also used Ana’s video on sizing drawer faces https://youtu.be/AlvlrPxXGUw
—at least for the bottom 4 drawers. I didn’t find that video until I’d completed the first 2 rows of drawers and they definitely require some tweaking still.
I added some moulding to the back and sides with 1/2” plywood ripped into 2.5” strips to complete the shaker look. Then I had a quartz top fabricated and installed.

My husband and I made the table and chairs for our screened porch. We really like how the project turned out. Many more Ana White projects on the our list!
I poured a 3 1/2" concrete pad first then bolted the completed shed to it.
Shed was easy enough to make, the plans were well done. Spent about 25 total hours on shed, including staining. Hinges were very expensive ($20 a pair with latches), spent about $400 NOT INCLUDING gravel, sand, & concrete for the pad or clamps.
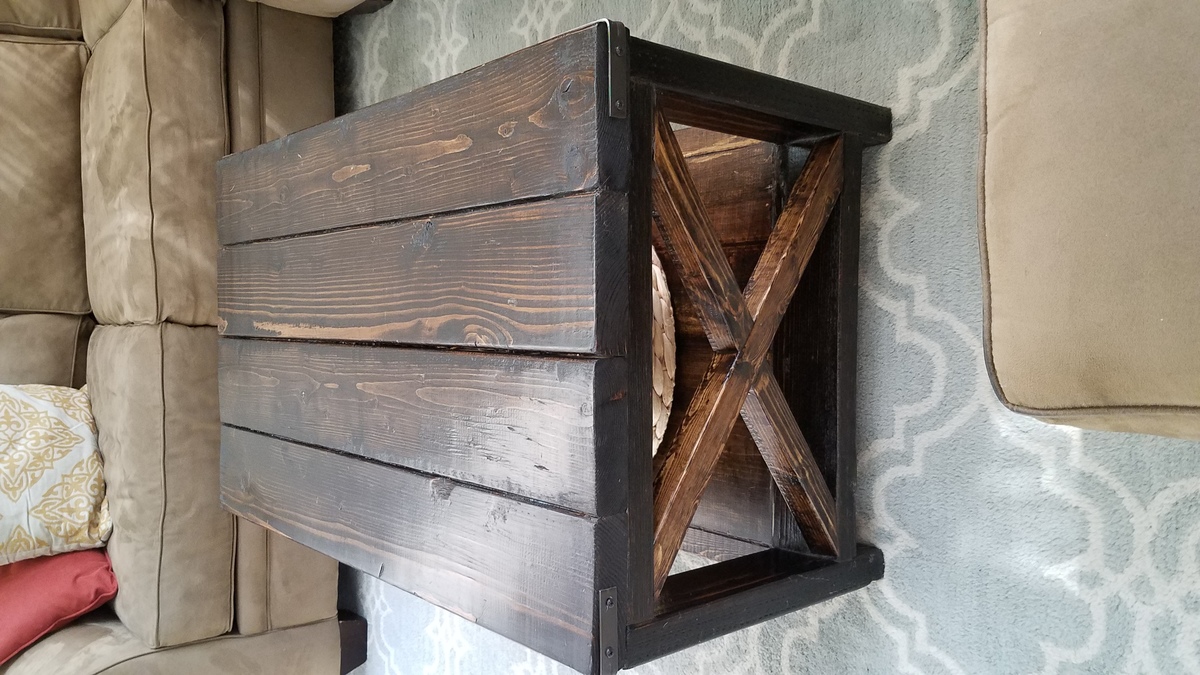
I loved Ana's version of the coffee table but it was way too big for my space, so I scaled it down quite a bit and it fits perfectly!
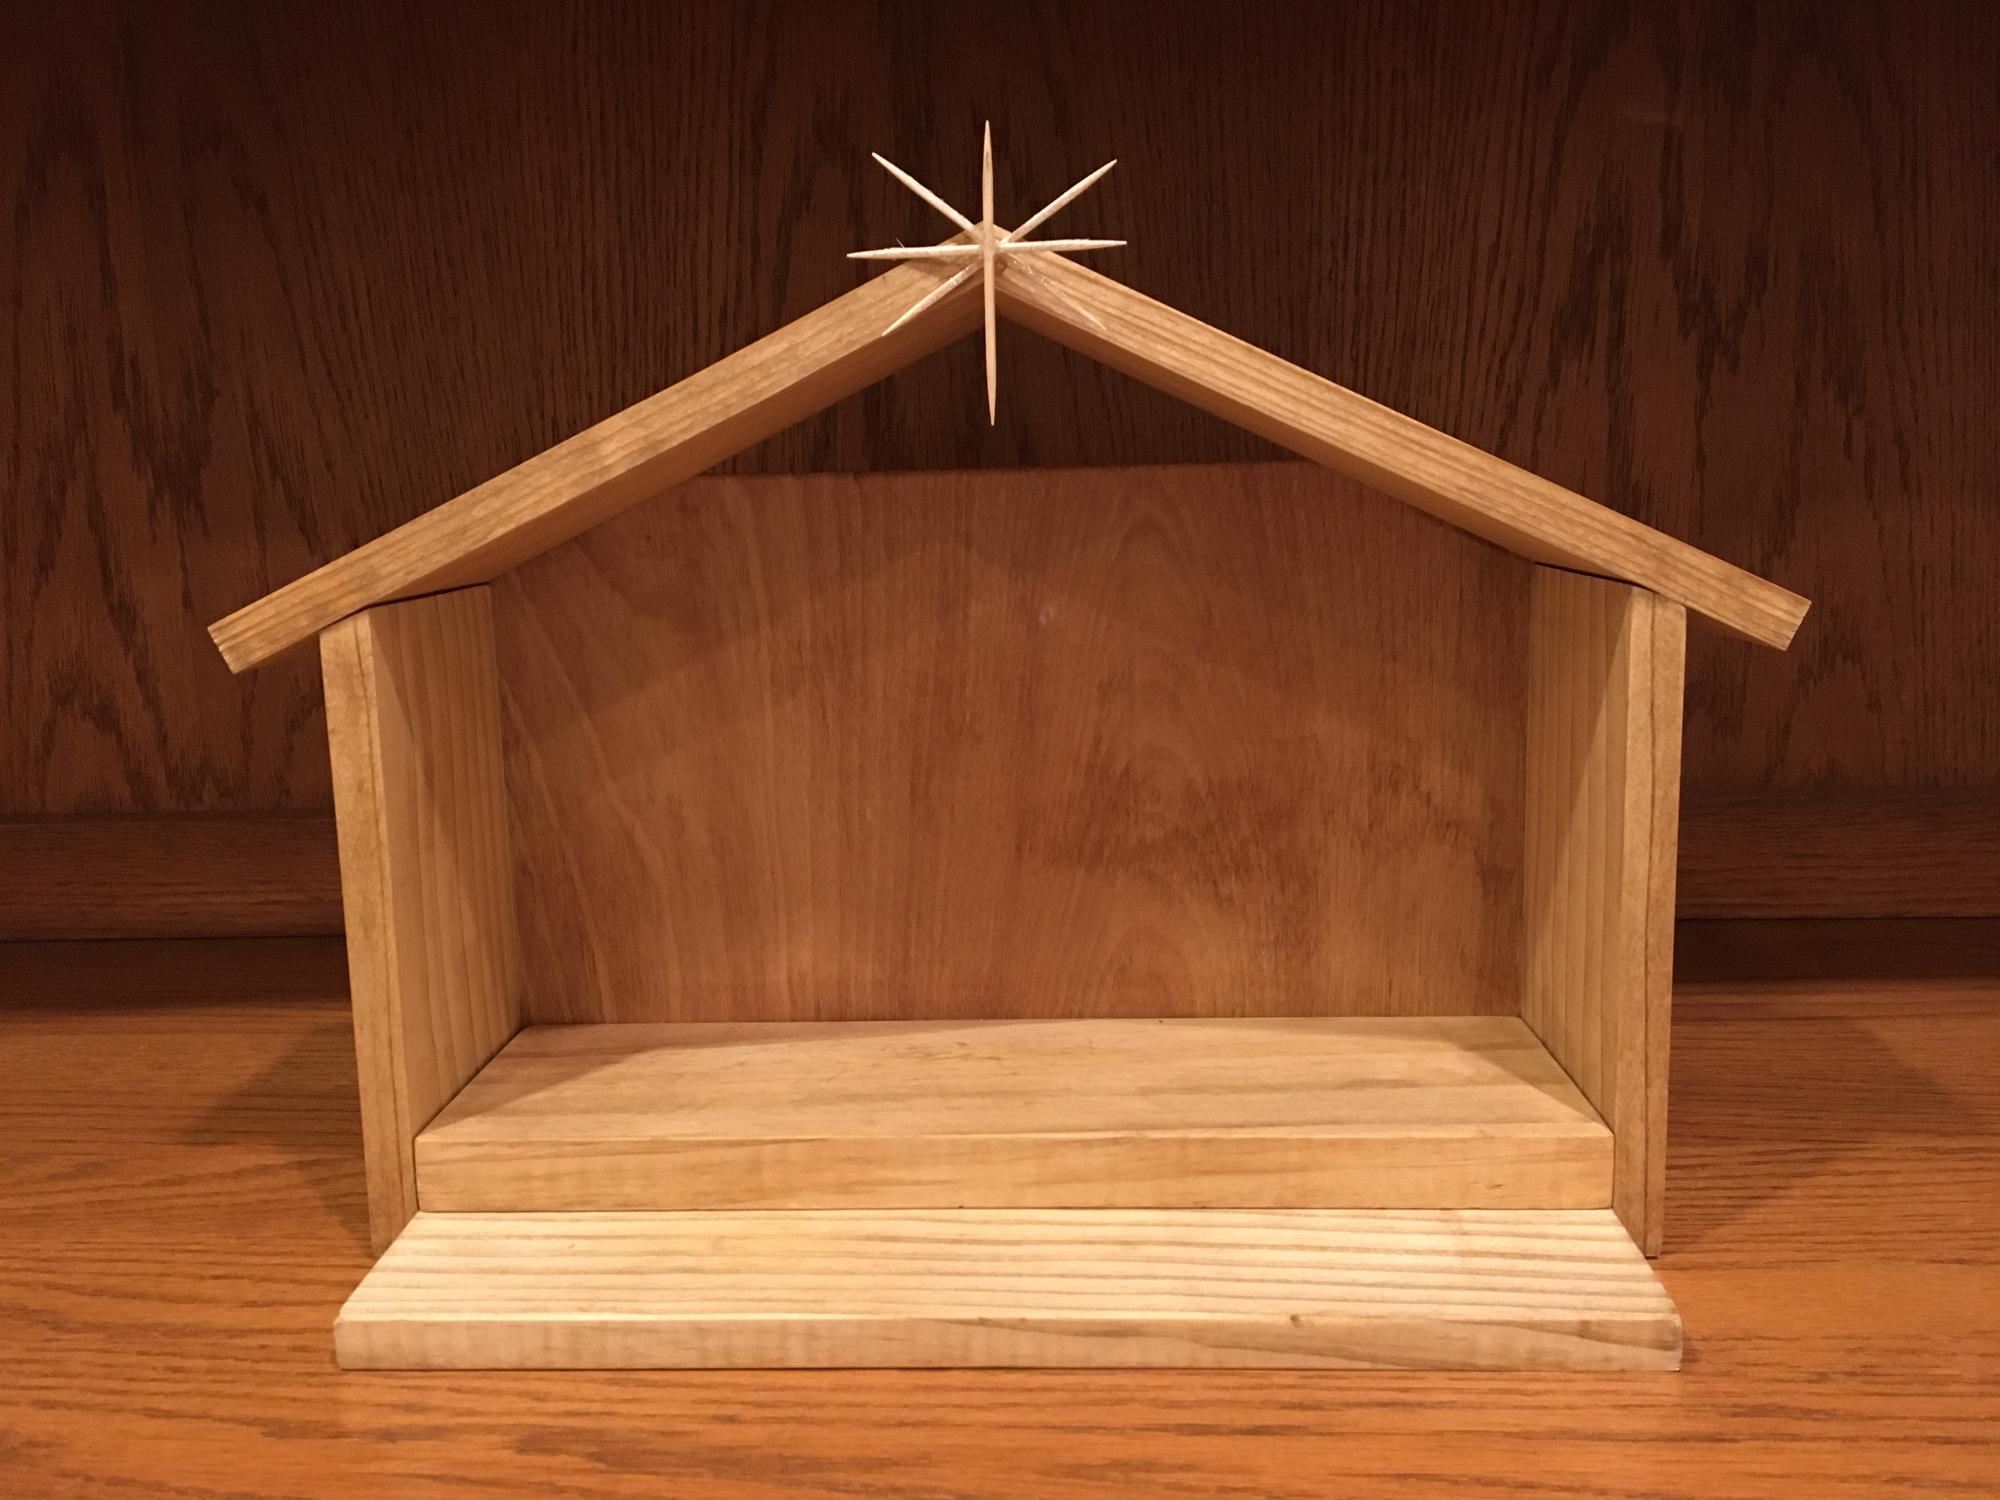
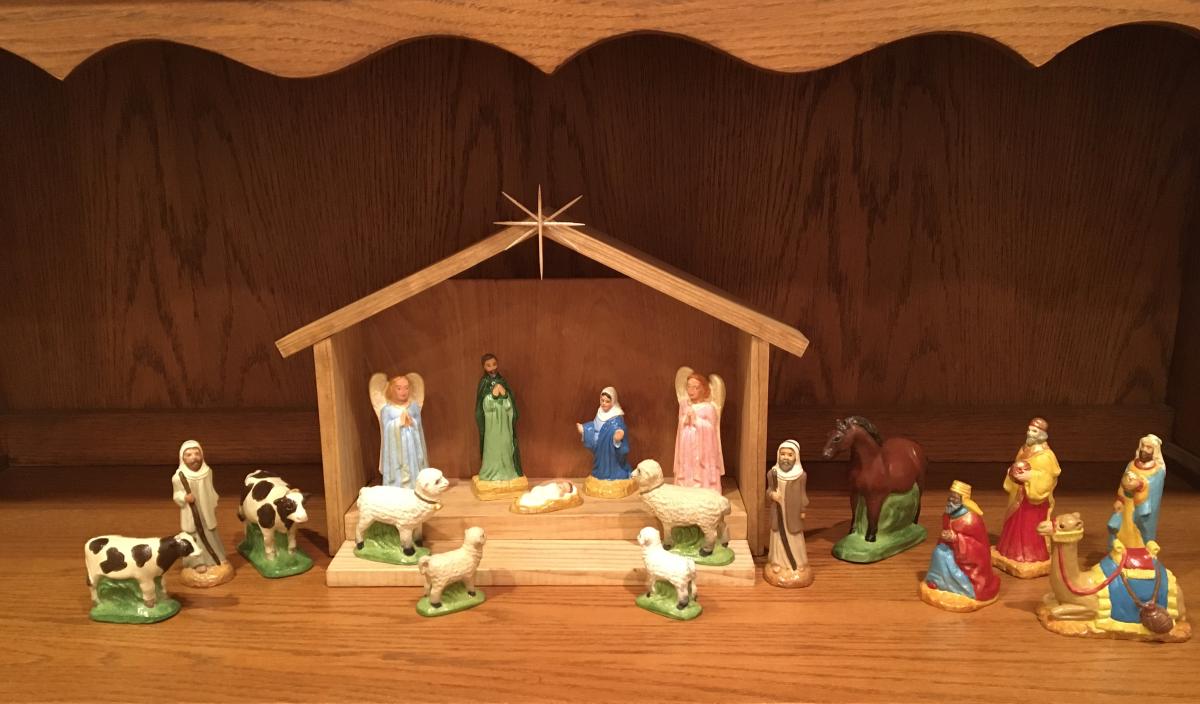
Stable made from scrap wood I had on hand (plus a few toothpicks).
Mon, 11/29/2021 - 05:42
Awesome use of material, it looks great! Thank you for sharing, God Bless~
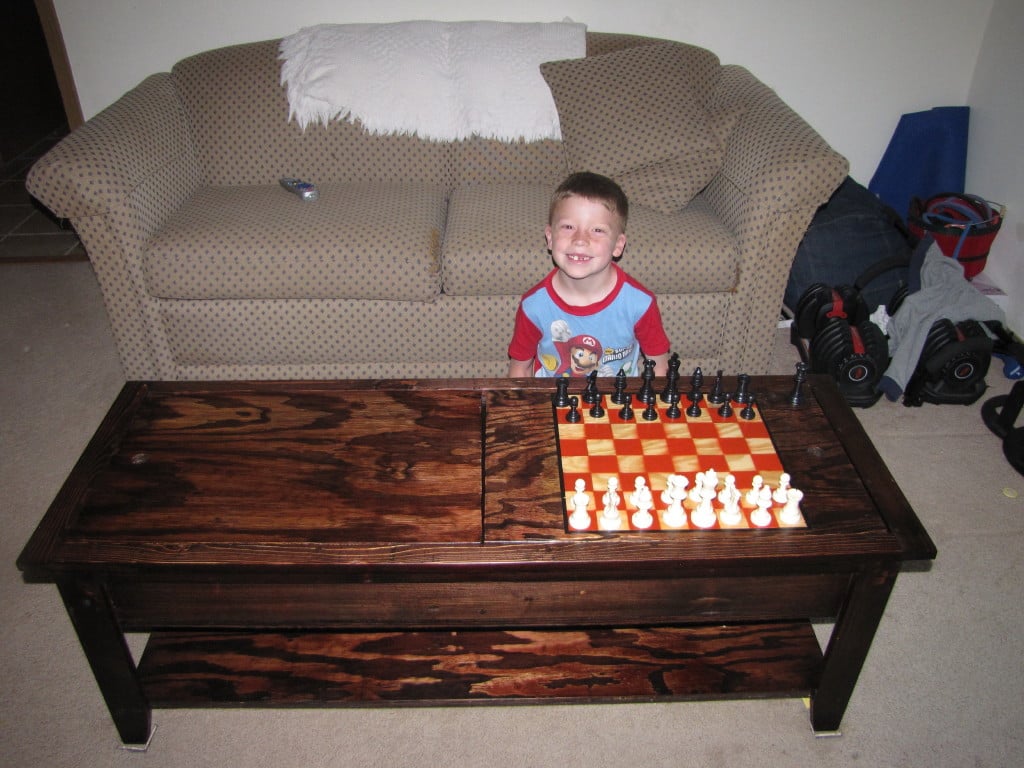
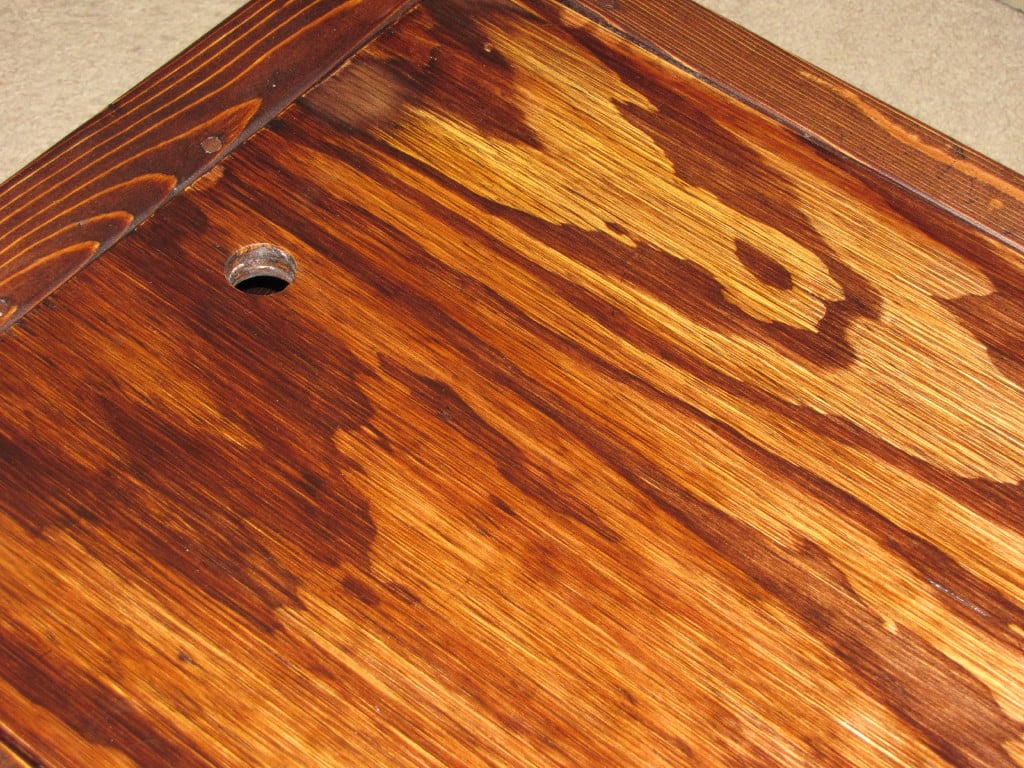
This is the Mom's Lego Table everything went according to plan until, I cut and tried to place the table tops in ... Ooops. Was not square, with the help of my father-in-law we got them to fit. So, as Ana says ..CHECK FOR SQUARE!!! The other part that took awhile was the chess board but was worth it my son loves chess!
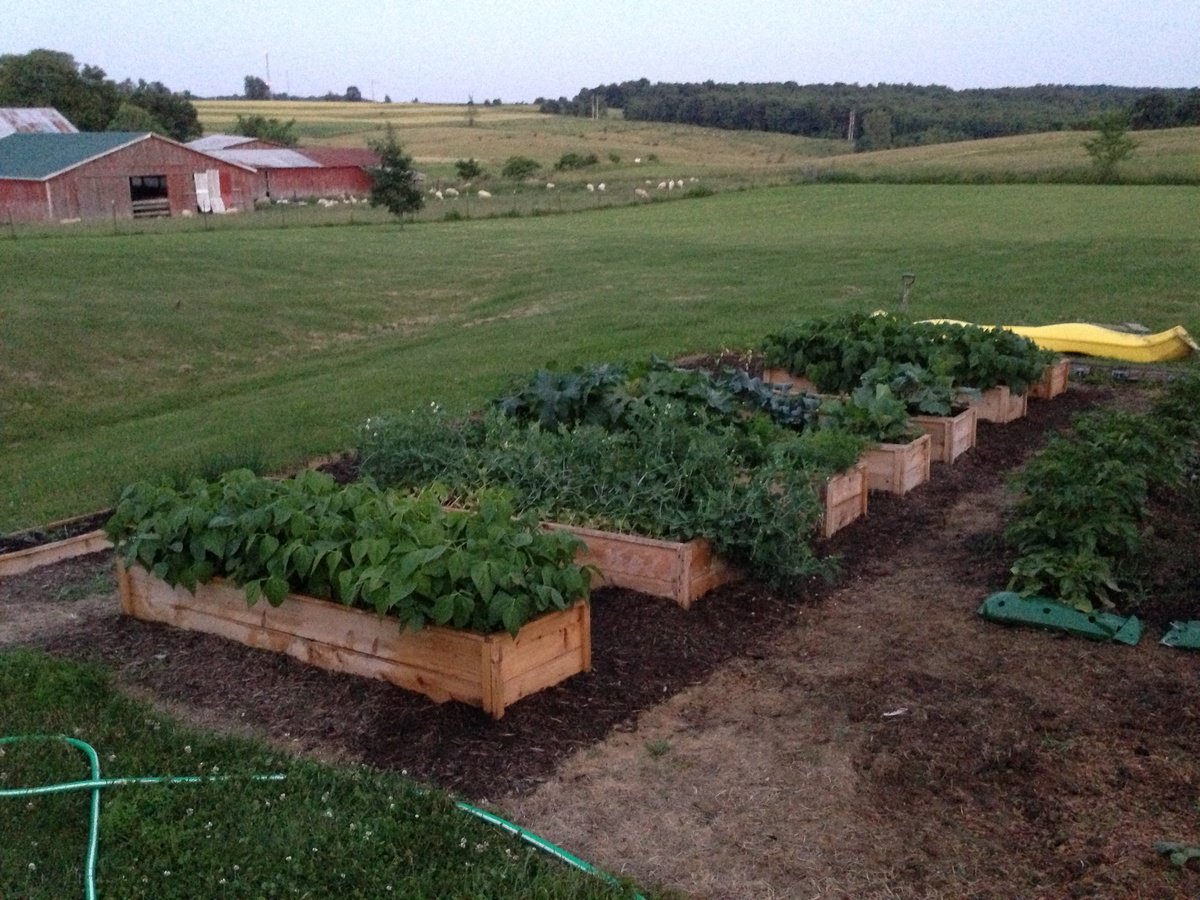
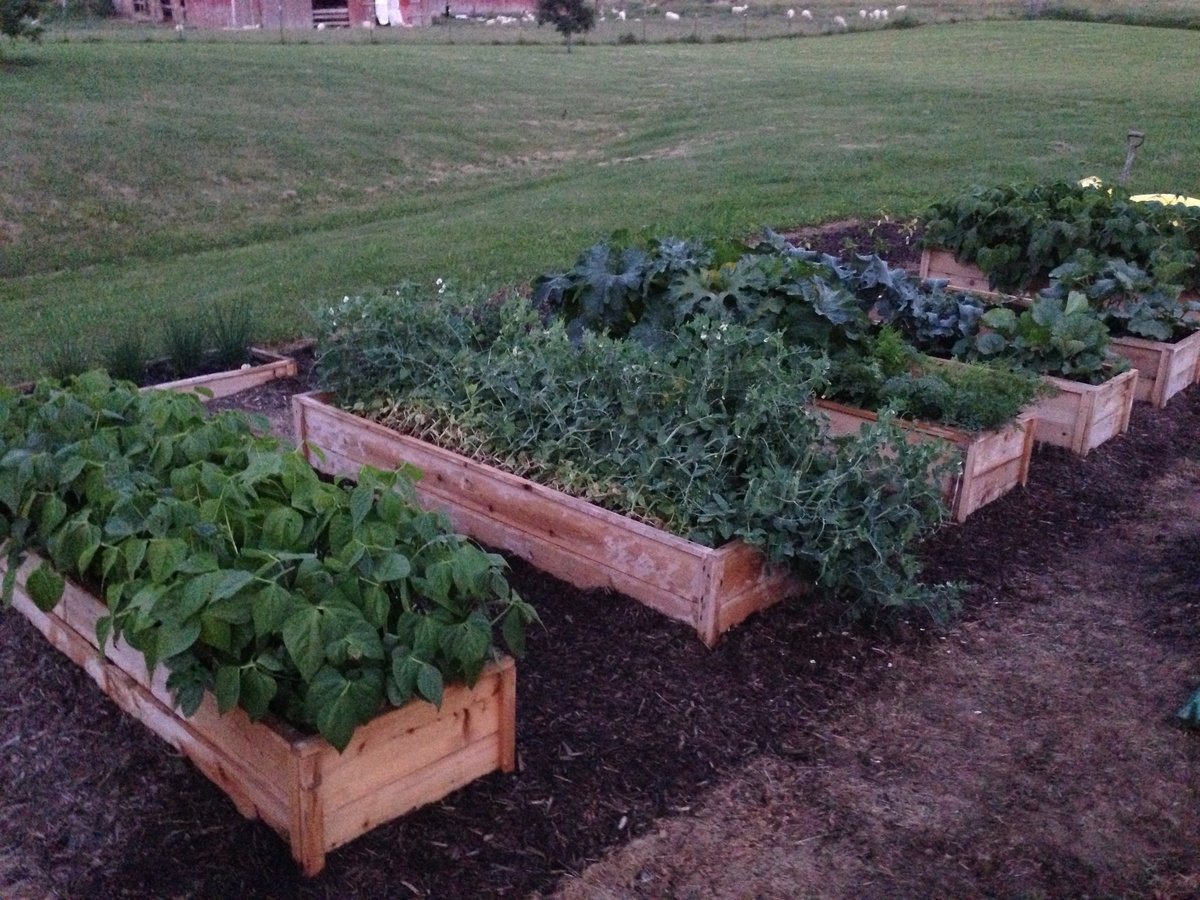
These garden beds are fantastic! They were so easy to build and look great in our backyard. We have always found ourselves with a garden covered in weeds or plants out of control. Our garden this year looks wonderful and we have hardly any weeds in the beds. Thanks for the great plans!

Fri, 05/24/2019 - 10:05
I'm so glad the plans worked for you! Your garden looks fantastic!
I washed the plans for the farmhouse table in hot water!
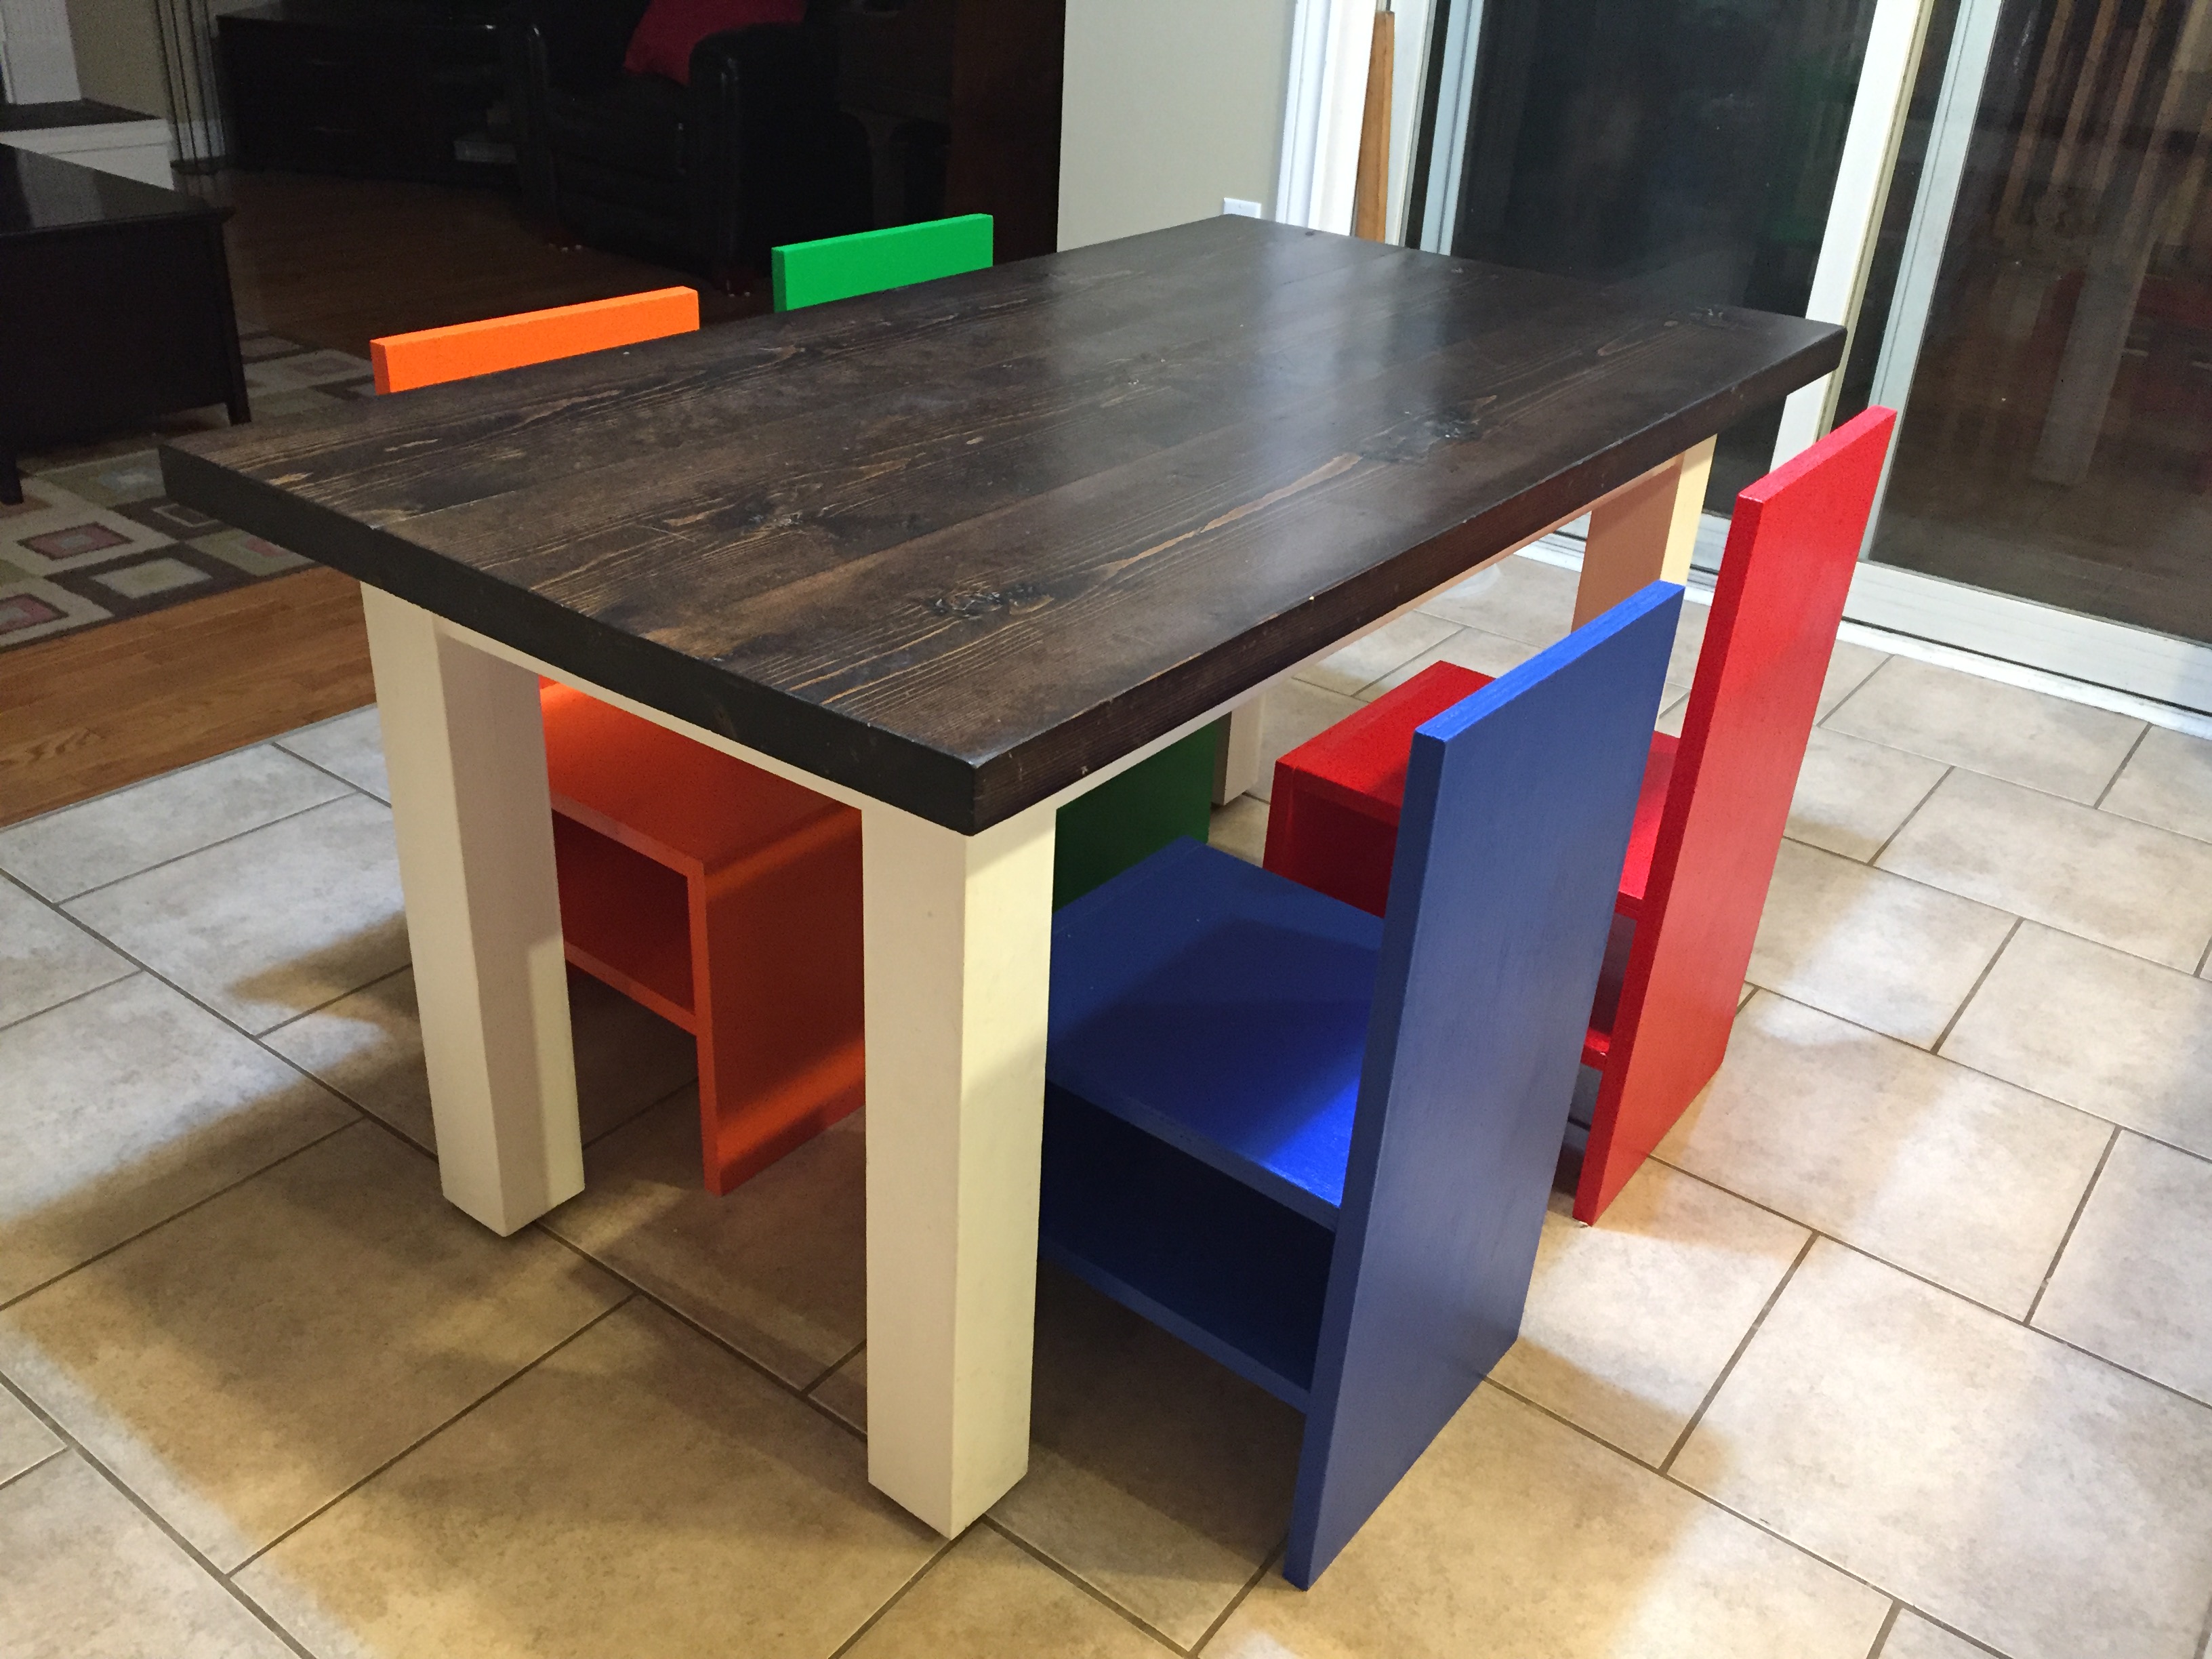
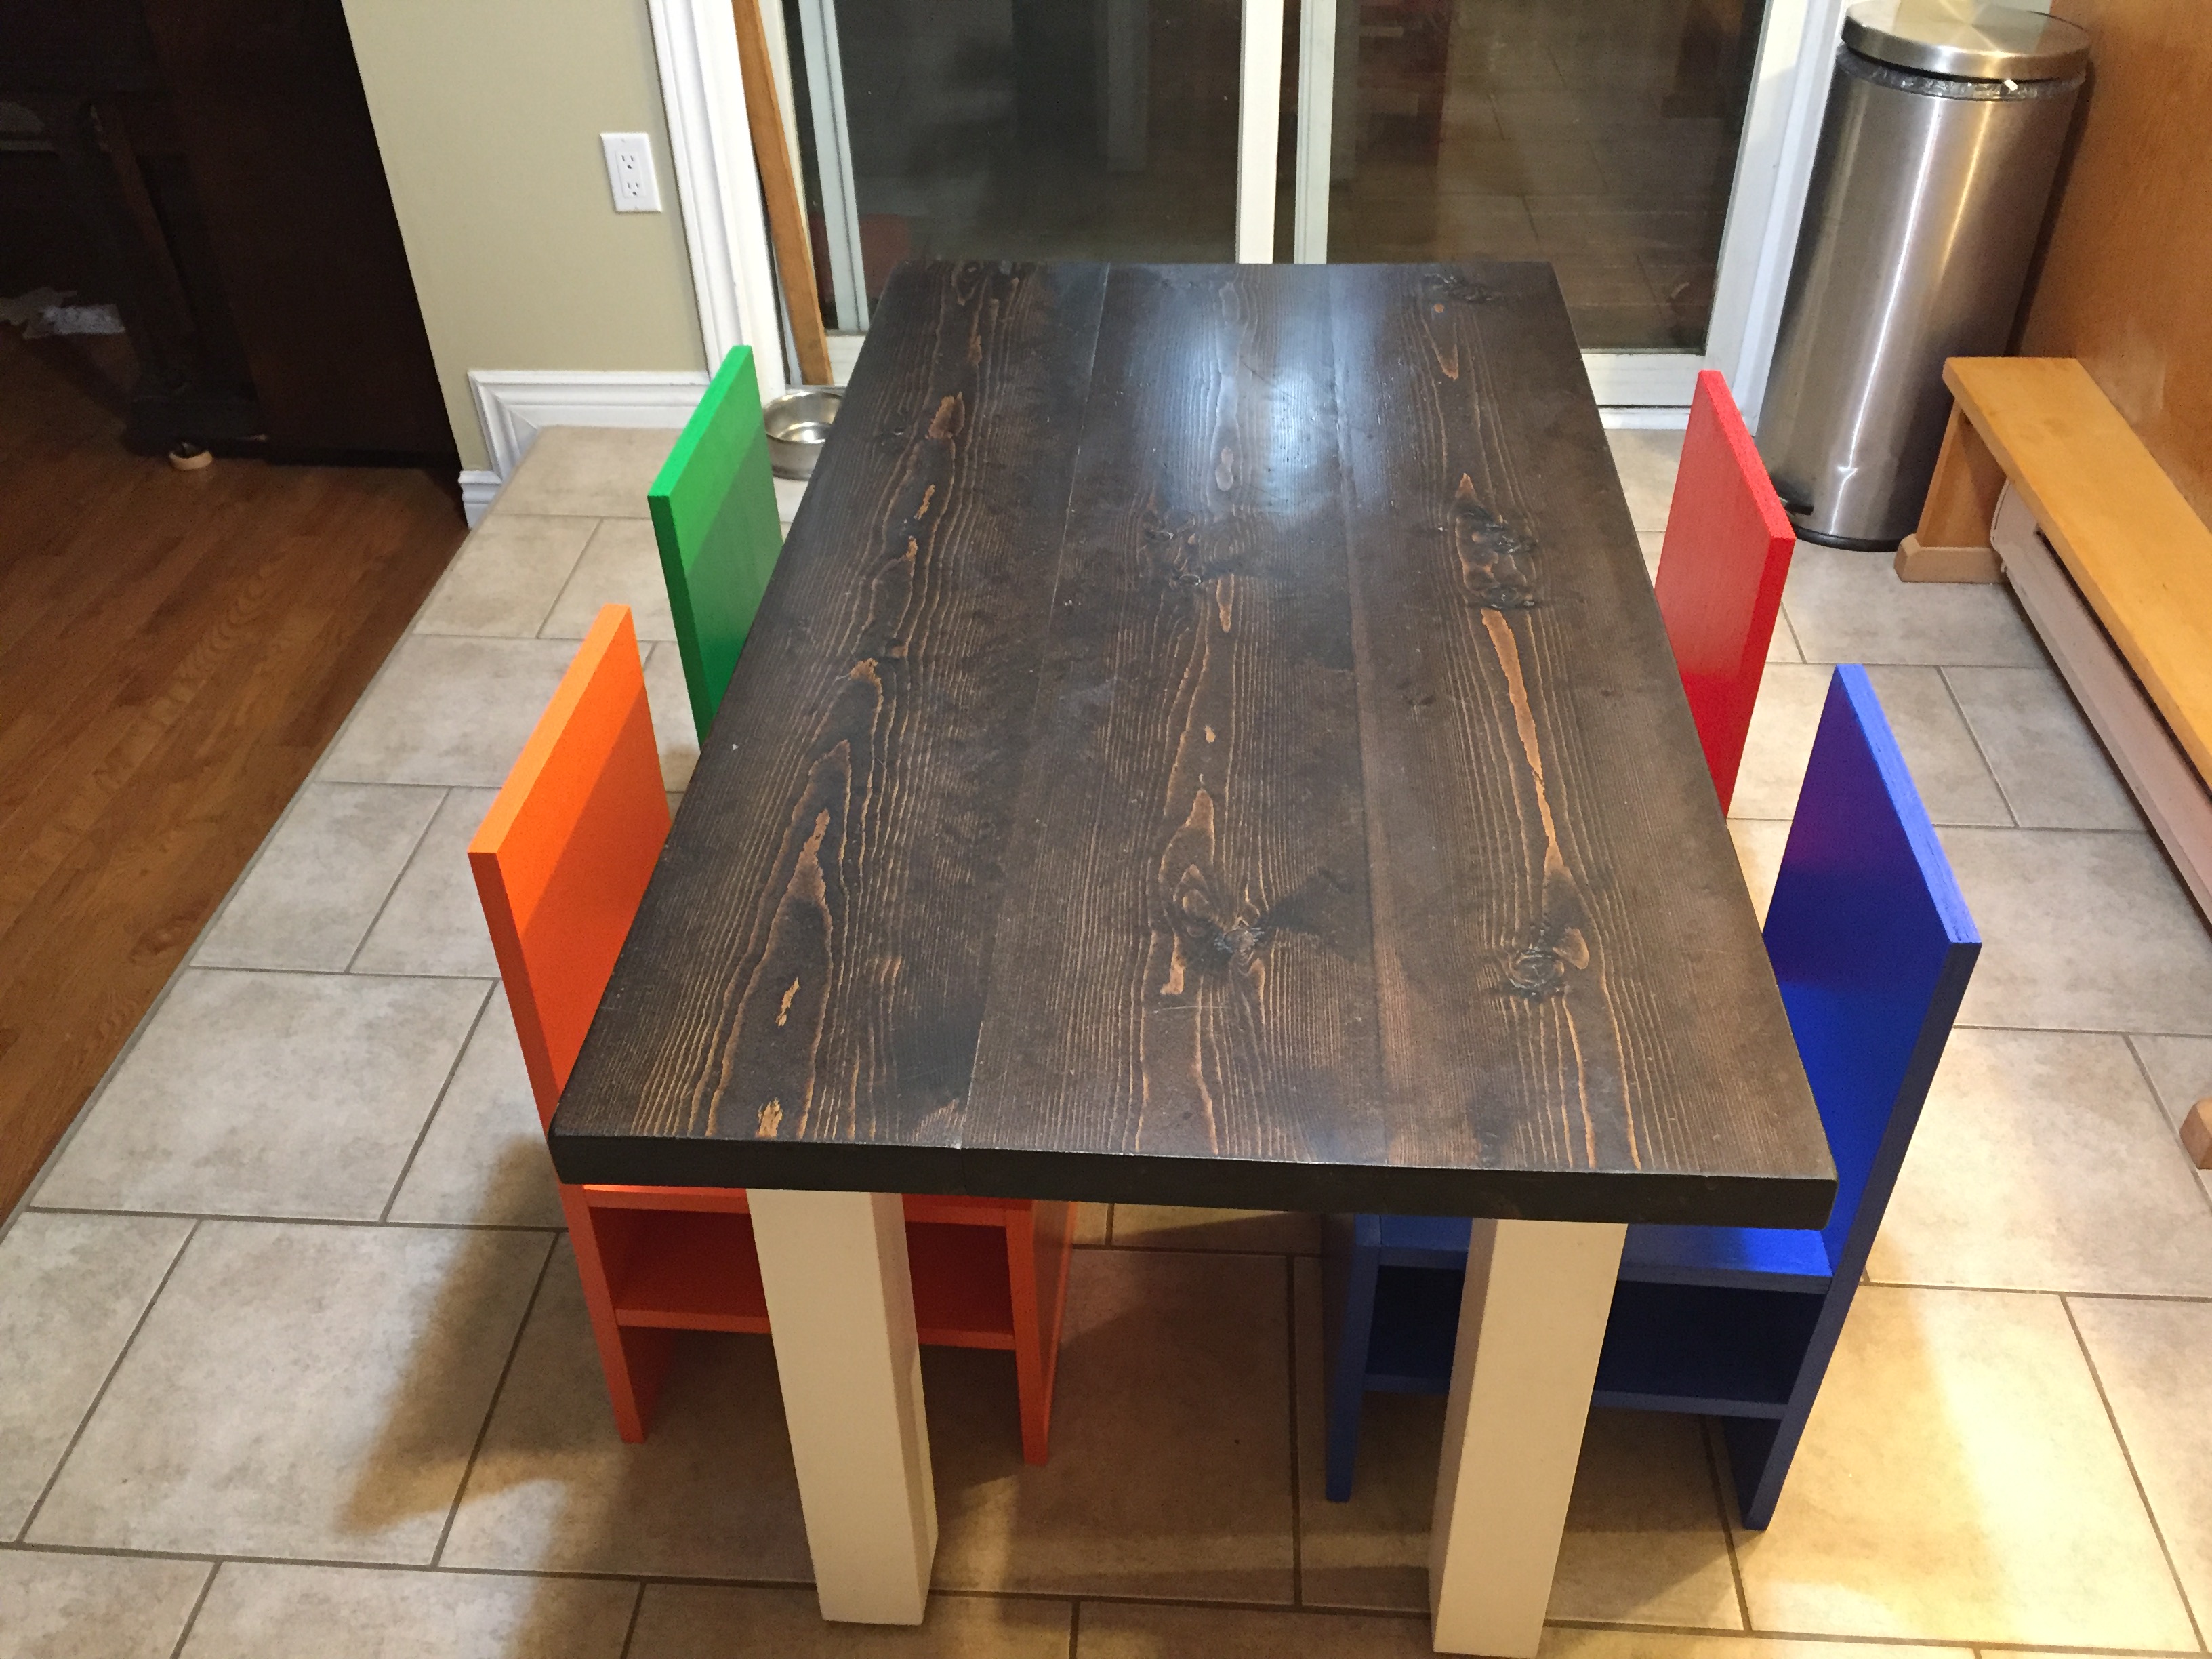
I modeled this kids table off the farmhouse table and then made the chairs out of 3/4" plywood with bright colours.
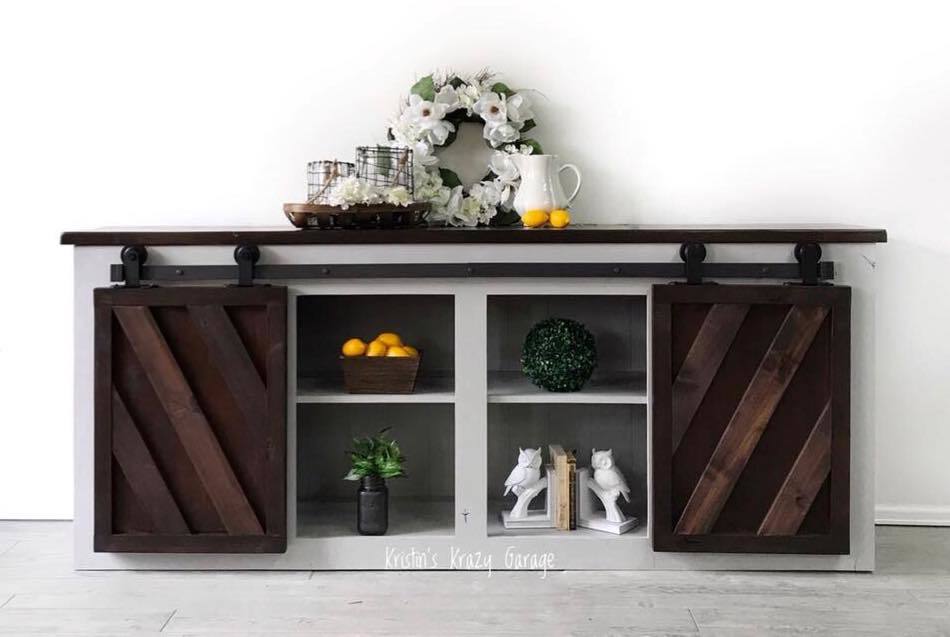
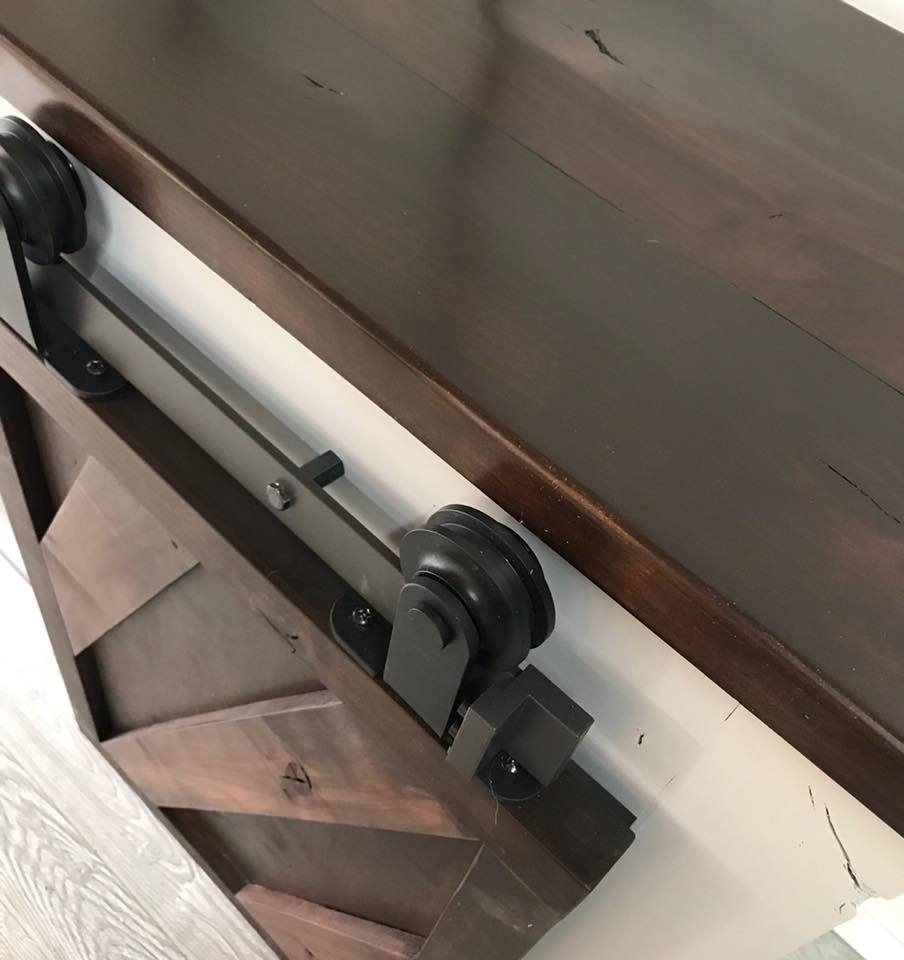
We decided to go big or go home. We made the console almost 8 ft long out of all Rustic Alder. Took almost a month with a few hours here and there in the garage. But everyone loves it and we can't wait for it to find a new home!
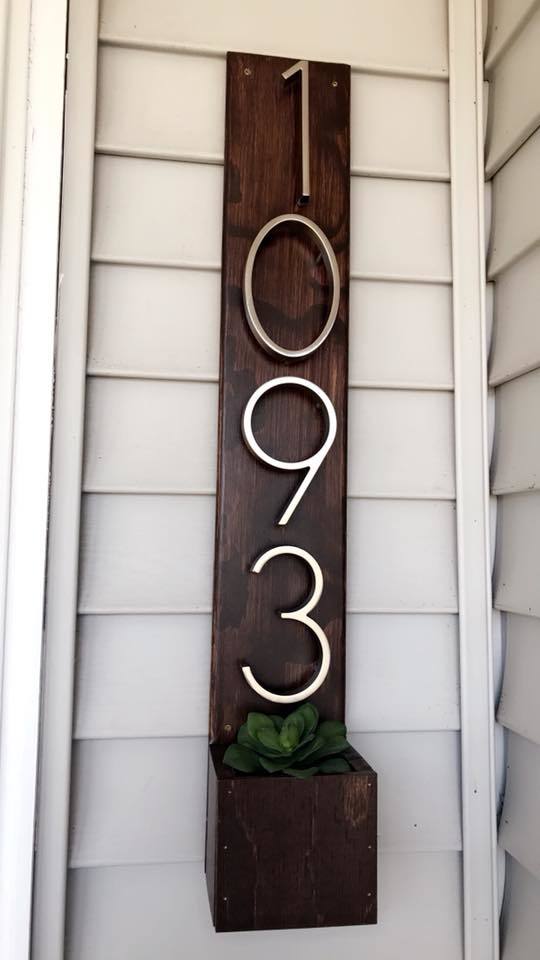
Address Sign
Thanks for the plans Ana!
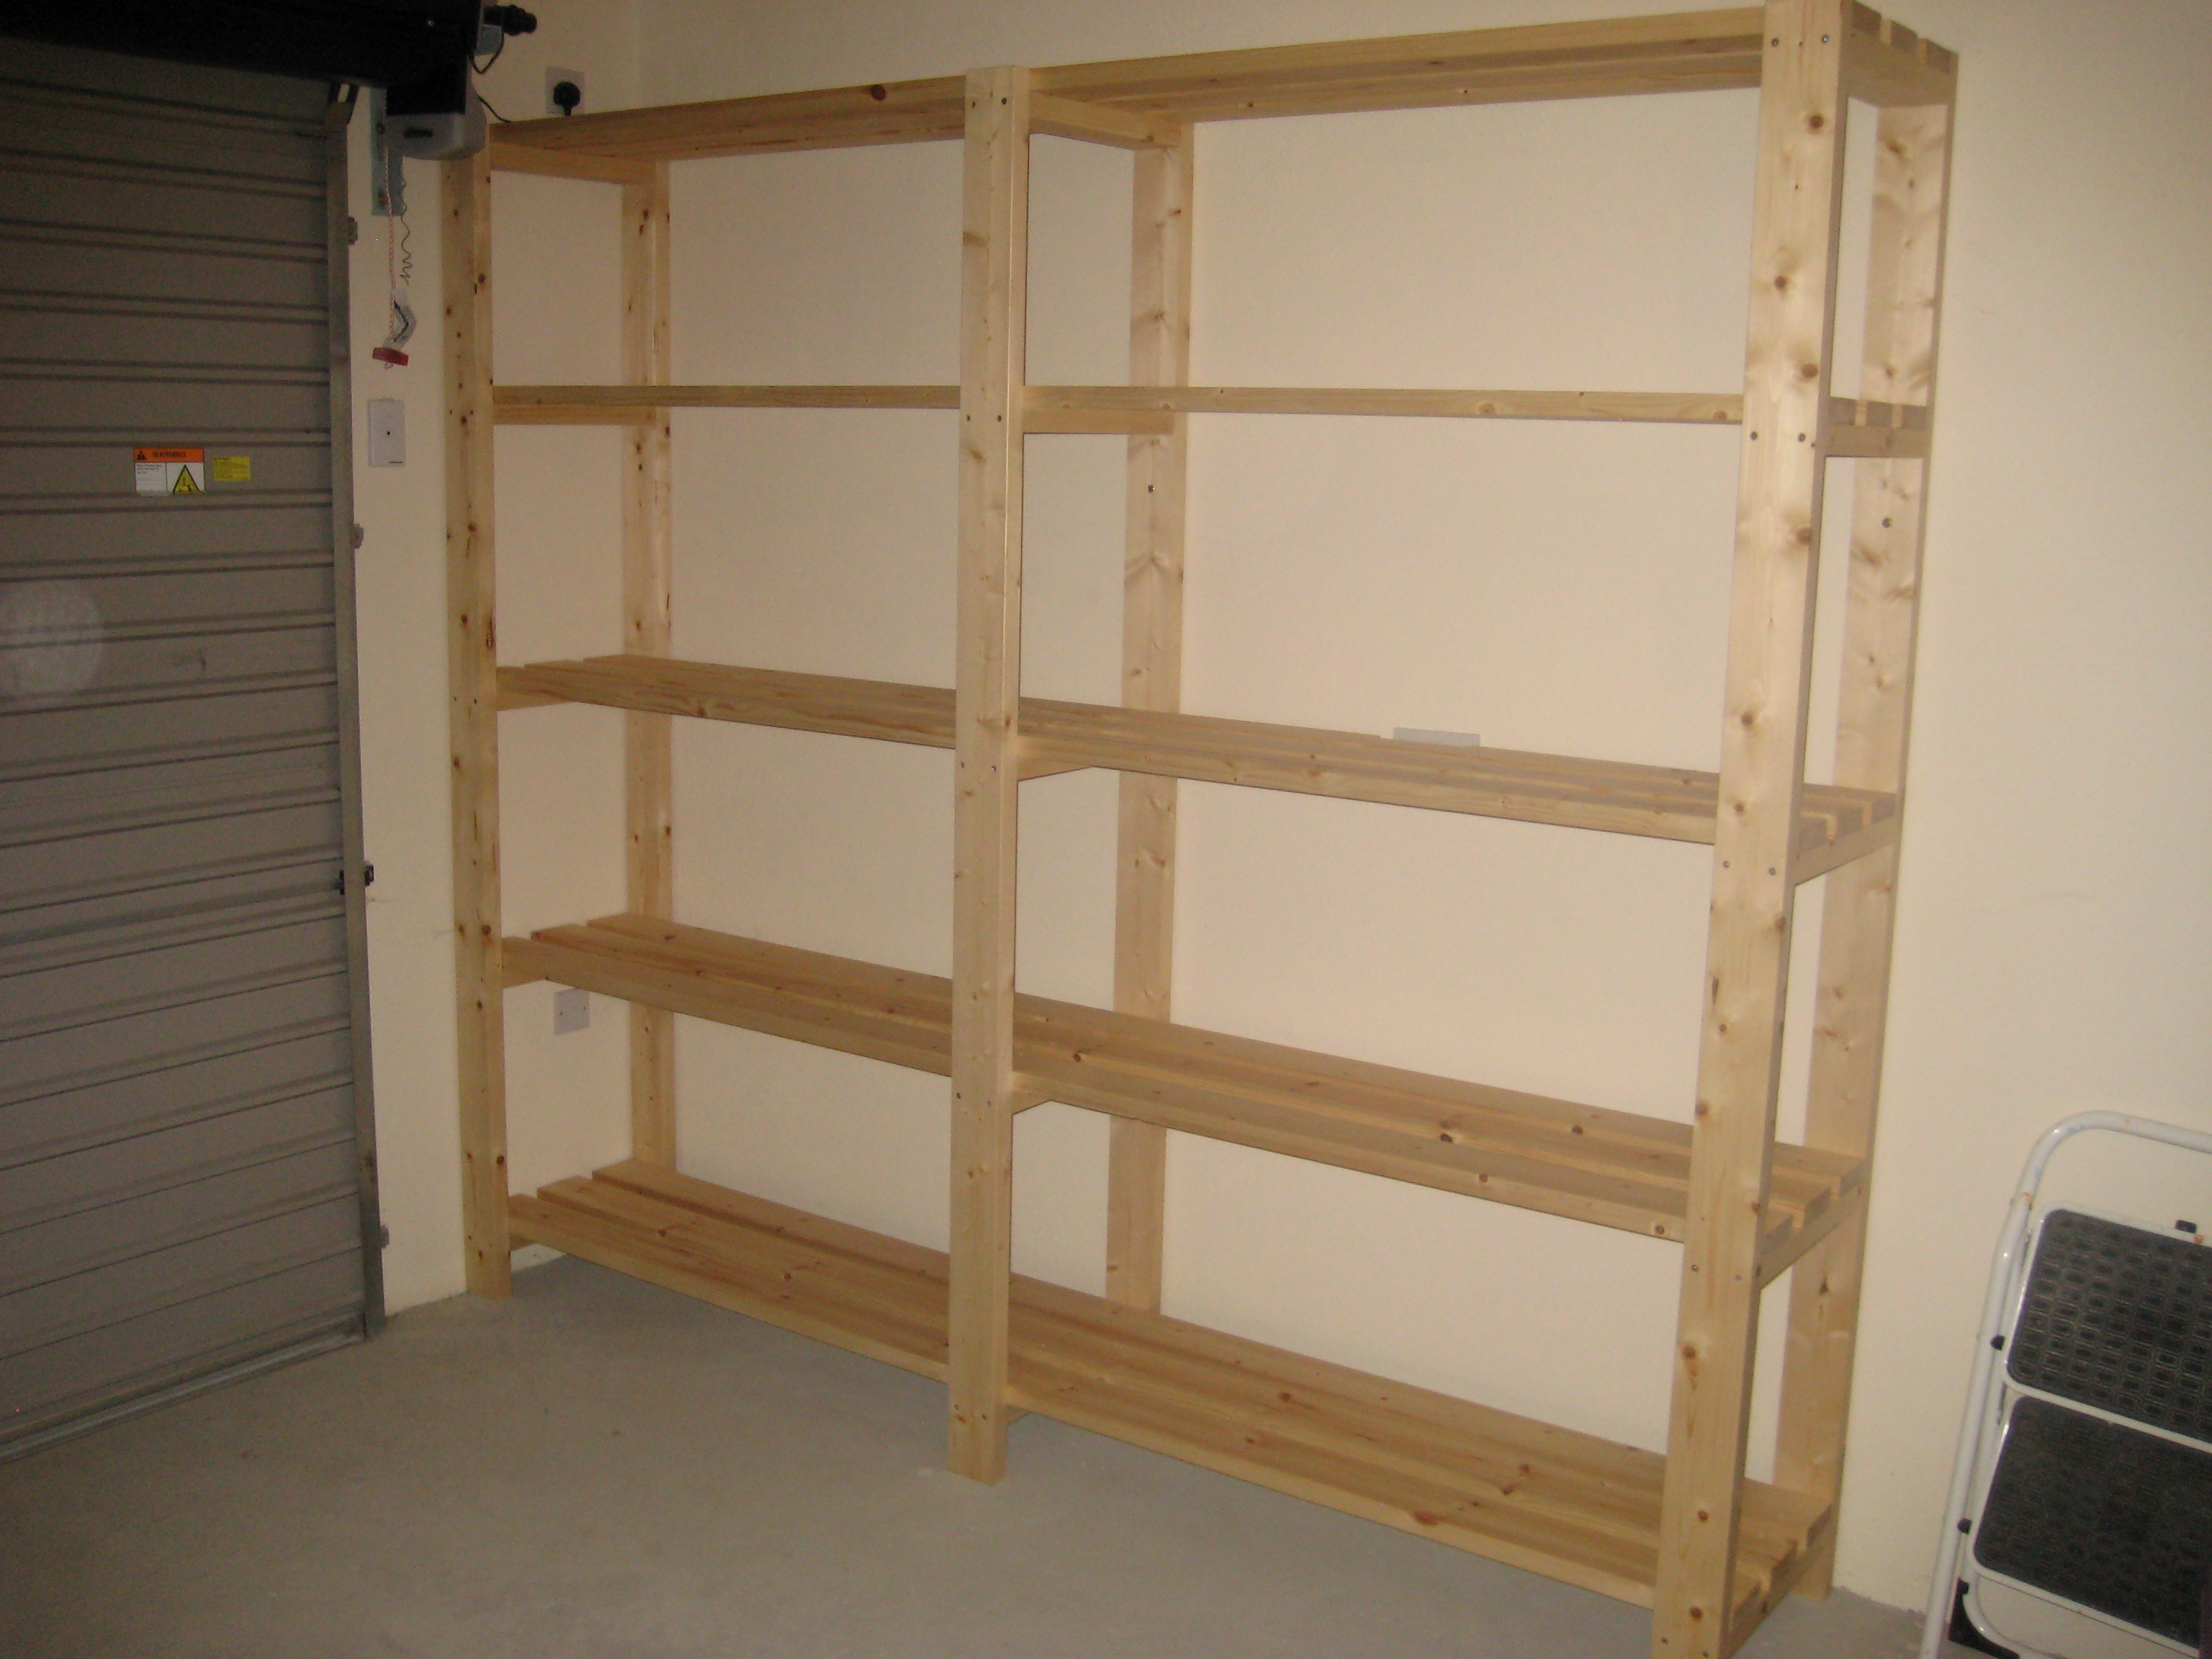
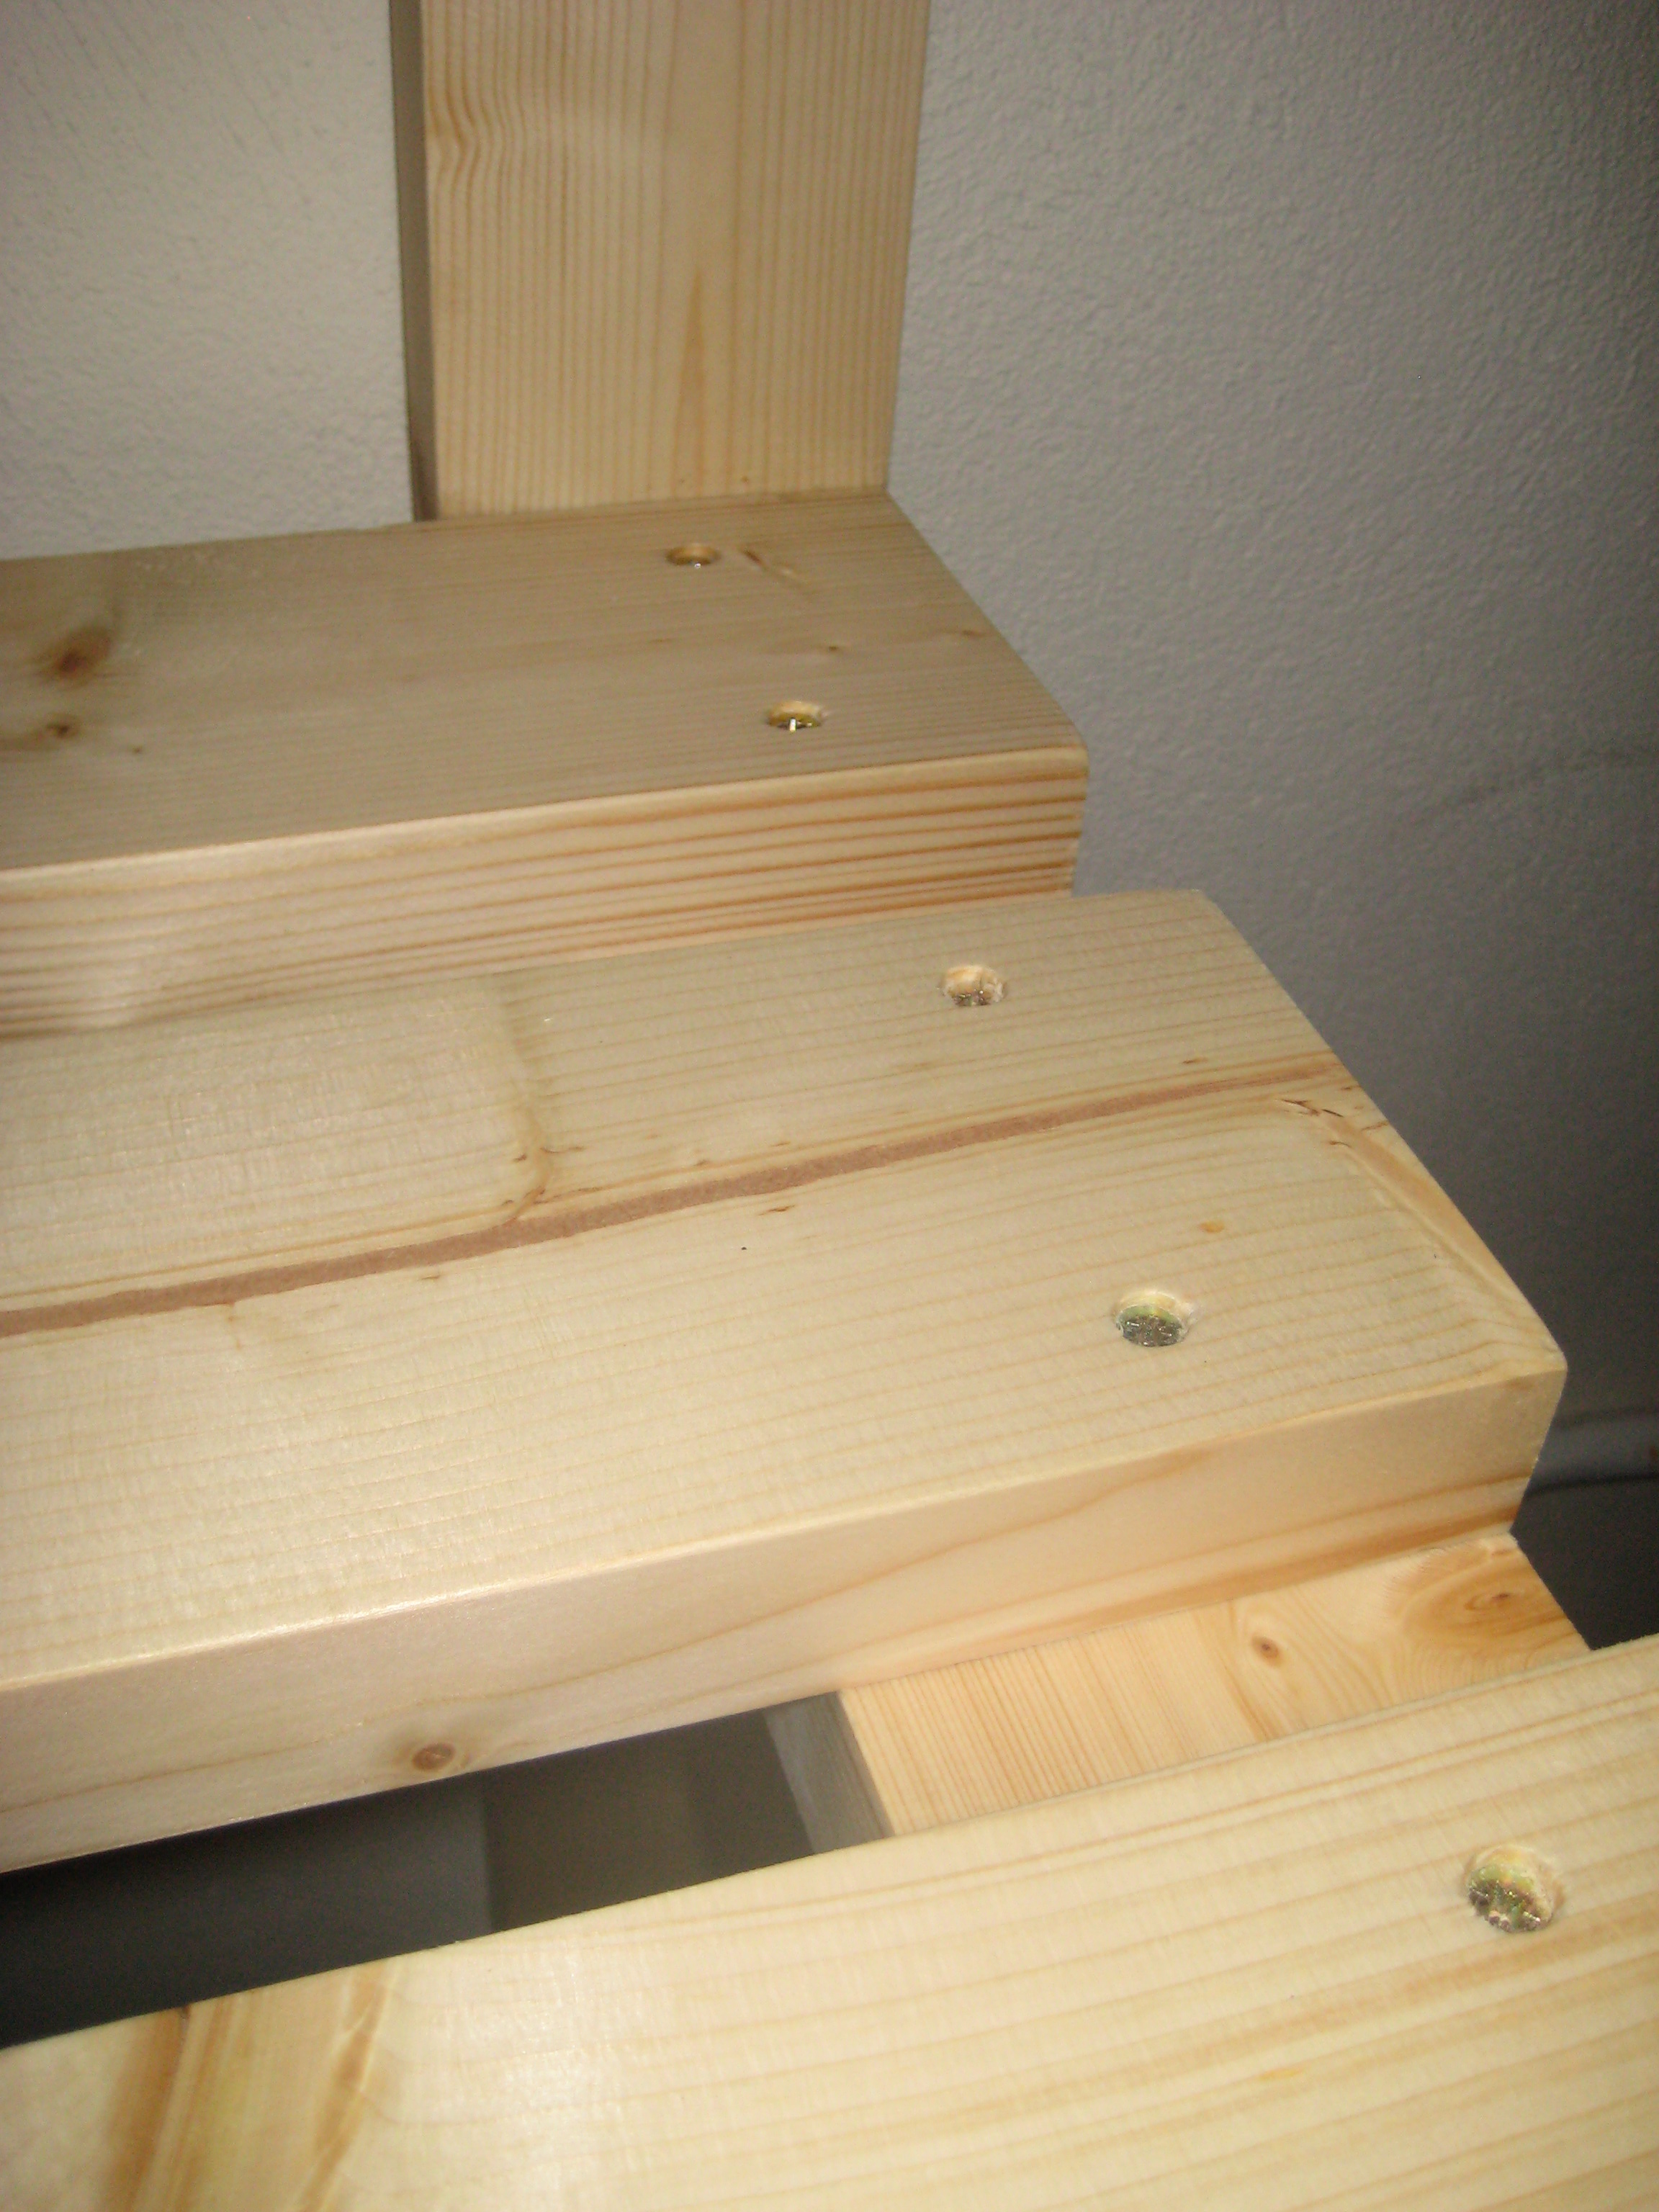
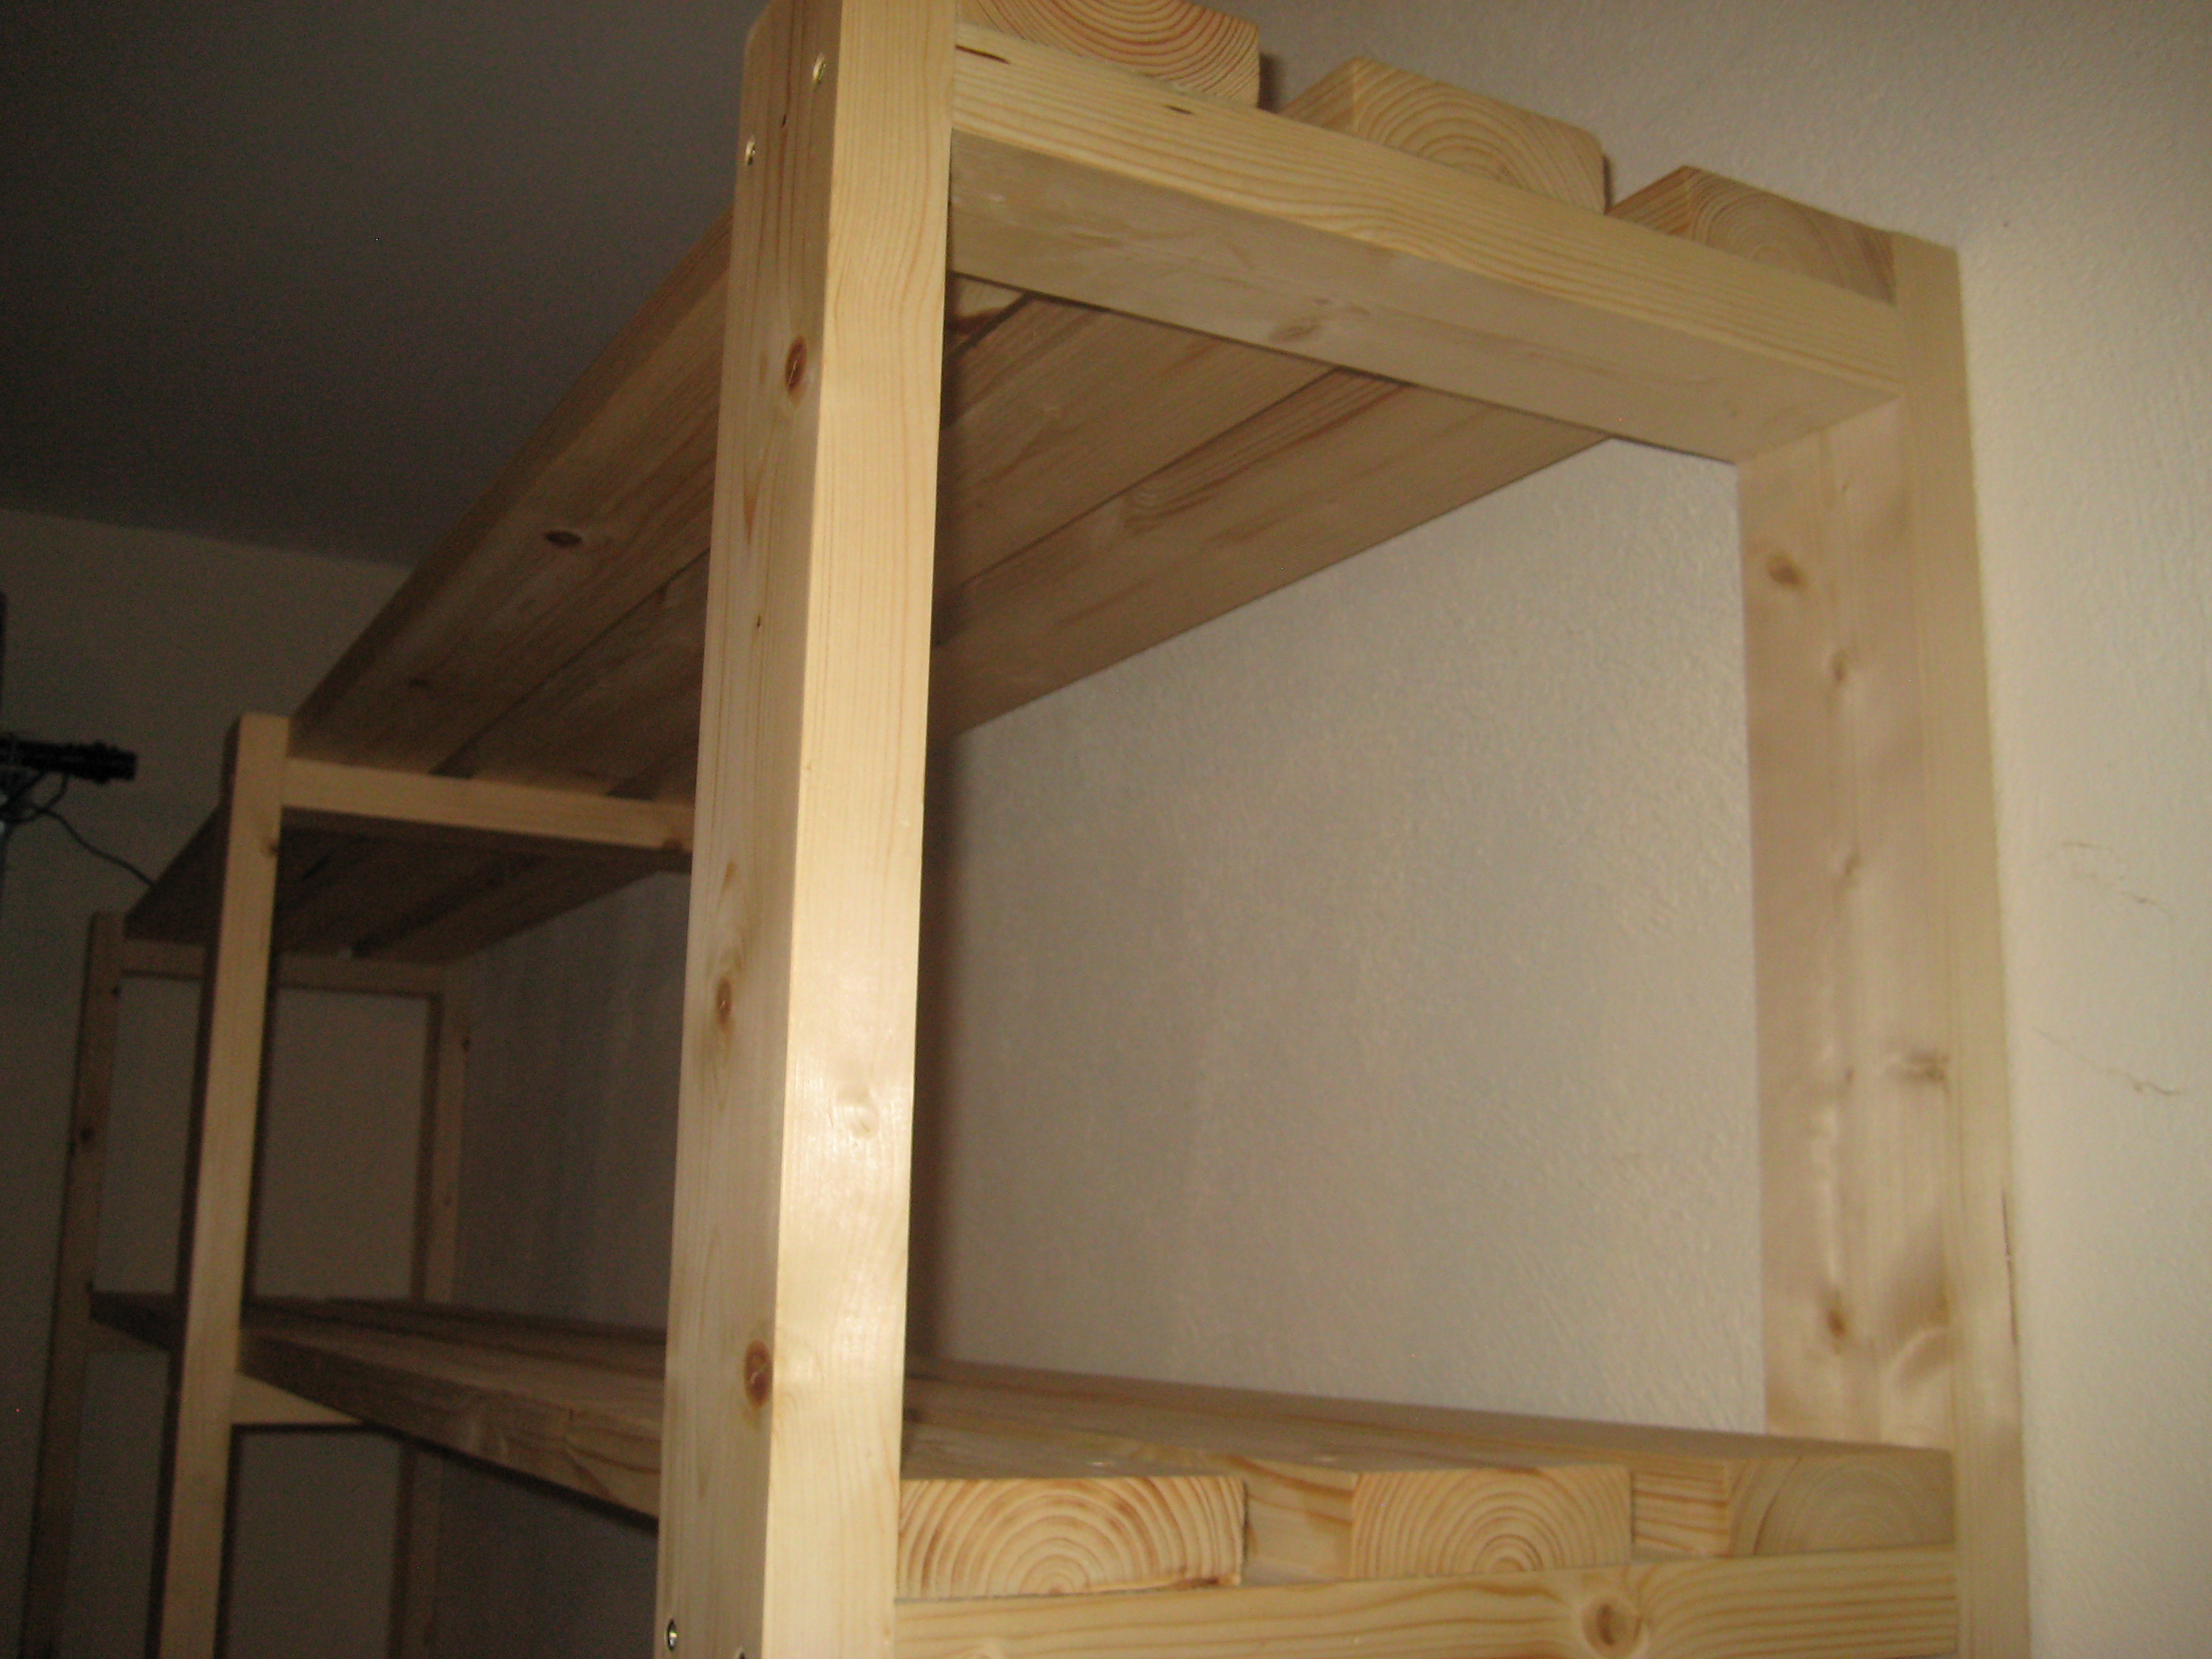
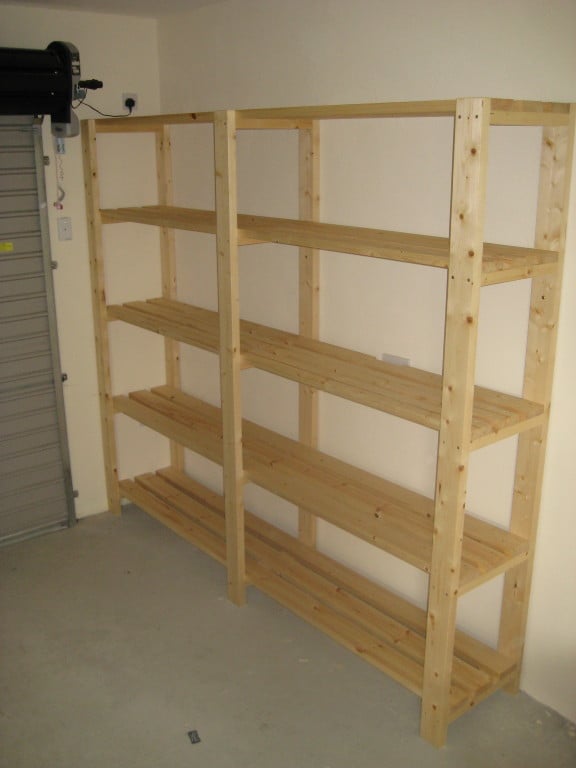
I stuck to the design but changed the dimensions to suit the space and the boxes we intend to store. This made the shelves 7.5 feet high by 8.5 feet wide. The timber was supplied in 17’ lengths so this also meant very little wastage. The frame is composed of 2x4’s, the shelves are 4.5 x 1.5’s - as I wanted the shelves slightly shallower this meant I could get away with three boards for each shelf instead of 4 as on the plans.
For the short cross pieces I used woodglue and screws – to attach the long shelf pieces I just used screws. I predrilled holes in the first piece for each of the screws, but I didn’t drill a pilot hole in the next piece, the screws were self-tapping and didn’t need one.
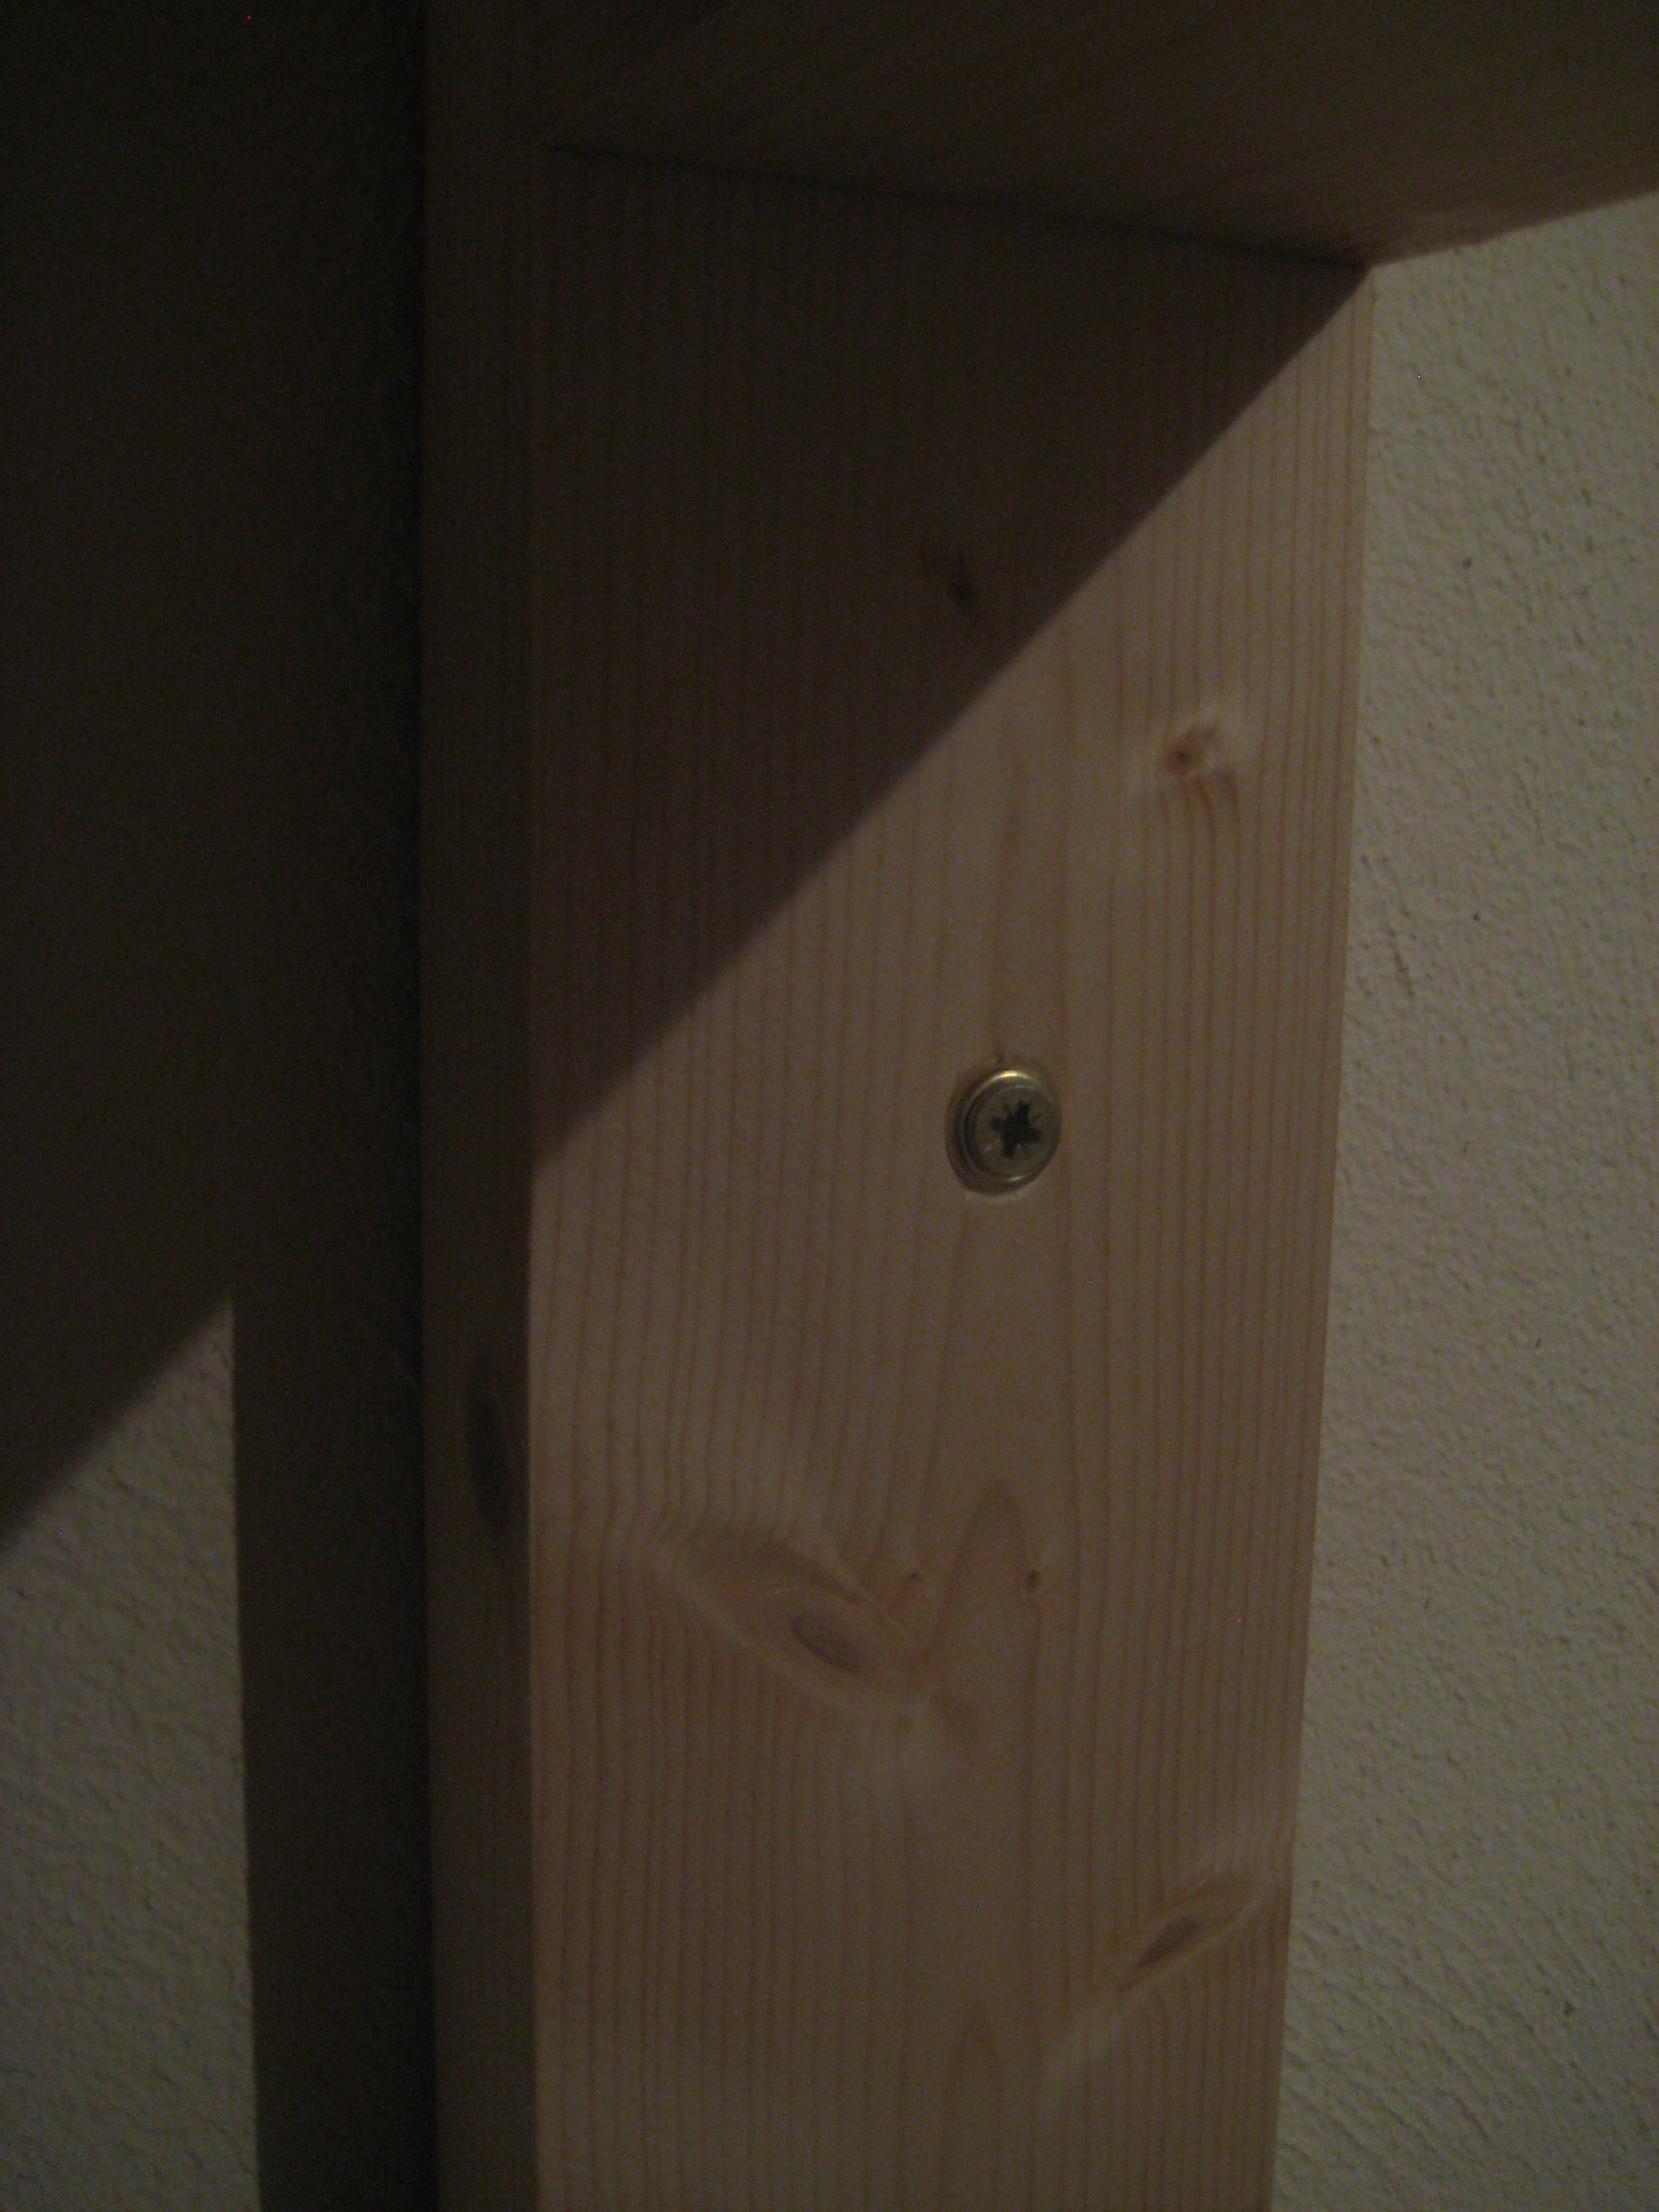
The back wall is concrete block and I screwed each upright to the wall using wall plugs and screws. I’ve 2 young children and as the shelves are quite high I was afraid they might climb on them and tip them over otherwise. The attachment to the wall definitely makes the whole thing feel much sturdier – the structure is completely rigid.
The only real issue I encountered was that some of the boards were slightly twisted or warped – and I had to apply some force to keep everything square when I was gluing up. Overall I’m very happy with the end product, and found it reasonably easy to put together. Now its time to put the shelves to good use and start tidying up the garage!
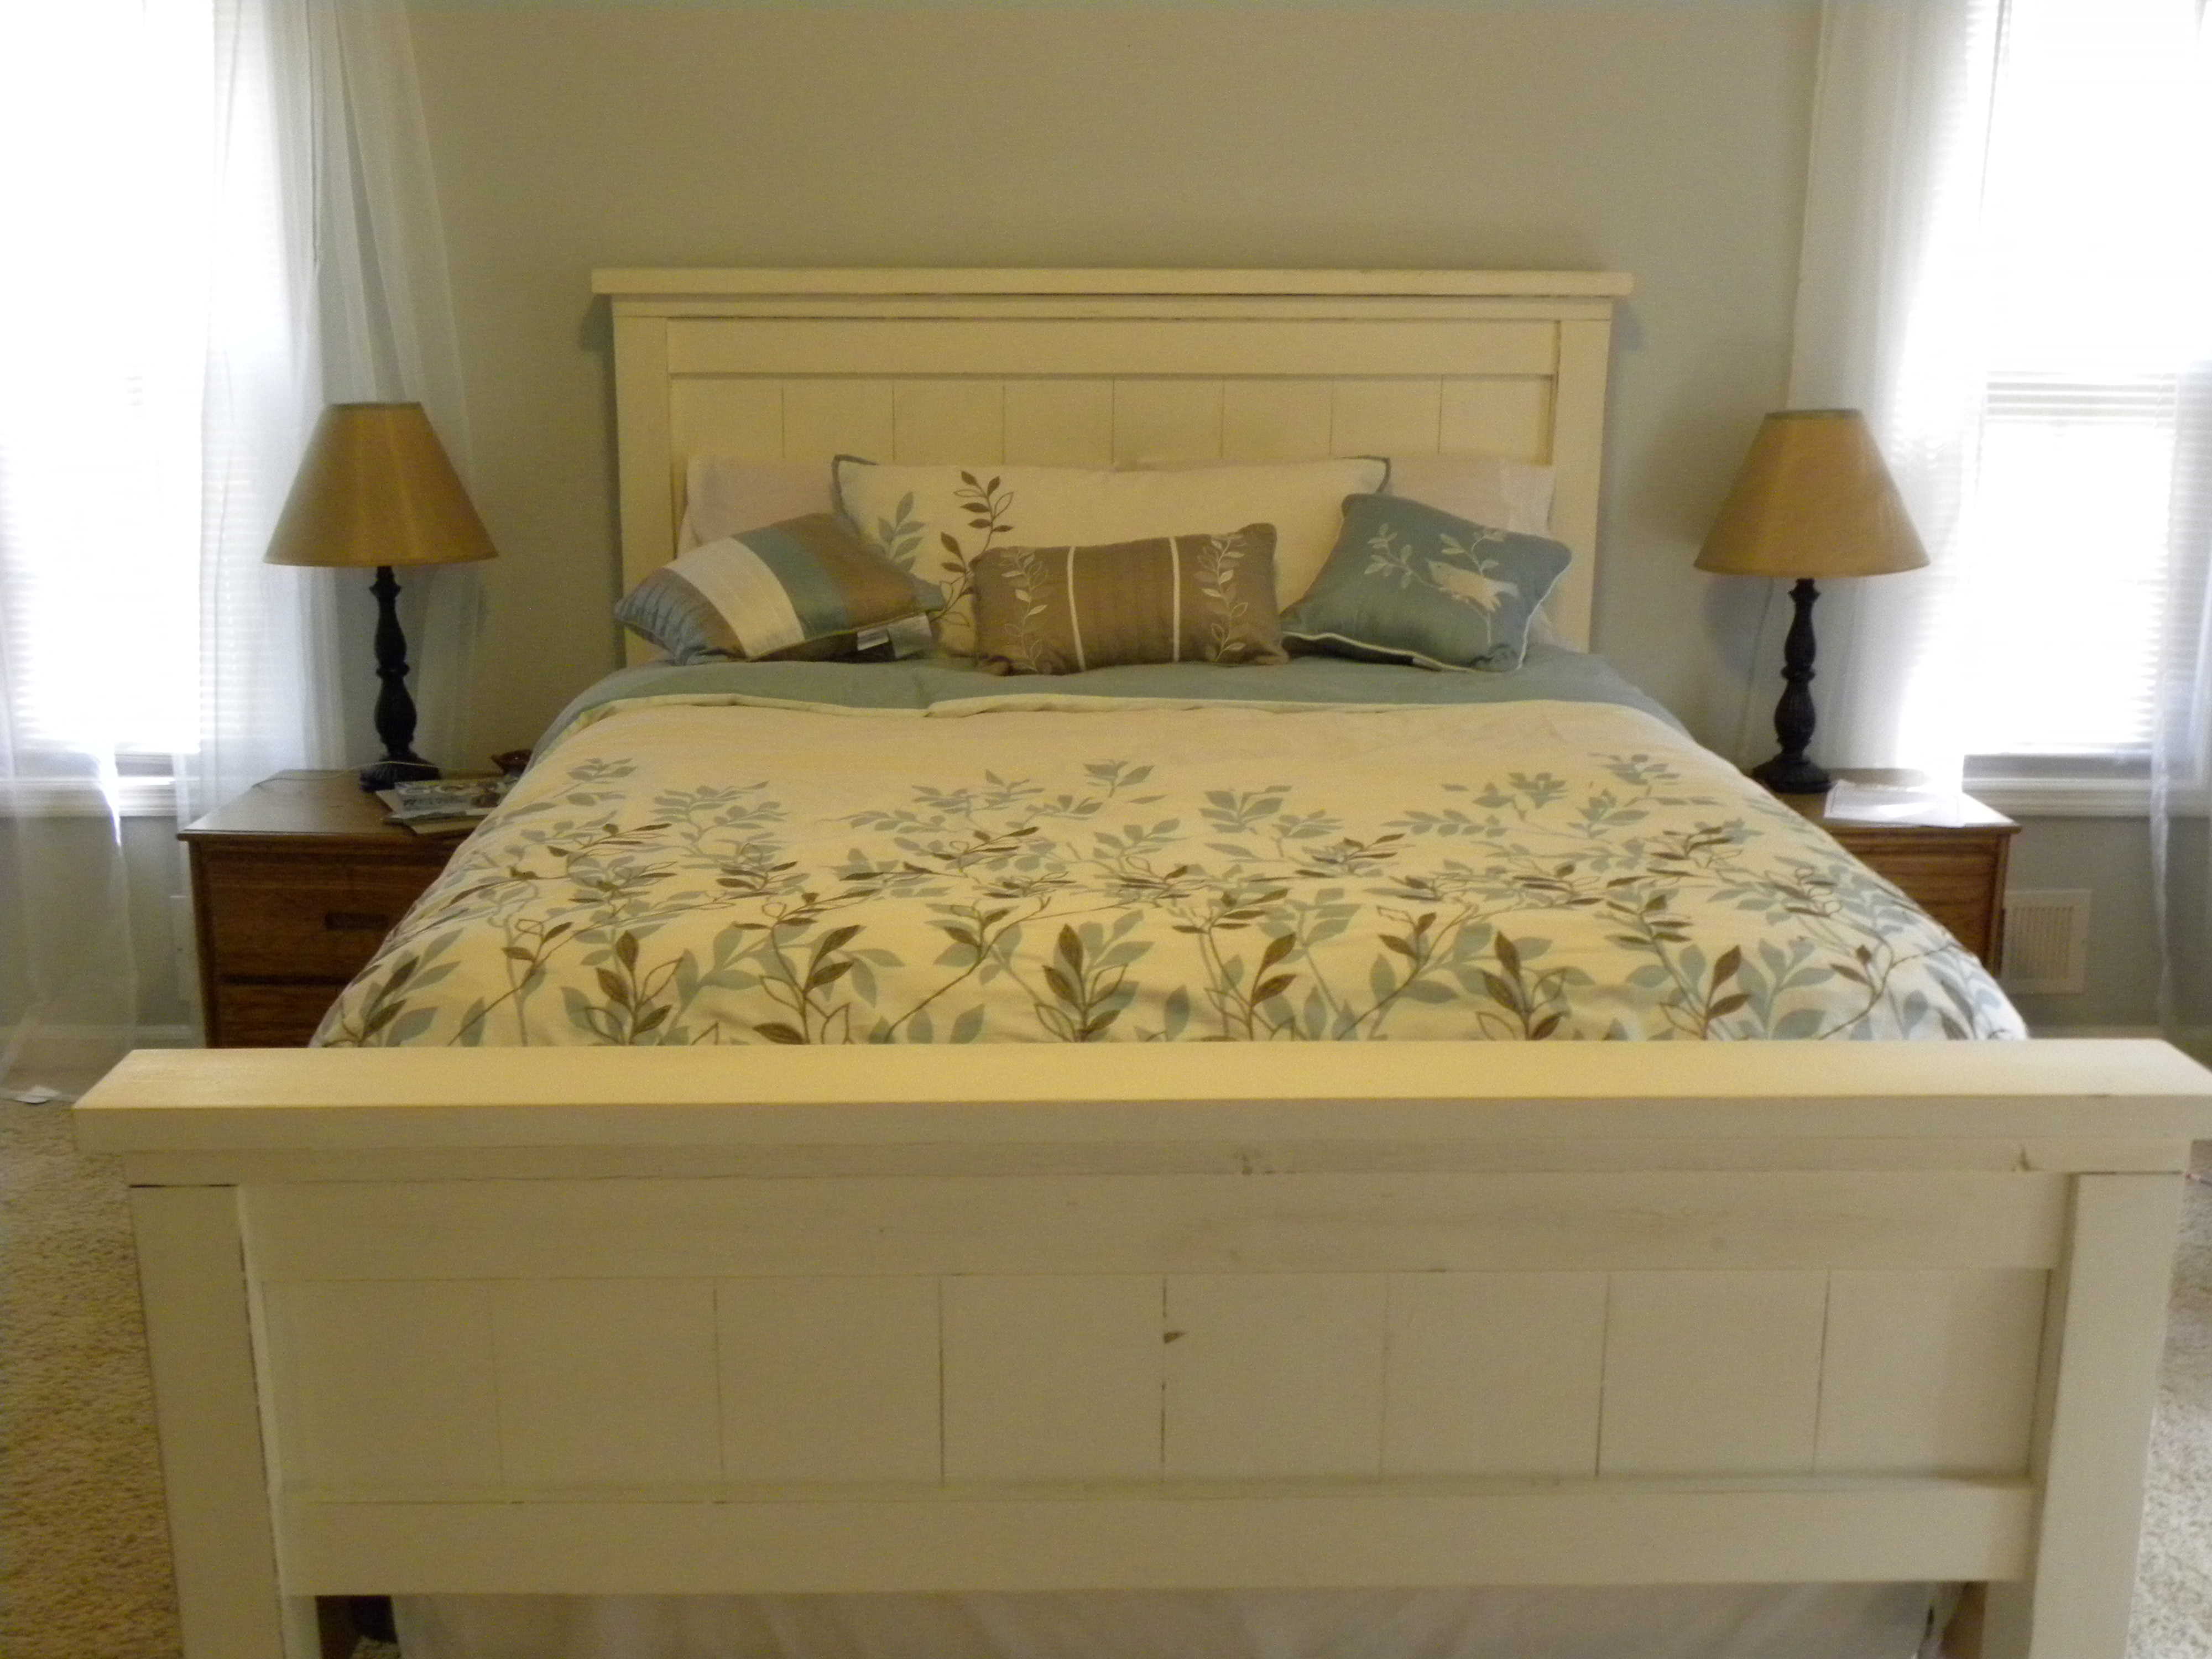
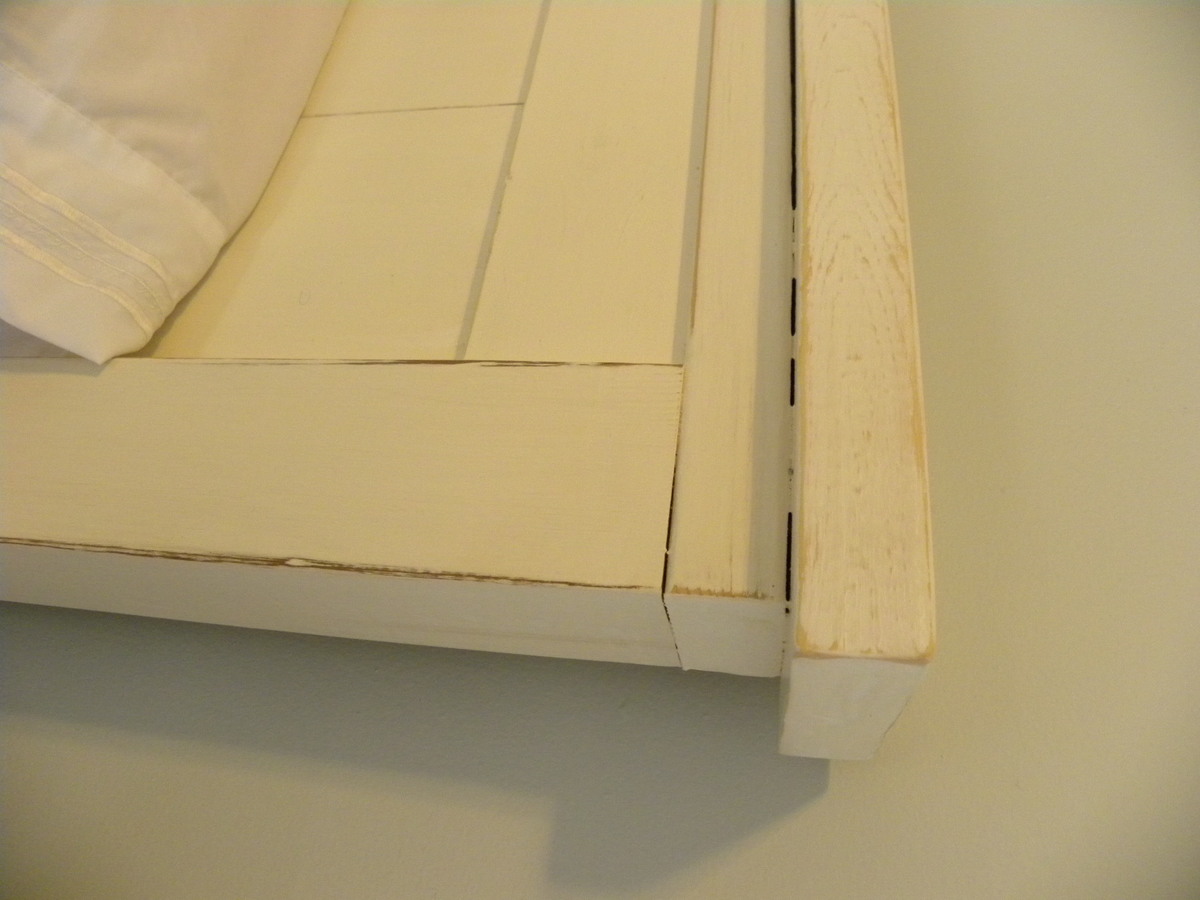
We built the Farmhouse queen bed and fancy X desk for our bedroom. It was relatively easy and looks so great! The bed is made of pine and cedar. (It is really really hard to find pine 4x4 posts that aren't pressure treated around here.) We used pine for the desk. Paint color on the bed and base of the desk is Behr "Polar bear" with a coffee stain distress. The desk top is Benjamin Moore "Dash of pepper." The bed cost about $175 to build and the desk cost $30. (We used a lot of scraps for the desk.)


Thu, 09/05/2013 - 17:03
Your bed and desk are beautiful! Great job on this build, and I love the colors!
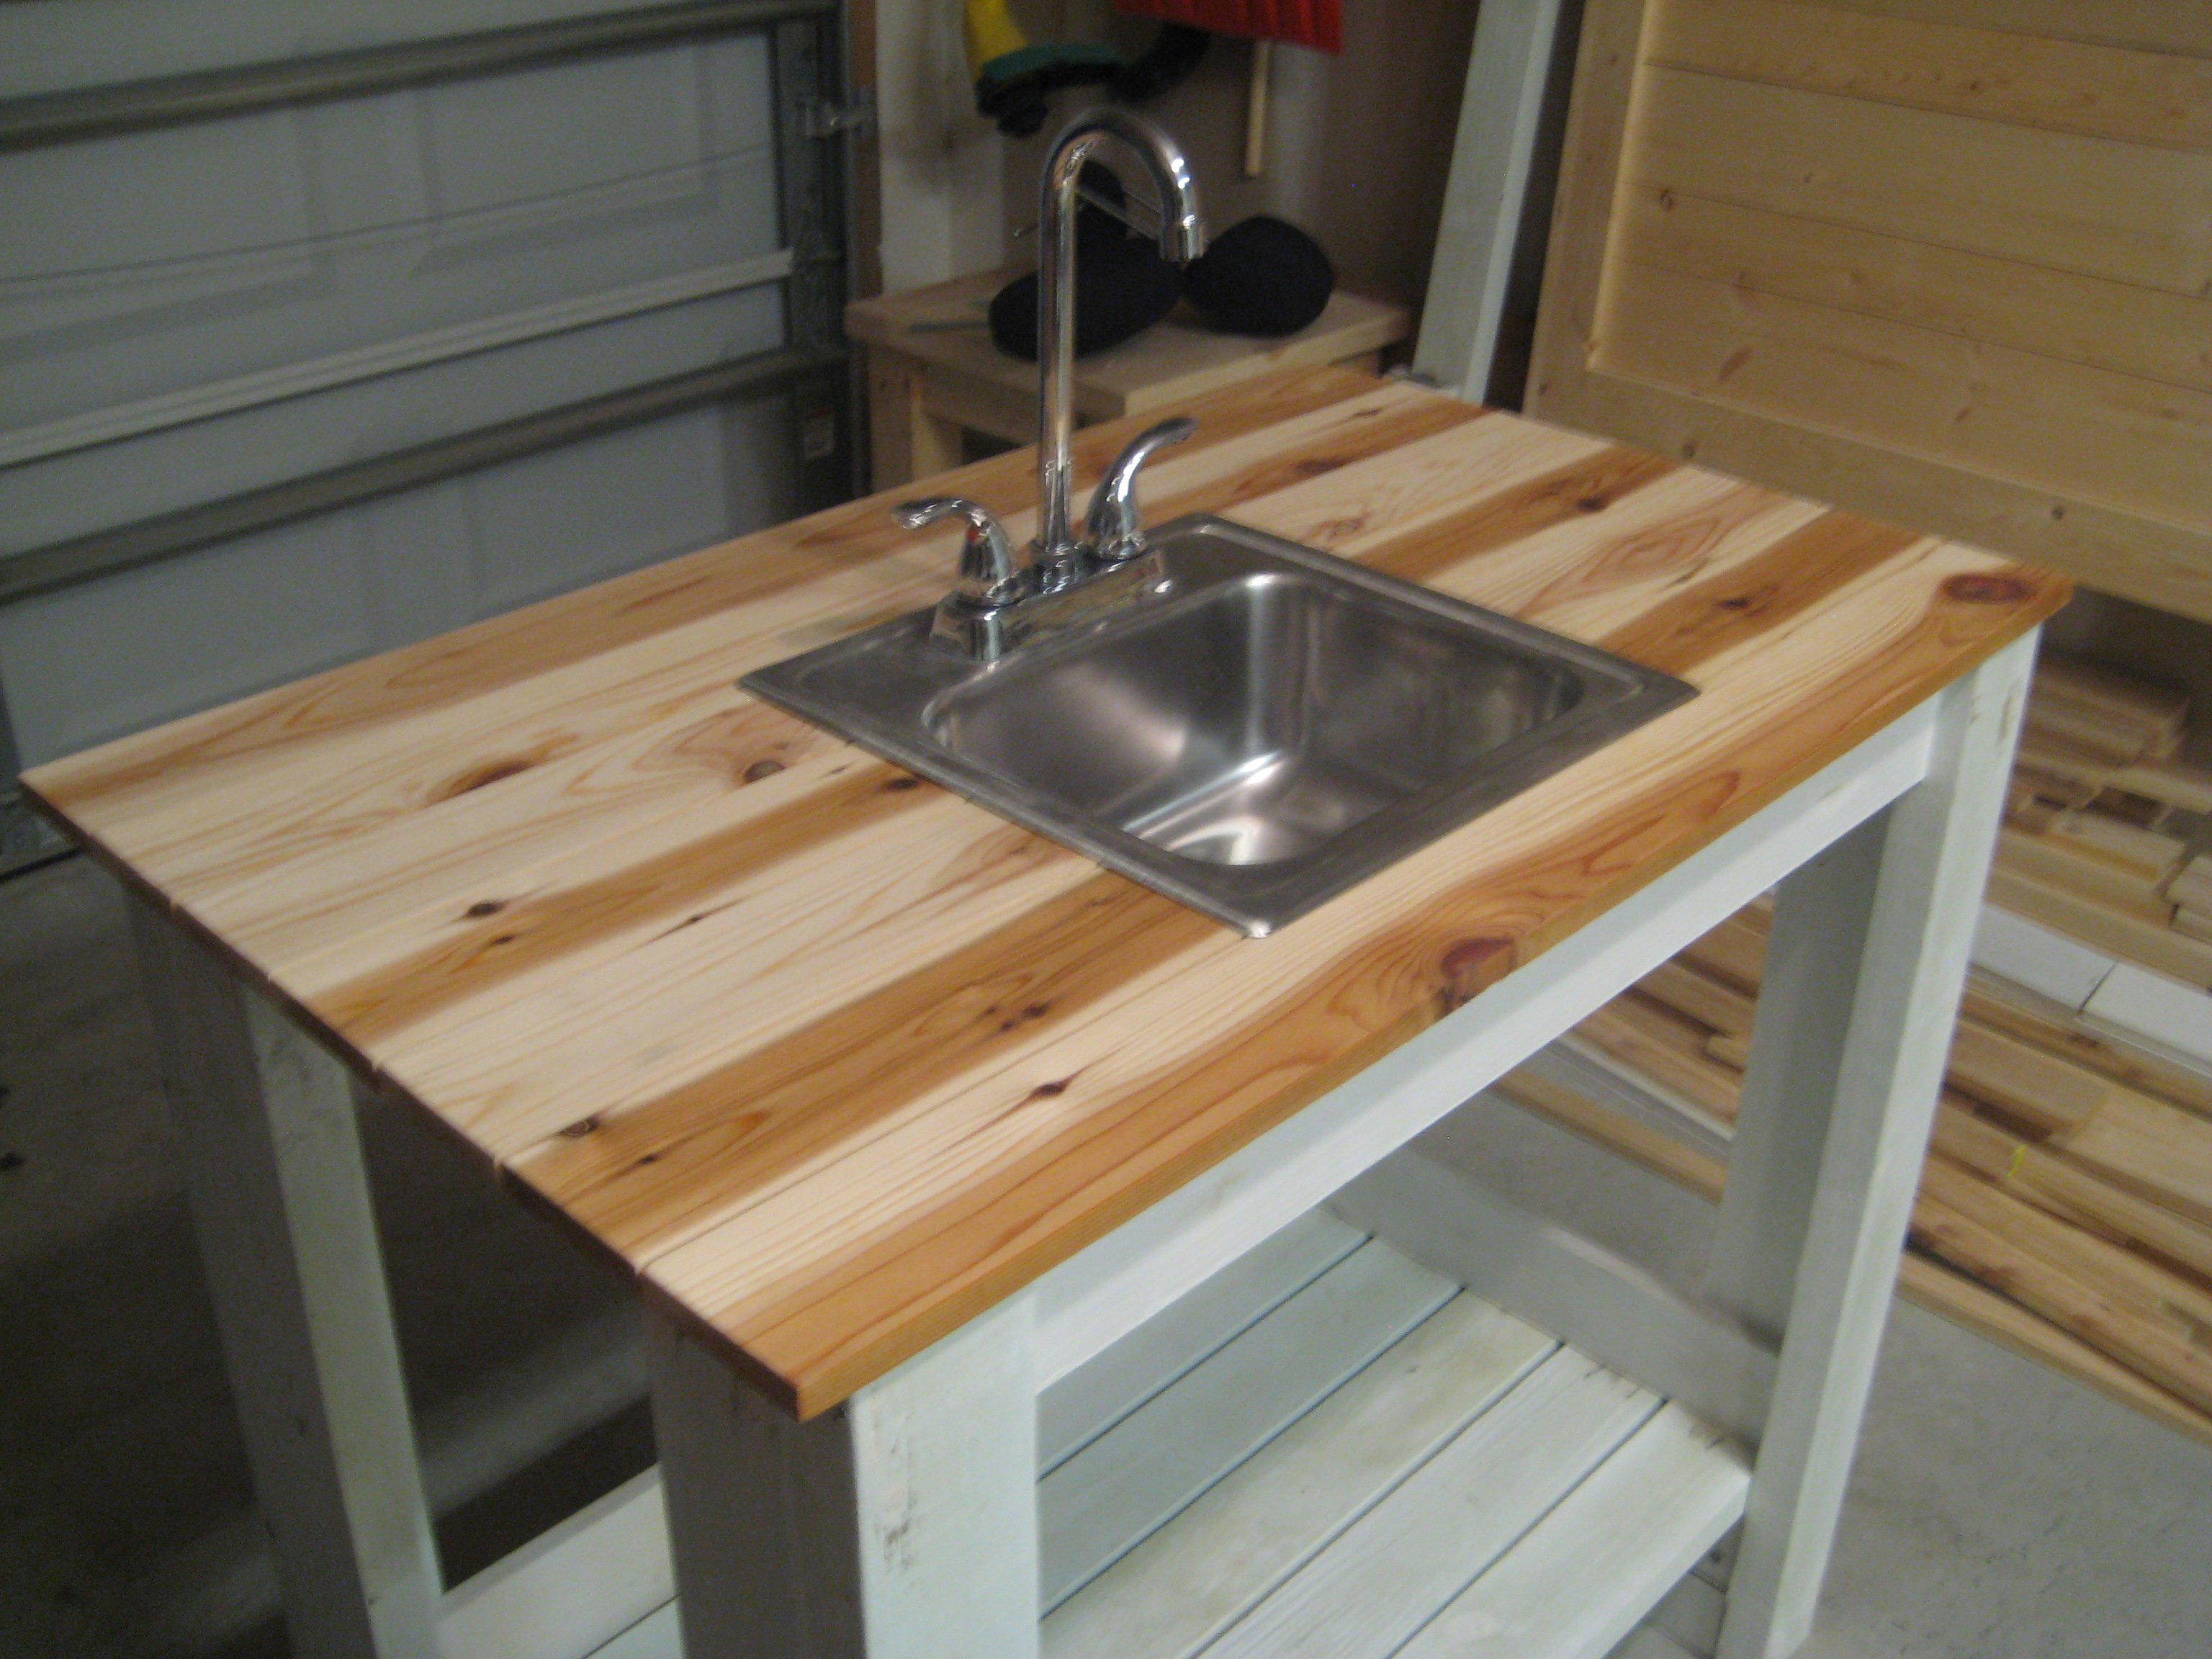
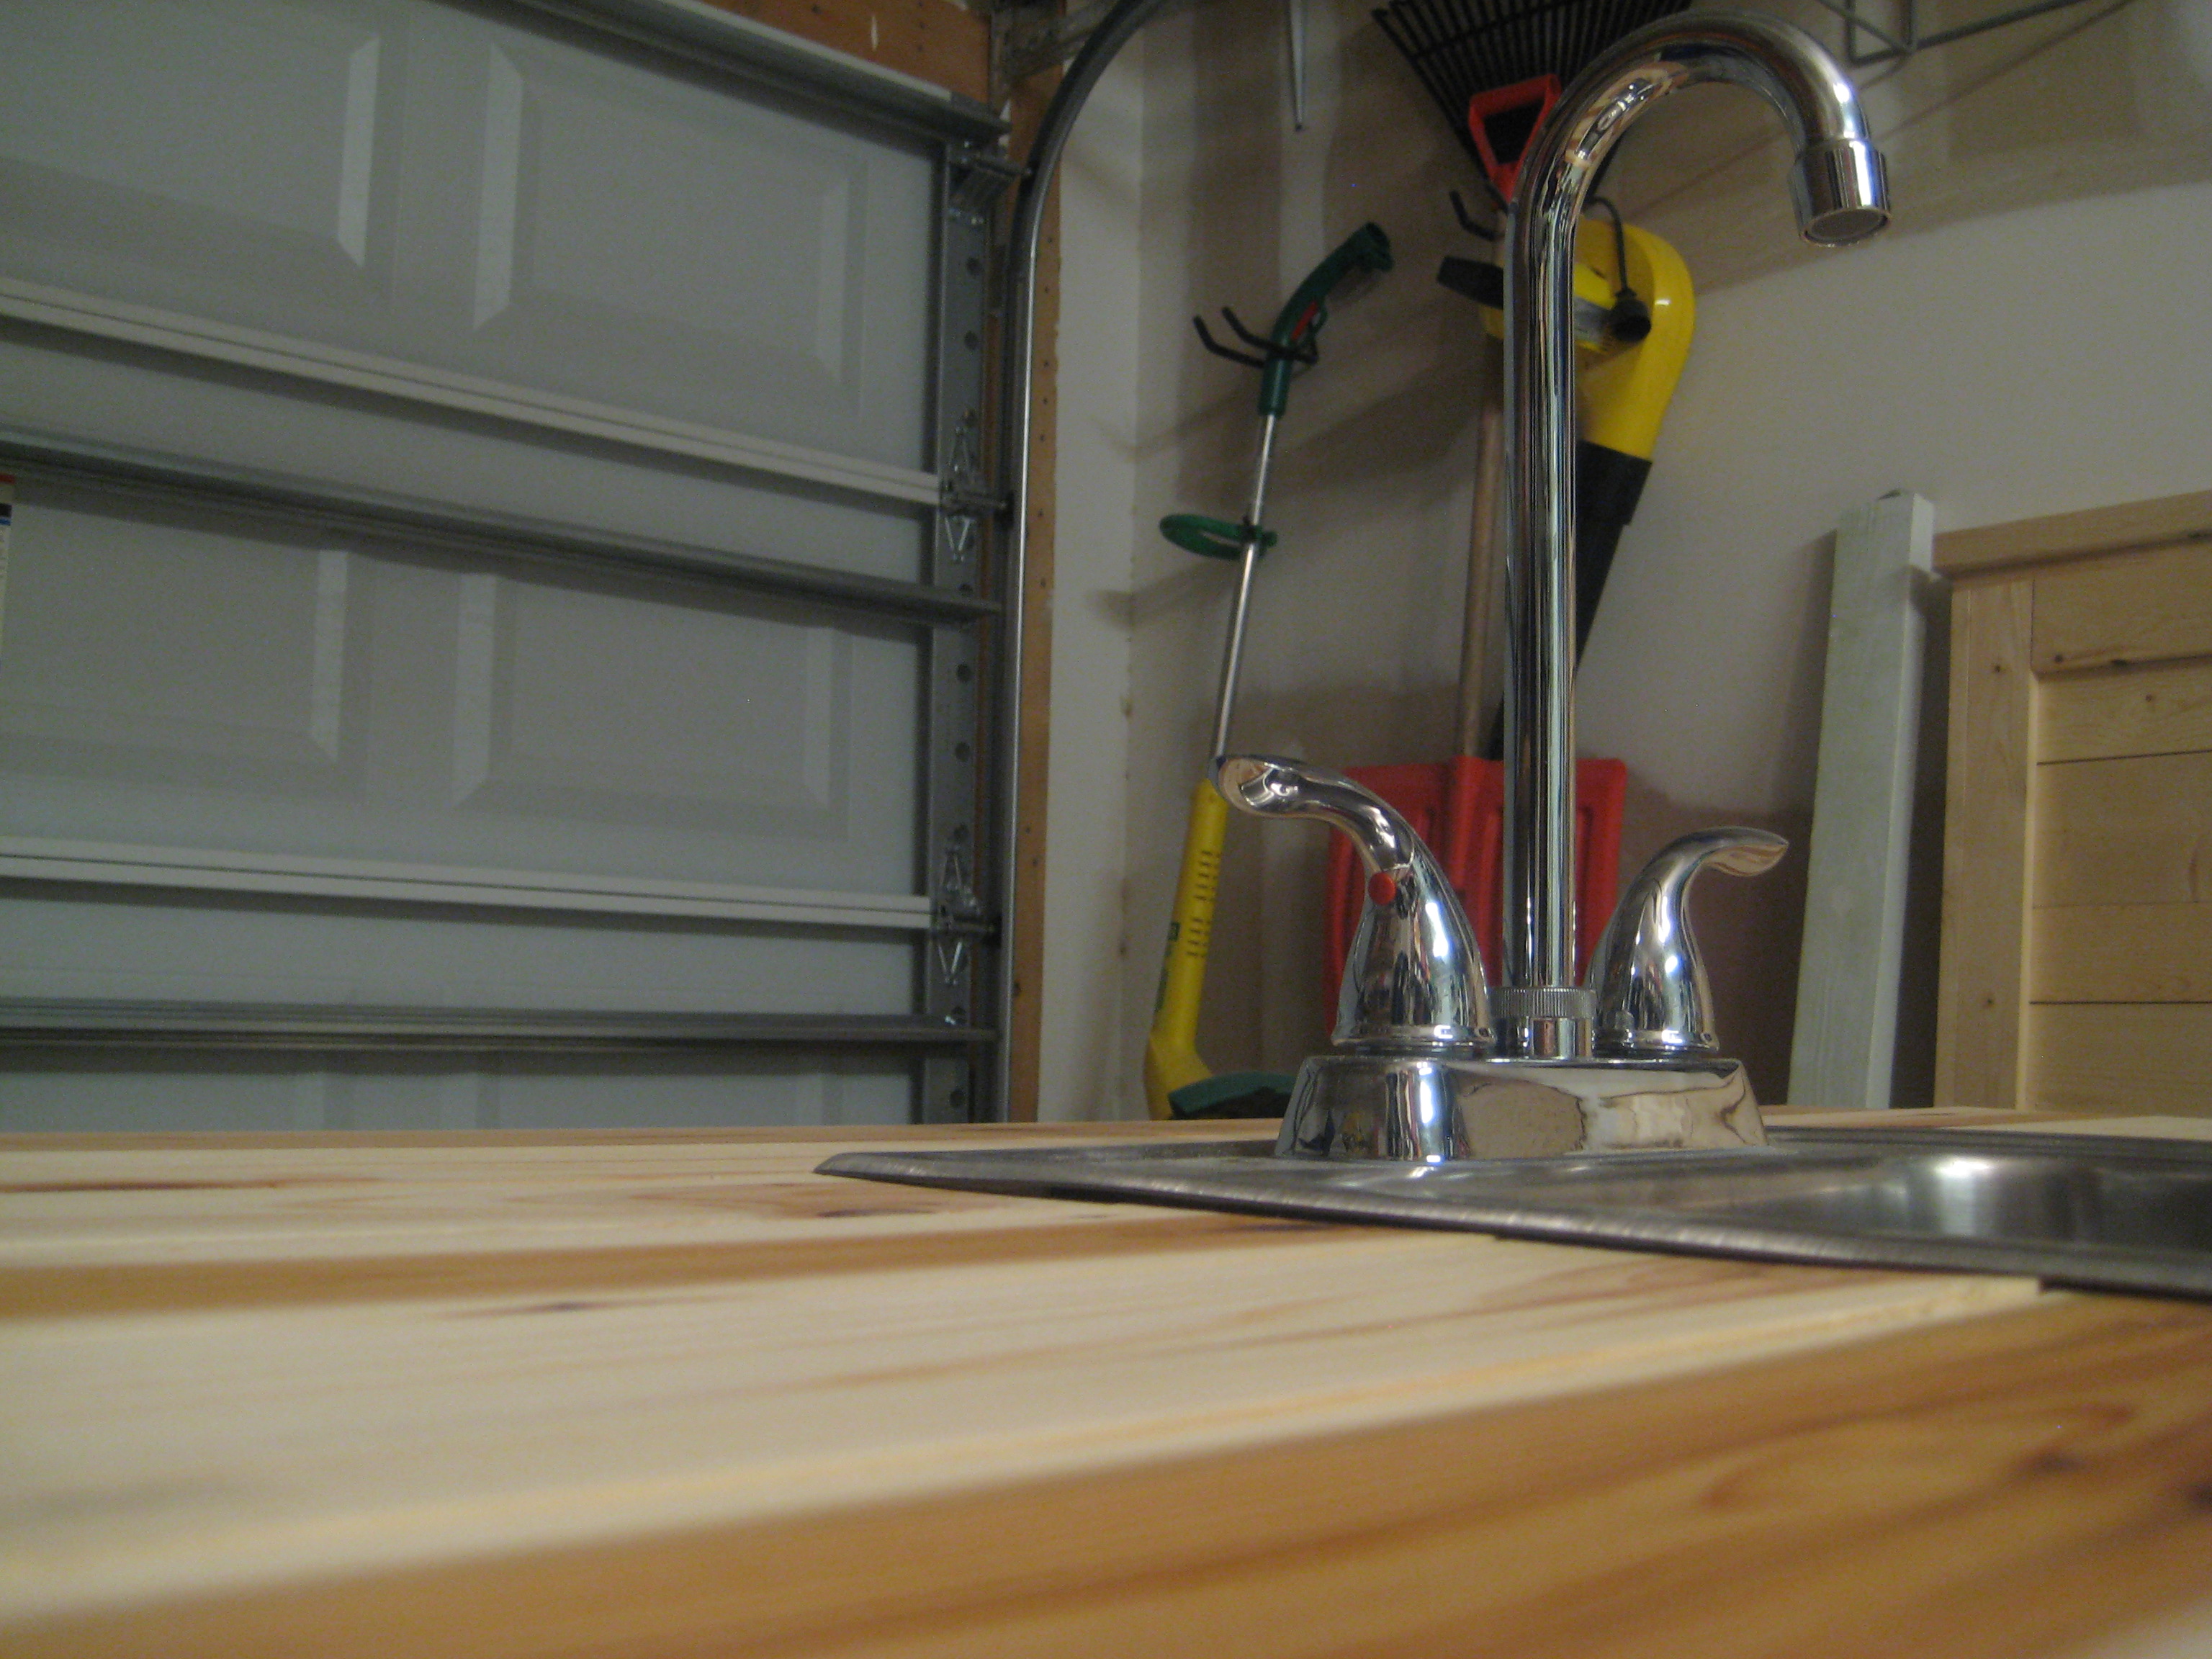
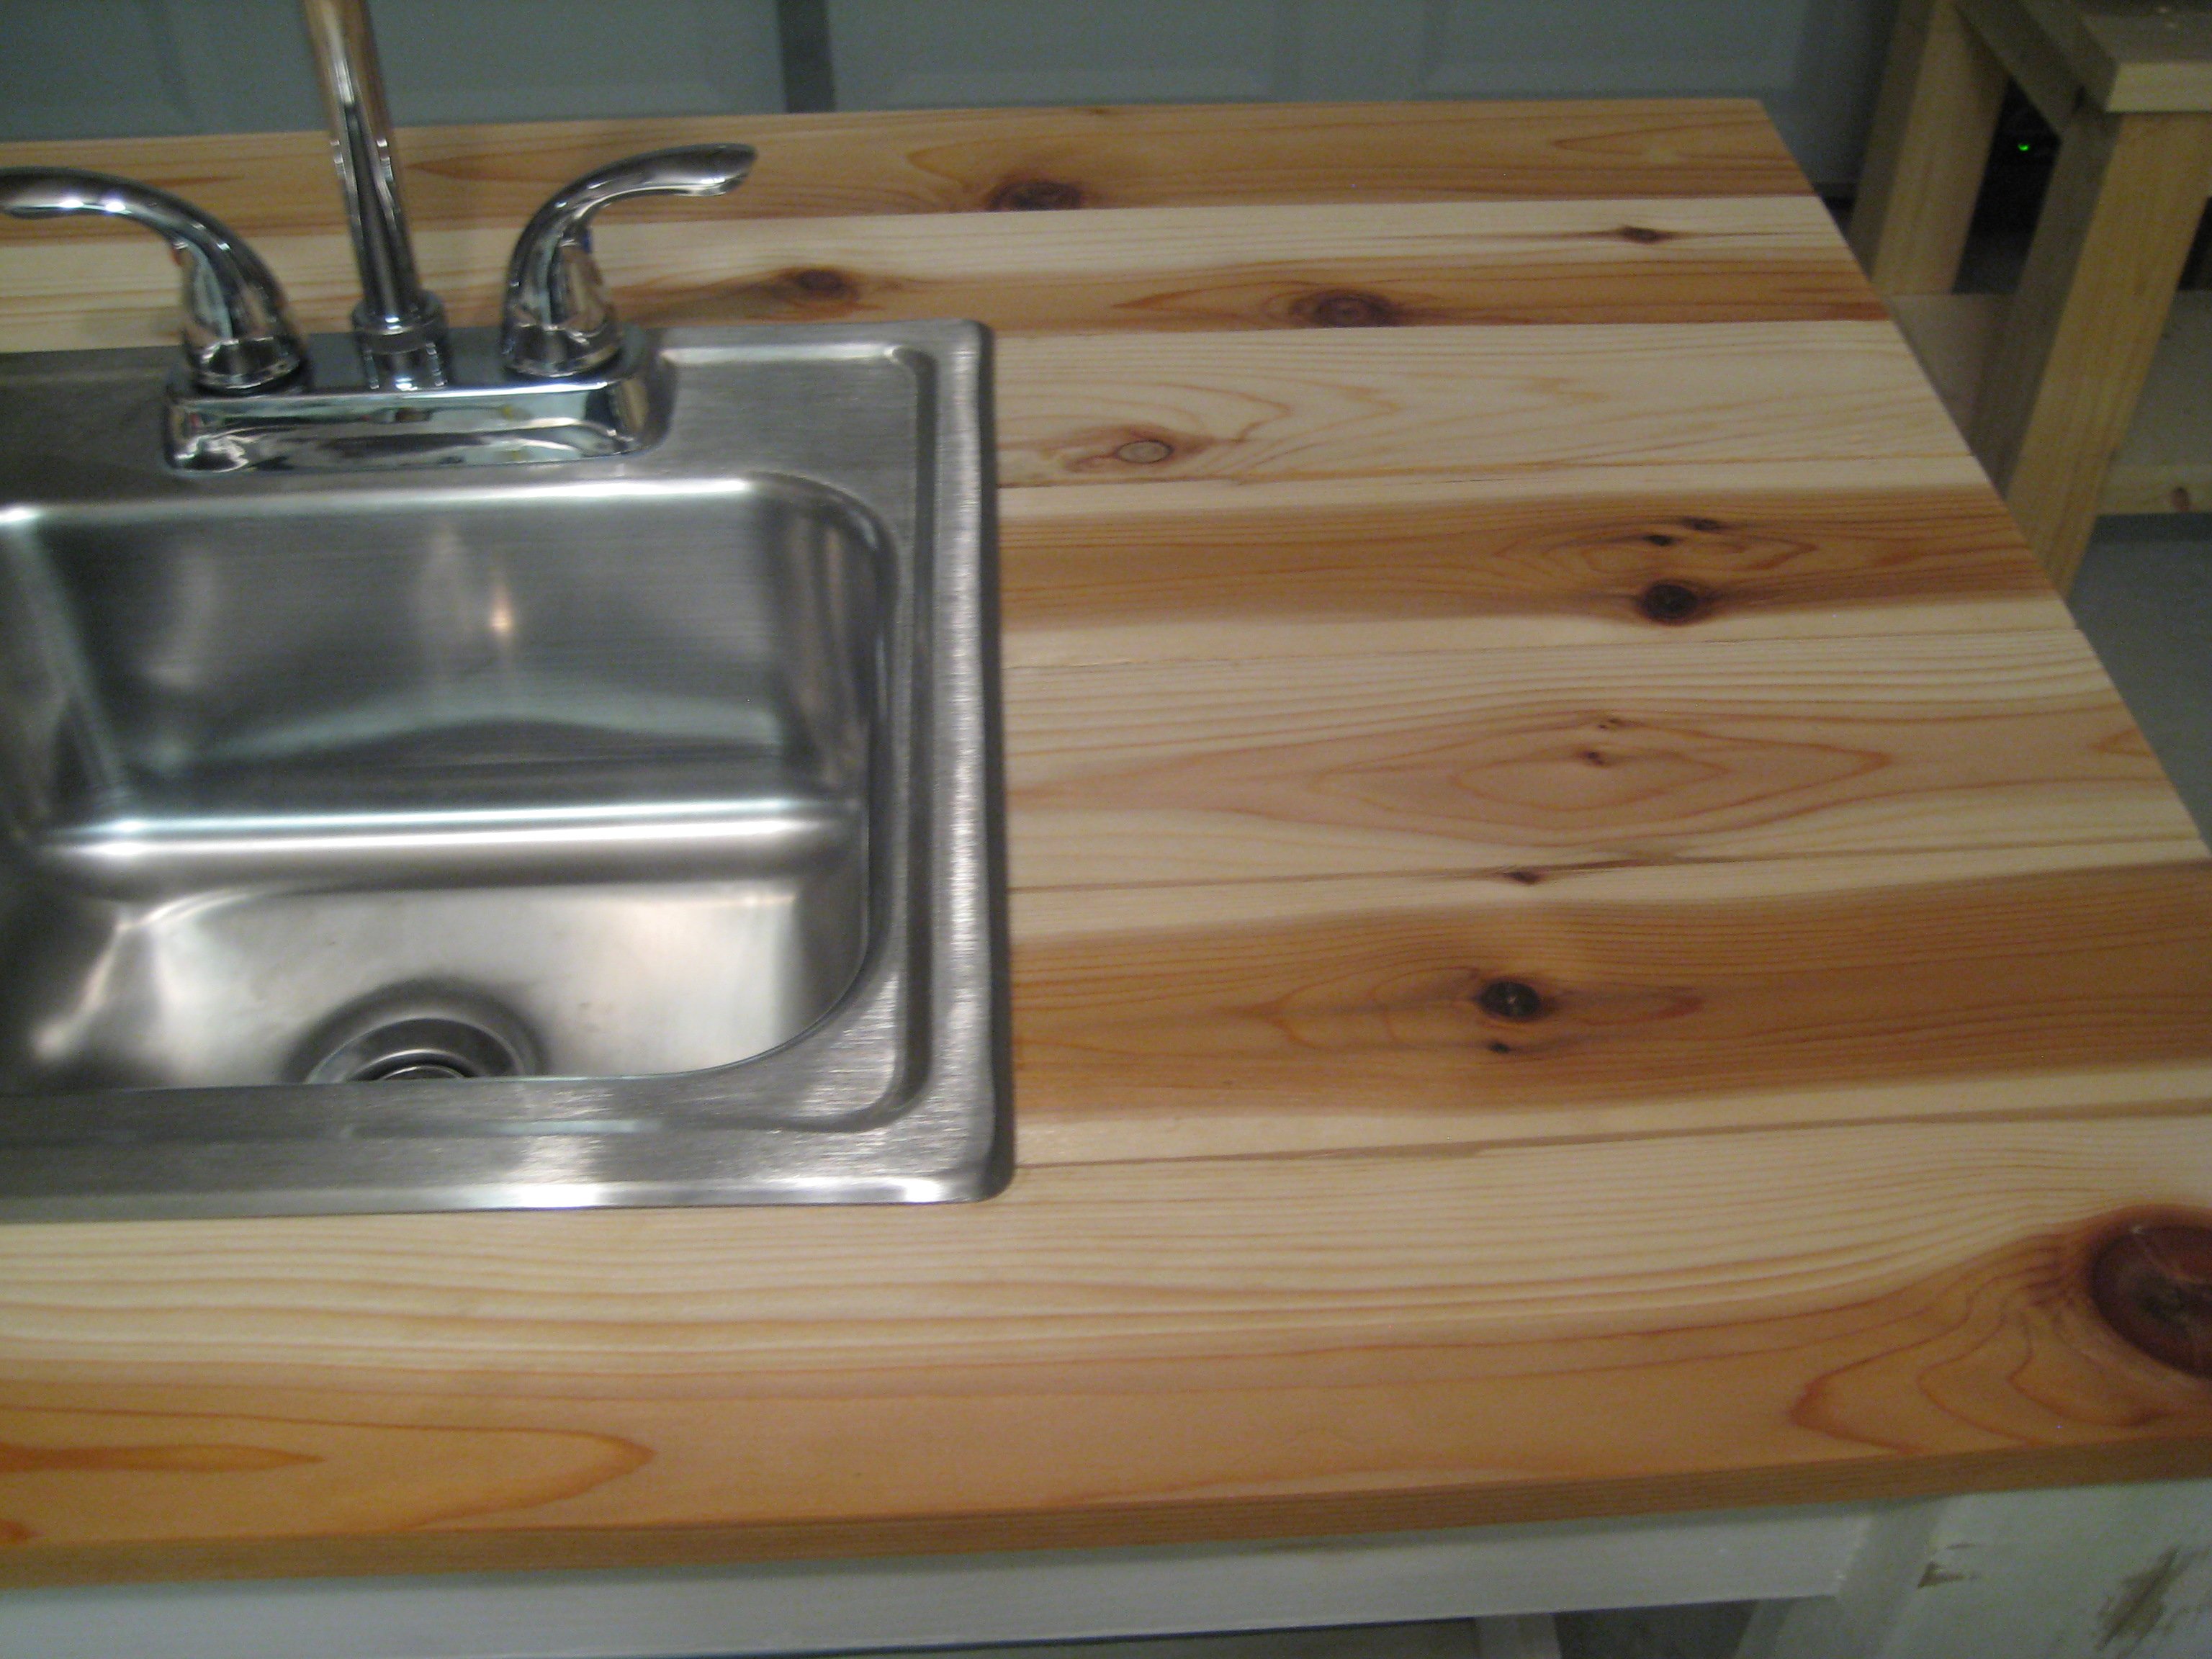
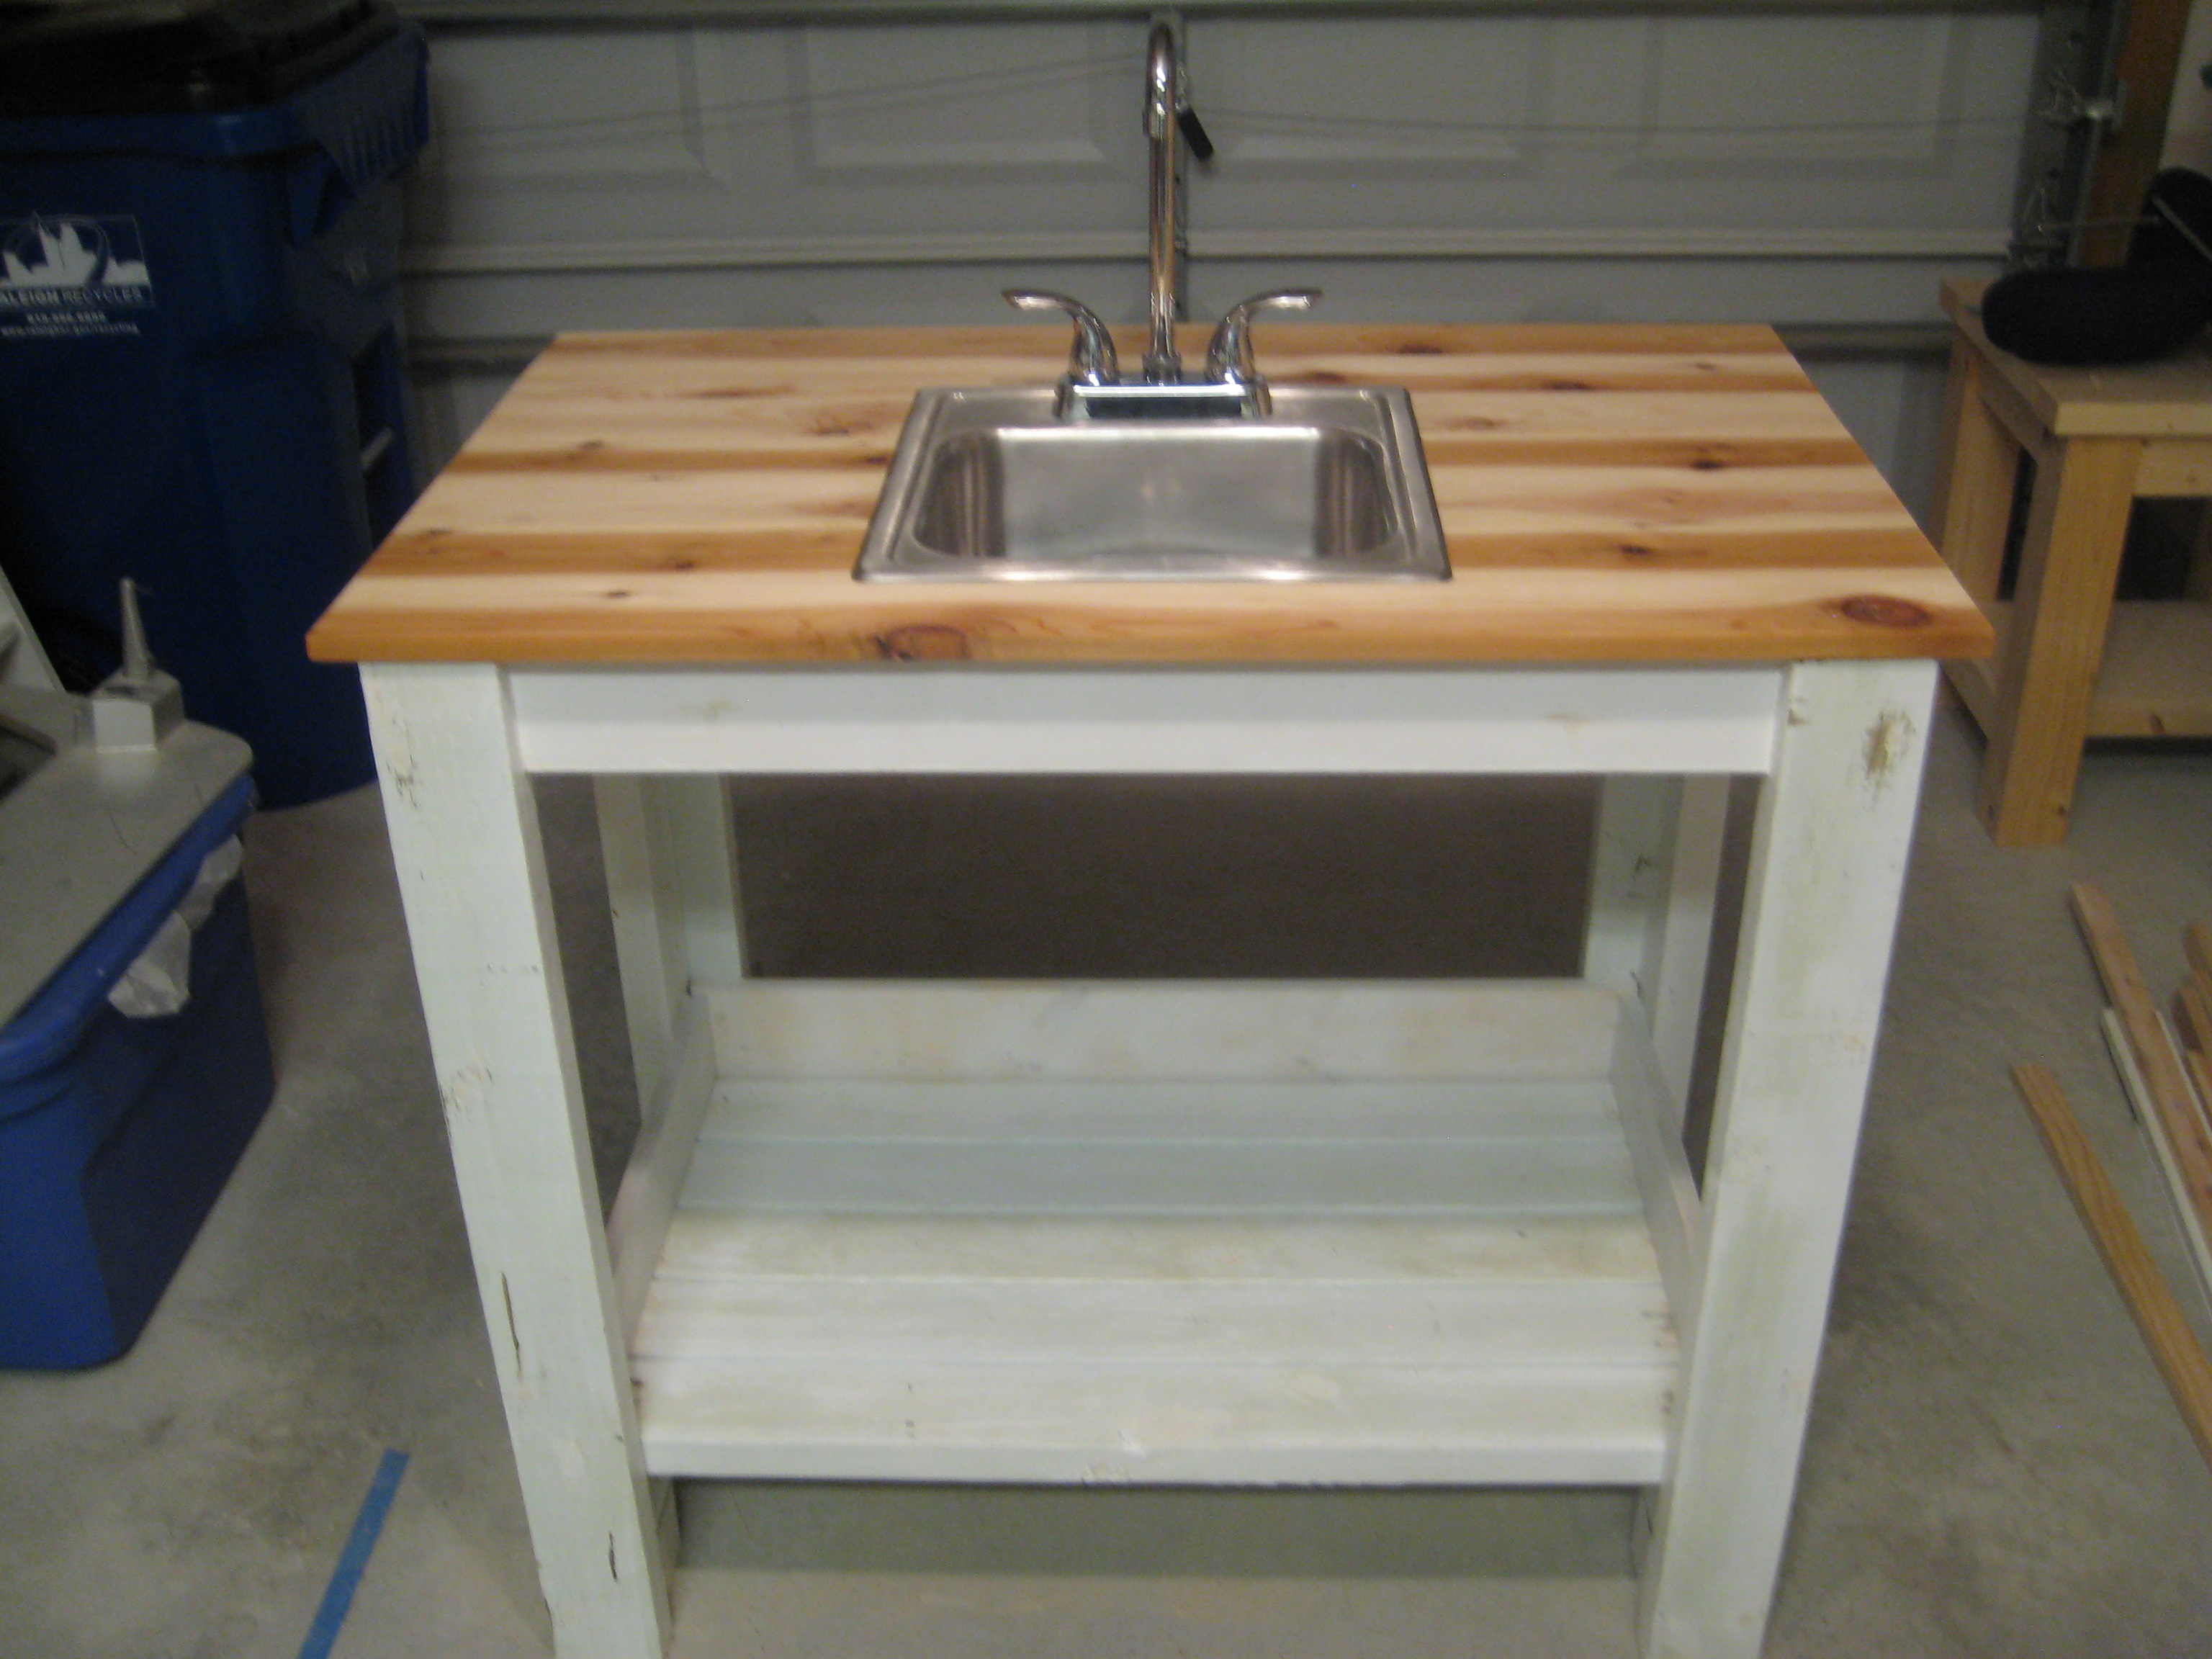
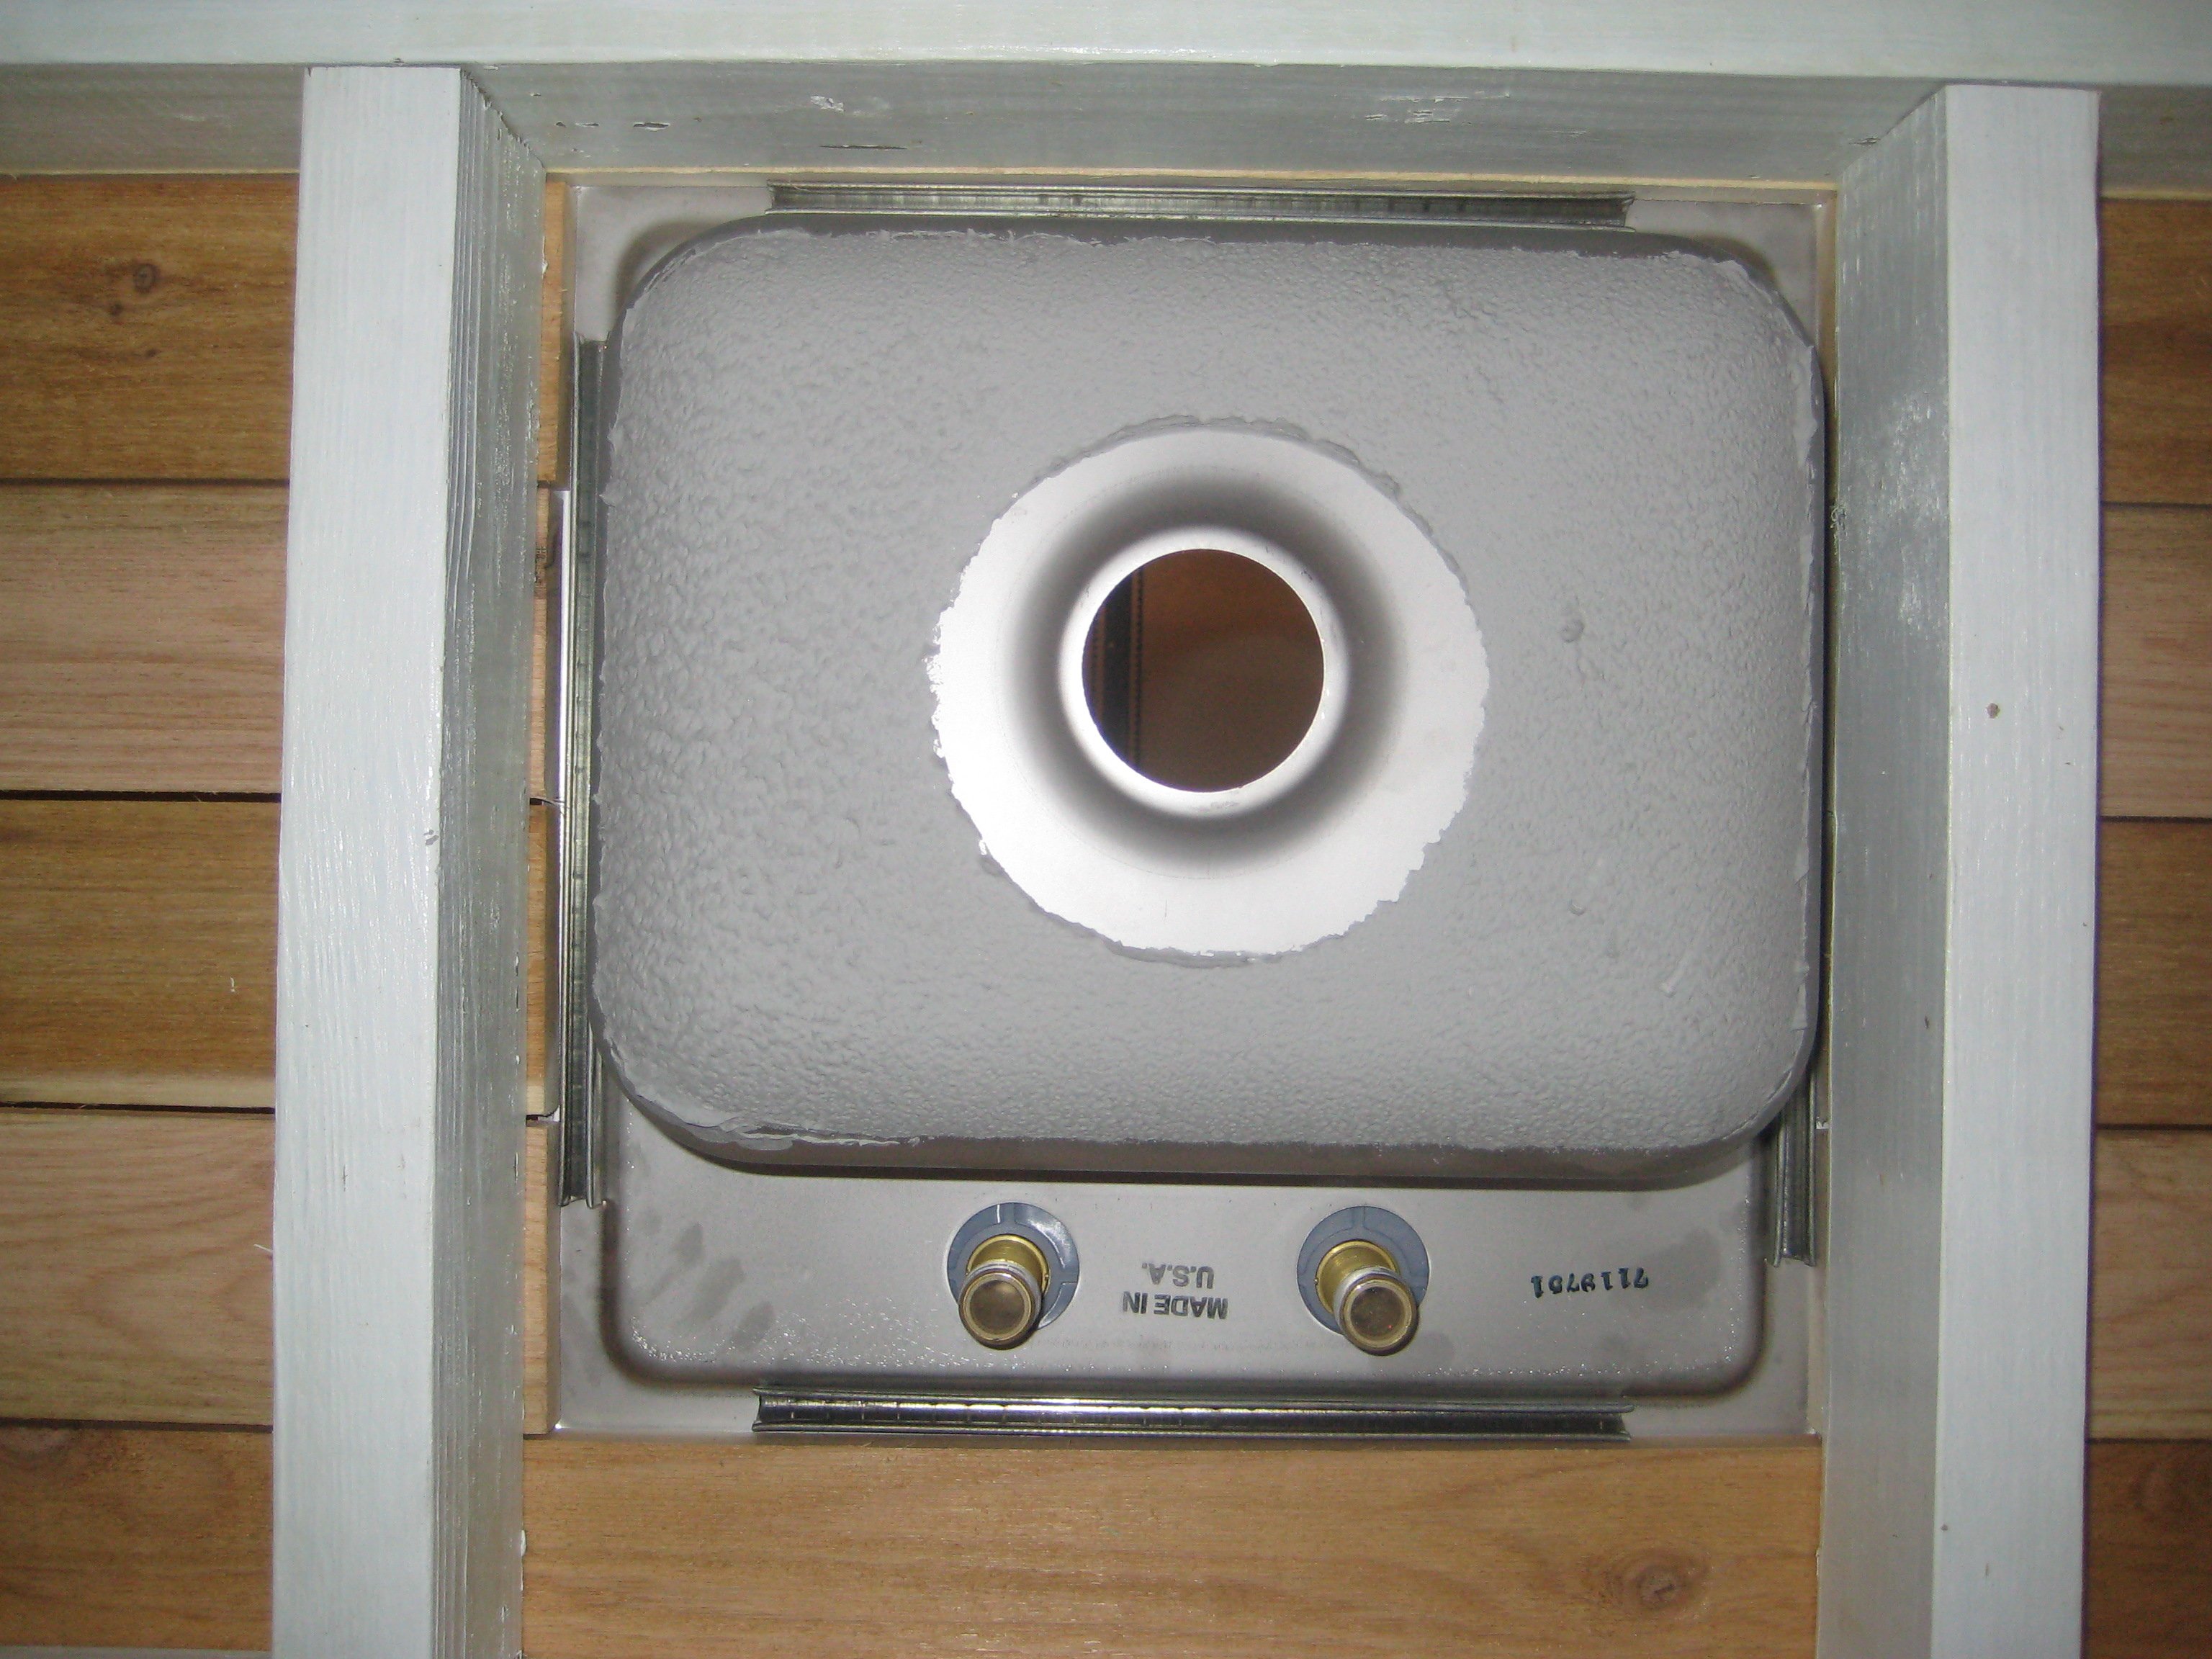
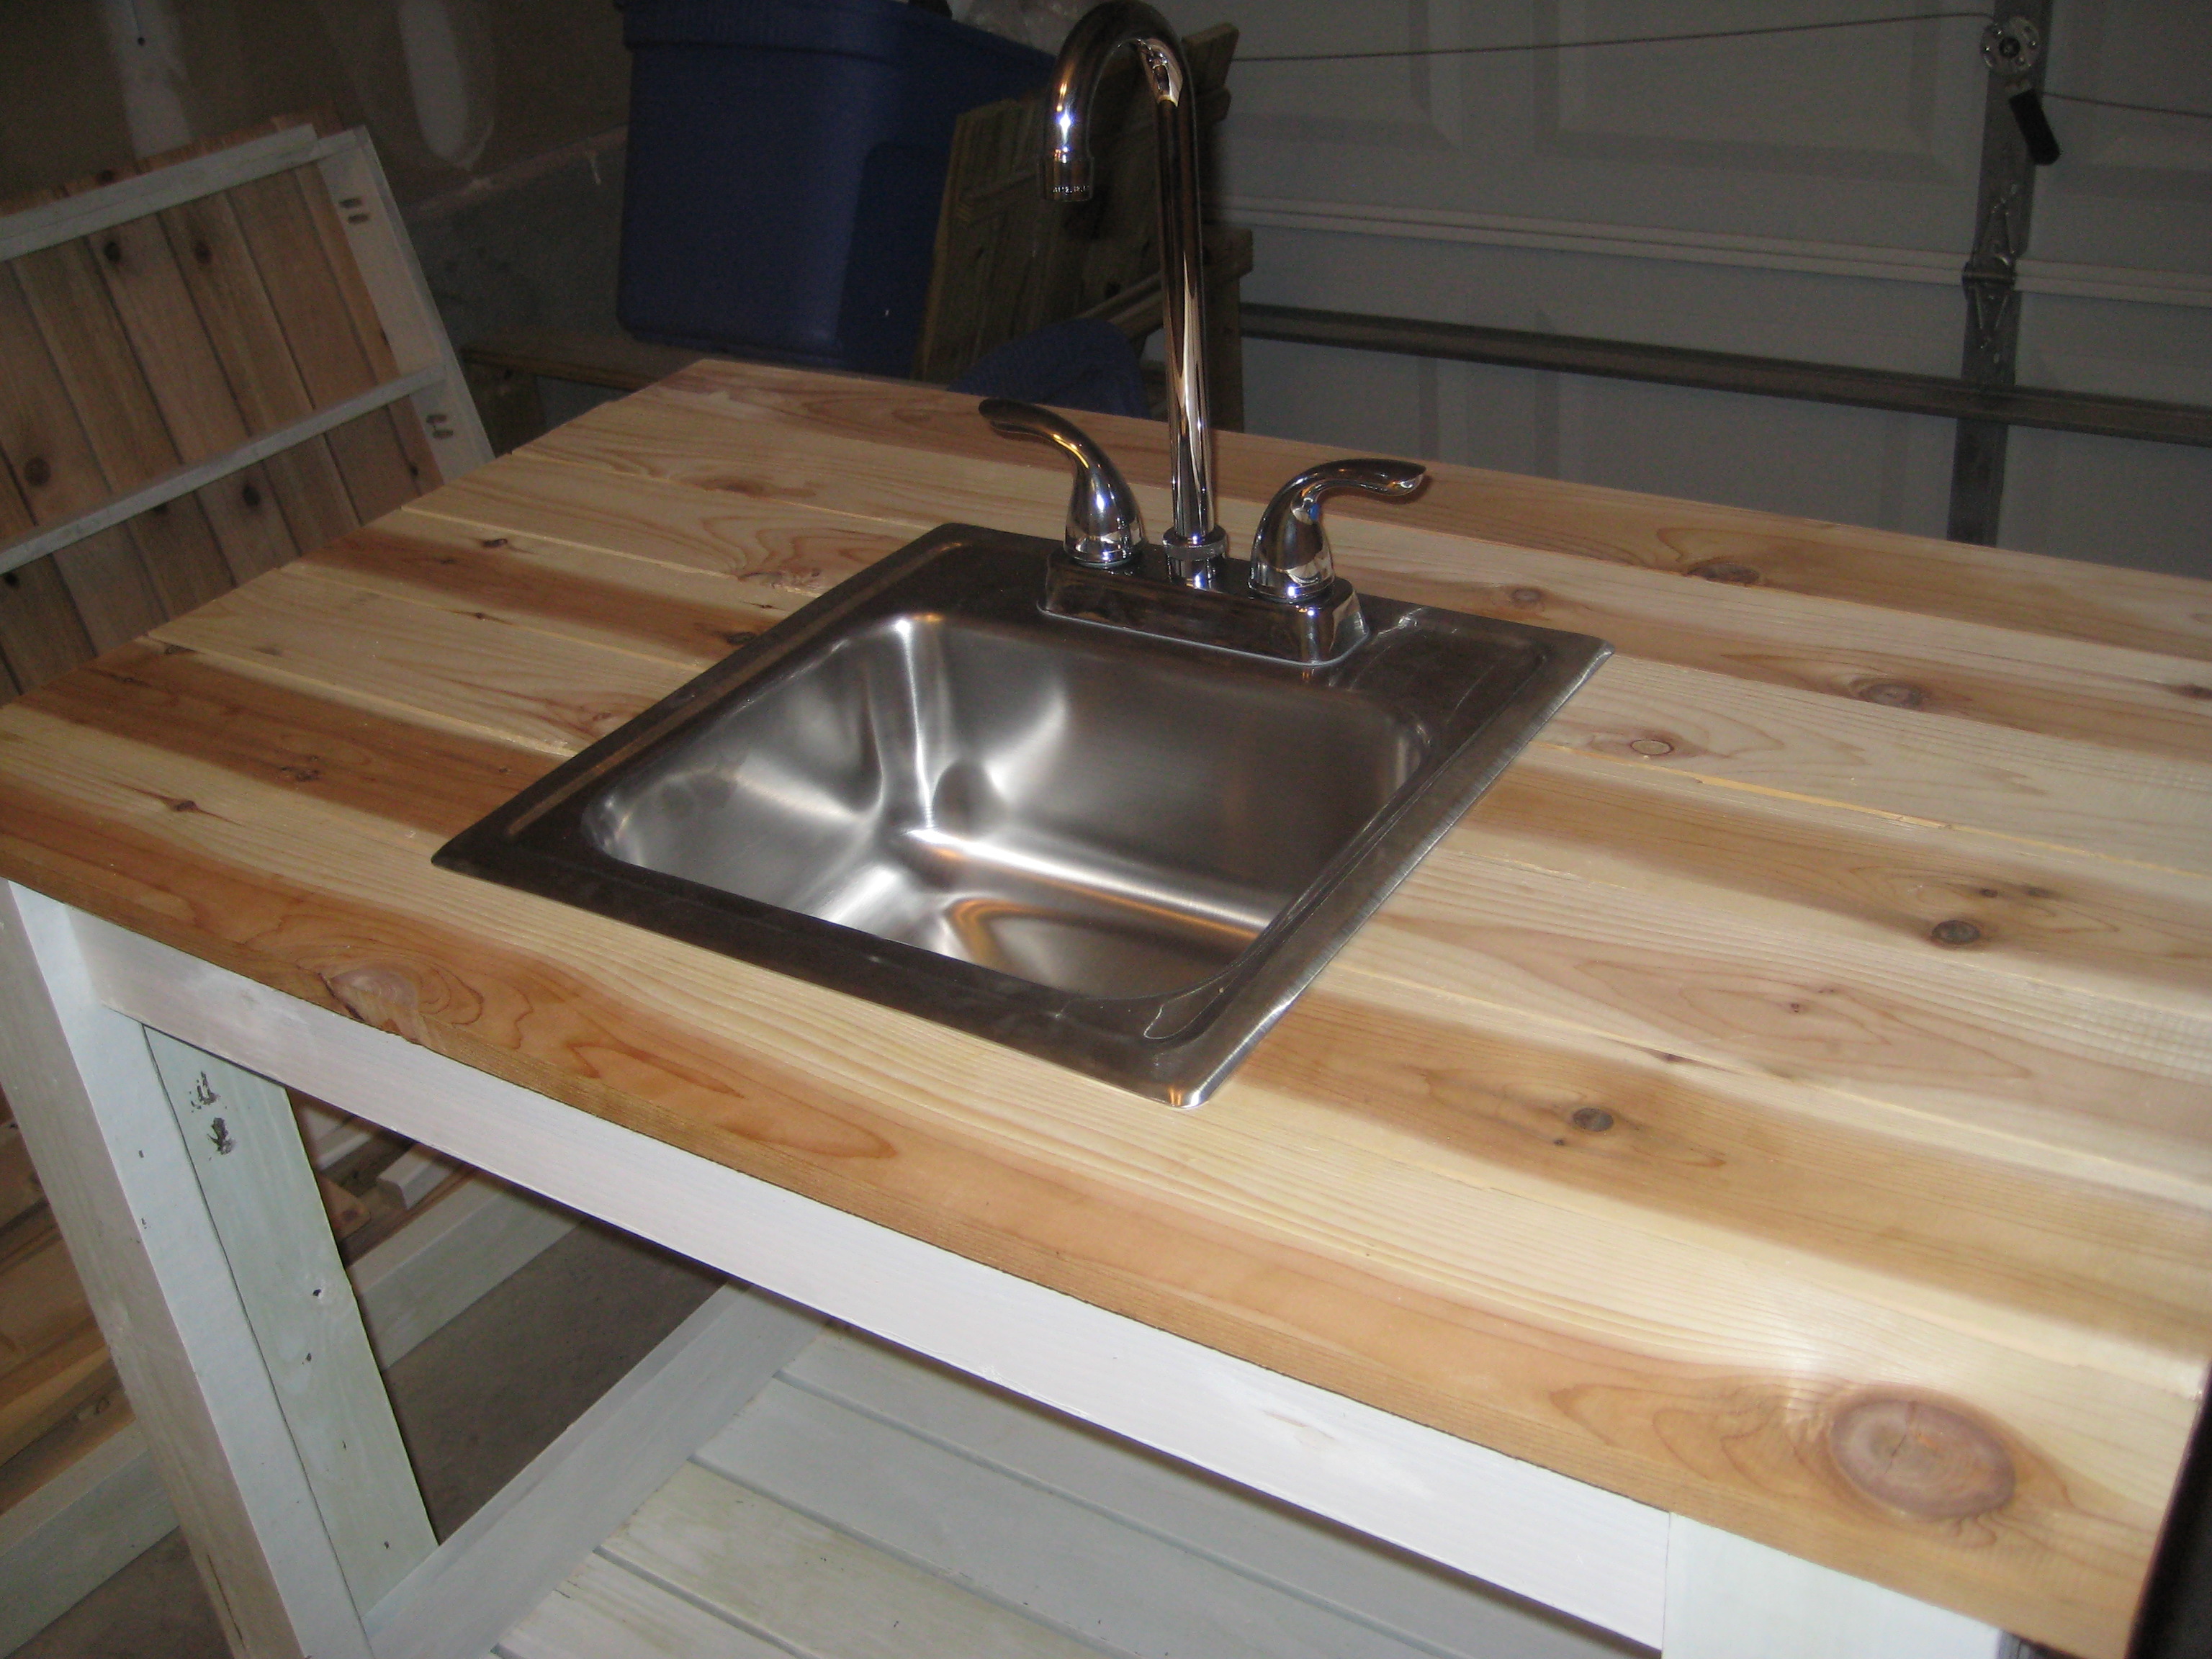
I finally completed the last piece to my customized simple two-toned outdoor collection...an outdoor kitchen sink!!! It still needs a couple of touch ups... but more on that later. This is by far my favorite and easiest project to date. We plan on using this as a grill caddie/garden station. This will eventually go onto a 24x12 deck up against our kitchen window (The indoor and outdoor sink will be against each others backs). I decided to go with the Sturdy Workbench plans for the base mainly because of the weight. We wanted something that's going to be difficult to move since it will be hooked up to outdoor plumbing. I used treated 2x4's for the base, cedar 1x4's for the top. I bought the bar sink for about $70. I also used a Kreg Jig to screw in the cedar slats from underneath so the screws won't be visible from the top. FYI - Wait a couple of weeks before you paint soaking wet treated wood. The green chemical from the 2x4 is starting to leak through my white paint. I'll have to go and prime/paint it again when it finally dries. Other than that, it came out 10 times better than I could ever imagine.
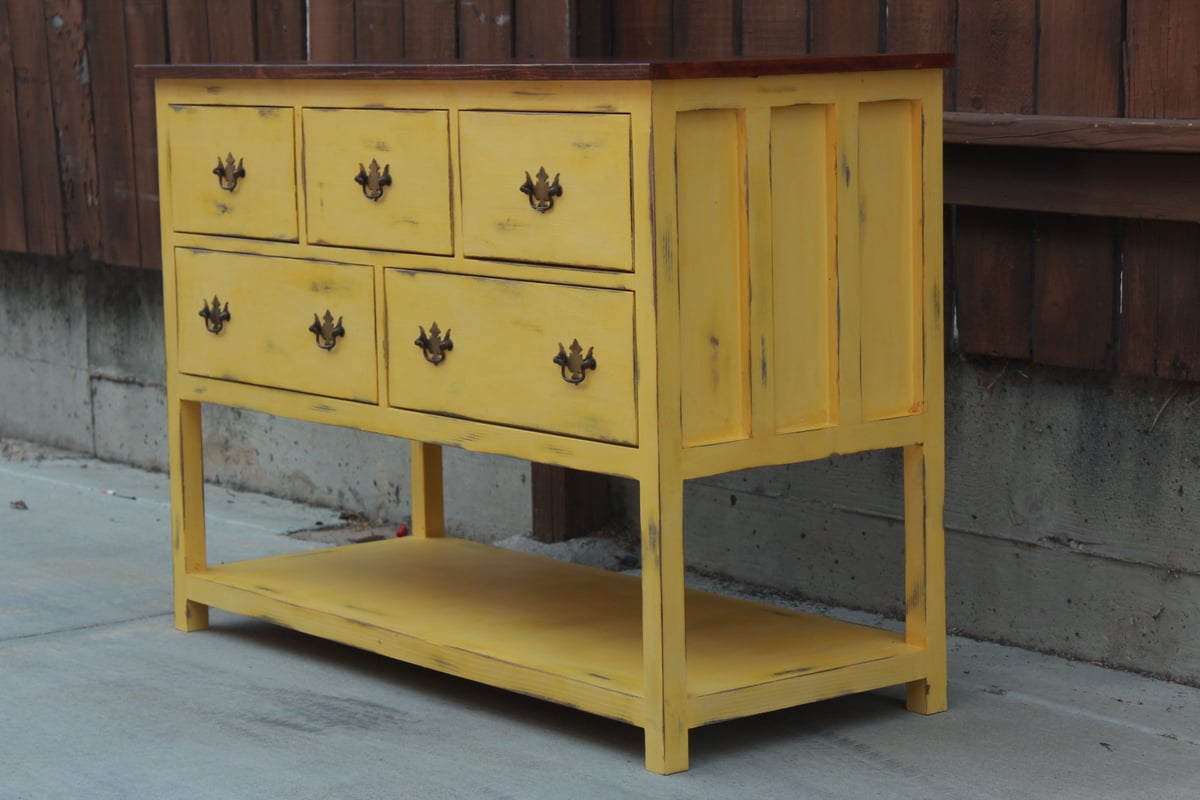
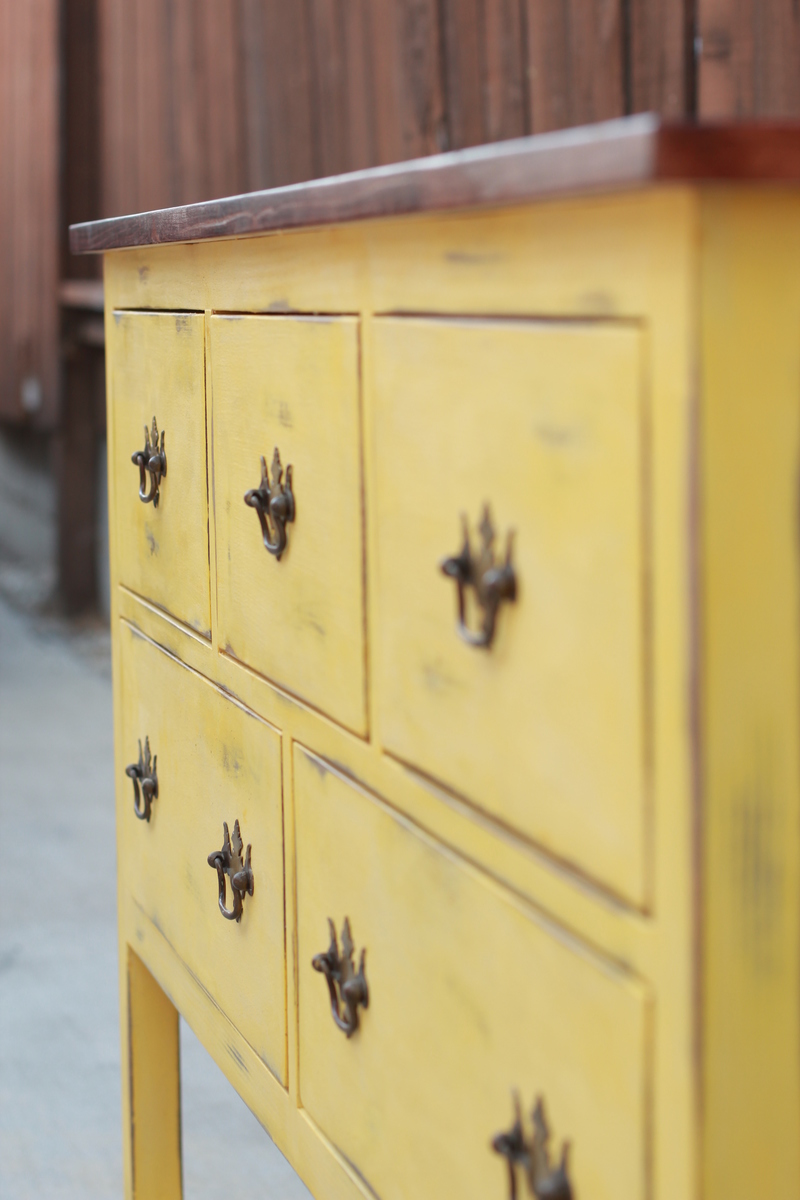
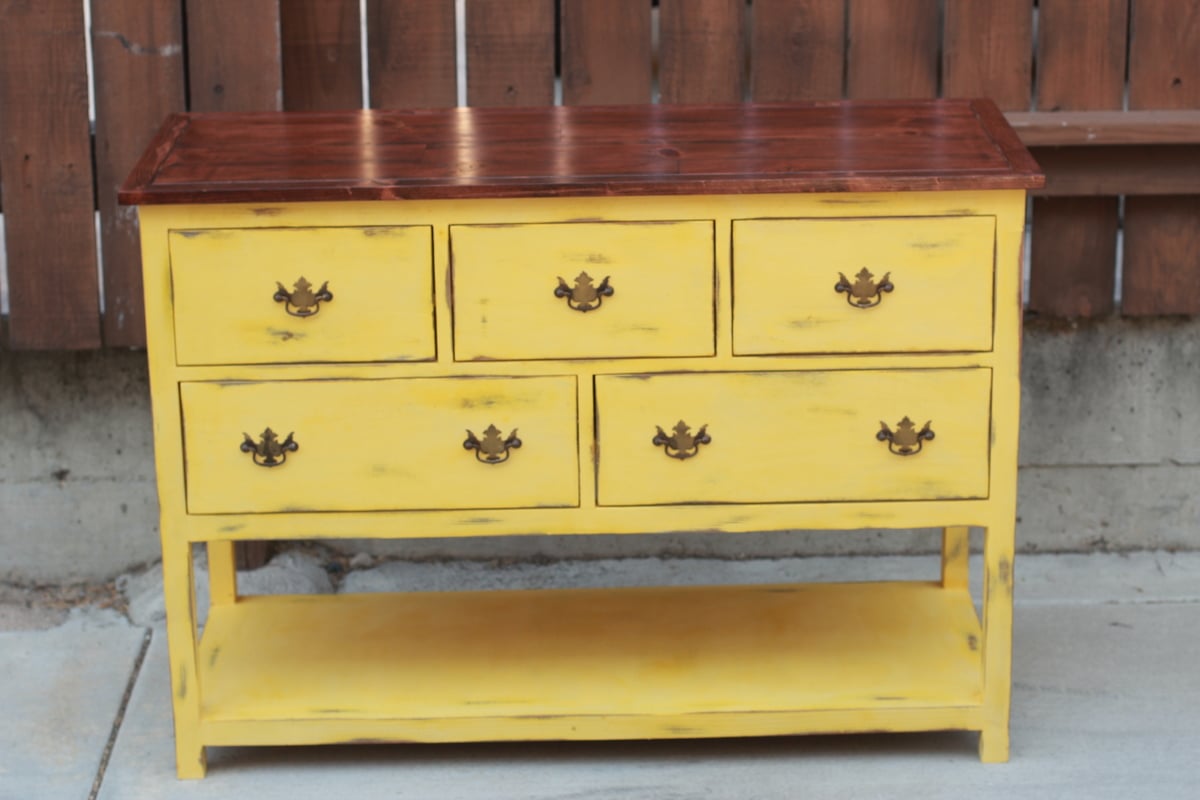
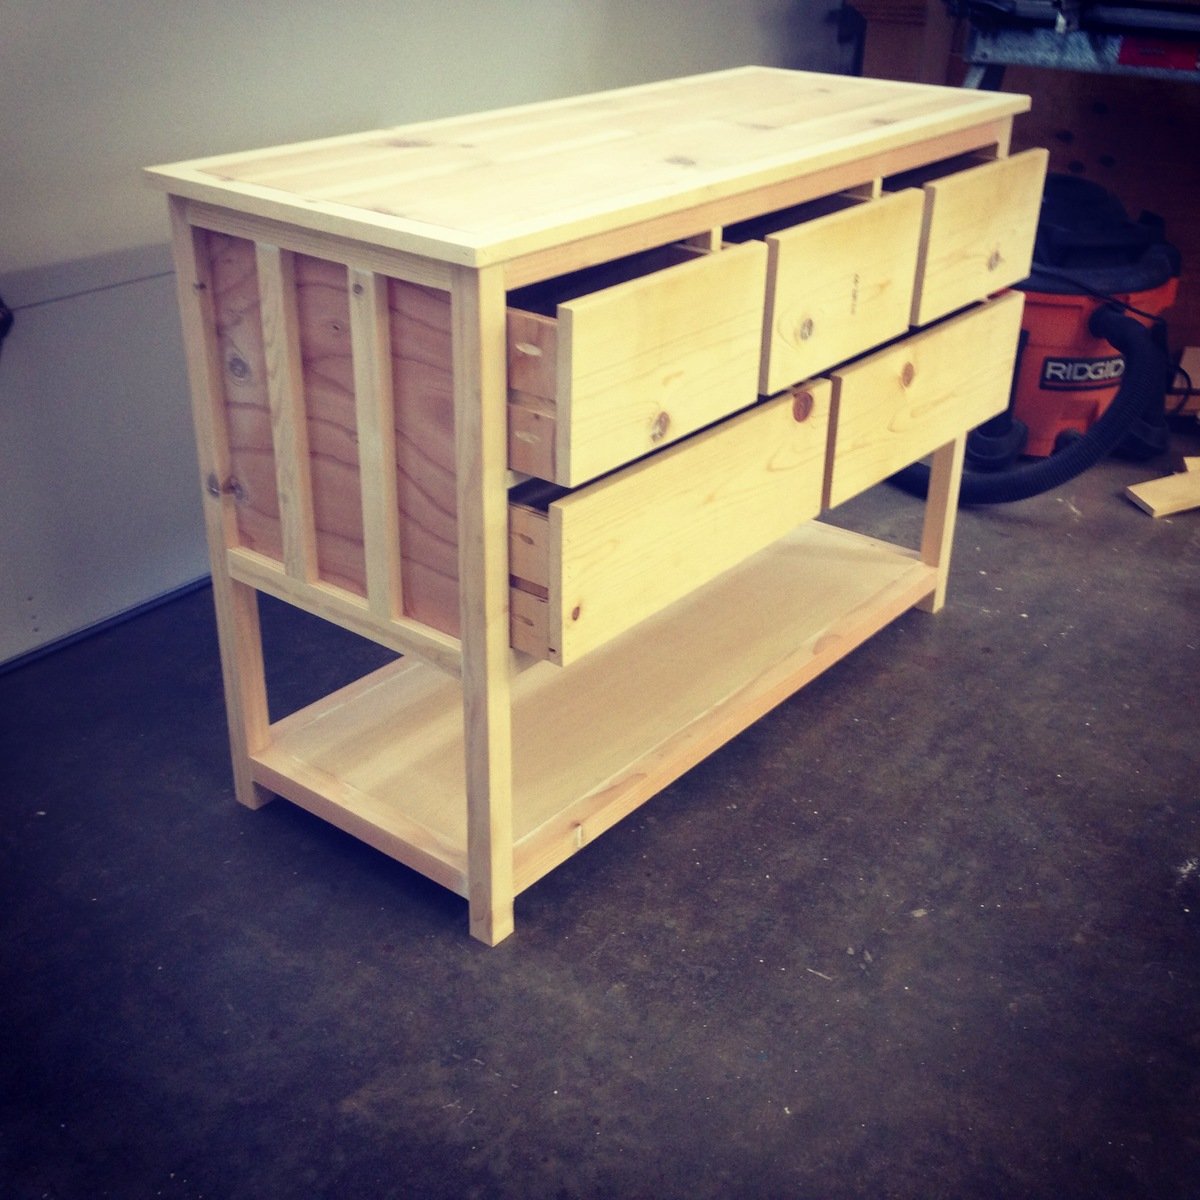
This is a country style dresser I built from one of ana's plans. I slightly modified the top and the dimensions to fit my needs. Painting this dresser was the biggest challenge. First I stained the entire dresser, then I applied 3 coats of ce ce caldwells chalk paint. I then used a wet rag to wipe away the yellow in areas I wanted distressed. Last I applied a paste wax to seal it.


I followed the plans except for the top, I used a 2x12, 2x4 and 2x12 pocket holes together.
Burnt the wood with a torch and stained over.
Thanks for the plans!
Questions? [email protected]
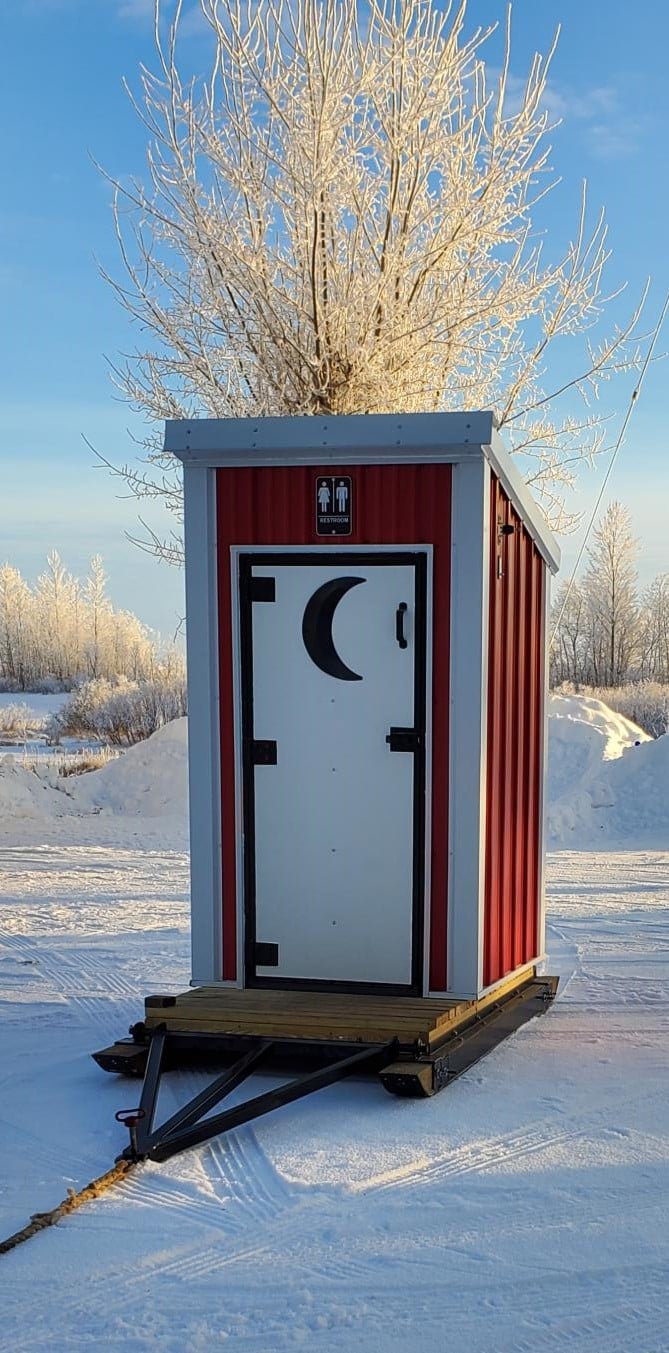
Your outhouse design was modified for a snowmobile club project as the building needs to be towed across a lake to a site next to a warming shelter. An LED light with a timer switch and solar battery charger were installed to provide light in a remote area of Lake of the Woods.
A steel hitch and skids with hyfax were added to the design.
Thank you for providing a design that allowed us to make modifications for winter outdoor recreation accommodations.
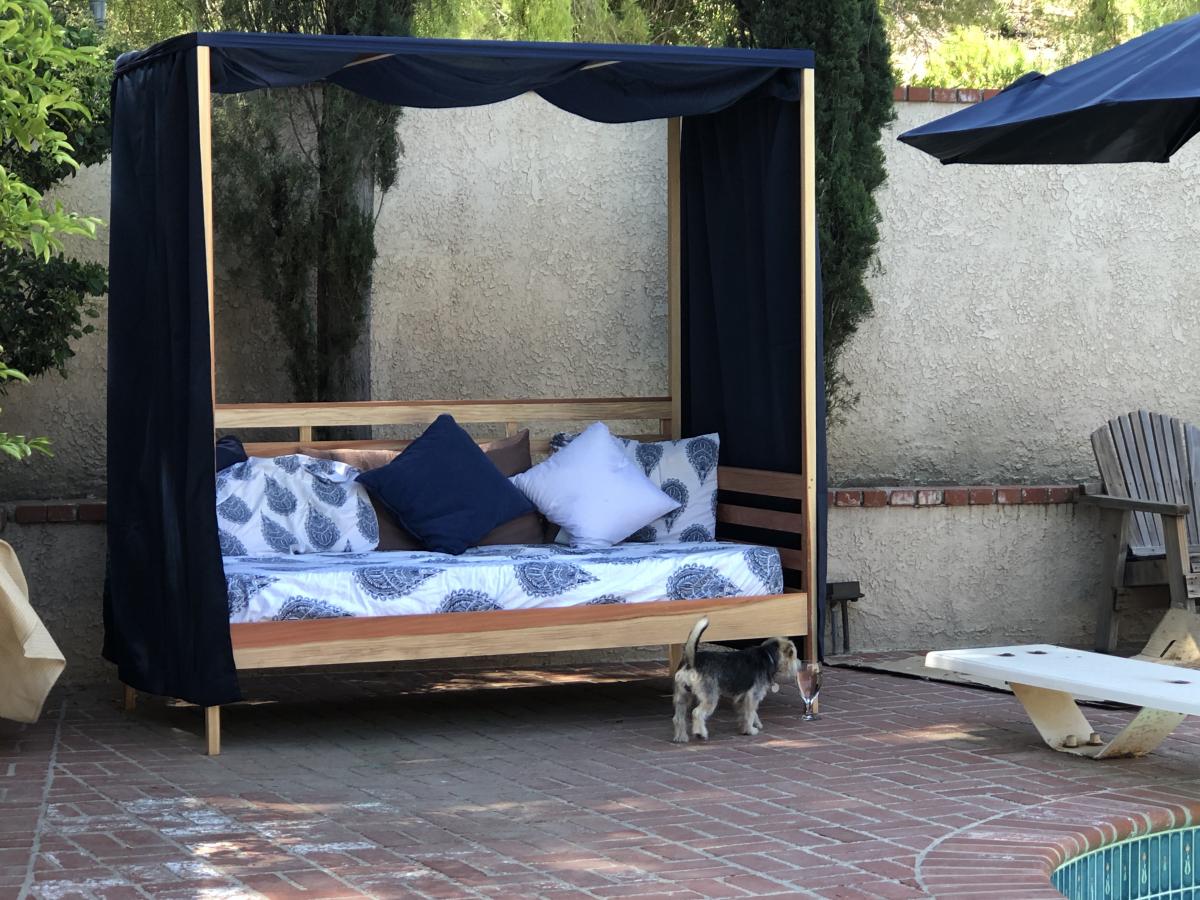
Loved making this. Used old sun curtains and a sheet for extra splendor.

Wed, 07/03/2019 - 11:19
This is beautiful! Thank you for sending in a brag post, we very much appreciate it!
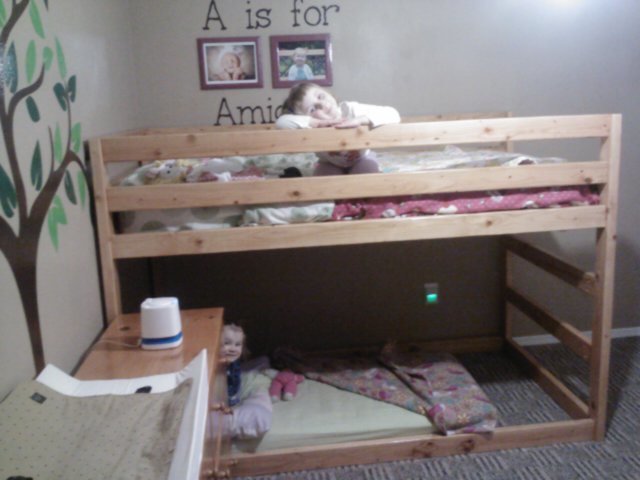
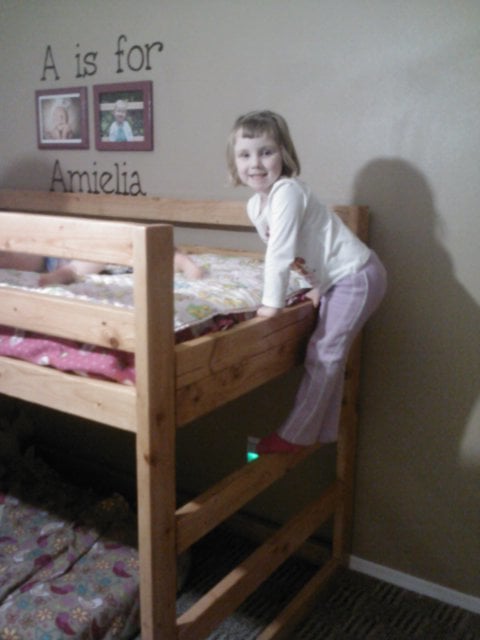
We loved the idea of the Jr. Loft Bed, but made some modifications to fit our needs.
Modifications:
-I didn't really feel the 2x6 railing was needed, so to cut costs, we used all 2x4s. On the end, I put two 2x4s one on top of the other to keep the mattress from sliding off the ladder side.
-Height was a concern for me as my kids are 4 & 2. So I lowered the overall height by about a foot. 54in is the height. Since we are putting my youngest on the bottom (on the floor) we made sure she had enough head room.
-We wanted this to be STURDY and reversible. So we added bottom supports on both long sides to ensure that the frame wasn't going to move. We also added six 2x4 supports under the mattress on the top. I can climb up there to tuck in sheets with no problem.
-We skipped the stairs & landing. I didn't want my kids to be playing on the bed. So we skipped the stairs and just built a ladder into the frame instead.
This was a fairly easy build. We previously built a HUGE Ana White Table. And I felt like I was kreg jigging for DAYS. This was only a few hours of cutting, sanding, kreg jigging, and a simple put together. Staining took the longest! It's a great bed and we're so excited it's finished!

Comments
Ana White Admin
Wed, 04/13/2022 - 10:35
Smart!
This is fabulous, thanks for sharing!