Community Brag Posts

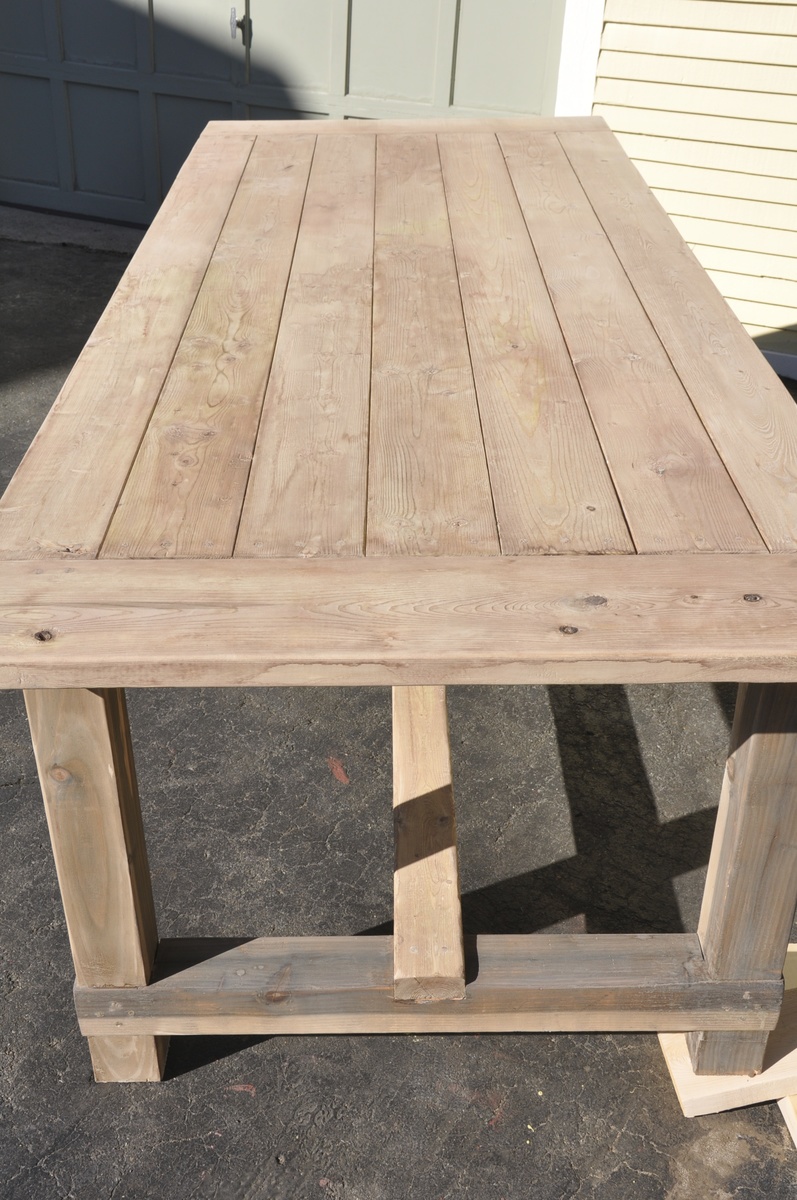
Farmhouse Table with Extensions
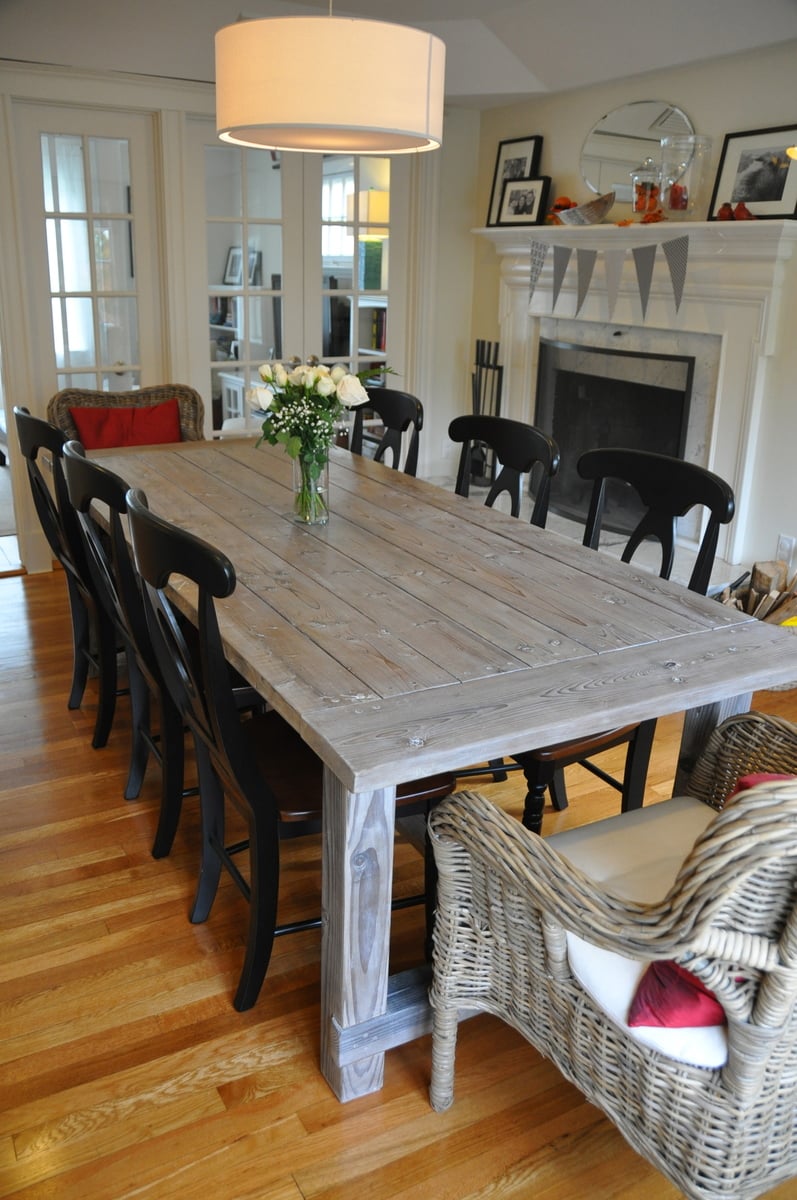
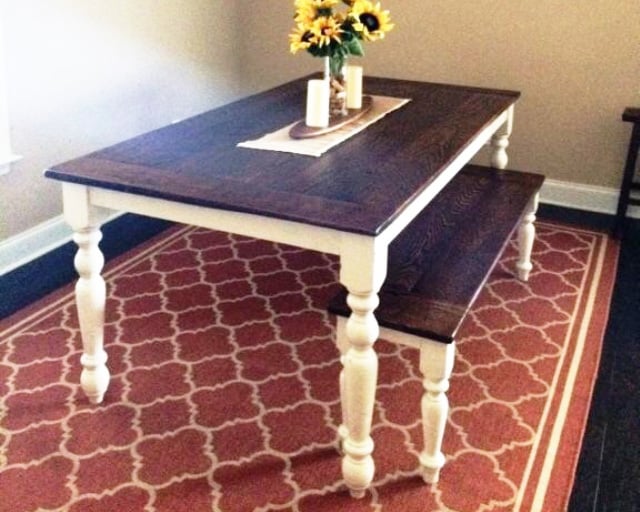
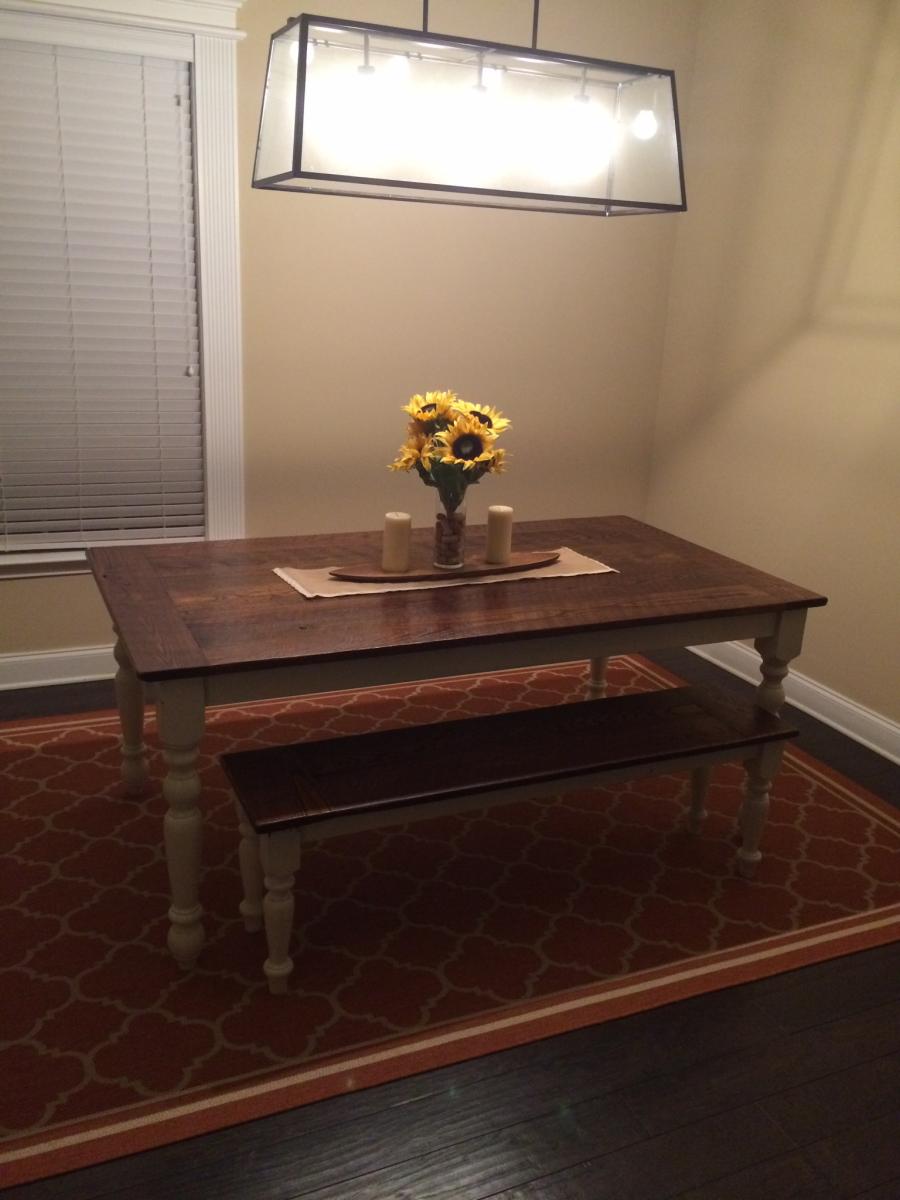
This was my first build and I learned A LOT and watched A LOT of youtube diy videos. The main take-away from this project is not to build in the freezing cold if the finished project is for inside. I finished this project in below freezing temperatures and I noticed that the wood expanded (increasing slightly the gap between the finished boards on the top) when it was brought inside.

I built this from the original farmhouse table plans with no kreg jig although I did buy and use a pocket kreg jig to make the extensions. The main modifications were using 4x4s such as were used in the Country Living magazine spread that inspired this build and also making modifications to allow the addition of 15" extensions at each end of the table's bread boards.

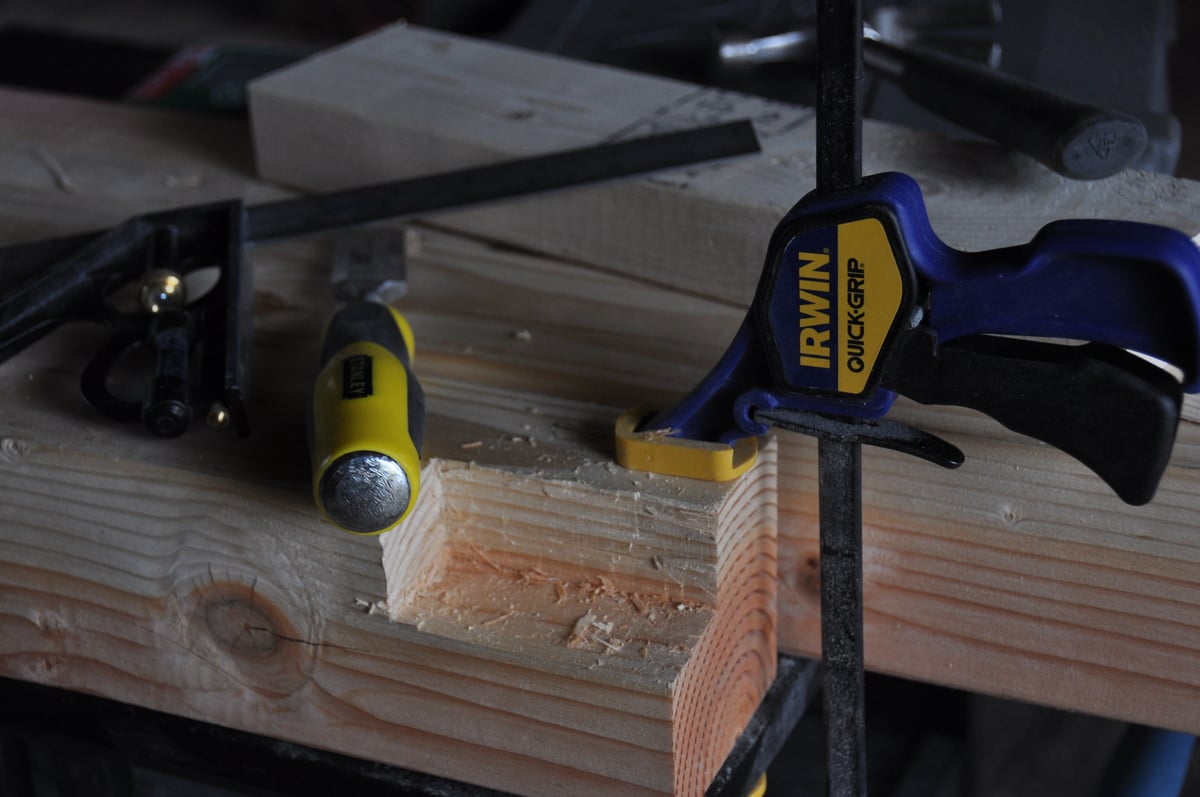
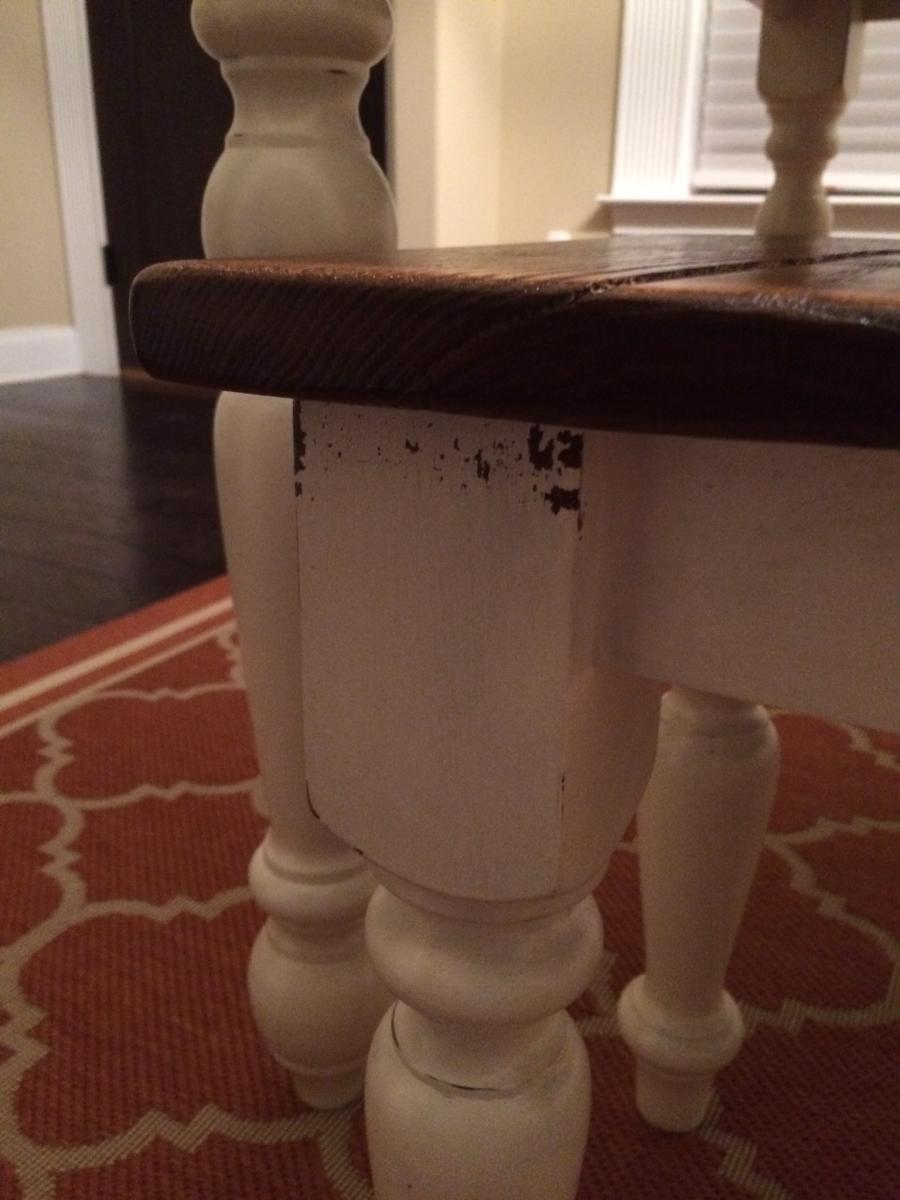
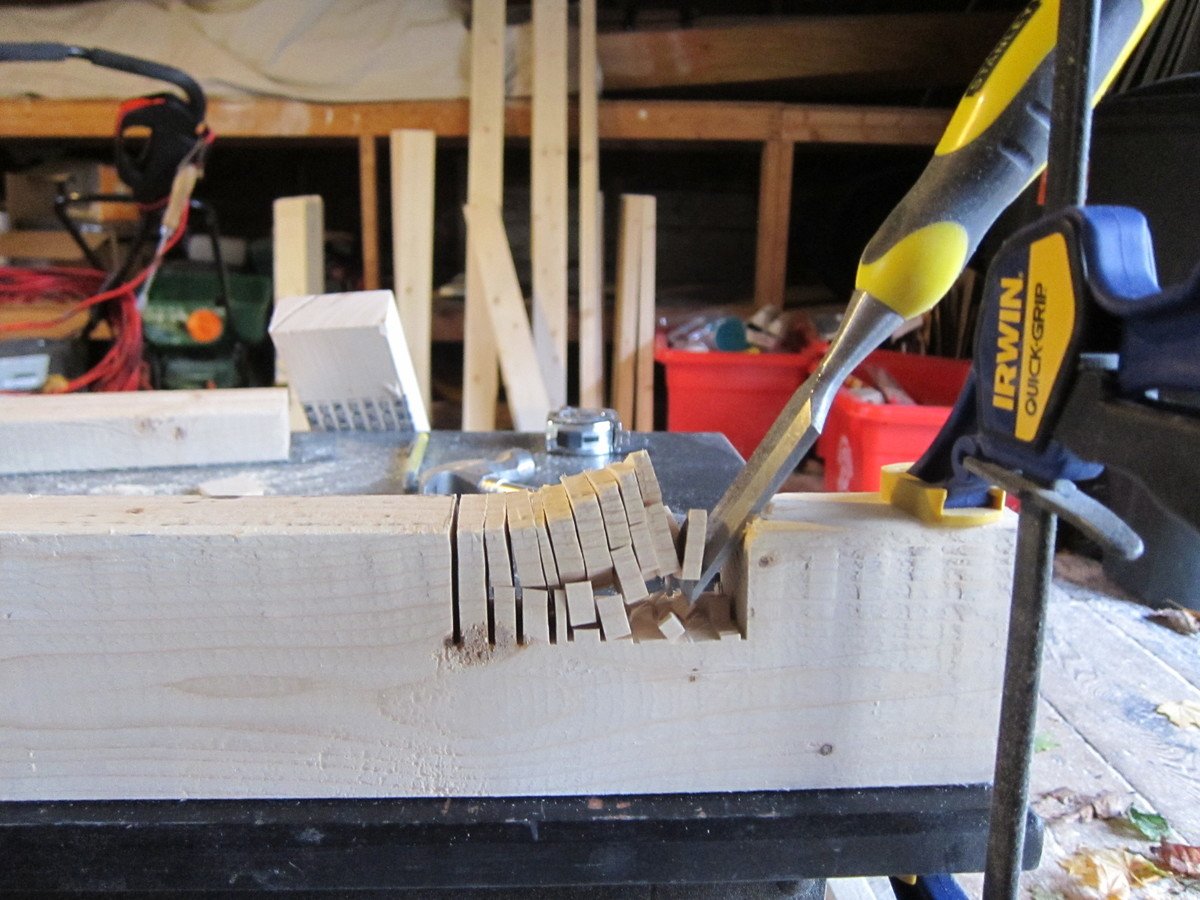
My first challenge was figuring out how to build with the 4x4 legs instead of the 2 2x4s screwed together. In order to accomplish this i had to use a chisel to create the corner lip that the table top frame would sit on. I added photos of this so I hope it will help someone. Chiseling these 4 corners (one on each post) only took an hour or two and was so worth it for the look of the 4x4s. Just measure carefully and work carefully with a sharp chisel. I actually removed half the wood by sawing off the corner at a 45 degree angle. Remember when cutting your boards for the table ends that a 4x4 has different dimensions than 2 2x4s screwed together. Compensate for this in your cuts.

Another challenge was hiding the screws on the table legs and table top. I was leaving the finish natural so didn't want to use wood fill. I accomplished this by getting a countersink bit and then buying wooden dowels the same diameter. For these screw holes, after finishing screwing, I put a dab of wood glue in the countersink hole, inserted the dowel as far as it would go, used a fine hand saw to cut off the dowel flush with the table and then used a hammer to make sure the dowel was in tight and flush.

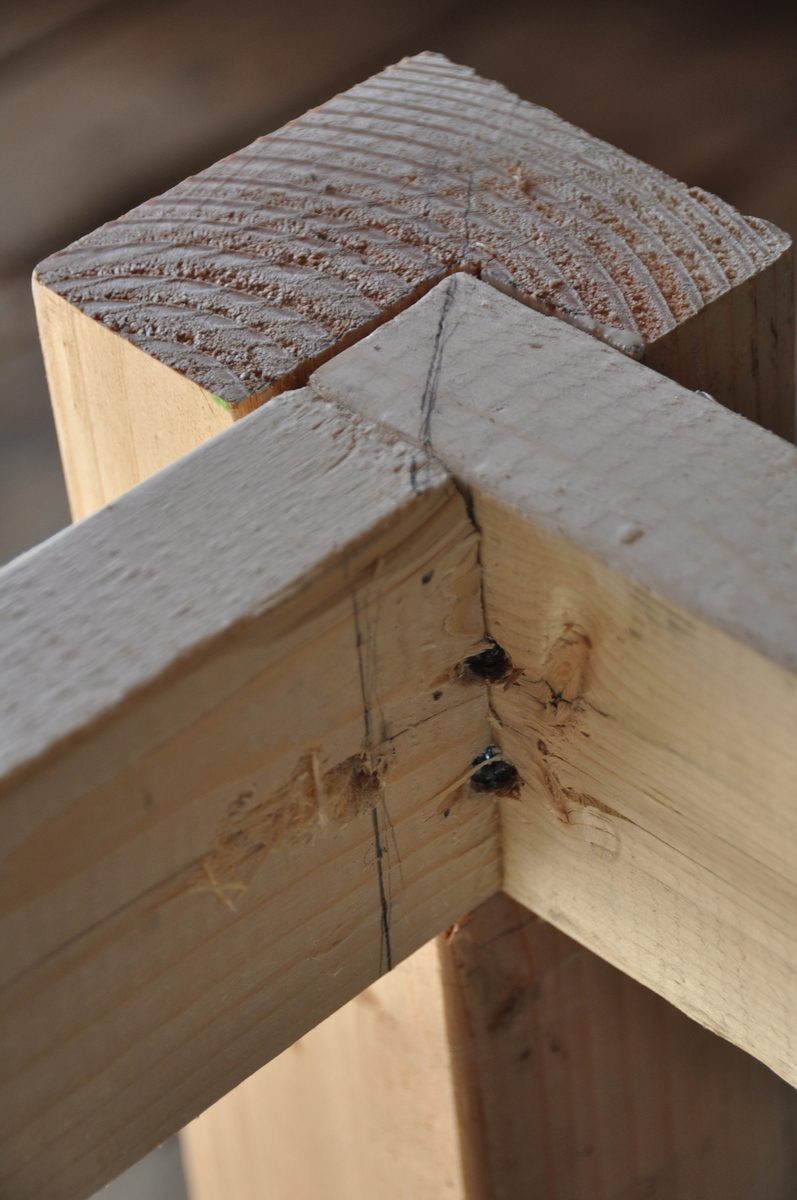
I had trouble figuring out how to attach the table top frame to the table legs with the long screws from the plans so I included a picture of this step. Its really easy but I was not able to use three screws as the plan calls for. I used two instead and it has been very solid. I used the long screws as proscribed.

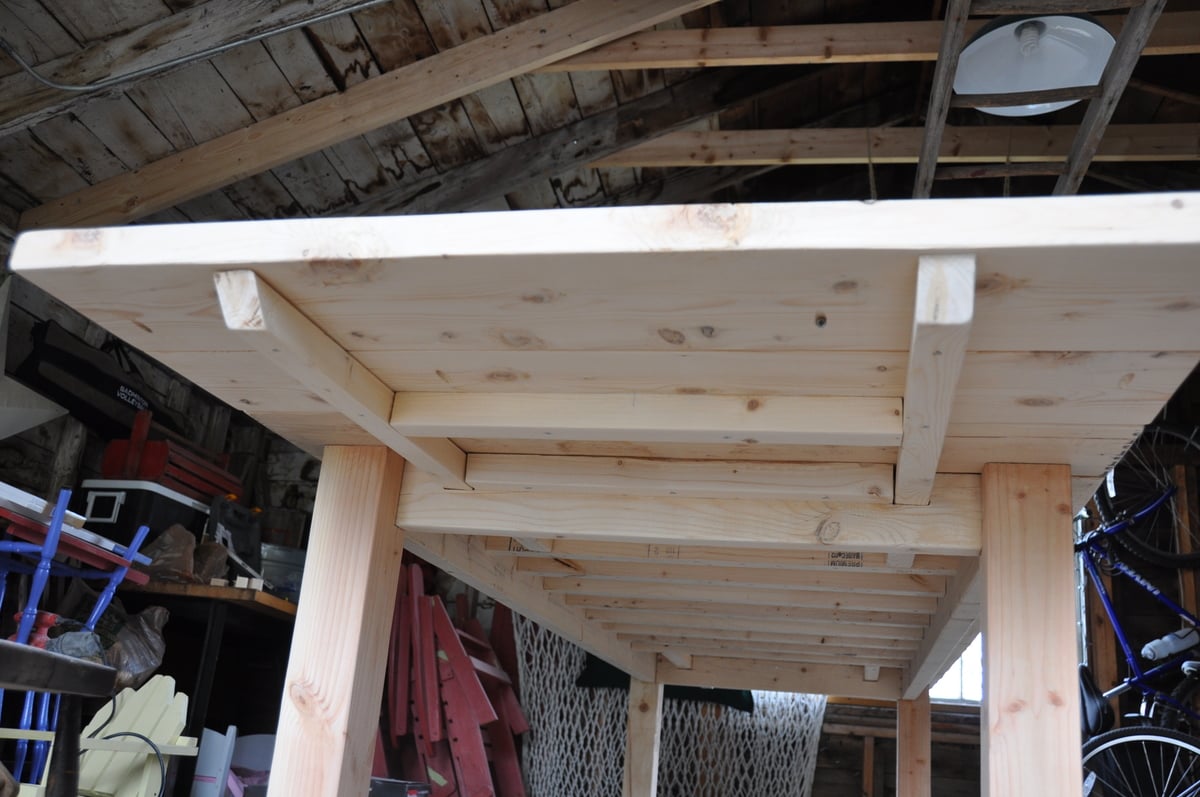
Finally, I wanted to build extensions (2 2x8 boards kreg jigged together) so I could increase seating up to a max. of 12 persons, so I needed to cut out 2x2 gaps on the table ends. I also included a picture of these in place. To make room for the 2 2x2s that extend under the bread boards and table top to brace the extensions, I left out one of the 2x2 cross beams at each end of the underside of the table (the boards that the table top boards screw into).

I hope this is helpful to you!
Estimated Cost
$250
Estimated Time Investment
Week Long Project (20 Hours or More)
Finish Used
Vinegar and Steel Wool Solution (soak steel wool for 24 hours in vinegar and be sure to test on a sample) to "age" the wood. Tung oil over this sealed the stain/wood. over this I applied a wax finish. First I used Briwax Liming Wax to enhance the gray finish and leave a slight white wash patina. This finish was enhanced because I had steel brushed with the grain to remove some soft wood so the liming wax would enhance the grain. I finished the project with clear briwax. We have been using this as our everyday table since February and there are no stains or problems with this finish.
Recommended Skill Level
Starter Project

Comments

dyemond47

Mon, 02/10/2014 - 11:55

Great job on the table! I love...I had visions of this table before I saw it. I wanted to use the 4x4's for the legs as well, the same finish. I am concerned now about the 4x4's because I am an amateur and I think that may throw too many wrenches into my plan. I started with the bench, finished in 3 hours I have patted myself on the back. Plotting on a Kreg jig right now.
epweigel92

Sun, 07/24/2016 - 09:57

Love the look of this table! Just to make sure I'm following correctly, the extensions are ones you can add and remove, not fixed? Do you have a pic of how they slide in or out?

DIY Folding Camp Stool with Burned Wood Finish

Submitted by Anonymous (not verified) on Wed, 09/25/2019 - 08:30

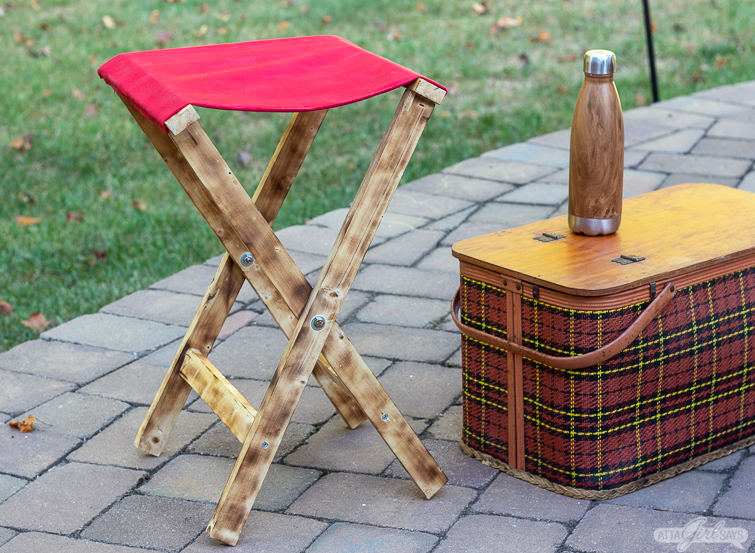
I used Jaime Castiglio's tutorial and Ana's plans to build this folding camp stool. I modified the plans slightly and just stapled the canvas seat to the frame. I used a heat gun to create the burned wood finish on the stool. I also used the heat gun and a bar of fabric wax to waterproof the canvas seat.

Built from Plan(s)
Estimated Time Investment
Afternoon Project (3-6 Hours)
Finish Used
I used a heat gun to create a wood burned finish. You can seal it with a clear topcoat.
Recommended Skill Level
Beginner
Seasonal And Holiday

Farmhouse Table

Submitted by Anonymous (not verified) on Thu, 10/03/2019 - 10:02

Received the wood from grandfather who had it rough sawn in Henry’s valley PA. I cut it down and made a more rustic top to go along with the standard base from osbourne and local lumber shop. Added the final touch with in memory of grandfather after his recent passing, at the time.

Built from Plan(s)
Estimated Cost
$200
Estimated Time Investment
Week Long Project (20 Hours or More)
Finish Used
Base was gel stain with homemade chalk paint. Top was general walnut stain
Recommended Skill Level
Beginner

Comments

Greenhouse

Submitted by Anonymous (not verified) on Mon, 06/26/2023 - 13:04

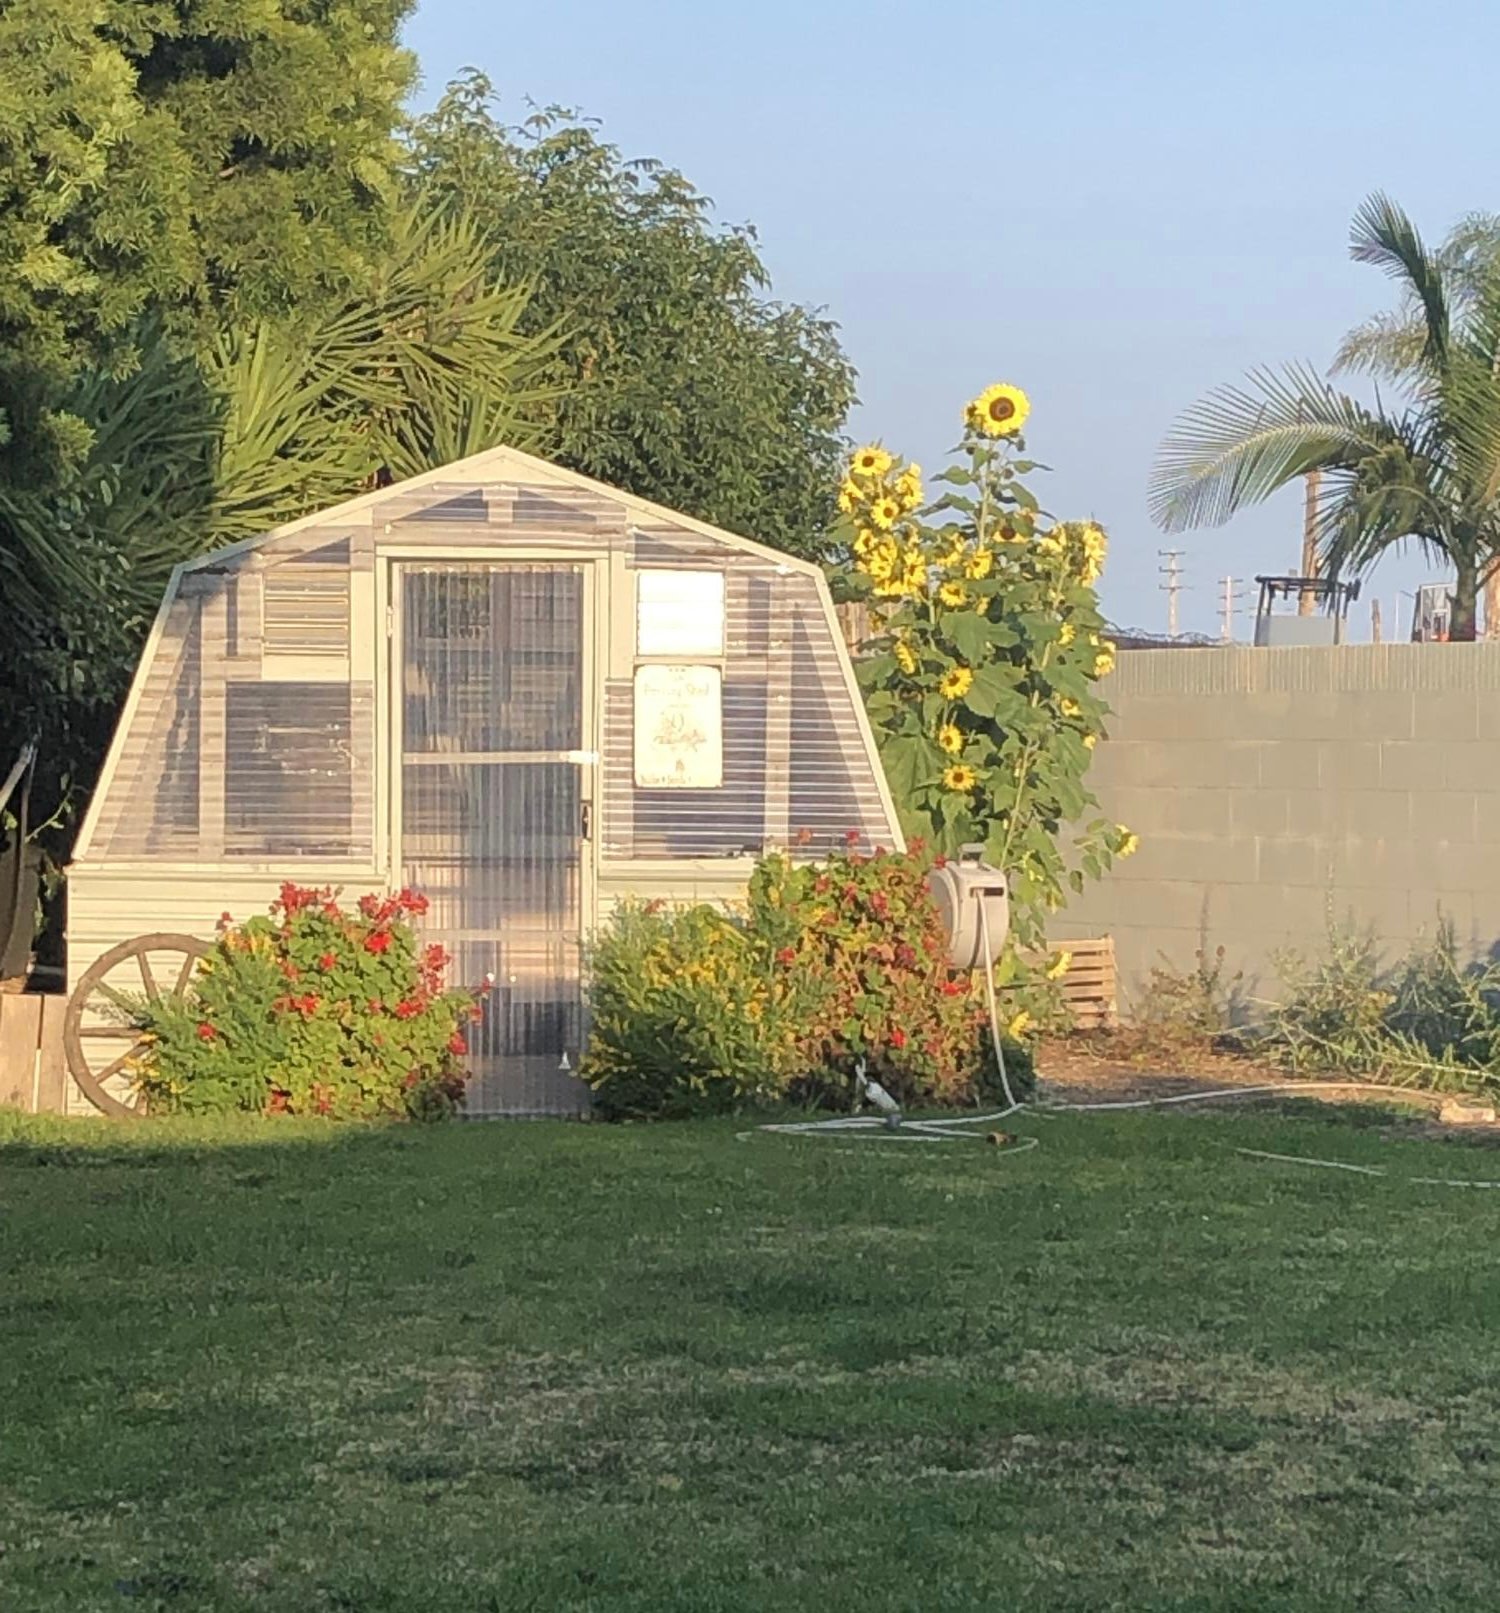
I saw this greenhouse built on the Justin Rhodes YouTube channel and immediately wanted my own. My husband was a champ at making my dream come true!

Built from Plan(s)

Comments

nifof17547

Tue, 04/09/2024 - 01:43

What a great idea! Building your own greenhouse can be a rewarding and cost-effective project. With the right planning and choice of materials, you can create a sturdy structure that will last you for years to come. In fact, a greenhouse is a great way to take care of your health because the crops grown there are undoubtedly of higher quality and healthier for you. Speaking of health, if you want to improve your health, consider using natural supplements such as mullein. Mullein supplements are known for their potential respiratory benefits and can promote overall well-being. You can find organic mullein supplements https://www.amazon.com/USDA-Organic-Mullein-Drops-Lungs/dp/B0CKBPTPRL on Amazon. Adding them to your daily diet can complement the peaceful environment of your greenhouse. So, whether you are a gardening enthusiast or just starting out, remember to take care of both your plants and your health!

Seasonal And Holiday

Super Easy DIY Upholstered X Bench

Submitted by Anonymous (not verified) on Thu, 03/10/2016 - 16:36

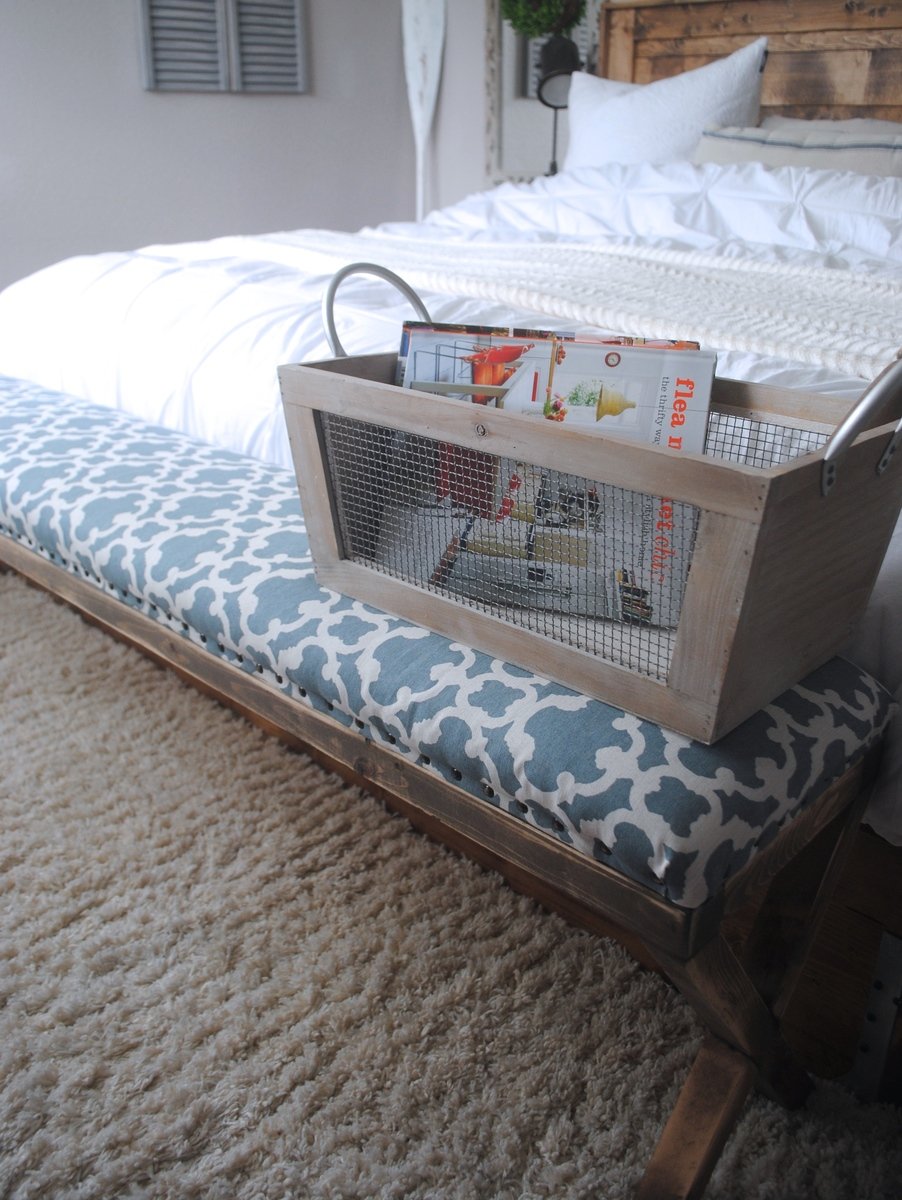
I've wanted a nail head upholstered ottoman for forever. I came across this tutorial & Roque Engineers tutorial and combined them Super super easy guys! We made ours at 6' in length x 12" in width ( our room is SUPER small ) Check out our blog for more details.

Built from Plan(s)
Estimated Cost
45.00
Estimated Time Investment
Afternoon Project (3-6 Hours)
Recommended Skill Level
Starter Project

Big Boy Bed

Submitted by Anonymous (not verified) on Tue, 08/01/2023 - 14:56

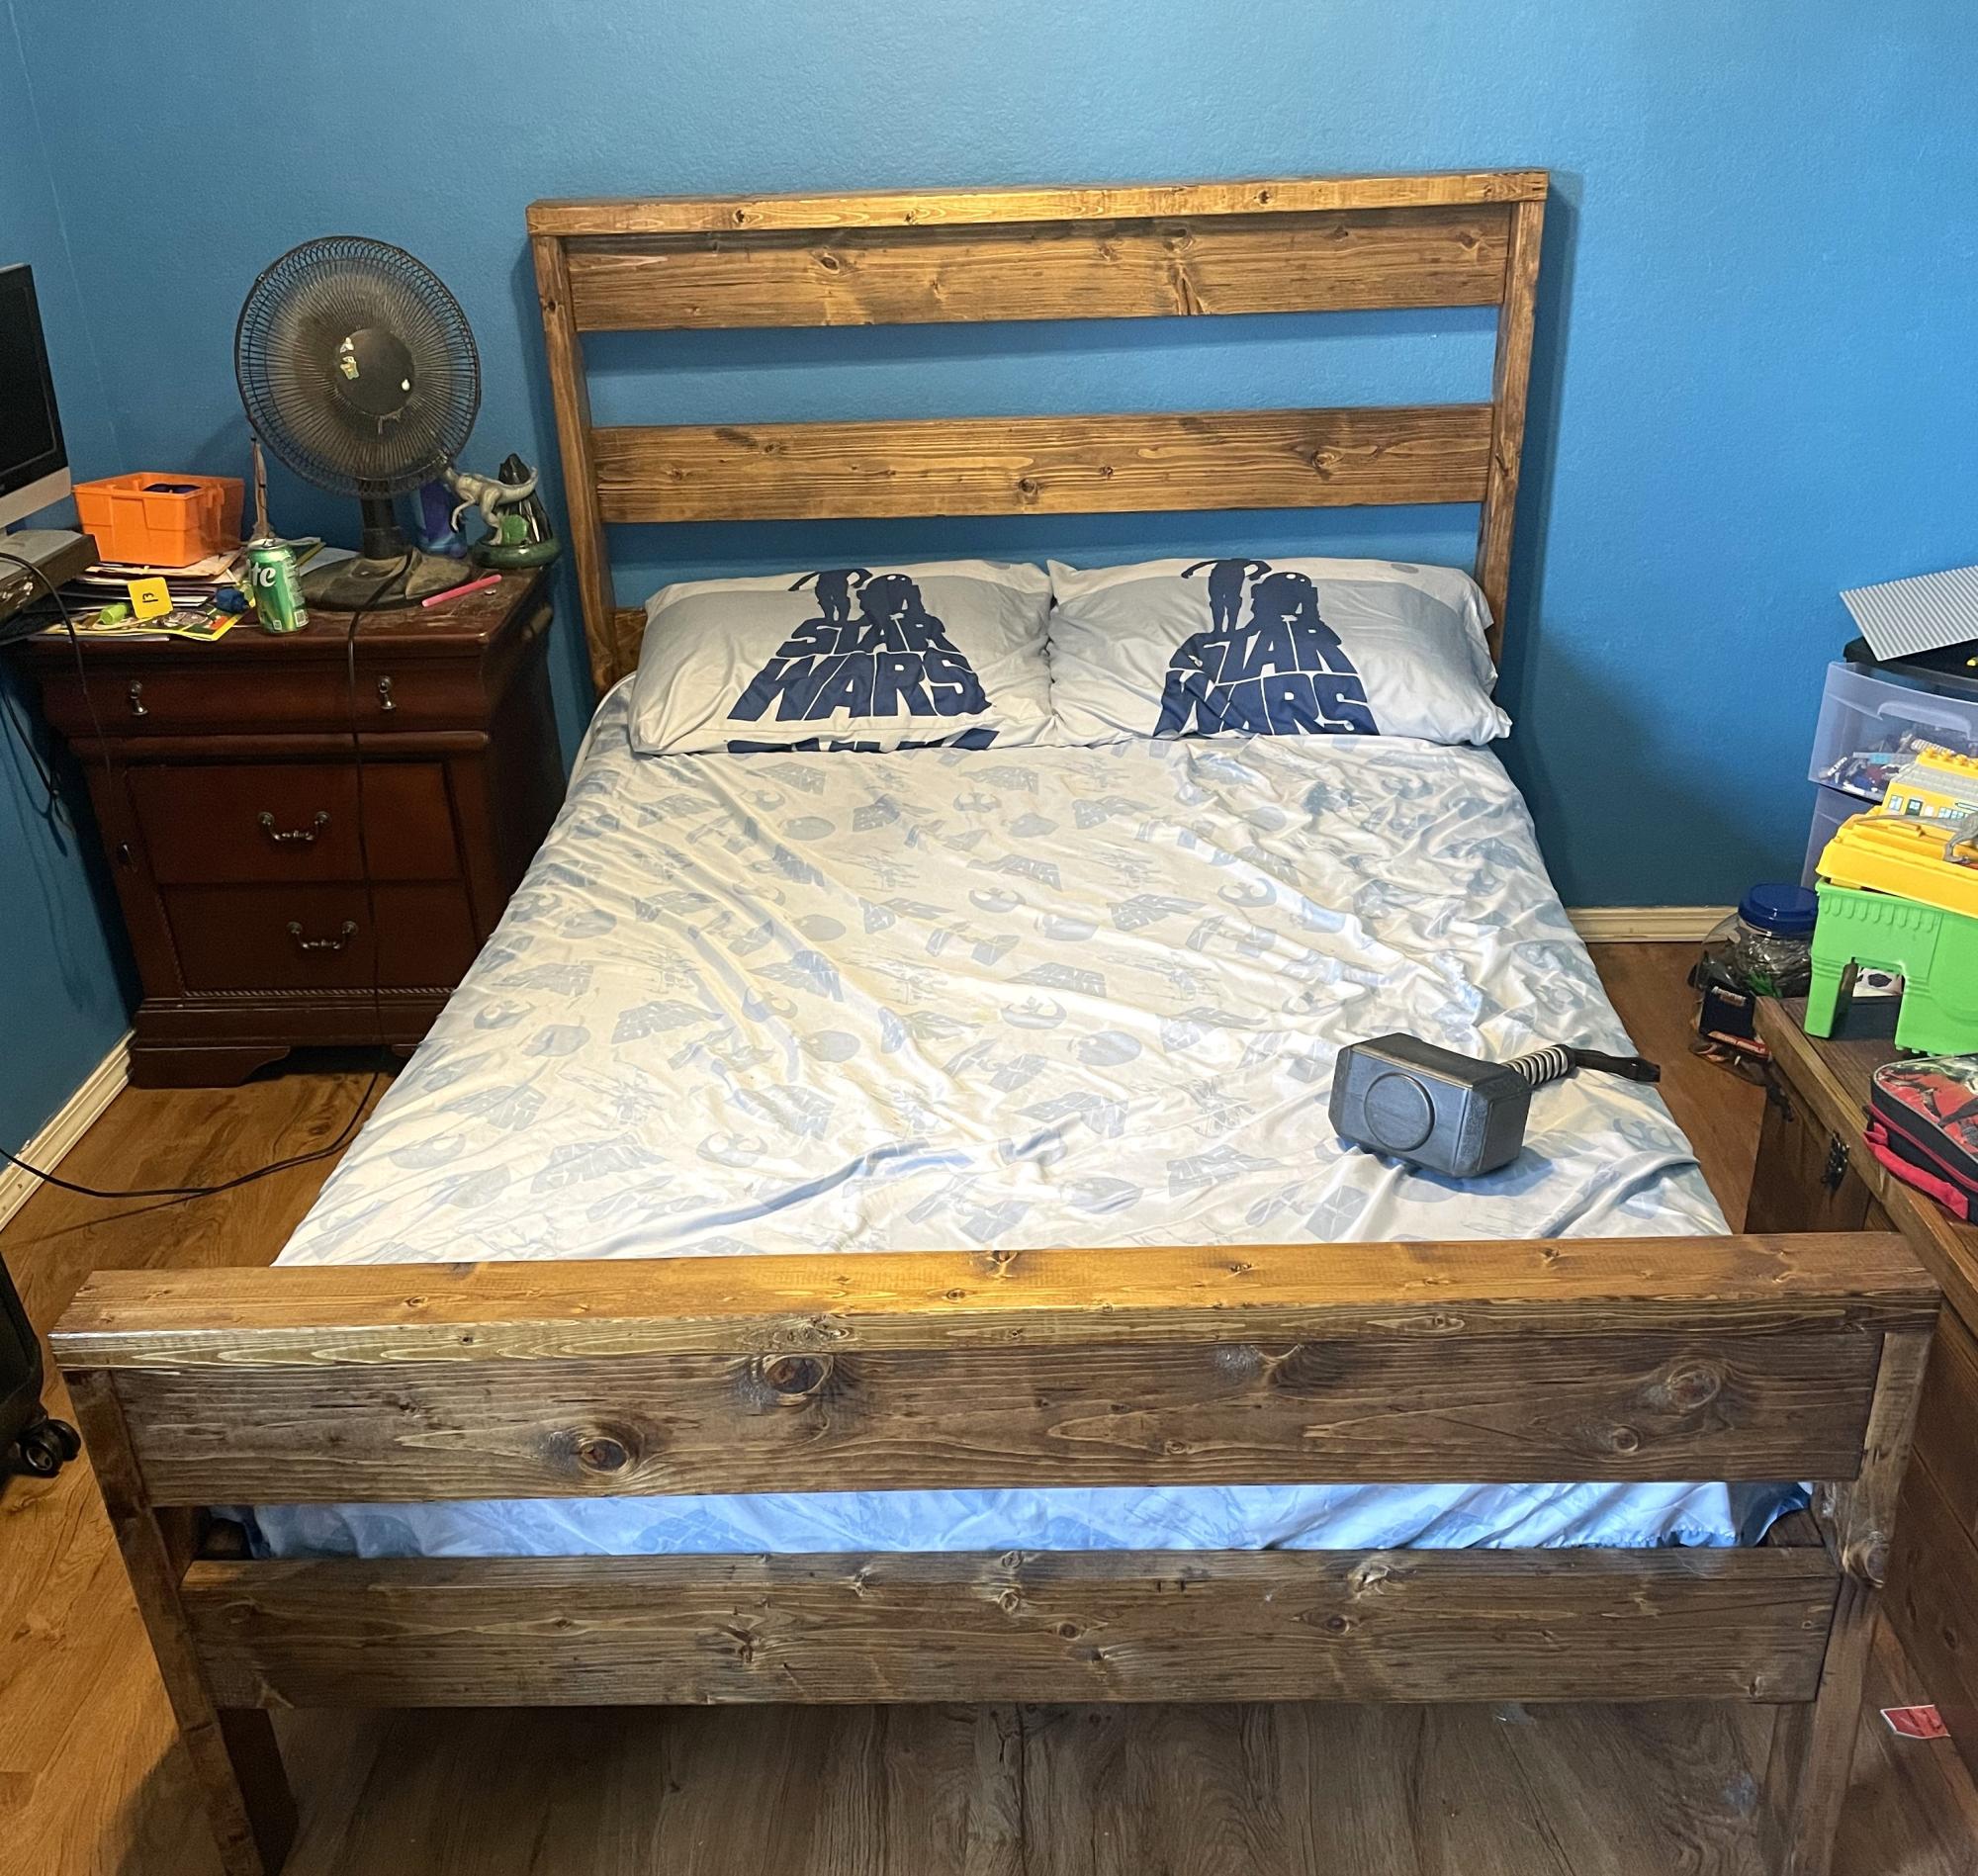
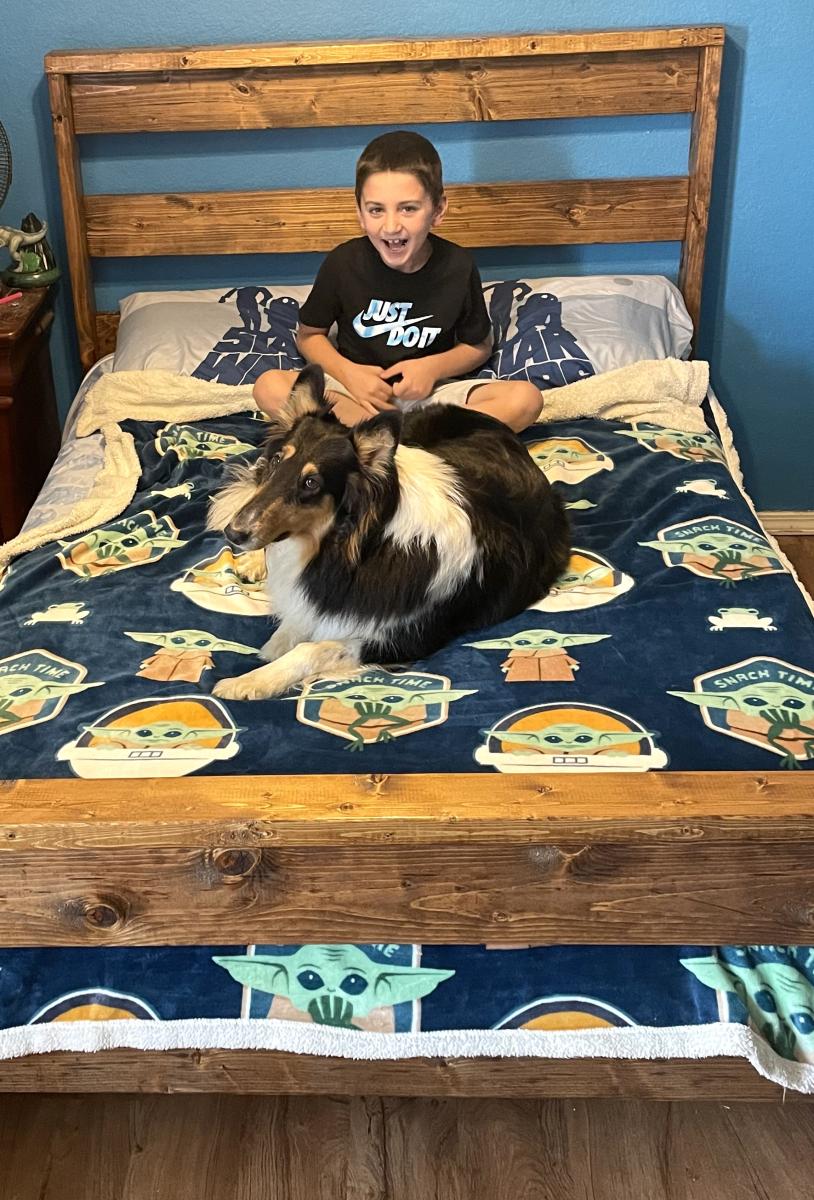
New bed for my boy. Great plan and not expensive.

Sean Hight on Facebook

Comments

Cedar 4x4 Truss Beam Table

We had gotten a piece of granite for free, so my husband modified the plans to fit the slab. We made one in pressure treated lumber and loved the look so we decided to make a nicer one in cedar. The benches are a little wider because of the size boards available. We could have ripped them down, but we prefer the wider seat. I will sand the seats and seal the wood to keep it looking fresh longer. We look forward to many great memories at our new table by our outside fireplace. Thank you for the great plans!

Estimated Time Investment
Day Project (6-9 Hours)
Recommended Skill Level
Intermediate

Easy to Build Workbench

Submitted by Anonymous (not verified) on Wed, 09/06/2023 - 09:09

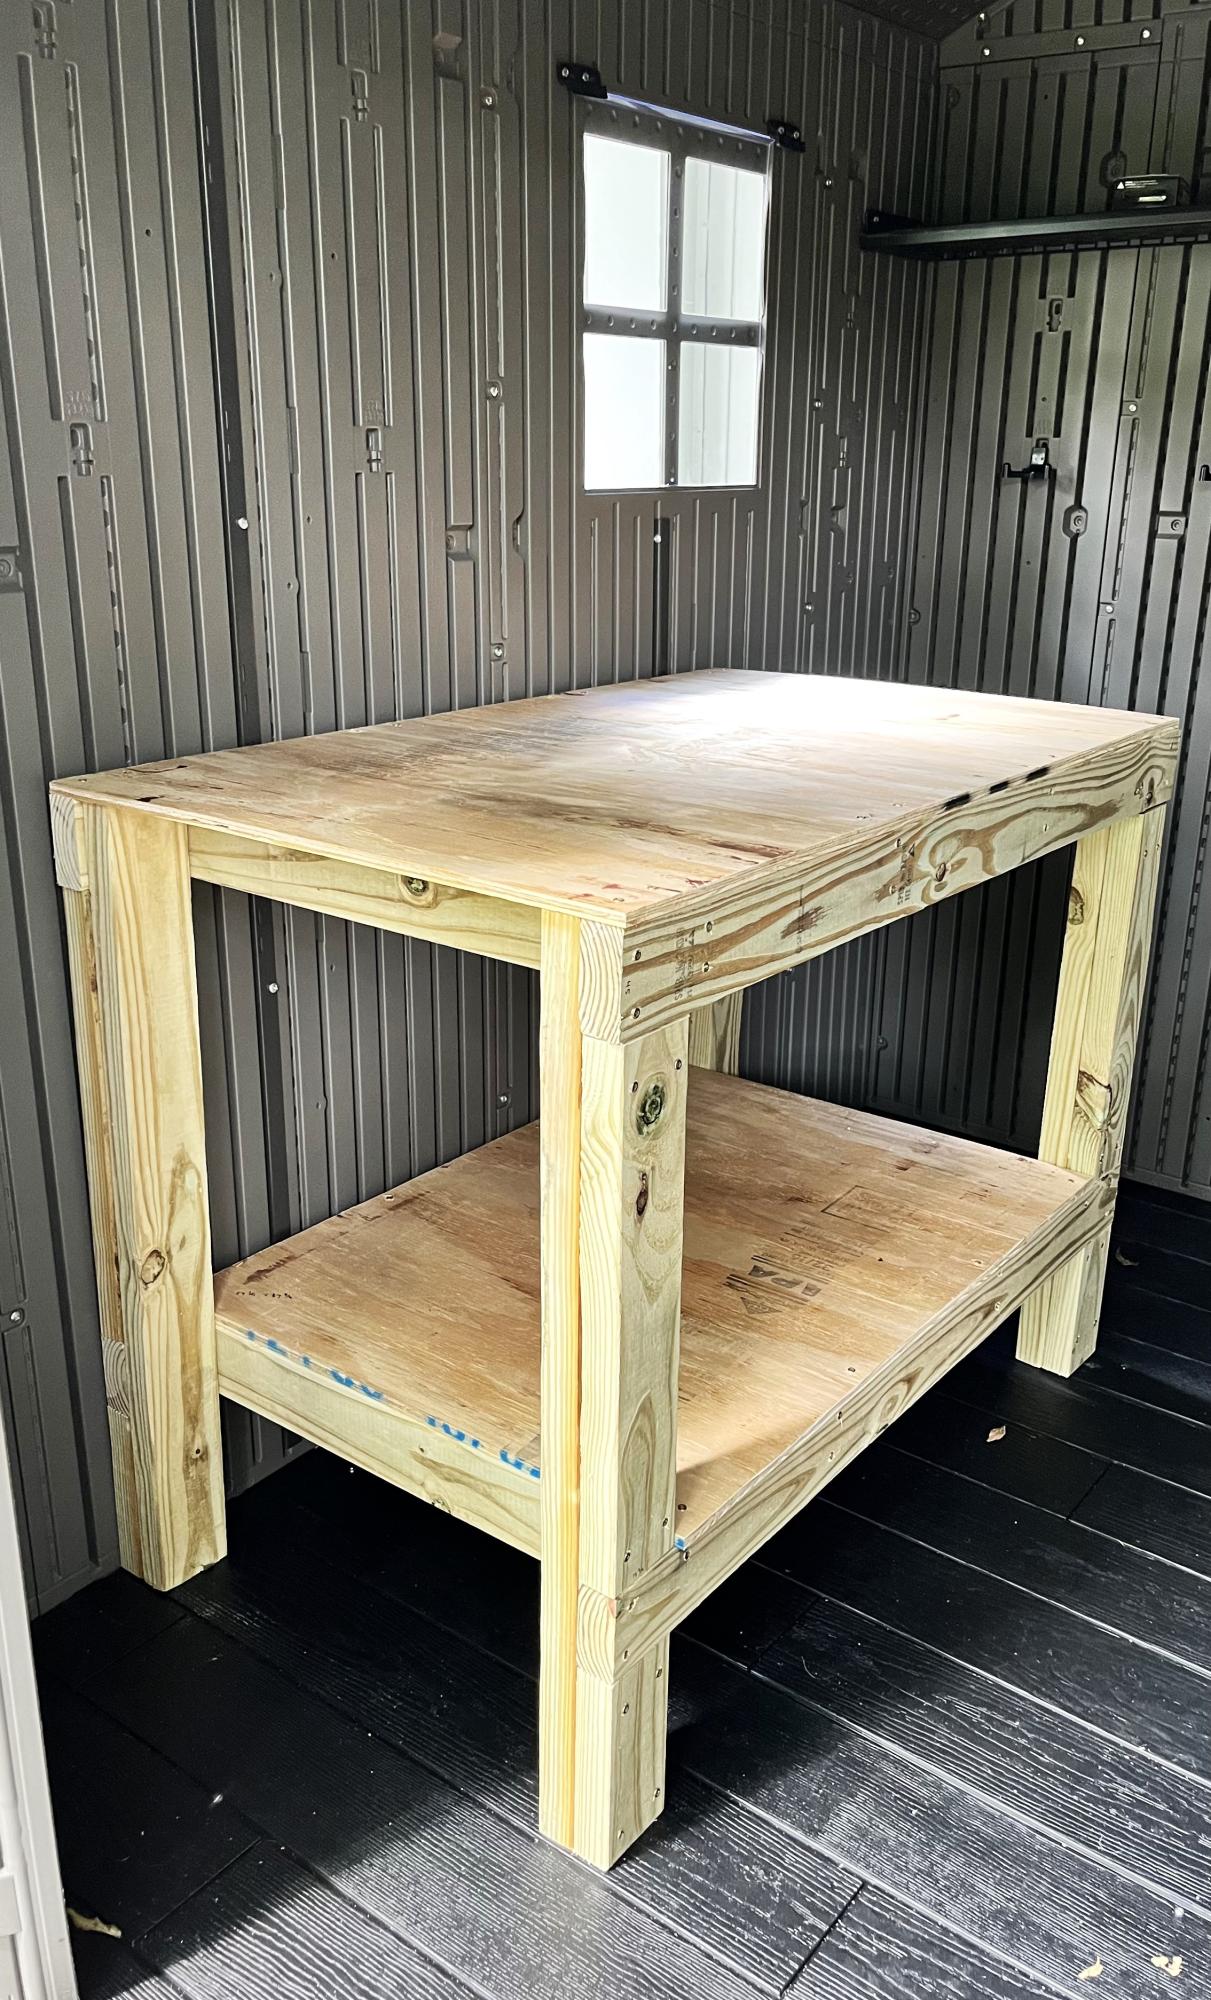
I was wanting a work bench for my outside shed to work on occasionally and help keep organized. This is the first piece of furniture I have built totally on my own! The plan was easy. I sized it down a little with no problem. I'm a little off on a couple of the cuts but will practice more! Overall, thrilled and extremely proud of it!

Lori B

Loft bed with desk and book case

Submitted by puffin_81 on Thu, 01/16/2020 - 05:14

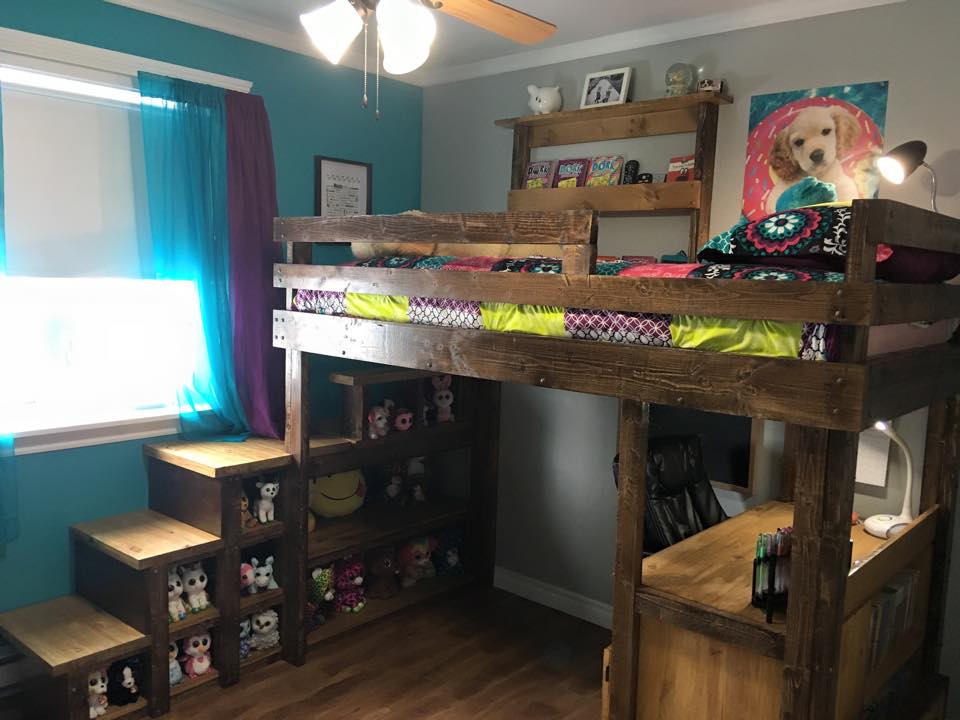
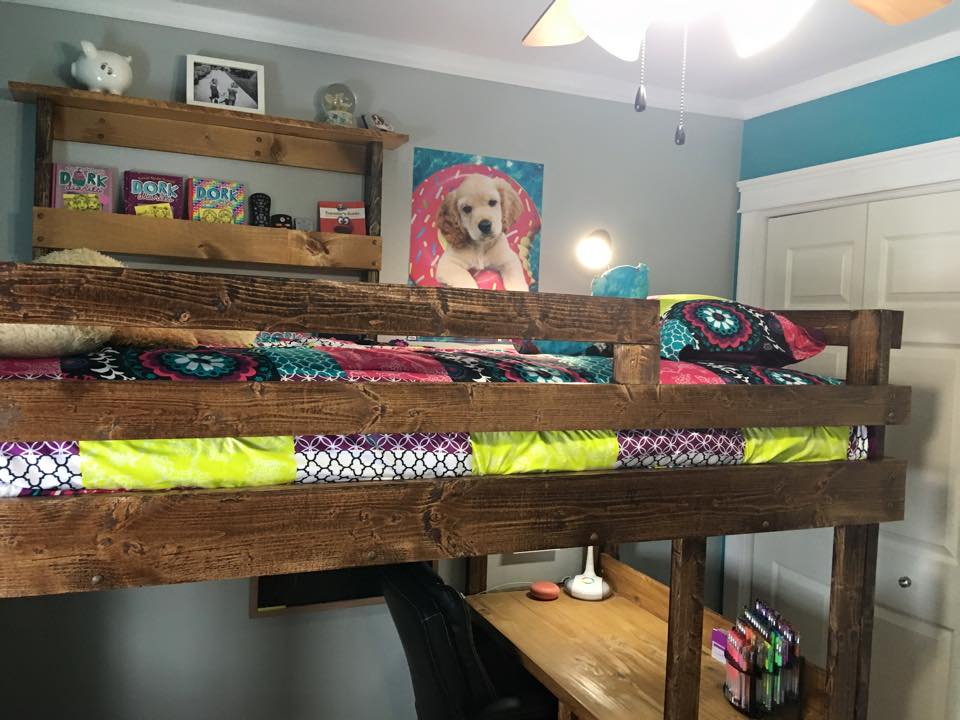
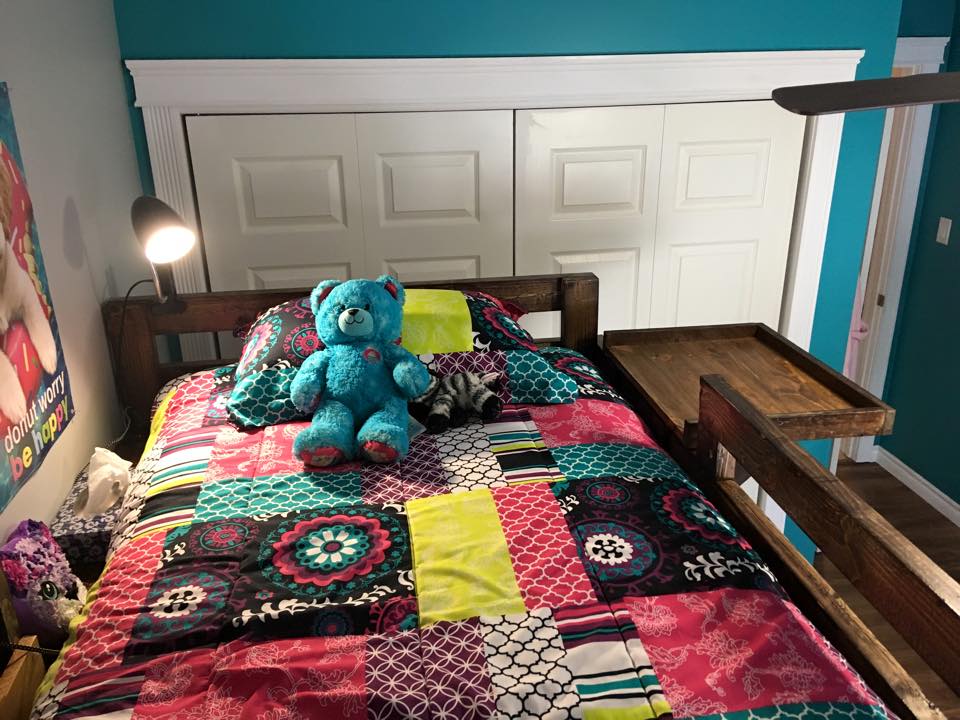
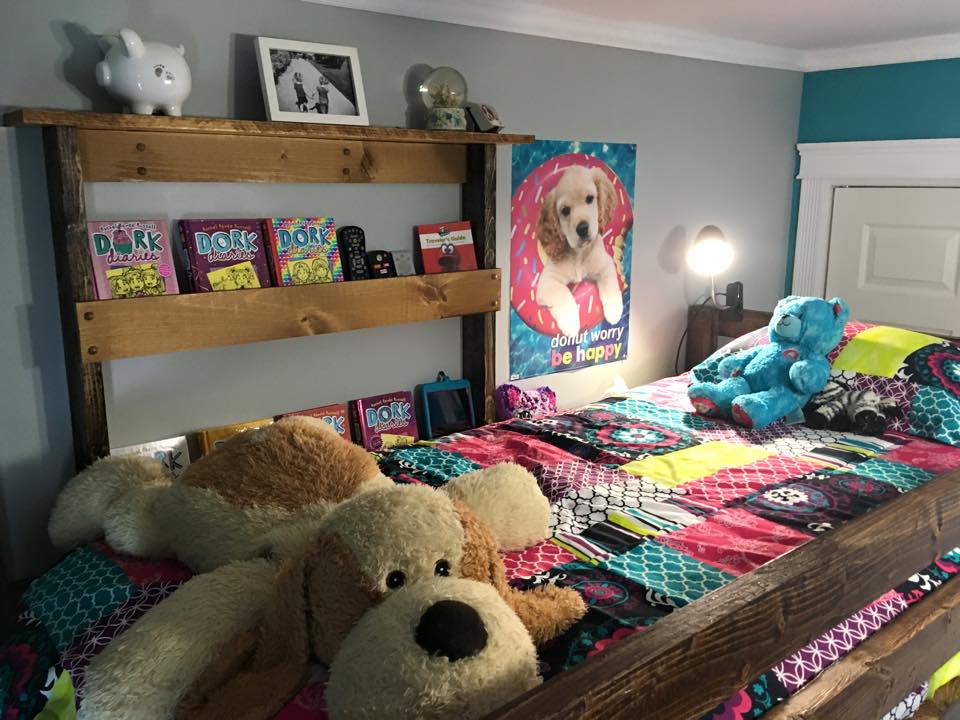
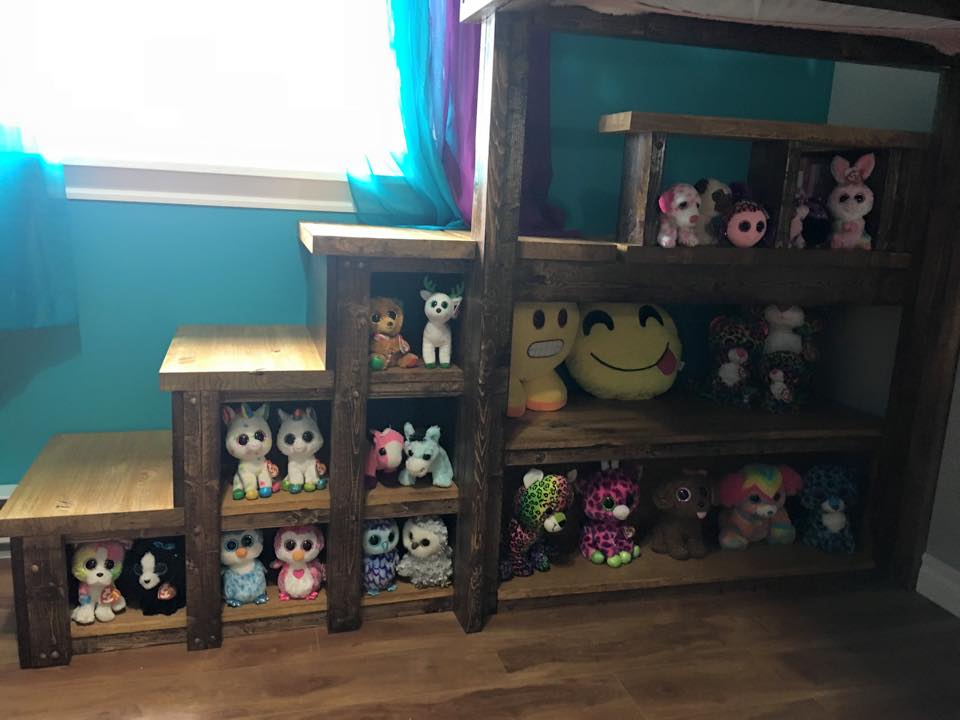
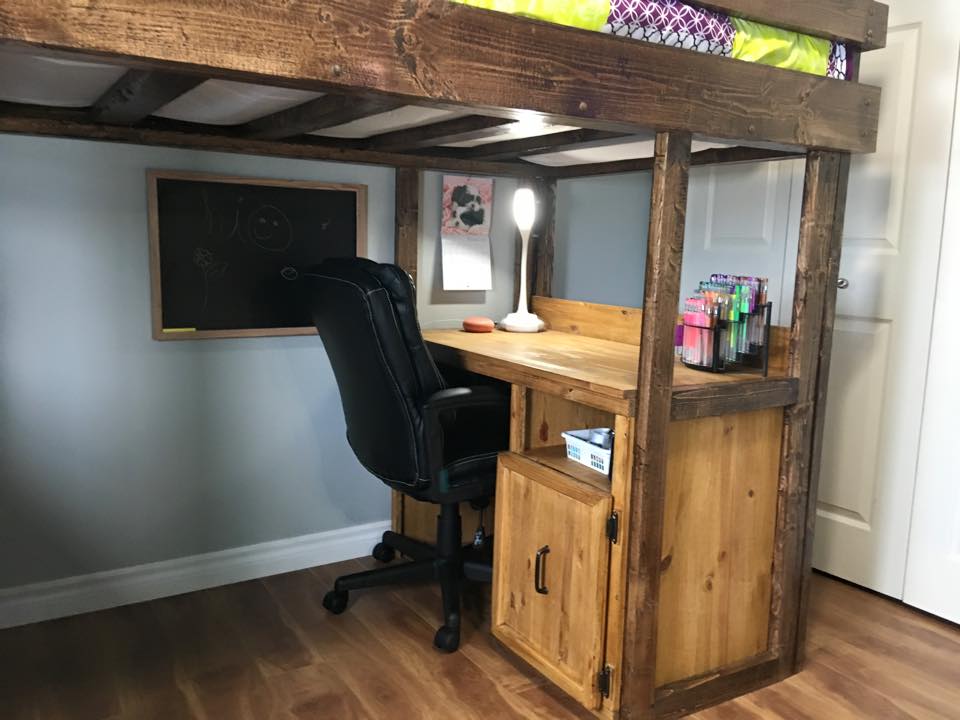
My daughter's bedroom was getting a bit cramped so wanted to make a loft bed for her but I also wanted to incorporate a desk and some shelves for her books and toys. I started with the base plans from Camp Loft Bed with Stair, Junior Height posted on this site and kind of incorporated my own touch with the stairs, desk, book case. I also added a removable tray for when my daughter is eating a snack in her bed. It hooks on the top rail of the bed. Another addition I made was the wall shelf I mounted above the bed for storing her books, I-pad, etc.

Sorry but I do not have any plans for these modifications. I just made some simple drawings and winged it. This is my first ever build so hope you enjoy it

Estimated Cost
600
Estimated Time Investment
Week Long Project (20 Hours or More)
Finish Used
Minwax American Walnut for the dark finish and Natural for the light finish
Recommended Skill Level
Advanced

Roll Away Workbench with Miter Saw Stand

Submitted by advanlente on Sat, 03/28/2020 - 11:03

After collecting my tools, I needed a place to store them that would protect them. I had already had two jigsaws break because I was storing them in a rubbermaid tote. When I saw this plan I knew it was going to be perfect for my shop. My husband was supper happy because I would finally have a central spot for my workshop. My boys were happy to help when they could. 

Estimated Time Investment
Week Long Project (20 Hours or More)

Hidden bathroom storage

Submitted by Imadeit on Wed, 07/20/2016 - 13:13

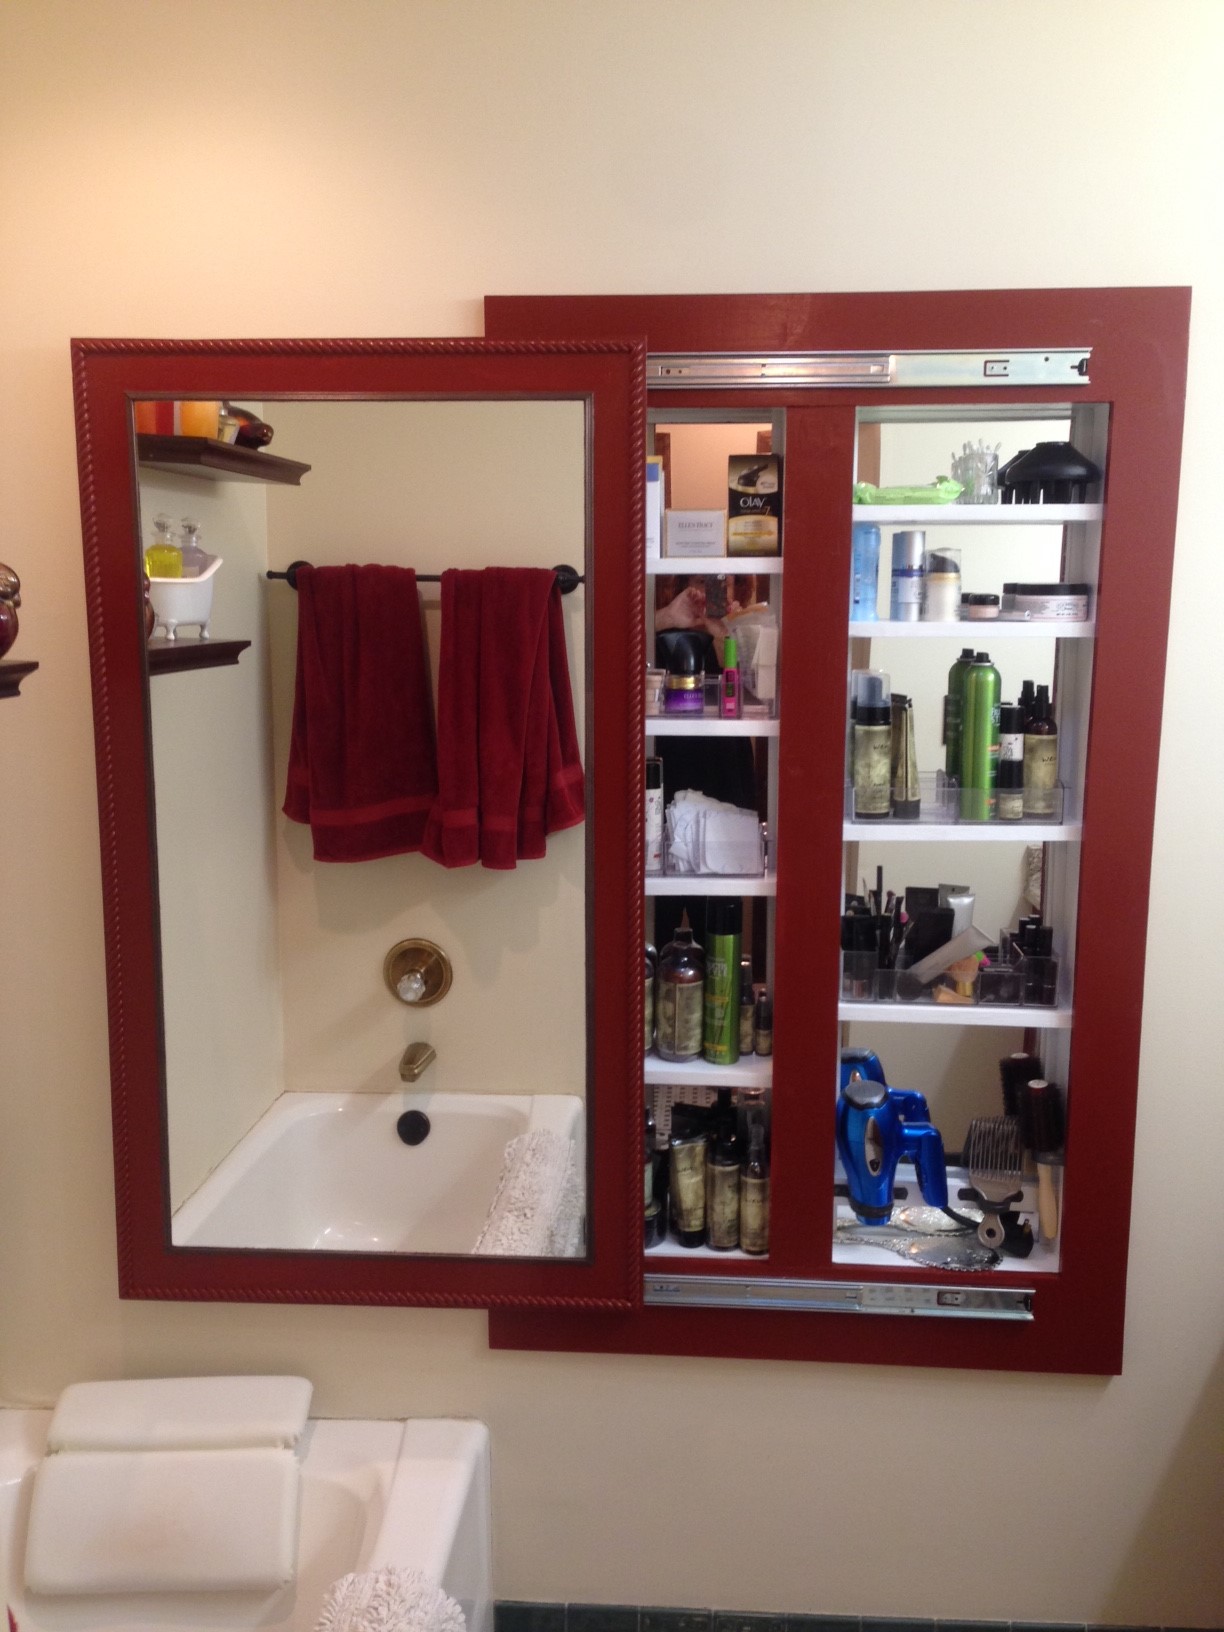
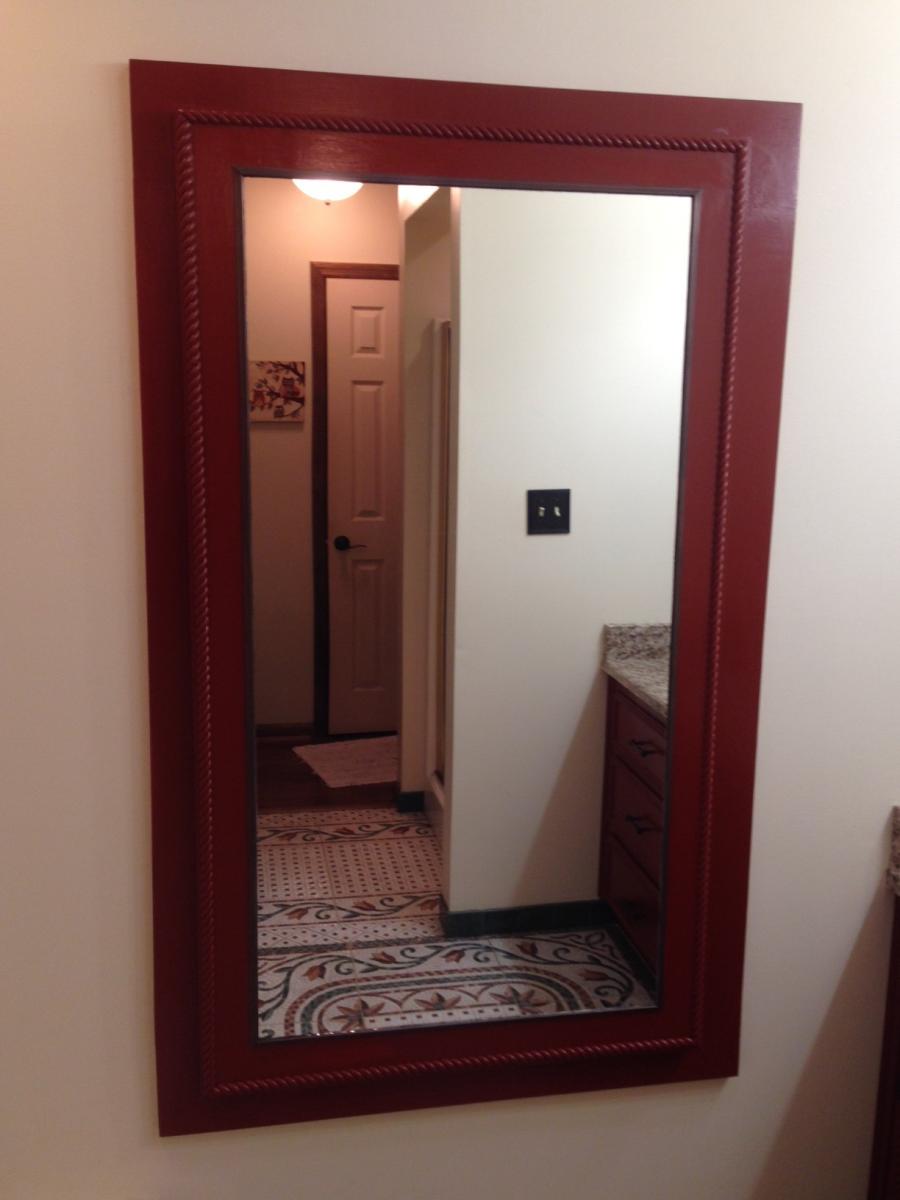
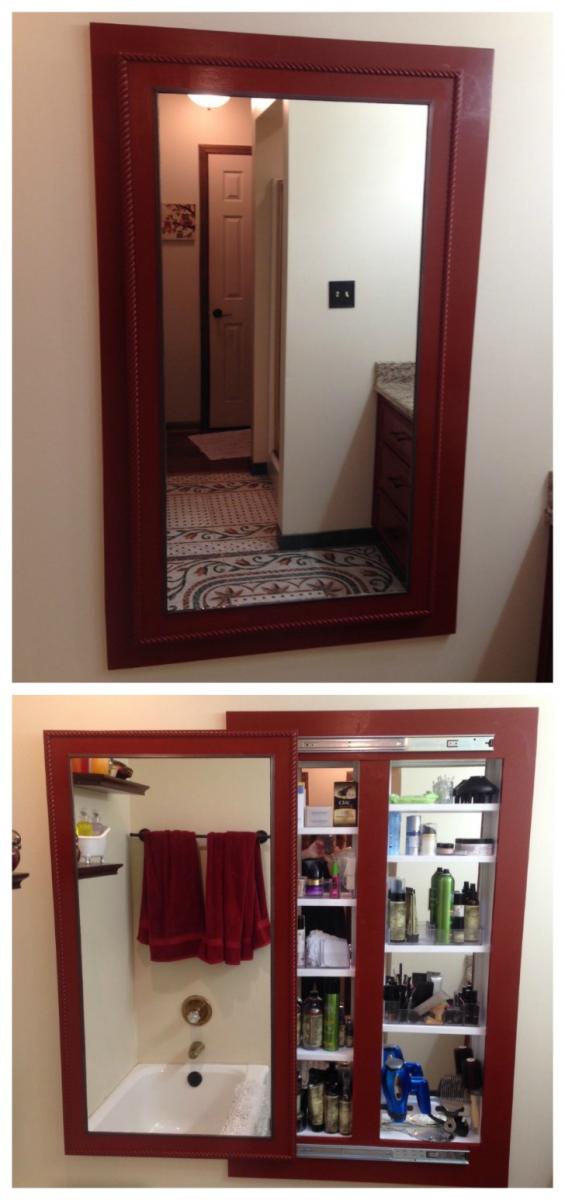
Adapted Ana's full length mirror storage idea.  I needed to recess the cabinet into the stud cavity to save needed floor space.  Opened two cavities and made the interior the same length as the cheap $6 behind the door mirror.  Was able to just sit them on a ledger board and the shelves hold them from falling forward.

The cabinet looks wonderful and holds a TON of things.  Thanks Ana for the inspiration!

Estimated Cost
$200 because of buying a custom cut mirror for the outside, and adding expensive rope molding to match what is on the adjacent vanity.
Estimated Time Investment
Weekend Project (10-20 Hours)
Finish Used
Chili pepper semi-gloss Aura paint by Benjamin Moore
Recommended Skill Level
Intermediate

Comments

bull5480

Sun, 02/27/2022 - 15:58

I am wanting to build a thin or recessed cabinet for an incredibly small area in my bathroom and knew to go right to Ana White! The combination of these two projects is perfect and exactly what I was looking for! Now here’s to praying I can pull it off!! 😬

2x4 Sofa w/ Chaise and coffee table

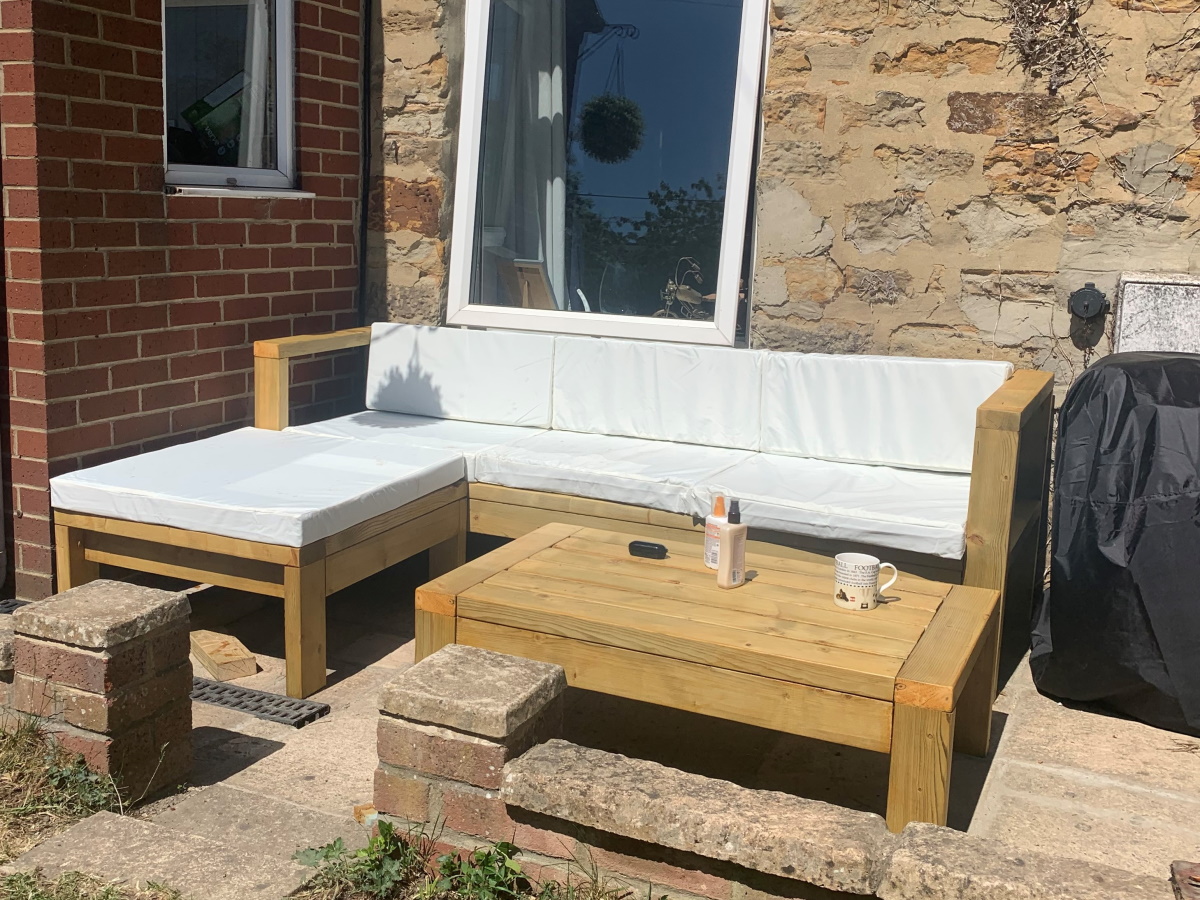
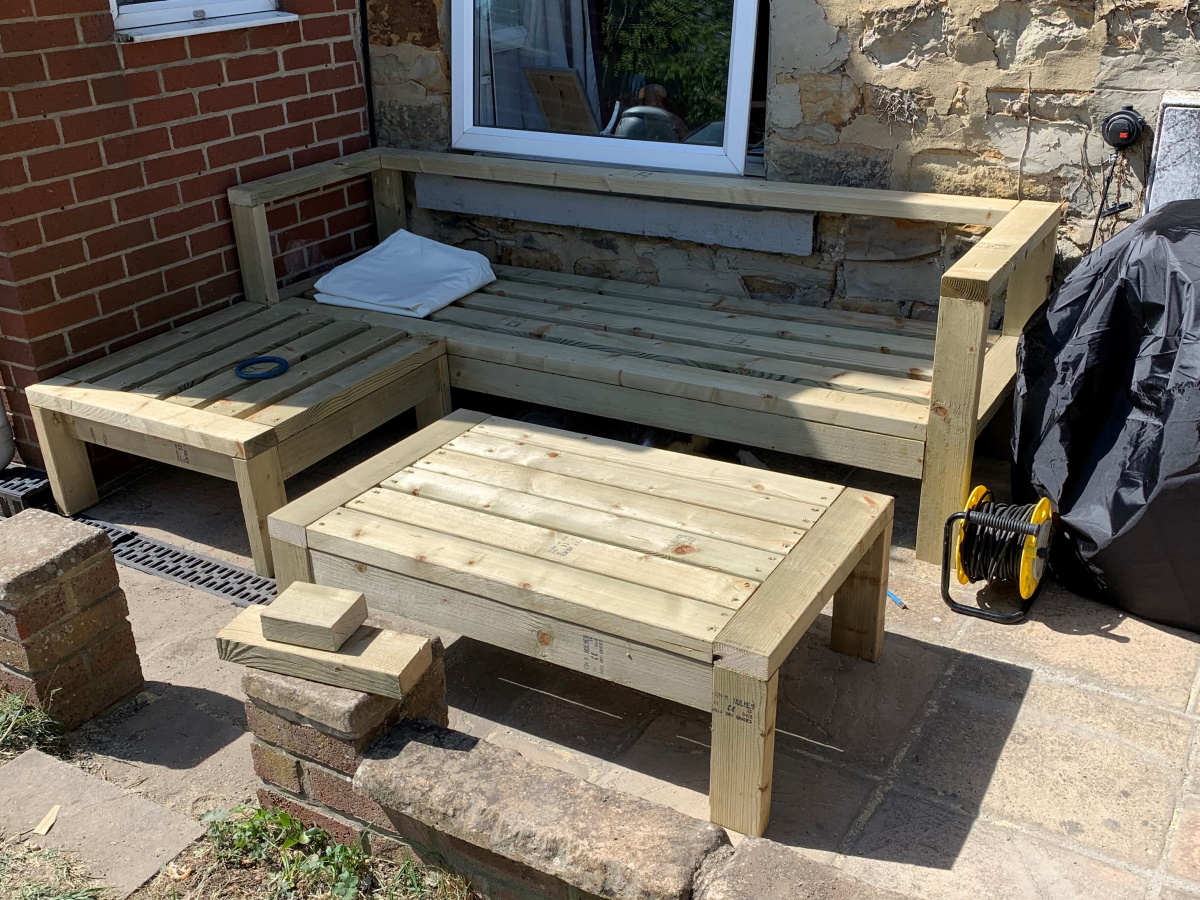
Submitted by andrew_w on Wed, 06/03/2020 - 10:25

Just completed this to make the most of the little hot weather we get in the UK. Great plans to follow thank you. Built around a cushion set for a rattan corner sofa which was then filled with 3" firm upholstery foam

Estimated Cost
£200 including upholstery
Estimated Time Investment
Day Project (6-9 Hours)
Finish Used
Ronseal Natural stain
Recommended Skill Level
Beginner

Hybrid Hall Tree

Submitted by jfloyd on Fri, 06/19/2020 - 08:17

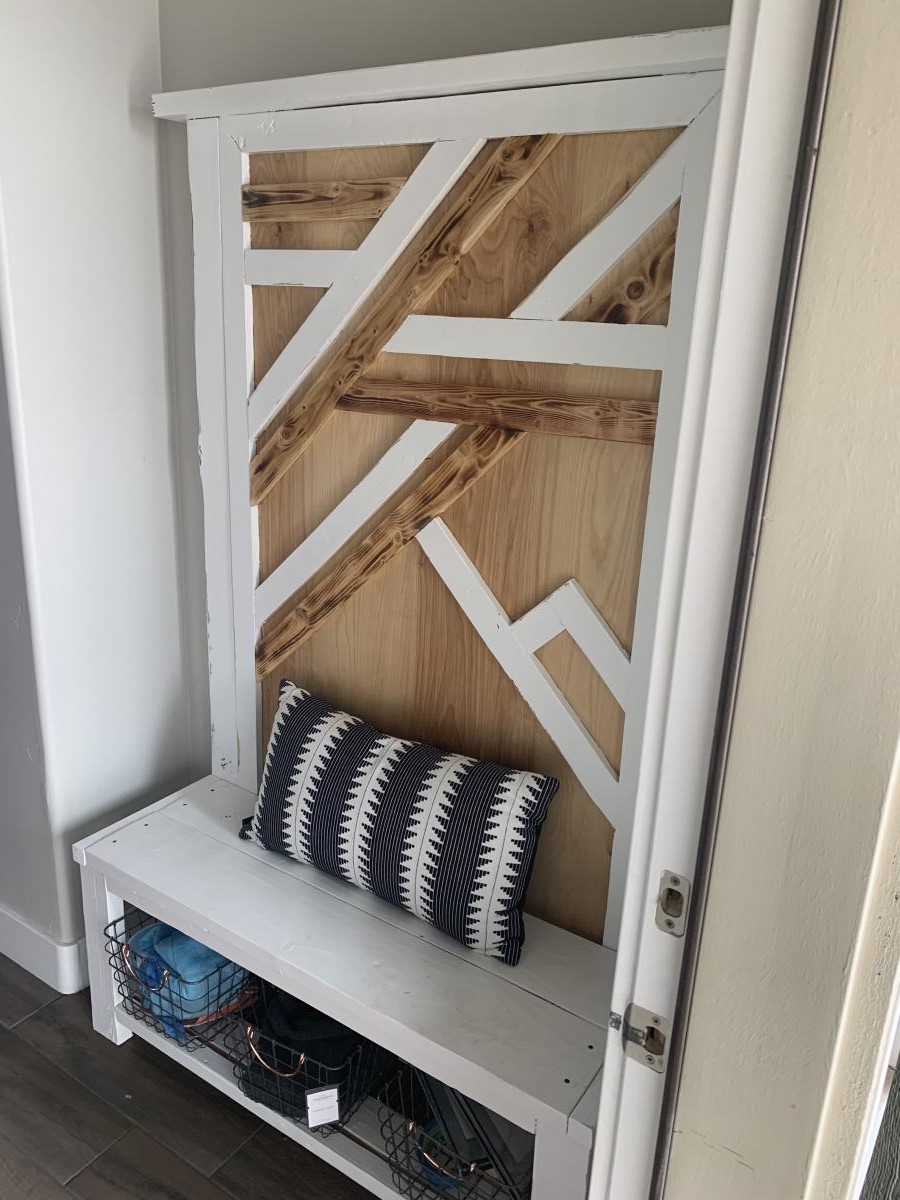
We utilized Ana's rustic x bench to fit our hall tree design. Love the bench.

Built from Plan(s)
Estimated Cost
$50
Estimated Time Investment
Day Project (6-9 Hours)
Finish Used
Shellac, clear; leftover white paint
Recommended Skill Level
Beginner

Comments

Screen door with built in dog door

Our old screen door wasn't cutting it anymore, so I built a new one, and to kill two birds with one stone, I included a built-in dog door. Now I just need to find the motivation to close off the old dog door.

I have the plans to build this screen door with a built-in dog door posted via the blog link below for anyone interested.

Estimated Cost
80
Estimated Time Investment
Afternoon Project (3-6 Hours)
Finish Used
white exterior paint
Recommended Skill Level
Intermediate

Modern Industrial Adjustable Work Stand

$120 for 2 bases, one top ... less if you have scrap lumber and pipe

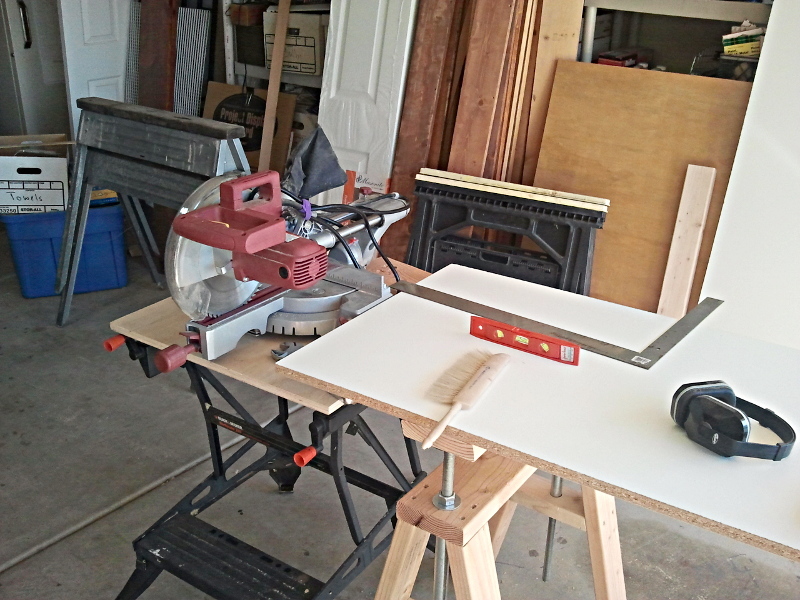
The hard part of some woodworking is what to do with the stuff BEFORE and AFTER it goes through the tools.

We need an infeed and outfeed table for routers, drill press, and saws but have no room to install a permanent workbench with an adjustable tool lifter.

We saw the coffee table to desk height adjustment mechanism and lightbulbs went off! This adjusts! We can take the top off! It stores!

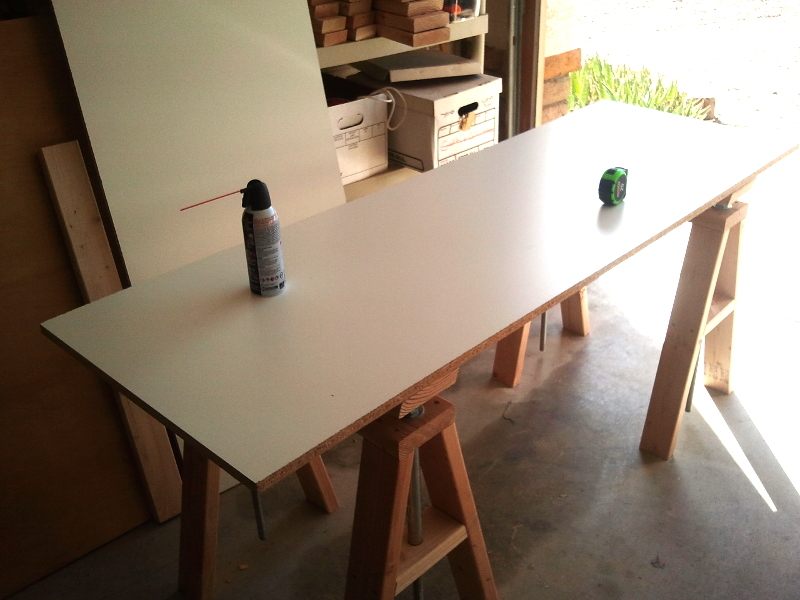
The first photo shows it adjusted to align with the miter saw's cutting area.

As built, there are a couple of changes:

1 - It's taller. Lowest table height is about 30" ... add 8 inches to each leg.

2 - We only used 1 leg brace, about half way down the leg. Cut it to fit after you get the legs screwed to the top.

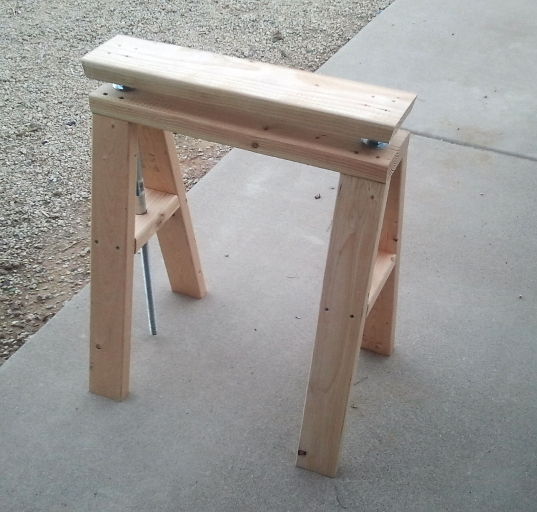
3 - the wobble of the adjustable bar on the threaded rod is not good for precision woodworking ... the second picture shows the guide pipe that keeps the threaded rod straight up and down.

4 - No pocketholes (sorry Anna) because this is a workbench, not fine furniture.

5 - The tops are cut from one sheet of 4x8 3/4 in melamine coated MDF ... 2 are 2x6 and one is 2x4.

This could also make an adjustable craft table. Raise or lower it to handle fabric for your sewing machine.

Estimated Cost
$120 for 2 bases, one top ... less if you have scrap lumber and pipe
Estimated Time Investment
Day Project (6-9 Hours)
Finish Used
None
Recommended Skill Level
Intermediate

Comments

Farmhouse Playhouse for the Grandsons

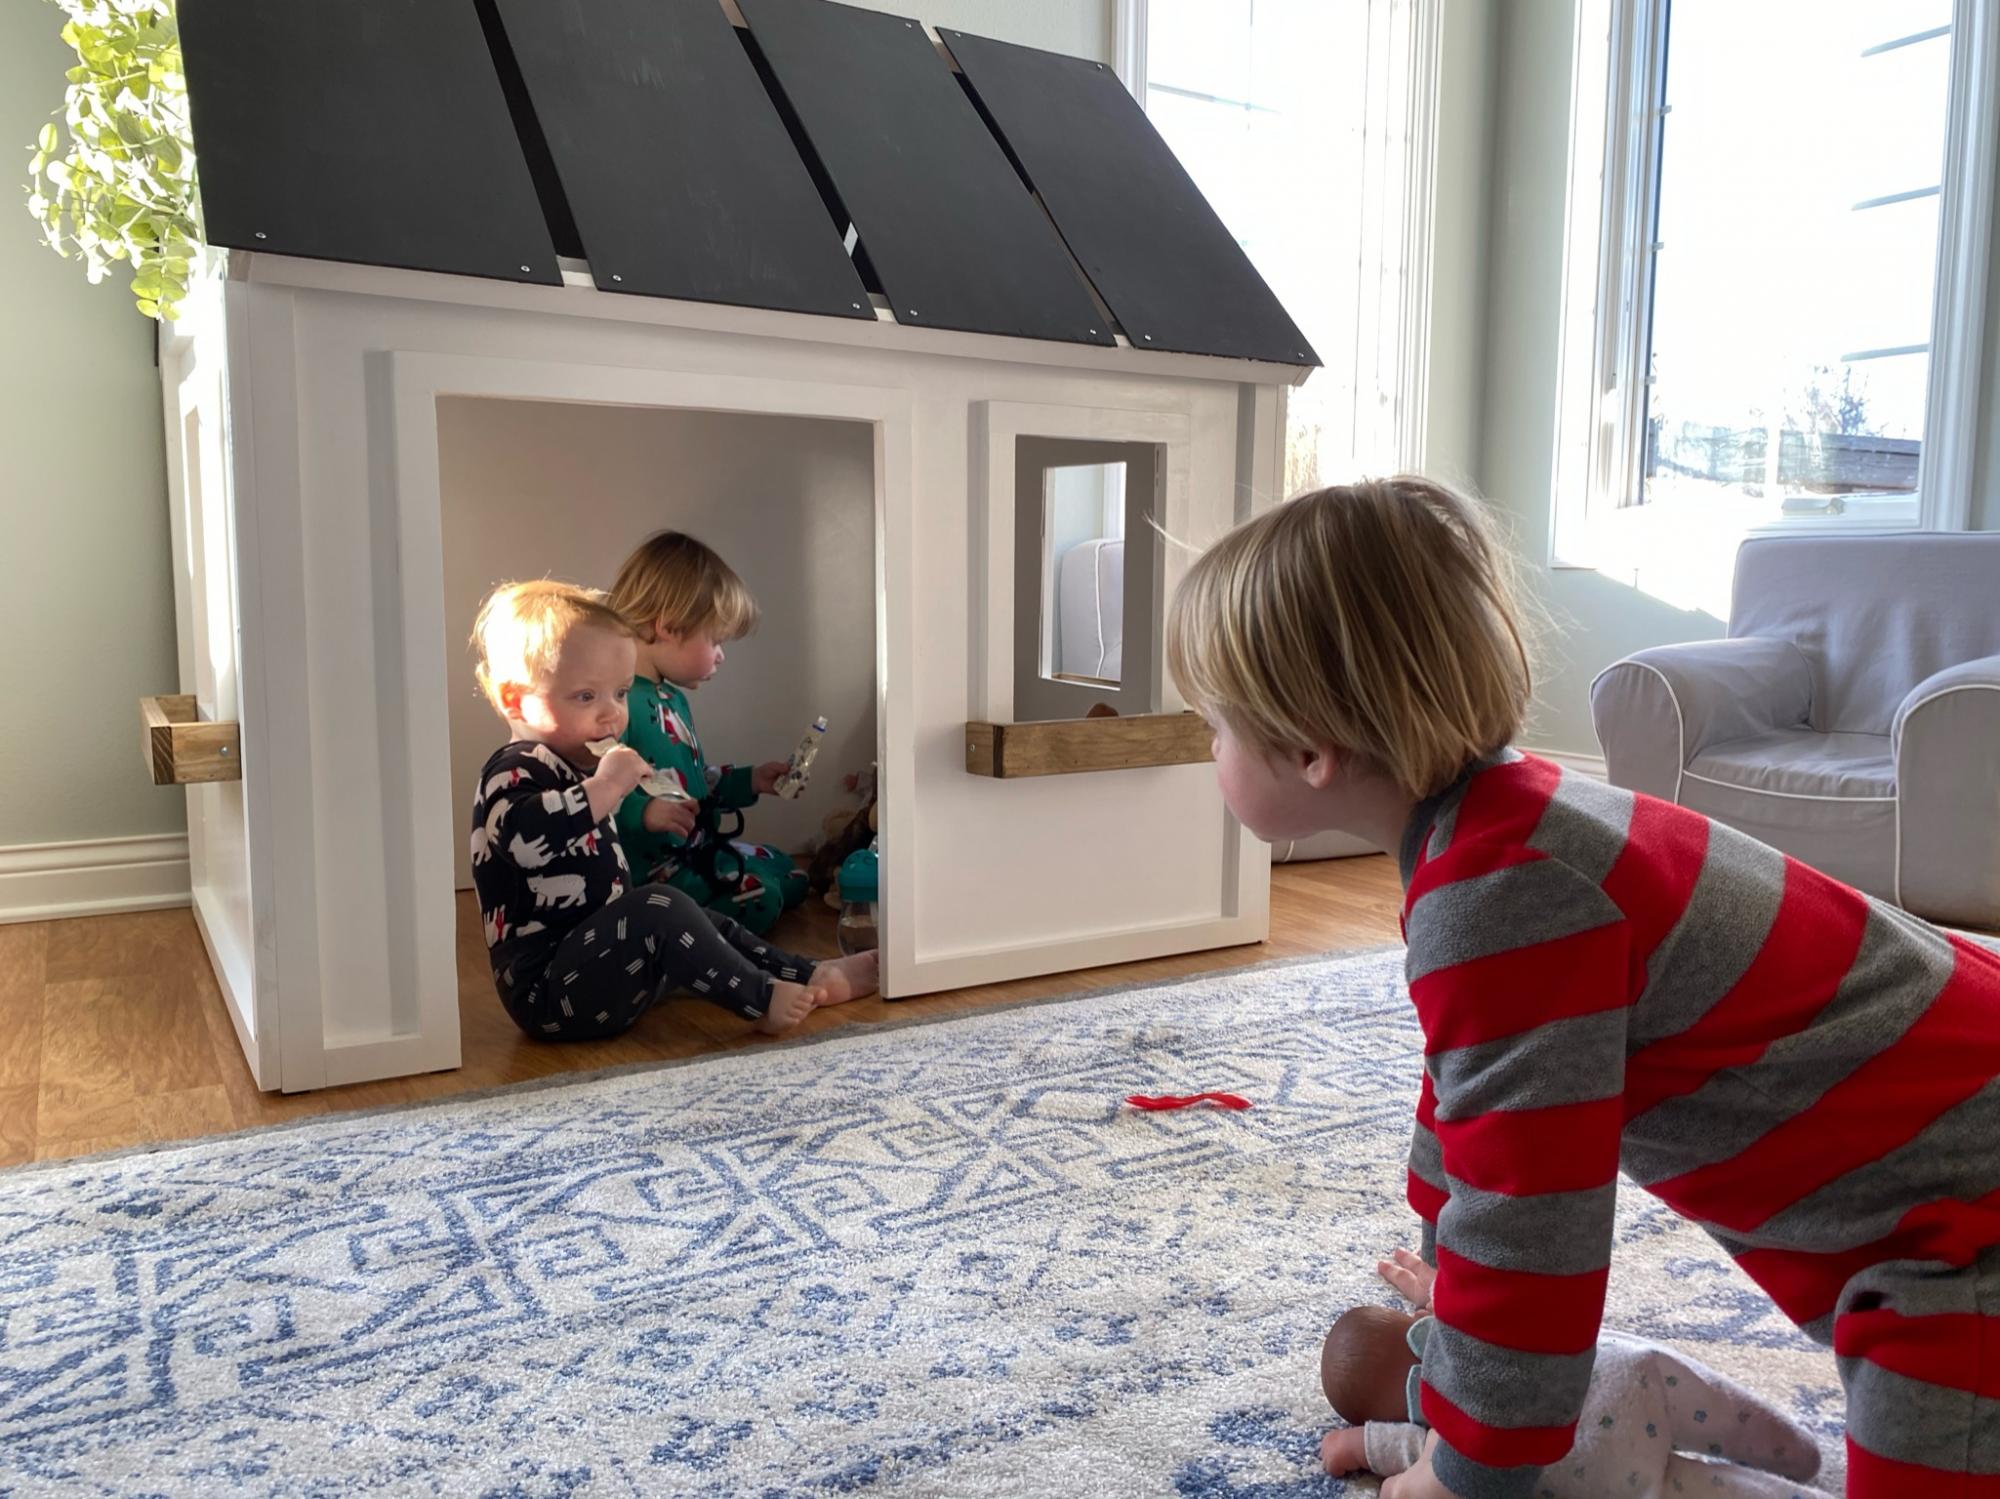
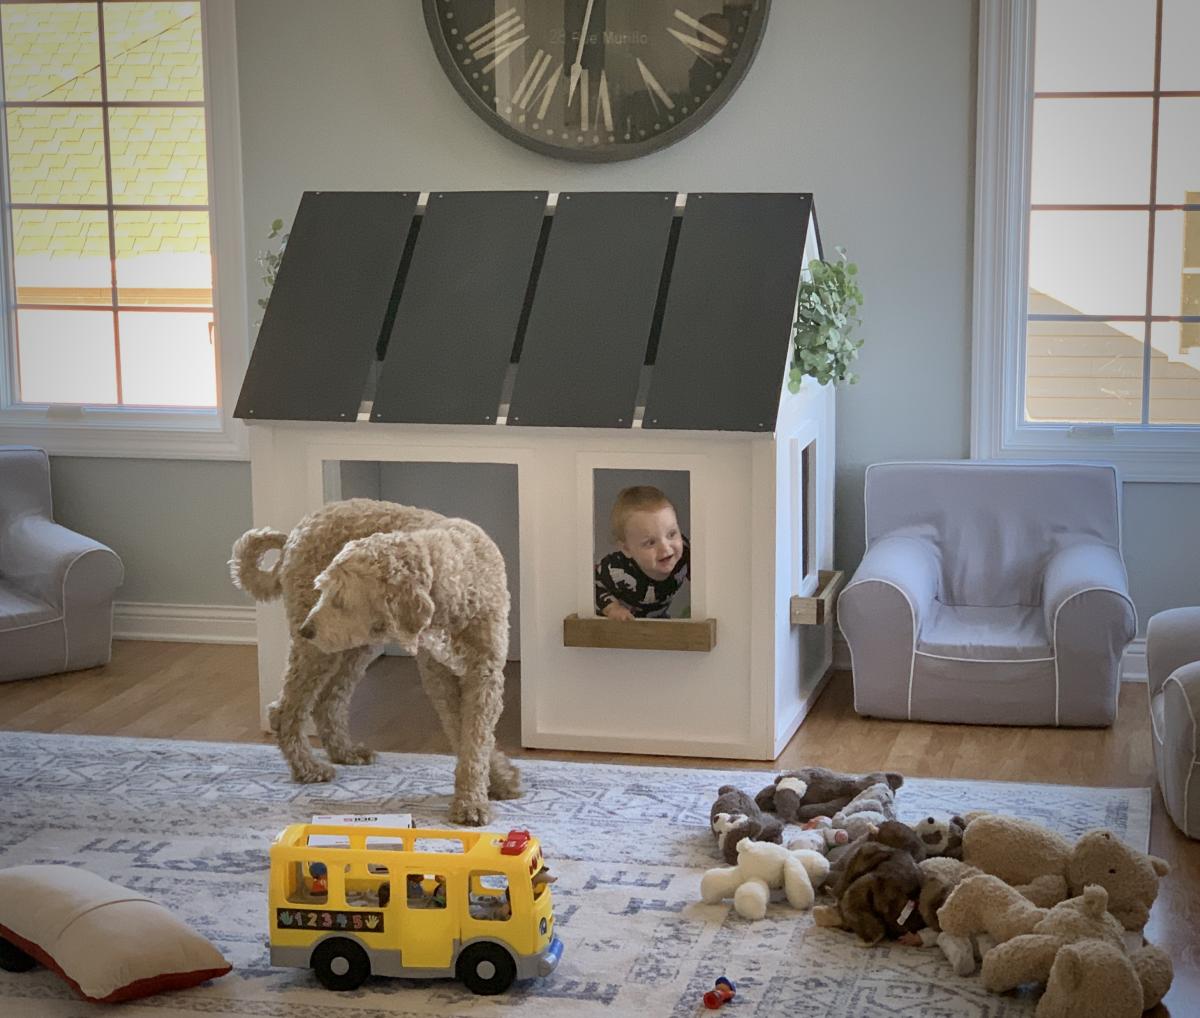
Ana White's plans were amazing and the outcome was perfect! What a fun project for Christmas! Thanks a Zillion, Ana!!

Built from Plan(s)
Estimated Cost
$100.00
Estimated Time Investment
Weekend Project (10-20 Hours)
Finish Used
Sanded, Primed and Painted
Recommended Skill Level
Intermediate

Comments

Bi-Fold Closet Doors

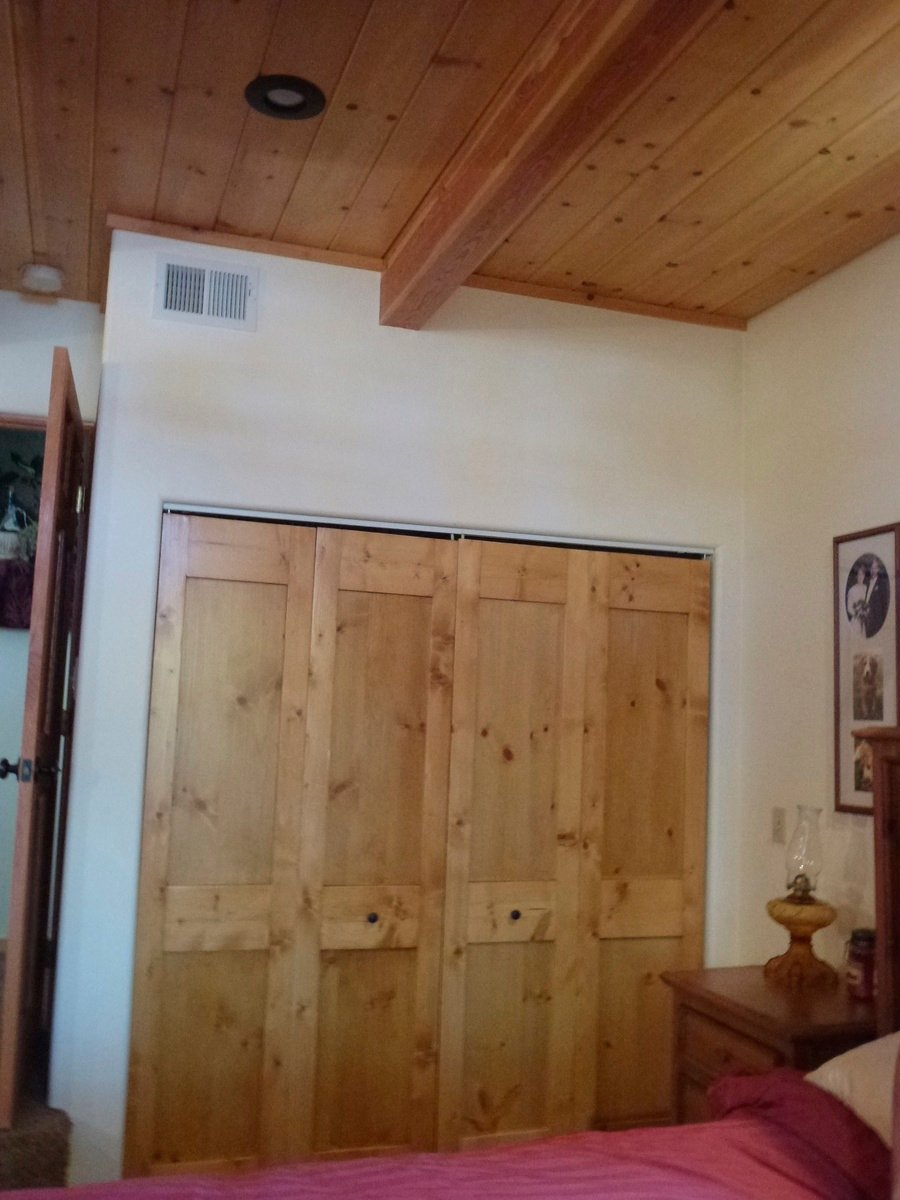
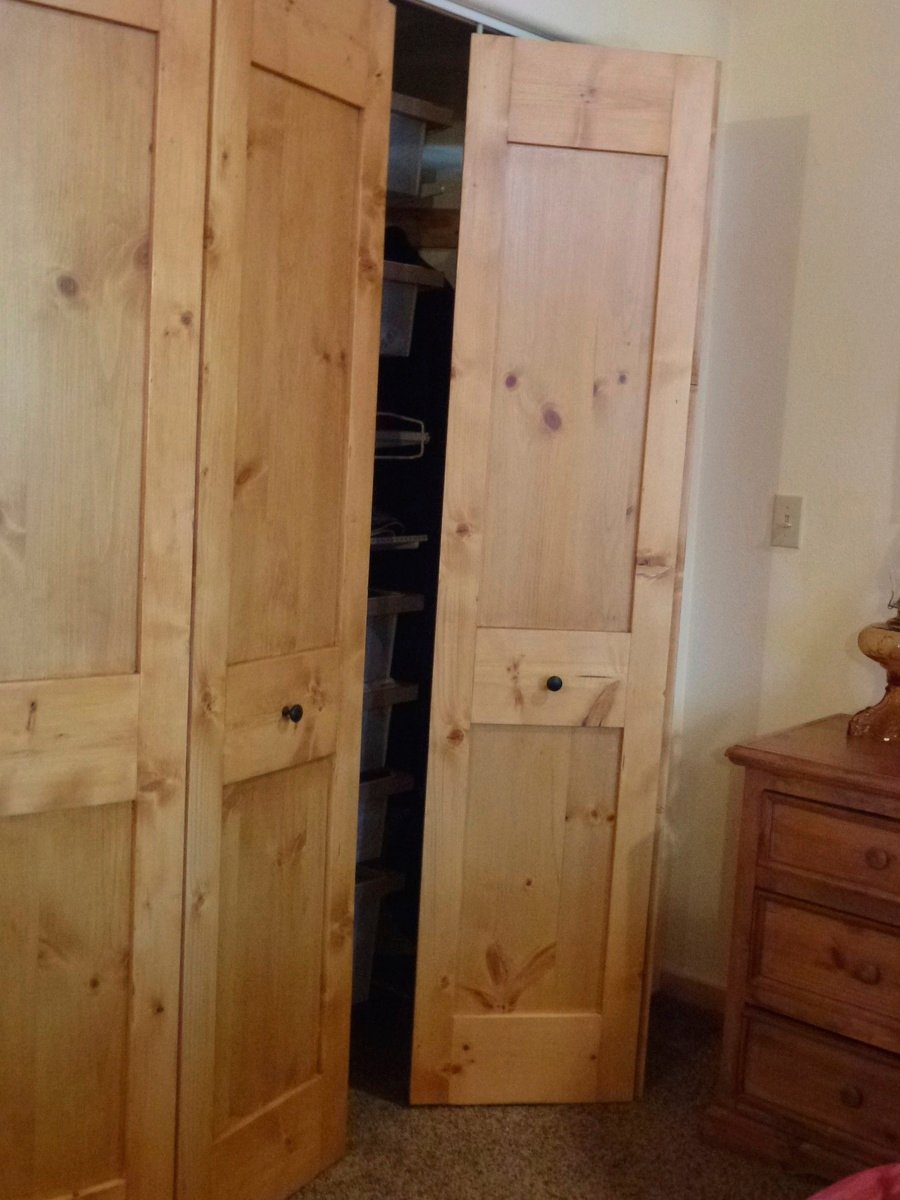
We wanted to replace the vented / painted bi-fold closet doors in our Master Suite with something that was warmer and more consistent with the decorating motif of the house.  We priced out various wood bi-fold doors and were shocked at the $350 - $600 price range of what was available.   We decided that building them ourselves was a much better choice.

The frames are made from 1” Knotty Pine and the panels are from ¼” Knotty Pine.   Frames were made to fit and assembled w/ Kreg screws & Glue.  Rabbet channels were cut w/ the router and the panels were brad nailed & glued.

It was finished w/ the same stain used on our Knotty Pine ceilings / walls and finished w/ a satin varnish for a perfect match to our house.

This was a very straightforward, quick & inexpensive alternative to purchasing expensive bi-fold doors.   

The doors took about 15 hours to build / sand and 10 hours to finish.   Total cost was around $100. 


Estimated Time Investment
Week Long Project (20 Hours or More)
Finish Used
Custom stain and satin varnish.
Recommended Skill Level
Beginner

Comments

Master Closet System for flipped house

Submitted by donnamarie on Sat, 01/03/2015 - 11:31

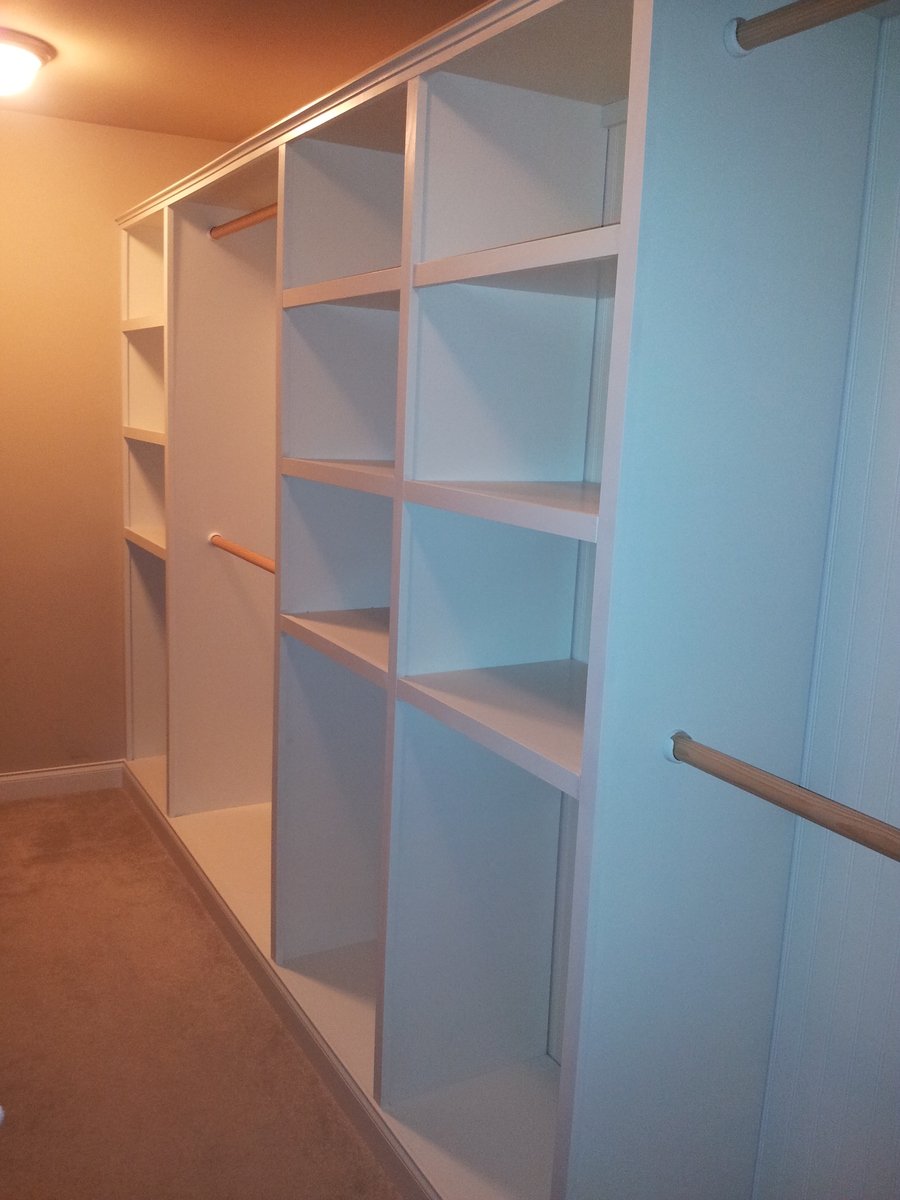
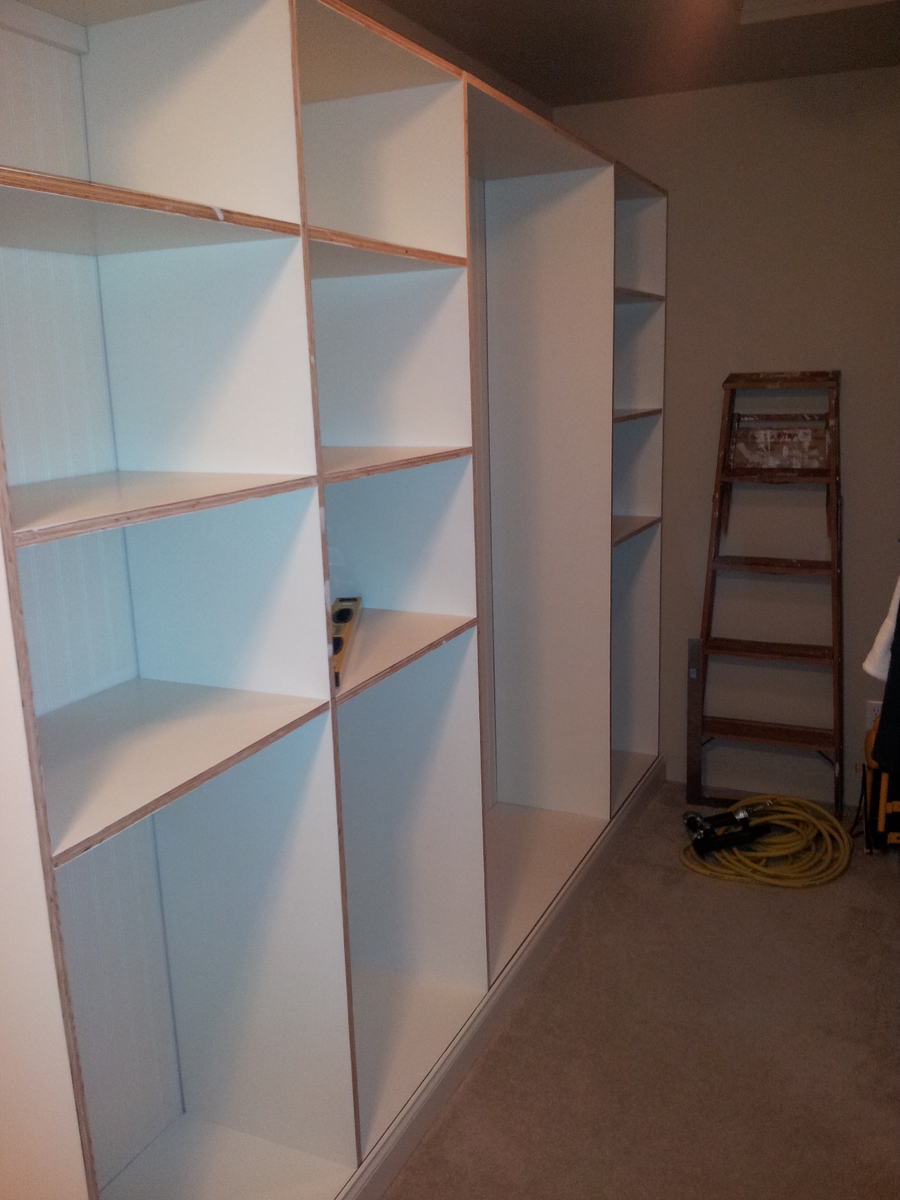
I built Ana's Master Closet System for a flipped house.  The closet was a large walk-in, approximately 6'W x 15'L.  I pretty much used Ana's plans as written, with some tweaking in shelf length for a custom fit.  I used beadboard in the back for a built-in look, and 1x1/2" boards to trim out the edges.  The entire closet was plywood, which was cut, primed, and painted before install.  The pictures are the completed project and before the trim was installed.

During the house sale, the closet impressed potential buyers more than any other feature.  This was my first build from Ana's plans, and now I'm hooked.  I am currently renovating a 1910 home and plan to use Ana's site for everything from built-in's to furniture.  Thanks Ana for such a fantastic site!

Estimated Cost
$400
Estimated Time Investment
Week Long Project (20 Hours or More)
Finish Used
two coats of primer followed by two coats of Sherwin Williams Dover White semi-gloss
Recommended Skill Level
Intermediate