Patio chair
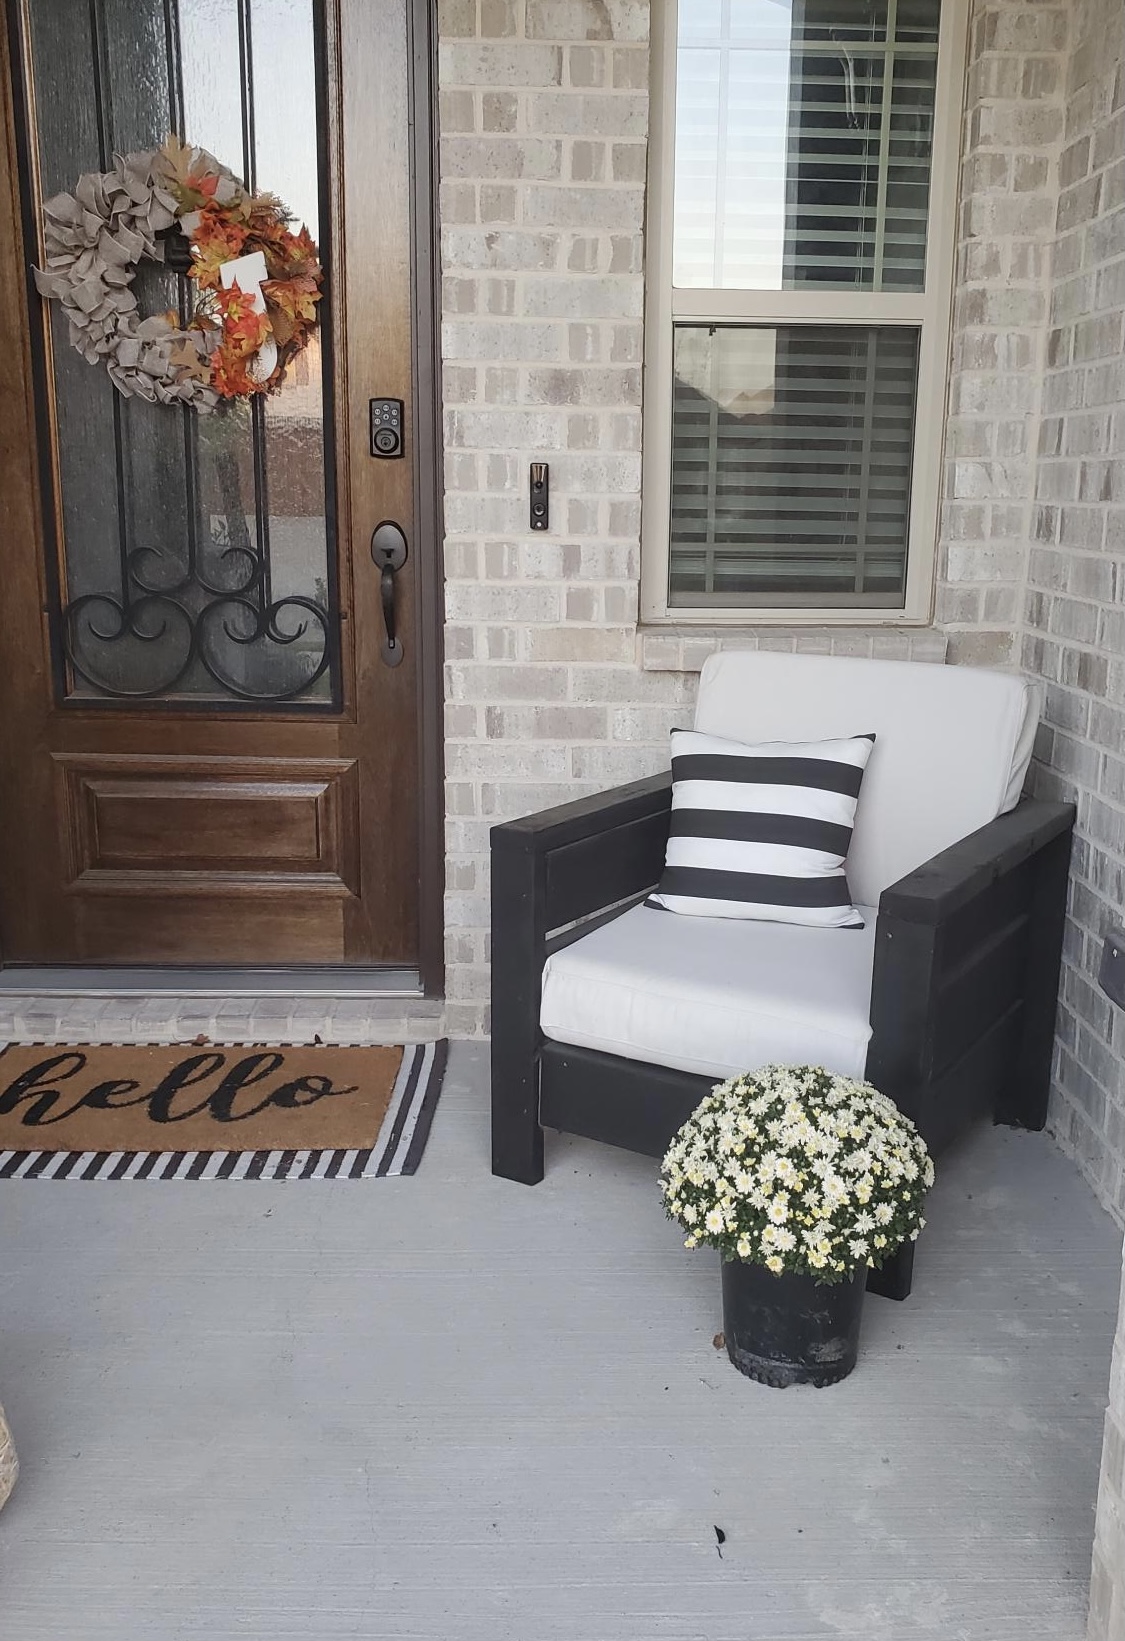
I chose to make the chair which came out great although the plans were only for one chair I thought it waa easy to do.
Built from Plan(s)
I chose to make the chair which came out great although the plans were only for one chair I thought it waa easy to do.
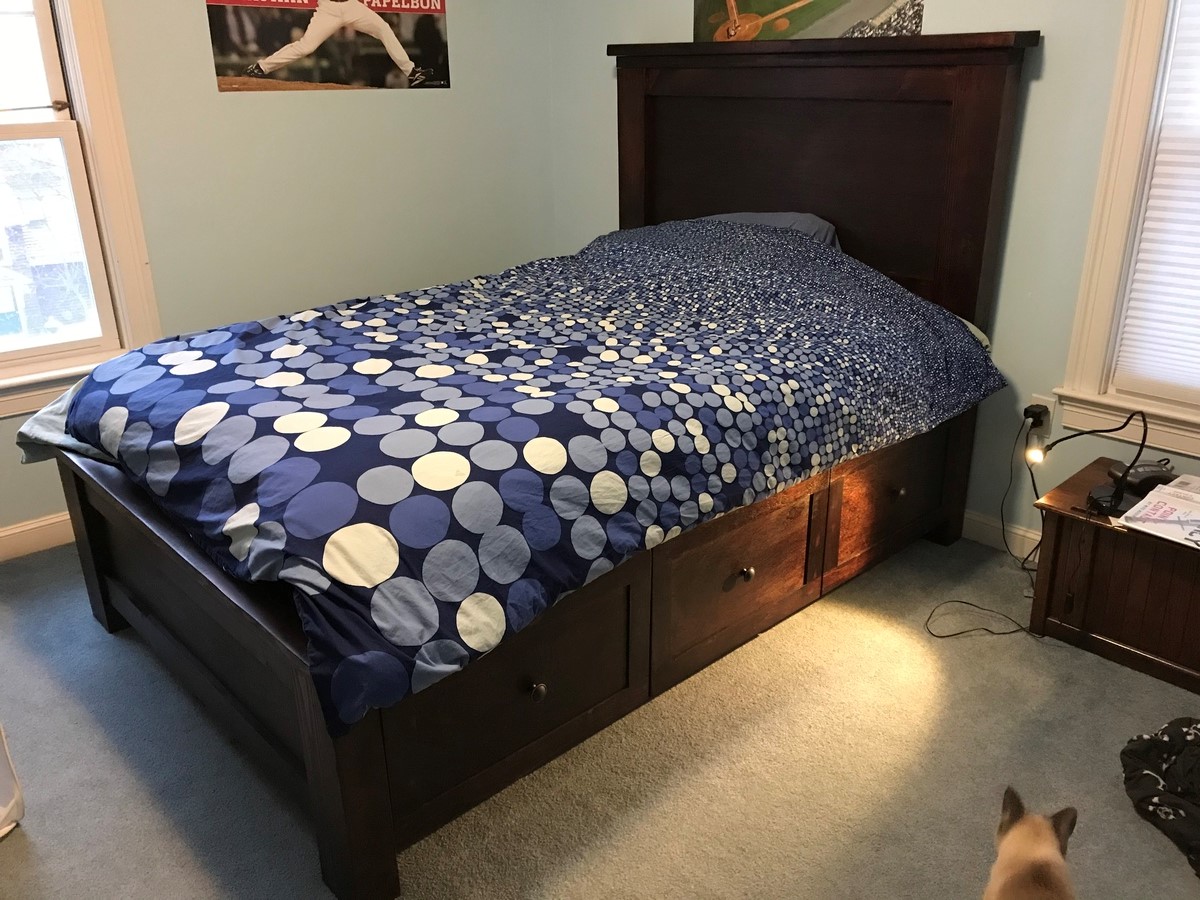
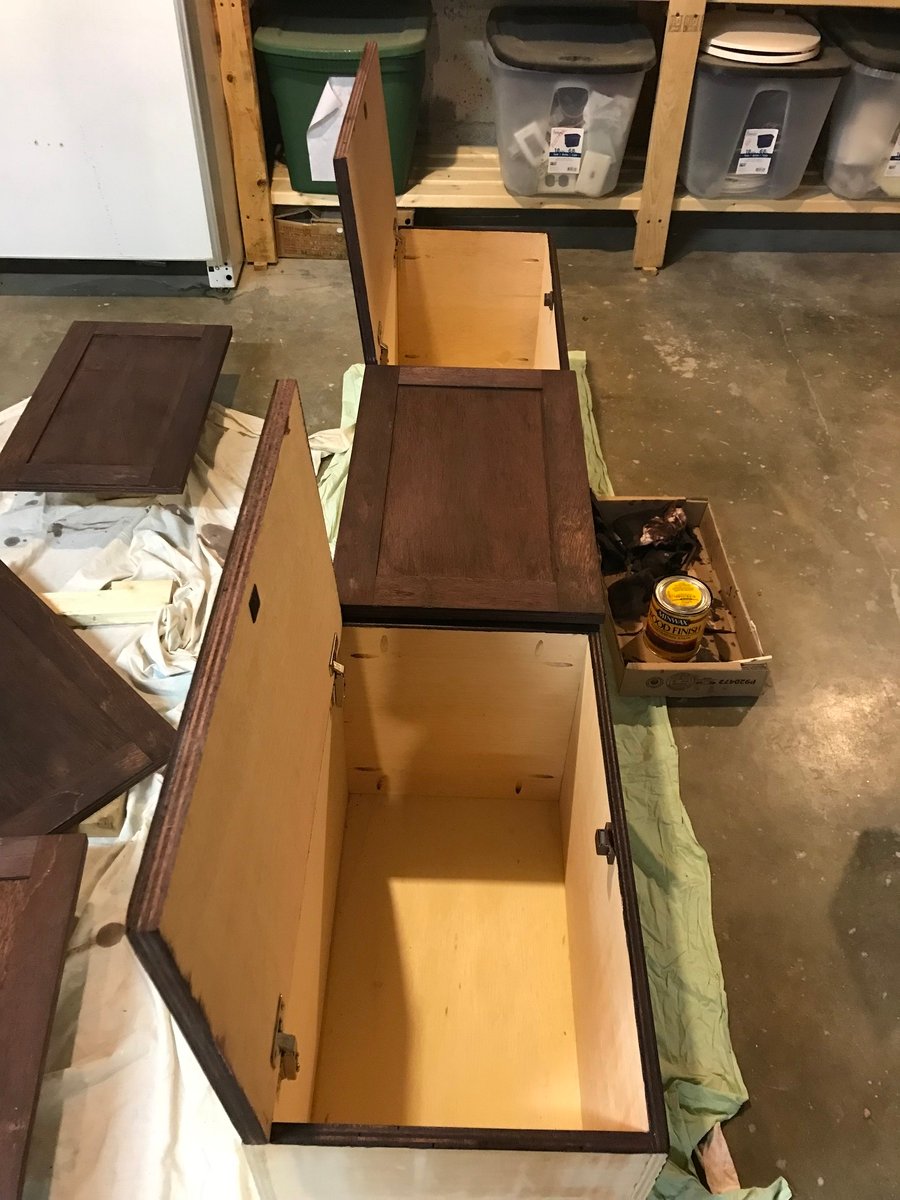
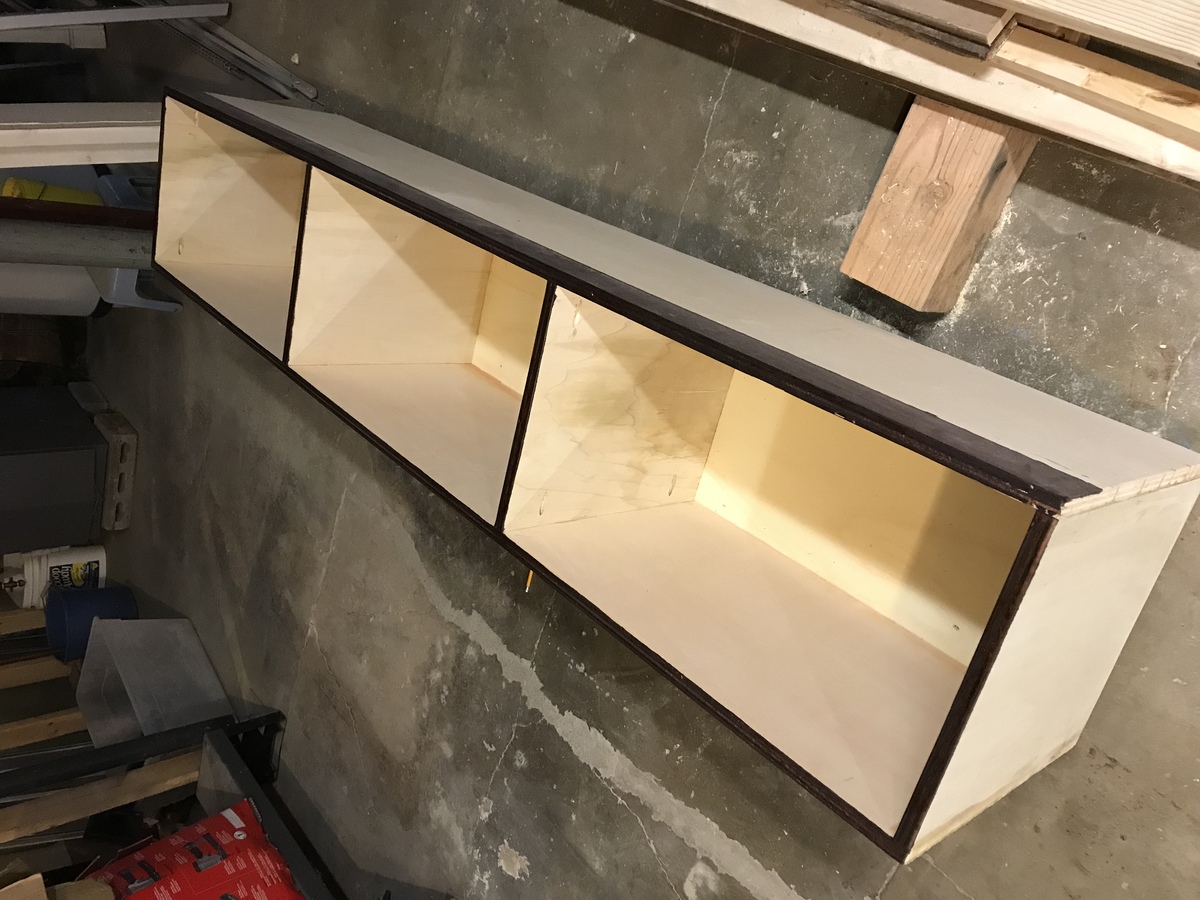
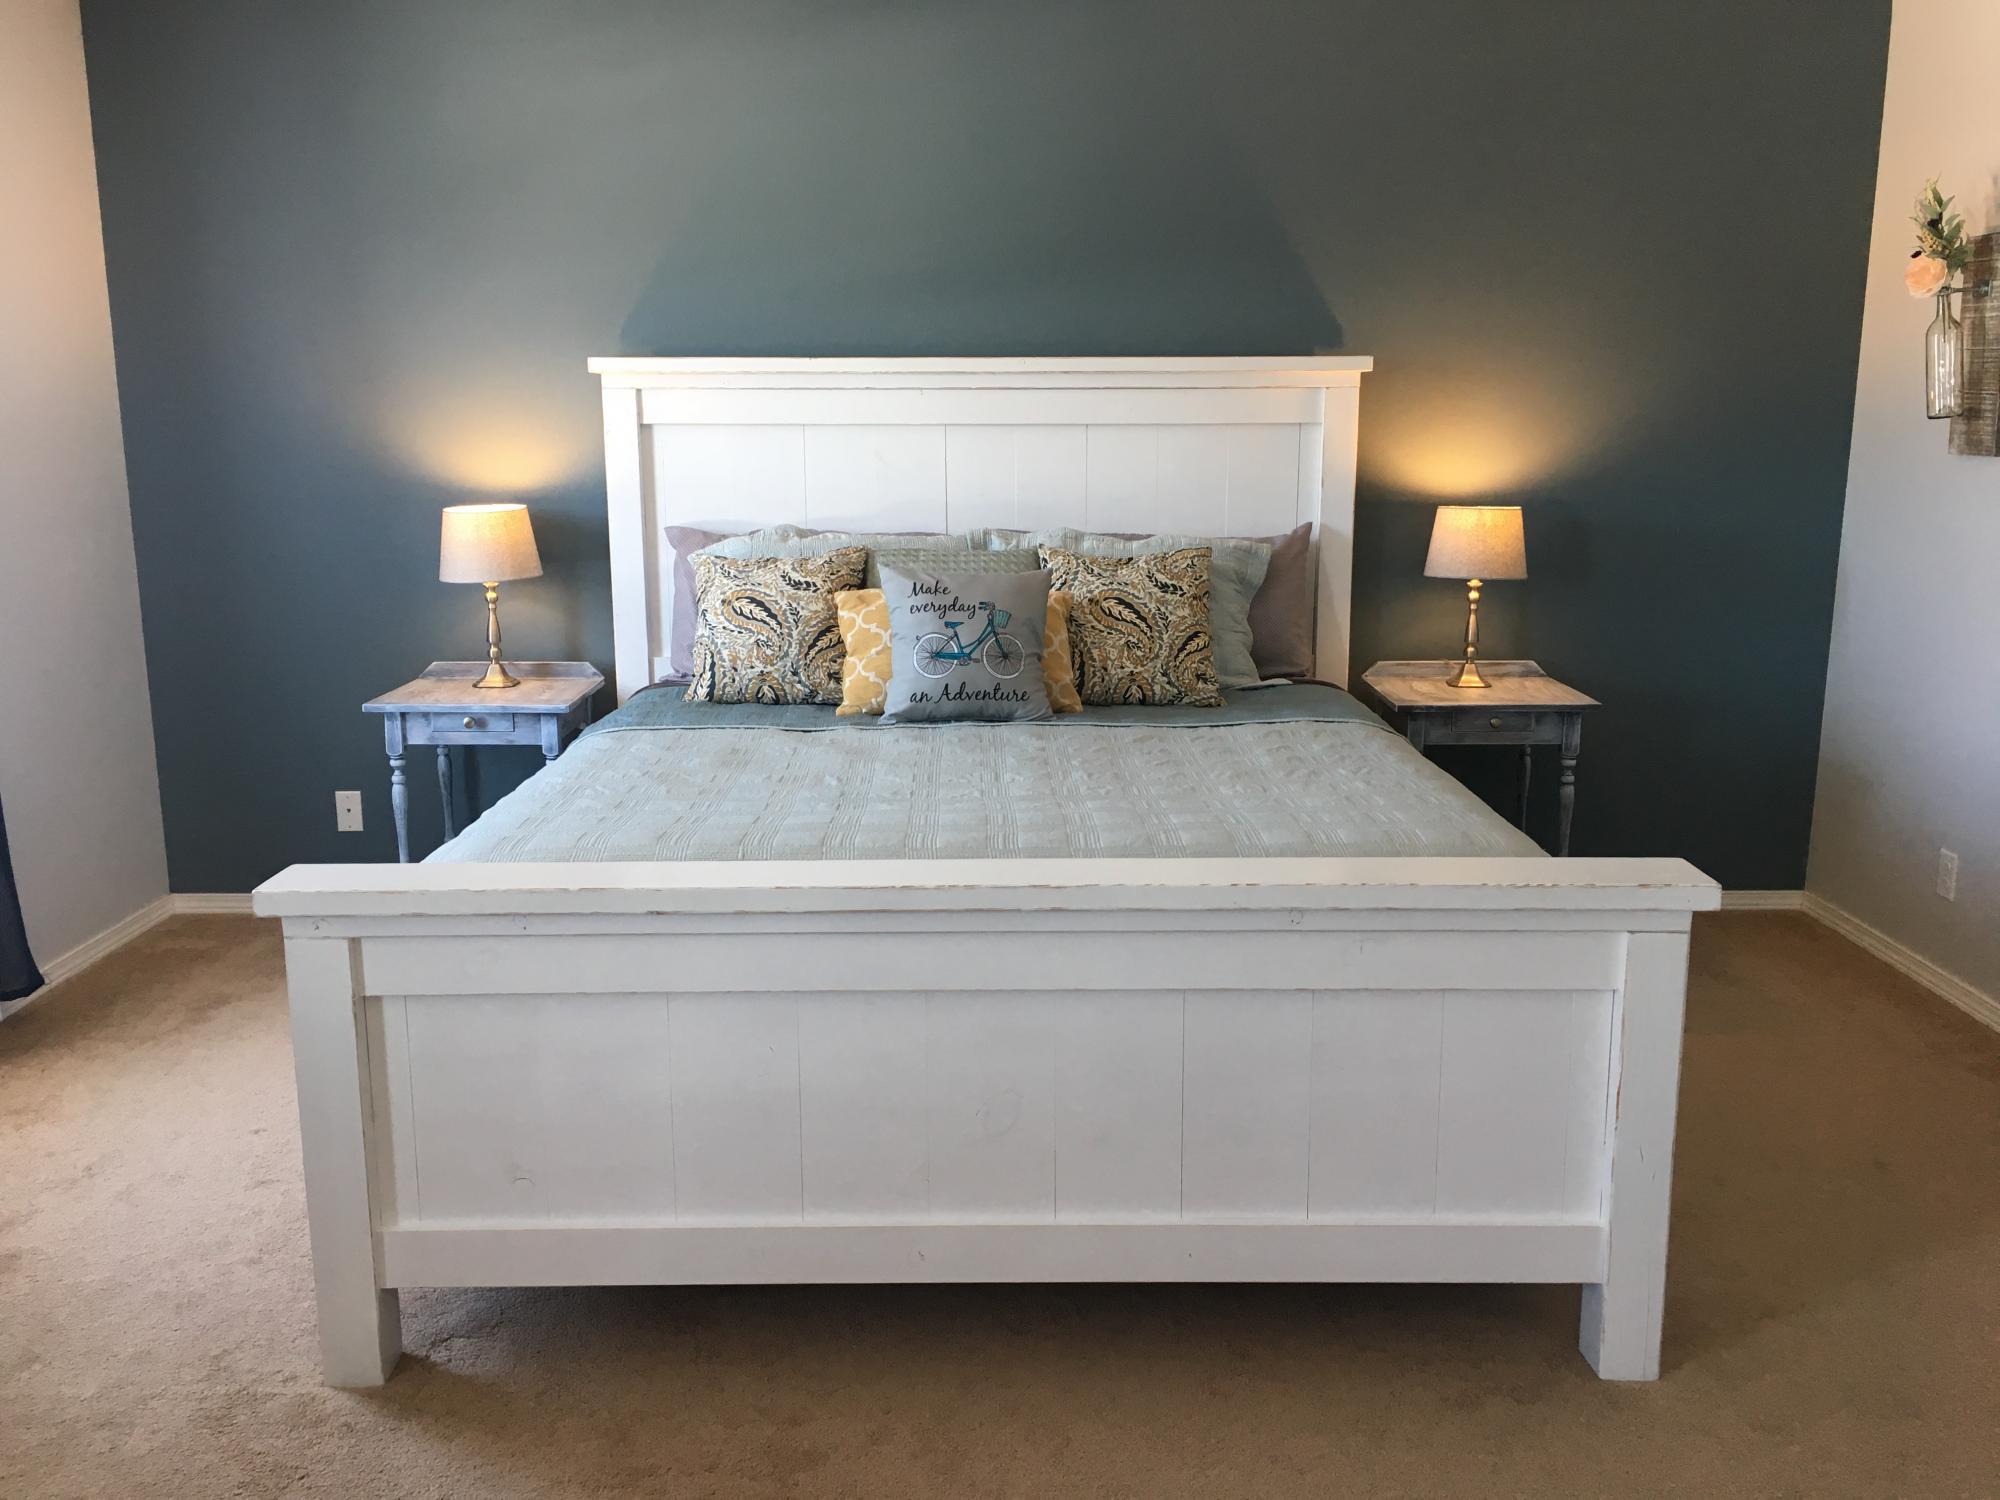
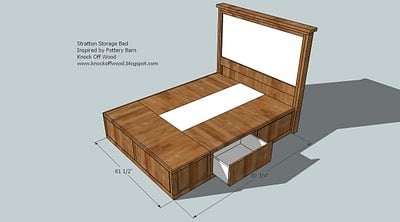
Made the standard full farmhouse bed with storage, but did a couple modifications. 1) Didn’t use drawers, but wanted closed, not open cubbies. I made the drawer fronts and then attached with full overlay hinges and magnetic catches do they open from top down like a horizontal cabinet. 2) built the slats as two, one piece slat frames which sit on the cleat so that they can easily be removed for the extra long term storage between the cubby boxes. Just lift mattress and the two pieces of slats and lots more space.
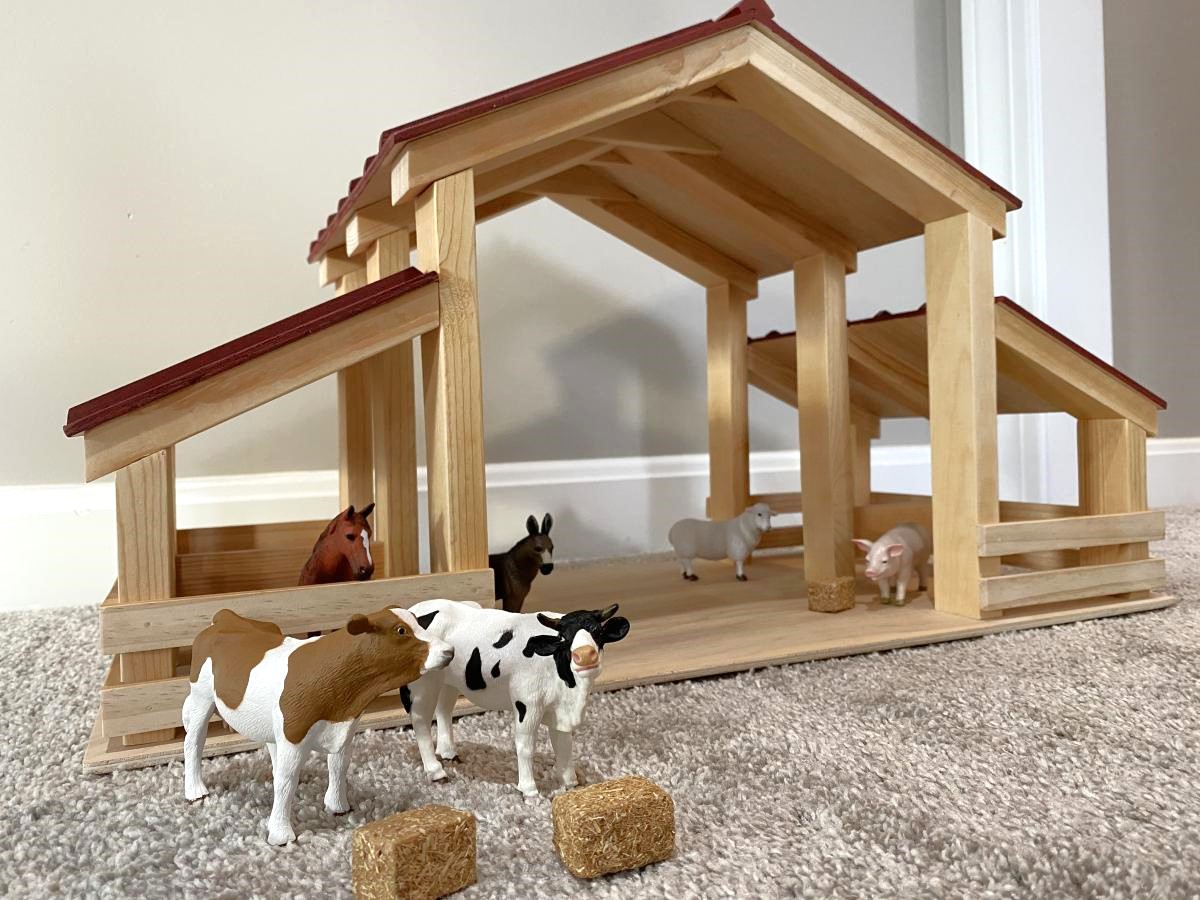
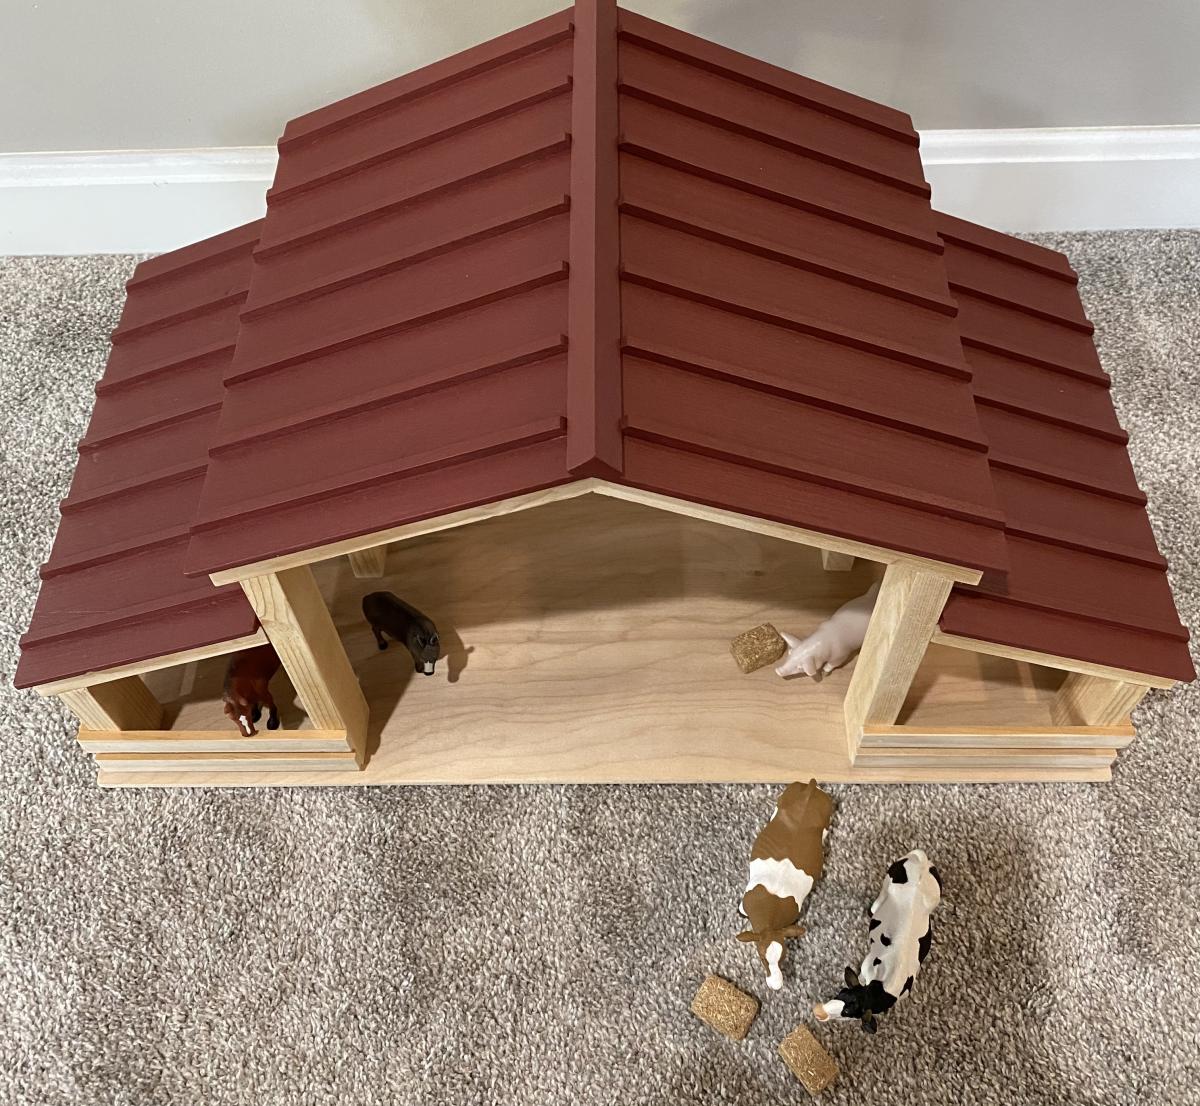
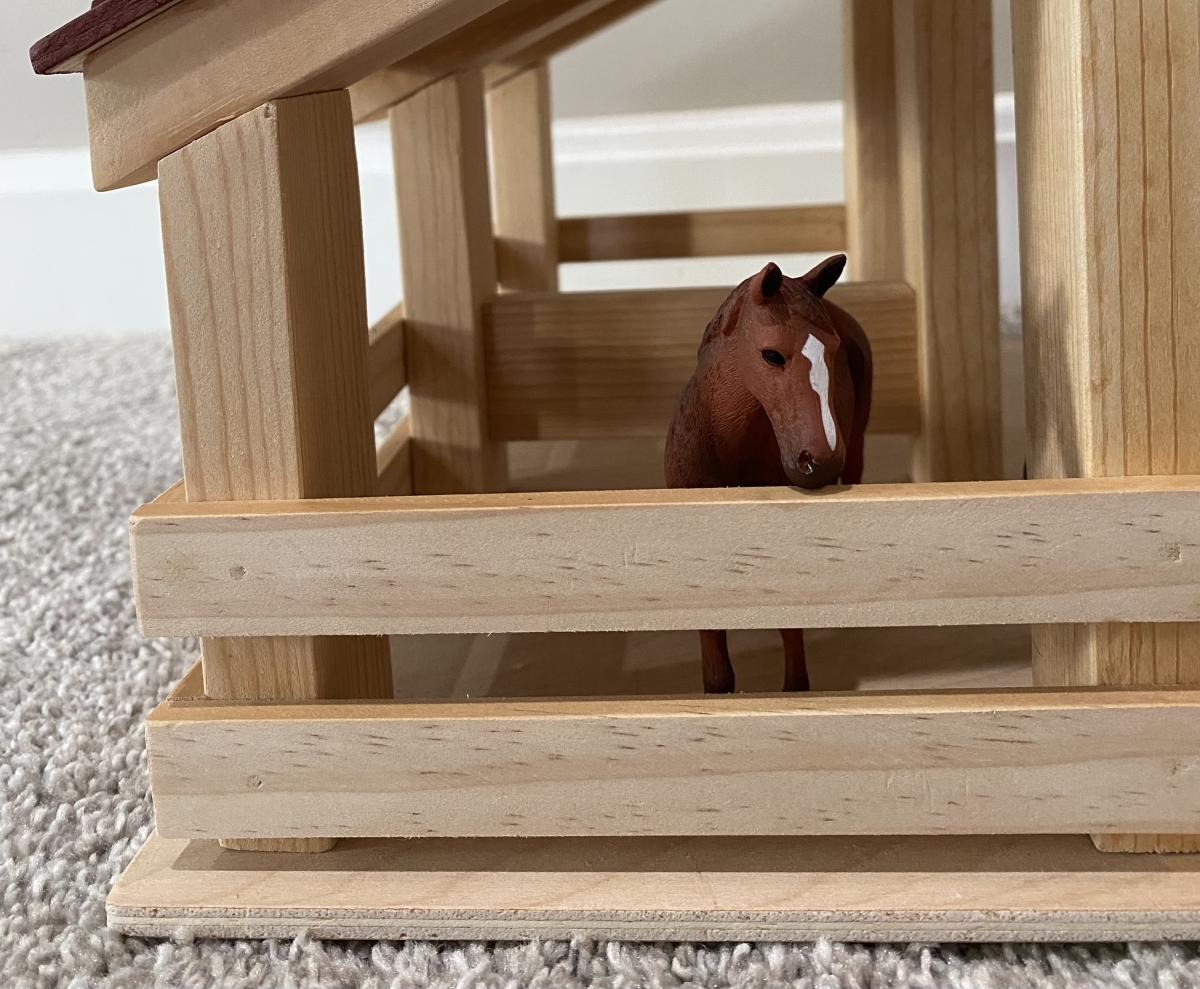
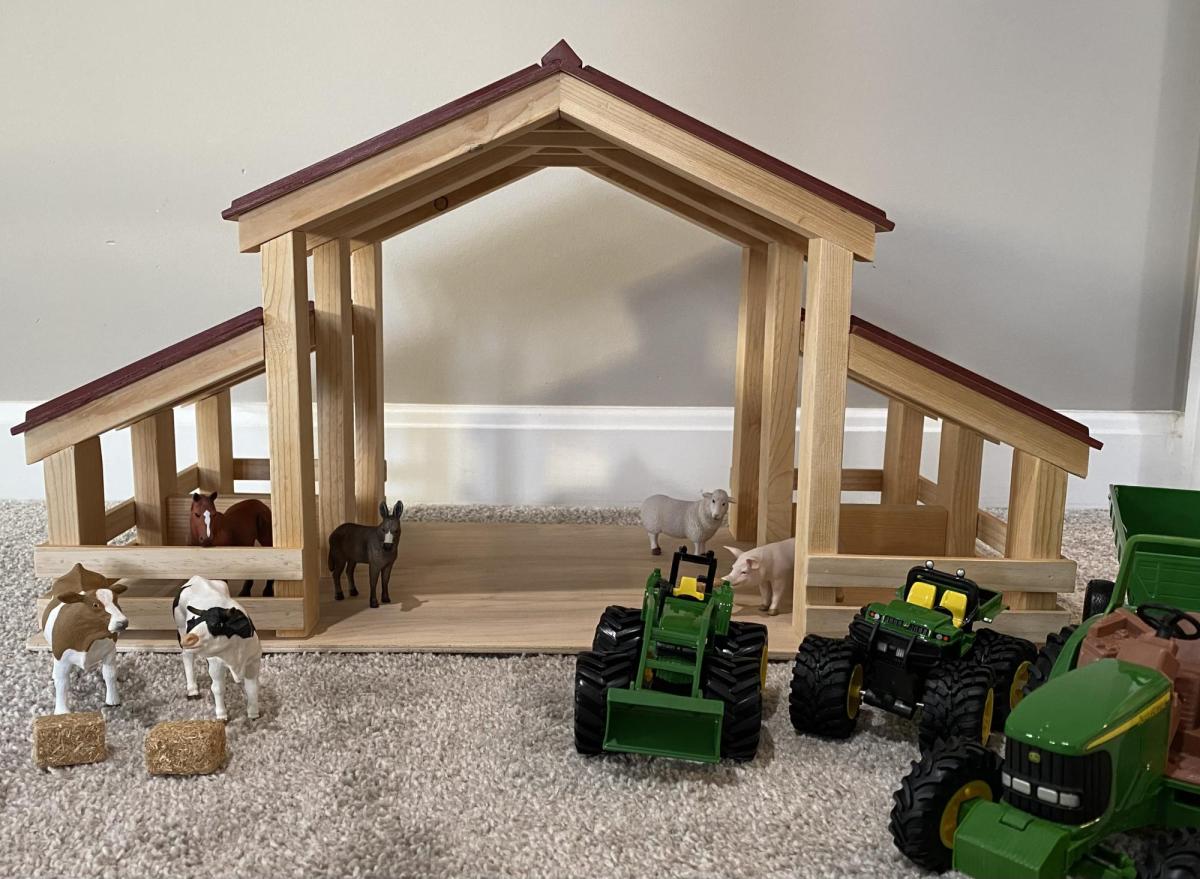
When I spotted this plan on Instagram, I knew I had to make it for my grandsons for Christmas. Instructions were easy to follow and I had fun rounding up the animals, tractors, etc.
Sat, 01/08/2022 - 15:36
Well done, that will be loved and enjoyed for many years to come!
This is our first Ana White project and we're pretty happy with the results. We modified the plans a bit to use 1/4" plywood for the sides instead of the heavy 3/4" ply. Specifically built for our kitchen since we couldn't find one that we really liked or could afford. Pottery Barn seriously sells this for $1200?!?! Score!
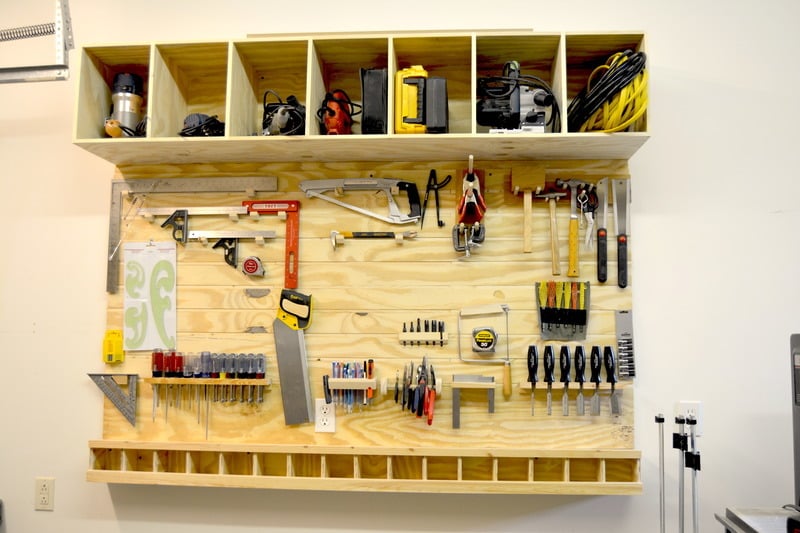
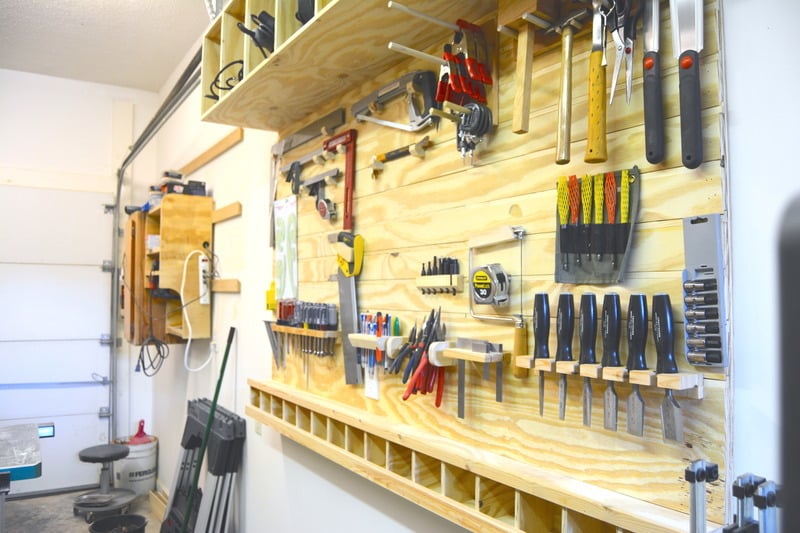
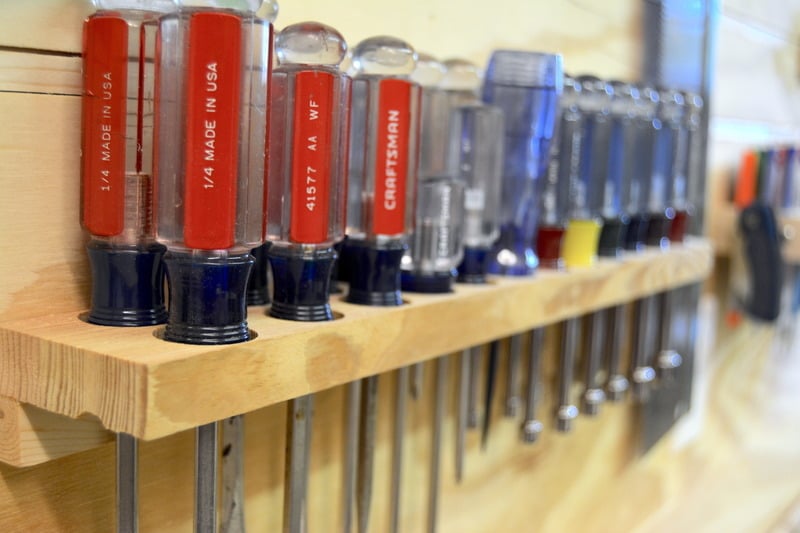
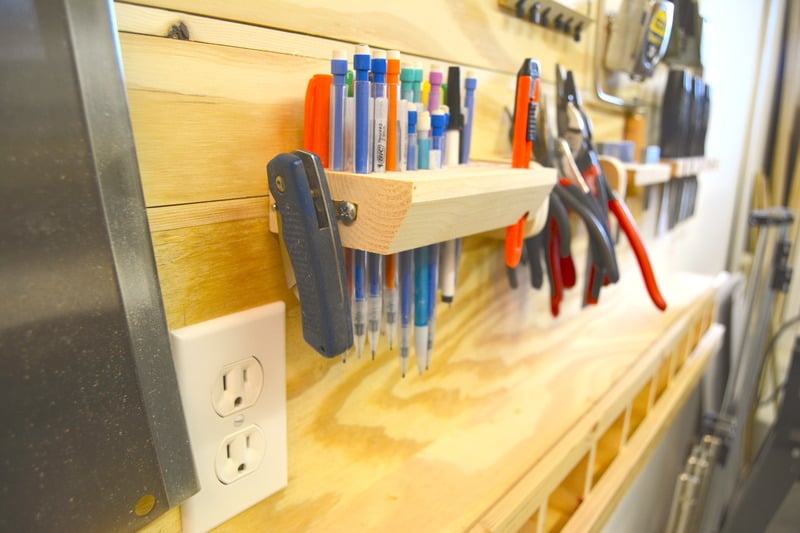
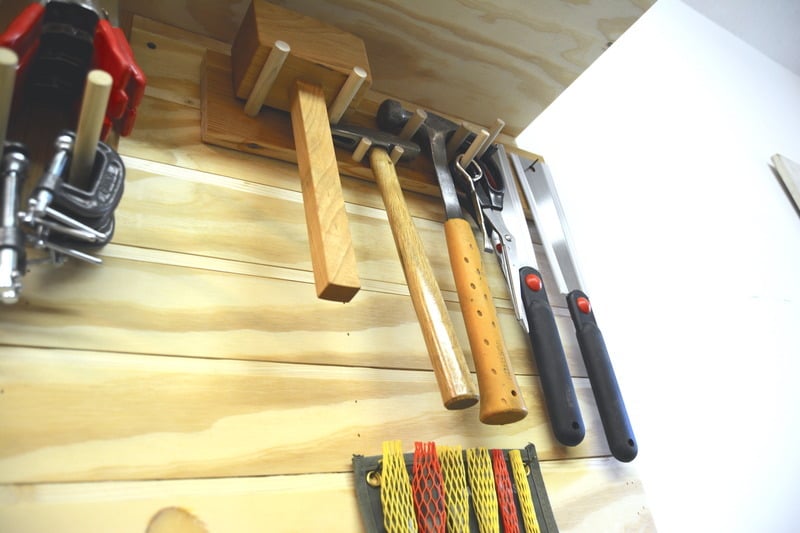
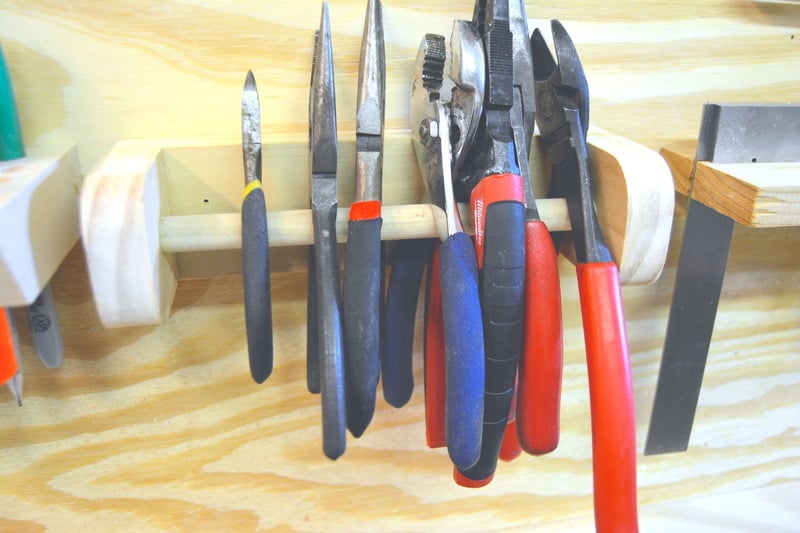
This weeks project was a slat tool wall to organize all my most used hand tools. I wanted a way to have everything in reach and also easy to organize and keep track of. This is John Heisz original design and I decided to build one for my shop. Here is a link to his site with a full tutorial including measurements- http://www.ibuildit.ca/Workshop%20Projects/tool-board-1.html.
I also have a couple videos of my process here- https://www.youtube.com/watch?v=qNz_a_vKAqY
Sat, 07/18/2015 - 09:19
Nothing beats being organized! Look fantastic, thanks for sharing!
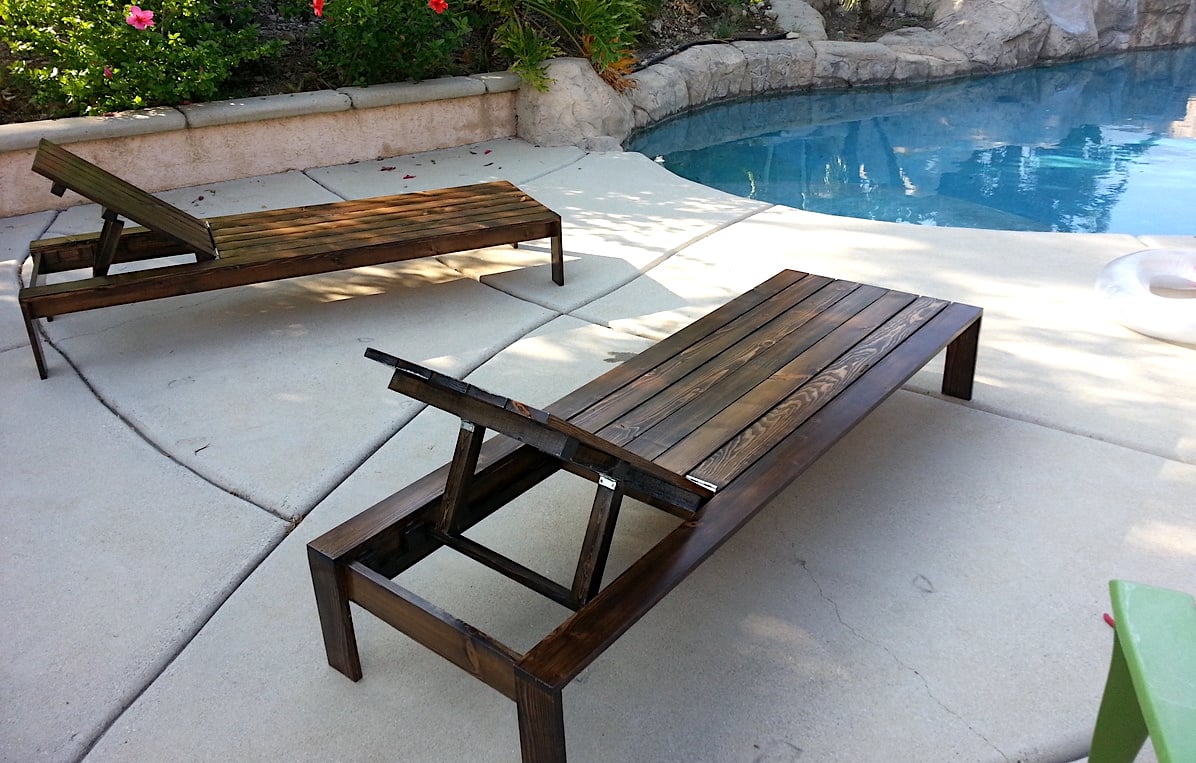
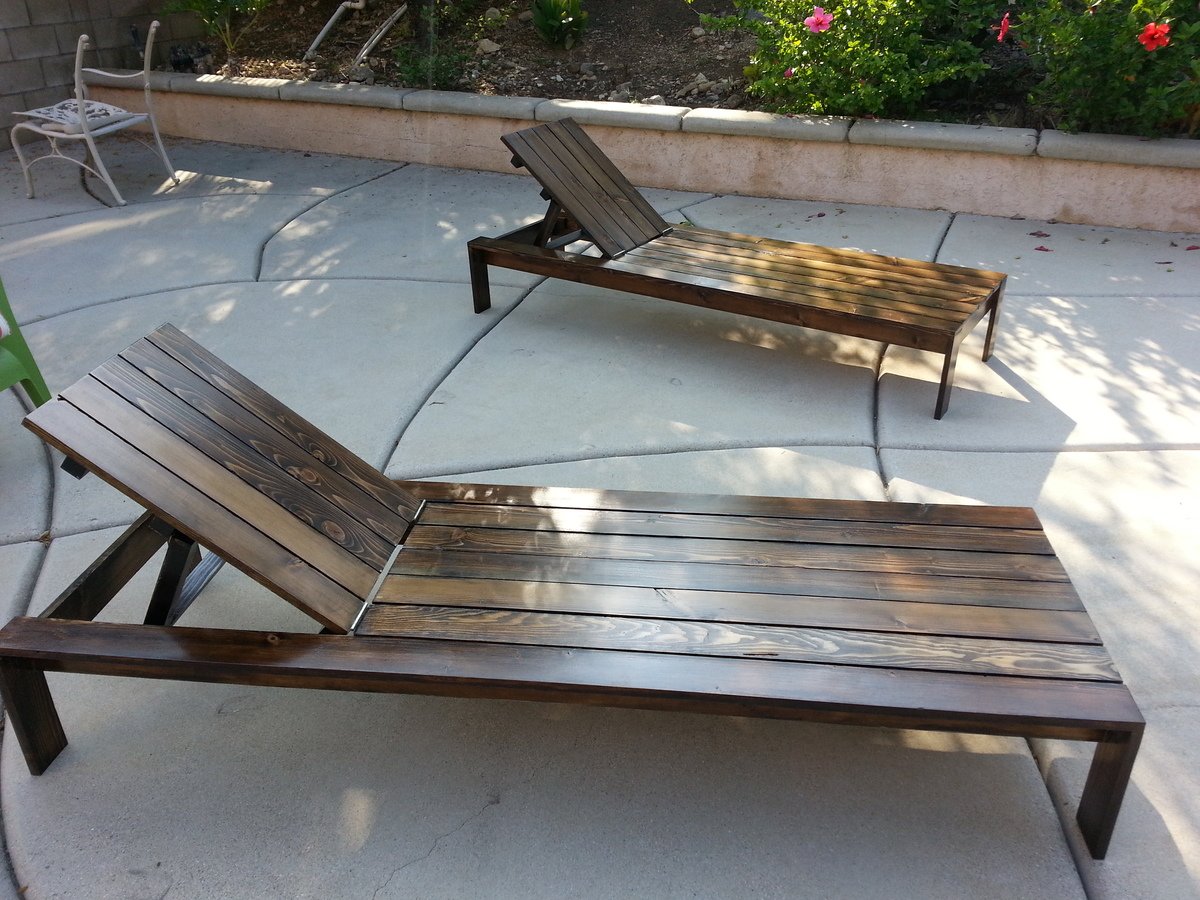
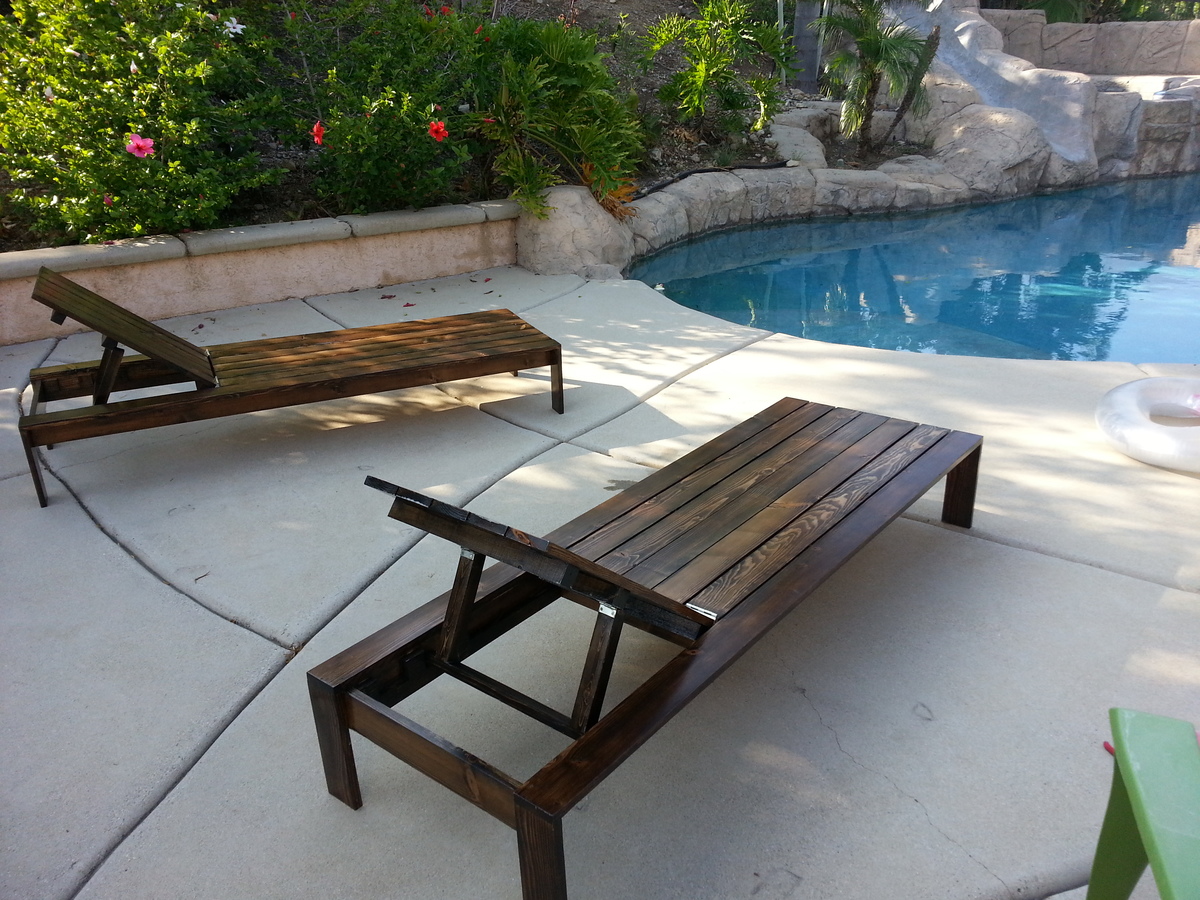
This was a fun and easy project for our pool area. We have high winds and our store bought chairs did not last. These loungers are sure to fare a bit better.
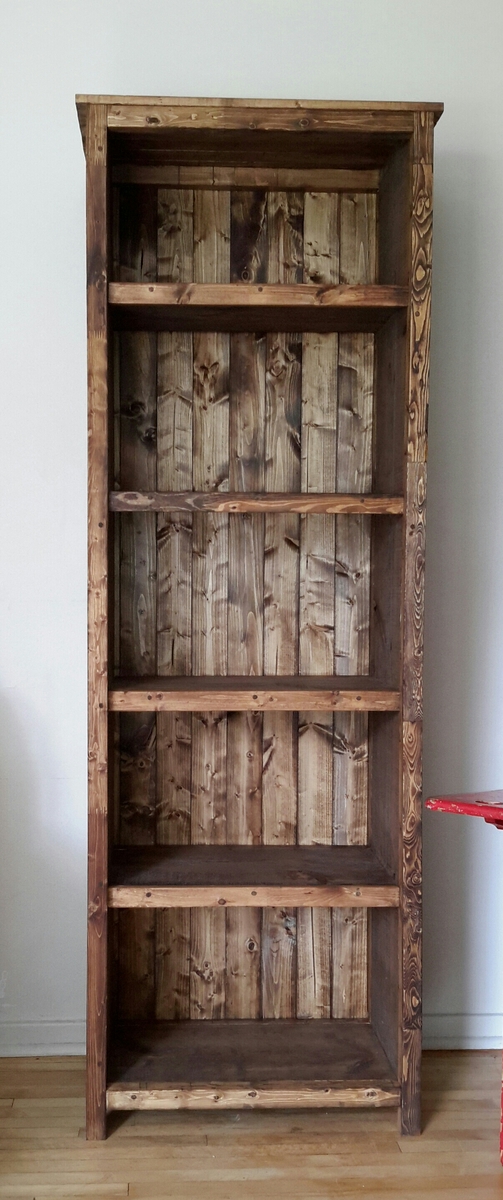
I loved this from Ana's site so much we tacked one. Please note I glued, screwed and dowel ed the holes. I hate kreg jigs. We also made ours taller to add an extra shelf.
Wed, 09/02/2015 - 06:33
Can you tell me the length of your 1x12 sides to make it a 5 shelve case? Thank you and your's looks great!
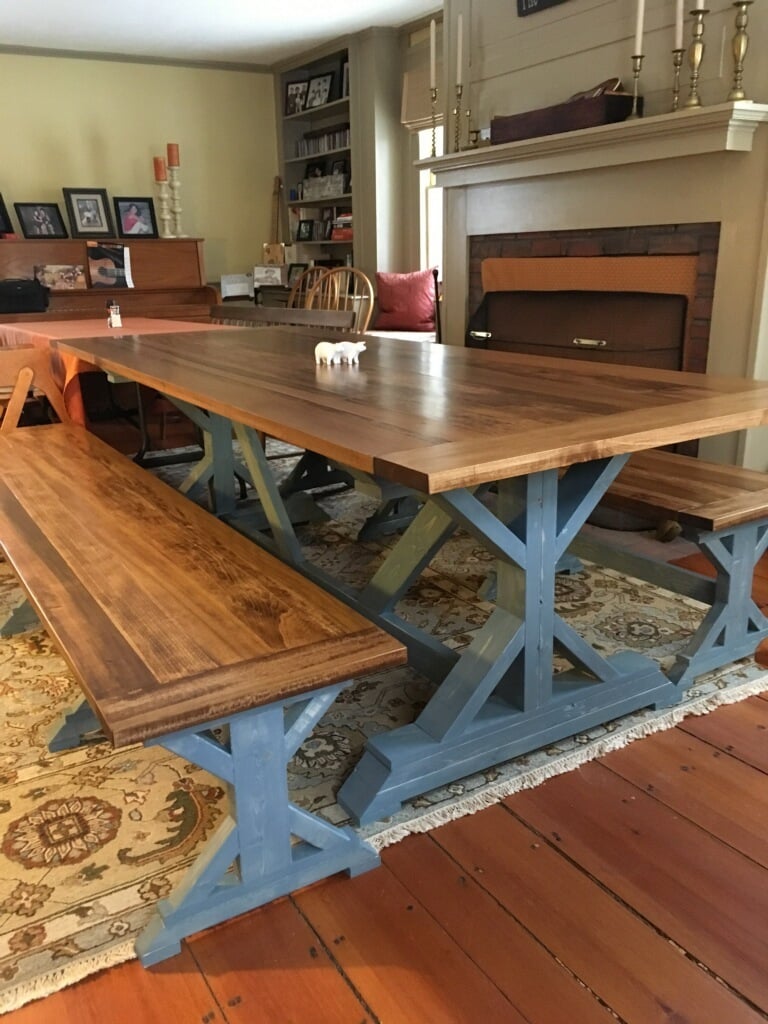
This was my first big furniture piece that I've built. I'm pretty happy with how it turned out. I used 5/4 poplar for the tops instead of the 2x10s for the table and 2x6s for the benches that the plans called for. Finished the tops with Minwax Early American stain then 3 coats of satin oil based polly. Finished the bottoms with water based Minwax tinted River Stone then coated with water based polly.
Wed, 03/14/2018 - 06:18
You did a great job, especially for your first big piece.
I love the River Stone color you chose for the bases, beautiful combination.
My wife wanted a patio set and I initially made a set using pallets but I knew I could make a better one so after seeing one Ana made on Pinterest I went to work. I have now painted it white and my wife will be make the cushions for it as I made it a little wider than the actual plans called for.
Essential outdoor chair, by Al.
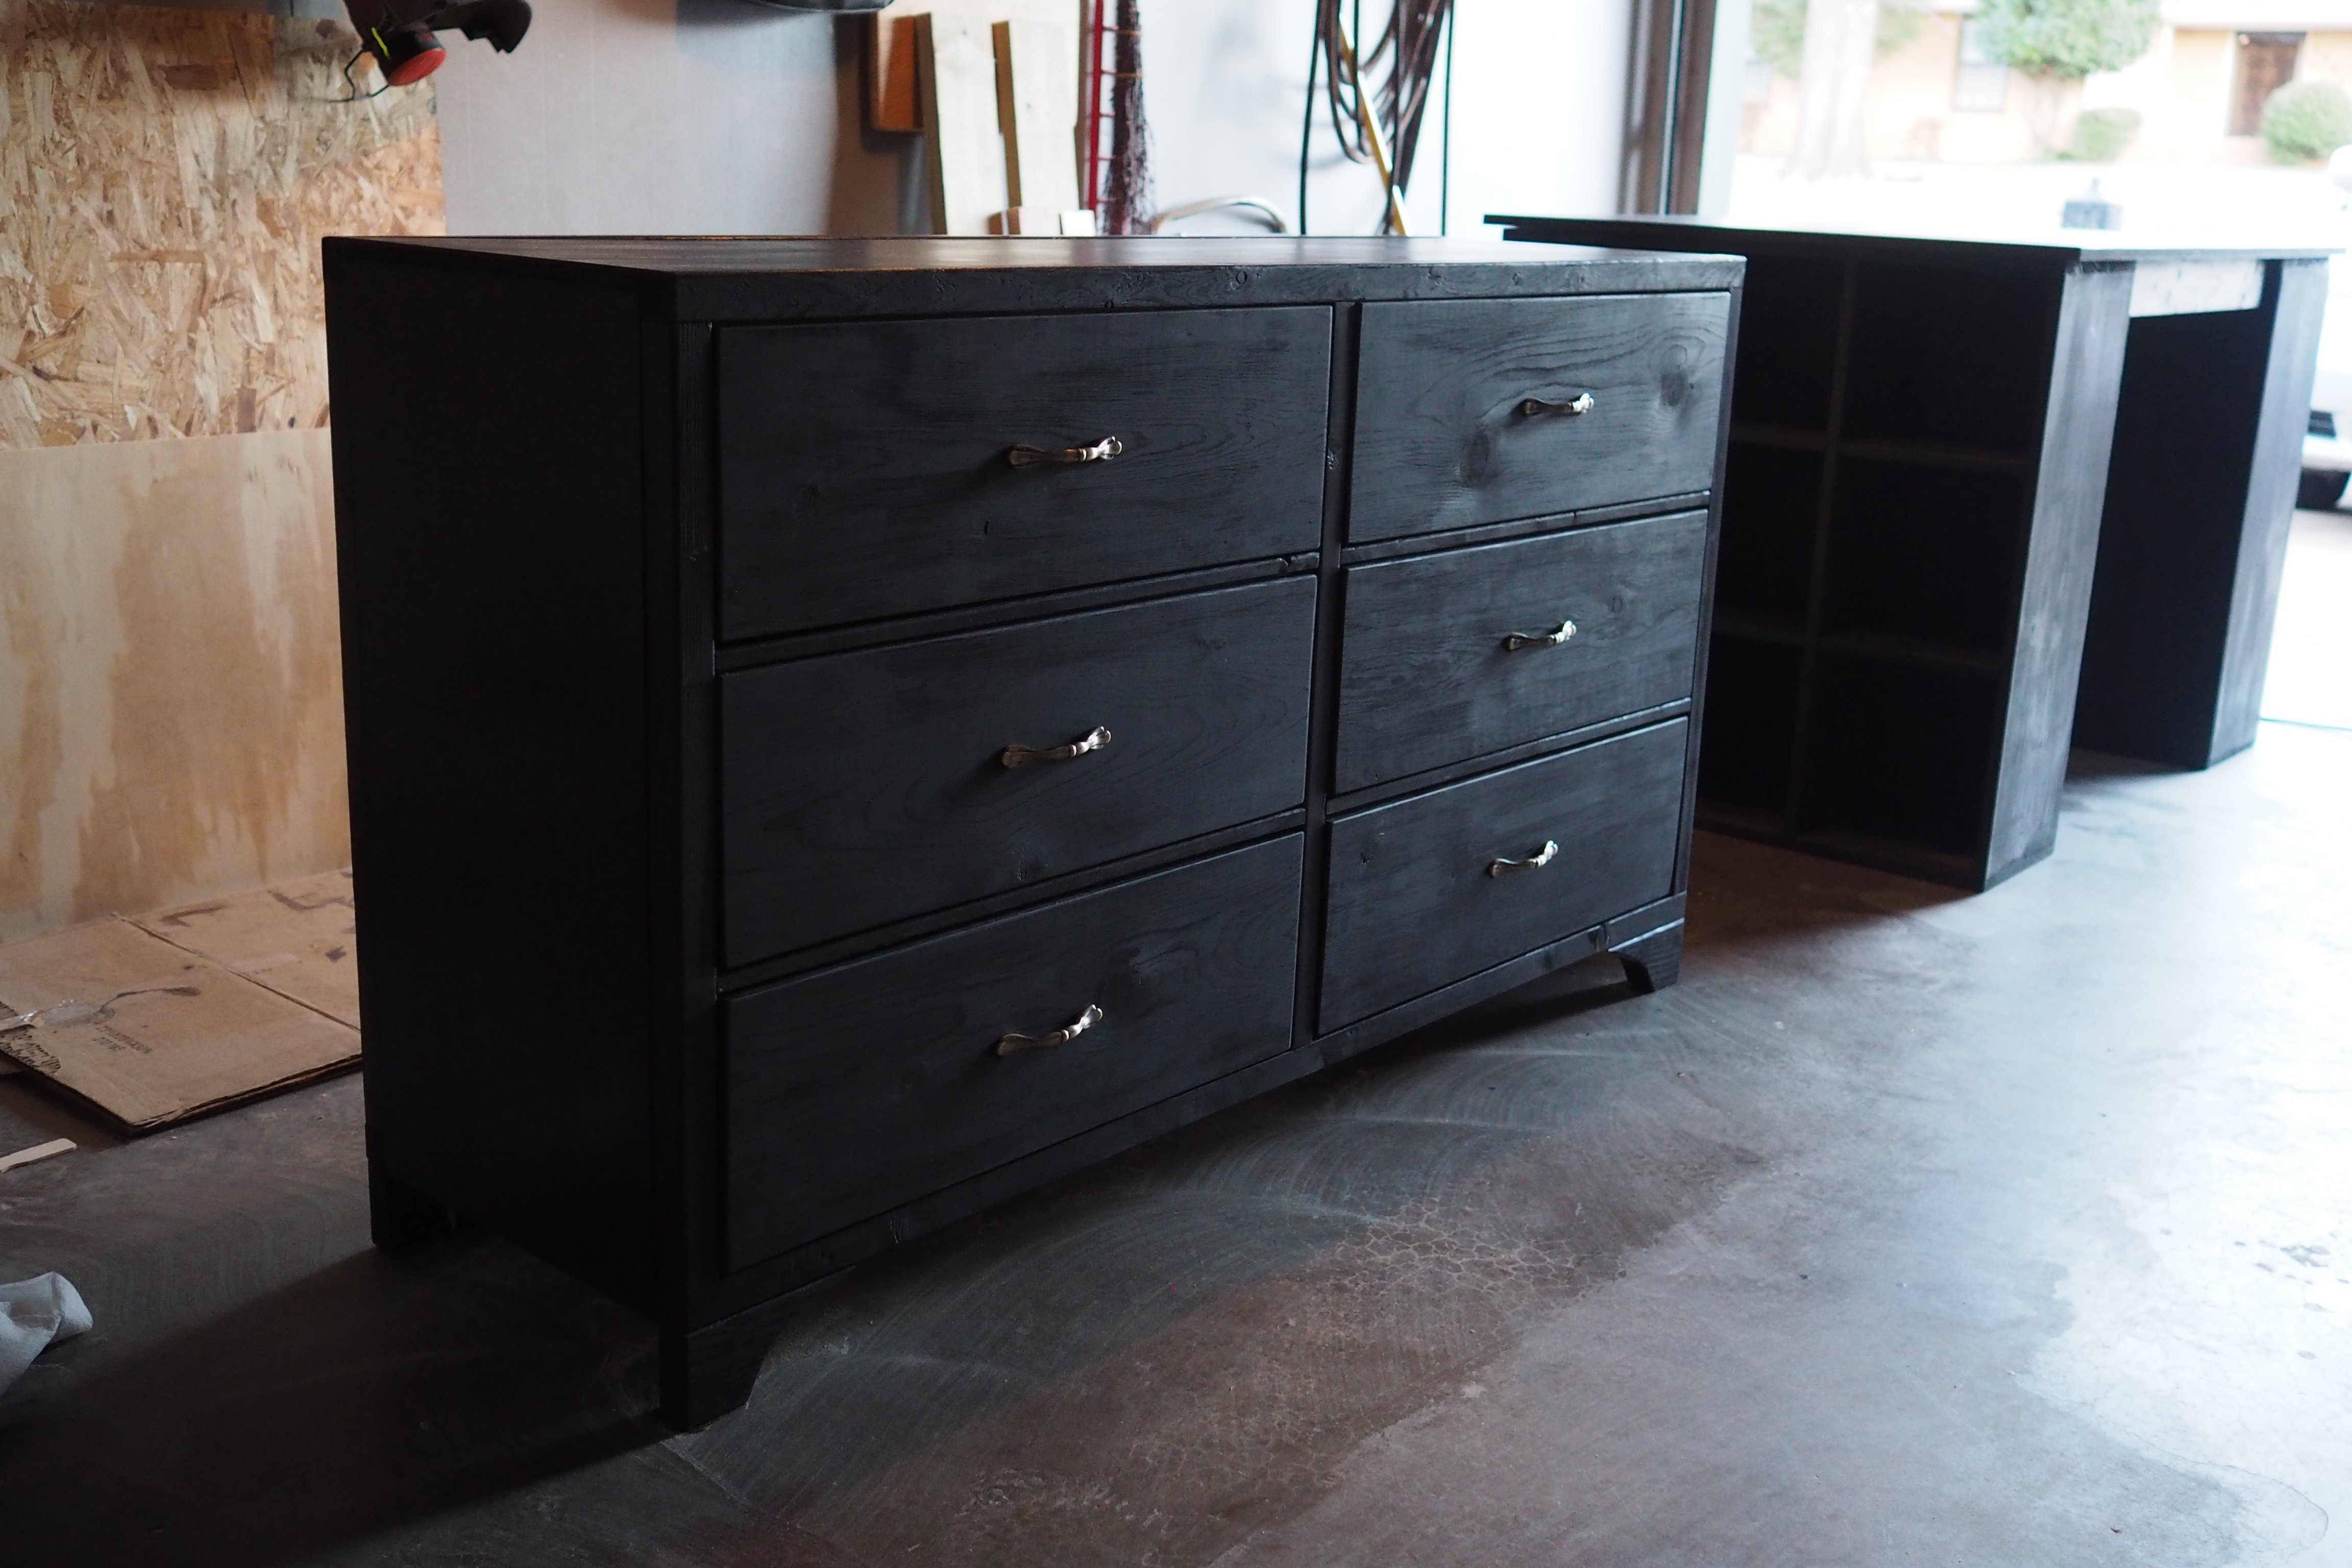
I made this dresser for my daughter for Christmas. I followed the plans exactly except I made feet with 2x4 scraps instead of wheels.
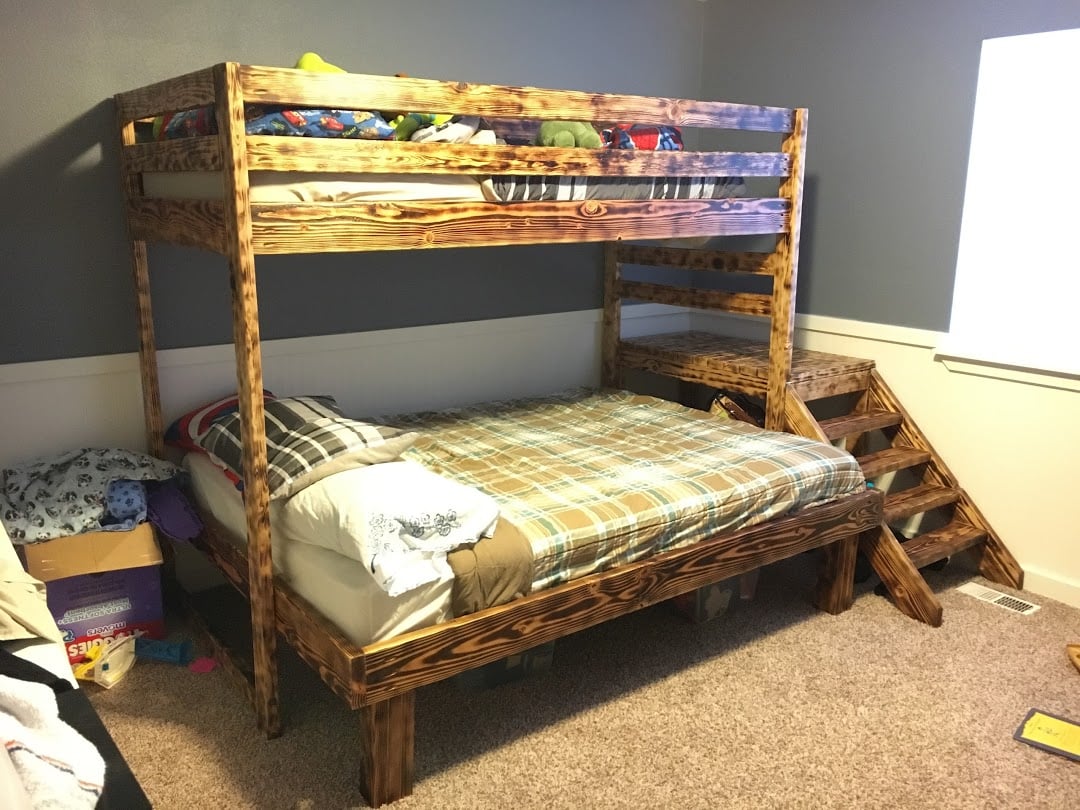
This is the nightly sleeper for our 6yo (queen) and 4yo (twin) boys, but we have in-laws who visit from out of town frequently and we also wanted a place to allow them to be comfortable as couples.
To accomodate adult headroom on the queen, I raised the entire loft 7" (72" high) and to fit the queen beneath, I had to lengthen the loft rails by 9" (84" long). To fill the resulting gap, I just used some 39" scraps of 2x4 and 2x6 overlapped to create a 4x10 landing which actually ended up a cool addition since it gives the kids a spot lower than the mattress to make the transition from the ladder to the mattress. It also has given us adults a spot to sit off the mattress while comforting them to sleep when needed, so we don't end up waking them when we leave.
I based the height of the queen legs (made four of them) off the size of a standard storage tote, which was ~13". We can fit 12-16 totes of clothes or other random storage under the bed as a result. The queen frame was just a simple 64"x84" rectangle out of 2x6s with 7 2x4s used as crossbeams to hold the mattress.
Note on the mattresses - these 8" memory foam mattresses are just as comfortable as our expensive name brand king mattress, but MUCH cheaper!
https://www.walmart.com/ip/Mainstays-8-inch-Memory-Foam-Mattress-Multiple-Sizes/47826185
Despite raising the loft, I kept the height of the stair platform the same, but just added a second 'ladder' rung to get up to the loft (refer back to the 4x10 landing spot on the loft). To keep with the using available storage space theme, instead of attaching the stairs permanently, I used 1"x4" hinges to that we could swing the stairs up and put 4 more storage totes under there. (However, we quickly found that the kids liked that area as a 'fort', so we've left it open for their use.)
In the picture, you'll note there are four treads/steps on the stairs because I thought to myself "little feet, little steps" would be better. I soon learned that the littles are more than capable of using adult sized steps while adults nearly killed themselves coming down the little feet, little steps. As such, I ended up removing one of the middle steps and moving the new singular middle to a spot between the other two. Much better, stay with 3 steps.
While the queen can stand alone, I still attached it to the 'legs' of the loft so that our rambunctious boys didn't 'sweep the leg' and bring the whole thing down on themselves while under it.
Thank you so much for the plans. We enjoyed building it. We love it!!!
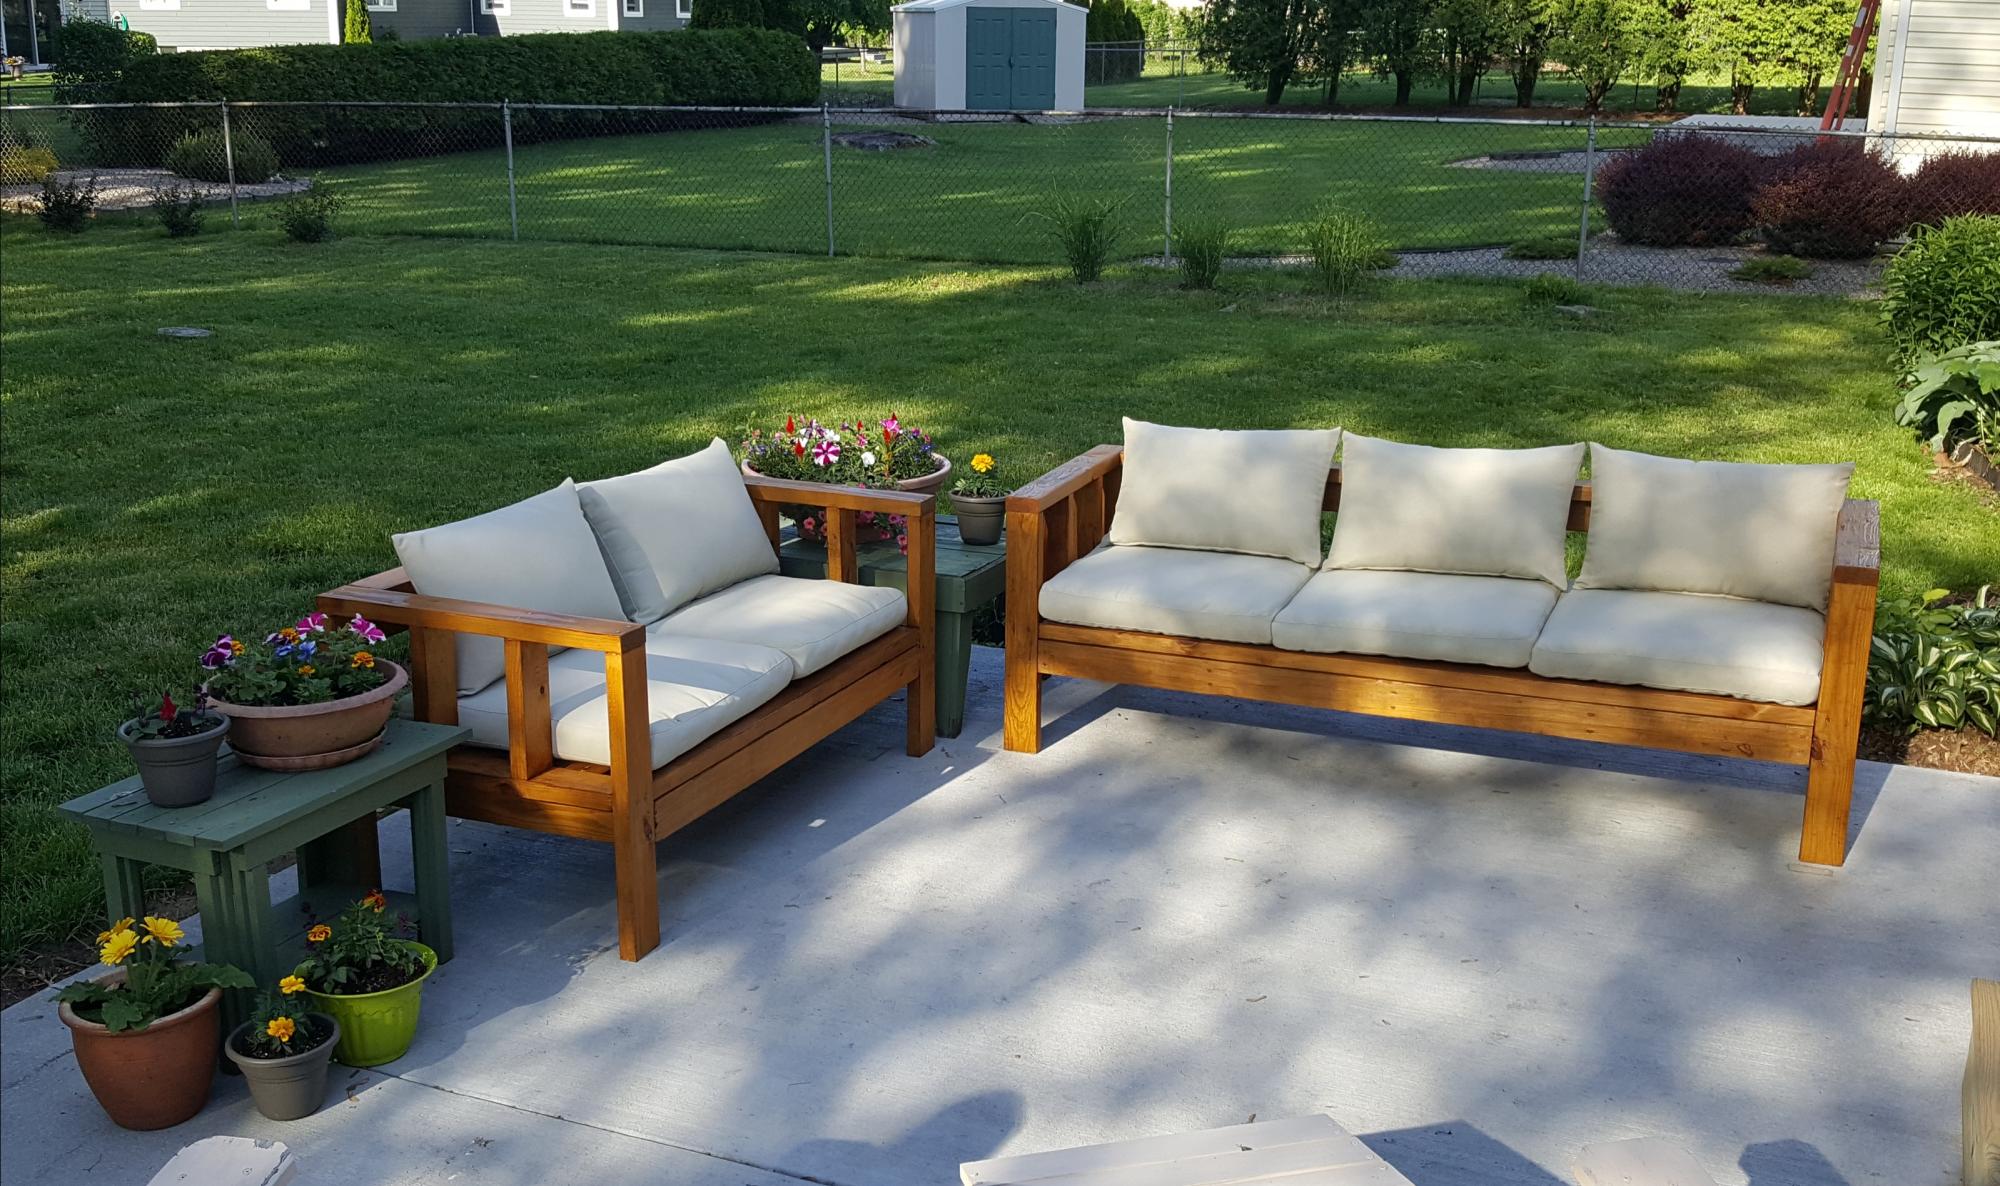
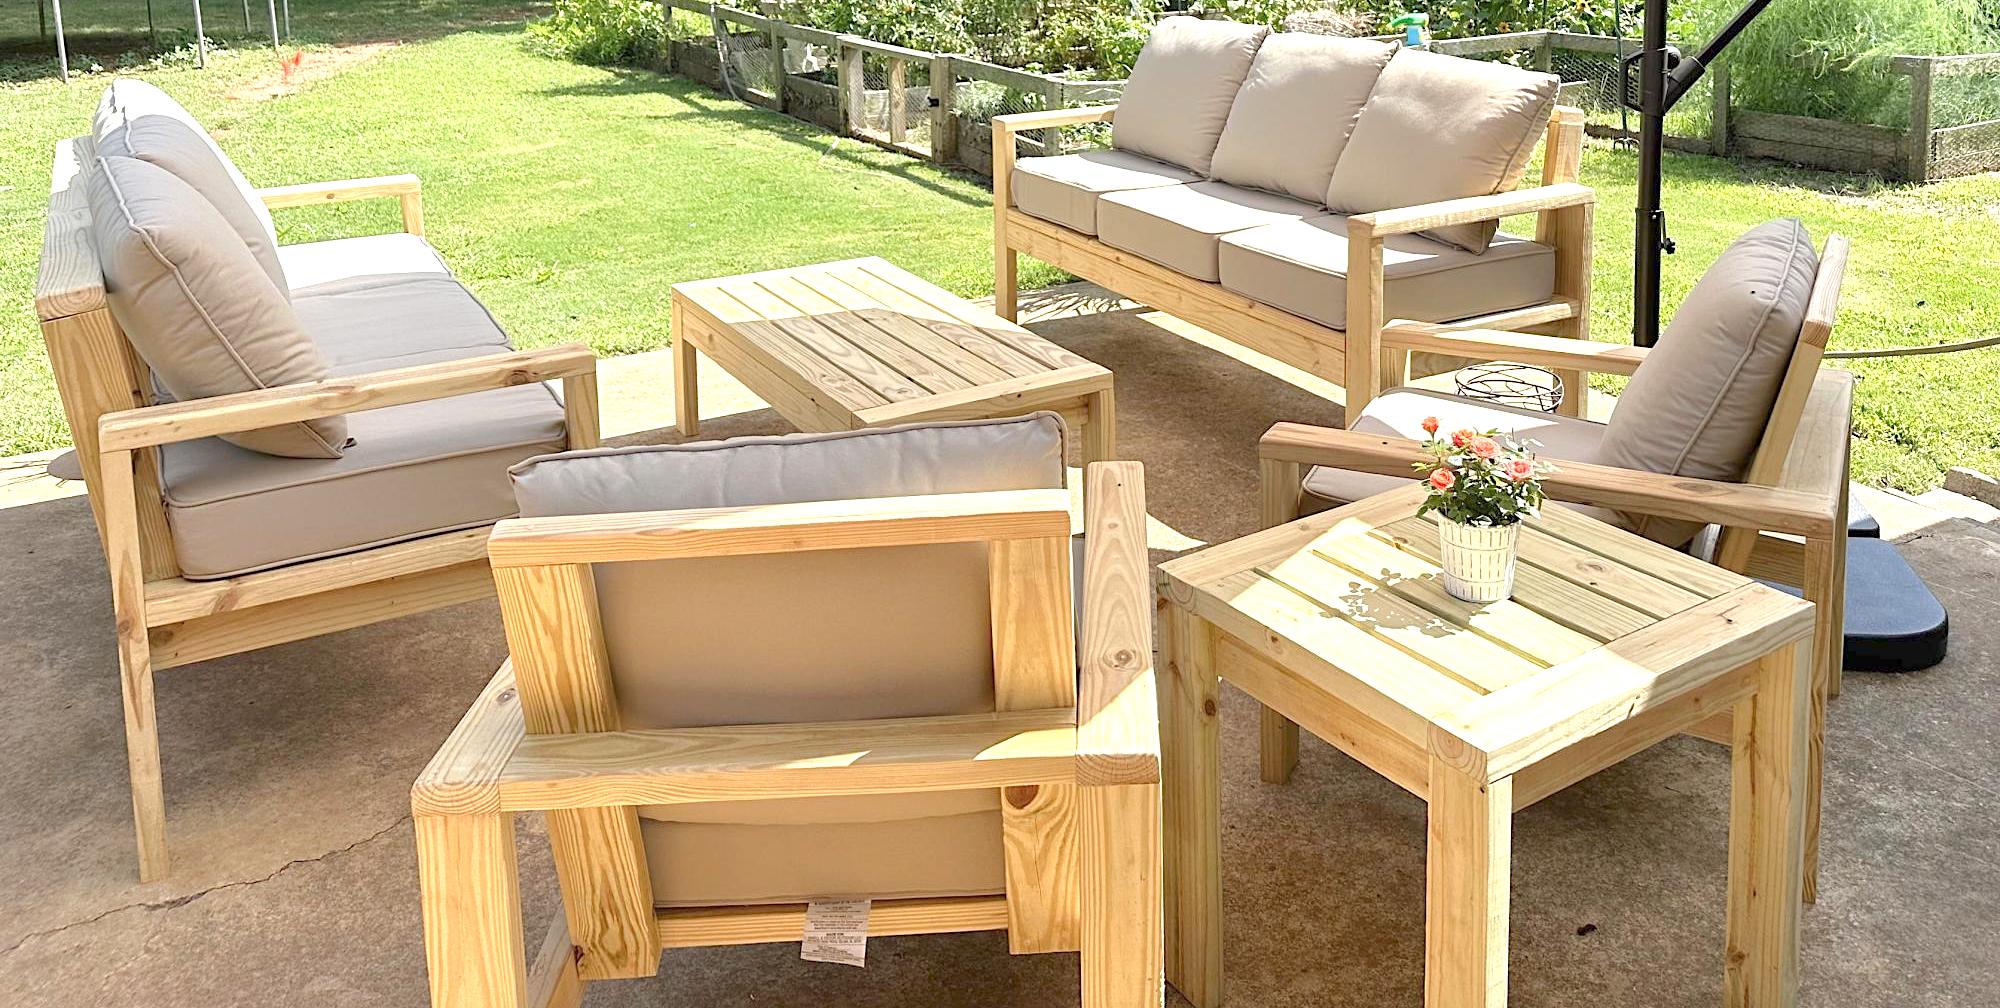
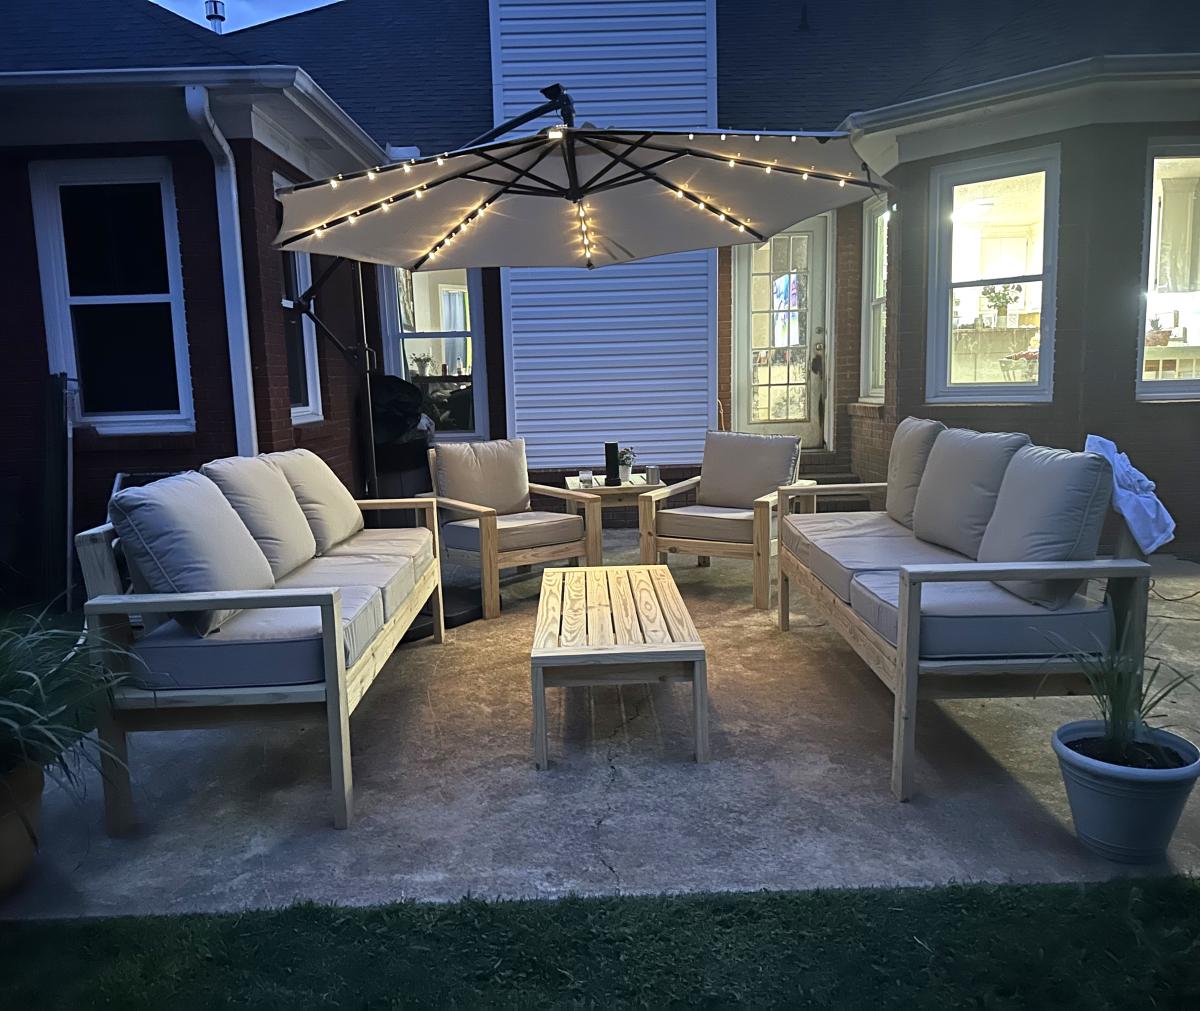
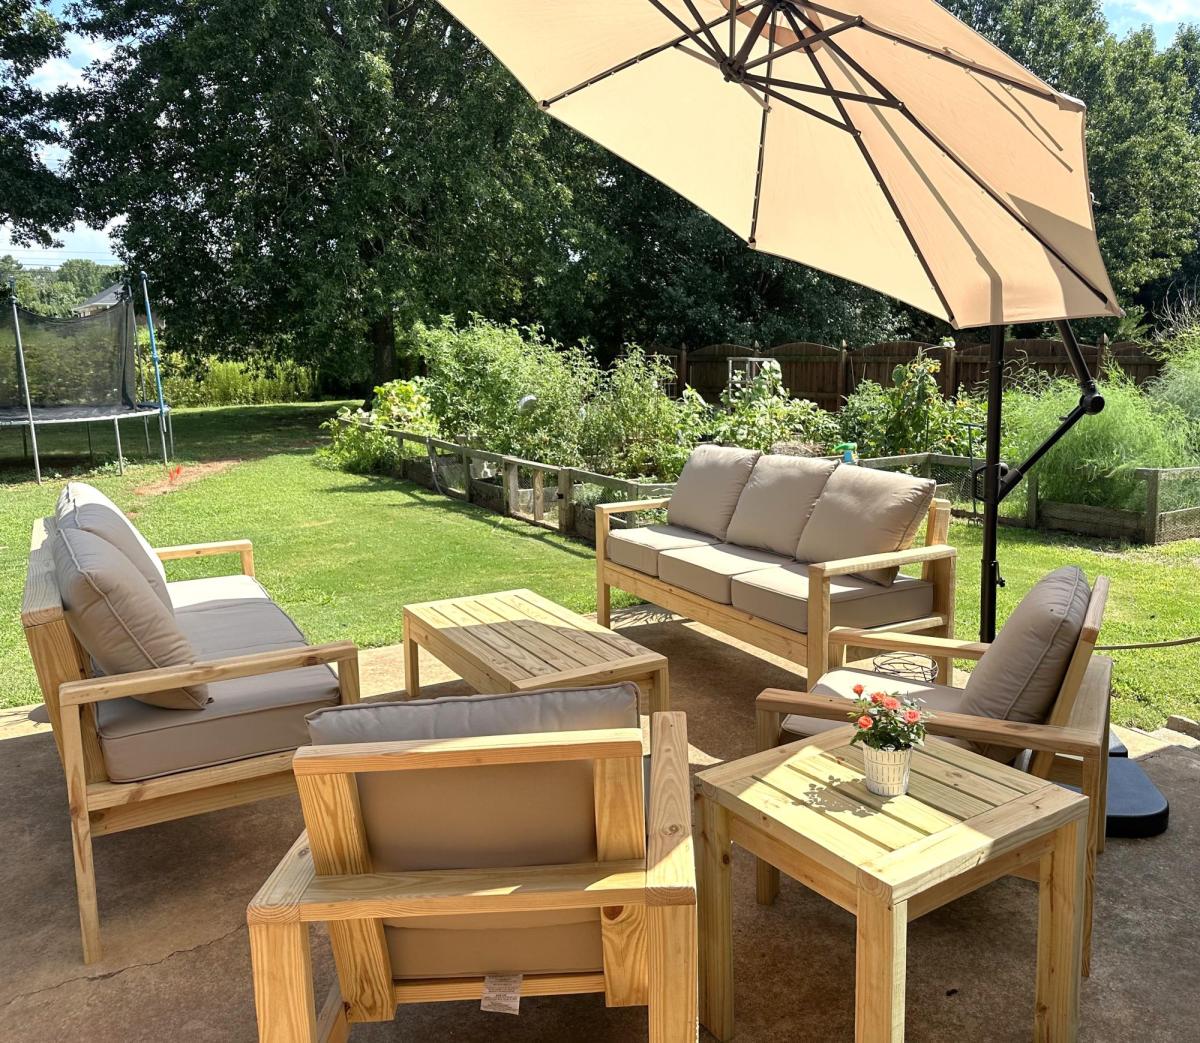
I decided for my patio a love seat/sofa combo would work better than the sectional. It was easy to make both and modify the plans to have arms at both ends of the pieces.
Getting inexpensive cushions was a challenge. I ended up getting IKEA HÅLLÖ cushions. I added more foam to the back cushions as was suggested in another post since the IKEA cushions were a little flimsy and tend to fall through the back of the sofa. I might add some bigger cushions at some point
Wed, 07/10/2019 - 17:06
I want to try this as soon as we get into our house.

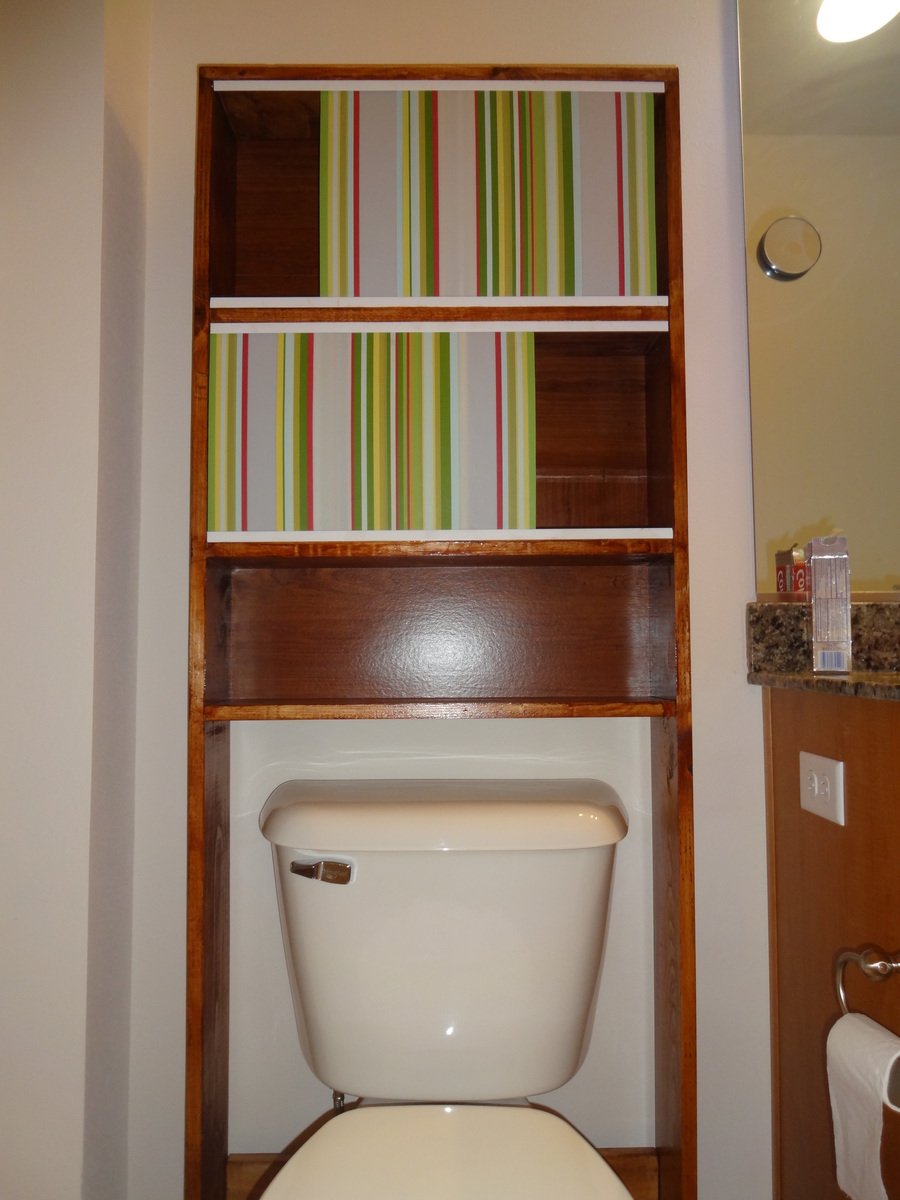
I recently discovered your blog and got really inspired. After building a couple of beginner projects following your plans, i started to think about making something that can be used as medicine cabinet and does not take much space. Came up with the idea for this over the toilet storage rack.
My goal was to recycle/reuse some of the stuff that was sitting in my garage.
Started with building a frame using 1x6s (24 inch for shelves and 72 inch height). Used plastic table mats were used as sliding windows. Found a PVC trim (8 ft) for $2 at lowes that has been used as the rails/track for the windows. The back is piece of cardbord that was scrap from an old broken ikea bookshelf.
I am pretty happy that i recycled some stuff and made this in less than $15.


Tue, 12/01/2020 - 14:20
Did you do anything to the bottoms of the legs to prevent wet floors from wicking into the wood? I am wanting to build something similar to replace a particle board cabinet-in-a-box because the particle board did soak up water and get ruined. What I'd REALLY like are metal end caps with an adjustable foot (like you put at the bottom of a table leg) but I can't find a combination of the two anywhere.
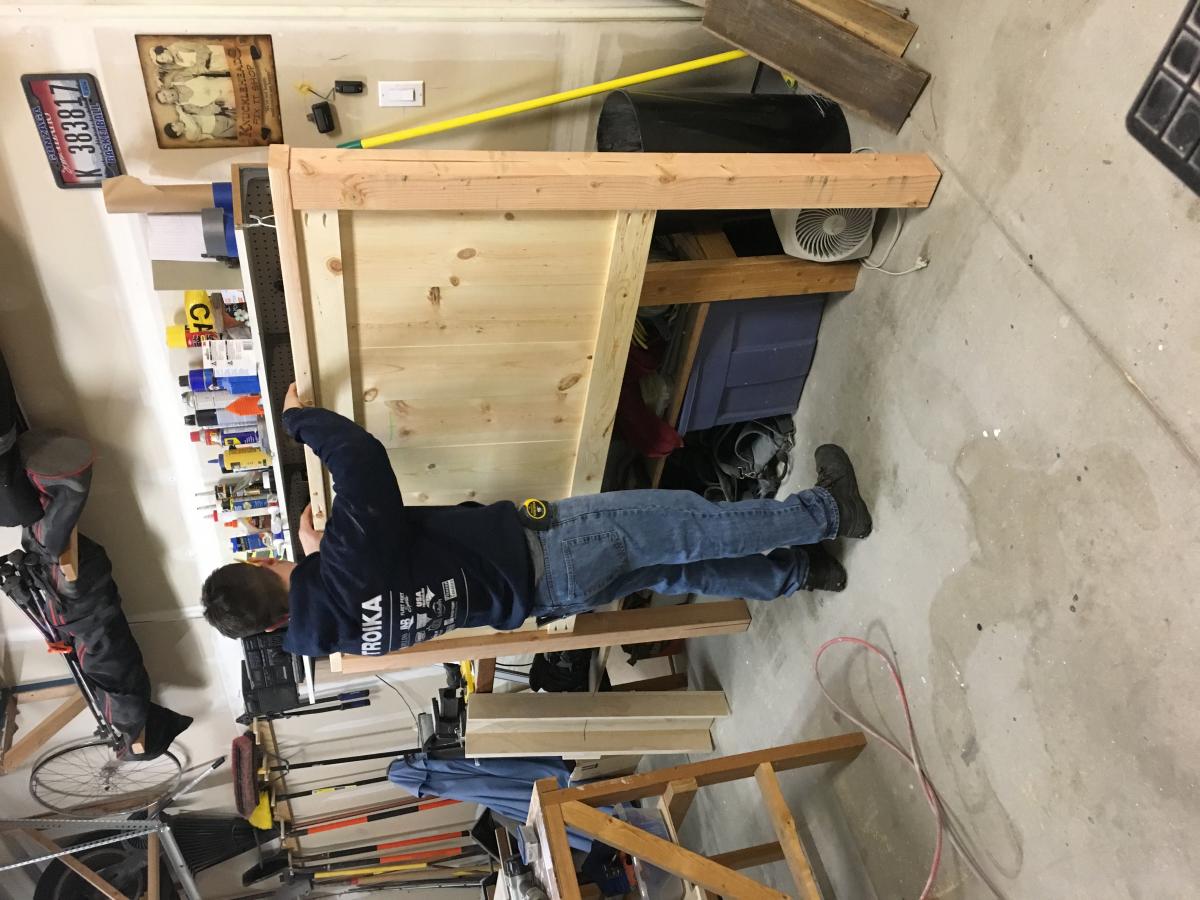
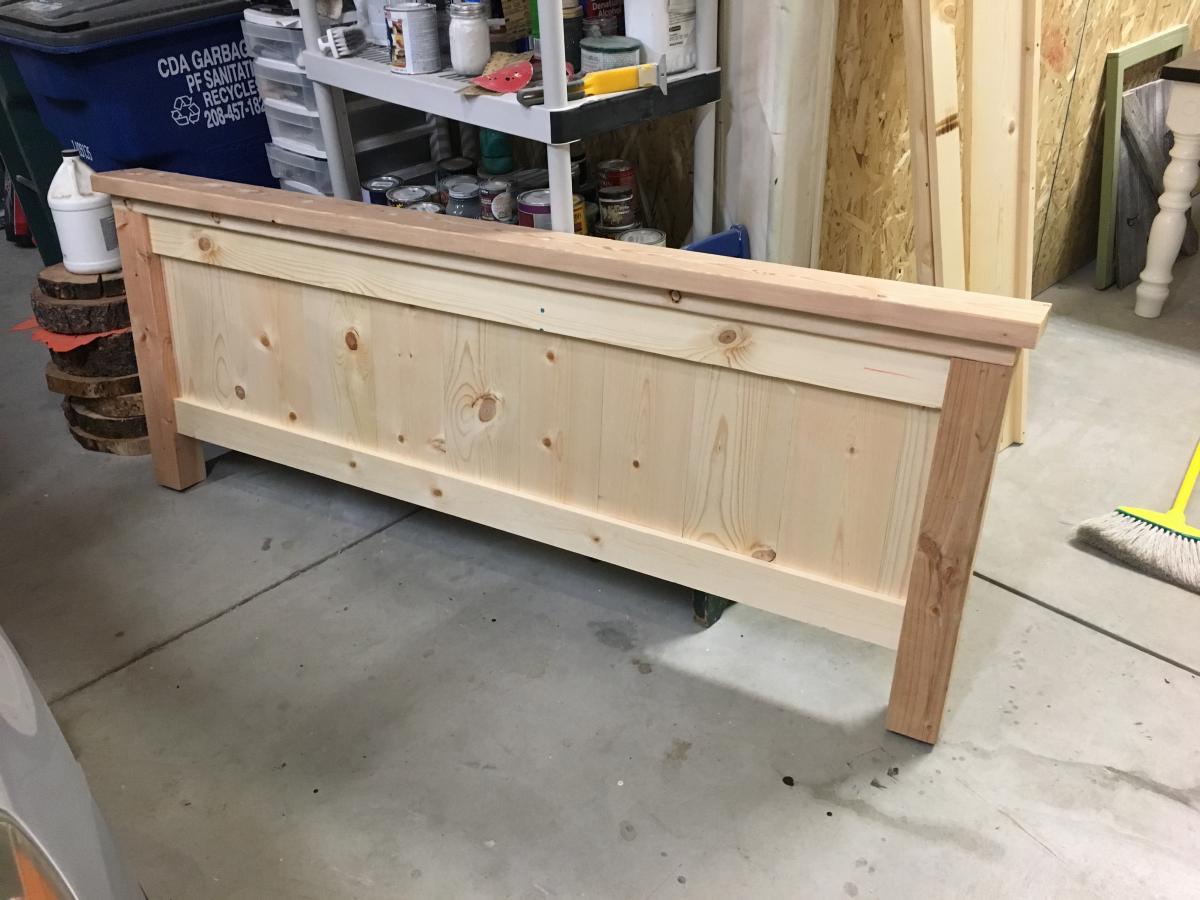
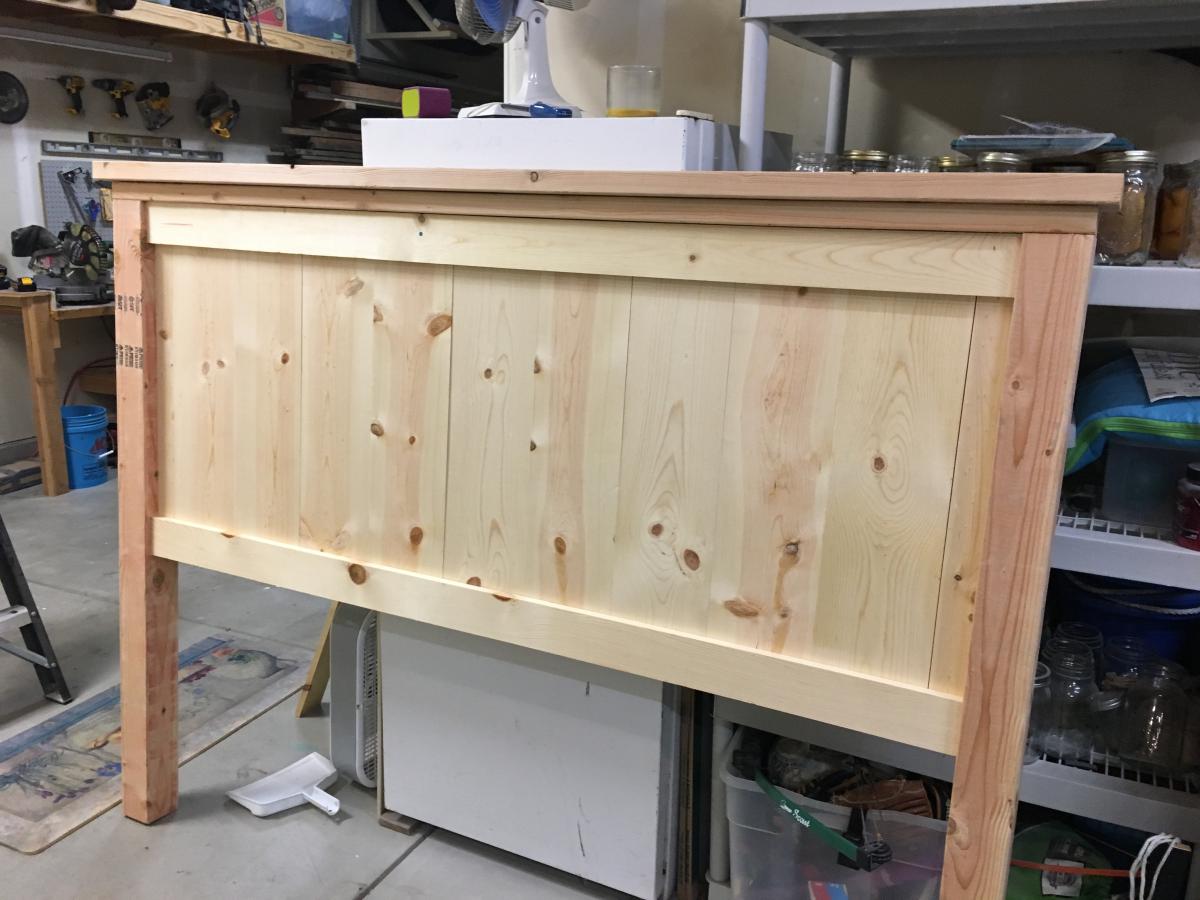
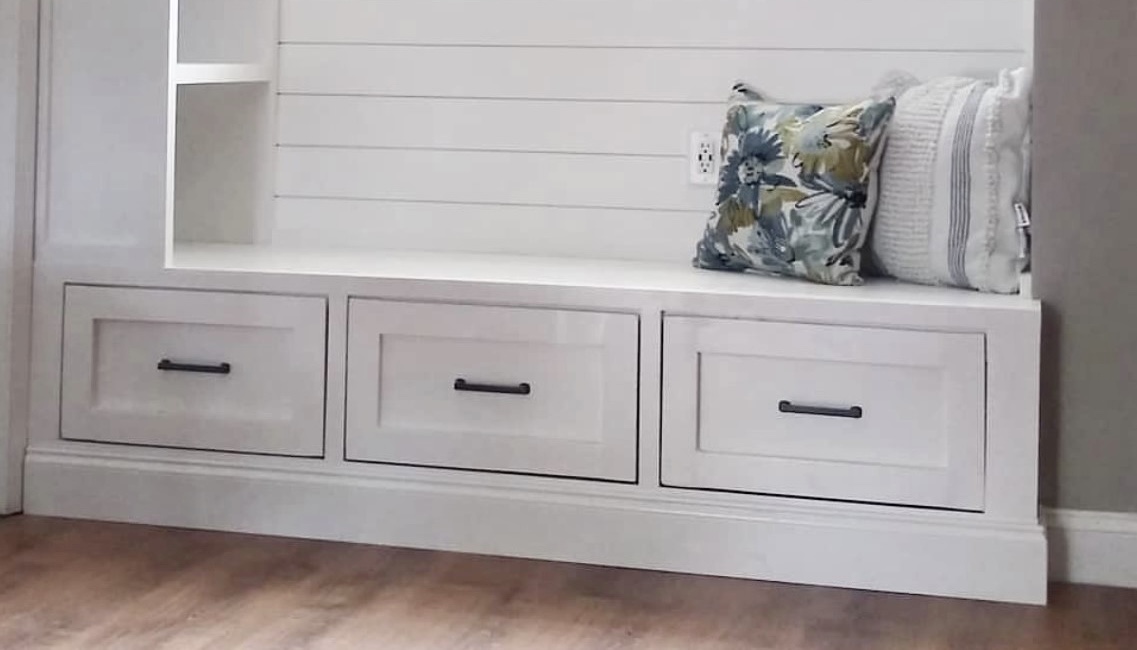
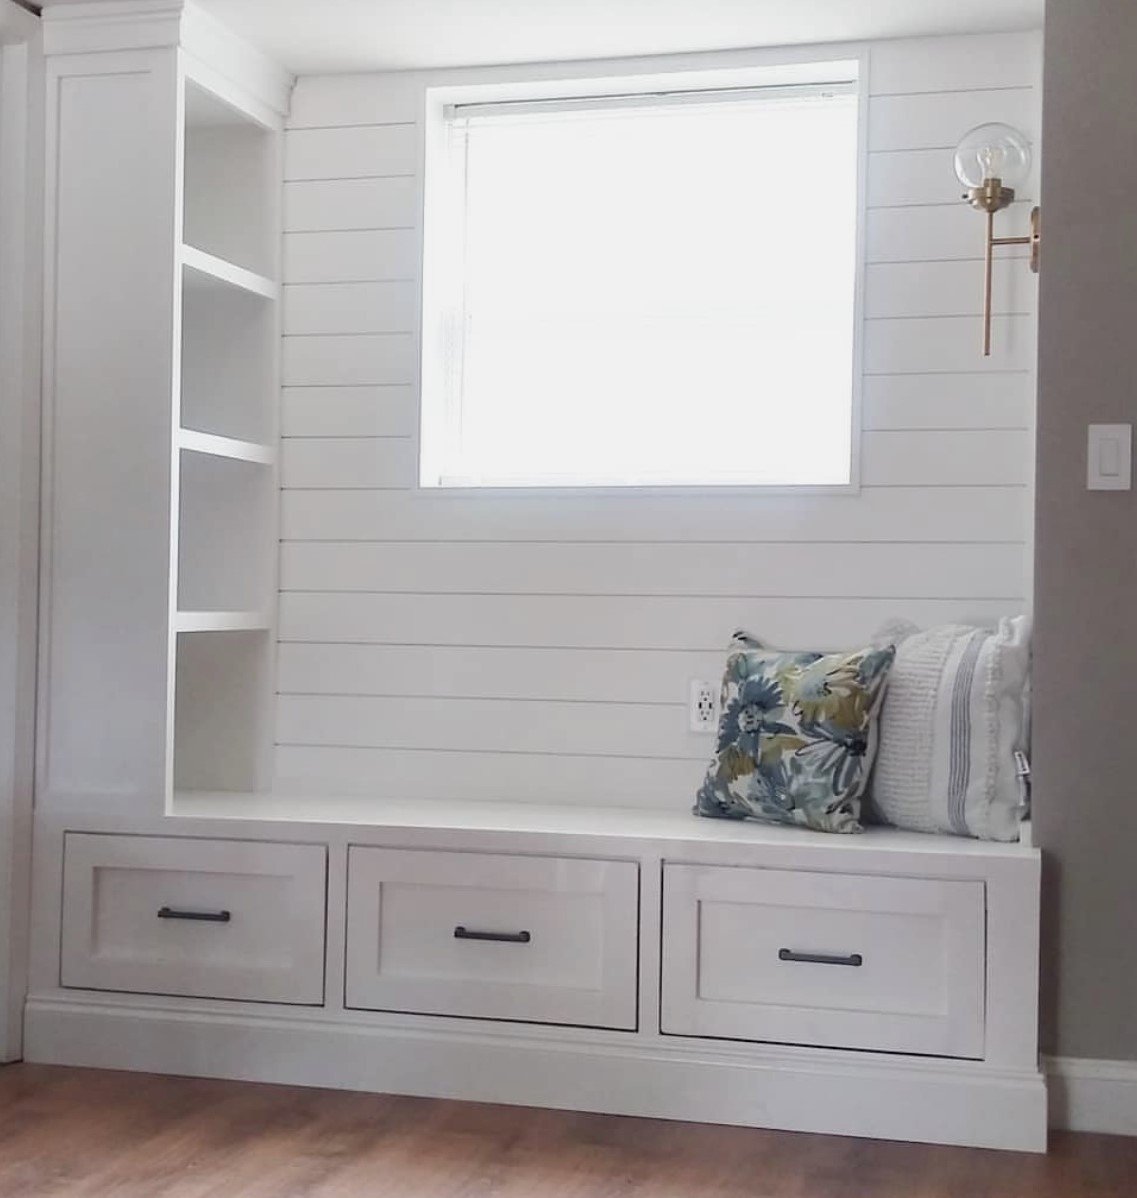
Fun weekend project to build together. We are loving the fresh look to our master bedroom.
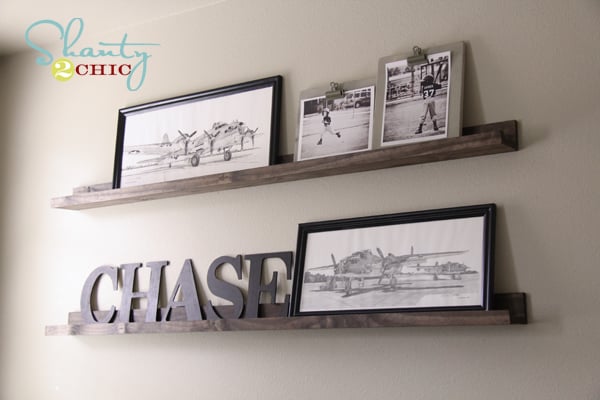
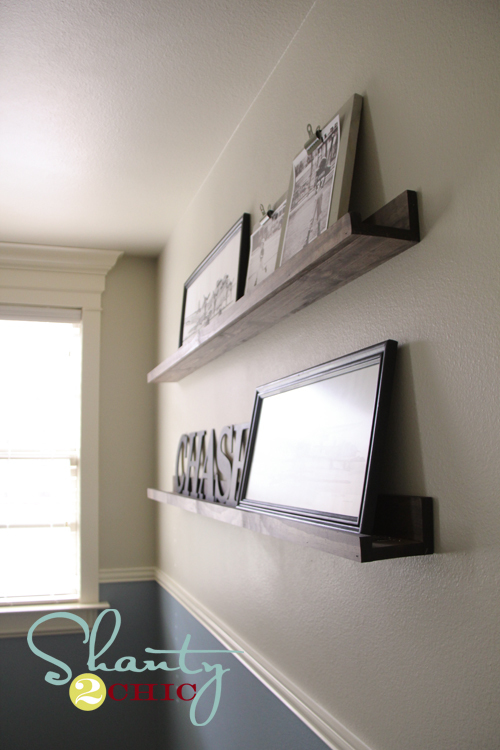
I love how these turned out! I did use my Kreg Jig to attach my back and bottom boards, but you could easily pre-drill and use regular screws. You can see a full tutorial at http://www.shanty-2-chic.com/2012/01/20-shelves-anyone-can-build.html !!

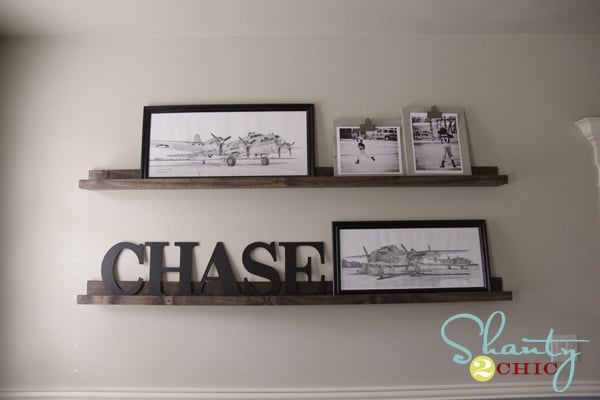

Tue, 01/24/2012 - 18:44
Whitney these shelves are so beautiful! Th stain is amazing, and I love the art!
In reply to Whitney these shelves are so by Ana White
Wed, 01/25/2012 - 04:31
I love them... One of my very favorite projects!
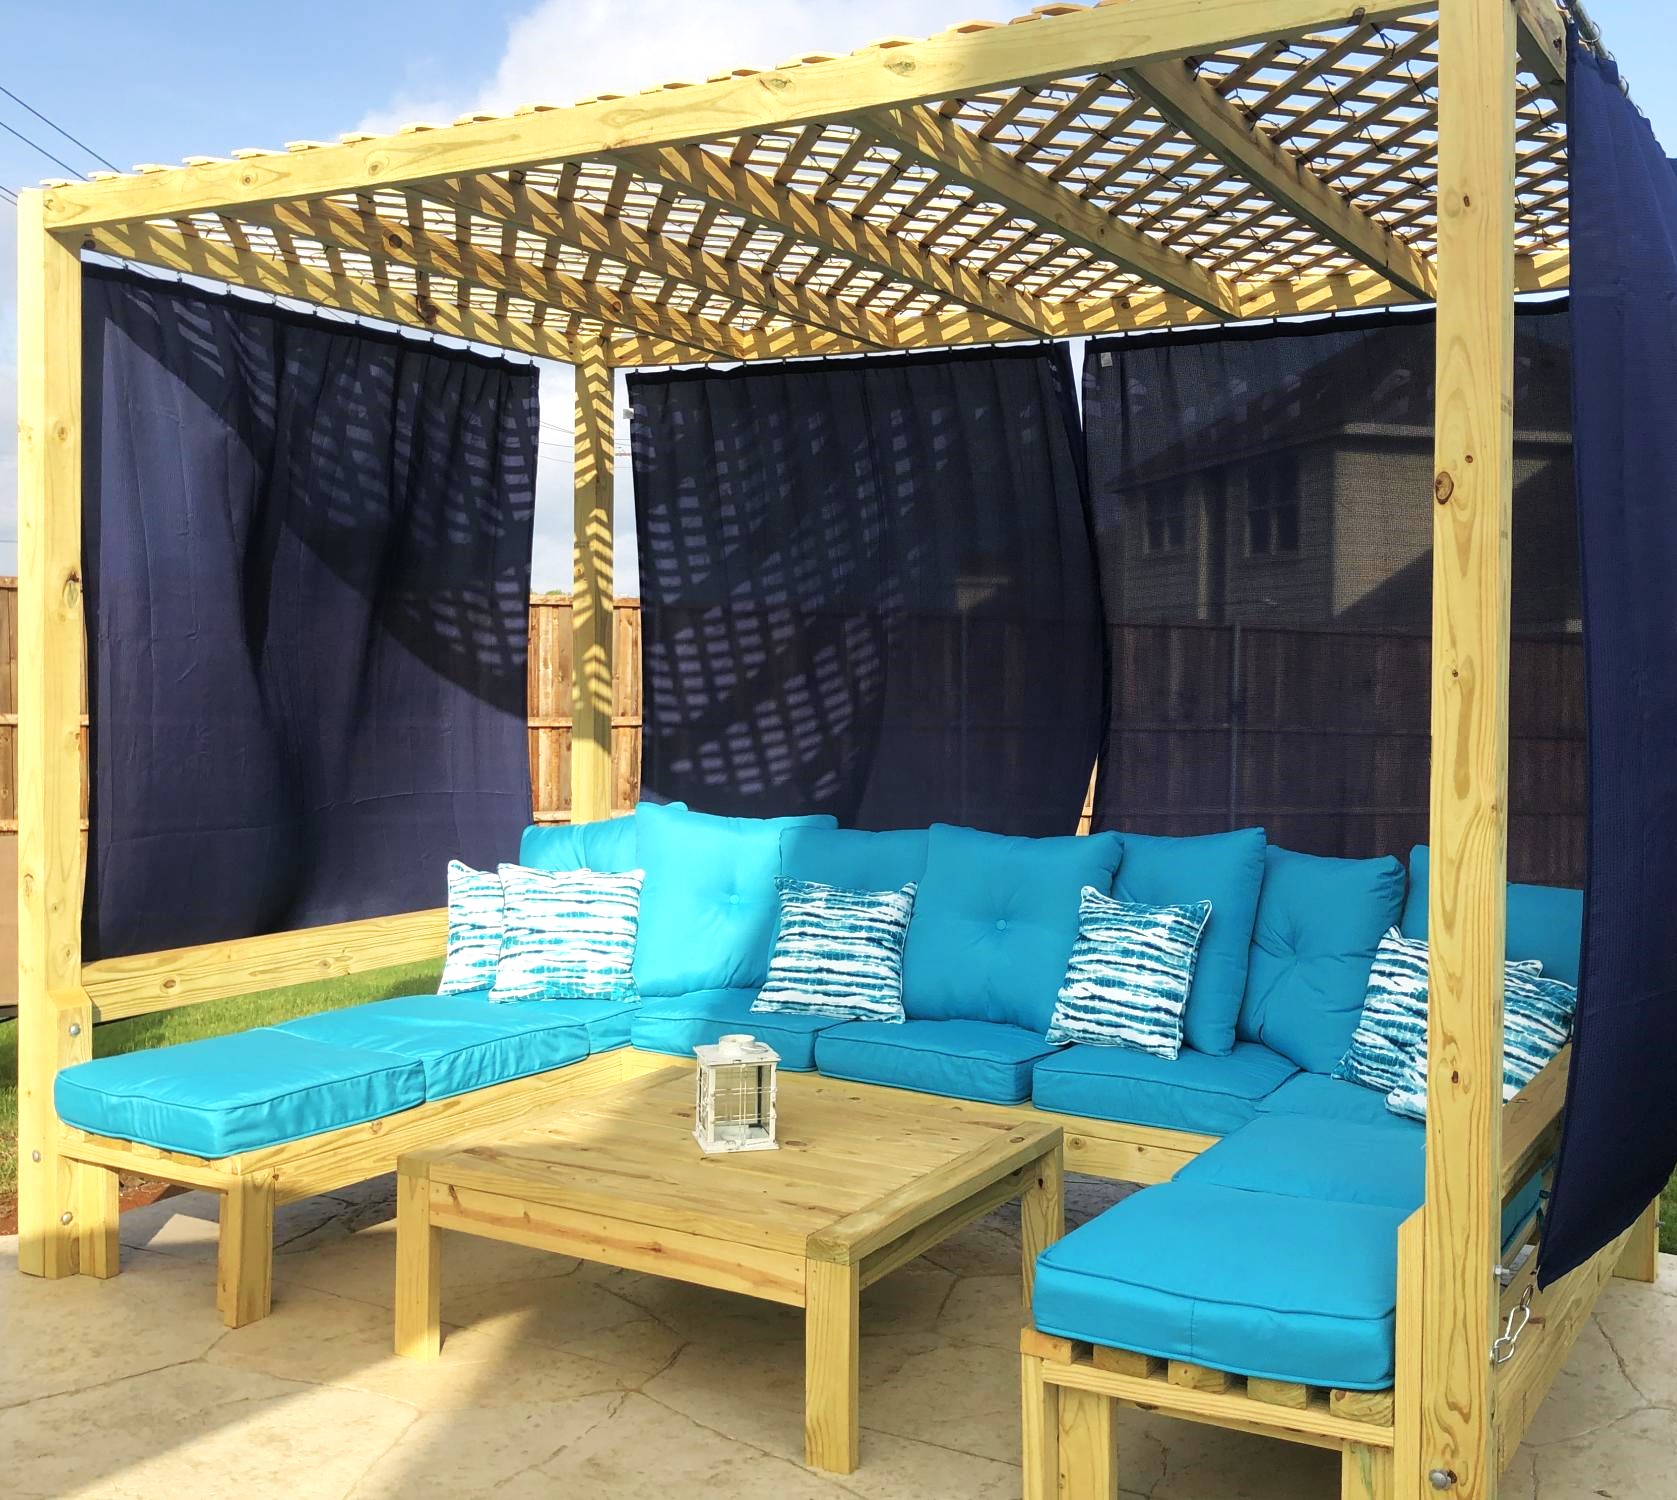
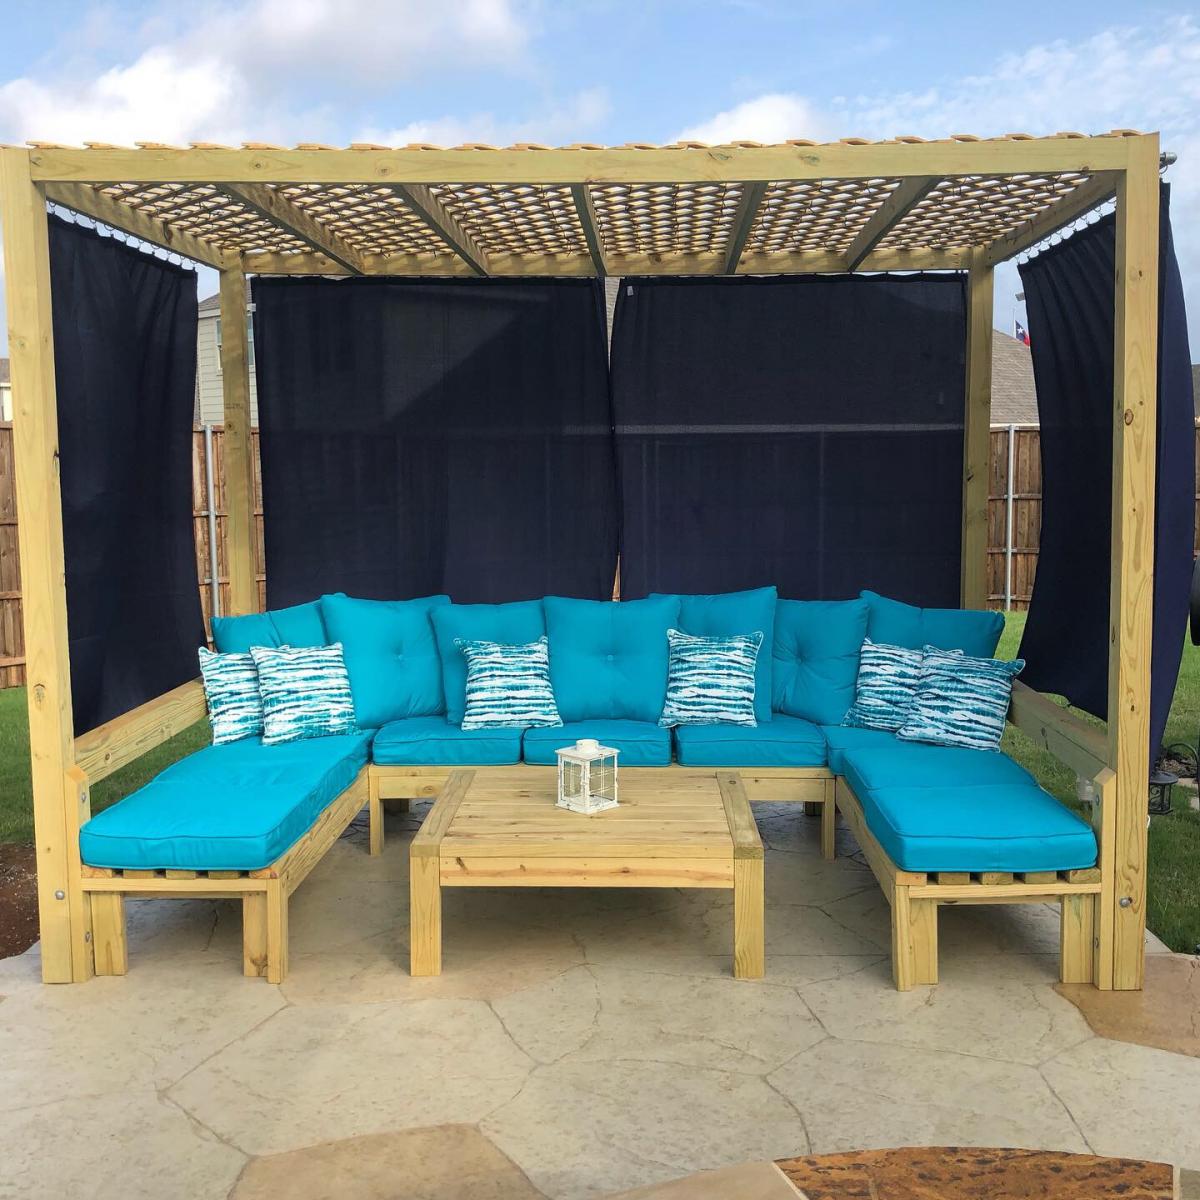
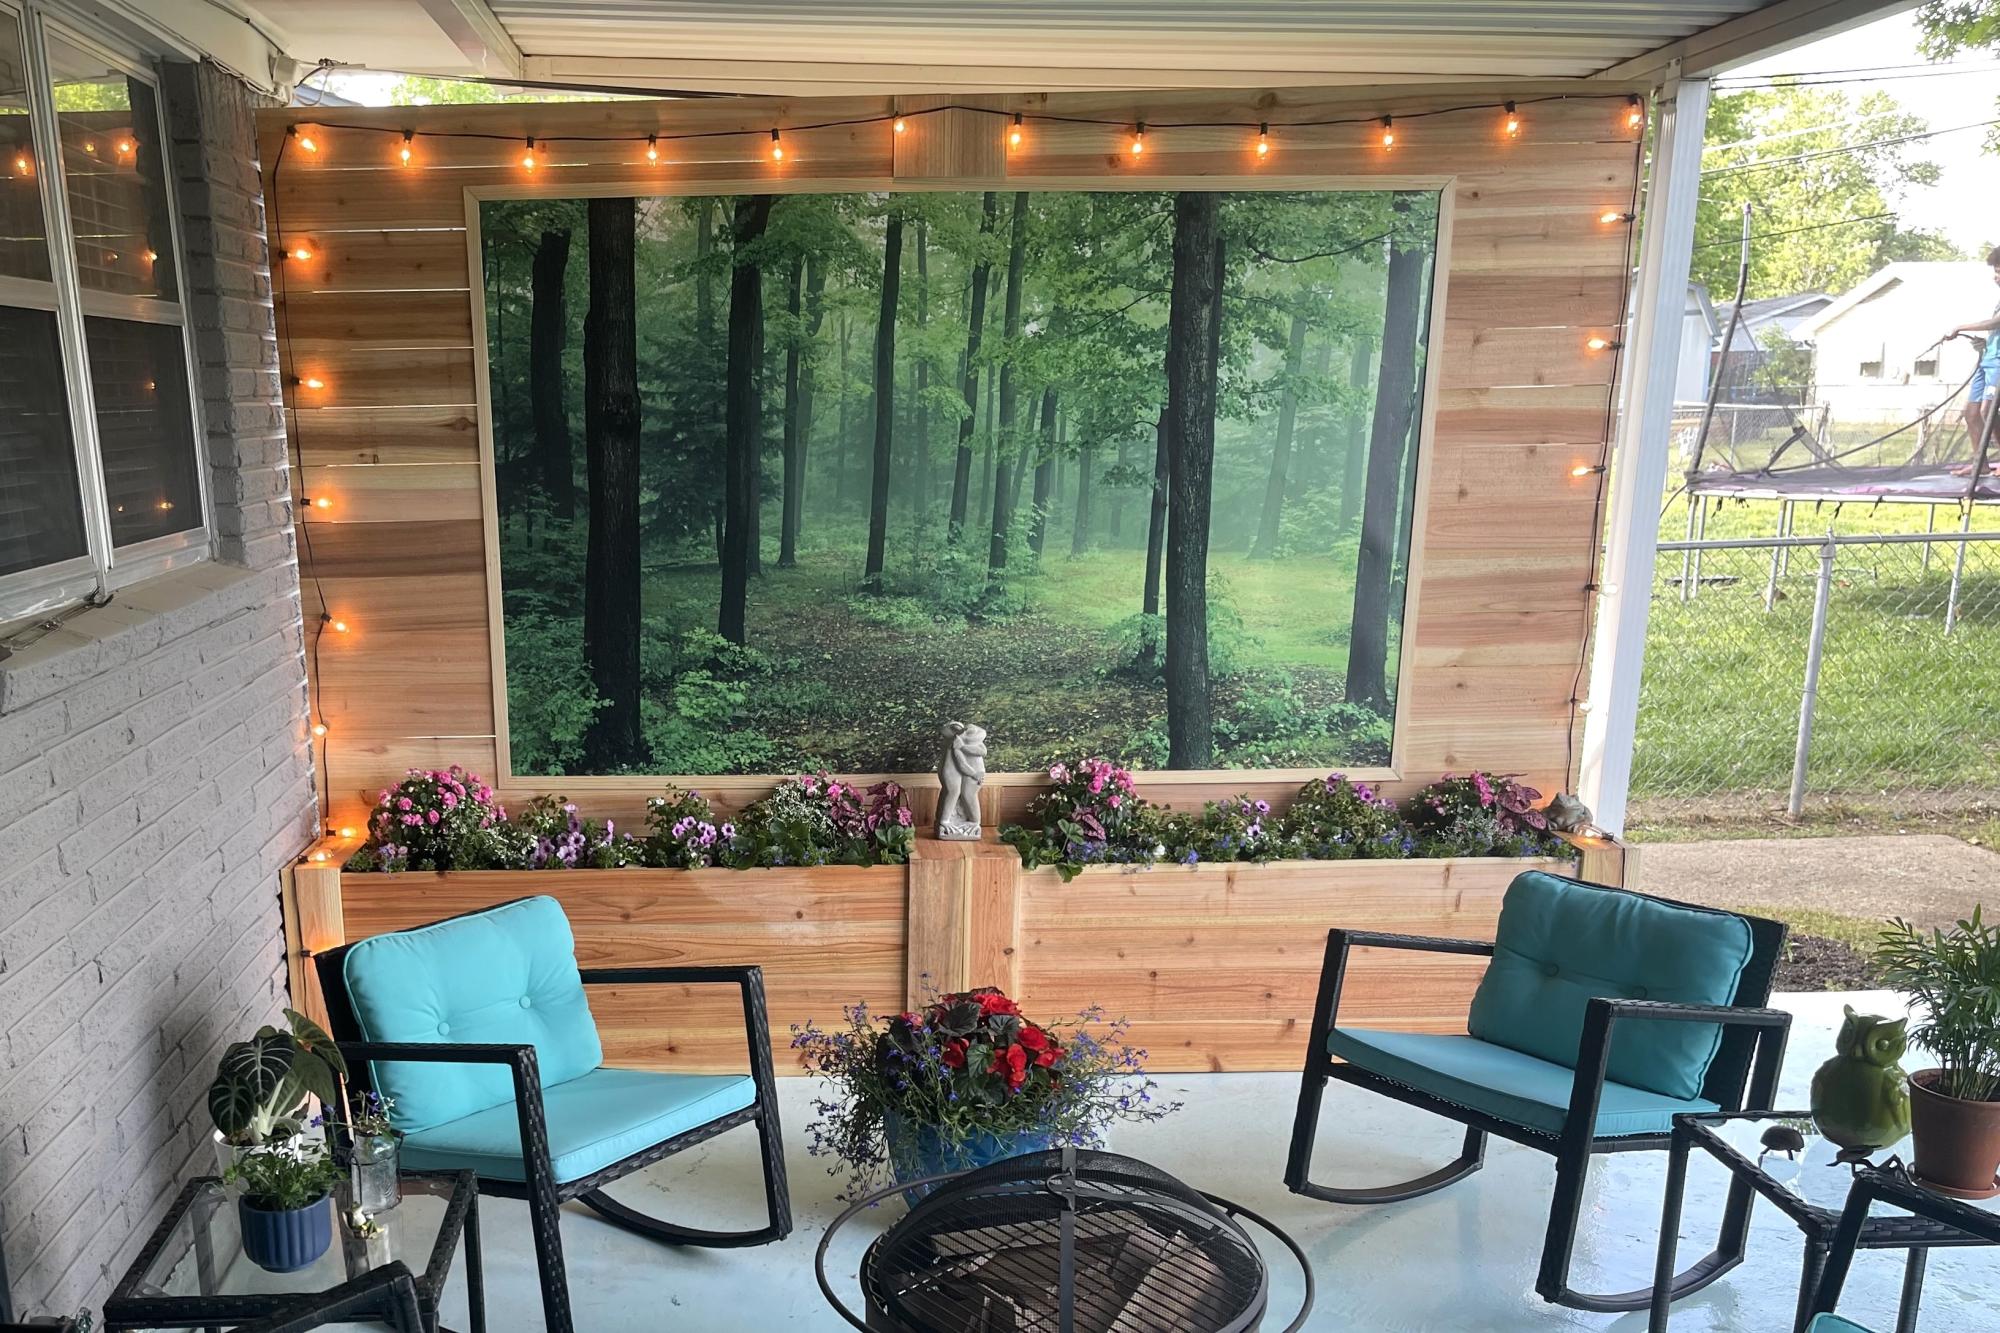
I wanted a huge cabana for my outdoor pool area to have a place guests could kick back and relax if they weren’t swimming. I took the plans from the one arm and armless outdoor sofas and modified the plan to include posts and a lattice top for shade. This inspired plan was finished off with cushions from at home and features seating comfortably for 9. Everyone loves this area in the backyard to kick back! At night we have solar lights twinkle at the top and they complete the project perfectly with a soft twinkle.
Fri, 06/02/2023 - 11:21
This is amazing! Great work on this project, thank you so much for sharing photos!
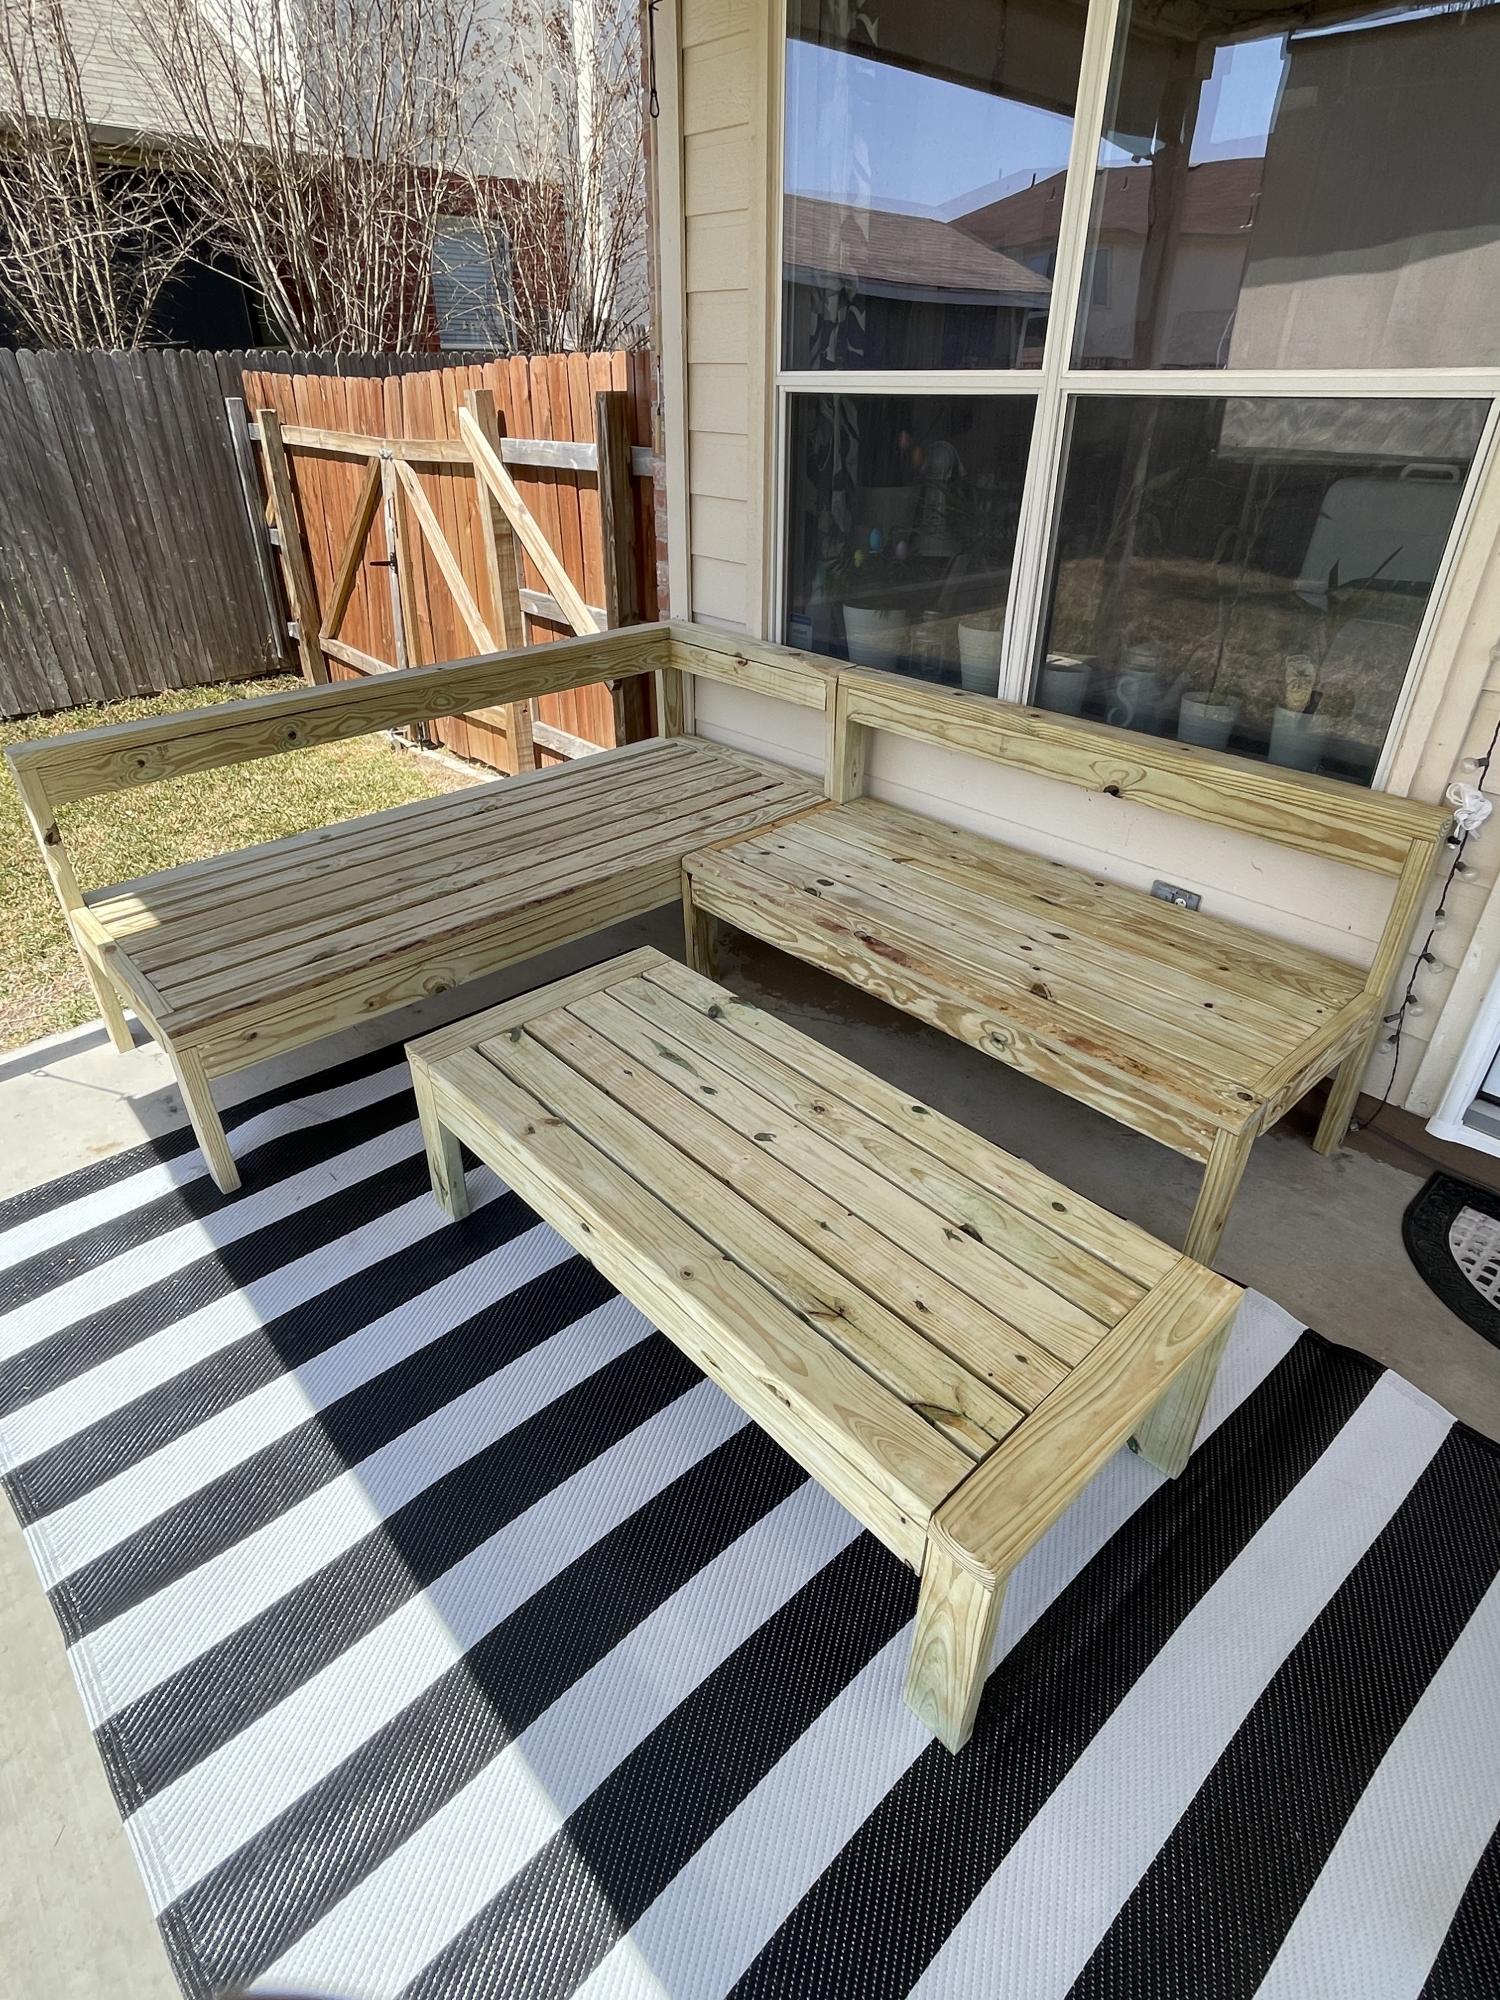
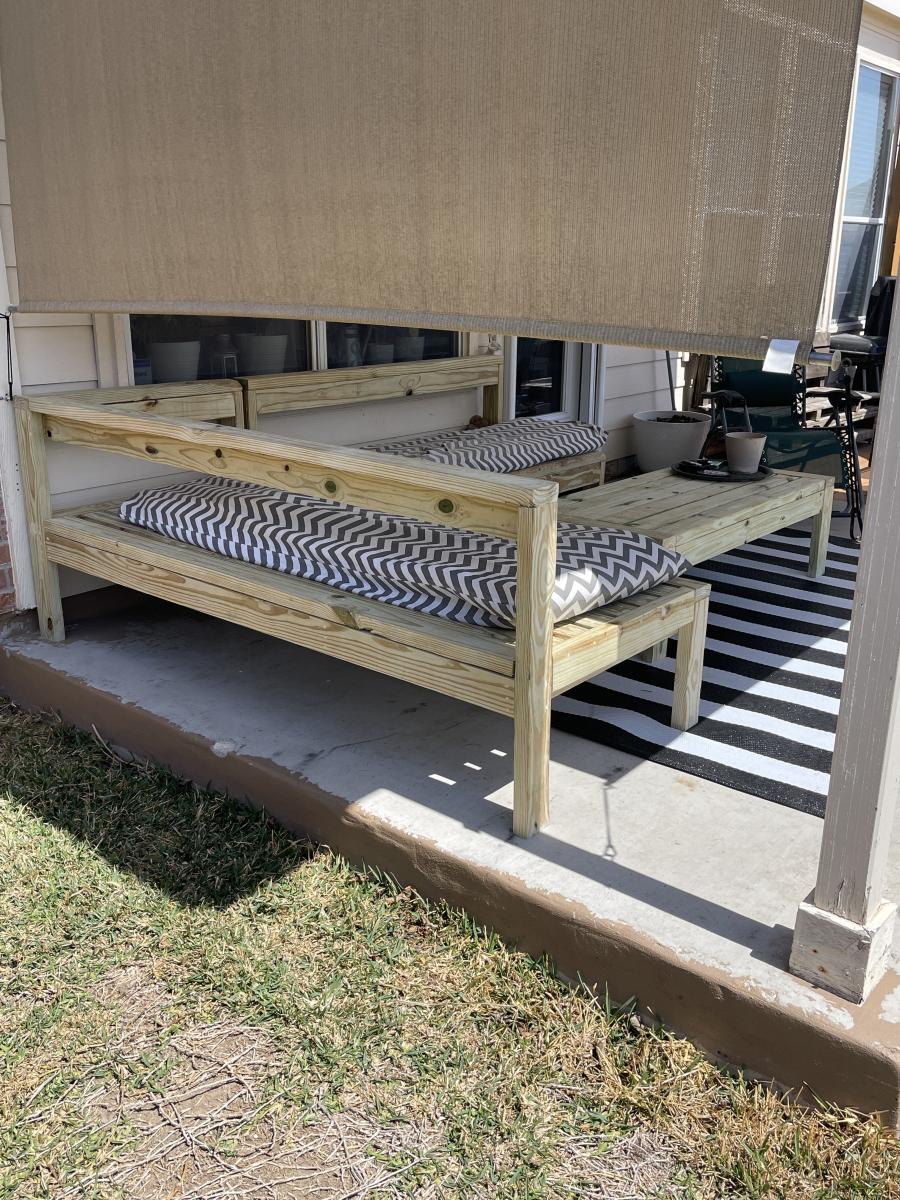
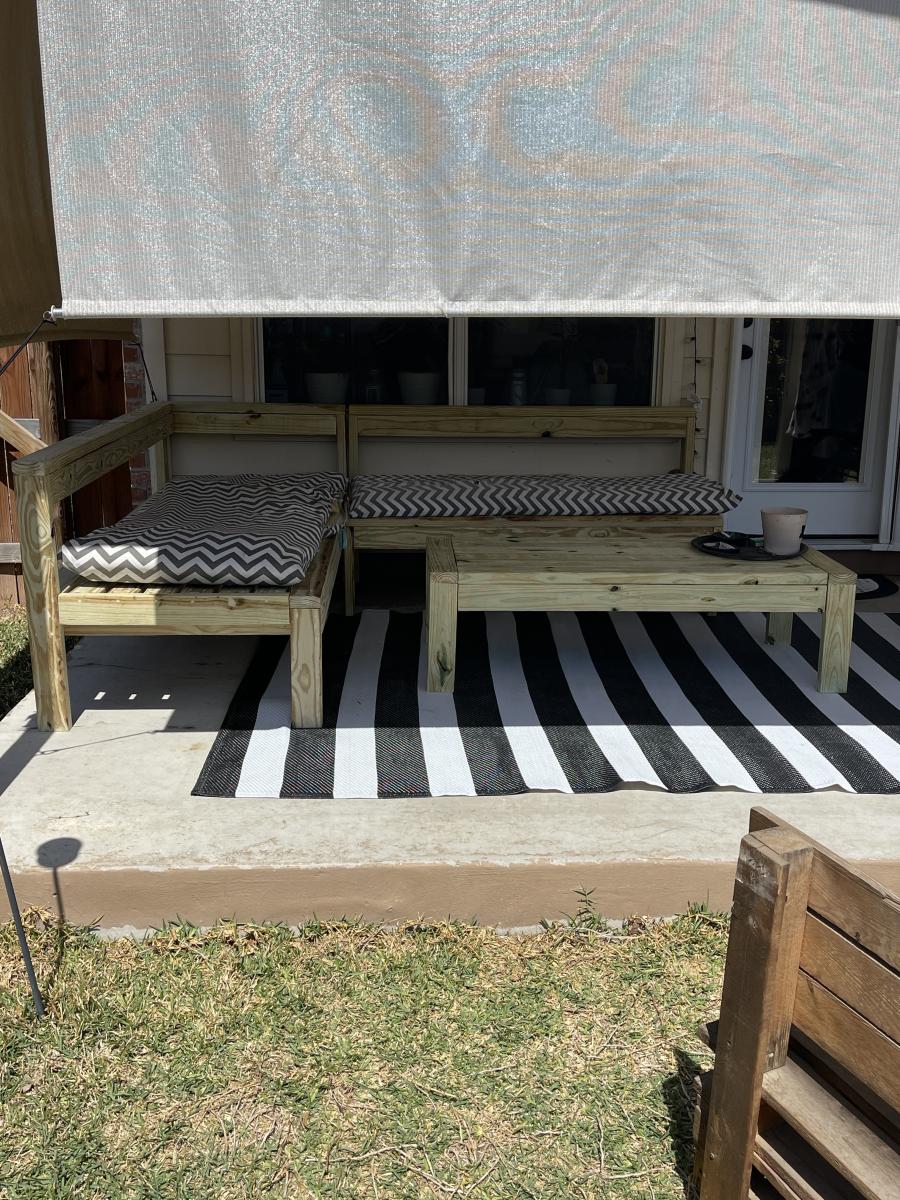
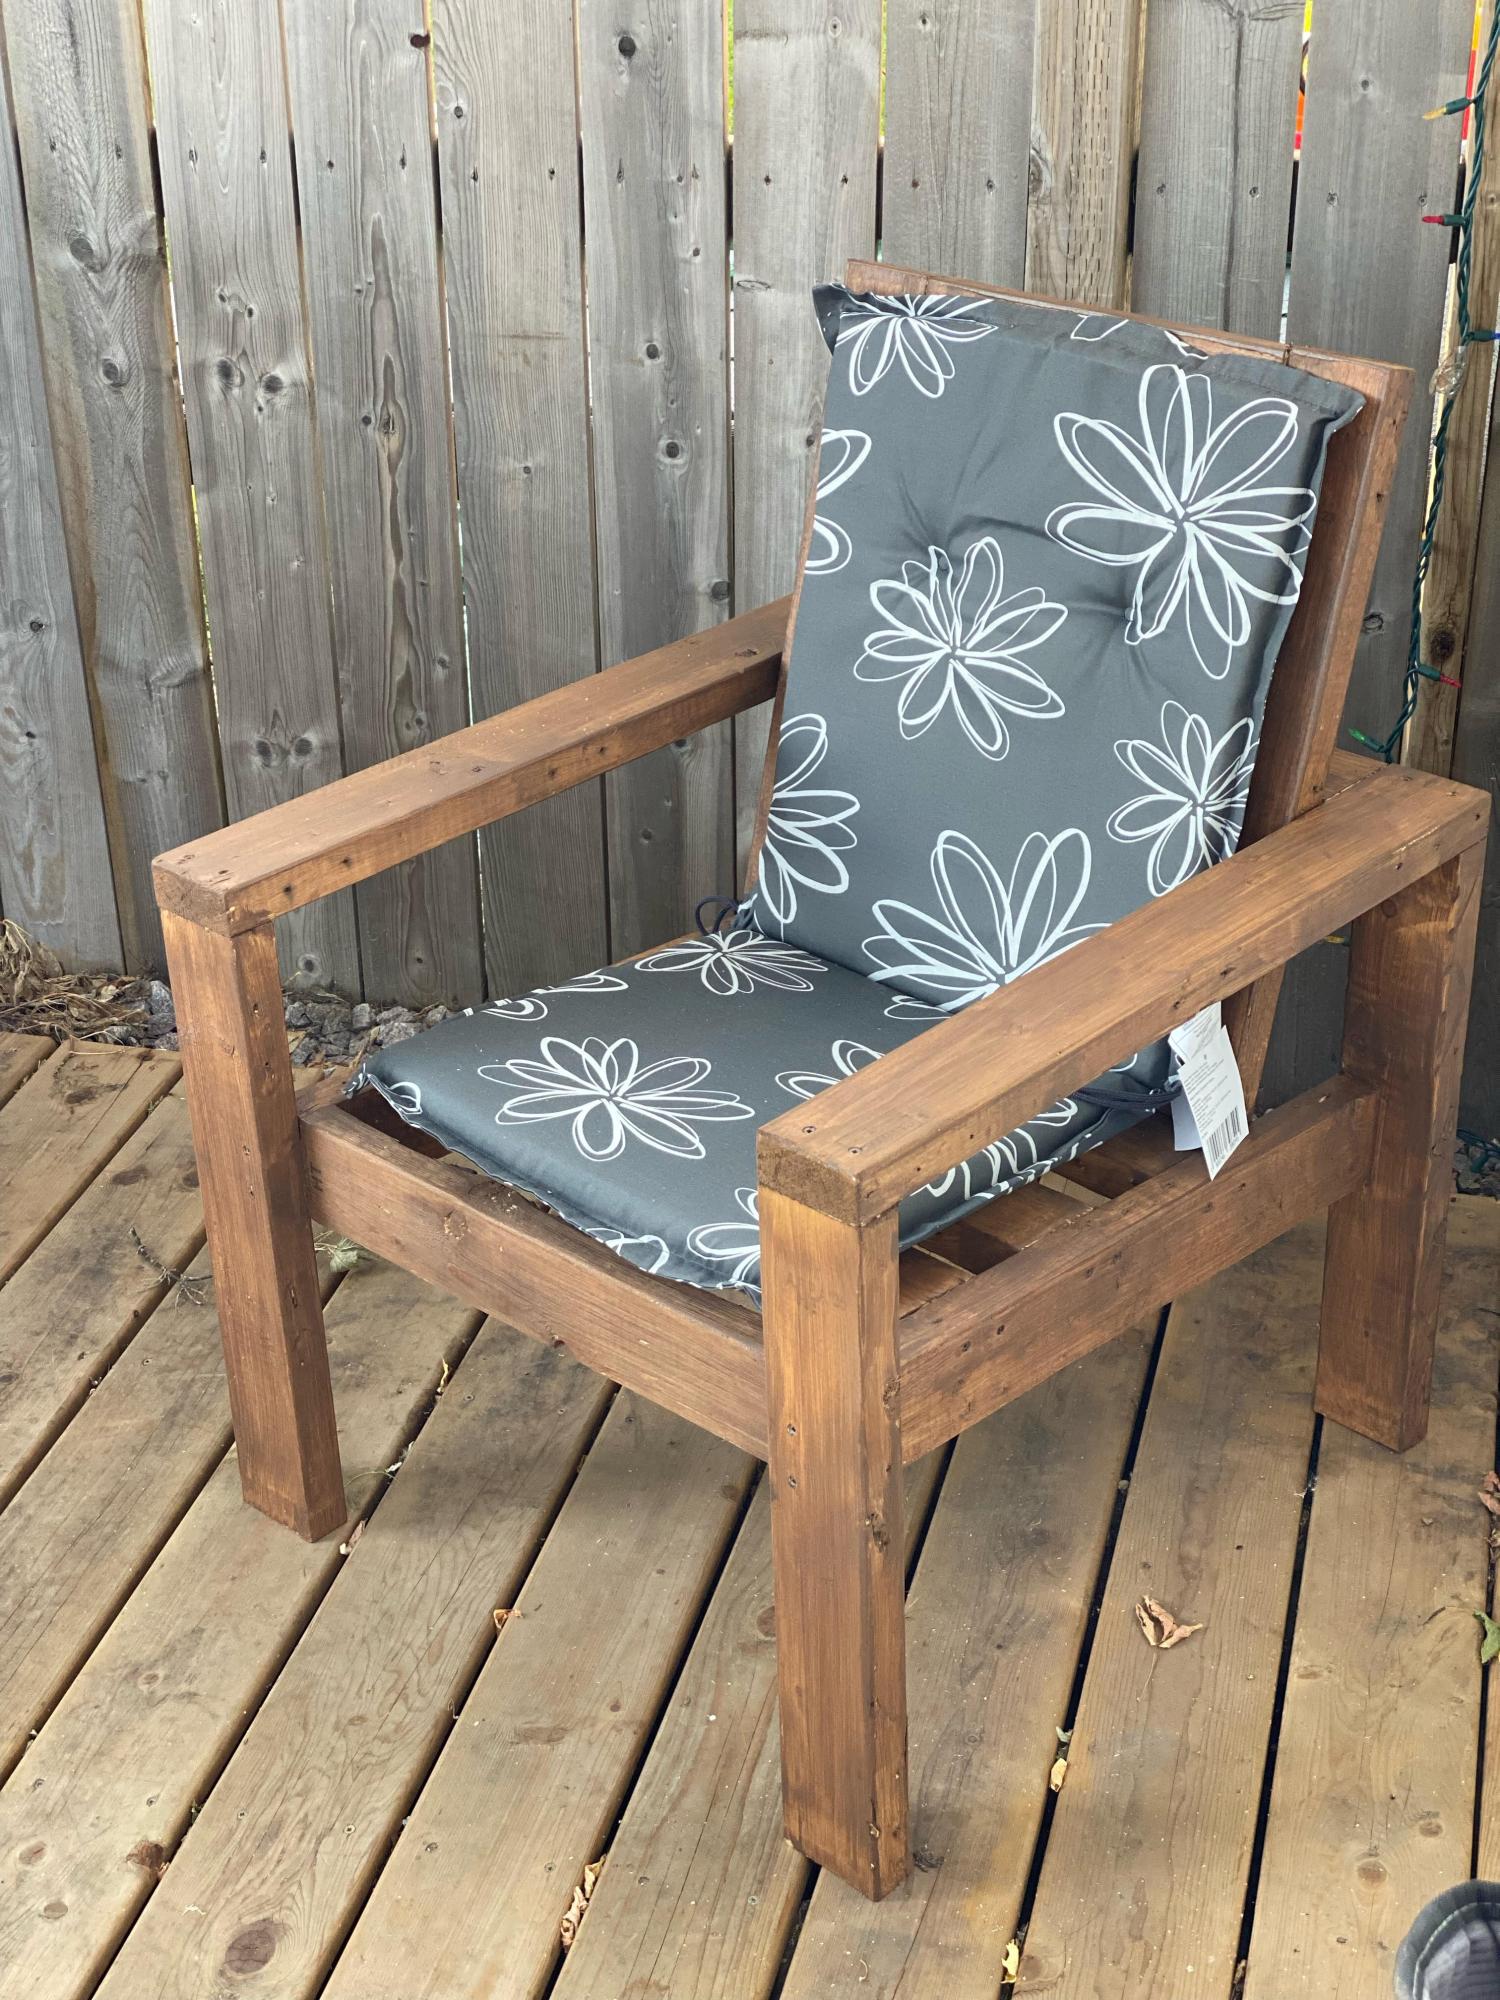
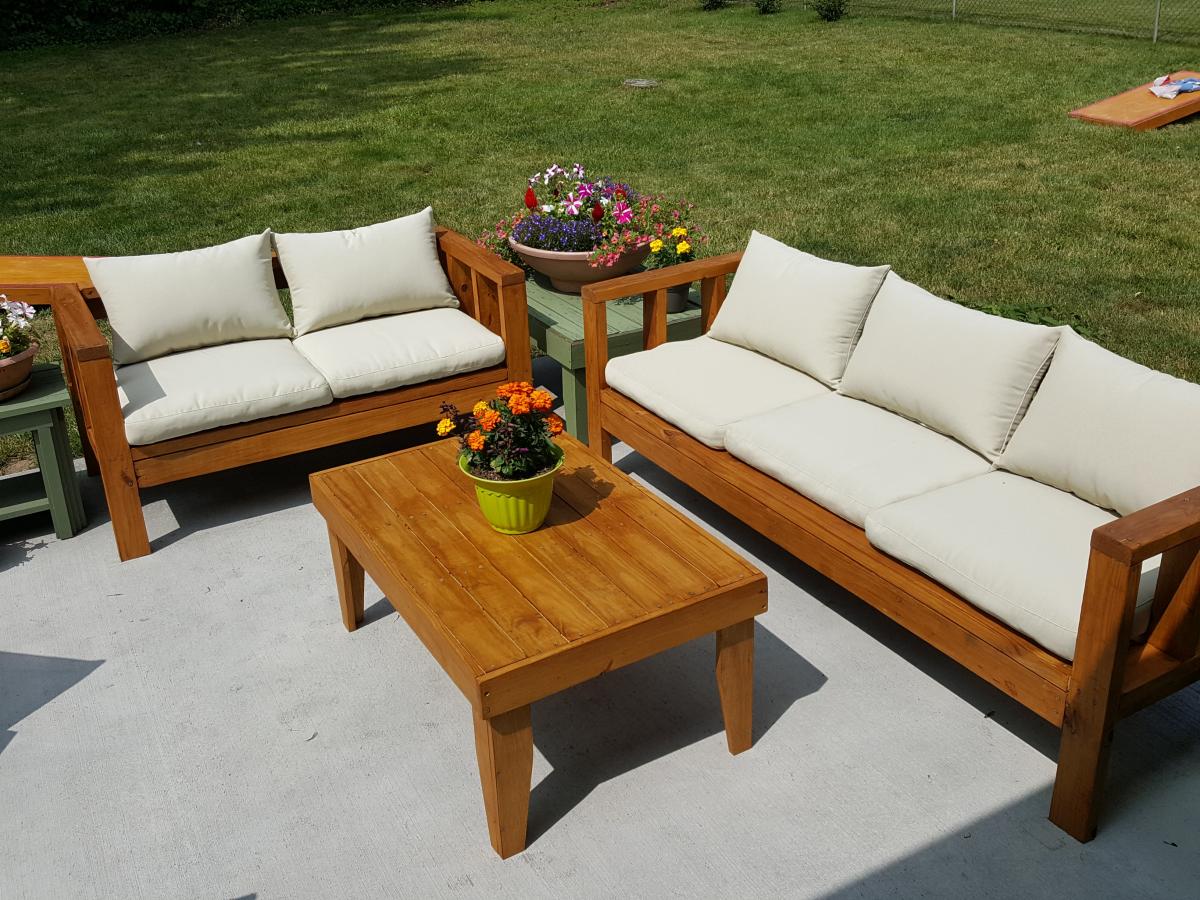
Loving this furniture! We modified it slightly by raising the height of the couches. Added some height and a slight tilt in the back. The chairs are super comfortable as the plans are done. We used 6” 25x25 cushions. We plan on staining soon.
Jaime Sallis

Comments
Ana White Admin
Tue, 10/05/2021 - 09:21
Great build!
That looks very comfy and inviting! Thanks for sharing:)