Community Brag Posts

Rustic X Kitchen Island with 4x4 Legs

Submitted by Rich2727 on Fri, 06/20/2014 - 10:52

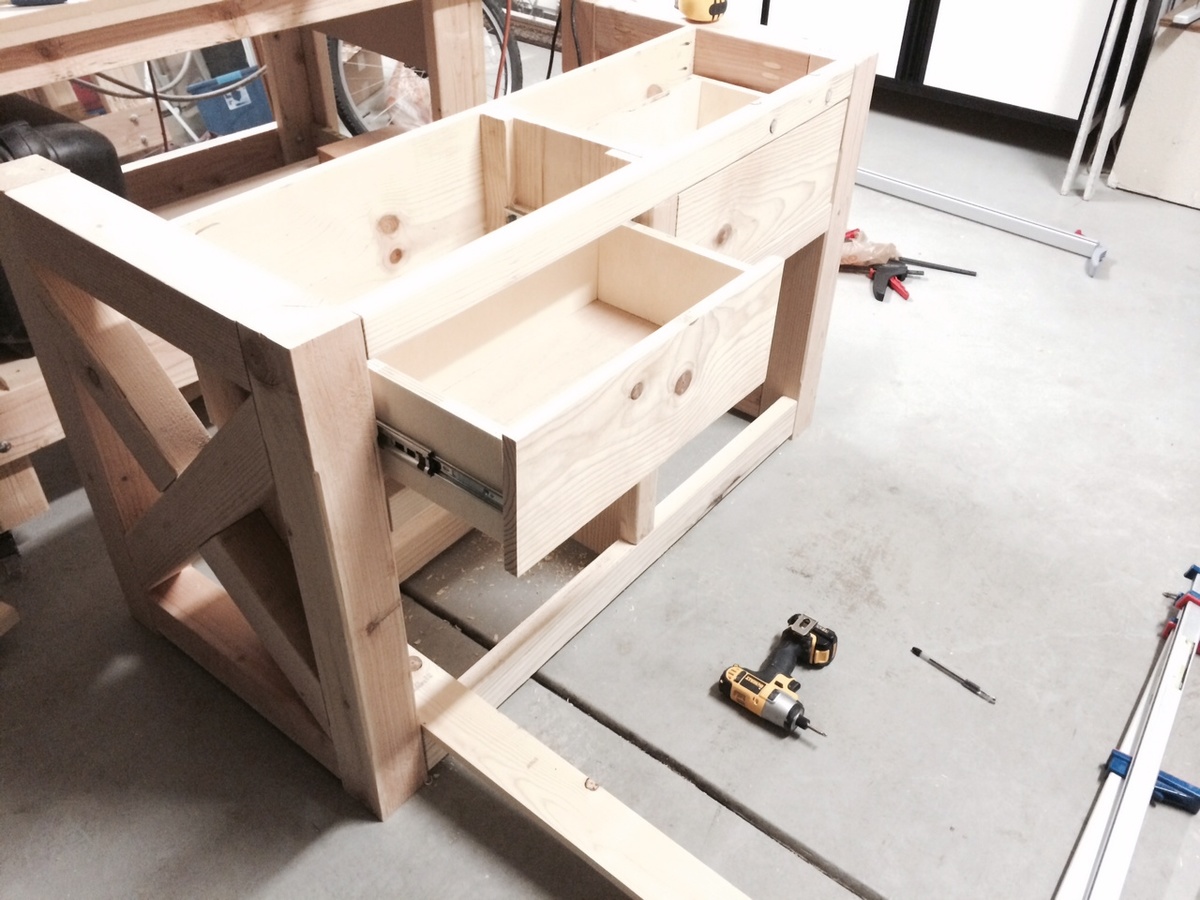
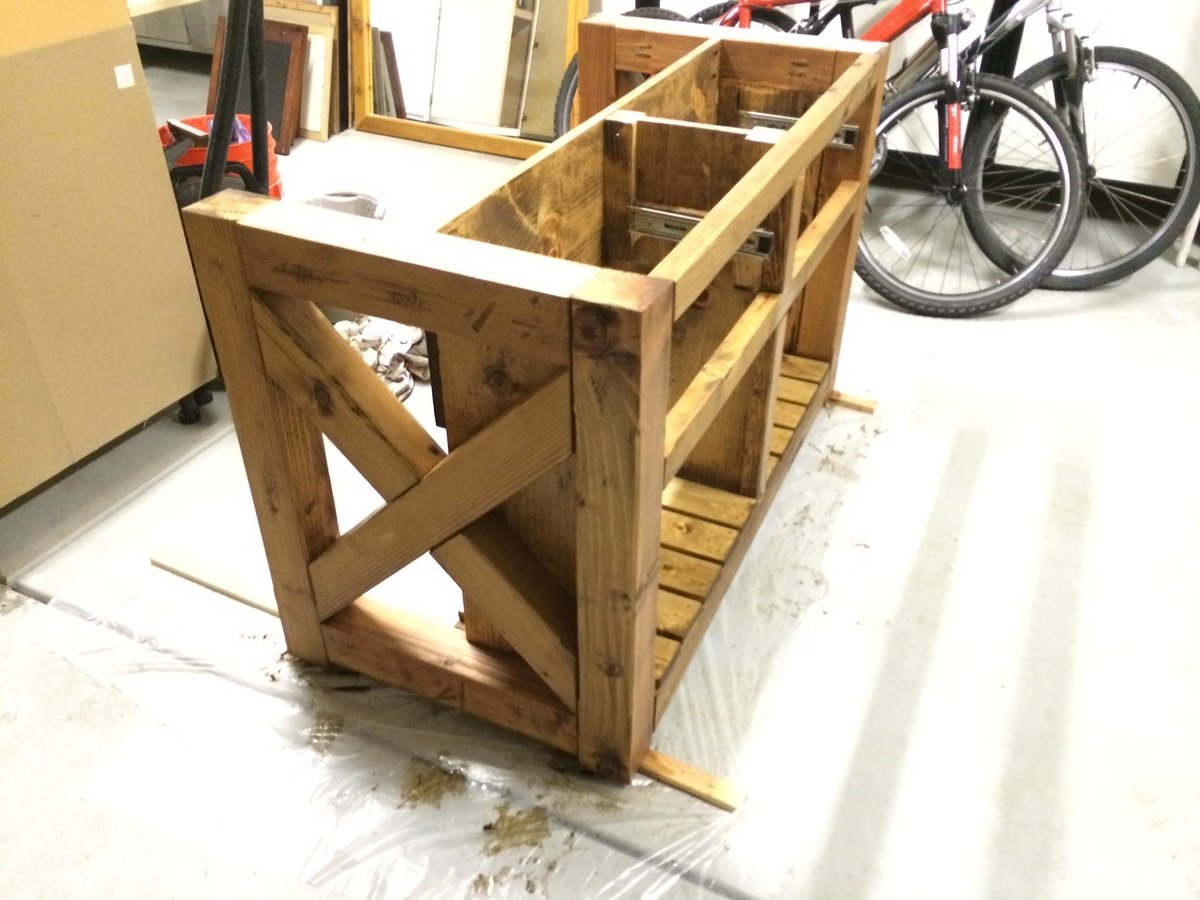
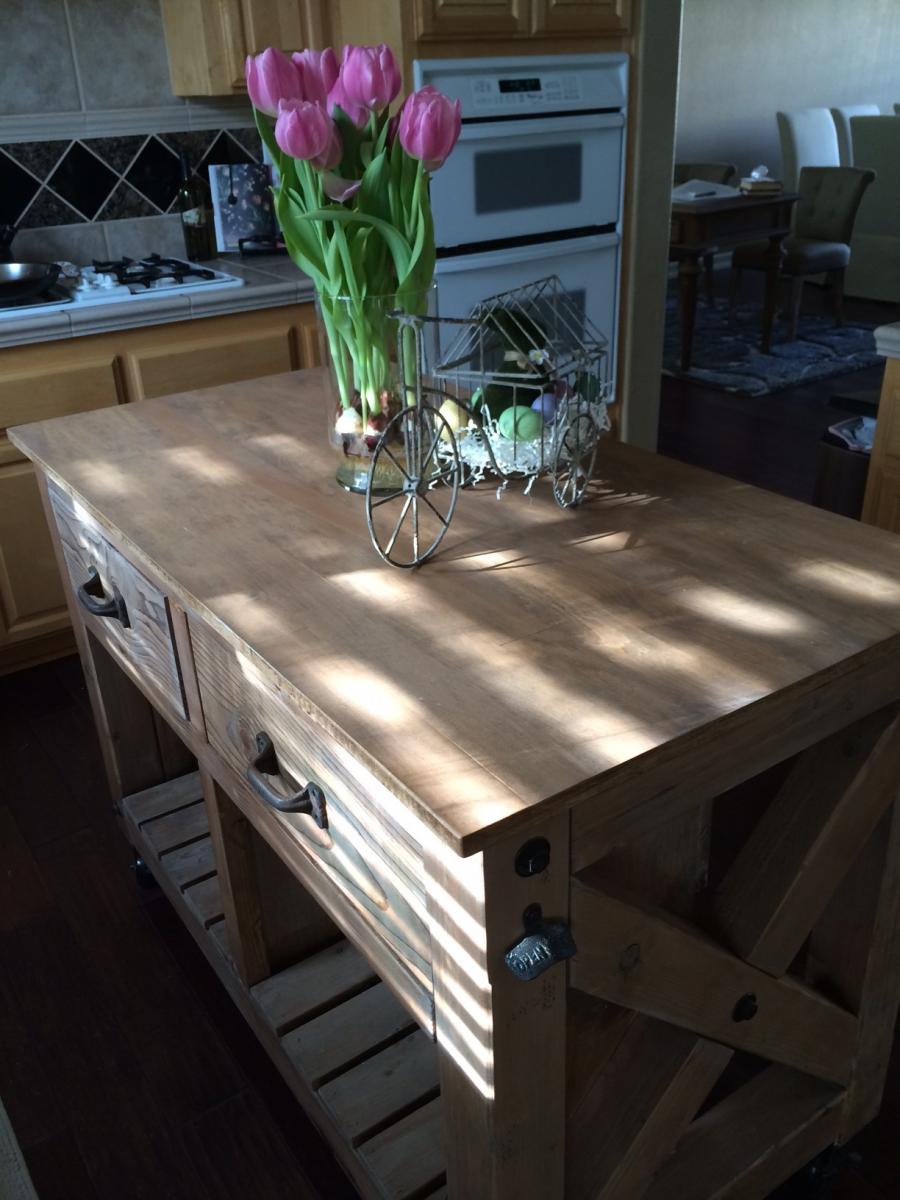
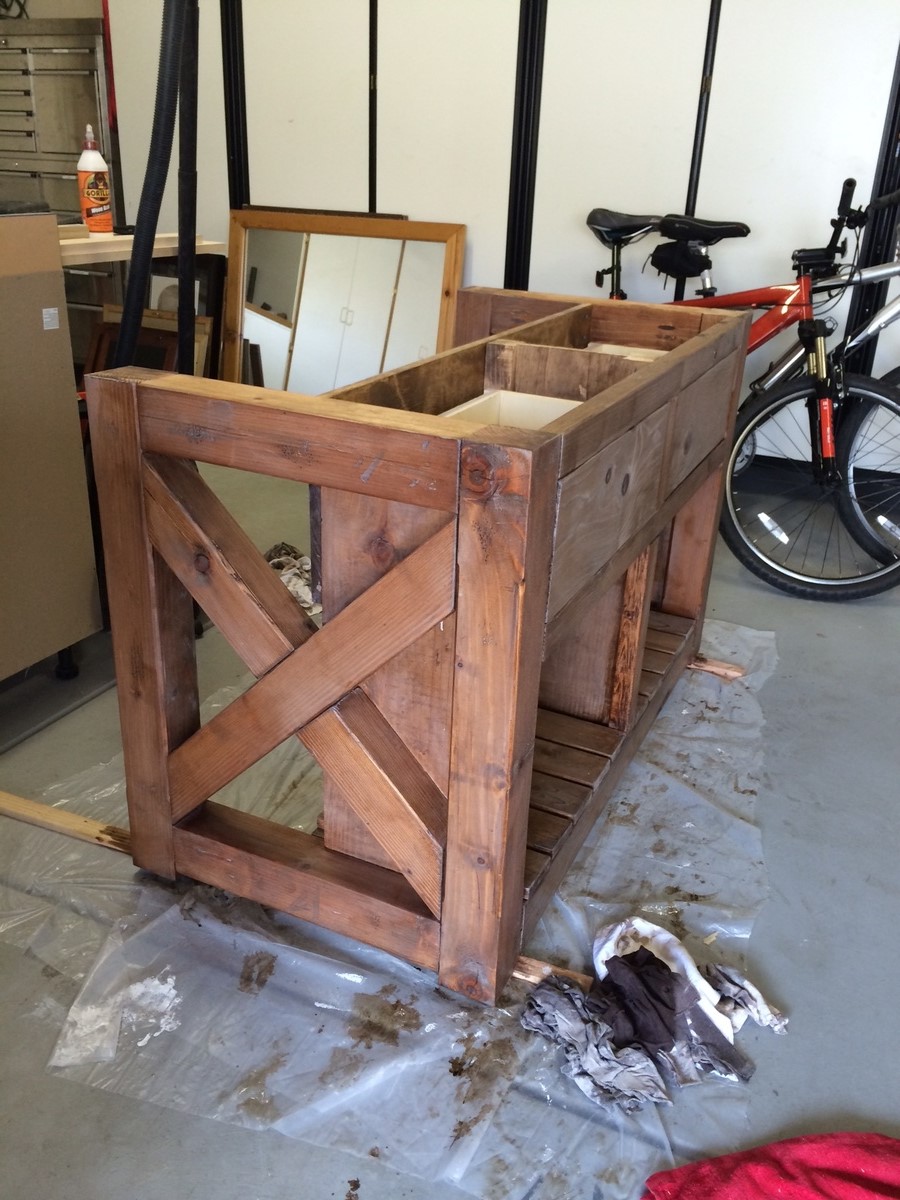
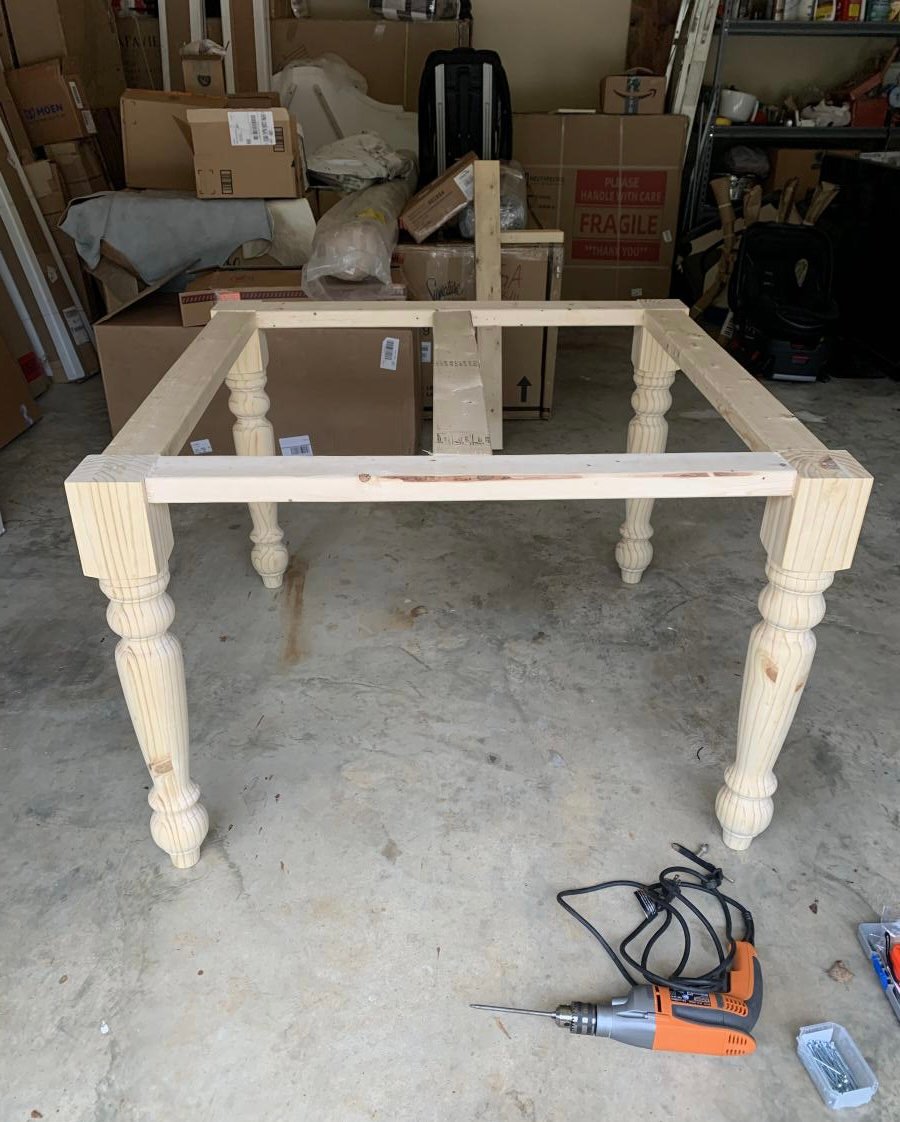
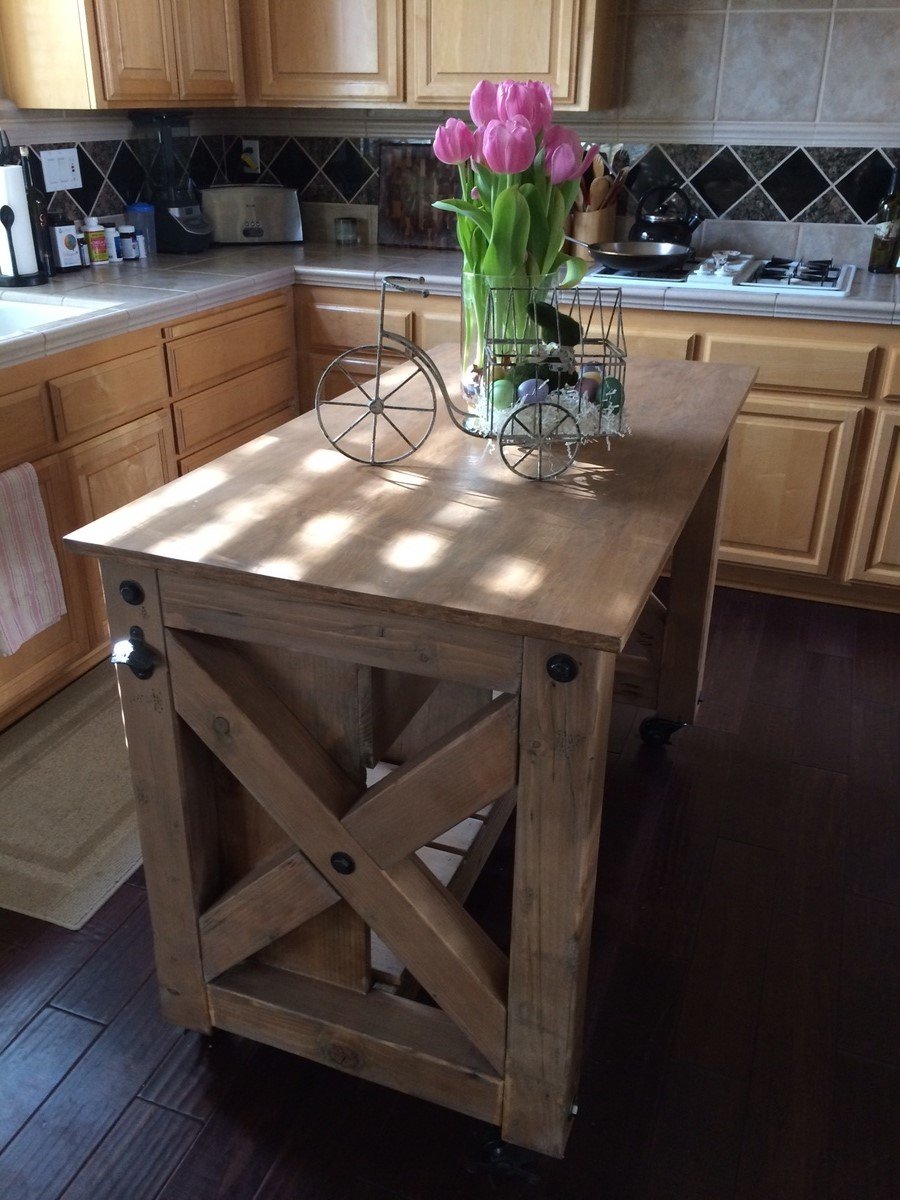
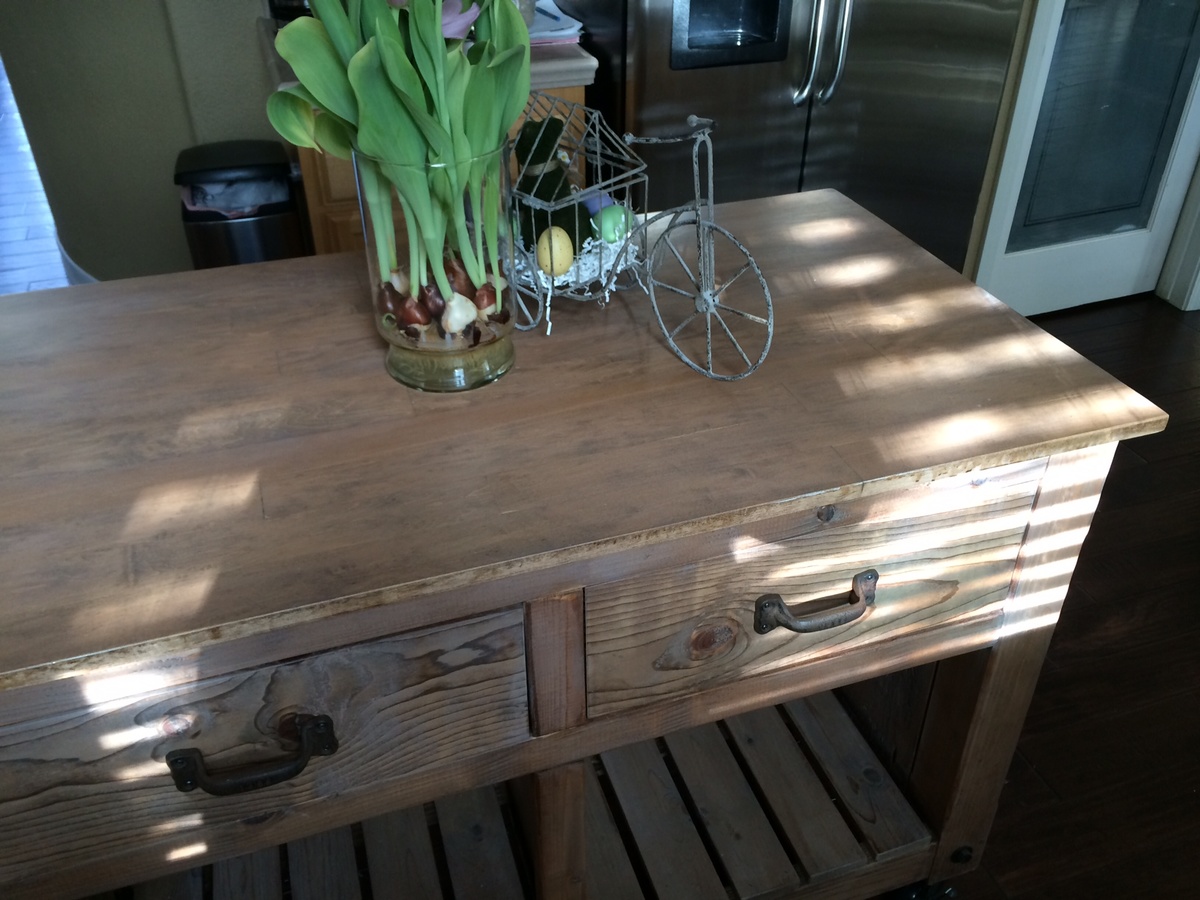
In order to make this island a little beafier I used 4x4 wood for the X as well as the the top and bottom braces. Top is made up of glued up 1x3 maple wood. It looked really good raw, but decided to stain it to give a more uniform look. I bought the rustic handles and the bottle opener on Amazon.com. I used lag bolts and washers for the finishing accents...similar to the pottery barn island. Painted them with Rustoleum oil bronzed paint and then dabbed it with a paper towel to give it a rougher finish to it and then sprayed the casters as well. This was a fun project and are getting a lot of use out of it. Thanks goes to Anna for the plans and inspiration for this island. Rich

Built from Plan(s)
Estimated Cost
$300
Estimated Time Investment
Week Long Project (20 Hours or More)
Recommended Skill Level
Intermediate

Comments

Mriddle

Fri, 06/20/2014 - 11:44

i keep debating if i should do this, you did a great job. i like the 4x4 sides.

Susan Hubbard

Sun, 06/22/2014 - 08:25

Rich, I love the changes you made with the 4x4's. You made a gorgeous piece of furniture! Can you share with me where/how you attached the drawer/shelf sides? I'd like to follow how you made this, but can't tell from the pictures. On the original they look inset from the 2x4's, but your space is taken up by 4x4's. Would you mind sharing??? Thanks!

Rich2727

Mon, 06/23/2014 - 16:36

So, I ripped the 4x4 cross pieces down by 1/2" so that the side panels would rest inside the rectangle and flush with the 4x4 frame and up against the X.

Did that make sense?

Susan Hubbard

Mon, 06/23/2014 - 18:28

That's what I thought, but I wanted to make sure. I'm going to make one similar to yours :)

Susan Hubbard

Mon, 06/23/2014 - 18:28

That's what I thought, but I wanted to make sure. I'm going to make one similar to yours :)

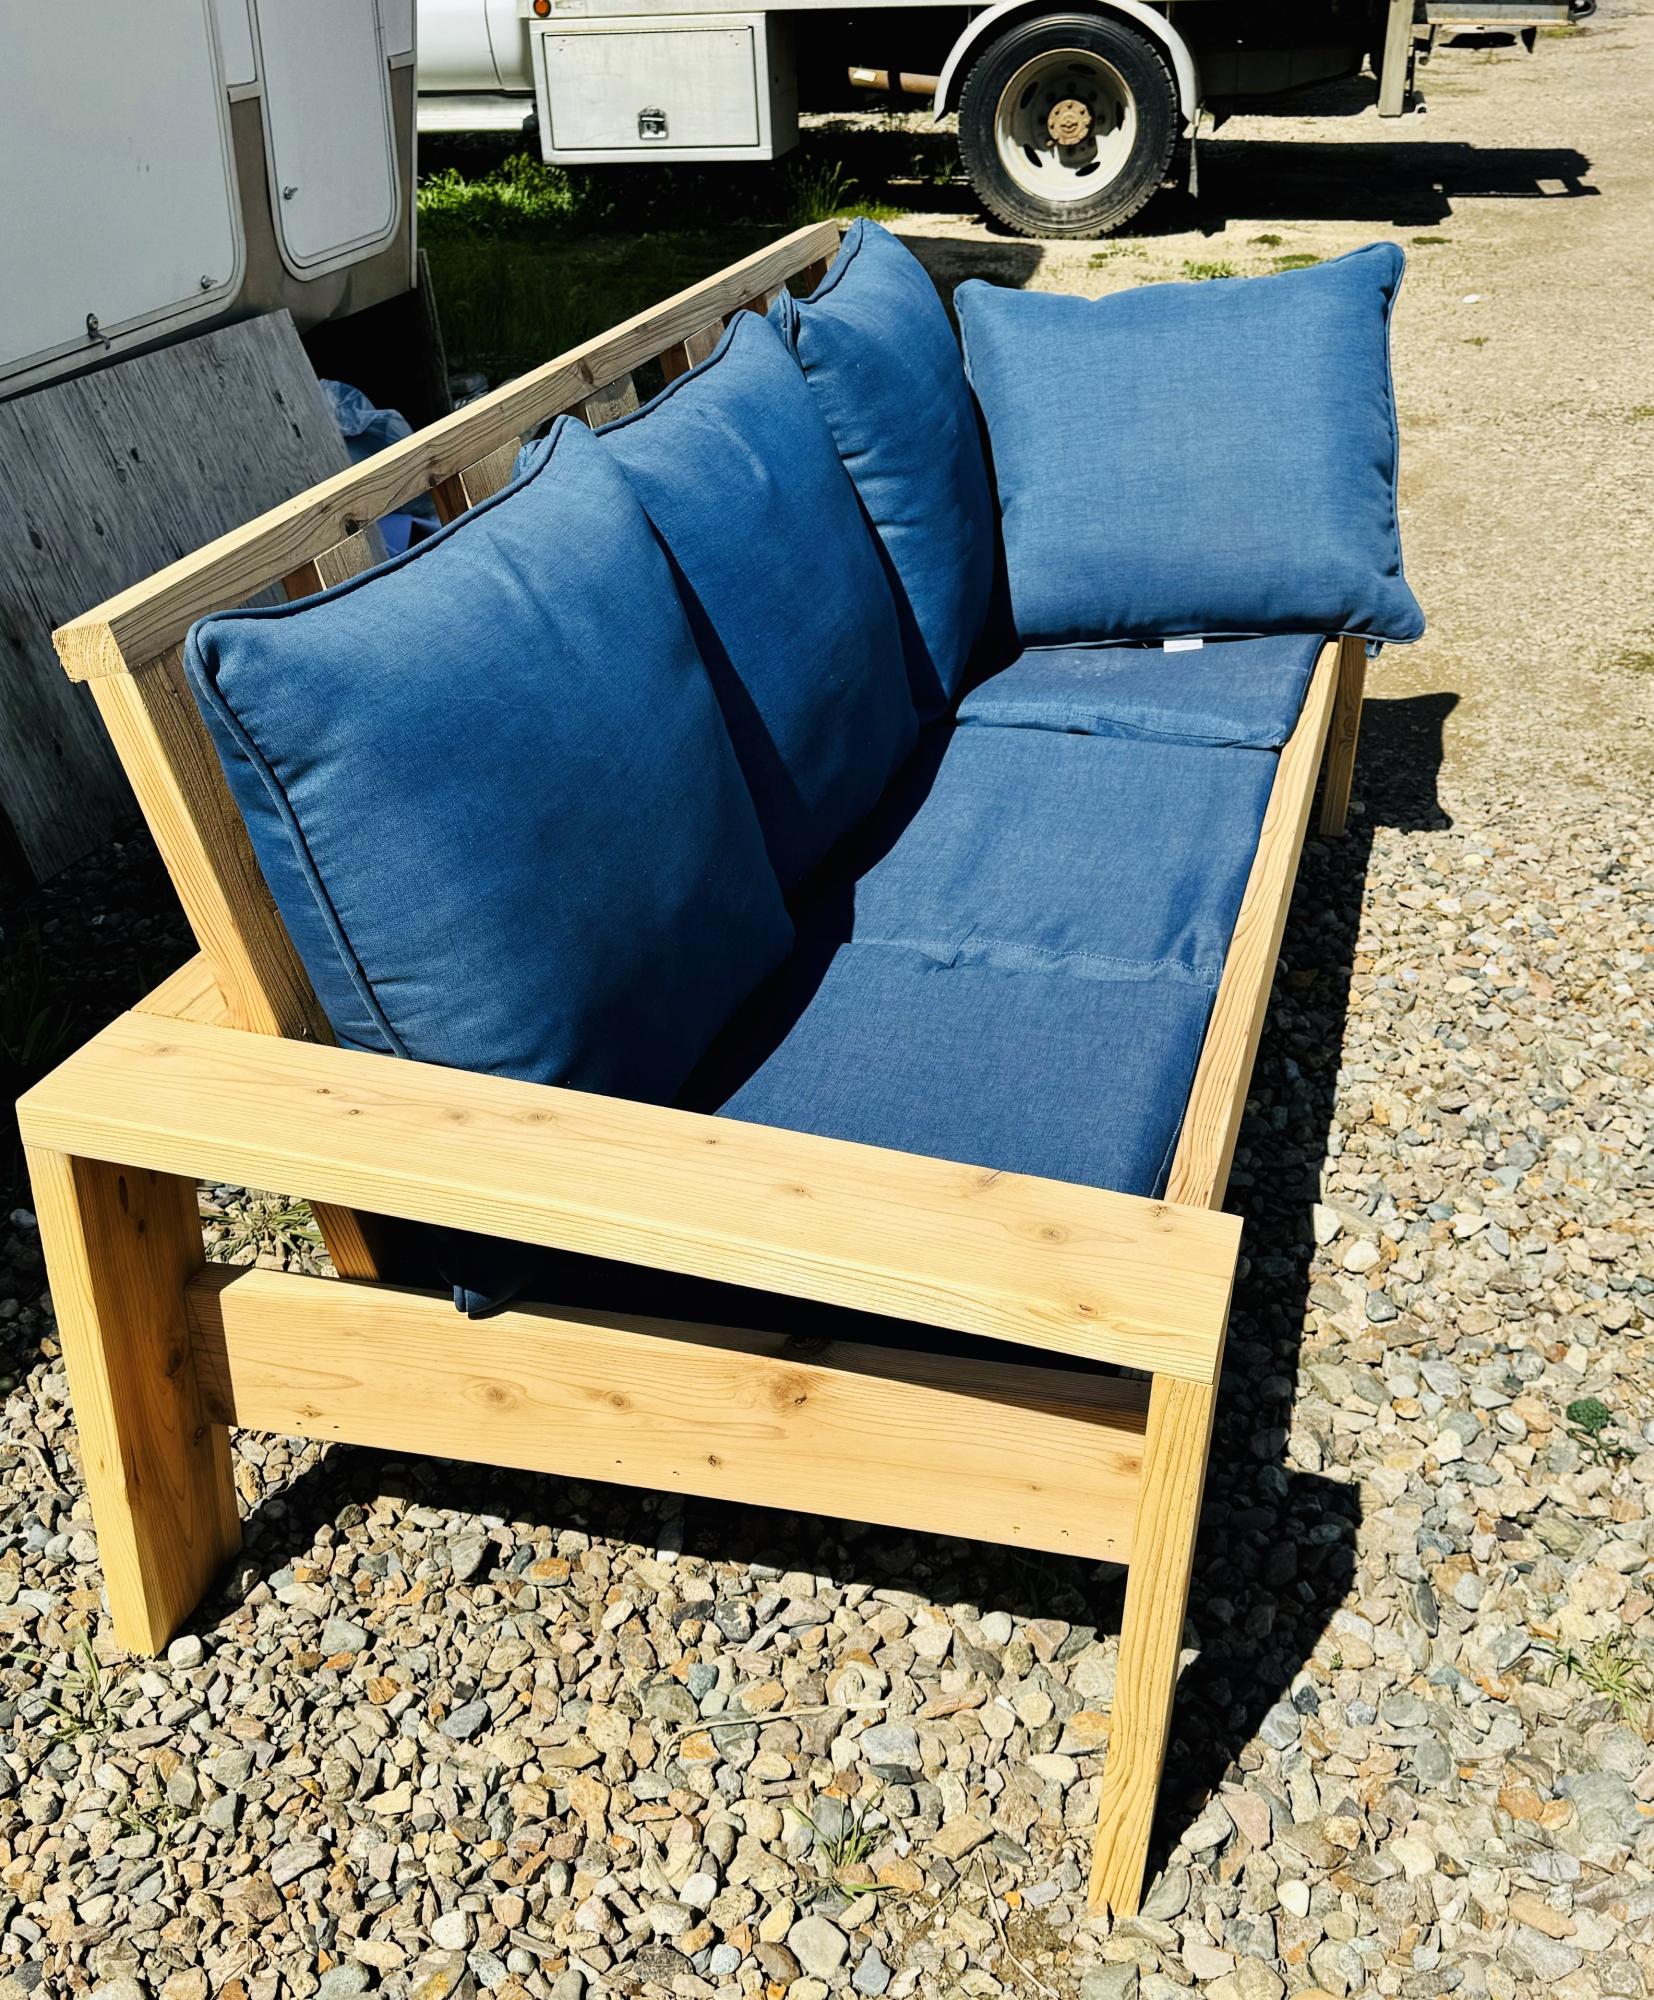
Cedar Outdoor Sofa

Submitted by Anonymous (not verified) on Mon, 05/06/2024 - 13:17

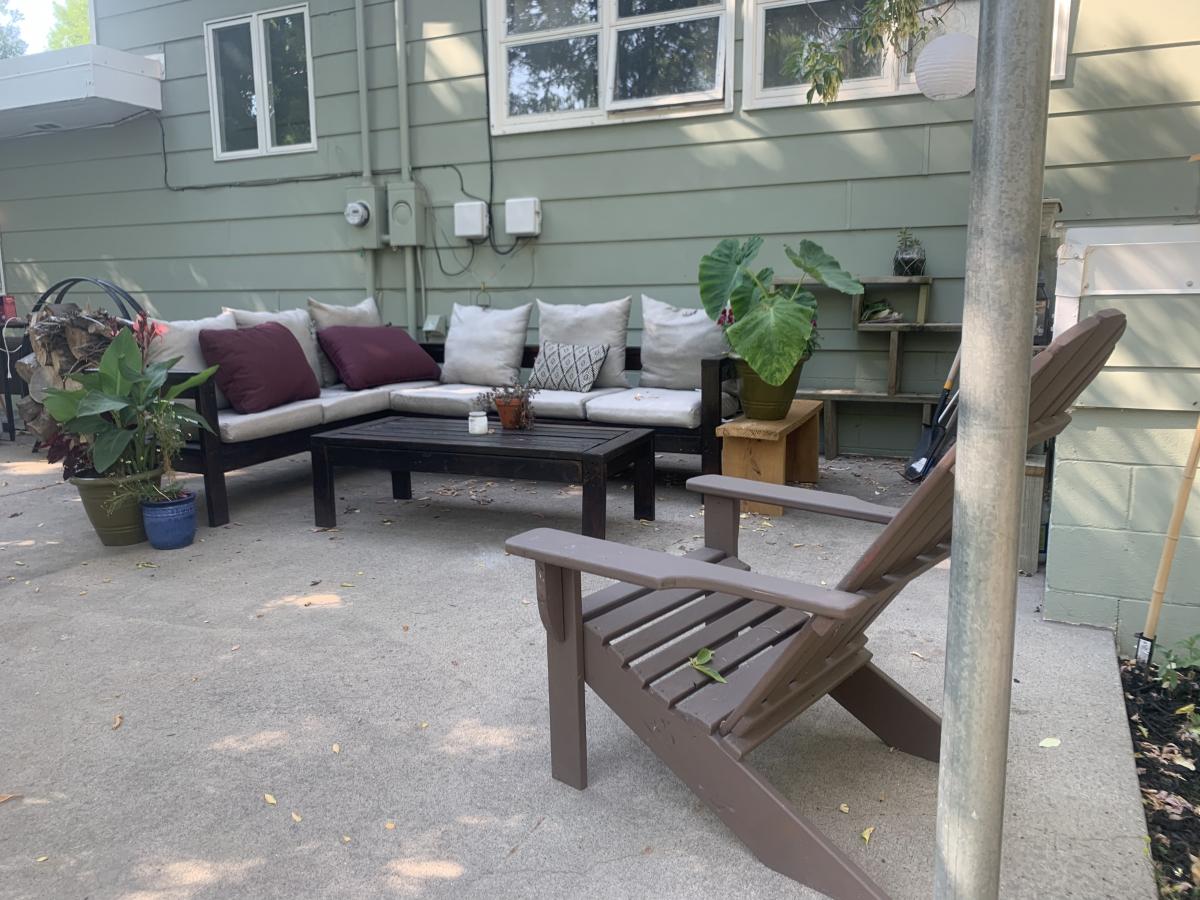
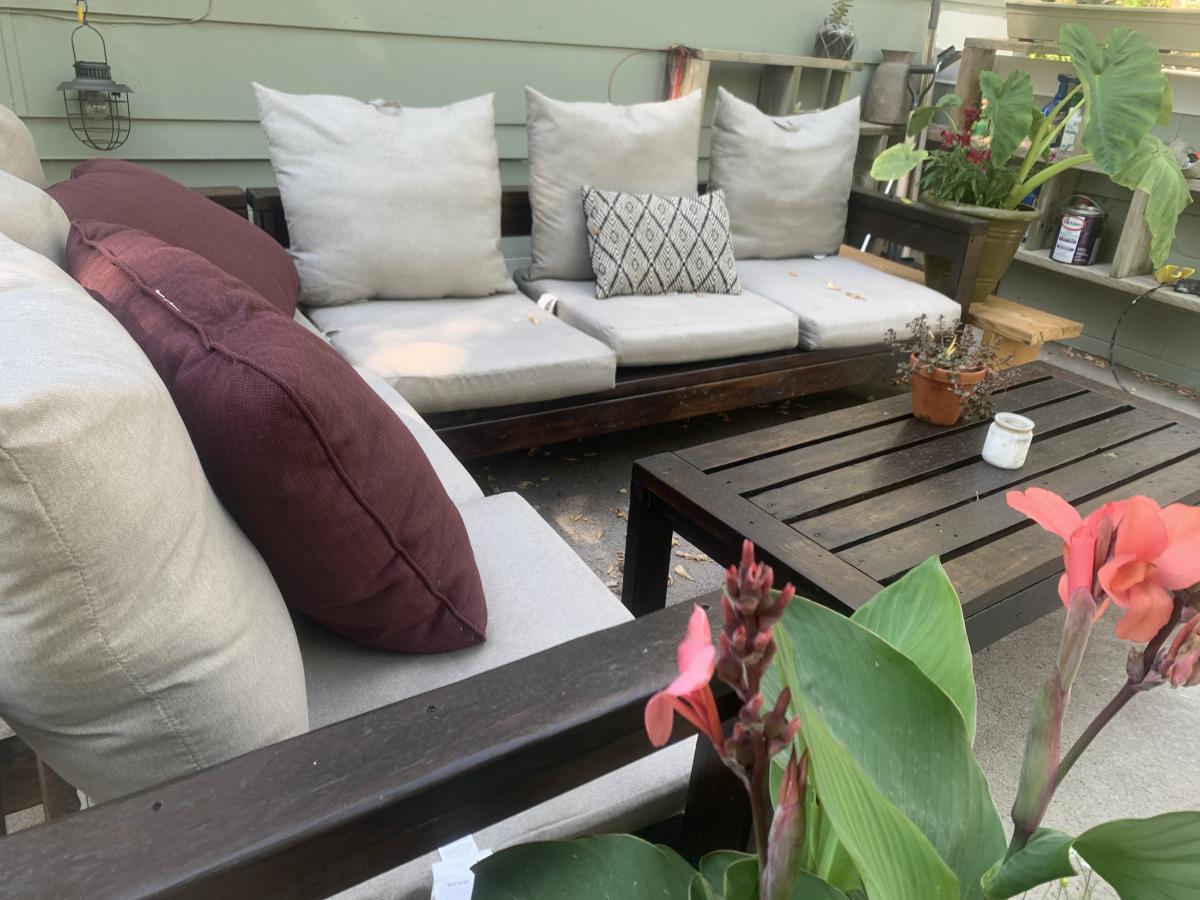
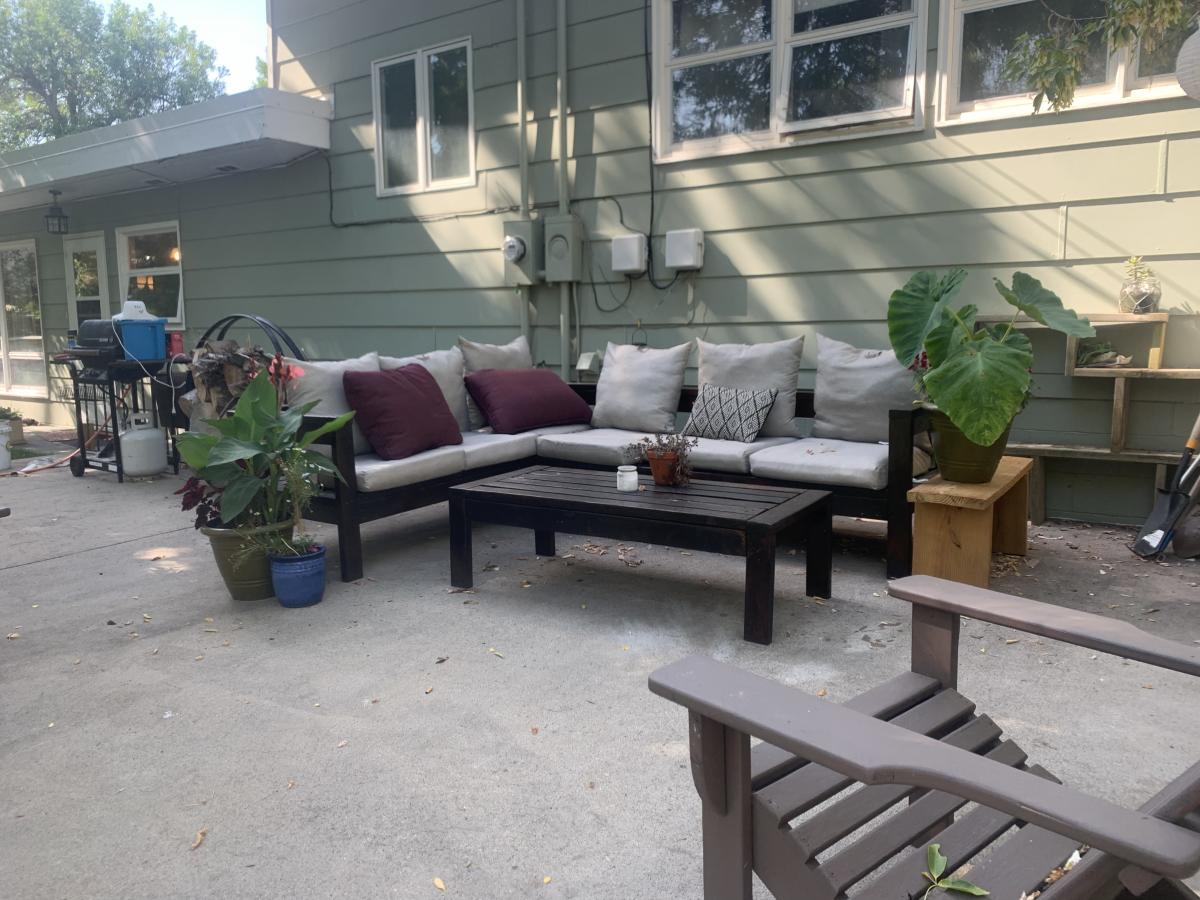
Two projects that I recently built for my wife and my daughter. My wife wanted a tea bar and a beach vibe, my daughter wanted an outdoor couch so it is made out of cedar. They both loved them.

Todd Springer

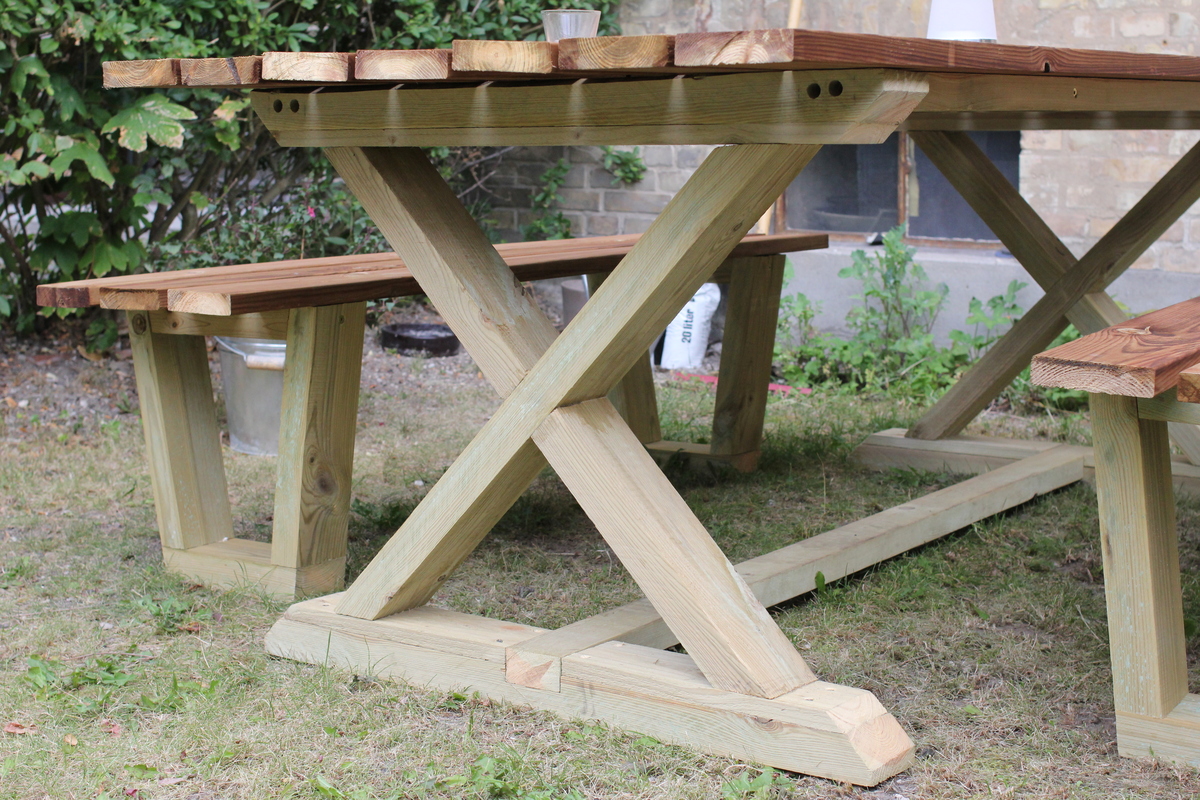
Freestyle X diningtable with fancy benches

Submitted by JSteenberg on Fri, 09/21/2012 - 03:48

Even though the summer has come to an end, I decided it was time for some new furniture for my small garden in the city. I looked in different stores, but for a student the prices were very much out of range. I then decided that perhaps it would be cheaper to build by myself and an interesting project as I've never worked with wood in a 1:1 scale. I came across the plans for the fancy x, table and farmhouse table and figured that it should be something like that. I made the table and benches in Sketchup, but wasn't really sure about a variety of the aesthetic solutions. I then tweeked it and tried to come up with a new design for the benches that would mach the x shape without just repeating it, and i came up with the final design through a lot of experimentation. The benches can be made by a complete novice, and the table is also quite easy if you have the necessary tools. I'll give it a finish this spring, perhaps just paint it. I've received very good feedback on the project, and even though the benches are quite fancy, you sit very well in them and I think the aesthetics are somewhat accounted for by the easy assembly and comfort. Thanks for the inspiration, and I hope it will inspire you to build even more! The plan is in millimeters, and the planks are standard european sizes, but it should translate ok. PLAN Direct Download: https://dl.dropbox.com/u/2622939/X%20Diningtable%20with%20fancy%20bench…

Estimated Time Investment
Weekend Project (10-20 Hours)
Finish Used
None atm
Recommended Skill Level
Beginner

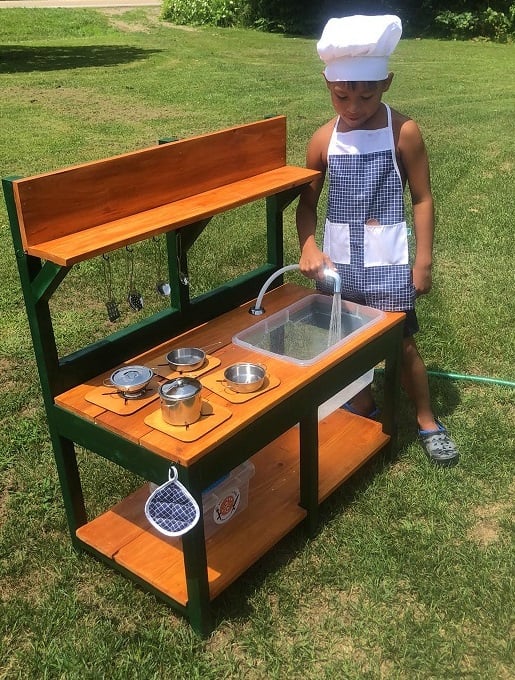
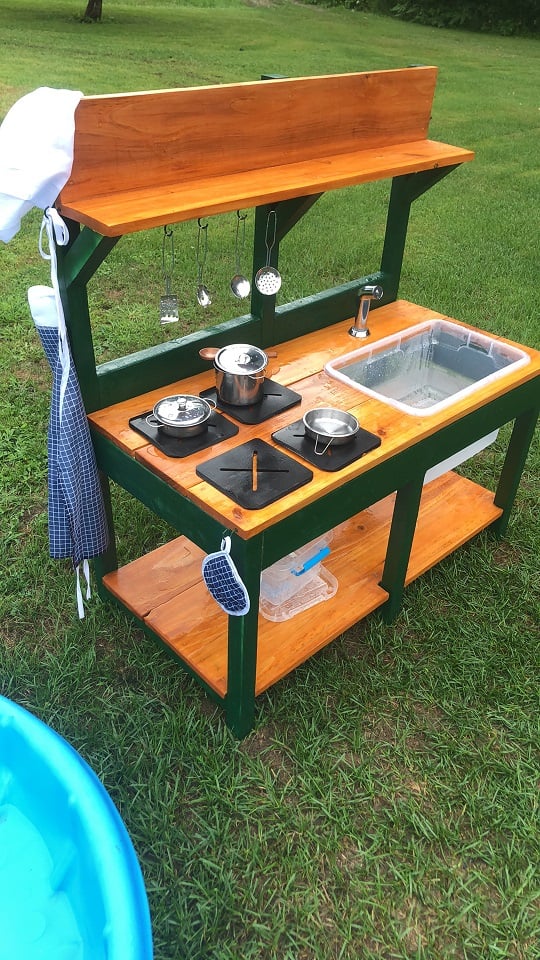
Mud Kitchen

Submitted by Noyehx4 on Mon, 07/20/2020 - 12:48

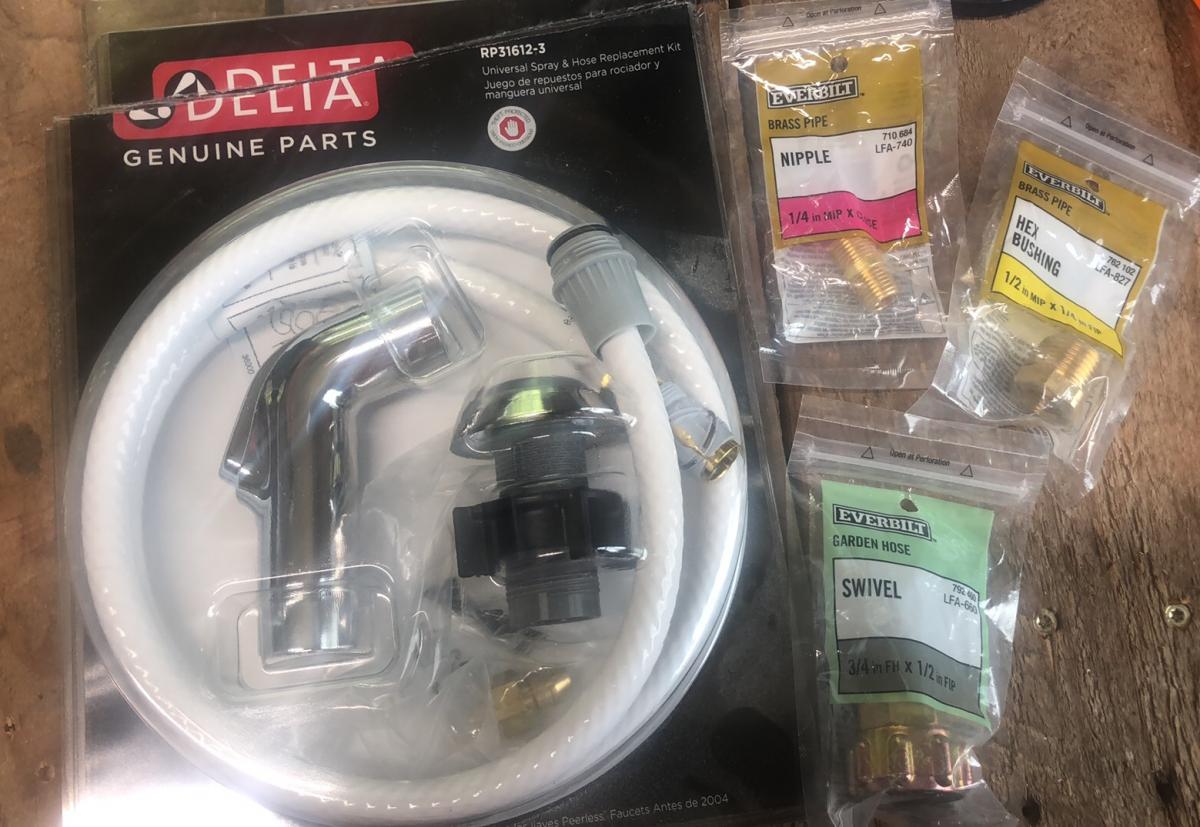
This was my first build, like ever. I am very proud! Props given to my hubby who is a carpenter by trade. I went back and forth on stains and paint colors at home depot. He didn't rush me and was awesome the entire time! He actually picked up the supplies, and is now a fan of the self tap screws! He thought he knew where everything in home depot was, but he had to ask to find those LOL. He wanted to use his new nail gun, but I wanted to follow the plans. The plans are awesome! We decided not to add an oven door just yet. Likely will soon. (Avoiding pinched fingers for now) I also have the knobs for the front, but it was hot and since I had only just stained them, they needed time to dry and second coat yet. (I kind of forgot about them once I finished them with my new dremel) We purchased the hose kit from the kitchen section at home depot. It came with everything, I searched market place and even posted asking if anyone had a used one for sale. No luck. This was $20 and came with everything, the guys at home depot showed me what adapters to get to ensure that it would hook up to our garden hose, and we grabbed those too and they worked perfectly! I messed up cutting one of the angles for the shelf the wrong way, but there was enough scraps for my husband to help me fix it. It was a fun build, and so rewarding to see our kids playing with it! I used my dremel 4300 and it wasn't powerful enough for the thicker wood, so my stove tops are thinner, but he actually enjoys setting them up and spraying them off the table with his hose! I painted the brass hooks green when we were painting the kitchen so they would match. The pots and pans came with the little tote and the apron chef hat and pot holder. It was a perfect finishing touch. *Edit to add photos kitchen hose kit from home depot, reading comments, others had a hard time finding adapters. I suggest taking what you have with you to home depot so they can show you what adapters you need. We needed three because we have a quick attachment on the end of our garden hose, (for our sprayer) now little mans mud kitchen can be connected and disconnected easily!

Built from Plan(s)
Estimated Cost
$75
Estimated Time Investment
Weekend Project (10-20 Hours)
Finish Used
Rust-Oleum Ultra Cover 2X Enamel Spray Paint and Behr Semi-Transparent Waterproofing Exterior Wood Stain and Sealer
Recommended Skill Level
Starter Project

Simple Outdoor Chairs for the Firepit

Submitted by Retta on Fri, 10/03/2014 - 19:27

I used Ana's plan and made ten of these for our firepit area.  The only thing that I changed was the back brace pieces....I couldn't get 1x2s so just used 2x2's.  

Built from Plan(s)
Estimated Cost
$300 including paint
Estimated Time Investment
Week Long Project (20 Hours or More)
Finish Used
Exterior paint.
Recommended Skill Level
Intermediate

My first plan-free project...

Submitted by Joni on Mon, 12/31/2012 - 10:11

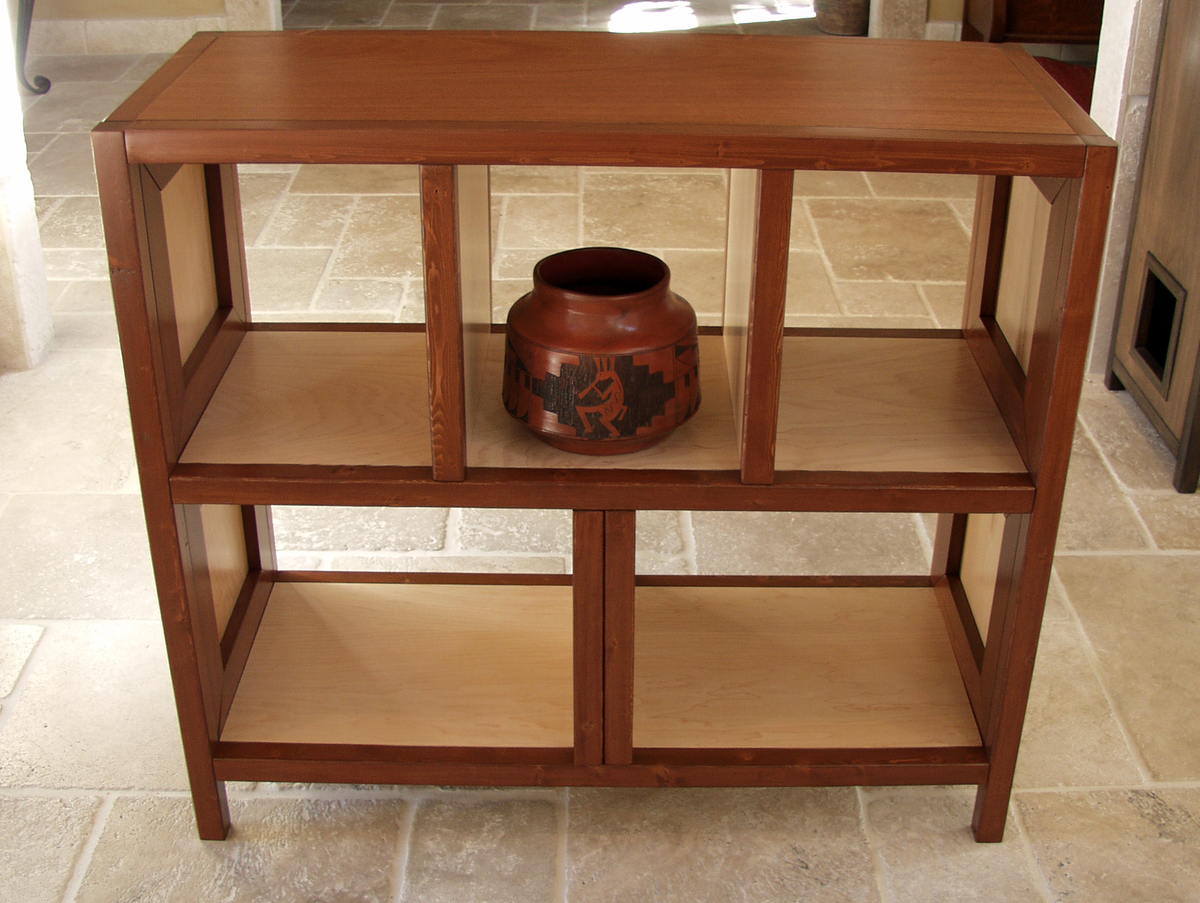
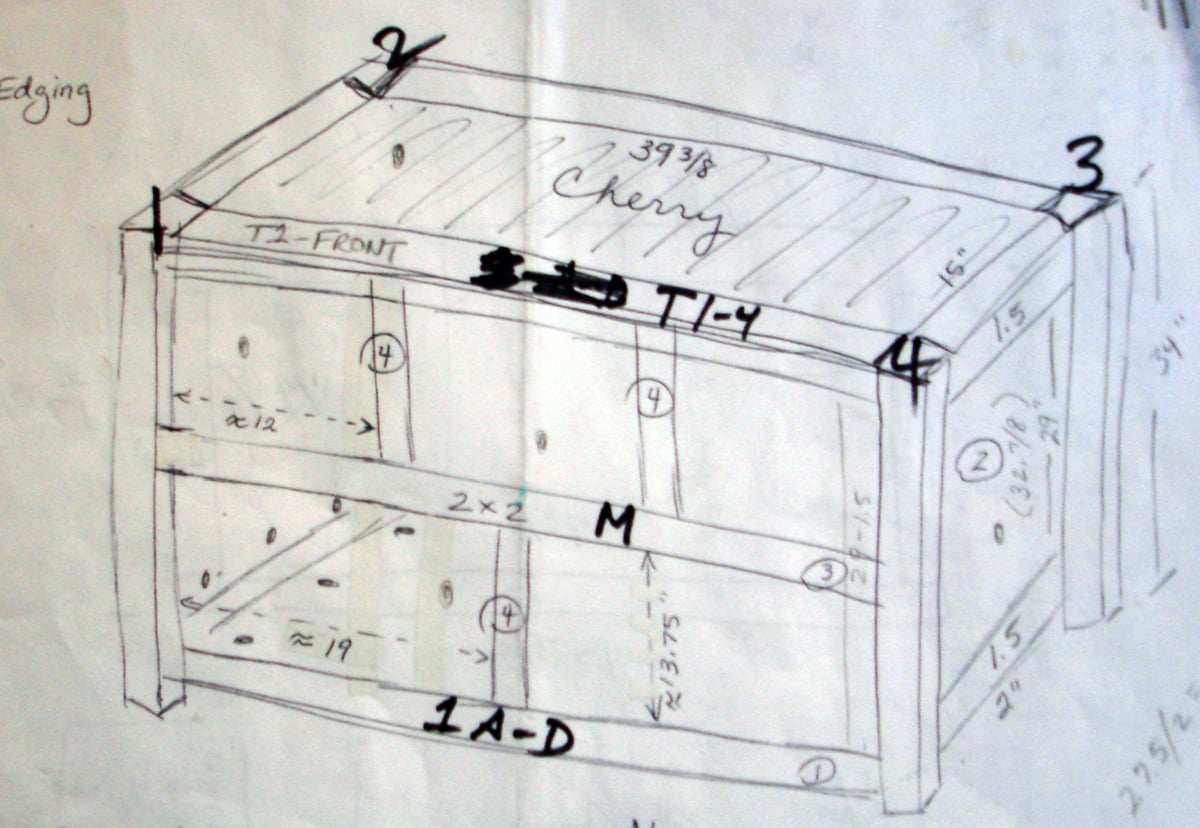
This was my first project without a set of plans, and all I had was a pitiful hand-drawn diagram and a lot of good ideas from prior Ana-White projects/plans (Google sketchup seems beyond my intellectual capacity!). I started with a spare piece of cherry that I wanted to use somewhere, so it became the basis for the top of this office shelf unit. I had to go with the dimensions of the cherry, so everything was built around that.

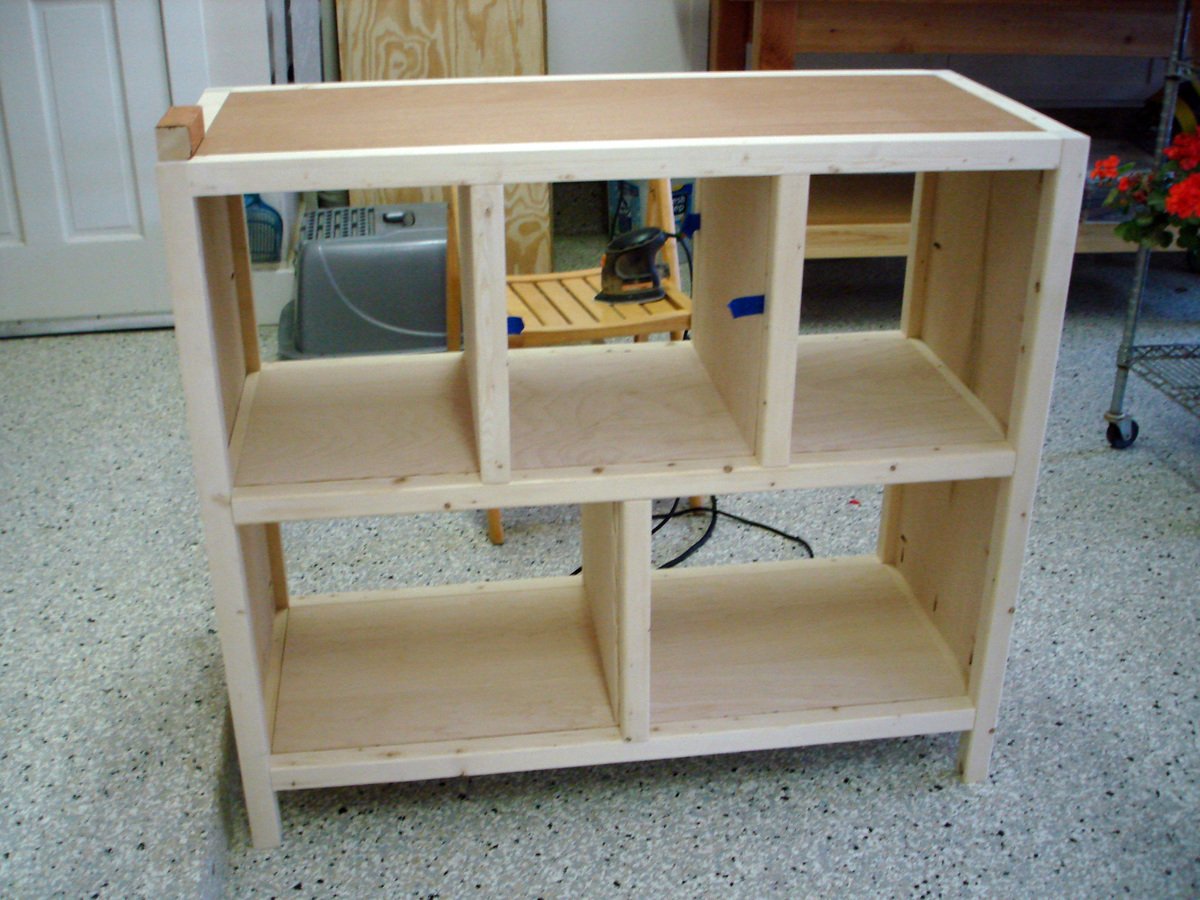
I used maple plywood for the base and sides of the cabinet, and pine furring strips for the frame/edging. Then, once I had the entire unit put together, I decided that I would like to stain just the frame. I had to take the whole project apart (all 51 pieces), stain the frame/edges, varnish the interior portions of the maple, and re-assemble without ruining the finish.

I try to never use glue because it's the one action that can't be reversed. I made a critical error on this (in a rush) when I installed the lower shelf in the wrong place and glued in a panel that hid all the screws. I thought the thing was totally ruined. My husband suggested adding a 2nd divider and calling it a "design feature". It saved the whole project.

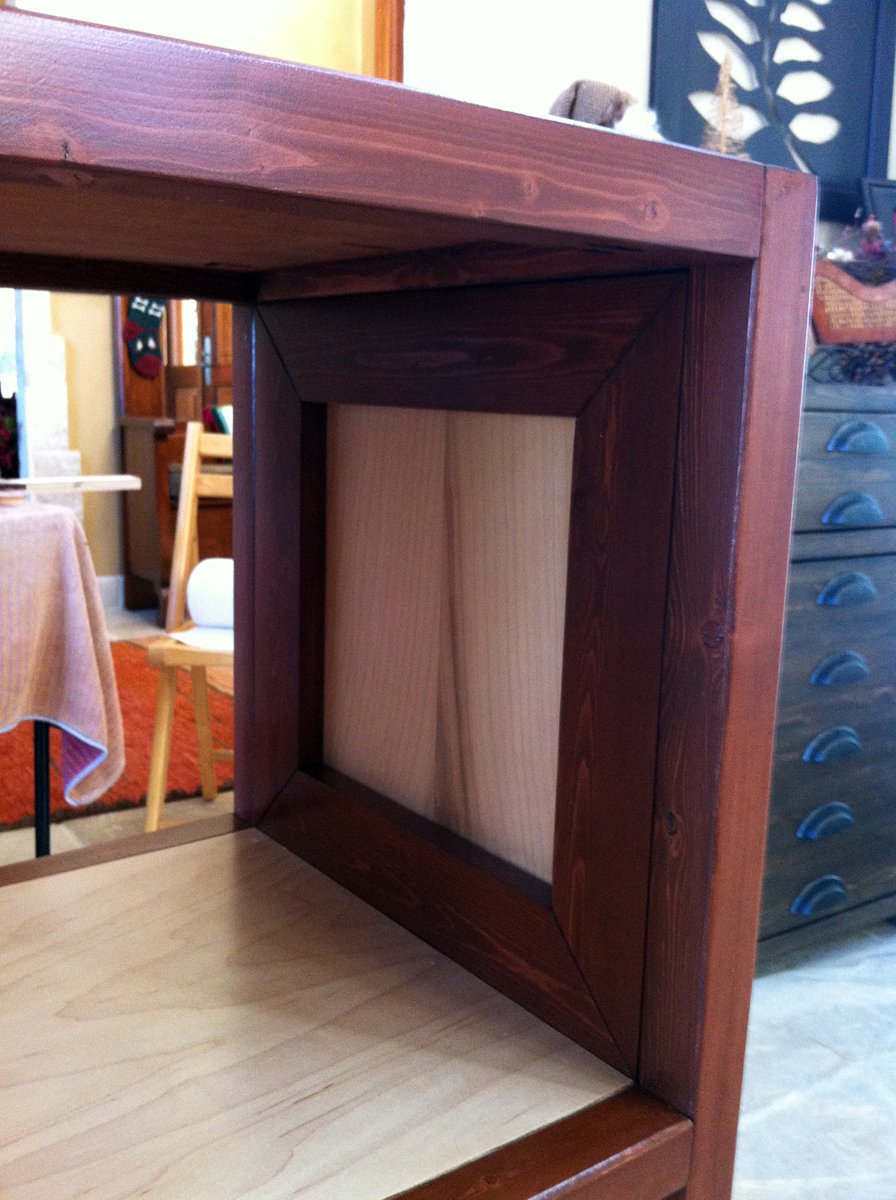
Once re-assembled, I didn't want my Kreg holes to show, and I haven't had much luck with the Kreg plugs. So, I added a mitered frame around the insides and stained it cherry to match the edges.

Minwax didn't have a water-based cherry that I liked, so I mixed my own out of various water-based stains. That process took over a week to get just the right tone. This was the first time I've used Minwax Polycrylic, and I will be using this product forever...it is fantastic.

Estimated Cost
60
Estimated Time Investment
Week Long Project (20 Hours or More)
Finish Used
Minwax Pre-stain conditioner, Cherry water based stain (made from 6 parts Antique Walnut, 2 parts Cinnamon Toast and 1/2 part Colonial Pine), followed by 4-5 coats Minwax polycrylic
Recommended Skill Level
Beginner

Comments

Cyndi2015

Sat, 03/21/2015 - 17:03

Wow! This is an amazing piece and I would love to build this. Could you give me more detail on how you assembled it???

Farm House Console

Submitted by DC_Idaho on Fri, 10/23/2020 - 07:21

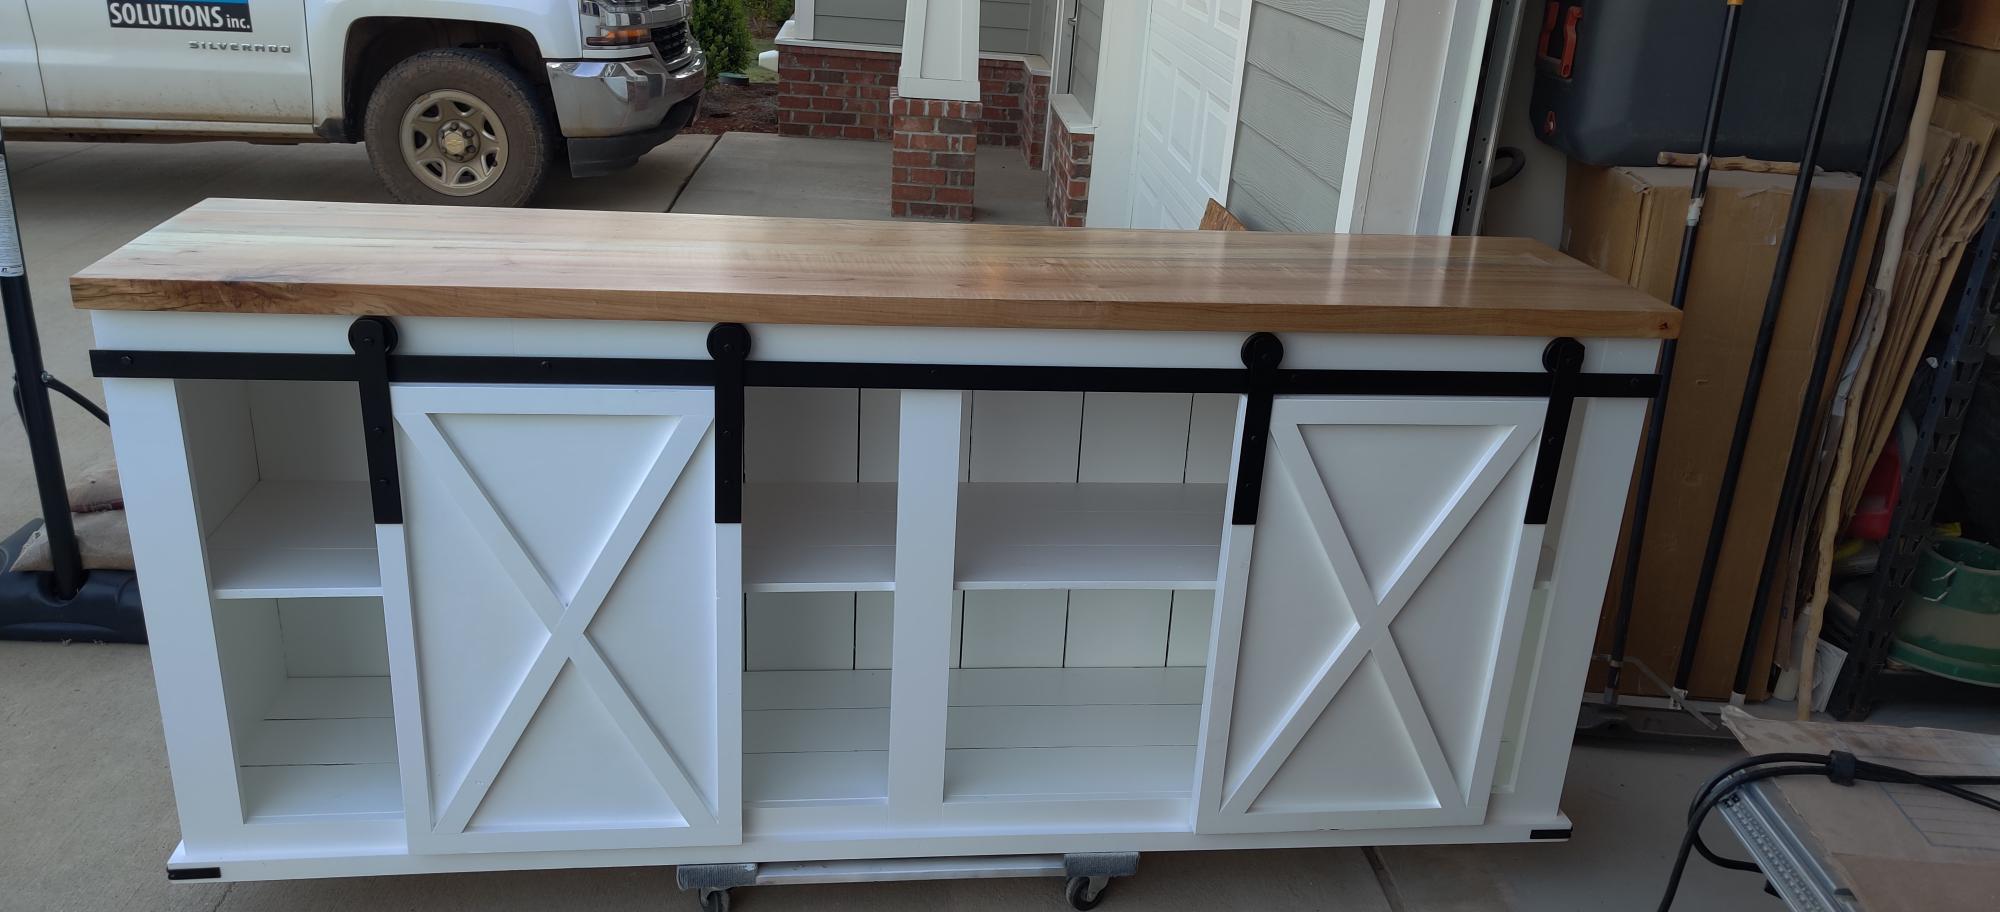
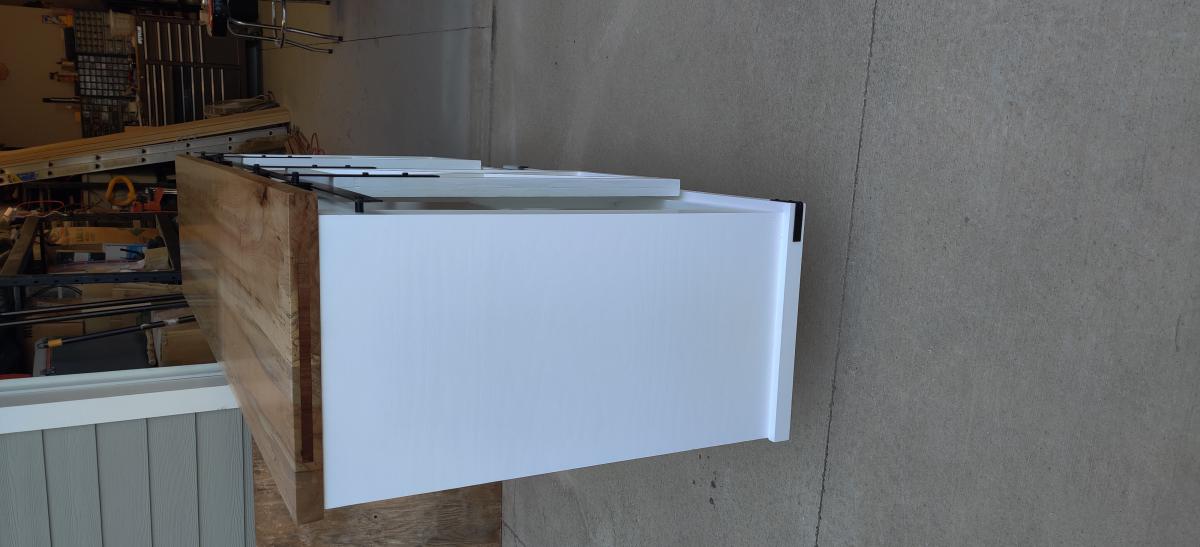
I really liked the idea of making a TV console for our house. I used your plans as a guide and then added a few features to it. I made all of my rail system hardware vs. ordering a kit. I also added some Walnut accent inlays on the ends of the table top.

Estimated Cost
Materials alone roughly $550.00
Estimated Time Investment
Week Long Project (20 Hours or More)
Finish Used
Lacquer for the table top
Black under coat of paint
White top coat paint
Recommended Skill Level
Intermediate

Comments

Distressed antique white corner cabinet

Submitted by Anonymous (not verified) on Sat, 02/25/2017 - 18:24

I used Anna's design to create an 8' tall cabinet with a weathered finish. The inspiration was a reclaimed window frame.

Built from Plan(s)
Estimated Cost
$200
Estimated Time Investment
Week Long Project (20 Hours or More)
Finish Used
Minwax Mocha stain on shelves with grey paint dry brushed over a few areas to look weathered. I finished the shelves with a satin poly.

For the rest of the project I used DIY vinegar and steel wool stain on everything else. I then rubbed a candle of over parts of the stain where I wanted the wood to show thru. I painted over the stain and wax with antique white paint. I then used a heat gun to melt the wax and scraped it off with a chisel.
Recommended Skill Level
Intermediate

Rustic Toy box

I used tongue and groove pine for this. I just ripped the top board down so the ridge wasn't there.

Built from Plan(s)
Estimated Cost
130$
Estimated Time Investment
Weekend Project (10-20 Hours)
Finish Used
I used strong tea, then once dried I used a vinegar and steel wool mixture. Once that dried and finished the chemistry i sealed with clear varathane. The edge pieces i used a jacobean stain for contrast.
Recommended Skill Level
Beginner

Comments

Greenhouse

Submitted by Anonymous (not verified) on Tue, 01/05/2021 - 08:08

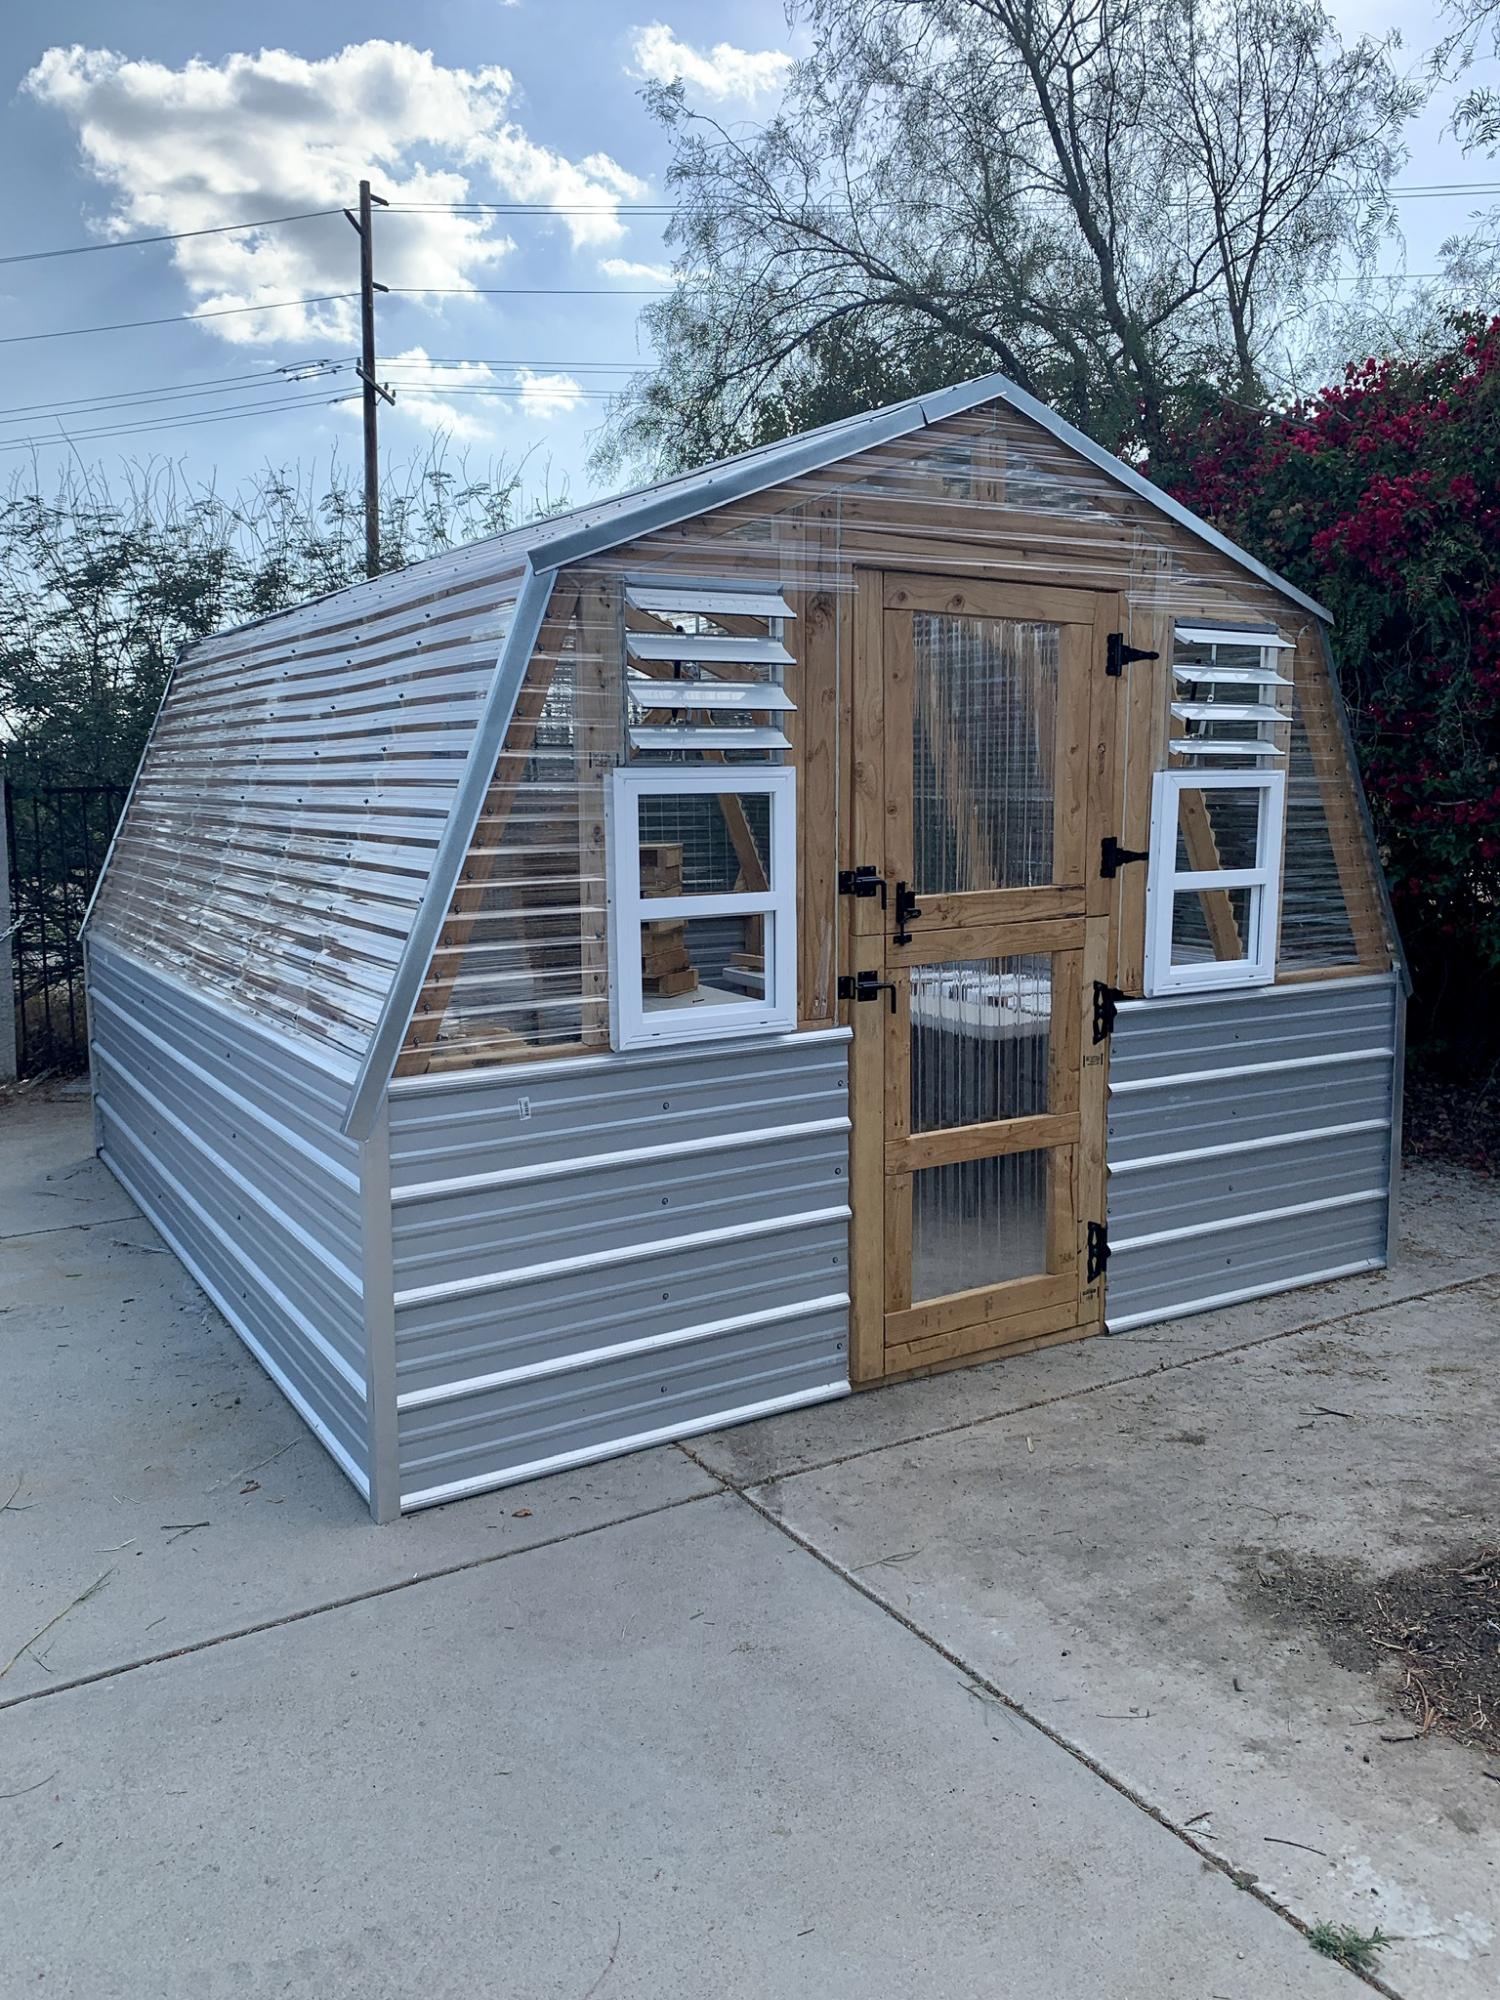
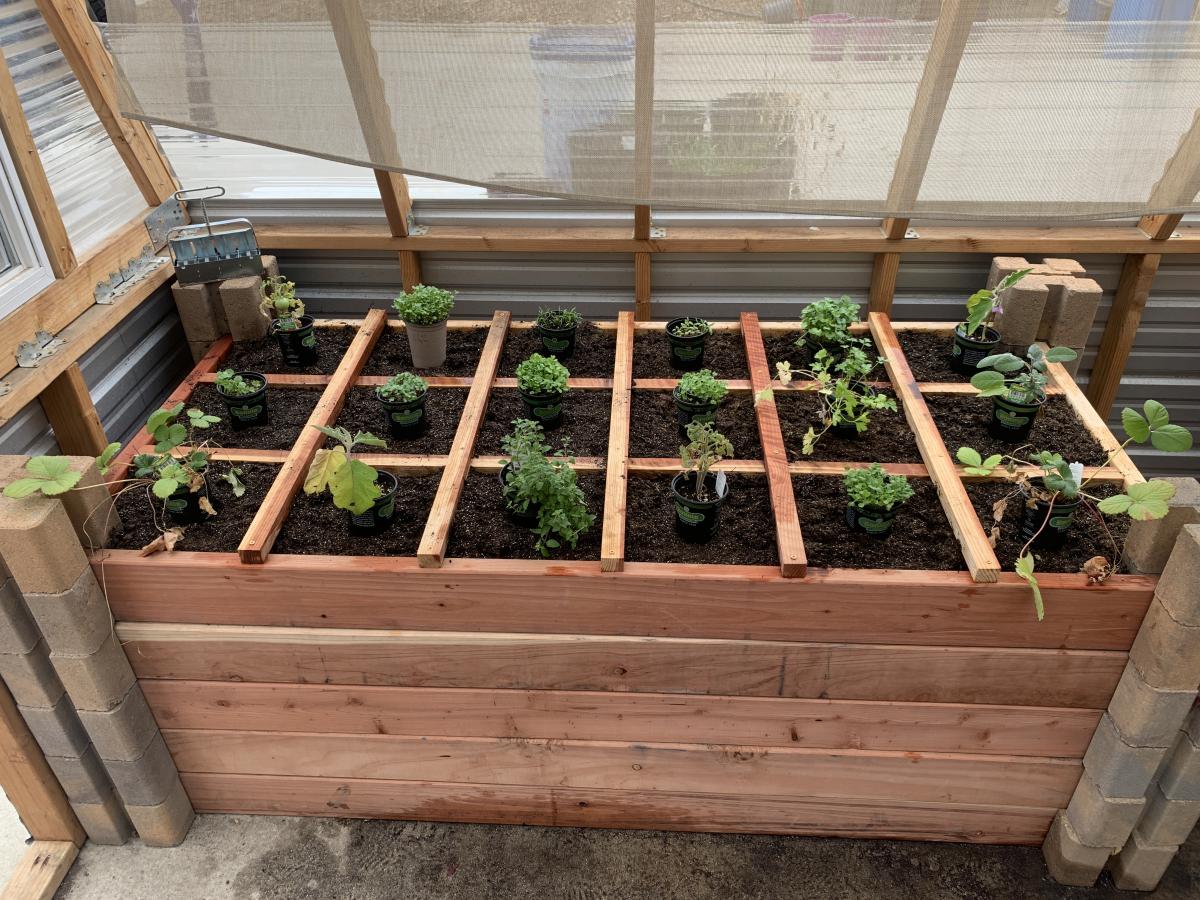
We made some modifications to the greenhouse to include a bench with three levels, a working bench and a square foot garden. We also put it on concrete to keep all the weeds out from the bottom as well.

Built from Plan(s)
Estimated Cost
2500.00
Finish Used
We start our own seeds and plan to grow 15 different varieties of vegetables inside this greenhouse all year long.
Recommended Skill Level
Intermediate

Comments

$1 Small cedar planters & $10 ledges

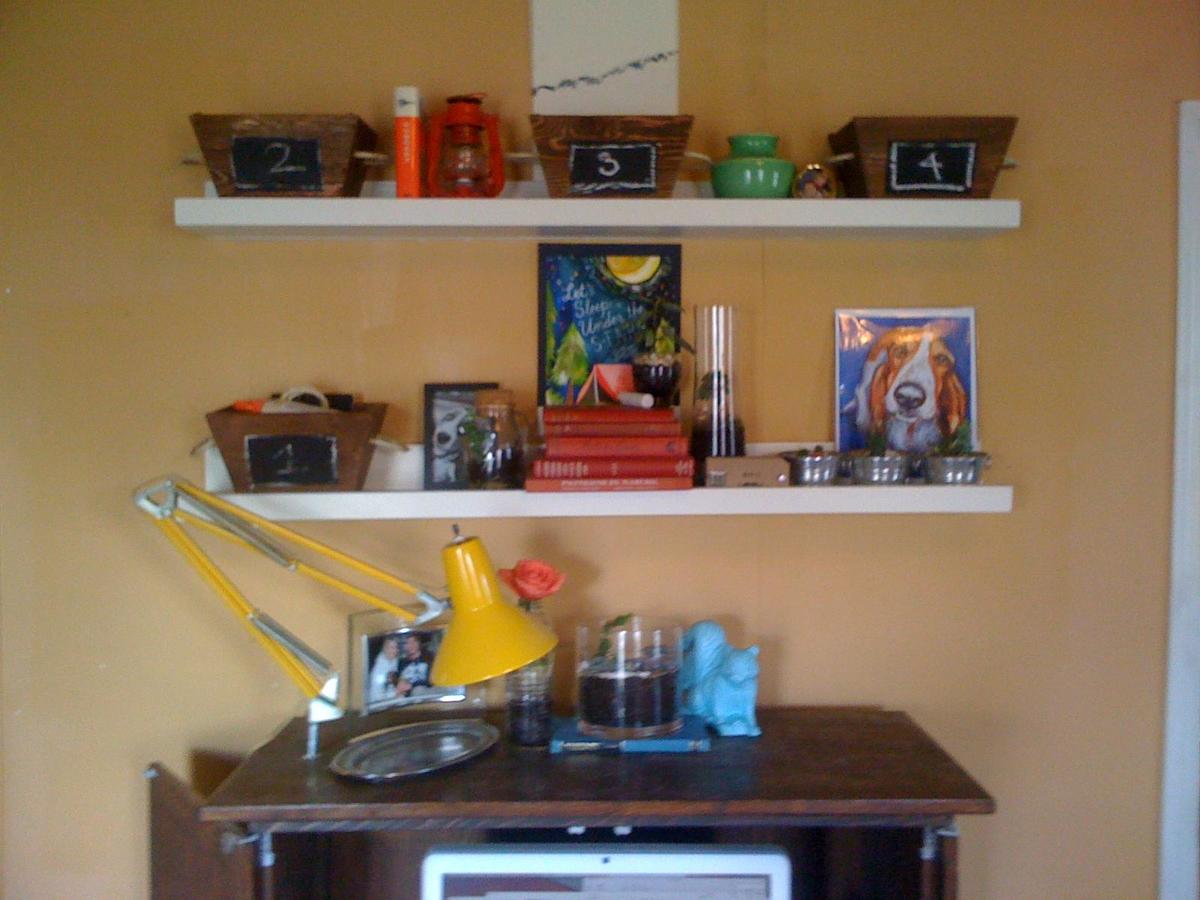
We have been stalking ana-white.com for awhile and making a few projects here and there. we made the $10 ledges to fit over our entertainment center. When we found the plan for the cedar planters we thought they would be a great little storage area for all of the little junk around the house. We made 6 of these planters out of 3 cedar planks and modified them to fit on the $10 ledges (which are actually made with a 1x6 to allow for more things to be able to fit) so they wound up more rectangular than square.

Sorry for the crappy I-phone pics!

Estimated Cost
$15 for ledges $6 dollars for 6 crates
Estimated Time Investment
An Hour or Two (0-2 Hours)
Finish Used
Miniwax in early american + chalkboard paint for crates

Antique white paint for ledges
Recommended Skill Level
Starter Project

Gigantic planked sideboard

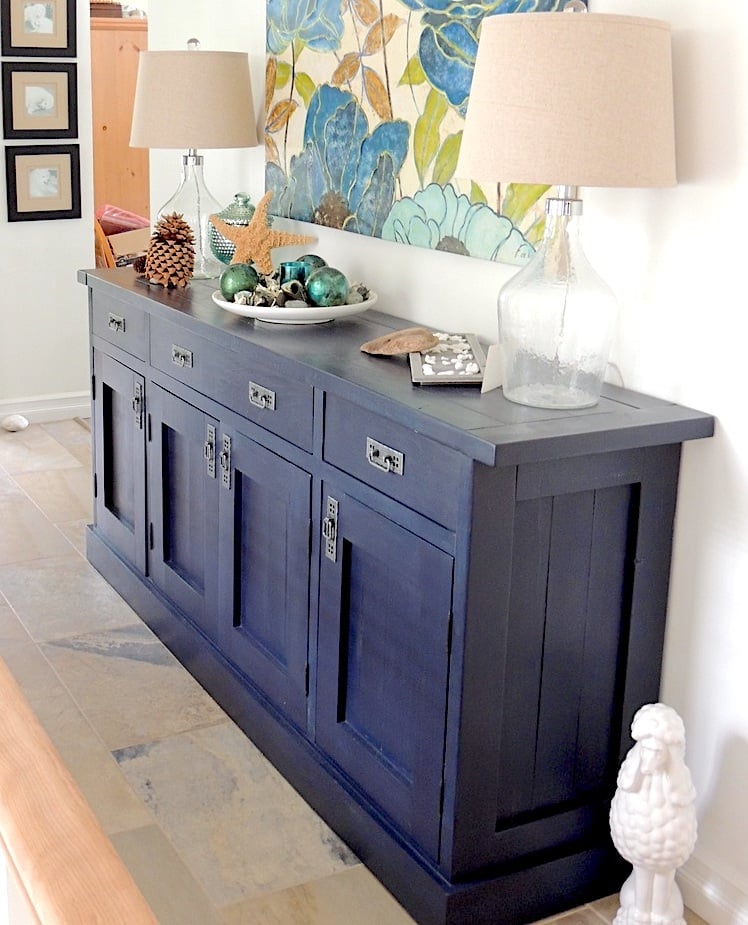
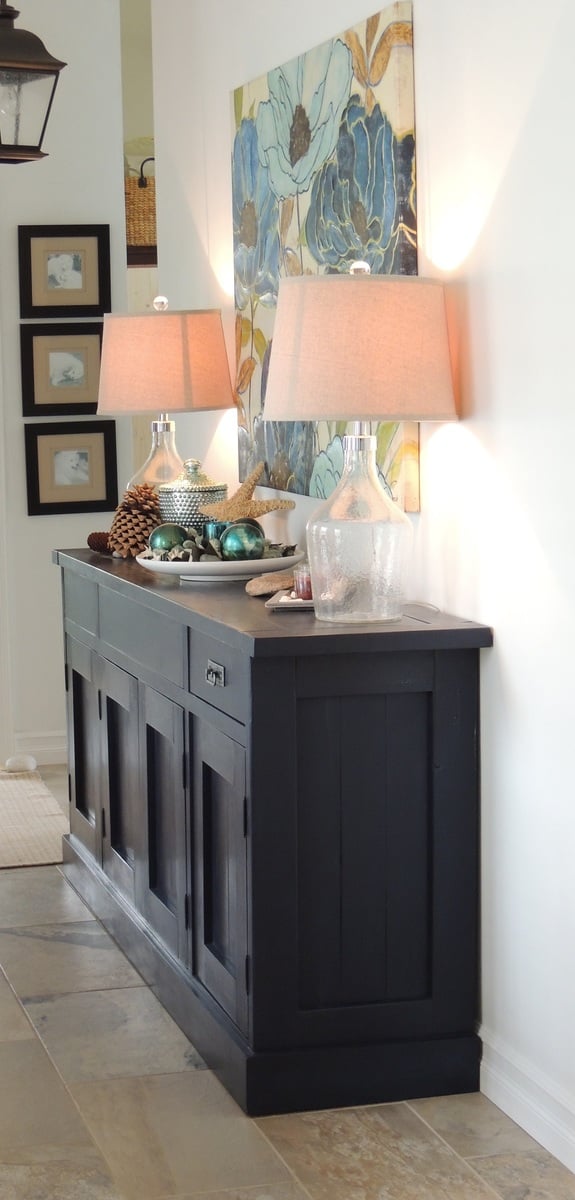
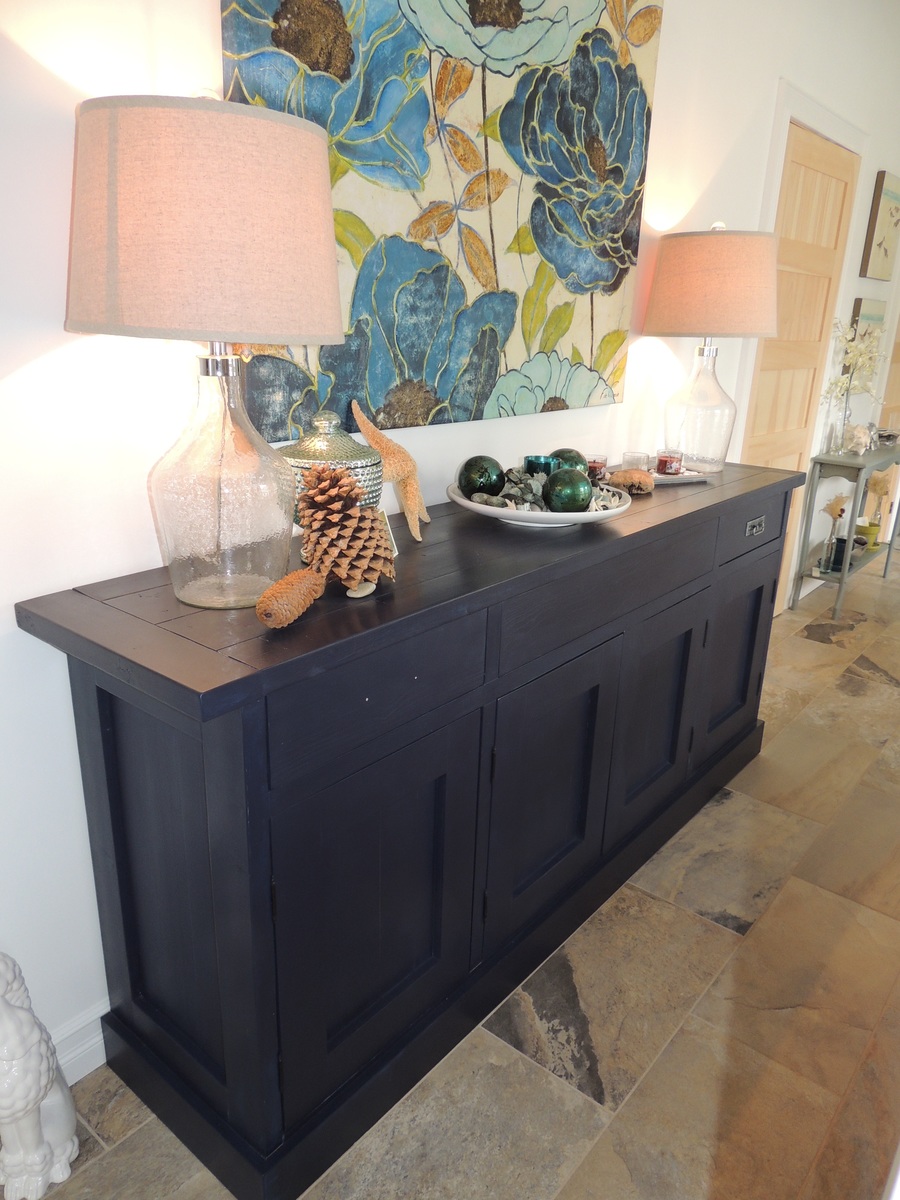
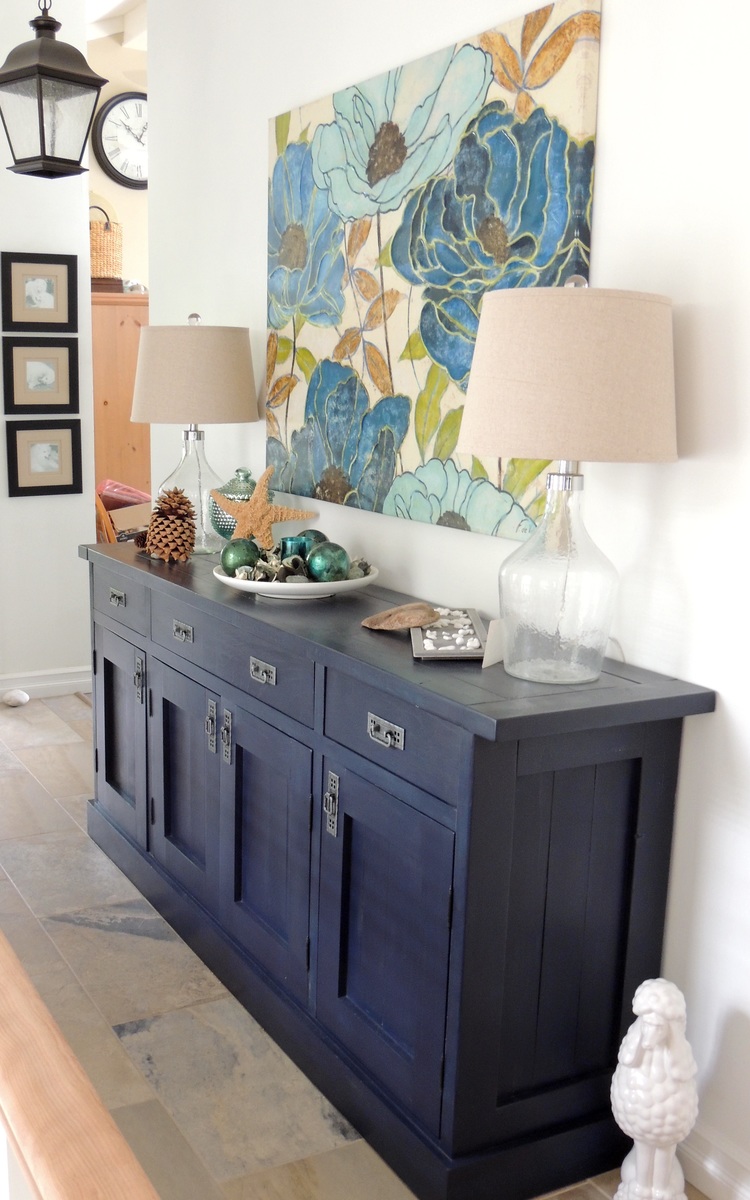
This was my second project and my first piece of furniture I built from Ana's plans. We have a vaulted ceiling in the hallway near my entry and needed a really big piece to fill up the large blank wall. I always hated the space but now I Love It. The Gigantic sideboard is perfect there. I finished it with milk paint and paste wax. If you inspect it closely it is not perfect but for my first piece... I love it and it's supposed to be rustic right!

Built from Plan(s)
Estimated Cost
I did not keep track of how much I spent but I'll say roughly 200 to 250 .
Estimated Time Investment
Week Long Project (20 Hours or More)
Finish Used
I first used wood conditioner then sanded, sanded, and sanded. For the paint I used General Finishes Coastal Blue and topped it with minwax paste wax.
Recommended Skill Level
Intermediate

Comments

Window Cornice

Submitted by BeingHome on Thu, 04/04/2013 - 01:46

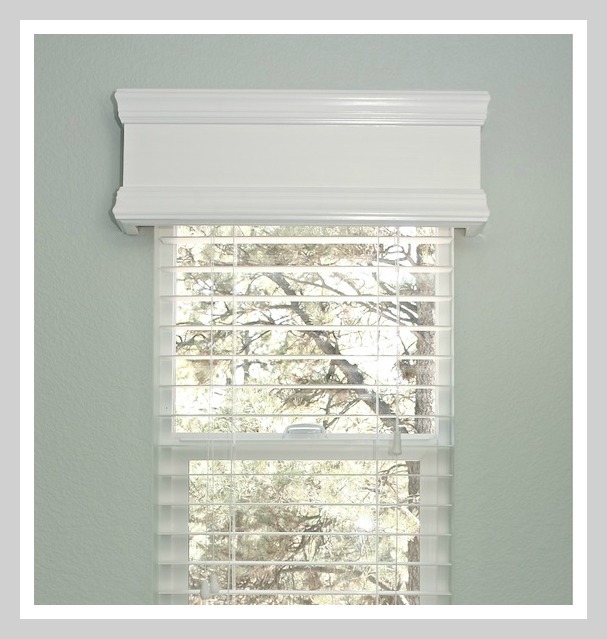
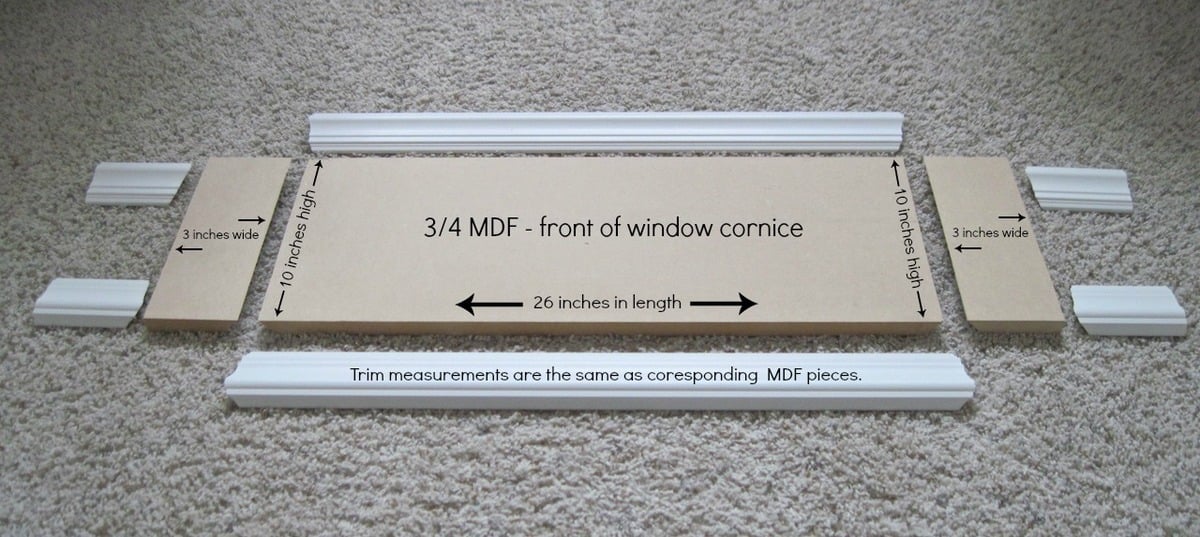
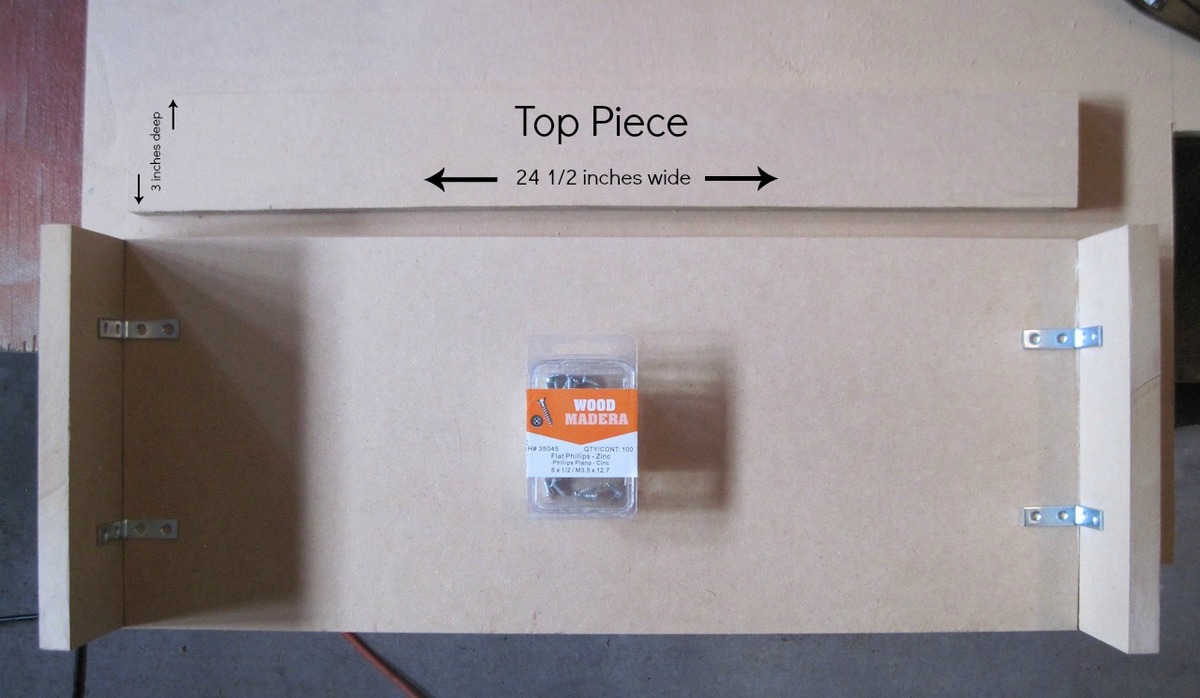
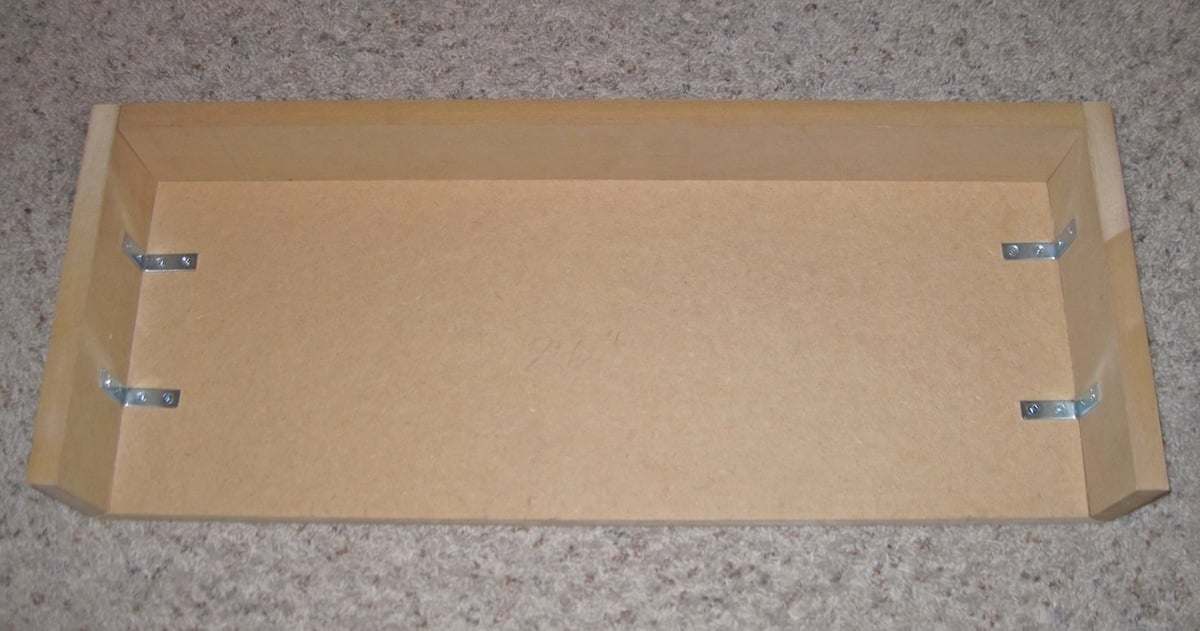
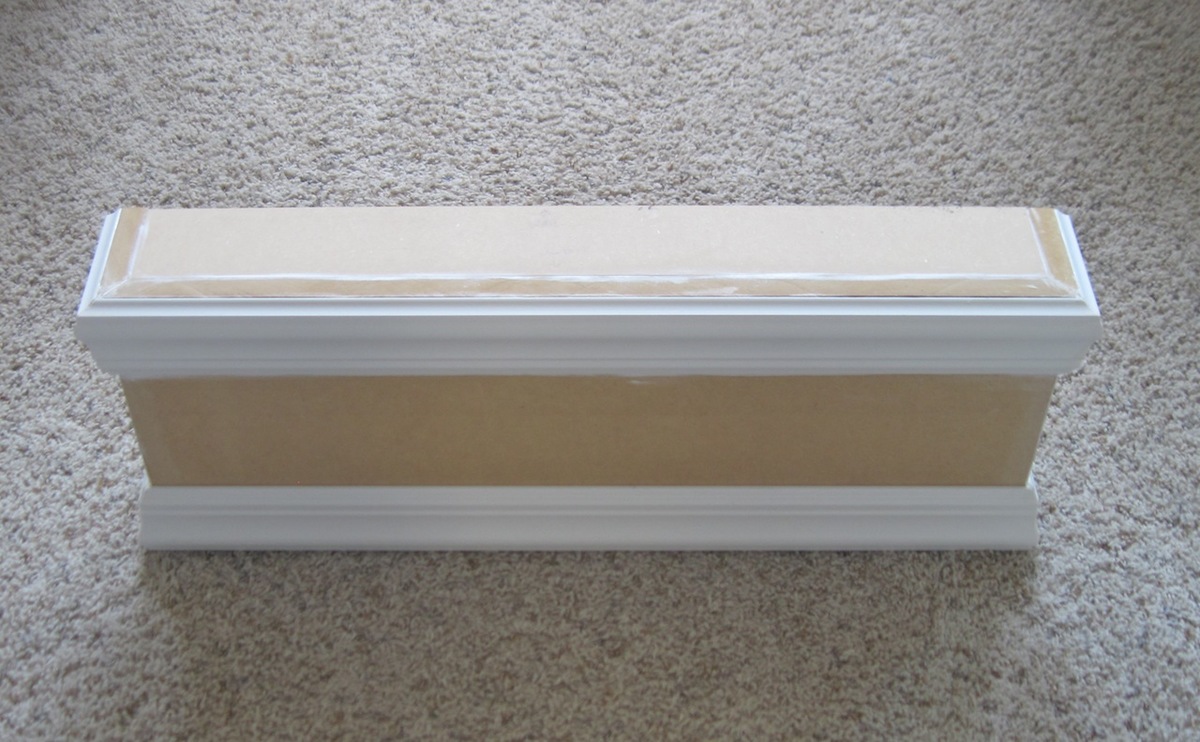
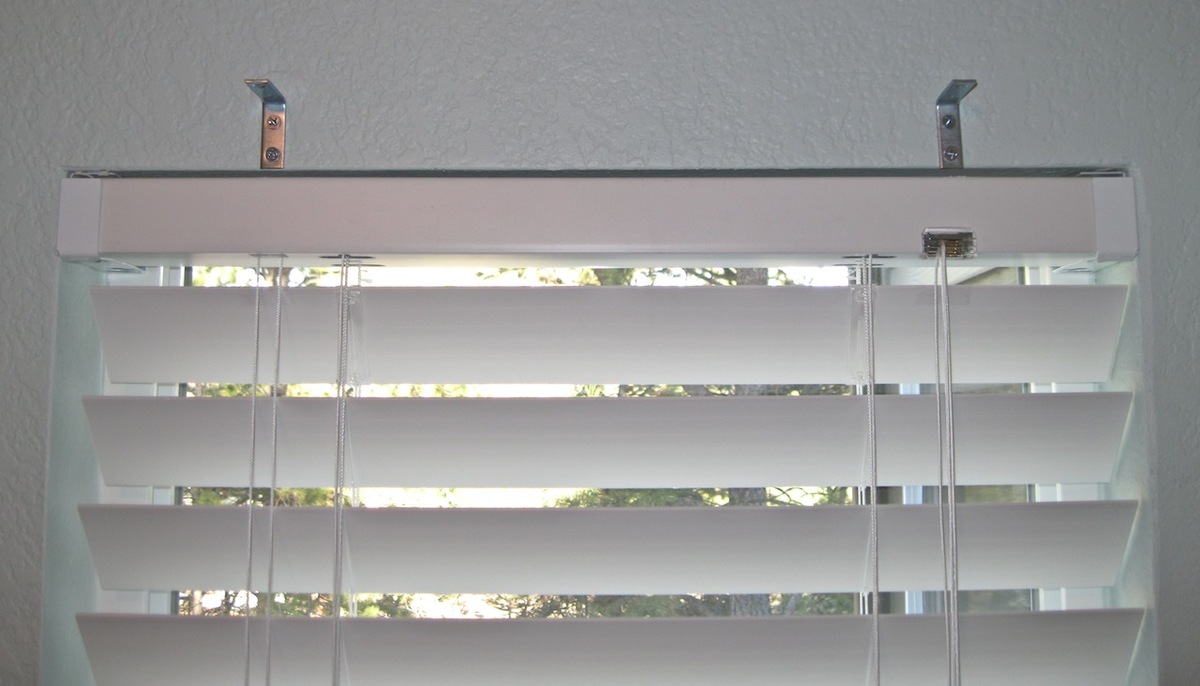
I have been wanting to build a window cornice for the laundry / mudroom and decided it was finally time. This project was very easy and inexpensive. Luckily, I was able to use some leftover MDF and only had to purchase and 8ft piece of trim. Everything things else I already had. 1. Using left over MDF the front and sides of cornice were measured, mitered and glued together using Loctite power grab (very strong glue). 2. Once glue dried, L brackets were placed on the corner insides for additional reinforcement. Probably not necessary since Loctite power grab is some super strong glue, but I did it anyway. ;) 3. Attached top piece of cornice using nail gun and #18, 1 3/4 inch nails. 4. Mitered trim pieces and glued on using Loctite power grab. 5. Paint cornice. 6. Attach L brackets onto top window frame. 7. Mount cornice onto L brackets. Once in place, I used #6, 1/2 inch wood screws to secure the cornice onto the L brackets. Again, this was an easy and a fun starter / beginner project. :) For more info, please check out my window cornice blog post. Thank you.

Estimated Cost
$8.00 and using supllies I already had. Otherwise this project could probably be done for about $20.00.
Estimated Time Investment
Afternoon Project (3-6 Hours)
Finish Used
Behr Ultra (paint and primer in one) in ultra white.
Recommended Skill Level
Starter Project

Comments

Scrap twisted stud outdoor sectional and table

Submitted by kaciejo on Wed, 09/15/2021 - 10:17

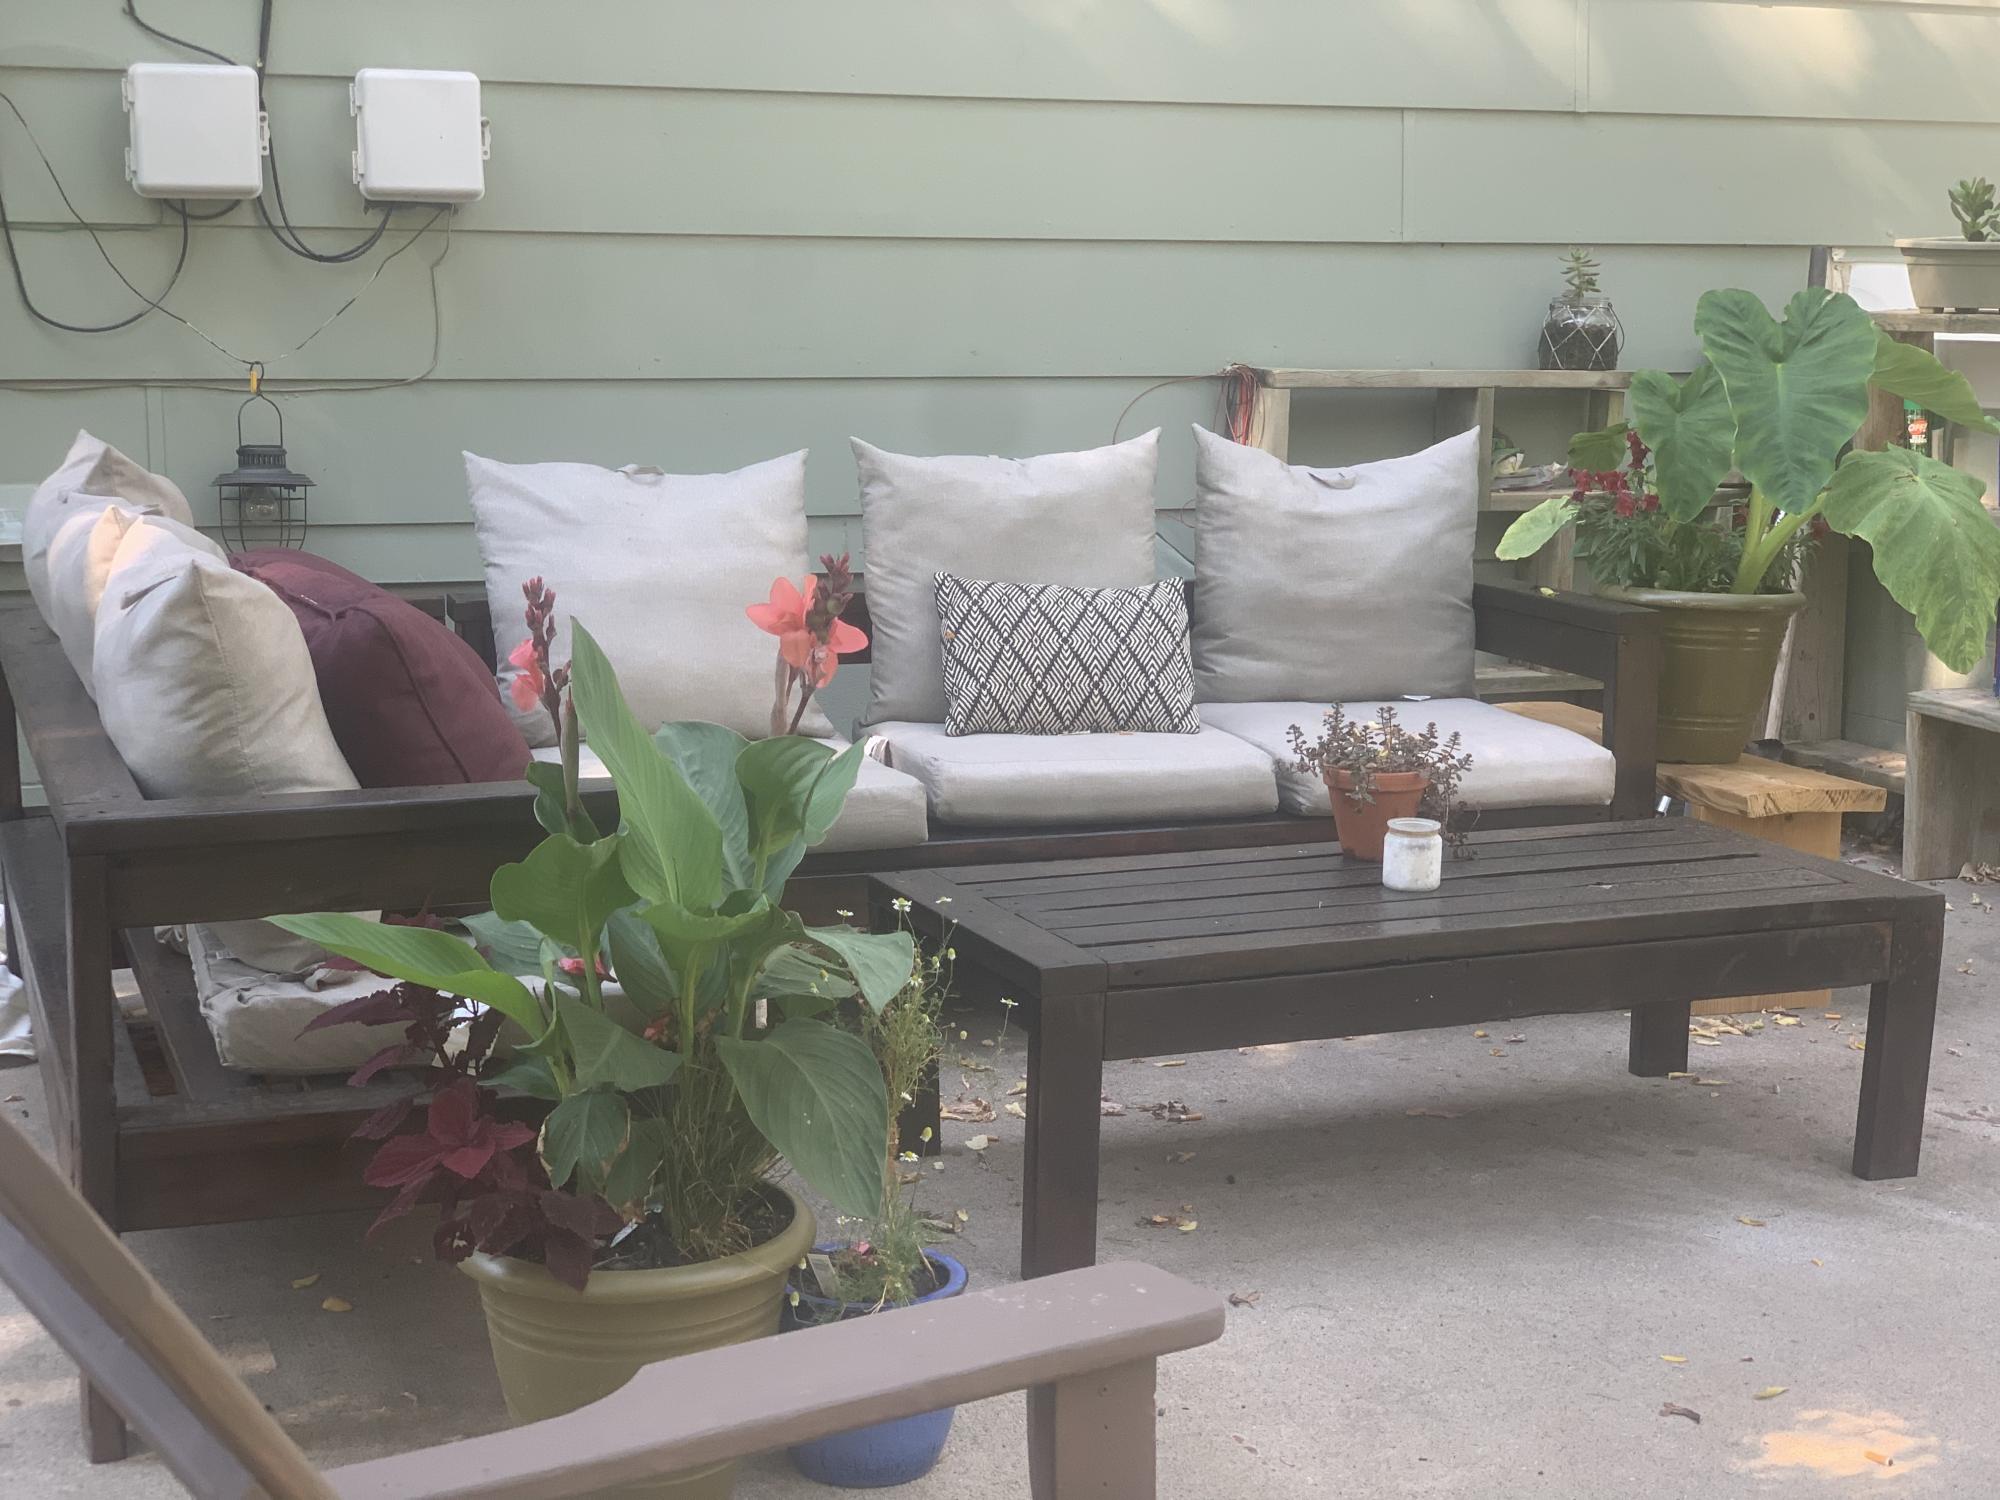
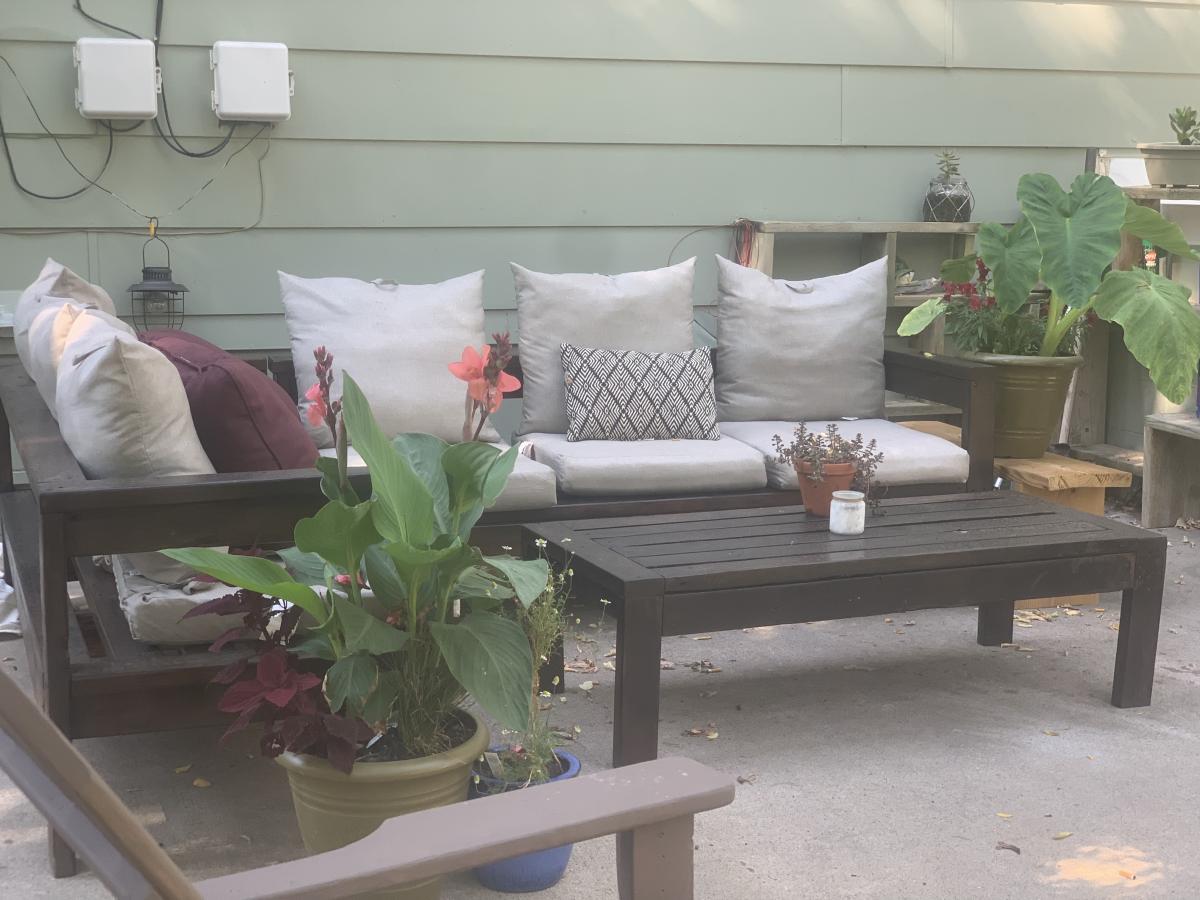
What to do with leftover twisted wood? Utilitarian single moms I straightenand make the outdoor sectional and table. Been wonderful.

Comments

72” round dining table

Submitted by Anonymous (not verified) on Mon, 10/04/2021 - 13:52

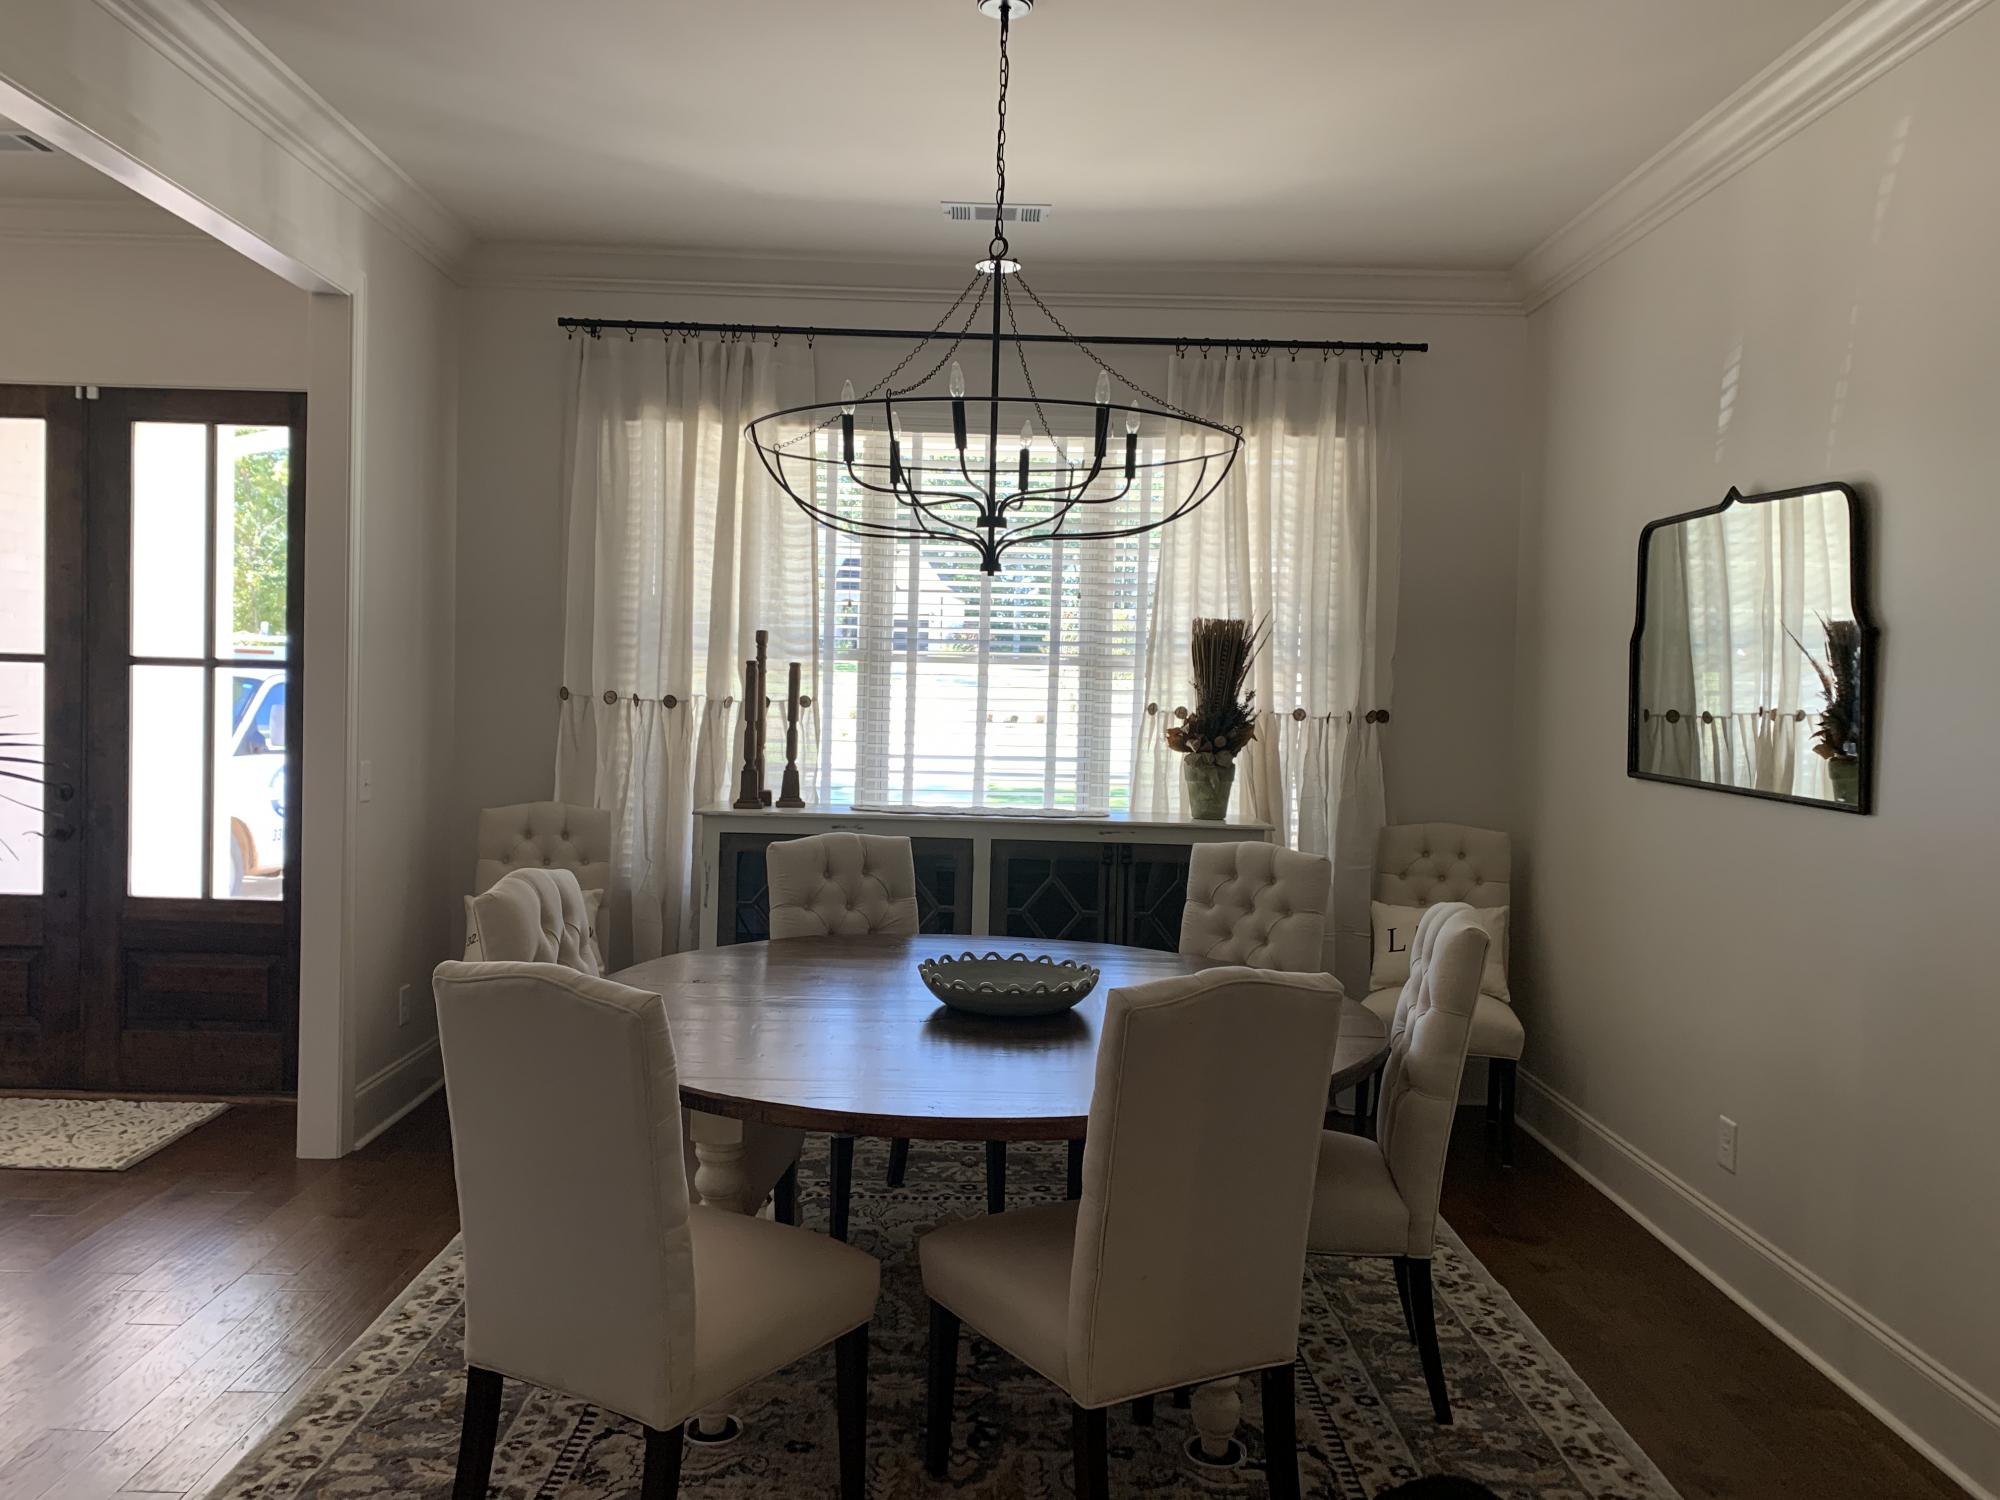
I wanted a 72” round dining’s table for my new home and found your video online. It was not easy to cut a circle, but it was easier than I thought it would be! I’m so happy with the finished product. I used turned legs with a square base instead of the pedestal shown. Have had so many compliments already and it looks fantastic in the space.

Comments

Pergola (attached directly to the house)

Submitted by dwm22 on Thu, 05/23/2013 - 17:34

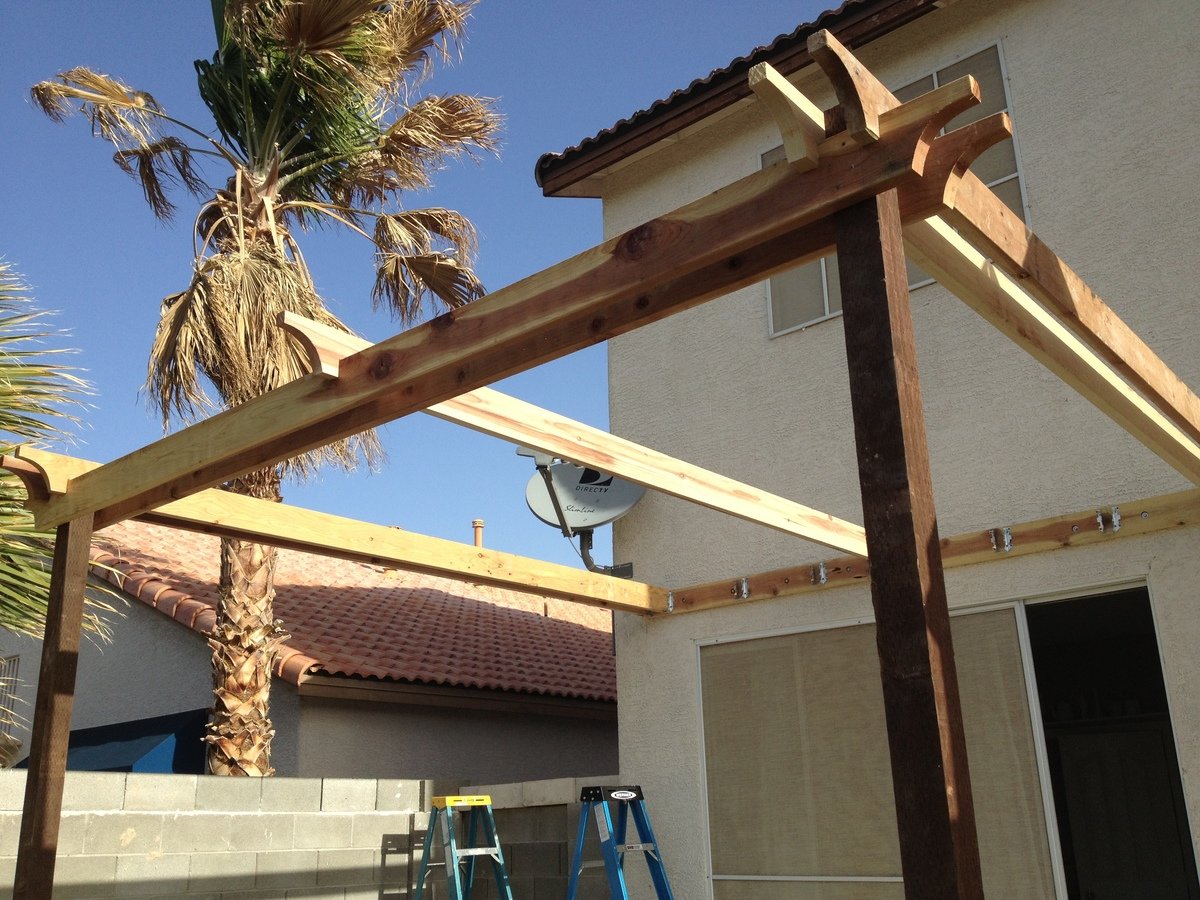
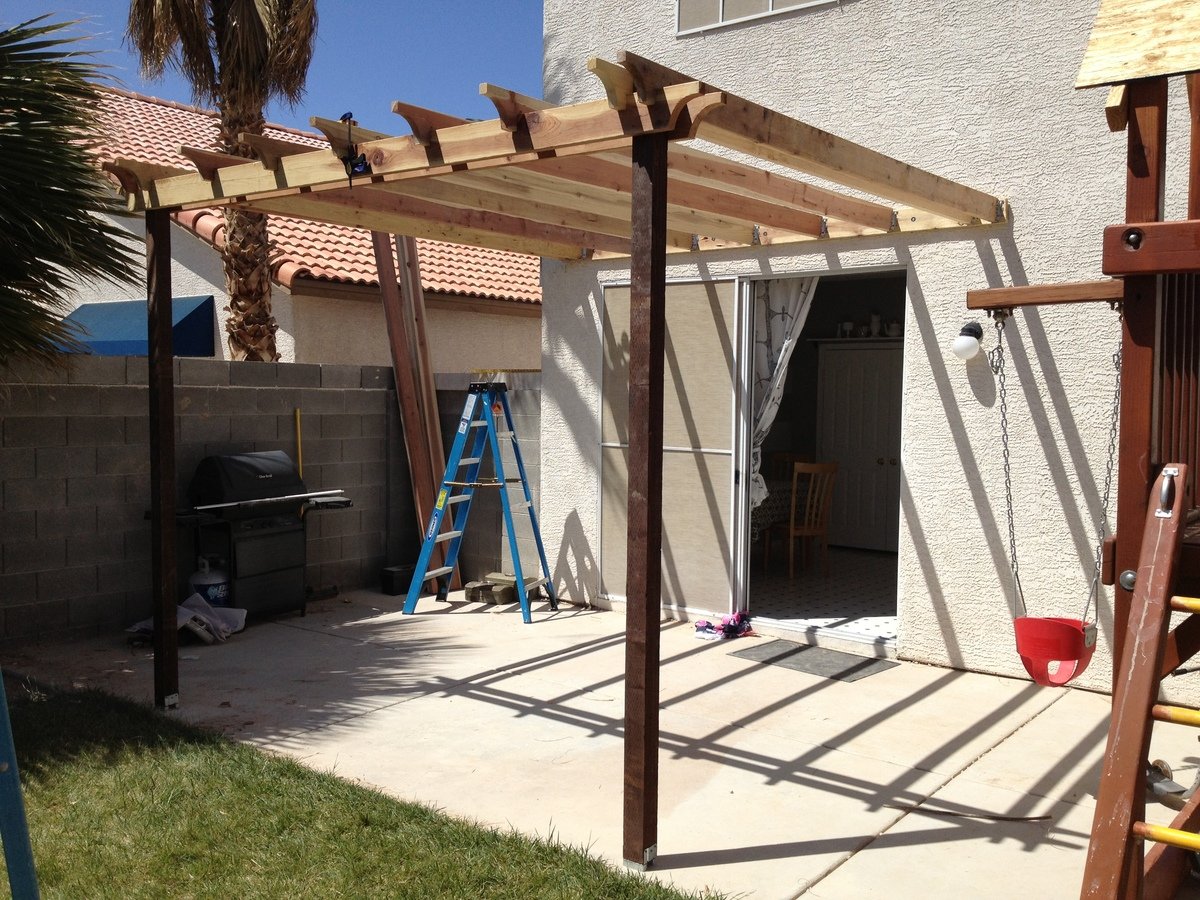
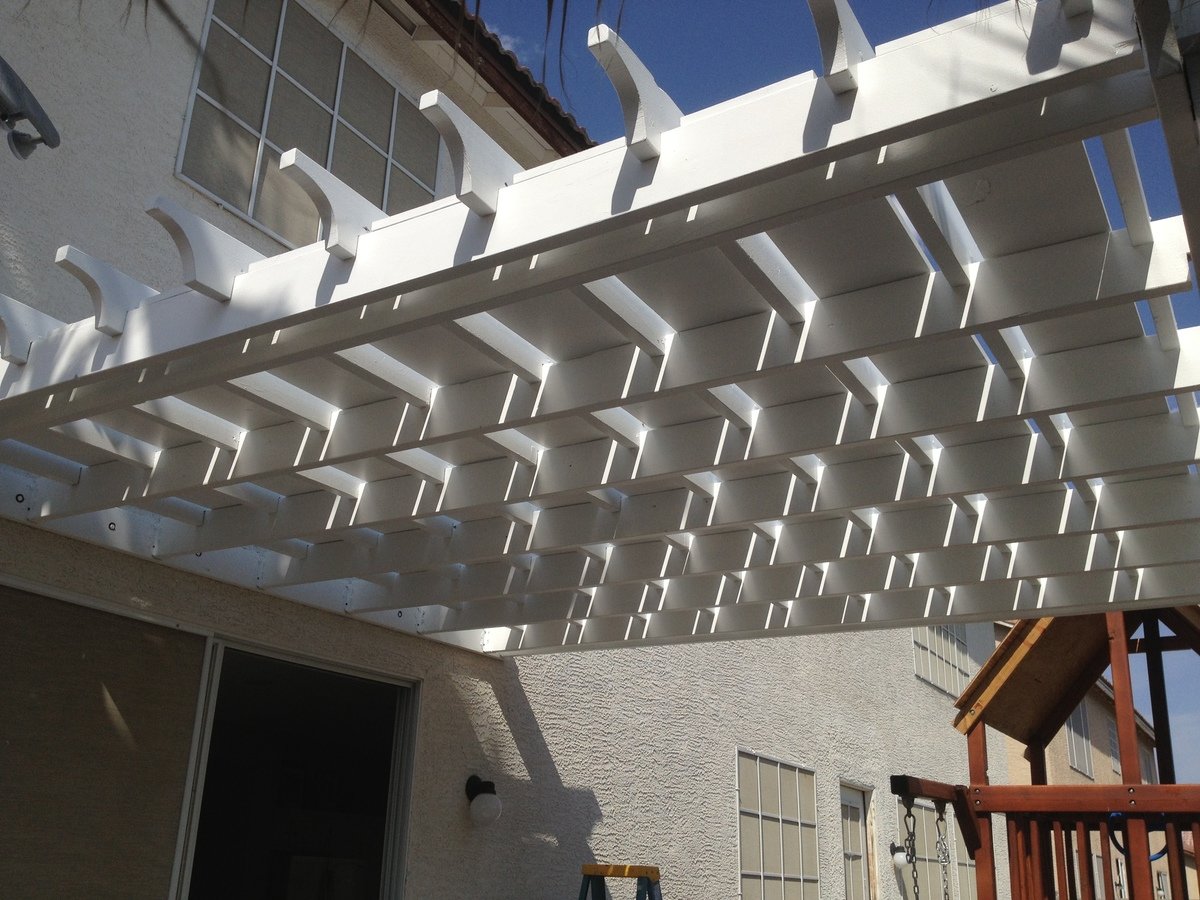
Instead of building a free-standing, 4-poster Pergola, I attached one side directly to the house. There are various Pergola design types and shapes. Simply Google for "pergola" images and decide which design you like best, or combine design ideas together (as I did).

Couple things to consider:
A: Is your Pergola more for decorative purposes or actual shade?
My design was more for actual shade (but with a decorative design), which is why I added the 1in x 12in x 12ft Pine boards between the cross beams at the very end (last picture). If your design is more for decorative purposes, you can space out your support beams and cross beams wider (using less wood and money).

You can also choose to use 2x4s as your support beams with 2x2 cross beams on top (essentially furring strips) either close together or spaced farther apart. This would also reduce the overall cost of your Pergola and make it much lighter as well. I chose to use all 2x6s for both support beams and cross beams.

B: What path does the sun follow across the sky over your Pergola?
If the sun passes directly over your Pergola and you want a lot of shade, you'll obviously need to consider this in your design (i.e., more cross beams that are close together).

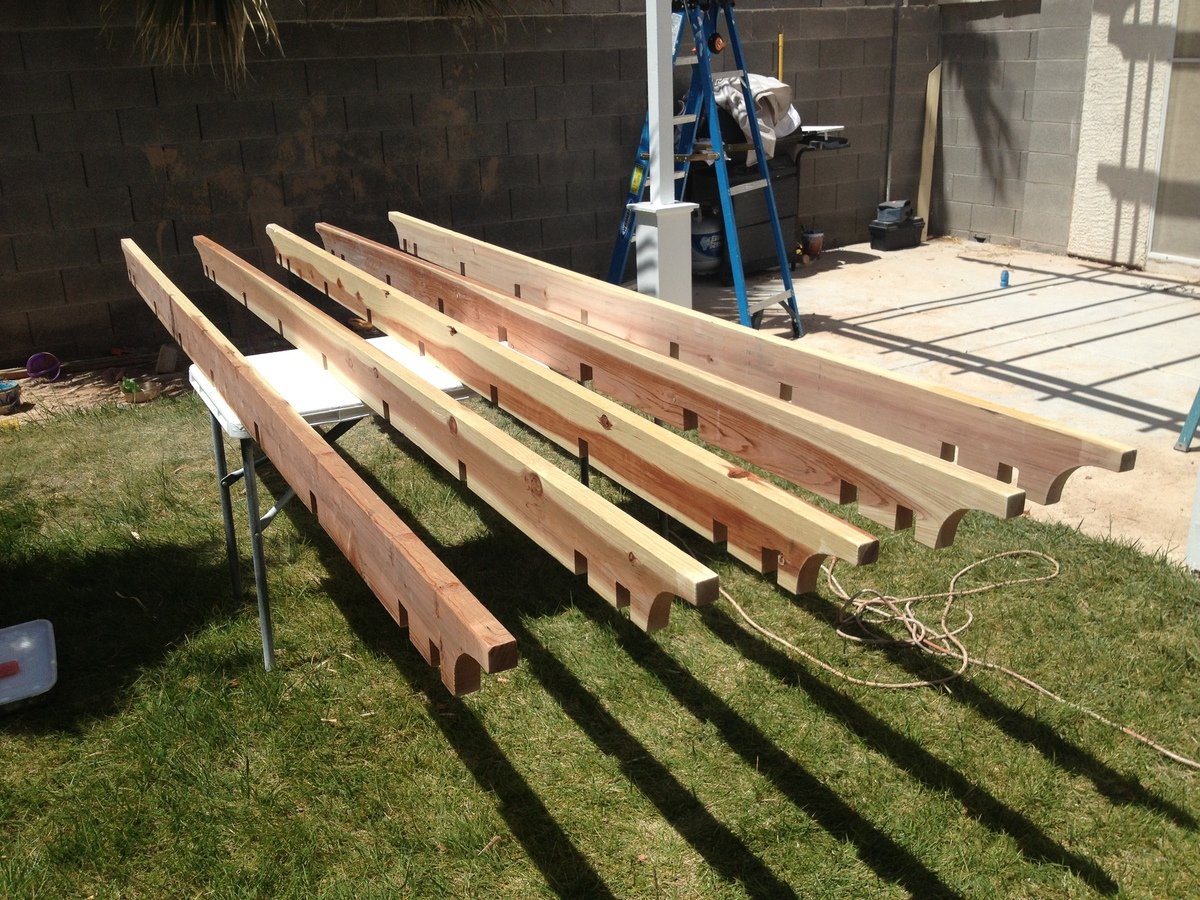
C: Do you want your support beams and cross beams to inter-lock (by cutting square notches and assembling them like linking logs), or simply stacked on top of each other? (Again, Googling for Pergola images will help you see the differences in designs.)

I chose to interlock all of my beams by cutting notches and fitting them together. Obviously more time consuming to measure each notch, cut, and chisel them but the stability of inter-locking beams should hold up a little better in the strong winds of Las Vegas.

HOW TO (abbreviated)

Overall Pergola Dimensions: 10ft Height, 12x12ft

Tip: Paint or stain all your wood prior to assembly. Much easier. You can always touch-up scuffs and scrapes after it's built.

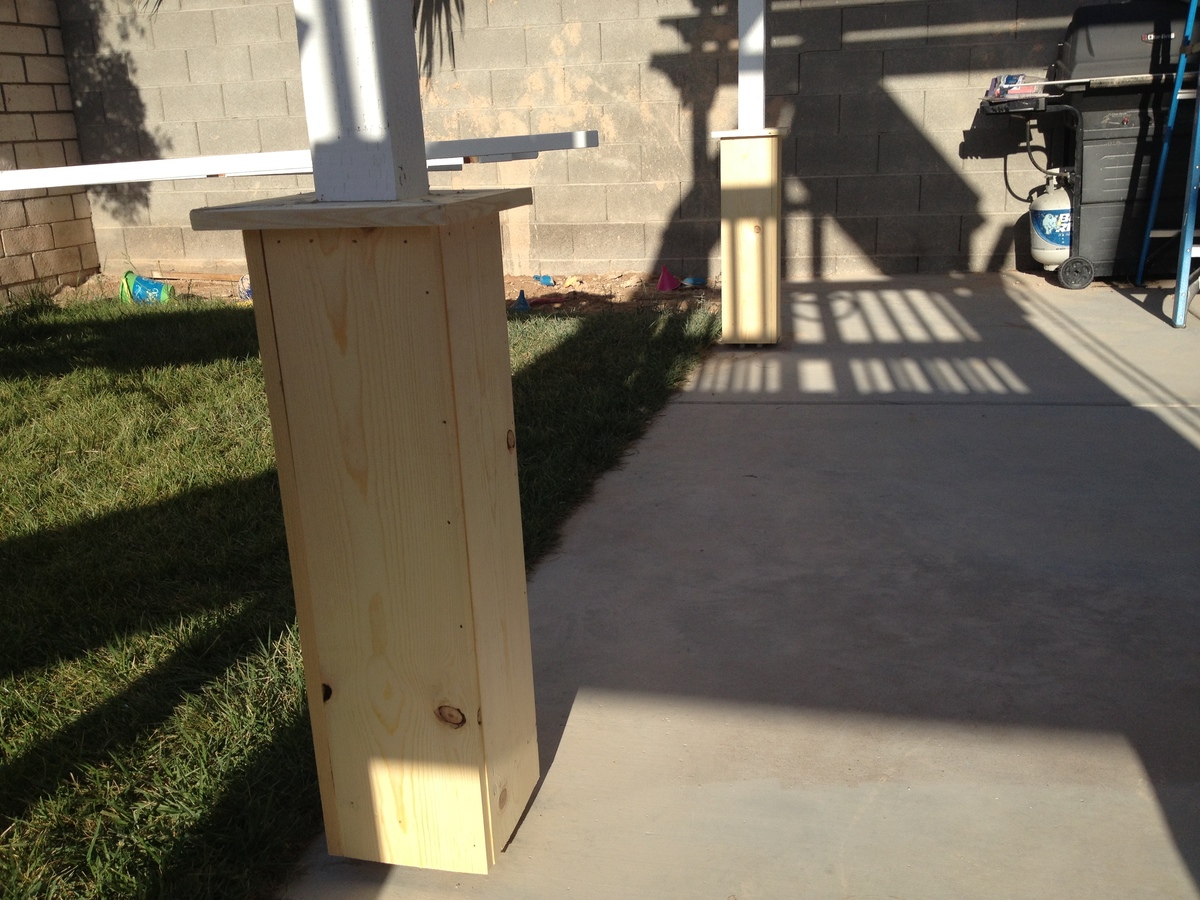
1. 2x6x12 installed directly onto the house (thru the stucco into the studs) using 3/8in. x 5in. lag screws. (Tip: Seal the top edge of the 2x6x12 that's against the stucco so water doesn't run behind it and down into the lag screw holes.)
2. Install the 2x6 Double Shear Hangers (as many as you need for your design)
3. 4x4 post anchors secured directly into the cement patio using Tapcon 3/16 in. x 2-3/4 in.cement anchor screws.
4. 4x4x10ft posts screwed on top of the anchors. Ensure level on all sides (use a partner to help hold the posts).
5. Attach the front and side 2x6 beams to the 2 posts (again, use a partner to help hold posts while you're up on the ladder screwing your beams to the posts)
6. Attach the remaining 2x6 support beams.
7. Attach the 2x6 cross beams on top (whether you inter-lock them by cutting notches or simply resting them on top, be sure to toe-nail screw them in with 2in exterior screws).
8. Lay 1x12x12ft pine boards on top in between the cross beams and secure with 2in exterior wood screws.
9. Construct the post bases ("sleeves" or "leggings") which greatly adds to the look, as outlined in the "Weatherly Pergola" plans.
10. Touch-up paint / stain any areas you need.
Built from Plan(s)
Estimated Cost
800
Estimated Time Investment
Week Long Project (20 Hours or More)
Finish Used
BEHR Premium Plus Ultra - Ultra Pure White Satin Acrylic Exterior Paint (2 coats applied with roller)
Recommended Skill Level
Intermediate

Comments

bullitt453

Tue, 05/28/2013 - 07:29

Great work and very detailed post. I plan to build something similar for my parents once they are done with their renovation.

Drop-Down Door Hutch Desk

Submitted by danicarby on Thu, 05/14/2015 - 13:47

I designed this desk from another desk I built. With this one, I wanted the overall foot-print smaller but still something that was able to organize all our office stuff and be able to close everything to keep it clutter-free. We have a small apartment, and although this desk is about the size of an up-right piano, it works perfectly into our living space!

I made it out of raw hardwood (Ash) and because I knew just the wood alone would make this desk heavy/bulky to move I made the top hutch removable. It's held in place by wood pegs (dominos). All the shelves are adjustable and the drawers are full-extension (something I've never had - wahoo)! The drop-down door is help up by 2 pull-out boards on each side (my first desk had chains). I spend a lot of money on this desk because I knew it was a chance in a lifetime to make and wanted it to be perfect and something that would last generations.

I built the main carcass off of plans/measurements I designed, but then all the insides, drawers, shelves, doors, etc where made as I built (because just a millimeter difference in building changes everything)!

If you want more pictures/descriptions of the building process I wrote about it in a 4-part series on my blog.

Estimated Cost
$1,000 for all wood & supplies
Estimated Time Investment
Week Long Project (20 Hours or More)
Finish Used
To achieve the ash gray color I used "General Finishes" brand water-based stains (equal mixtures of Walnut, Antique Oak & Whitewash) with 1/2 ratio of Pre-Stain Conditioner (bought from Woodcraft). I did 2-3 coats stain, lightly sanded and sprayed 2 coats of Ceramithane clearcoat using HVLP sprayer (sanding with 550 grit paper in between).
Recommended Skill Level
Intermediate

Comments

Bookshelf

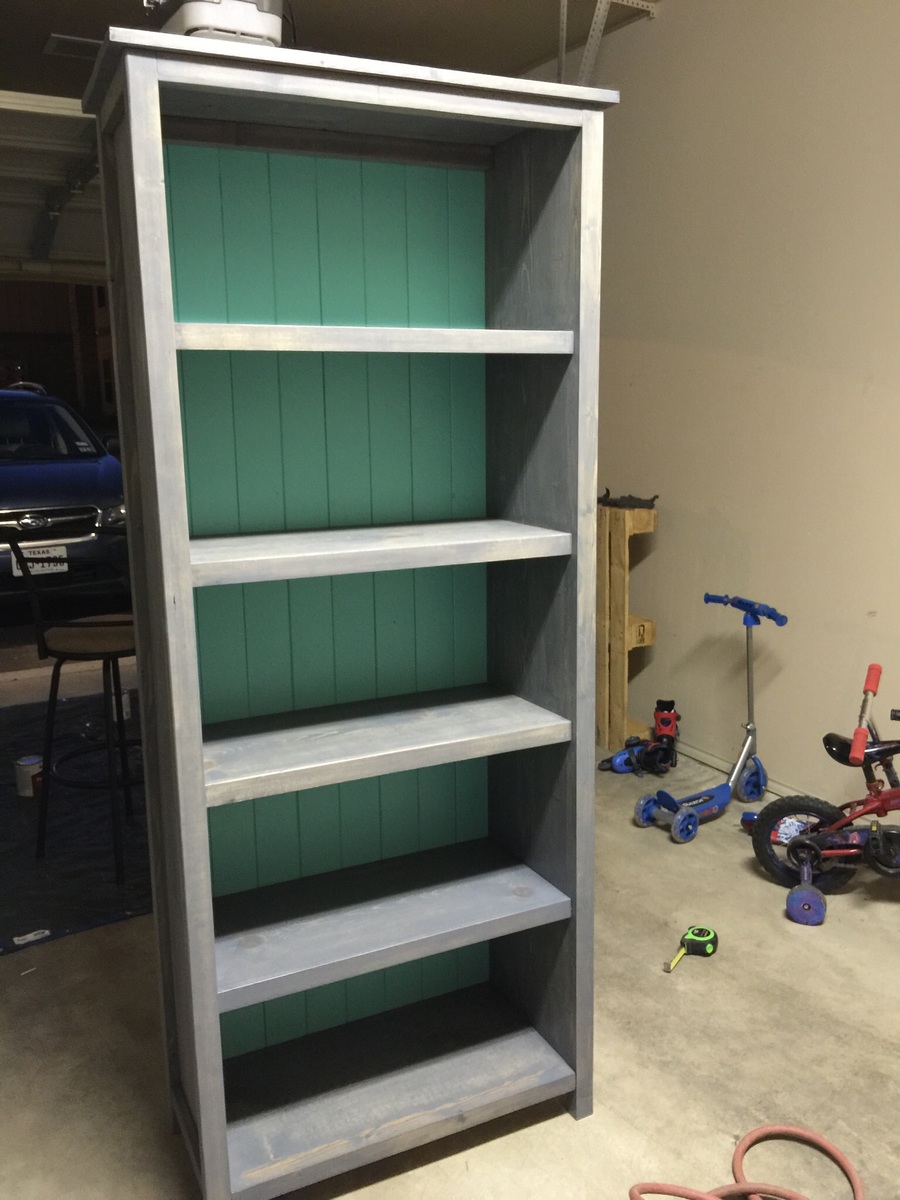
We added some height and width and a fifth shelf. So pleased with the outcome!

Estimated Cost
$100 including stain and paint.
Estimated Time Investment
Weekend Project (10-20 Hours)
Finish Used
Weathered grey stain and matte finish poly. Used acqua paint color for planking on the back.
Recommended Skill Level
Beginner

Comments

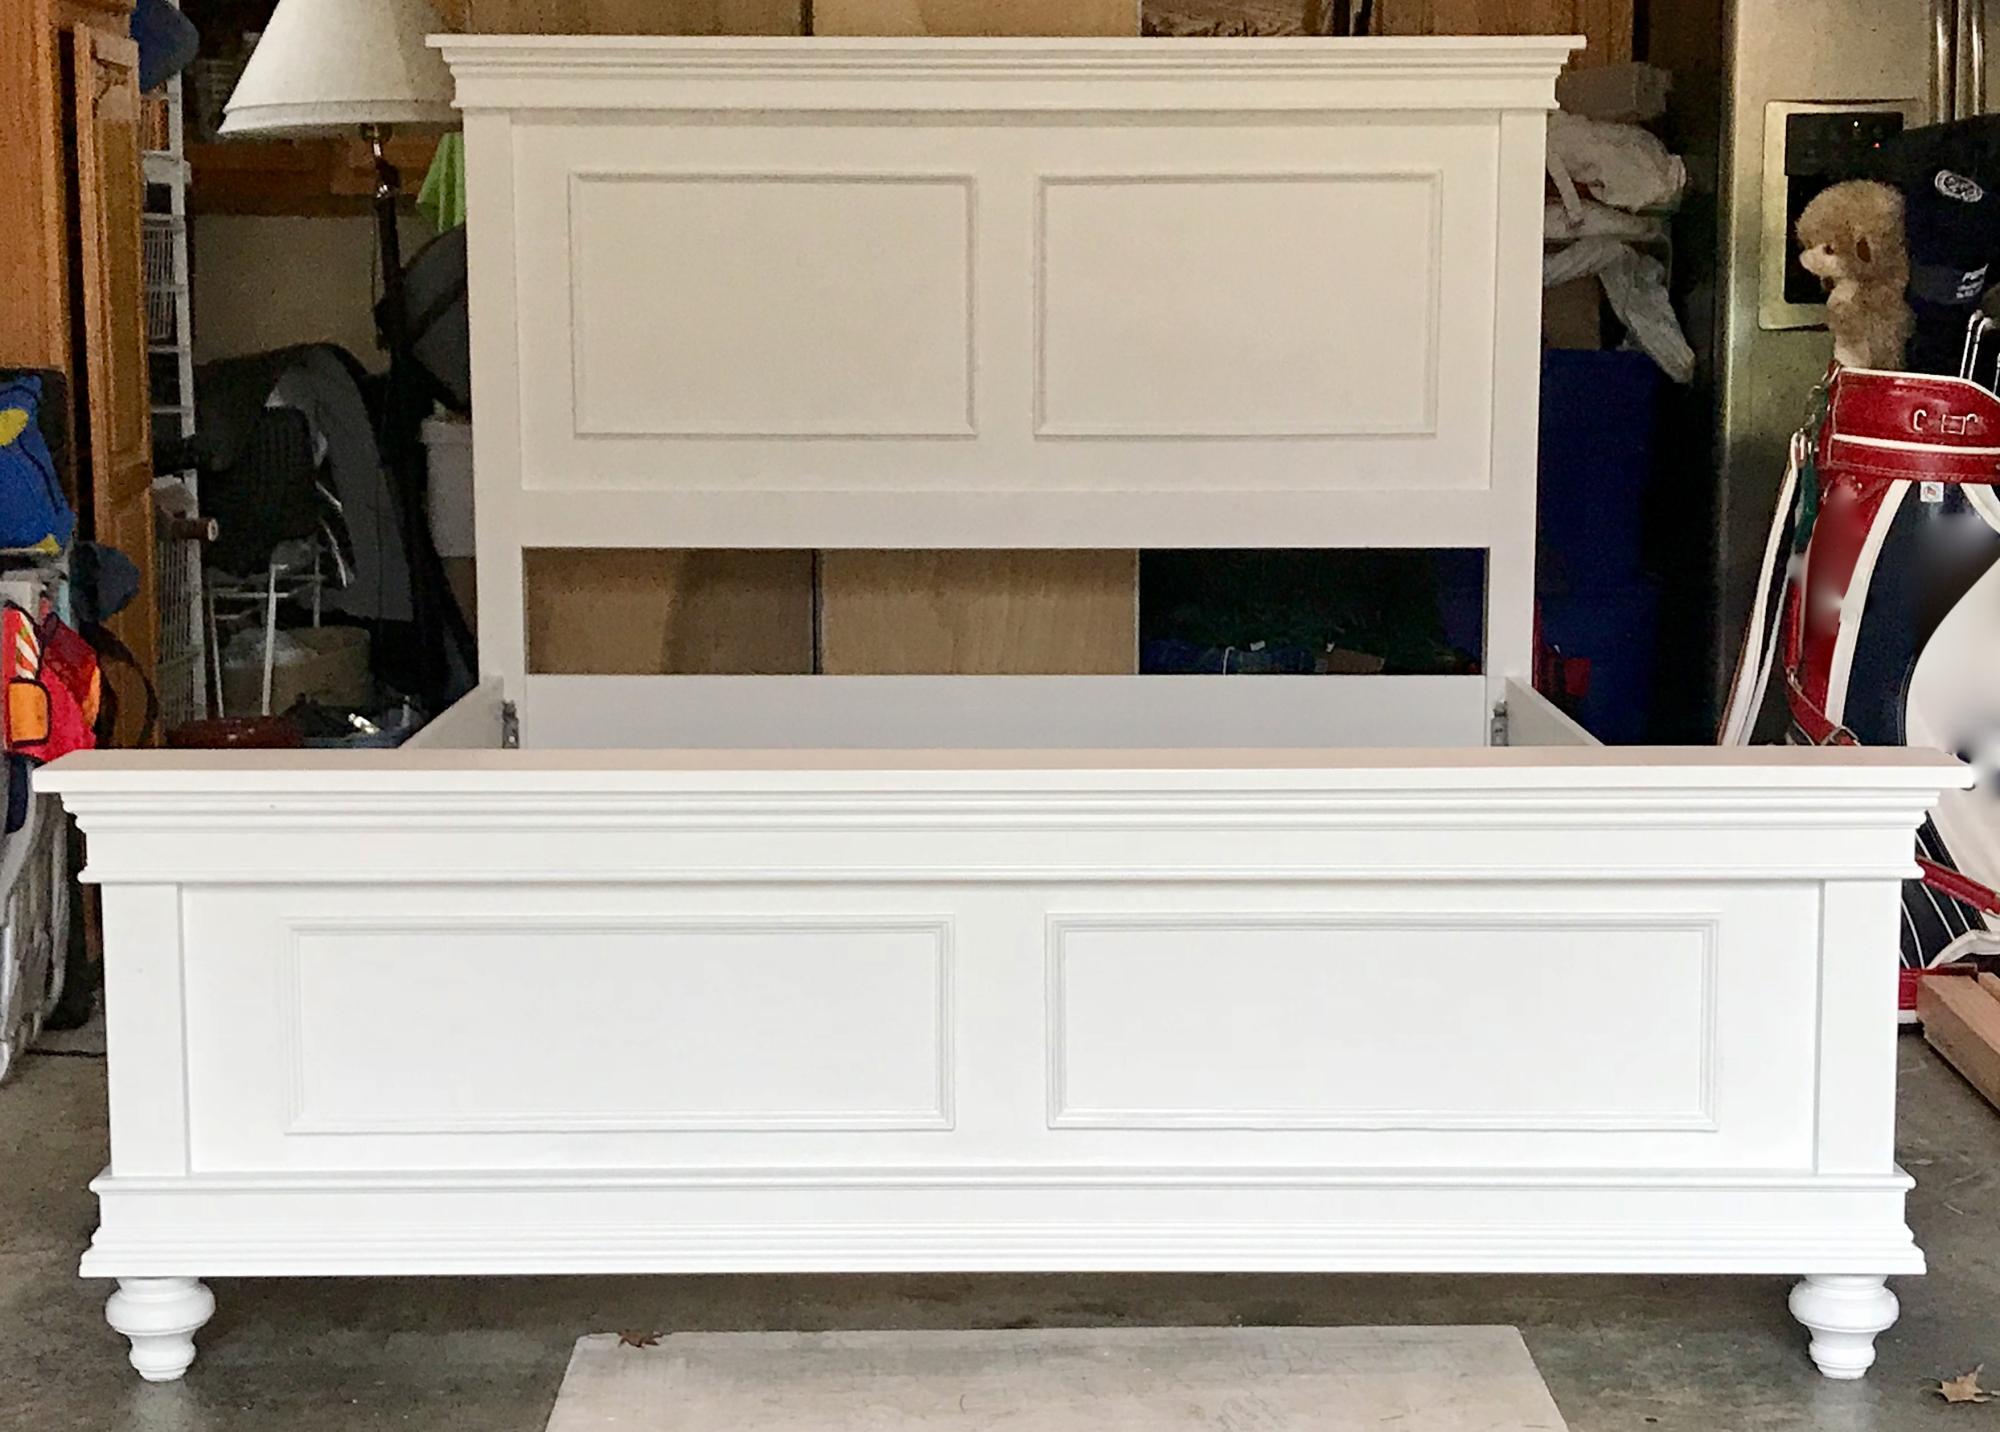
Farmhouse Queen Bed

Submitted by Anonymous (not verified) on Sun, 12/05/2021 - 06:07

I saw the Ana White Farmhouse king bed and used it as inspiration. I made a few modifications and adjusted the measurements to fit a queen bed.
Thanks for the inspiration!

Comments

Trash Bin

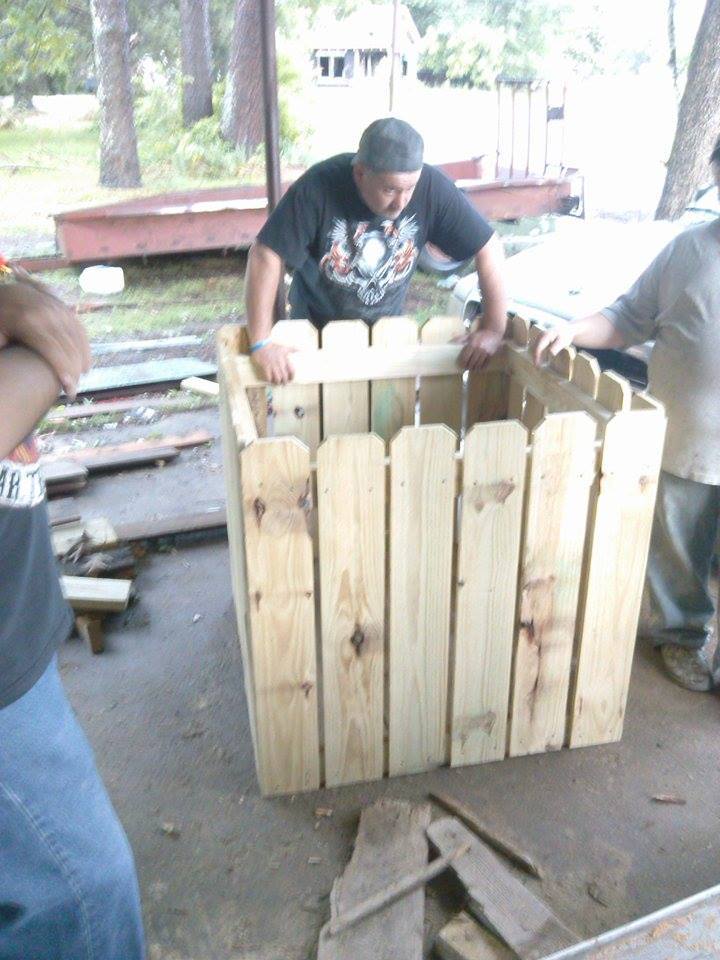
I couldn't find any plans on here for a simple outside trash bin so I drew these up and it turned out great
I used 12 1x6x6 fence pickets like you use for privacy fences they were 1.75 each and one 16 foot 2x4 and 1 10 foot 2x4 the trash bin is 3 foot tall and a 3 foot square

Estimated Cost
$35
Estimated Time Investment
An Hour or Two (0-2 Hours)
Recommended Skill Level
Beginner

Comments

First Build-Dog Kennel

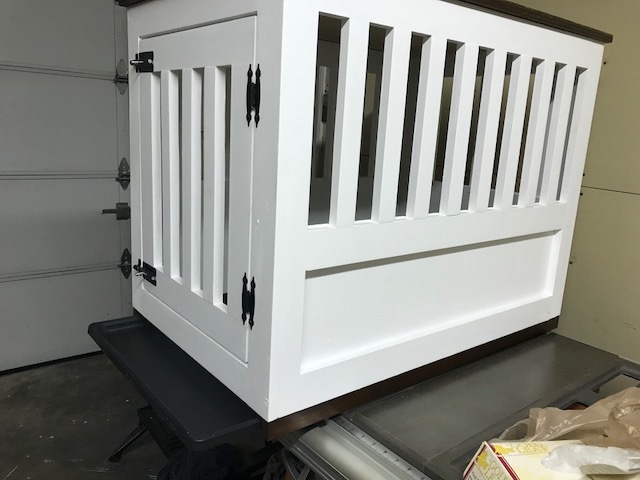
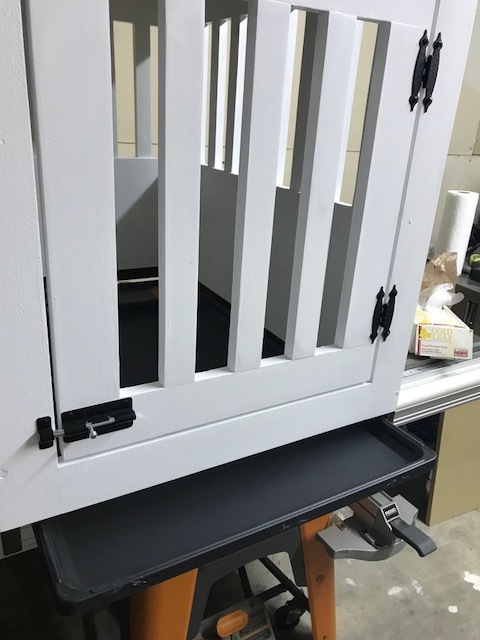
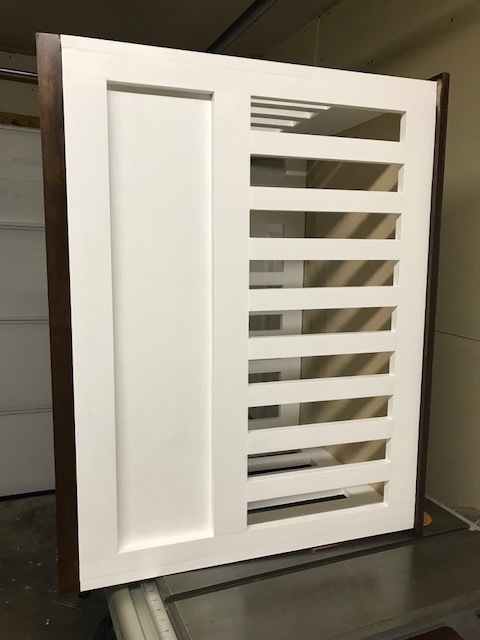
Made the kennel following the Large Wood Pet Kennel End Table plans as a gift for my mother in law, put a 1x2 rim at bottom cut to 1 1/4" to allow for a pan/liner to be slid in and out as needed. Mother in law was surprized and Extremely pleased.
 

Built from Plan(s)
Estimated Time Investment
Weekend Project (10-20 Hours)
Finish Used
Top and Trim mahogany gel stain, Frame white paint
Recommended Skill Level
Intermediate