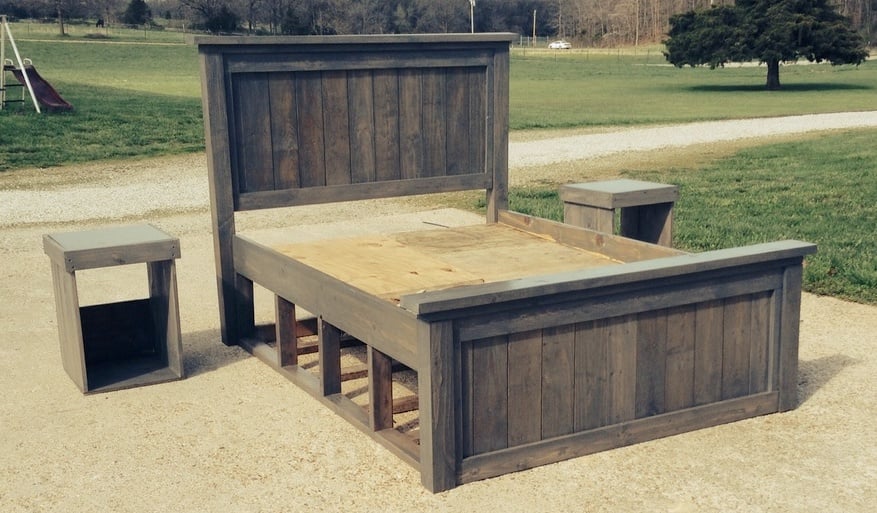
Community Brag Posts

Queen Loft Bed

Submitted by christy on Tue, 05/22/2012 - 07:54

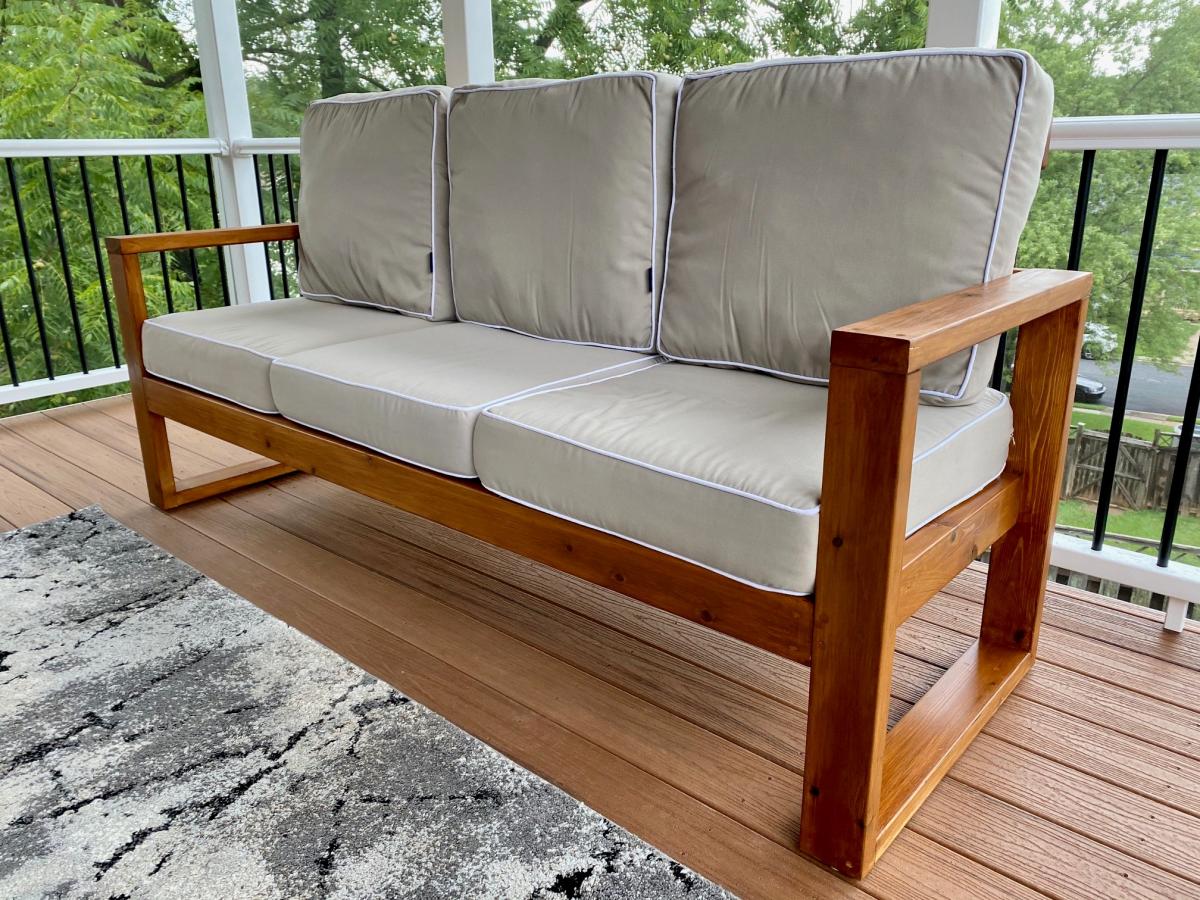
I made this bed for my 6 year old daughter. I loved Anna's Loft Bed plans, but she wanted a bigger play area underneath. So I modified the twin loft bed plans to fit a queen mattress. I also added extra supports for the mattress, and I used PureBond plywood on top of the supports for the mattress to sit on.
That's the Farmhouse Toddler Bed underneath. My younger daughter inherited her big sister's twin bed, so the toddler bed was put to use in the new "playhouse."

Estimated Time Investment
Week Long Project (20 Hours or More)
Finish Used
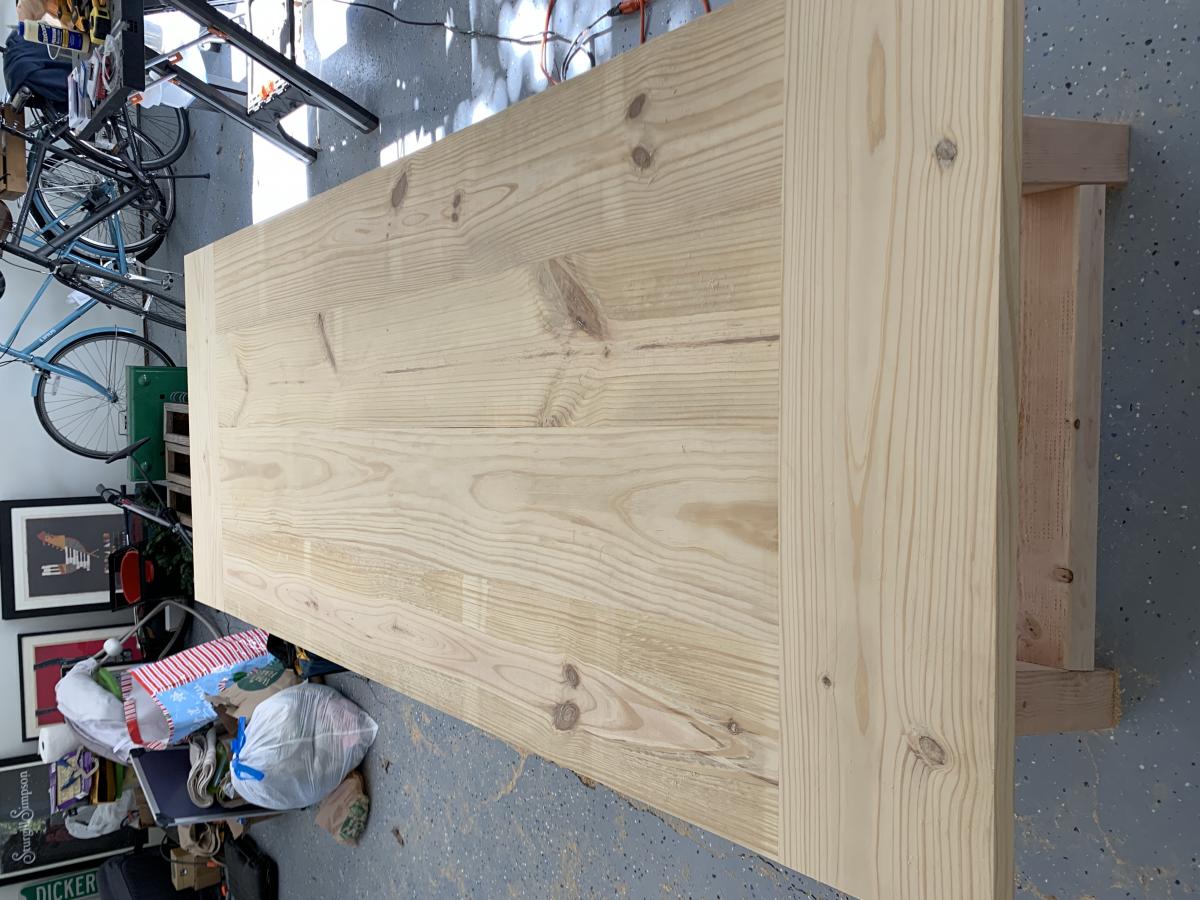
I sanded the wood and primed it. Then I sanded (lightly) again and painted it with Valspar latex enamel in Gloss Almond.
Recommended Skill Level
Intermediate

Comments

Neatha (not verified)

Mon, 08/20/2012 - 13:04

Do you have your modified plans still? I don't know where to begin with editing the originals. I am moving and we have limited space I need to place a desk under and queen sized bed but my ceilings are only 8ft.

Lindsay (not verified)

Sun, 09/02/2012 - 12:45

I think it's great that you modified it to a queen! I live a studio and NEED something like this. Could you share the modifications? It looks beautiful = )

christy

Sun, 09/02/2012 - 20:58

The changes I made were:
End planks cut to 63"
Top back guard and front and back rails cut to 87"
The top guard rails on ends cut to 66"
I measured for the mattress supports and the front guard rail after the rest was completed.
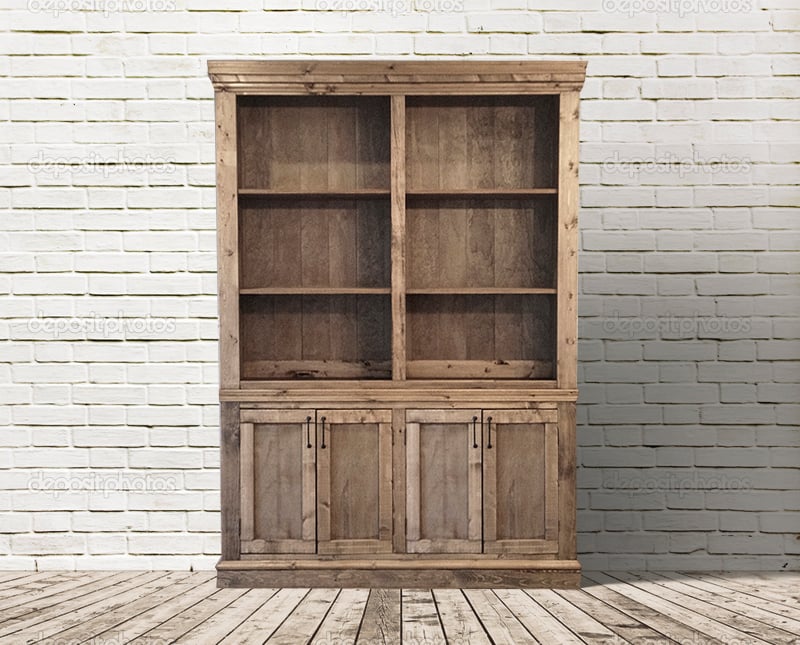
You should also measure for the bookcases after the rest is completed, but each of mine wound up being about 31" wide.

Everything else was pretty much the same.

Hope that helps.

dbai (not verified)

Thu, 11/01/2012 - 08:24

This is wonderful - I've been looking to make something like this for an urban efficiency (adult) apartment! Thanks so much for sharing your modifications!

gmur589

Mon, 07/29/2013 - 14:08

Will the height of the bed allow for adults to stand under it? If not what modifications should be made to make the height fit a standing adult? (the highest being 6'1" male) Thanks! =D

etb1999

Sun, 10/06/2013 - 08:23

Hello, about how much did it cost you to make this?
THANKS

NicoleLance0826

Fri, 09/19/2014 - 12:30

Hey Christy I was wondering if you could send the plans for upgrade to queen size. I cannot pull up the changes. Thank You. Im sure its not to many changes.

pretty-prima

Thu, 03/24/2016 - 16:52

Hello! I would like to build this queen sized bed, could you give me a cost estimate? I don't have any wooden planks sitting around so I would have to buy them all new.

Log Cabin Birdhouse

I enjoy making birdhouses and log cabin style is my favorite. I make the logs by setting my saw to rip 3/4 pine at 3/4 so I have 3/4 square strips. I then decide the size of my birdhouse and cut the logs accordingly. I also "wittle" on them a little to make it look more authentic. I simply then just stack, glue and nail one row at a time. You can use 1/4 poplar for the roof but I ripped pine at 1/16 and cut shakes with my utility knife and glue them on one at a time (there are 104 on this roof).

Estimated Cost
7.00
Estimated Time Investment
Afternoon Project (3-6 Hours)
Recommended Skill Level
Intermediate

DIY Children's Picnic Table

My first truly functional build! I love how it turned out, but even more importantly my kids are loving it - we are literally using it for every possible meal and snack right now. Perfect summer project, and bonus - we get to keep all the eating messes outside! 


Built from Plan(s)
Estimated Cost
$22.50
Estimated Time Investment
Afternoon Project (3-6 Hours)
Finish Used
For the first table I sued a combination of stains.. Minwax Jacobean and Weathered Grey with a white latex paint wash. White semi gloss Behr for the legs and bottom half of table.
Second table I used Varathane's Vintage Aqua and I sealed both tables with 4 coats of Varathane's SPAR- Urethane.
Recommended Skill Level
Beginner

Farm house queen/ crate storage

Submitted by Mathcky on Mon, 04/21/2014 - 10:50

Started with the farm house queen bed and changed the plans. I made the head/footboards 3 inches taller and took the panelling on the footboard all the way to the floor. I made storage underneath the bed and night stands. I'm using old apple crates for the storage. I made the night stands with the crate in it too to match the bed. I used a single piece of 18x18 ceramic tile for the top of the nightstand. The set is stained Minwax classic grey. I used a mixture of wood. Oak and pine, surprisingly it stained good and matched up. The crates aren't in the pictures yet. We have an older house with small rooms so the storage is perfect. The grey finish looks good for the old wood look with newer wood used

Estimated Cost
$100.00
Estimated Time Investment
Weekend Project (10-20 Hours)
Finish Used
Minwax classic grey
Some pieces were stained more then once to get an even,matching color
Recommended Skill Level
Intermediate

House Number Planter from Cedar Fence Picket

Submitted by Juvlyne on Mon, 05/18/2020 - 07:30

Used Ana’s plans for this just made one modification, which was adding wire to the bottom so the plant can drain out. I also stained the fence picket before putting it together. The numbers were the most expensive part of this project they were ~$18. https://ana-white.com/woodworking-projects/house-numbers-vertical-plant…

Estimated Cost
$20
Estimated Time Investment
An Hour or Two (0-2 Hours)
Finish Used
Minwax Oil based wood stain grey & Krylon Matte clear coat spray
Recommended Skill Level
Beginner

Modern Outdoor Chair - High Back Adirondack

Modified with a high back and modern adirondack arms.

The base of the chair is built exactly to the plan except that the arms are done in a modern adirondack style.

The back was made independently to fit inside the base and then attached to the plan base.

Very comfortable but very heavy chair even without the modified back.

Not stained yet obviously.

Cushions are hard to find I think I would make it slightly smaller next time and maybe even find the cushions first and alter the plan to fit.

Estimated Cost
$45 Can
Estimated Time Investment
Afternoon Project (3-6 Hours)
Finish Used
None yet
Recommended Skill Level
Beginner

Comments

Night Tables

Submitted by Aisha on Fri, 07/20/2012 - 09:40

I used the plans for the Reclaimed Wood bedside tables but I didn't want to make all those drawers (being a beginner) so I settled on one. It took me fairly long to complete but really it should have been only a weekend project. I love the way they turned out.

Estimated Time Investment
Week Long Project (20 Hours or More)
Finish Used
One coat each of Varathane's Early American followed by Red Mahogony. Two coats of poly.
Recommended Skill Level
Beginner

Comments

Debi_G (not verified)

Fri, 07/20/2012 - 20:16

I too fear drawers.
Your bedside tables have turned out beautifully!

Outhouse

Submitted by kraftdan on Sun, 05/31/2020 - 10:54

Added shingles and a 3" vent in the back. Also made it a 2-seater to prolong time between dig-outs and extended the roof overhang. Two inch T&G siding seemed like overkill. I used regular 1x8. Painted it to blend in with the woods.

Built from Plan(s)
Finish Used
Exterior paint
Recommended Skill Level
Intermediate

Saw Horse Work Bench

Submitted by jsquires3 on Thu, 07/26/2012 - 23:34

This was my first project off of Ana's site. I followed her simple sawhorse table plans verbatim. The only thing different I did was use a self-made chalkboard paint for the top (instructions under the finish section) and added screws to the left side to mount my power strip with (easy on and off for everything on the bench). I made the top a chalkboard top so that I could write notes on the table and mark measurements for various projects. Costs were $30 for wood (some leftover), $8 for paint, $2 for screws, and $5 for surge protected power strip. If you have any other questions please let me know.

Built from Plan(s)
Estimated Cost
$45
Estimated Time Investment
Afternoon Project (3-6 Hours)
Finish Used
Espresso stain for legs and a self-made dark blue chalkboard paint for top (mix about 1 cup of paint with 2 tablespoons of non sanded tile grout).
Recommended Skill Level
Beginner

modified bench swing

Luv your site. Took your bench swing plan and modified it a bit (shortened depth) and then created a small pergola to hang it from. Just need to stain/poly to finish it off. Thanks for your plan and website it is very inspiring.

Estimated Time Investment
Weekend Project (10-20 Hours)
Recommended Skill Level
Beginner

Nail polish cabinet

So another super awesome project from miss Ana. I dont have a lot of jewelry, but I make up for it with nail polish. I made a few minor adjustments and viola and wicked cabinet to hold all of my piggy painters!

Built from Plan(s)
Estimated Cost
20$
Estimated Time Investment
Afternoon Project (3-6 Hours)
Finish Used
espresso/classic grey. Poly
Recommended Skill Level
Beginner

Comments

balloongal247

Tue, 06/24/2014 - 10:55

Did you use 1x3s for the shelves and doors, and 1x4s for the rest? I've been needing a nail polish shelving unit, so I may copy you. :)

Picnic Table

Submitted by asaldanha on Fri, 06/27/2014 - 07:20

Wanted to kick start my summer projects with something that would not take too long. So I built this picnic bench for a friend over the last weekend. Thank you Ana for the plans.

Estimated Cost
$150
Estimated Time Investment
Day Project (6-9 Hours)
Finish Used
Benjamin Moore Red Barn Stain
Recommended Skill Level
Starter Project

Comments

gkatie26

Sun, 03/01/2015 - 12:16

I was just wondering if these are 5ft boards from the plan or if you used longer boards? If so what length did you use? Love the way this one looks! :)

Miter saw stand with rolling tool storage carts

Submitted by UCF99ENG on Fri, 11/25/2016 - 18:04

When I saw the plans for the miter saw stand that had two rolling tool storage carts, I knew I had to make it.  Having a cart used for an outfeed table is a brilliant idea.  It was a fun project to make.  I tweaked a few dimensions because I like taller workbenches because I'm taller.  Now my shop is looking more organized.

Estimated Time Investment
Weekend Project (10-20 Hours)
Recommended Skill Level
Intermediate

Comments

CSaintD

Sat, 03/18/2017 - 09:02

Very nicely done.  I am thinking about building the same system.  How is the dust control on the mitre saw working?  That is my one concern, that sawdust will be all over my other tools when I use the mitre saw.

UCF99ENG

Wed, 05/10/2017 - 20:47

I don't really have a dust control system.  I let the dust fall where it does and then just sweep it up.  I have a wet/dry vac but my wife uses it in the house because it's more powerful than many other vacuums.  If the dust gets out of control, I can just bring the wet/dry vac out to the garage and clean up.  There is lots of room to maneuver the vacuum.

CSaintD

Sat, 03/18/2017 - 09:07

Very nicely done! I am thinking about building this same system but am worried about the dust from the mitre saw getting all over my other tools stored in the rolling sections.  Do you have any issues with that?

Outhouse

Submitted by Speedbump on Fri, 10/16/2020 - 21:04

I built this outhouse for beside our barn. My first large project and I’m really pleased with how it turned out!

Built from Plan(s)
Estimated Time Investment
Week Long Project (20 Hours or More)
Recommended Skill Level
Intermediate

Comments

Garden Shed

Submitted by Anonymous (not verified) on Mon, 01/30/2017 - 06:26

Had to clean out my storage area to make room for my new woodworking shop, so a new shed was in order. Since my neighborhood does not allow large sheds i thought this would be the perfect fit for the small area right outside of the shop. I had to adjust the plan to make it narrow but longer. Used pressure treated fence pickets for the siding..

Built from Plan(s)
Estimated Cost
Cost approximately $300-350
Estimated Time Investment
Weekend Project (10-20 Hours)
Recommended Skill Level
Intermediate

Outdoor Sofa - Front Porch

Submitted by mclaudeg3 on Fri, 11/06/2020 - 16:47

This project was quite easy and did not require many tools. The plan allowed me to adjust the measurements easily so it could fit in that space. I used regular 2x4’s and treated the wood with Mountain Ash colour in a semi-transparent stain from Sherwin Williams, I just love the colour! I build 2 - 2 seaters exactly the same. The one side has no arm, as I wanted it to look like a lounge chair. I love to sit in the corner and stretch my legs 😊. I bought the cushion covers from IKEA, and got good quality foam.

Estimated Cost
Wood ~$300
Estimated Time Investment
Weekend Project (10-20 Hours)
Finish Used
2 coats of semi-transparent Mountain Ash stain from Sherwin Williams.
Recommended Skill Level
Beginner

Comments

Seasonal And Holiday

Potting bench

Submitted by Anonymous (not verified) on Tue, 01/12/2021 - 10:46

I used redwood lumber, 2x4s and 1x6s only. I wanted the bench to be a little taller so I used 2x4x10s for the legs to make work surface 38” high and total height 66”. To get the most out of the 8’ 1x6s I made the bench 48” wide. I also had to adjust the depth since I did not use 1x4s. And finally, I sanded the 1x6s because they were rough sawn.
Very fun project! Once I figured out the adjusted cut list the whole project came together in a matter of a few hours.

Estimated Cost
$100
Estimated Time Investment
Afternoon Project (3-6 Hours)
Finish Used
Light sanding, No finish.
Recommended Skill Level
Beginner

Truss Beam Dining Room Table

Submitted by td_tx on Wed, 02/03/2021 - 08:57

We built this table for our dining room. The project followed the plans for cuts and dimensions except for the top. Instead of using 2x10, we used 2x12 and ripped an inch off each side to have flatter top with out needing to plane.

We used pine for the top and douglas fir for the 4x4 base. Before staining we used a pre-stain conditioner. The table was stained using Minwax Early American and then finished with a clear satin polyurethane.

Built from Plan(s)
Estimated Cost
200
Estimated Time Investment
Weekend Project (10-20 Hours)
Finish Used
Minwax Early America and clear satin polyurethane
Recommended Skill Level
Beginner

Comments

RH Inspired Shanty Sideboard & Hutch

Submitted by jhavinga on Wed, 12/31/2014 - 14:34

Have been wanting to build this for 6 months now and just havnt had the time. Finally completed it!
I made some small changes to the design, different trim layouts, different dimensions, and went with a plank look for the back of the hutch instead of a solid peice of 1/4" plywood.

Built from Plan(s)
Estimated Cost
$500.00. This price includes wood, stain, and hardware.
Estimated Time Investment
Weekend Project (10-20 Hours)
Finish Used
1 coat of Minwax Weathered Oak, then 1 coat of Minwax Special Walnut.
Recommended Skill Level
Beginner

Comments

In reply to by ehays216

jhavinga

Thu, 01/01/2015 - 22:48

Thank you ehays216! Ive looked at your Farmhouse Storage Bed a few times.. Have always wanted to try the Steel wool/Vinegar trick.

Cheers,
Justin

timberandsoul

Sat, 01/03/2015 - 07:40

Great job! The love how the color turned out. May I ask where you purchased your backdrop from? And what size it is?

Thanks!

In reply to by timberandsoul

jhavinga

Sun, 01/04/2015 - 16:09

Thanks a lot timberandsoul!
Photo was taken on an empty wall in my living room, Which is currently a light gray wall. thought it looked boring so I did a quick switch of backdrops in PS. I just typed in brick wall in google.

Cheers,
Justin

Singhs

Sun, 01/04/2015 - 16:27

What type of wood did you use, home depot/lowes regular pine or some specialty wood ?

jhavinga

Sat, 01/24/2015 - 13:08

Sure! the plans call for 2 solid sheets of 1/4 plywood for the backing.. I simply just ran the plywood through a table saw at 5.5" wide and brad nailed it the back. =)
The stain is weathered oak and let sit for 15min. Then right away special walnut and let sit for 15 min.
repeat until desired colour. let me know if you have any more questions!

Cheers,
Justin

Sschoono

Sun, 01/08/2017 - 07:33

How many coats did you have to do to achieve this look?  The weathered oak looks so light...and gray.


Thanks!

Painterlyrhett

Sun, 05/17/2015 - 19:40

What was your strategy on attaching the sideboard to the Hutch. I haven't seen where there is any instructions or conversation around this. What and how did you accomplish this and/or is there anywhere to go that discussed this that helped you.

Thanks,