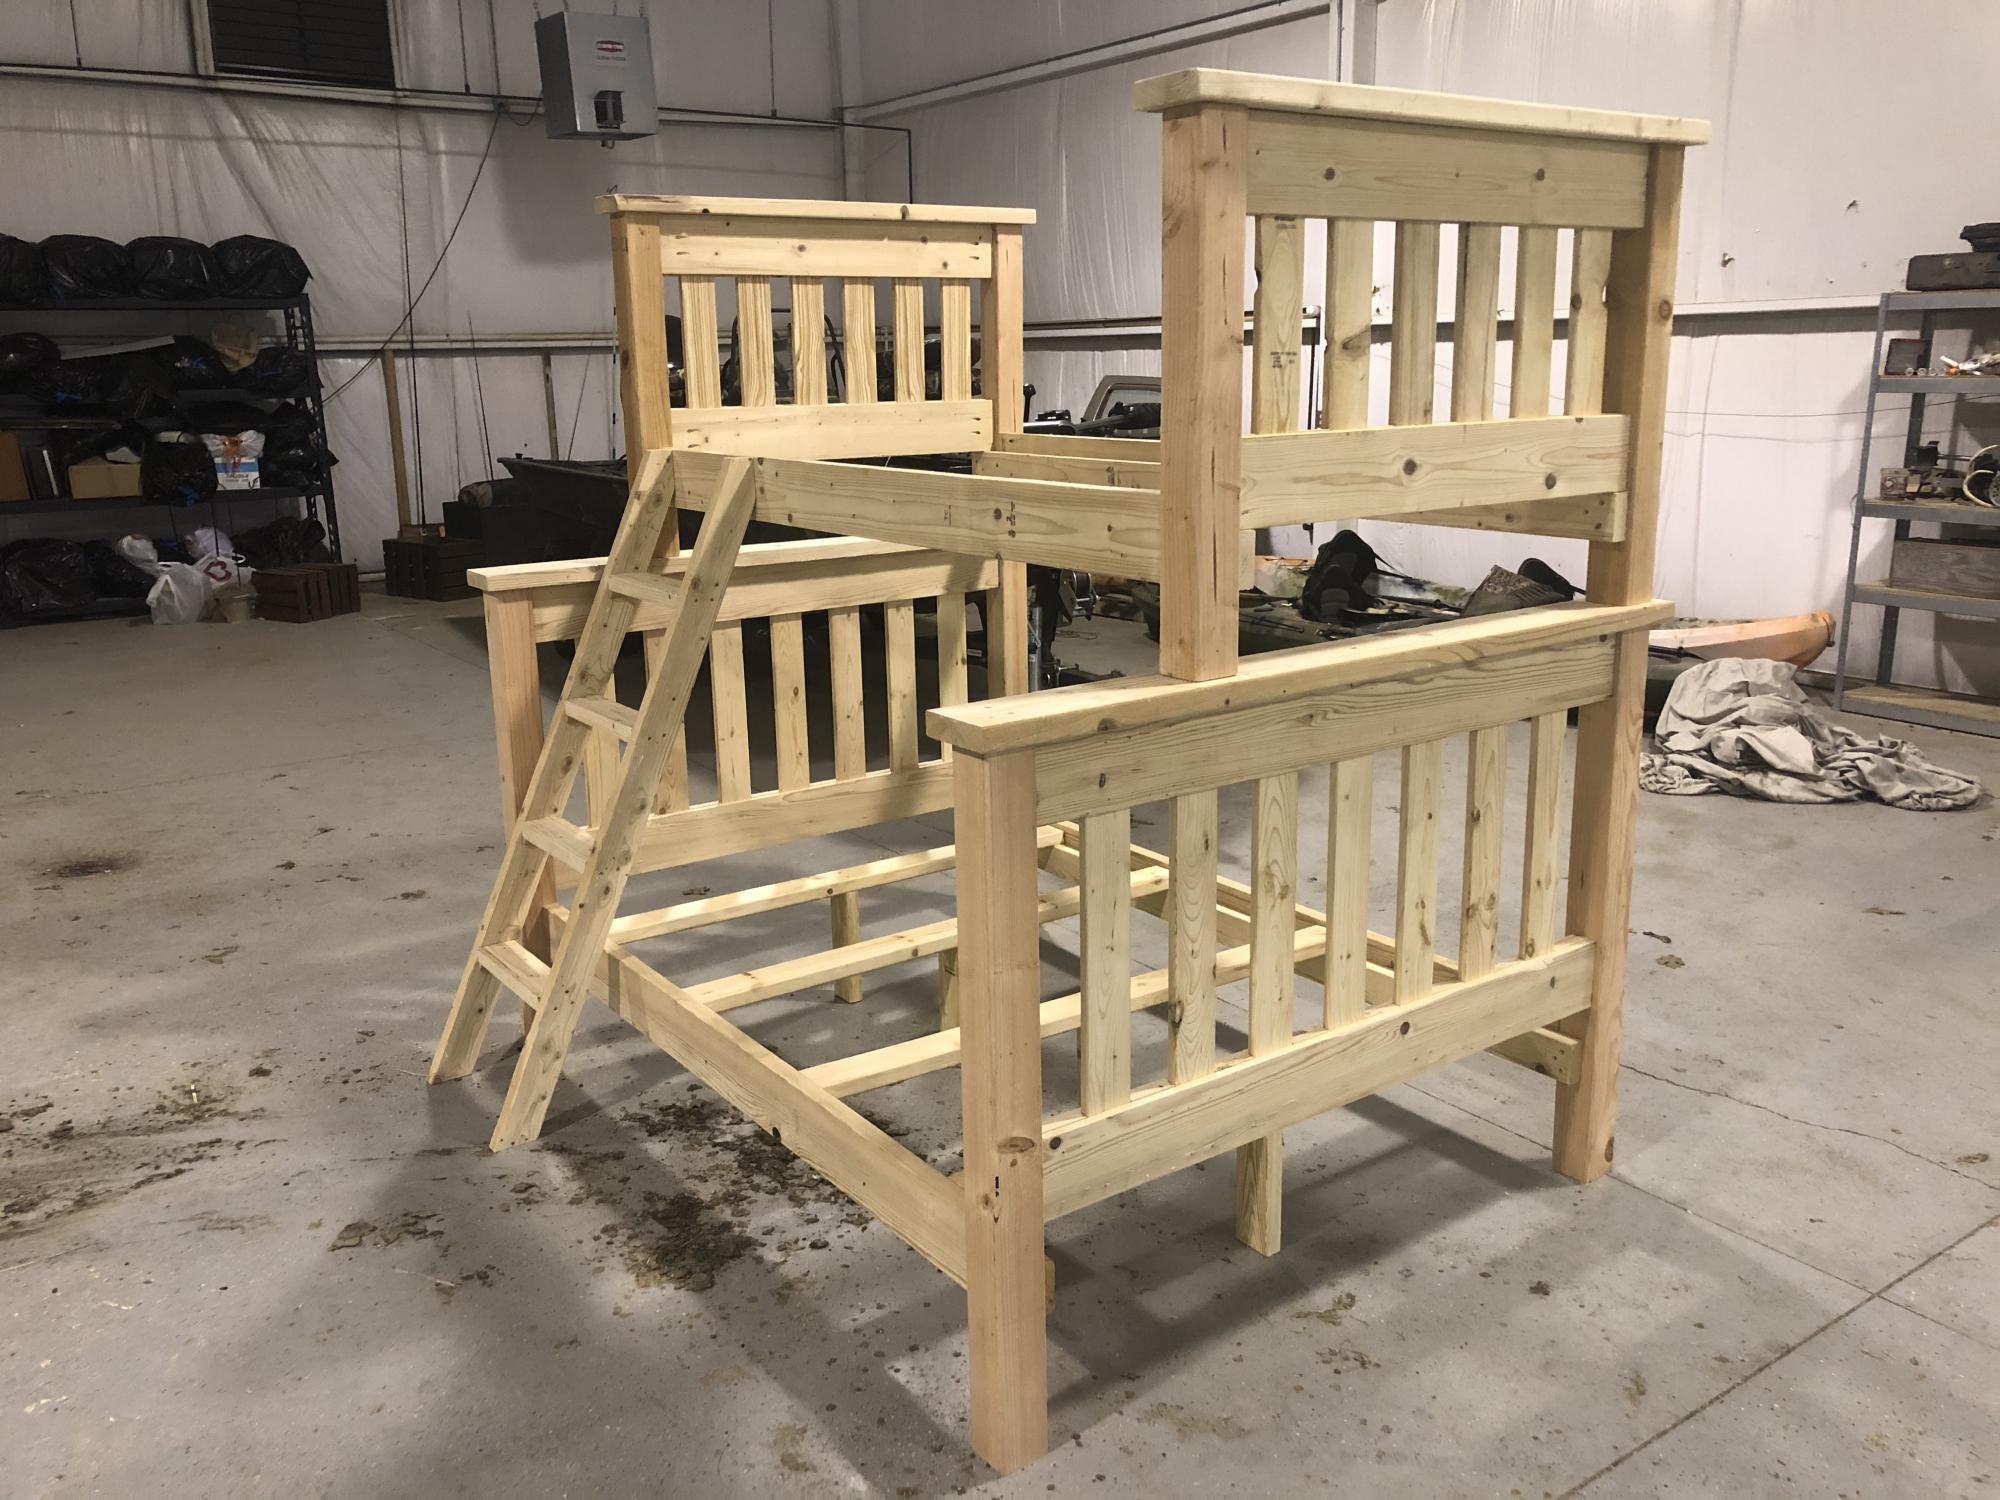
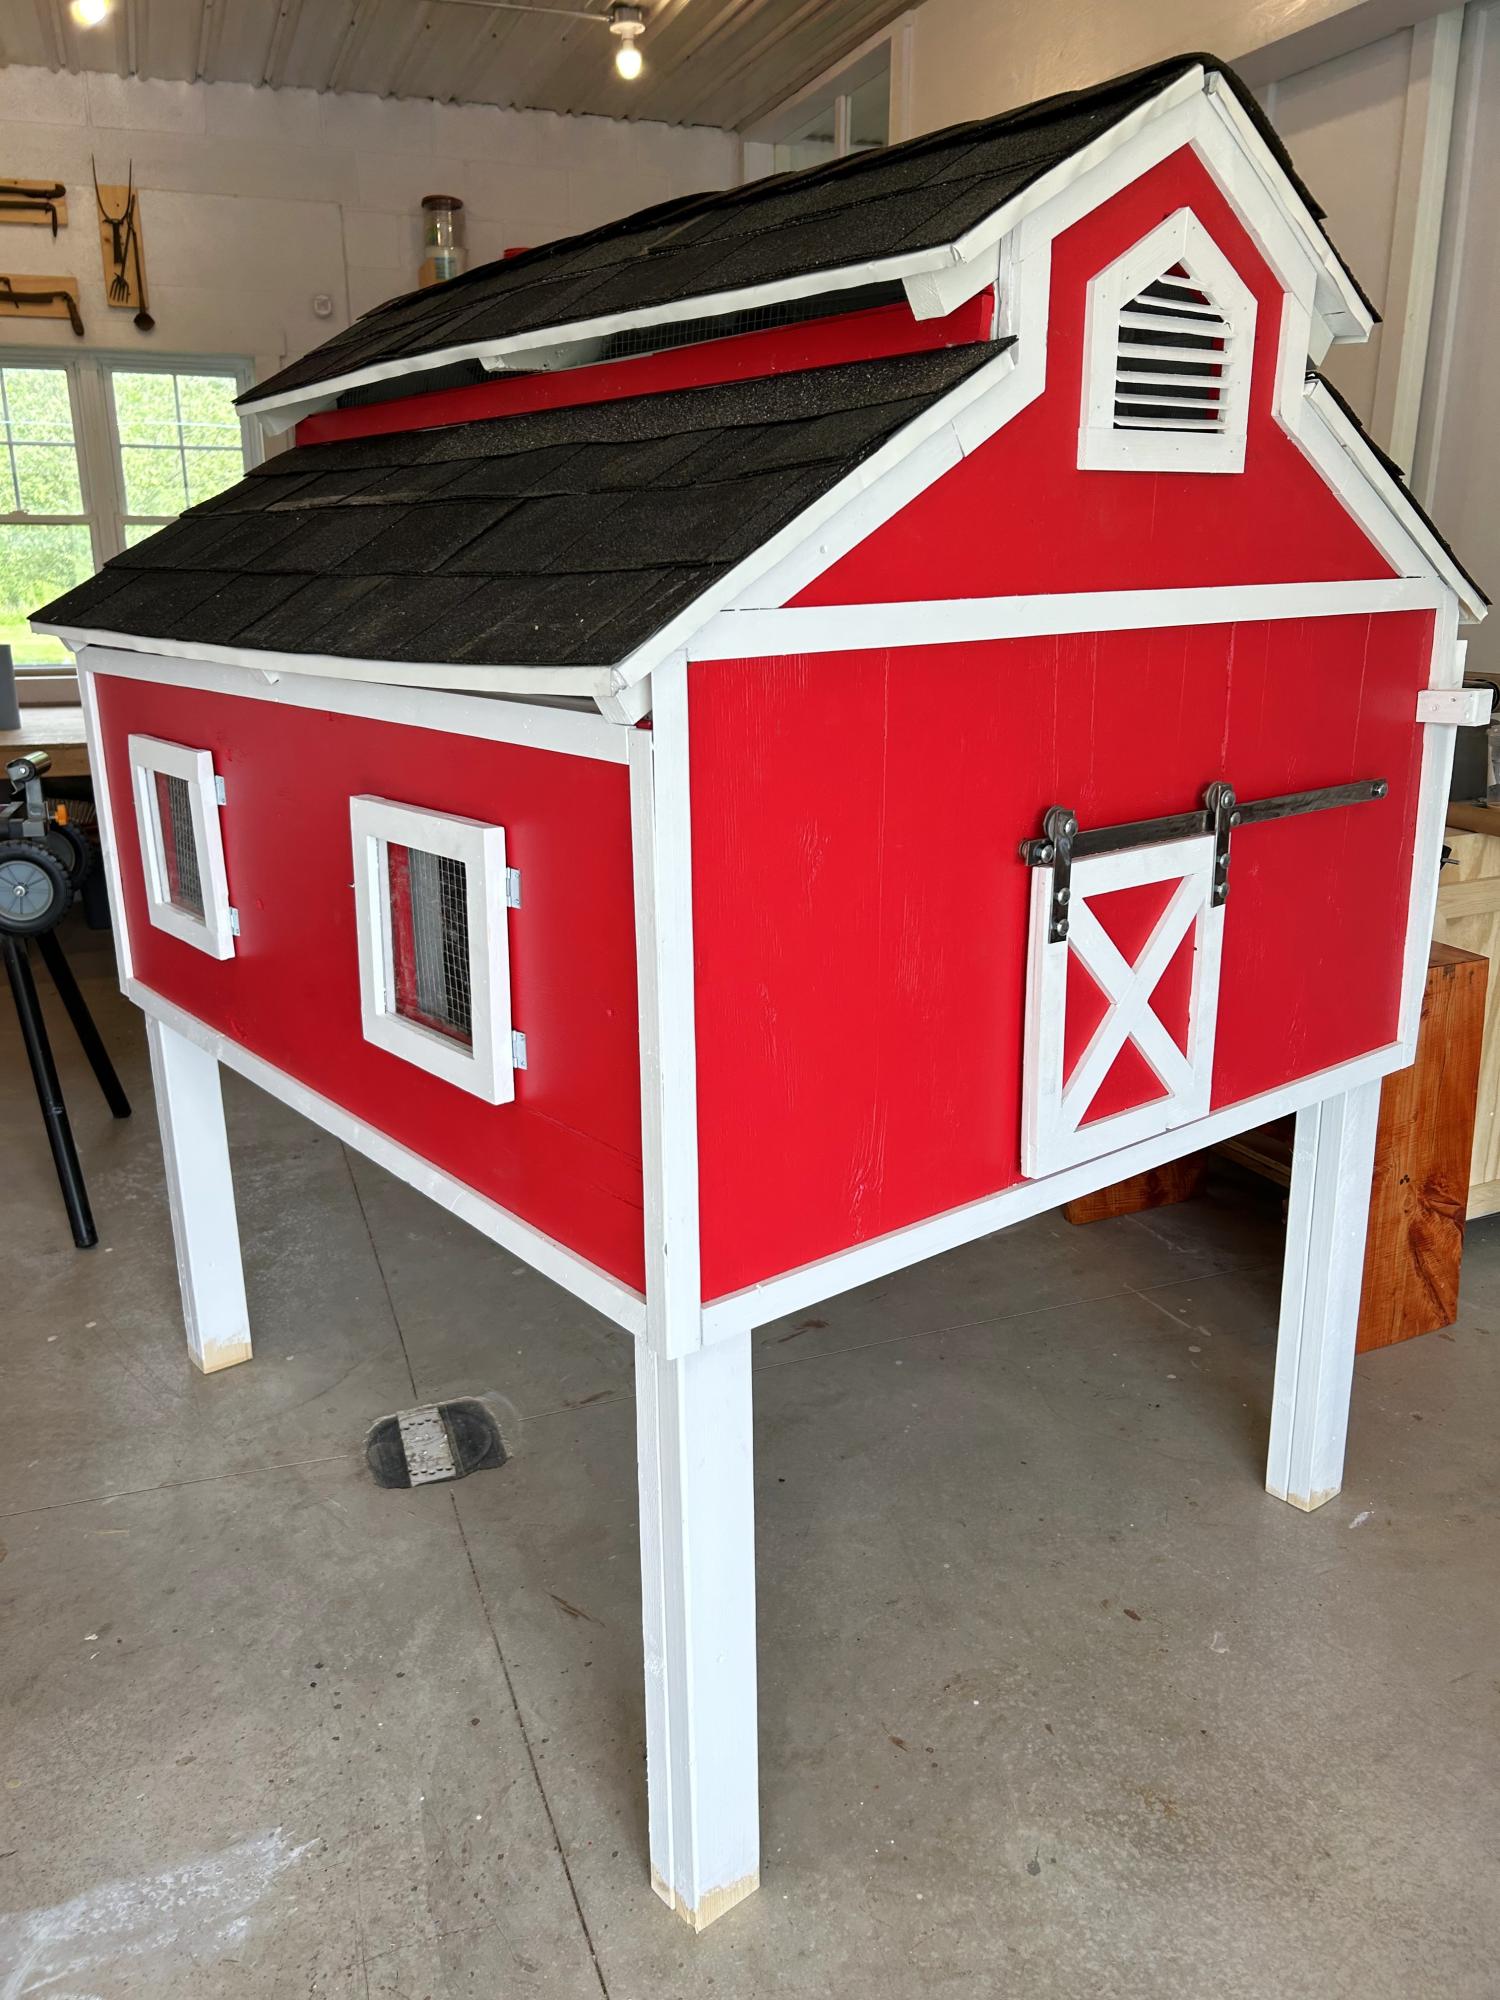
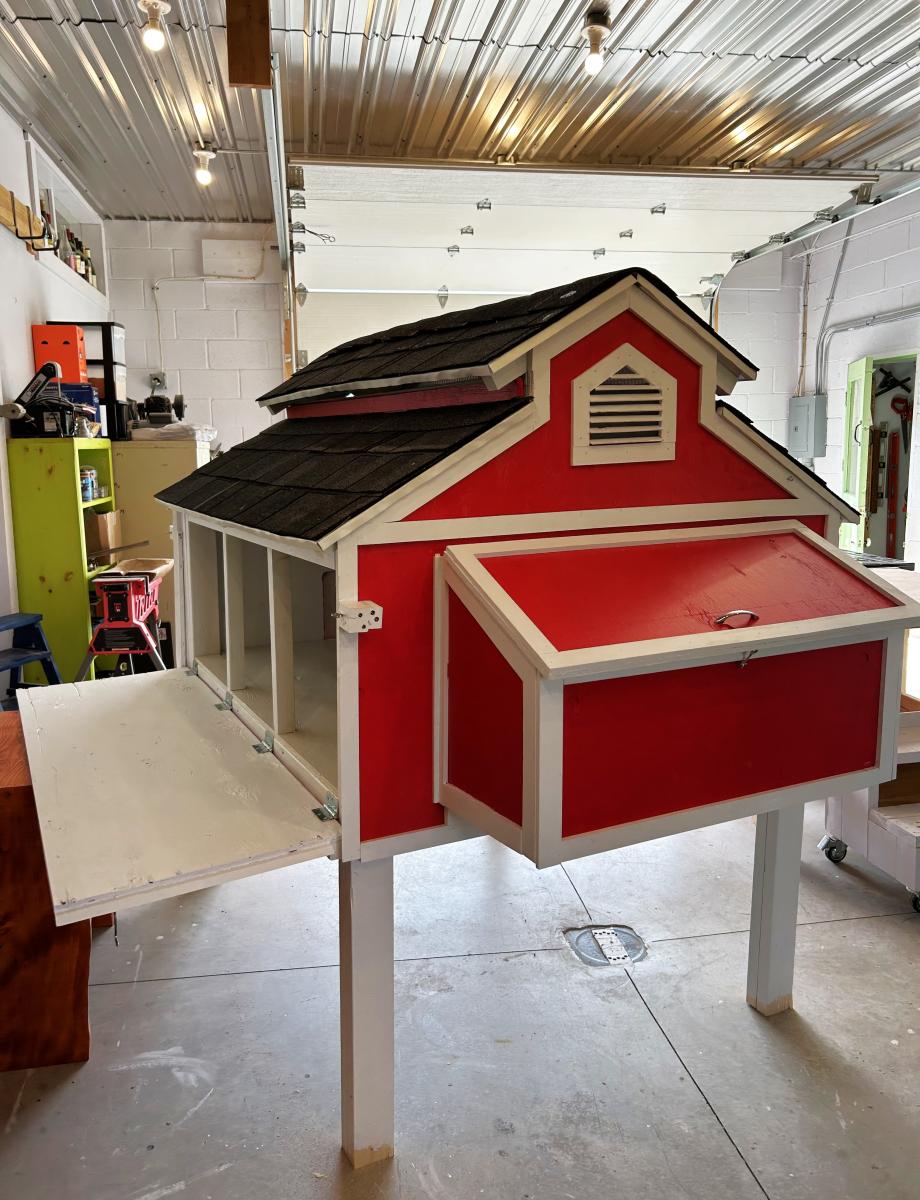
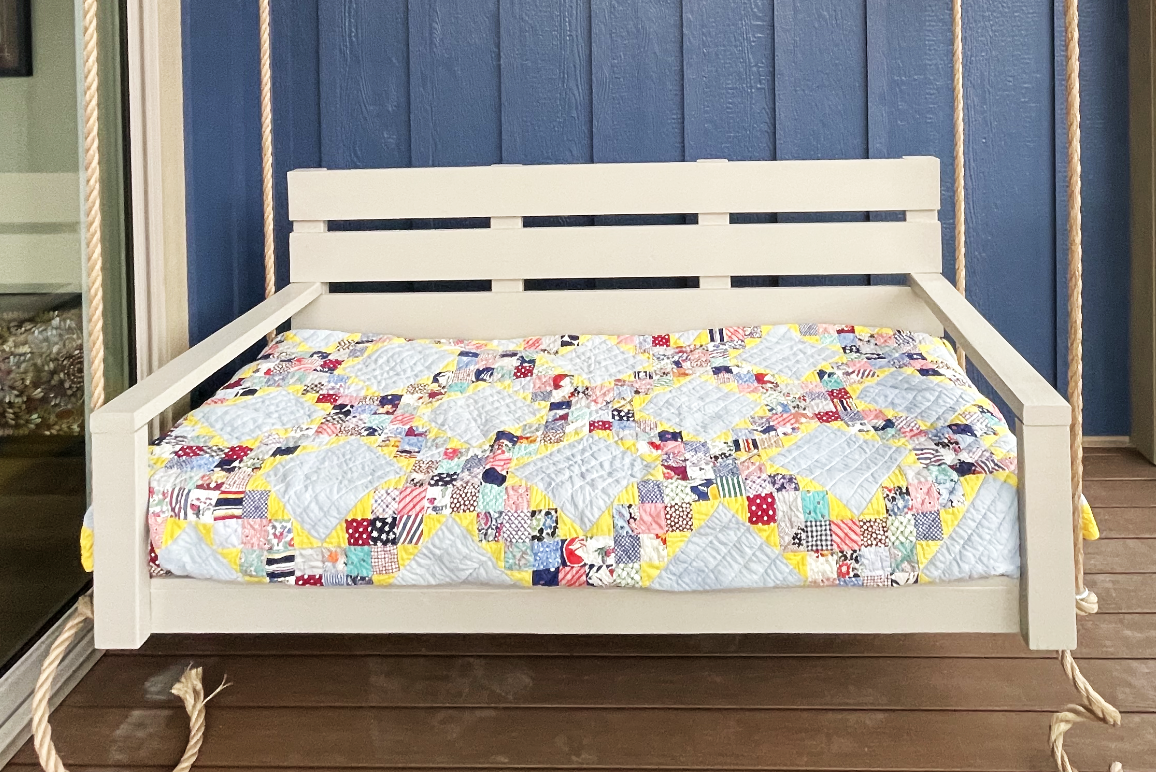
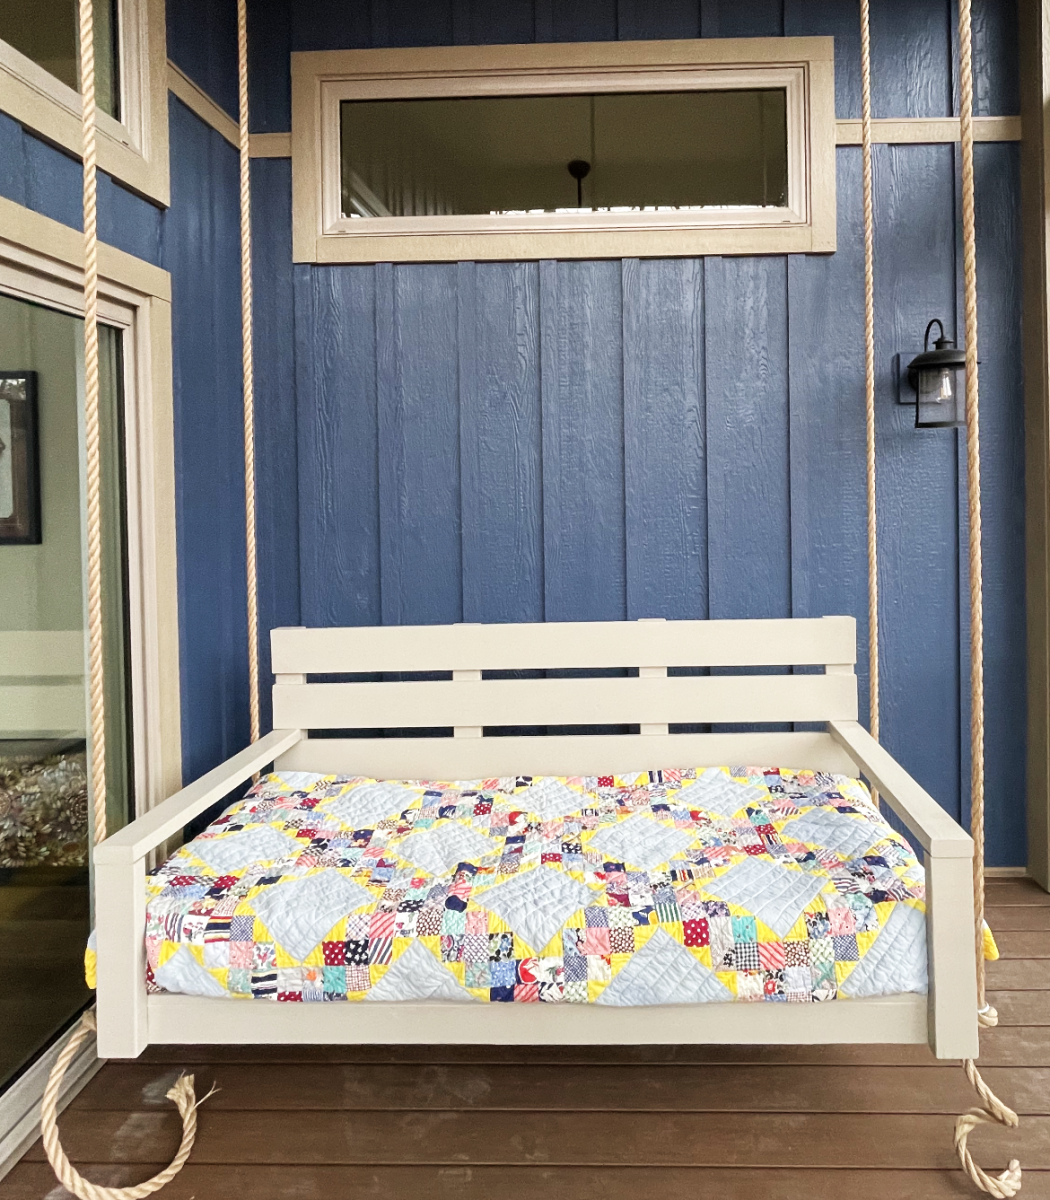
Community Brag Posts

Simple Modern Bed

Submitted by sarah0406 on Mon, 05/13/2019 - 11:04

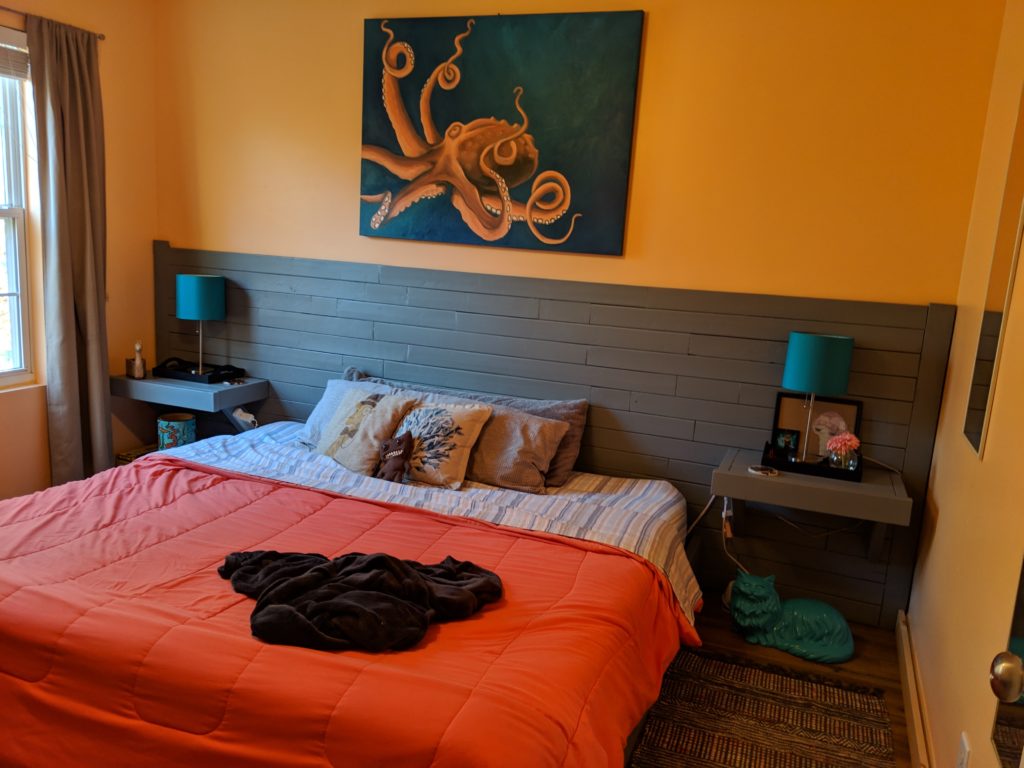
We used repurposed wood from a previous home reno project along with new lumber to build a king-sized bed frame and wall-length headboard - based off of the "2x4 Simple Modern Bed" plans from More Like Home. We are VERY much beginners so this was an incredible learning experience, but the end result looks pretty good, in my opinion!

Built from Plan(s)
Estimated Time Investment
Day Project (6-9 Hours)
Recommended Skill Level
Beginner

Kamado table

Submitted by lmarco191 on Sun, 05/16/2021 - 14:47

The table assembly was Inspired by farm table and workbench plans. It was built from construction grade untreated 4x4 and 2x6 and assembled using Kreg pocket screws and glue. Finish is semi-transparent wood stain. Rather heavy, the table have locking wheels to help move it. The lower shelf is used to store accessories.

The small kamado is just the right size for two people. I added a large ceramic tile under the firebox plus a small inlay next to the grill. That was the top of a small patio table. A few hooks were added as a final touch.

We built it last year; it gets a lot of use as a grill, smoker, bread and pizza oven.

We are very satisfied with the outcome. Many thanks for the plans and inspiration.

Built from Plan(s)
Estimated Time Investment
Week Long Project (20 Hours or More)
Finish Used
Semi transparent wood stain
Recommended Skill Level
Intermediate

Comments

Jacob1234

Mon, 08/02/2021 - 23:34

Your grill is very beautiful, but I prefer cooking in the kitchen, I will explain why, I recently read a lot of Kitchenotic.com here, what connects me and the kitchen most of all is the answers to my any questions, no matter how stupid they are and the answers were always correct

Kids' Playhouse (under stairs)

Submitted by kdins31 on Sun, 12/18/2011 - 09:22

Had the perfect space for a little playhouse under the stairs in the basement and it's been our plan for 4 years to do something. Finally, we did something. Wanted depth so I added the roof and portico. Also added cedar shingles that I picked up for $7 at HD. Inside I had extra laminate flooring so I put that down and added beadboard, chair rail and crown molding. There's also a small transom window above the small kitchen area. The kids love the barnhouse doors with old fashioned doorbell, mailslot and window. The bookshelf under the stairs was the final touch. I didn't use any plans from this awesome site but did, as always, get a bunch of tips and inspiration!

Pin for Later!

Kids' Playhouse (under stairs)

Estimated Time Investment
Week Long Project (20 Hours or More)
Finish Used
Dark walnut stain on cedar shingles.
Recommended Skill Level
Intermediate

Comments

Cindy from Indiana (not verified)

Sun, 12/18/2011 - 19:00

Wow! That is awesome!

You really did a great job on that! So imaginative, too. WTG!

Guest (not verified)

Sun, 12/18/2011 - 19:58

That is so stinkin' adorable! Fantastic job. I love everything about it. Your kids (and grandkids) will remember the playhouse under that stairs forever!

spiceylg

Mon, 12/19/2011 - 06:54

Wow, this is too cool! They are going to love love love this! Can't wait to see the kitchen reveal!

bhoppy

Mon, 12/19/2011 - 08:43

LOVE LOVE LOVE this!!!! It looks amazing! Makes me want to buy a new house with stairs. LOL

birdsandsoap

Sat, 12/31/2011 - 18:26

You did an amazing job on this. I'm planning a bunkbed with a similar facade. I love how cozy it looks without having to make an actual pitched roof. The shingles are such a nice touch that I may have to copy you! And it's wired for lights; you've really outdone yourself.

Guest (not verified)

Mon, 02/27/2012 - 21:14

I love this playroom you created. We are currently in the process of building a playroom under the stairs for our girls. Where did you find the door...it is exactly what I am looking for! What a wonderful job you did!!!

kdins31

Mon, 03/19/2012 - 14:26

Thanks to all of you for the nice comments! Re: the door, I just cut a plain 18x80 door slab ($21 from orange) and trimmed it out. I still need to put the window grille over the open space, and was hoping to find a cool 'speak easy' grille that fits the space.

Thanks again!

megan_m

Fri, 04/27/2012 - 09:07

this is such an amazing little space! great work!

MicheleInAlabama (not verified)

Thu, 05/03/2012 - 23:38

This has to be one of the most adorable things I've ever seen! What an awesome idea......how cool is that for the kids??! Love the lighting and the laminate (or is it hardwood) flooring inside. Even the stove is gorgeous! Such fond memories will be made there and remembered forever. Kudos!!

Amanda Rhoads (not verified)

Wed, 12/05/2012 - 15:34

Oh my goodness this is such an inspiration! However, as a beginning tool user, I don't think I could get my finishes so nice. How much experience had you had at this kind of stuff before? Was the area closed in before this project or did you do that too? I've got an open stairway into our basement and would be starting from scratch with ceiling, walls, etc. and have no experience hanging drywall or anything. I think it would take me a year. Great job, and thanks for sharing!

maggieasselin

Sat, 06/21/2014 - 12:51

Hi there!

I was just wondering how you made the door for your play house? We're basically stuck at this level in ours right now... ;) Thanks for any tips!!!

MITER SAW CART

Great Miter saw cart plans! Absolutely love how mobile my miter saw is now. I added adjustable shelves and drawers for a ton of storage.

Built from Plan(s)

Comments

Bunk Beds

Submitted by Anonymous (not verified) on Thu, 10/10/2019 - 17:26

A lot of fun to build and not that hard at all. Thank you for the great plans.

Estimated Time Investment
Weekend Project (10-20 Hours)
Finish Used
Minwax Polycrylic Semi gloss
Recommended Skill Level
Beginner

Storage cabinets

We needed extra storage in the living room and I didn’t want to pay mega bucks for our cabinet guy to make something I thought I could do. 
Its four ft tall, 3 ft long and 16 inches deep. I added 1x3’s to the sides and 1x4’s to the bottom.
I bought the Kreg shelf pin jig and it was super easy to use. Plan to use it again on a bigger project. 
Next is a fireplace and TV surround. 

Thanks Ana for the easy to follow plans!
 

Estimated Cost
$250-300. for both cabinets
Estimated Time Investment
Week Long Project (20 Hours or More)
Finish Used
Valspar cabinet paint in cream delight, applied with a sponge roller, 3 coats and sanded in between each coat. Knobs from Hobby Lobby and hinges from Hardware Source.
Recommended Skill Level
Intermediate

John's Washer/Dryer Pedestal

Submitted by coveyjt on Sun, 06/12/2016 - 10:59

The wife has a hard time bending down so she wanted pedestals for the washer and dryer.  The metal ones with a drawer were too tall.  I showed her Sausha's and she really loved that design.  I basically used the same construction plans idea from Sausha's project and some tips from Ryan's brag post.  But, I wanted to beef it up some.  I didn't like the L-bracket to attach the top and 4X4 legs.  It didn't seem sturdy enough for me.  I used my table saw to square the edges on the 4X4 posts and the 2X6 rails.  Then I used my Kreg jig and glued and screwed everything together.  I liked Ryan's trim ideas, so I used baseboard trim for the bottom and flipped it for the top trim.  I made a 1/2" lip so if it were to vibrate, the washer/dryer would not fall.  I put the trim on the bottom of the legs and was considering putting on the top but I put some different trim all the way around the bottom of the 2X6 rails.  The wife liked that.  I also added some carpet on the top to cut down on vibration and to help keep the units in place. I also put some 4X4 pieces of carpet on the bottom to keep the noise down and to help in moving it. I primed and used an gravity sprayer to paint it.  Then I put 3 coats of polyacrylic to help in cleaning and to cut down on scratches from the laundry baskets. 

laundry pedestals diy

Estimated Cost
150.00
Estimated Time Investment
Week Long Project (20 Hours or More)
Finish Used
Paint
Recommended Skill Level
Intermediate

Comments

zoolander

Wed, 06/29/2016 - 14:31

I think you could probably drive a truck on top of yours.  :)  I was a bit concerned about the strength of the construction when I first decided to build it, but I decided that since it would be stationary once I have it in place and the only force would be straight down, it would be fine.  Once I got it put together, it was actually sturdier than I thought it was going to be...from a horizontal force perspective.  Virtically, that thing could hold 100 washer/dryer pairs...the plywould would give out before the 2x4s and 4x4s would even budge.

Anyway, nice work!  I love the Kreg Jig...I need one of those. 

Custom Garage Shelves

Submitted by Anonymous (not verified) on Tue, 01/16/2024 - 17:19

I just finished shelves on both sides of my garage using your video.  I built a coat rack and boot rack.  I also made space for tall items like tools and ladders near the garage door.  I had to also build in a gun safe, freezer and my work bench.  Everything came together and now I have everything in bins on shelves. 

Gary Hoffman

Portable Workbench

Submitted by atlayank on Mon, 05/25/2020 - 17:27

I have a small workshop so this workbench allows me to bring the work outside. It was my first project and I think it came out great.

Built from Plan(s)
Estimated Cost
$100
Estimated Time Investment
Day Project (6-9 Hours)
Finish Used
None
Recommended Skill Level
Beginner

Underbed Lego Storage

Submitted by rosiejane on Tue, 05/13/2014 - 22:28

We were in desperate need of a lego storage solution for our son's small bedroom. I made this for his 7th birthday. I saw a photo of a similar one as a result of a google or pinterest search and decided to draw up some plans.
I recessed the top slightly so that pieces won't fall off. I just glued thin cleats to the inside of the box to hold the lid, (using spacers to get it at the height I wanted) Ideally the top would be reversible however I didn't quite get one of the dividers square so it only fits one way. I used Posca water-based markers to do the text. Make sure you wait until the text is really dry before you try to seal it (don't ask me how I know that...) Turns out that the markers don't react well with the brush on poly so I just left the text unsealed.
I was just going to have one handle on the front but then I made a stupid mistake and wrote the text so it would be upside down when pulled out (I know, dumb right!) So I added another handle on the other side. I used a water-based enamel for the whole box. Not sure if that was worth it of if I should have just used flat and given it a top coat of poly. I used a brush on the inside corners and found it really hard to get an even finish because I rolled the flat surfaces. Painting the pieces before assembly would probably fix this.
Added some castors so it can be pushed under the bed.

Estimated Cost
AUD$39 (plus lego baseplate and paint markers)
Estimated Time Investment
Weekend Project (10-20 Hours)
Finish Used
dulux aquanamel - vivid white, posca water-based poster markers
Recommended Skill Level
Beginner

Comments

jlharrison

Sun, 02/05/2017 - 08:48

This is so awesome. Do you think you could share a more detailed account of build. Dimensions? Supplies? I am a newbie at this! I would greatly appreciate! 

Easy planter

Submitted by anm8ed on Sat, 06/06/2020 - 19:21

Love this little planter. Already have ideas for anew version. Need to work that out, but that’s another brag. Thanks for the easy planter plans.

Comments

Backyard Pergola

First pergola build. Plans were very easy to follow and it turned out great!

Estimated Cost
$350
Estimated Time Investment
Weekend Project (10-20 Hours)
Recommended Skill Level
Intermediate

Comments

My first project! Thanks Ana!!!

Submitted by Sherice on Tue, 07/15/2014 - 07:29

I recently resigned from my job to stay home with my kids. This gave me time to begin a long desired hobby! Thanks to this website and the awesome, easy to follow plans, I have been able to start practicing with some very practical pieces. I have been looking for extra tall stools for over five years, since moving to our current home, and have not been able to find any I'm willing to buy. They have to be special ordered and are ridiculously priced for the chintzy pieces they are. I had fun making these ones and they look gorgeous in my home.

It took me several days to complete all three, but for a more experienced person it would take much less time. I used the Kreg Jig for all holes possible. And with each stool I learned something, and each one was completed in less time than the last.

THANK YOU ANA!

Built from Plan(s)
Estimated Time Investment
Week Long Project (20 Hours or More)
Finish Used
Two coats of stain, two layers of urethane with sanding in between the first and second.
Recommended Skill Level
Starter Project

Twin Storage Beds

Submitted by anne_c on Thu, 08/07/2014 - 07:36

This was really my first build and it stemmed from not being able to find the kind of beds I wanted for my girls. My brother helped me cut the wood and assemble the first one and my husband and I did the second together. It was so rewarding to make them and I love how they turned out! You can store so much and they are sturdy pieces. My girls love them too. (bedding is from Pottery Barn) I would stay this is a beginner's project. You don't need any specialized tools. it was a lot of fun and now I'm it itching to buy a Kreg Jig so I can complete many more projects!

Estimated Cost
$150-$175 per bed
Estimated Time Investment
Weekend Project (10-20 Hours)
Finish Used
After they were built, I sanded them and primed. The paint I chose was Polar Bear, which is a pretty true white, Behr brand from Home Depot. I used 2 coats of water based polyeurethane (Verathane brand), which has really protected it from knicks and scratches
Recommended Skill Level
Beginner

Finally finished my 2x4 modern adirondack chairs!

Submitted by Anonymous (not verified) on Fri, 08/28/2020 - 07:52

I finally finished my DIY Modern Adirondack Chairs! Frame made with 2x4 cedar lumber and seat and backs with 1x10 pine planks. Stained with Benjamin Moore Aborcoat silver grey semi-transparent stain with a clear coat. Used a free diy plan by Ana White with some slight modifications to make the chair back higher. Cost was a bit higher than expected but lumber has gotten more expensive during the Covid time.
Thanks Ana for the design and the YouTube video. I watched it at least 20 times!

Estimated Cost
About $100/chair
Estimated Time Investment
Weekend Project (10-20 Hours)
Finish Used
Benjamin Moore Arborcoat Silver-Grey semi-transparent again, Arborcoat Clearcoat
Recommended Skill Level
Beginner
Seasonal And Holiday

Floating Shelves

I built these shelves in an afternoon and they were really simple.  I'm fairly new to building and using powertools so these are quite an accomplishement!

Built from Plan(s)
Estimated Cost
$20 each shelf
Estimated Time Investment
Afternoon Project (3-6 Hours)
Finish Used
Provincial Stain and distressing.
Recommended Skill Level
Beginner

Comments

Back