Custom Mug Stands
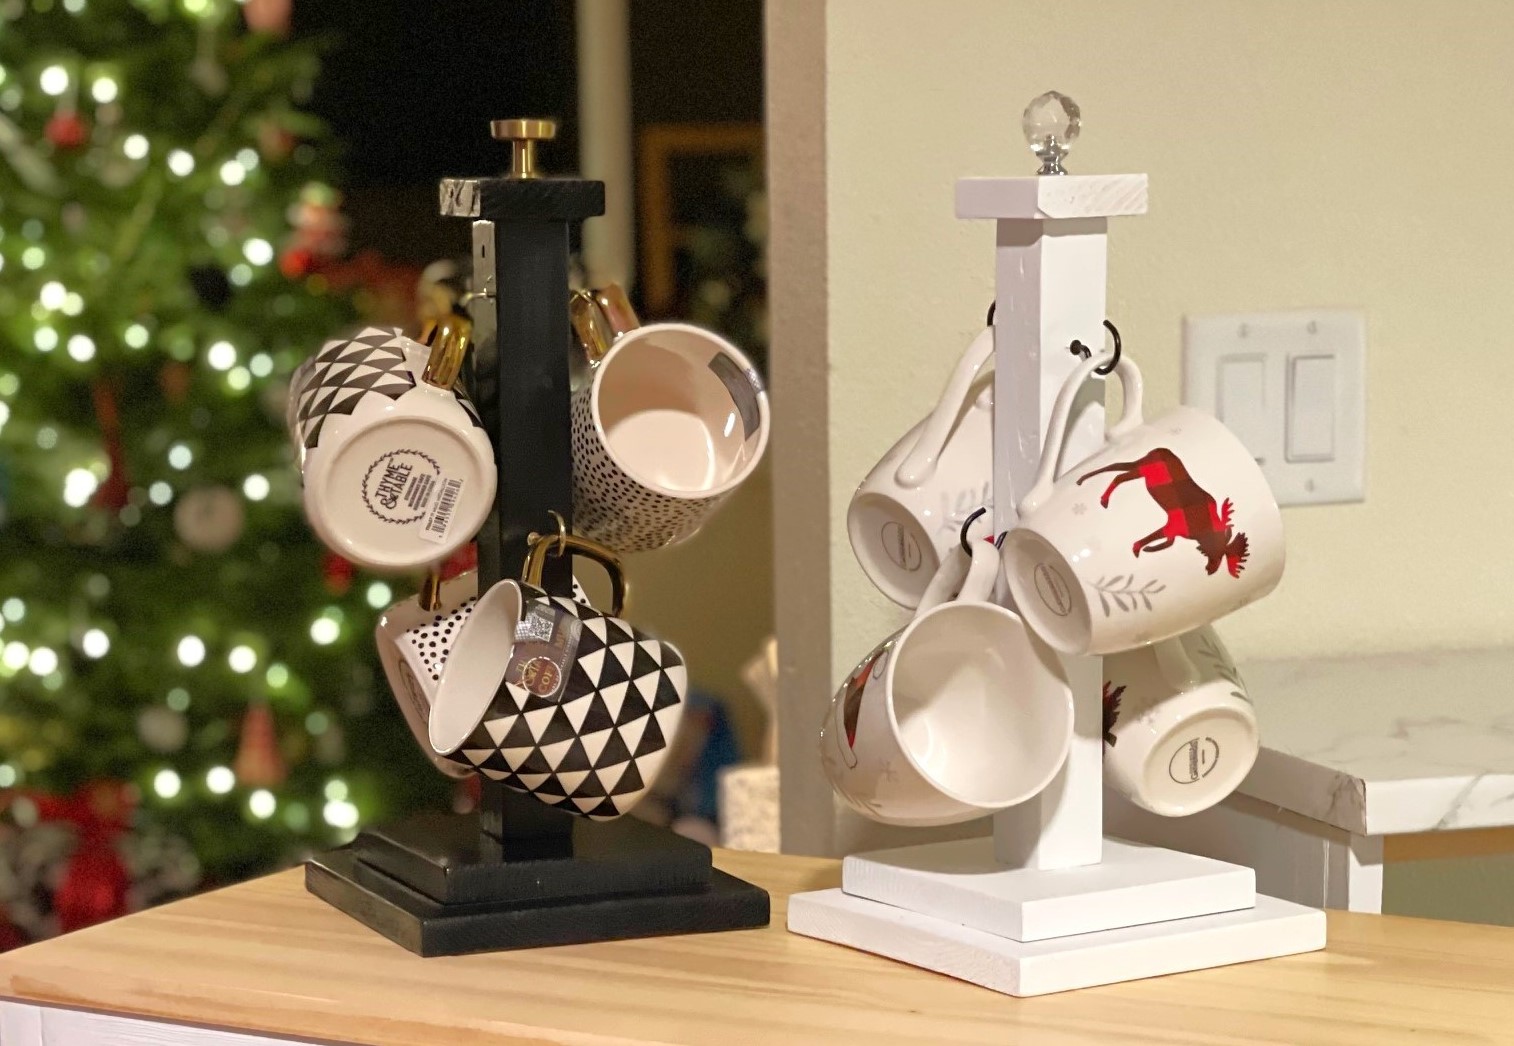
These are fun and easy handmade Christmas gifts. Easy to modify hardware and finish to get different looks depending on the mugs you choose to pair with it!
Built from Plan(s)
Seasonal And Holiday
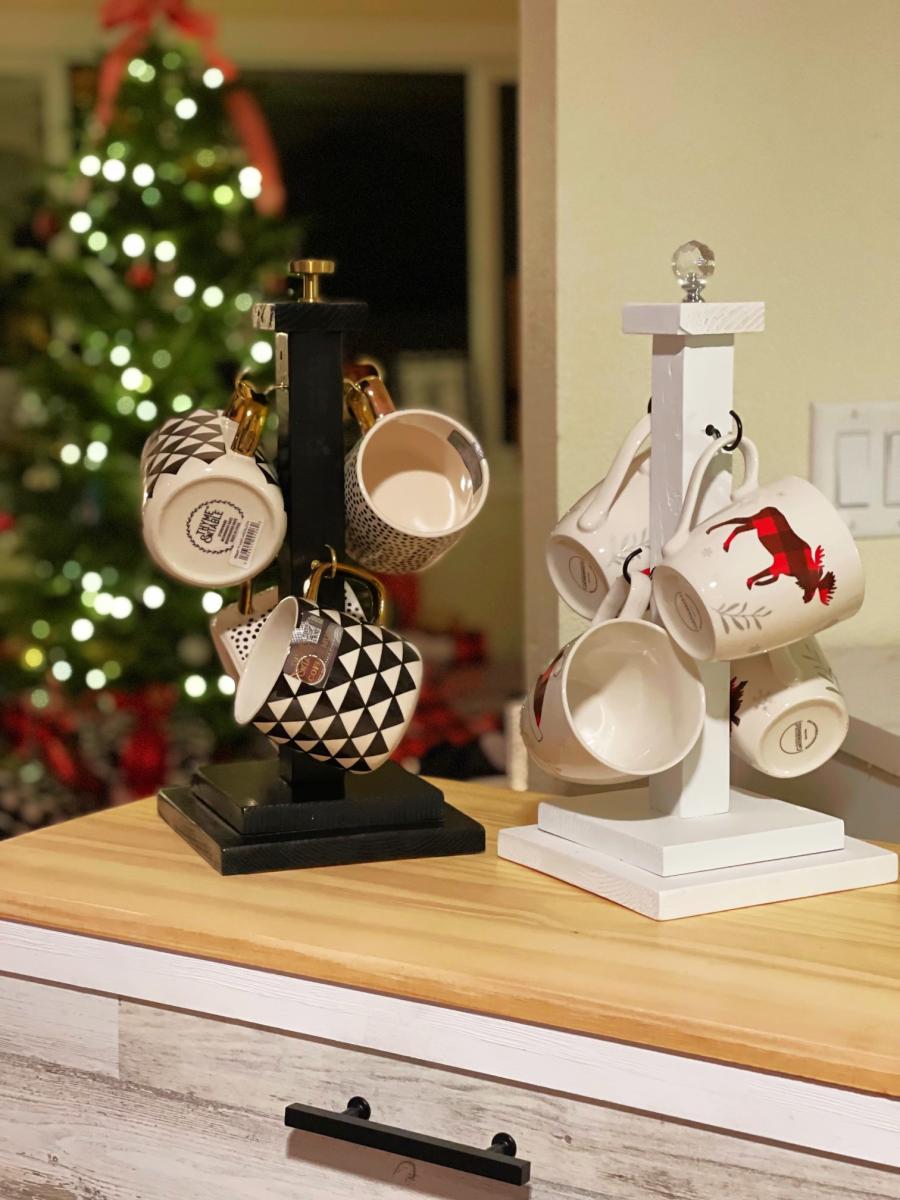
These are fun and easy handmade Christmas gifts. Easy to modify hardware and finish to get different looks depending on the mugs you choose to pair with it!
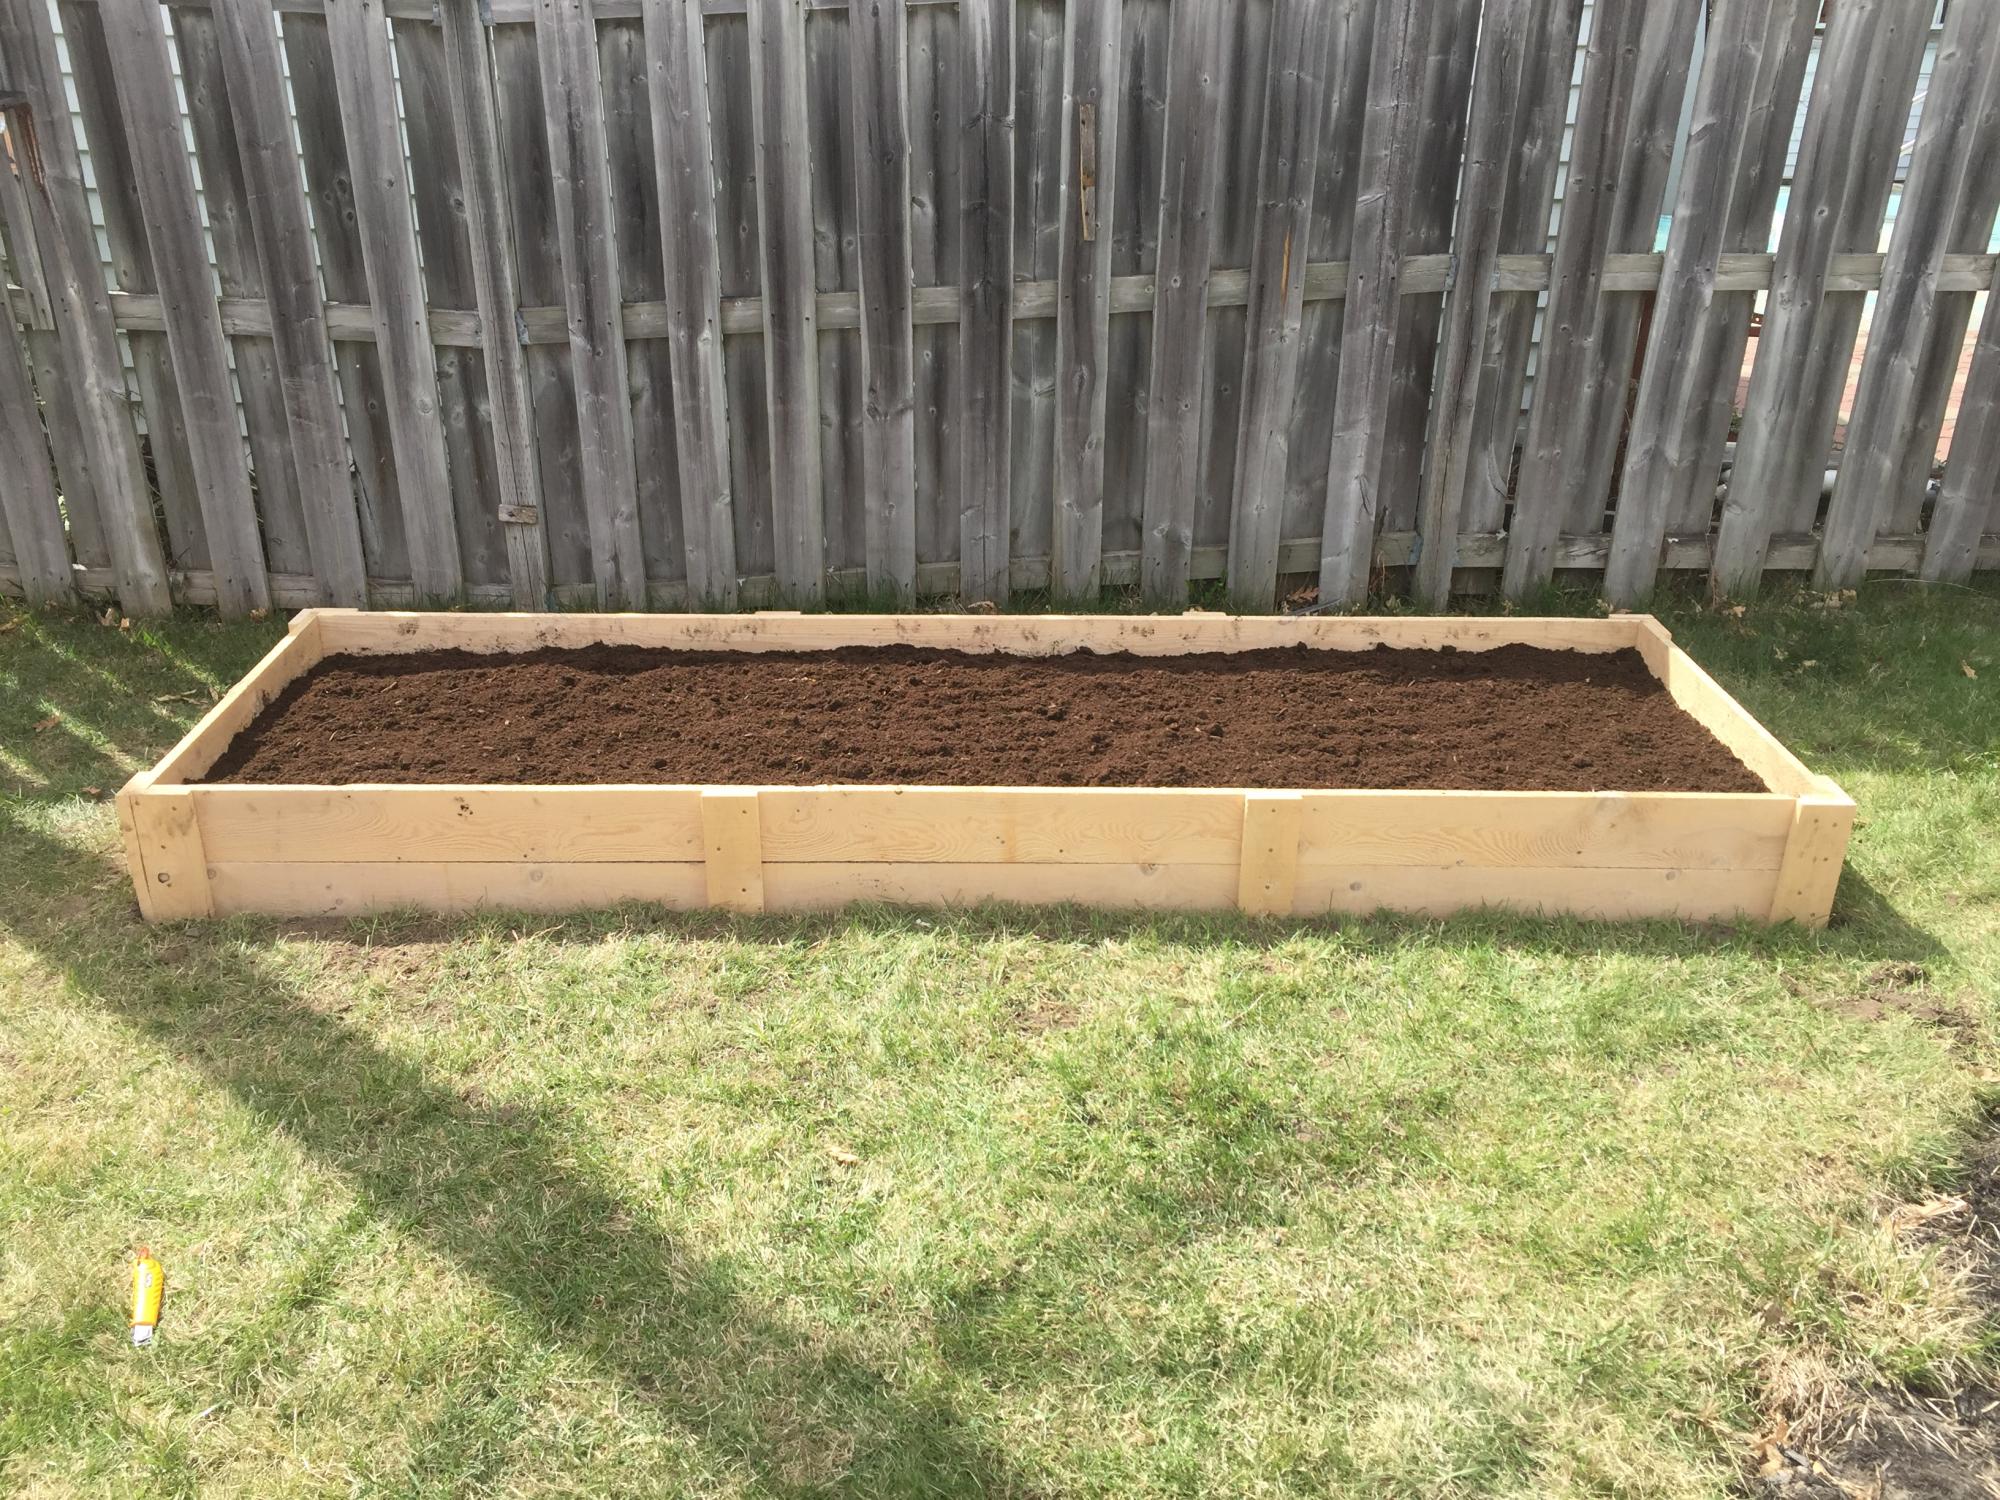
We built this 3x10 feet raised garden bed.
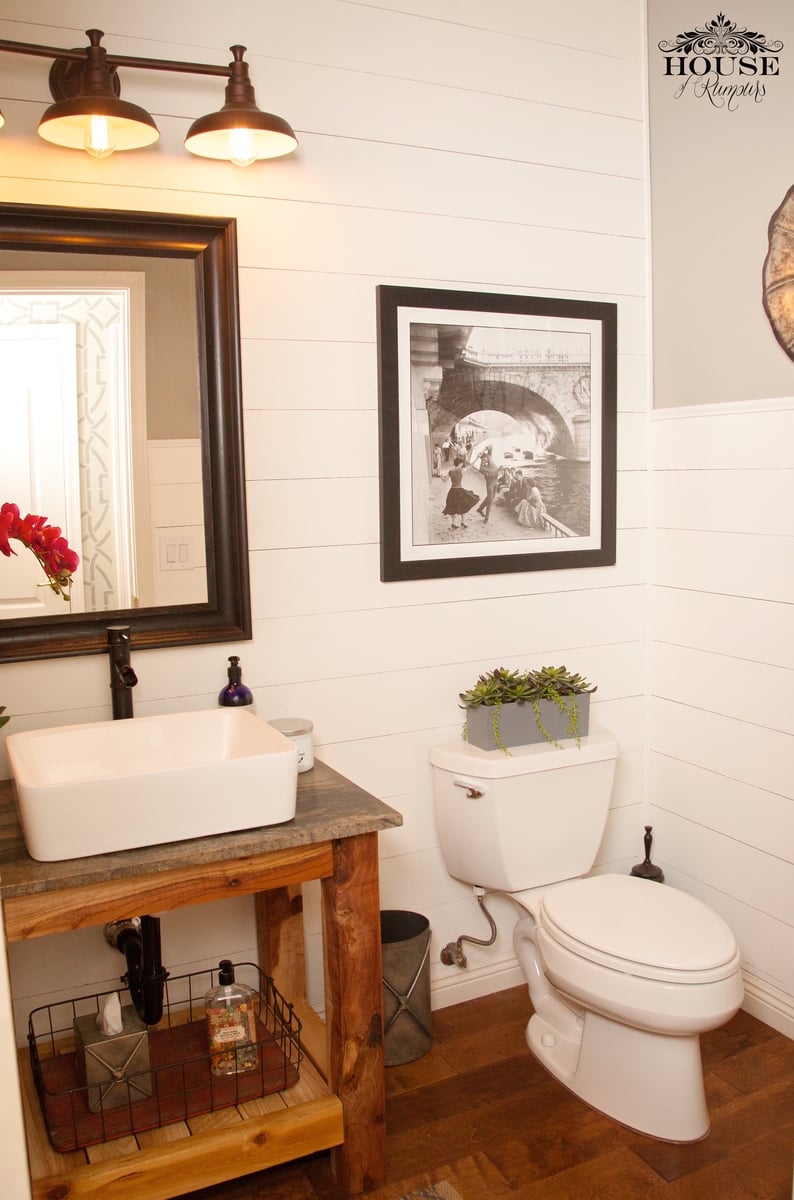
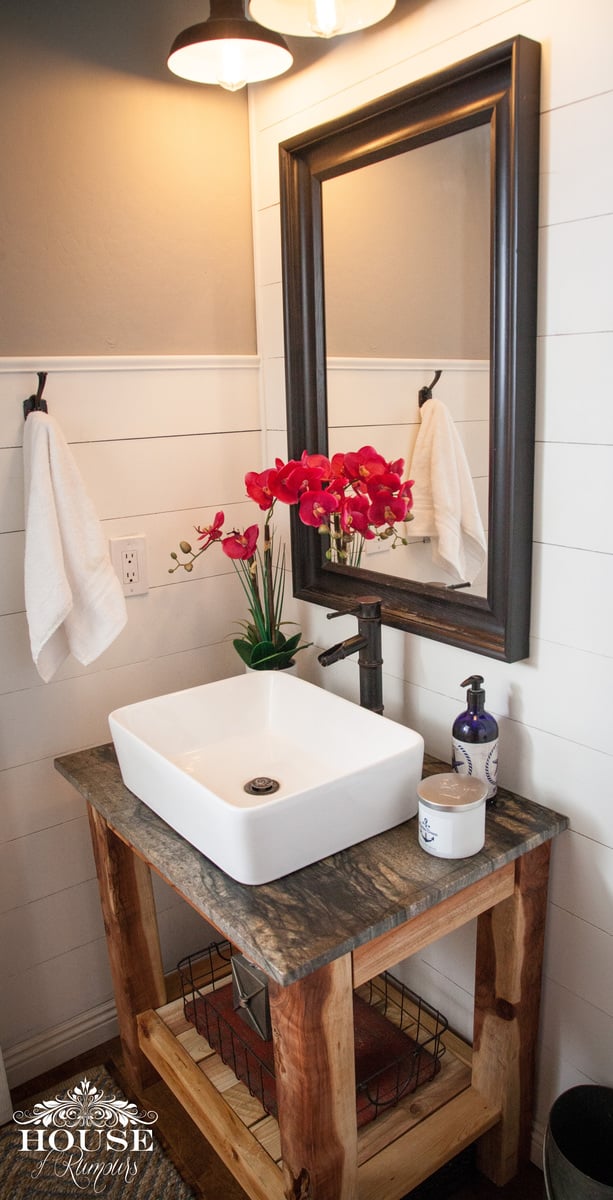
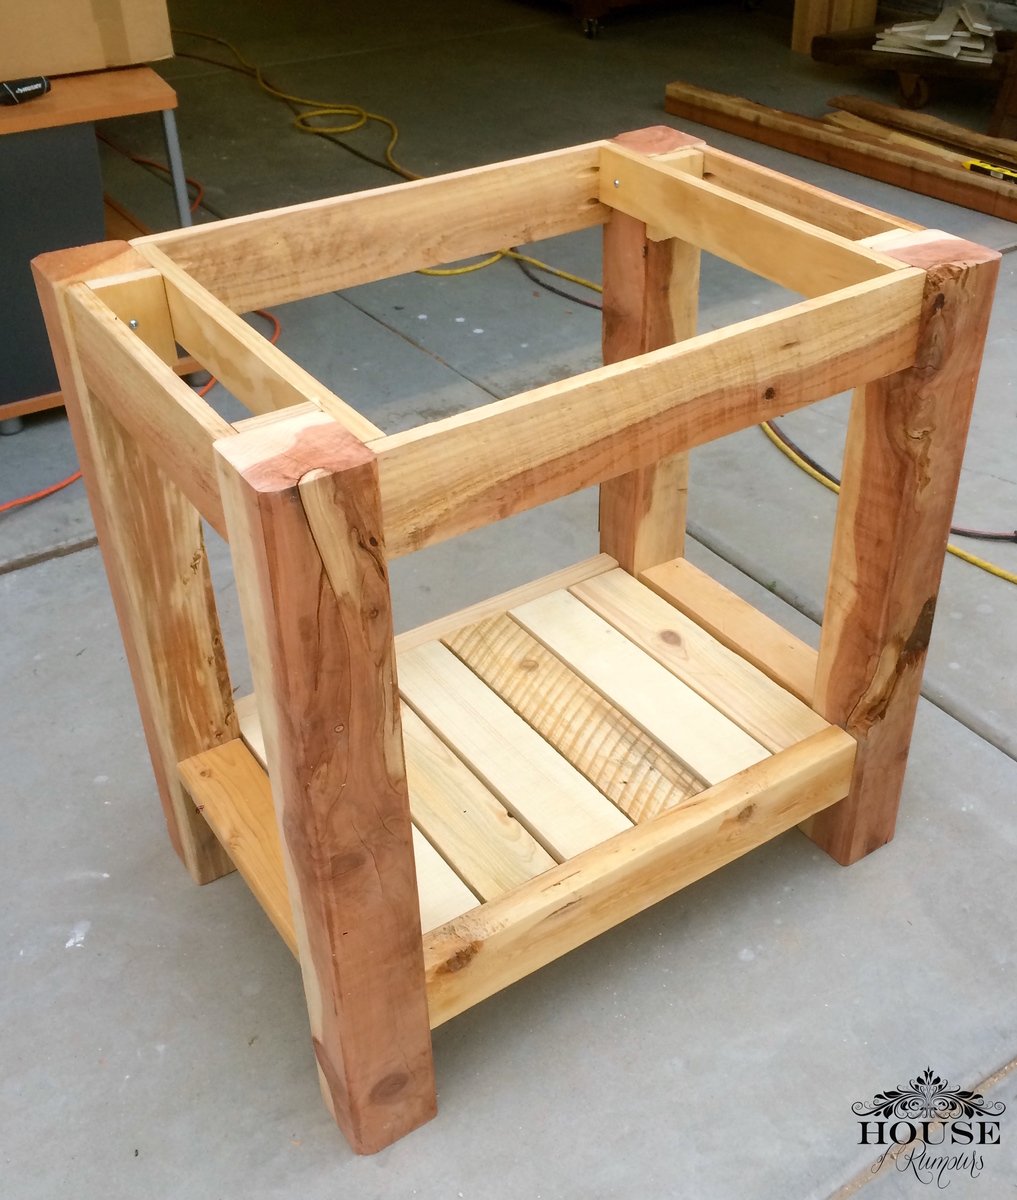
It had come time to renovate our powder room bathroom. We were on a tight budget so we decided to build our own vanity & add a little twist to it! We splurged on the granite countertop, vessel sink and faucet. Thanks to Ana White we built our vanity for less than $10! The plans were easy to follow . . . .we are so proud of our wood vanity! link to our blog: http://www.houseofrumours.com/shiplap-powder-room-diy-vanity/
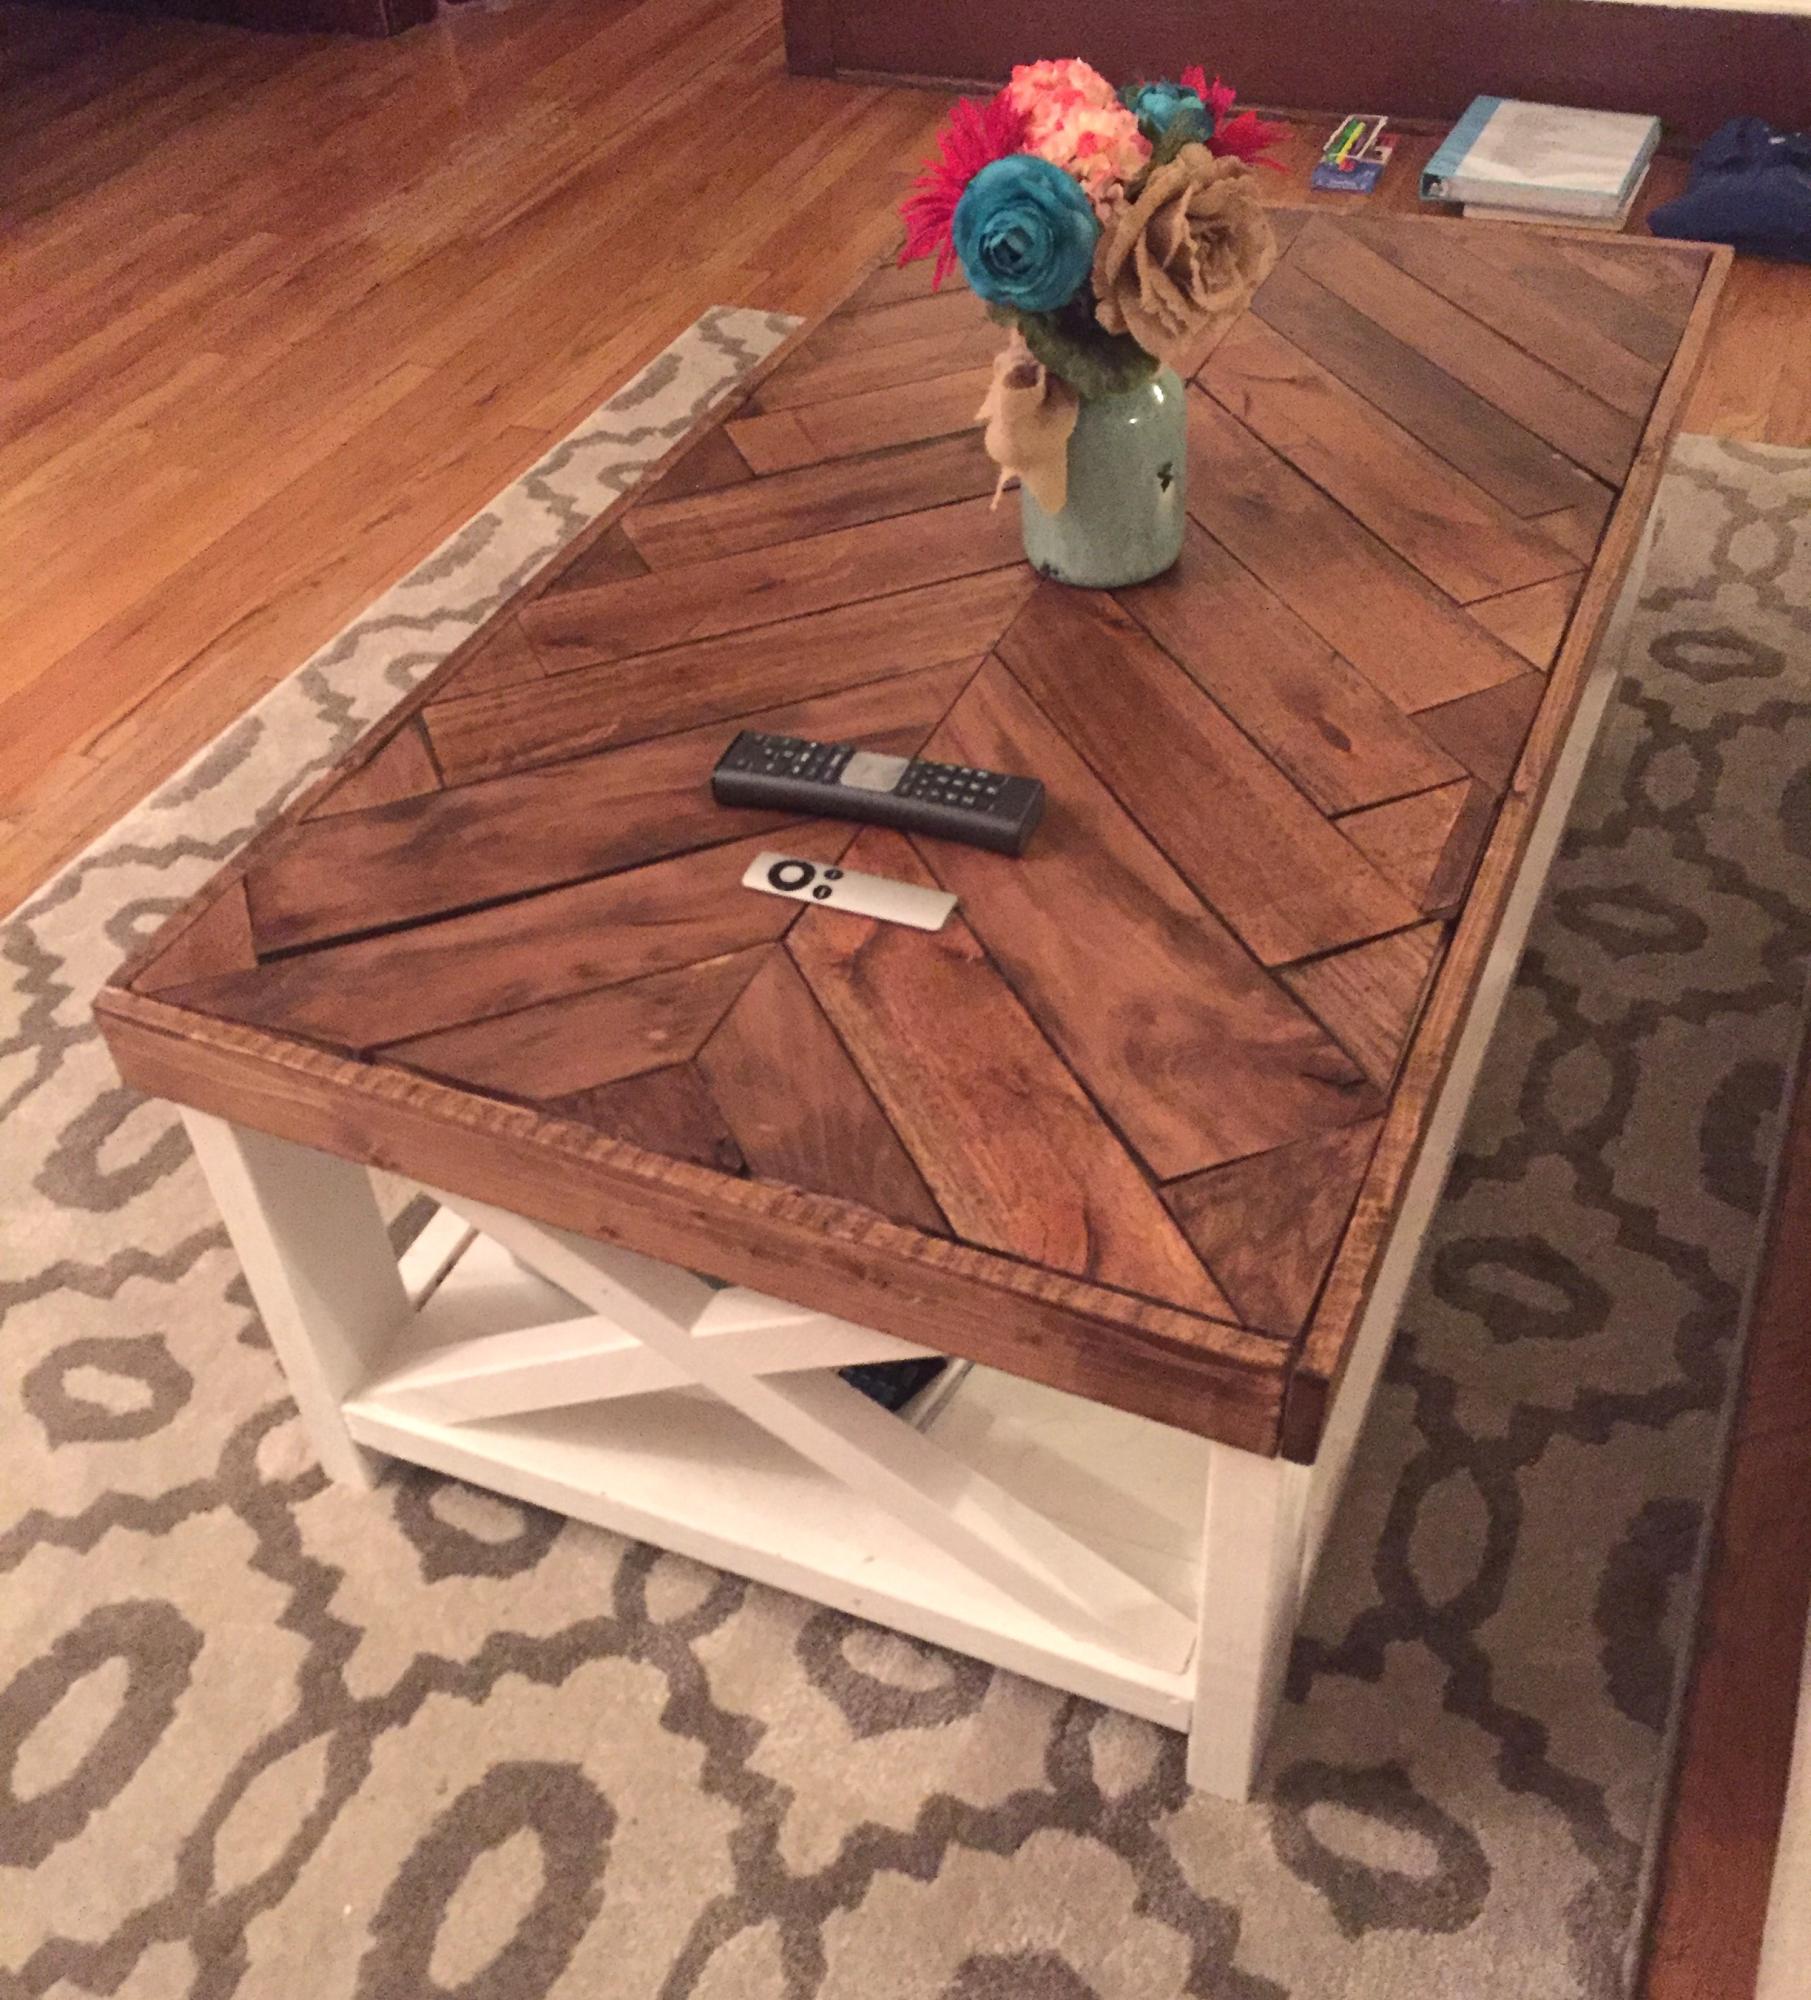
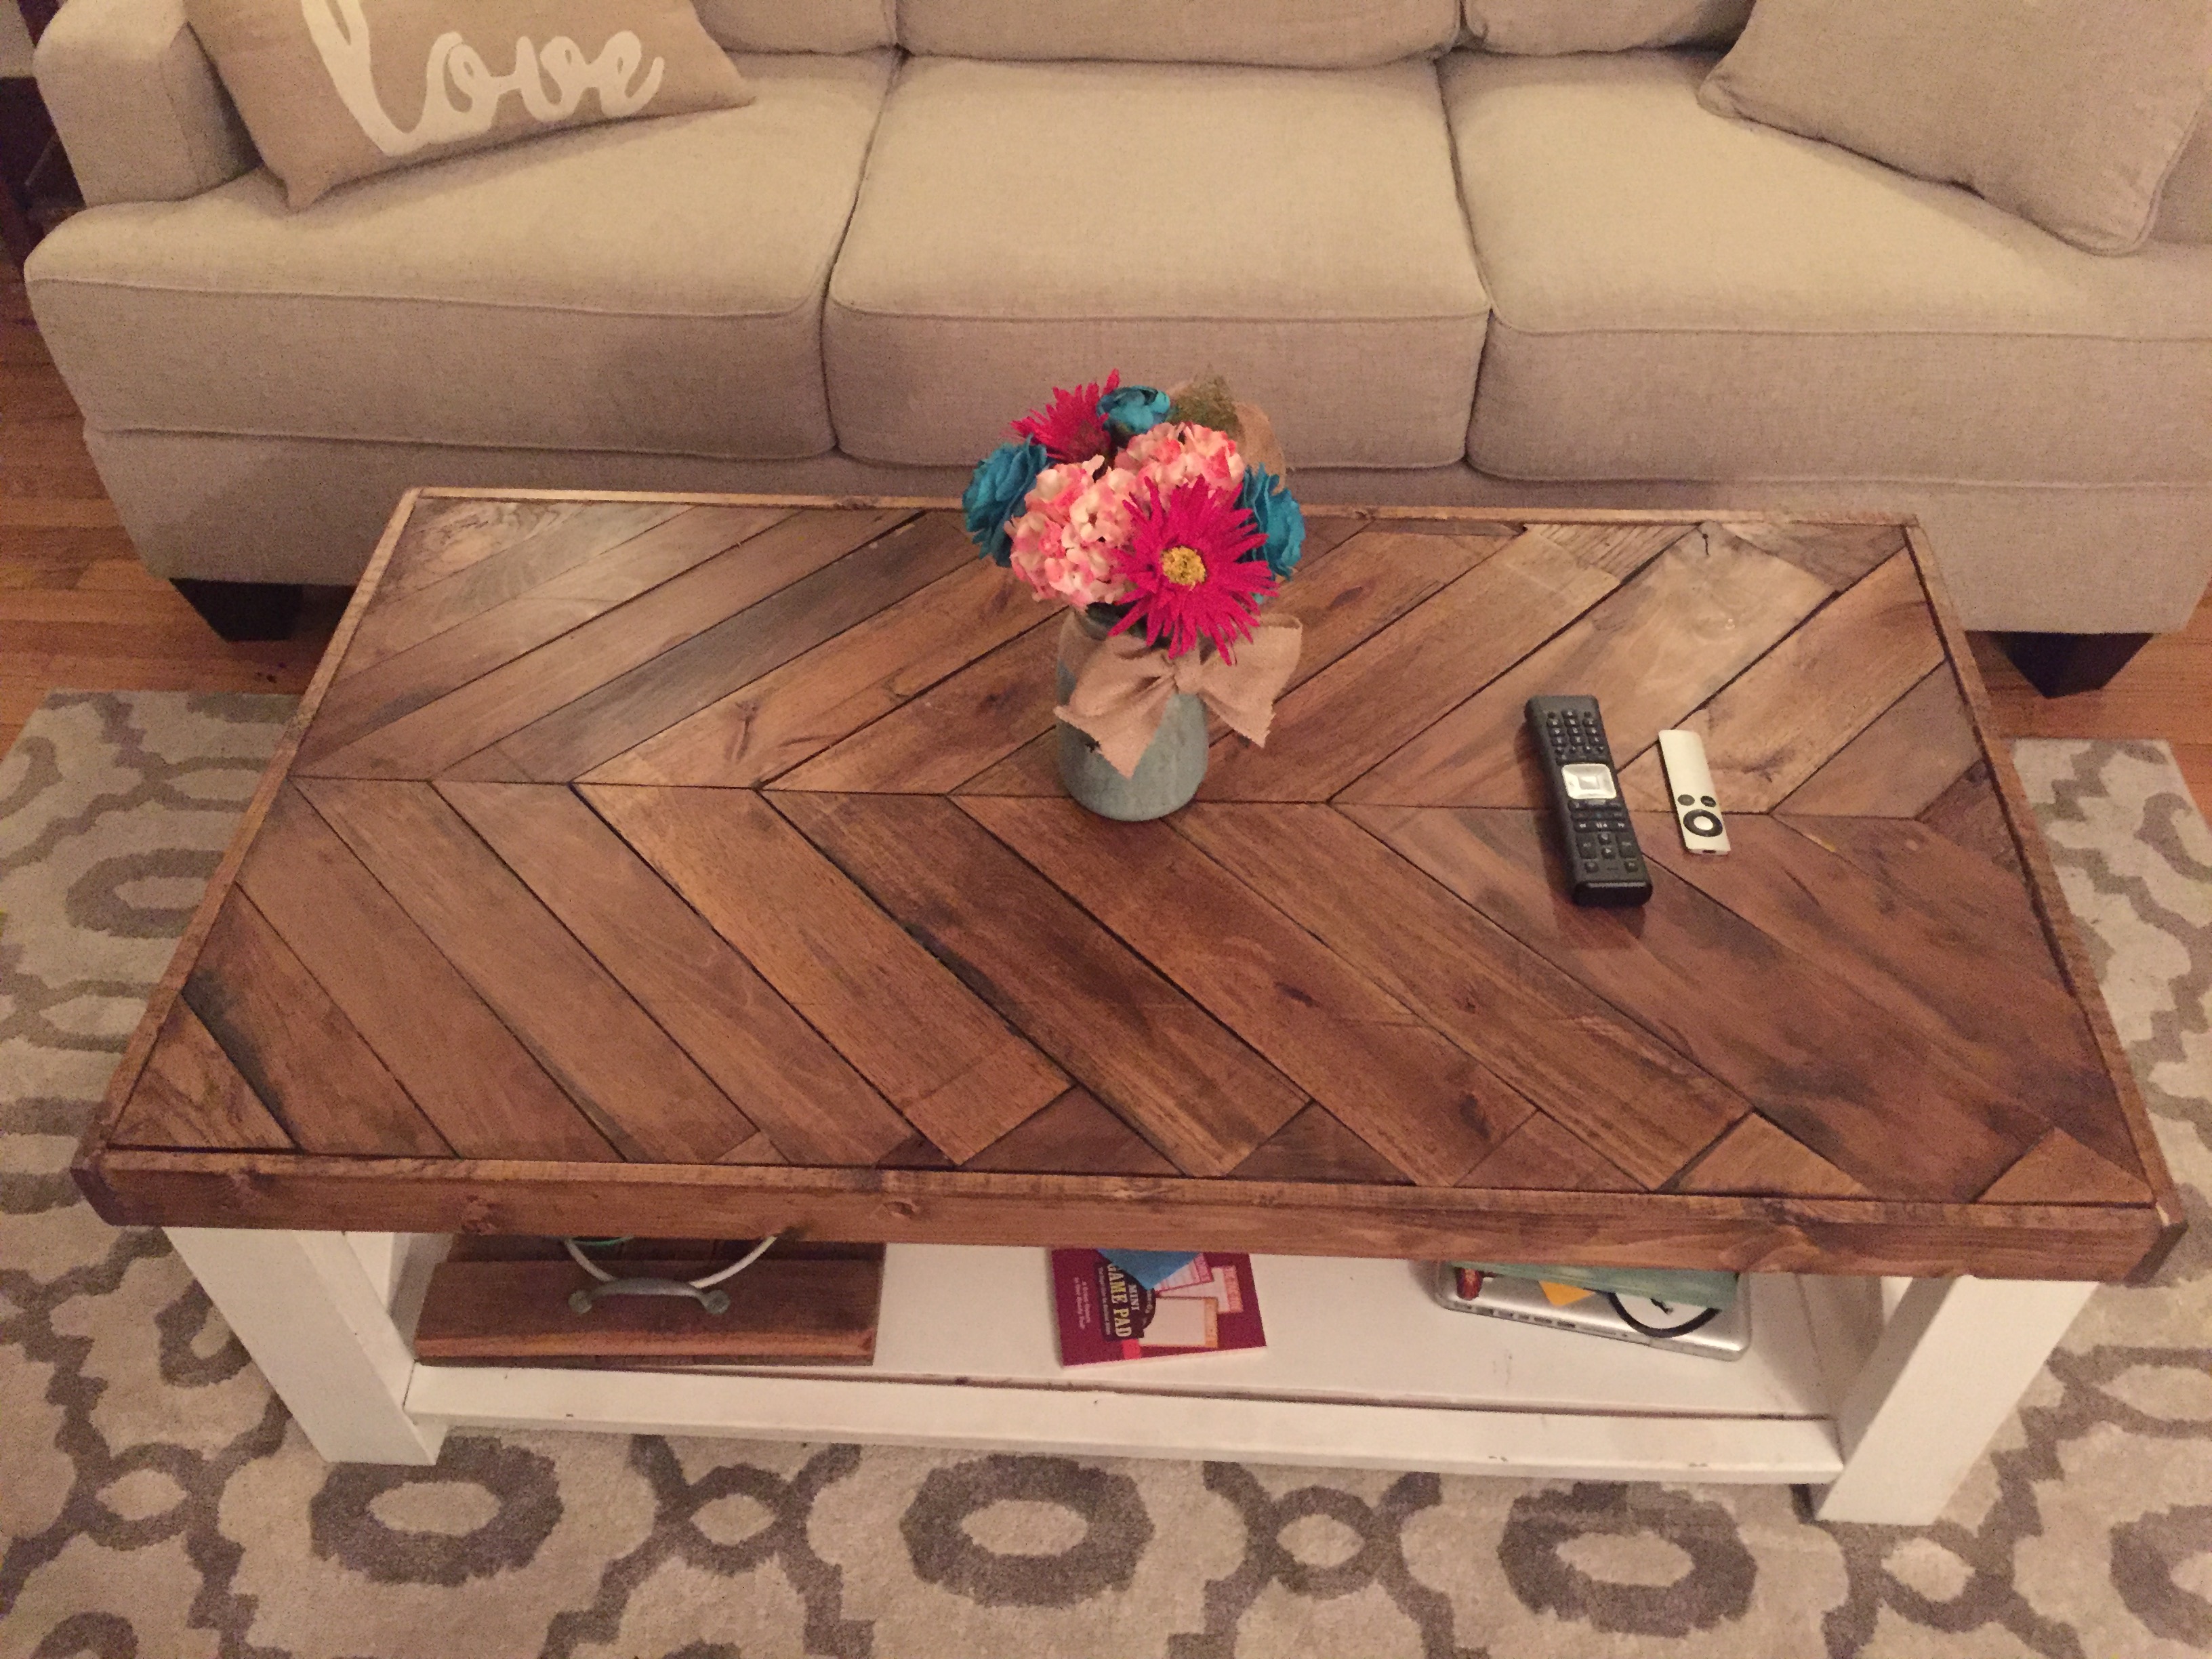
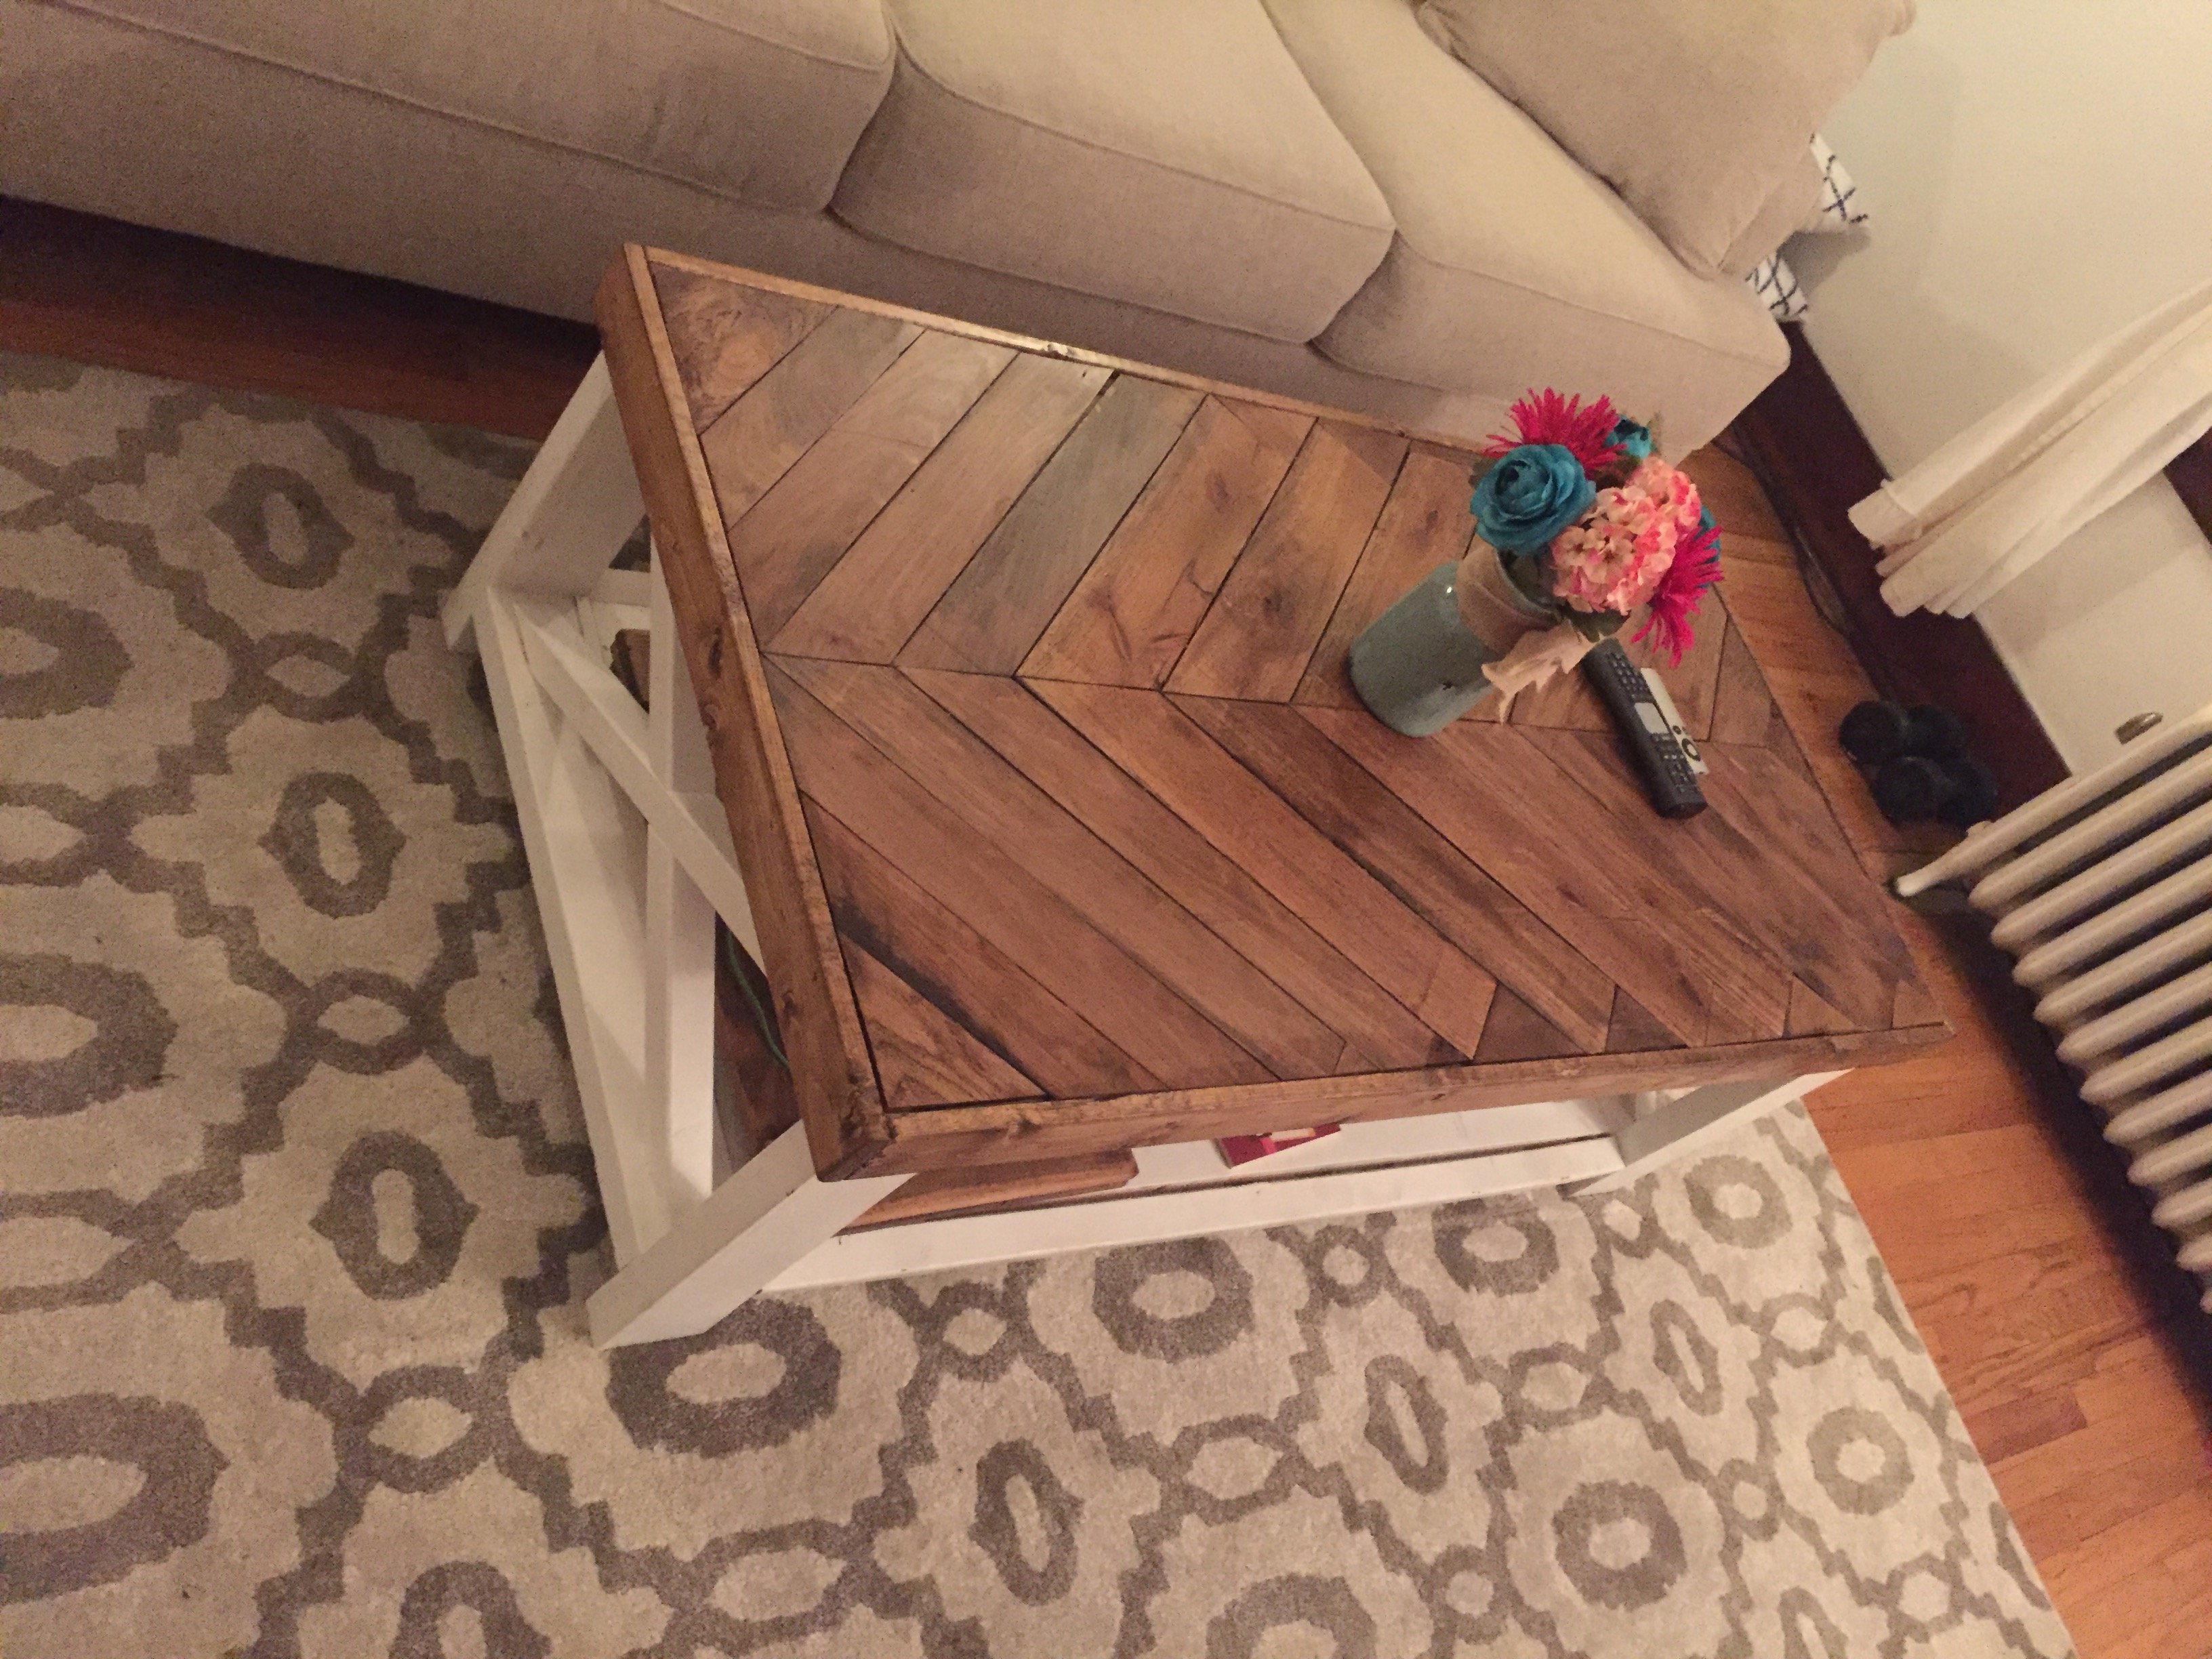
I built this coffee table at the request of my sister-in-law and it was my first attempt at a project like this. It was definitely a rewarding and great learning experience. I used a thickness planer for the pallet wood to get a consistent thickness for the top and so that the stain would set well. Other than the pallet wood itself, this table was built to the specifications of the original plan.
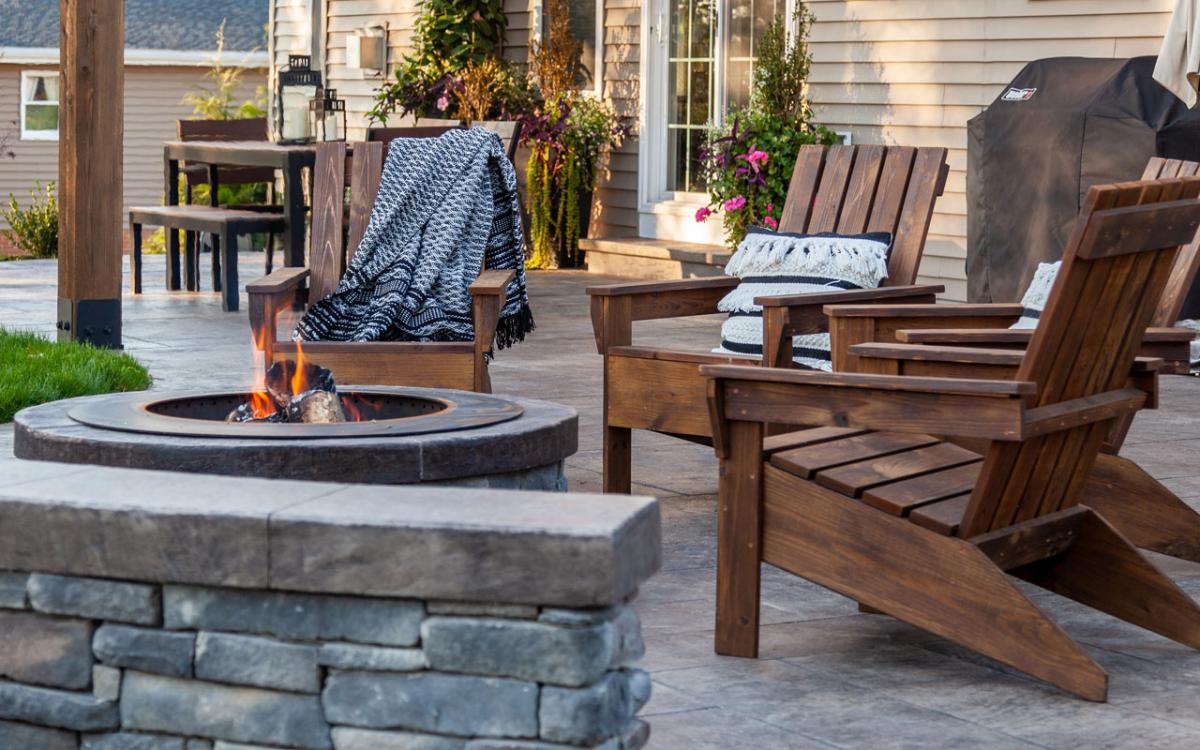
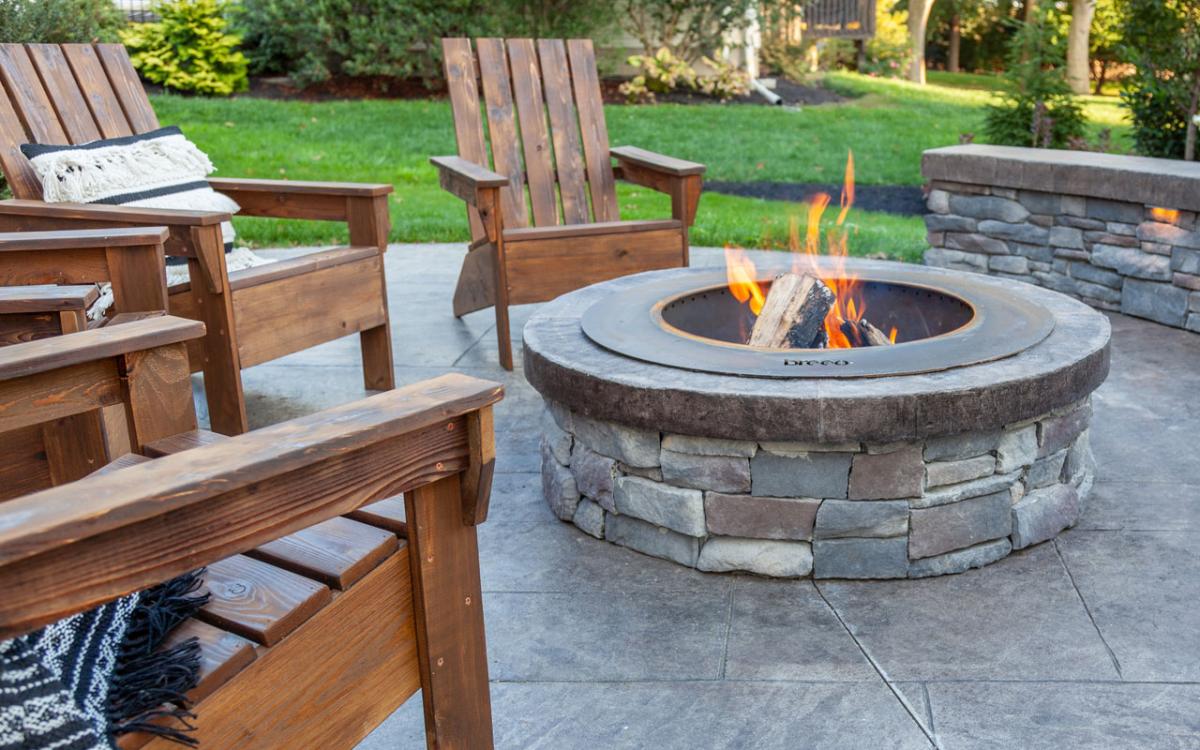
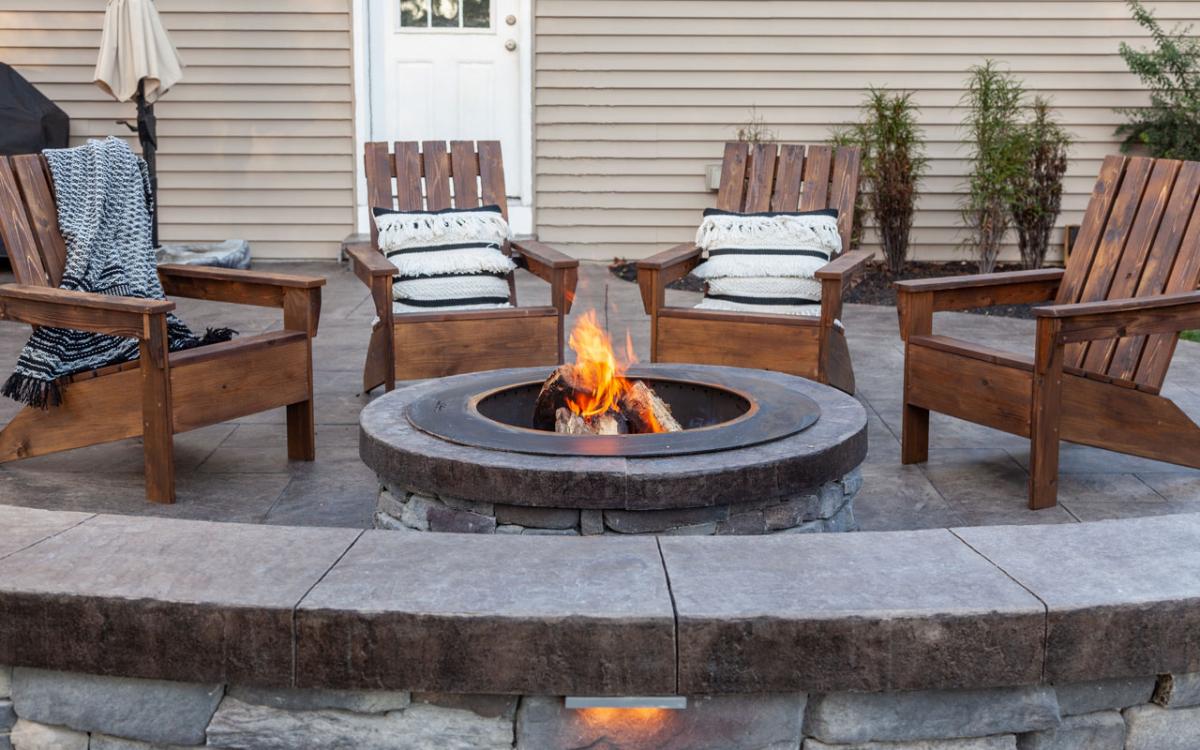
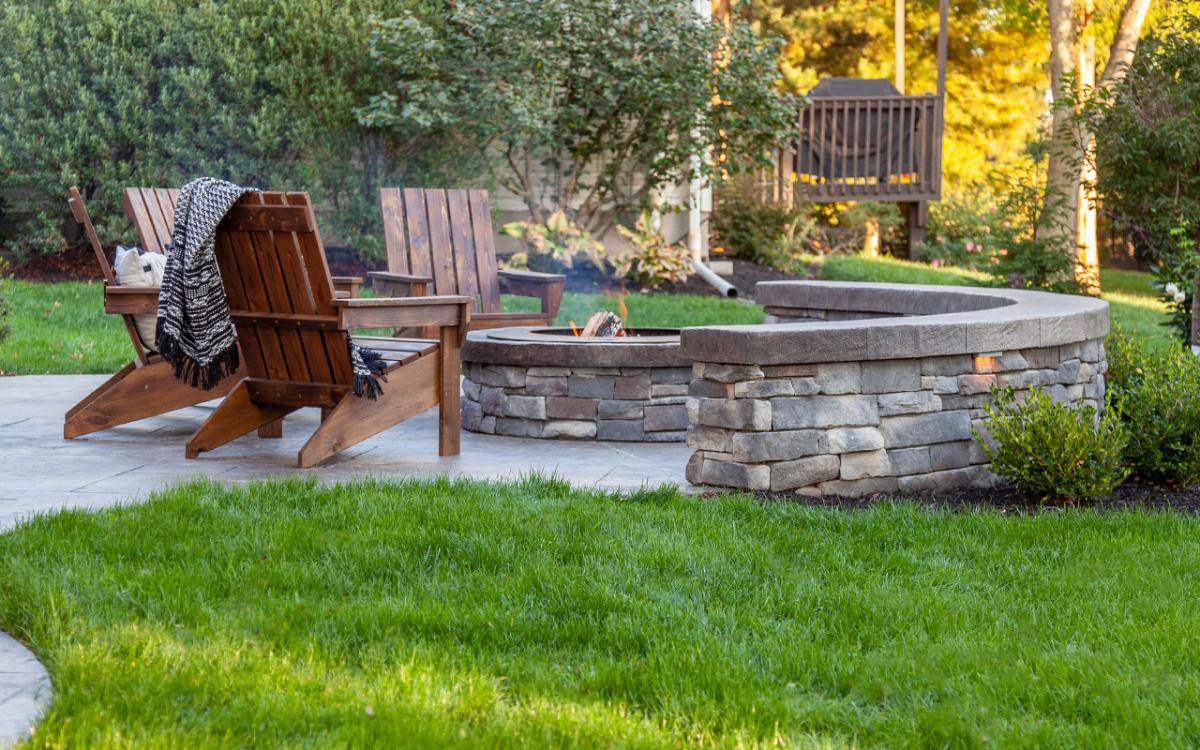
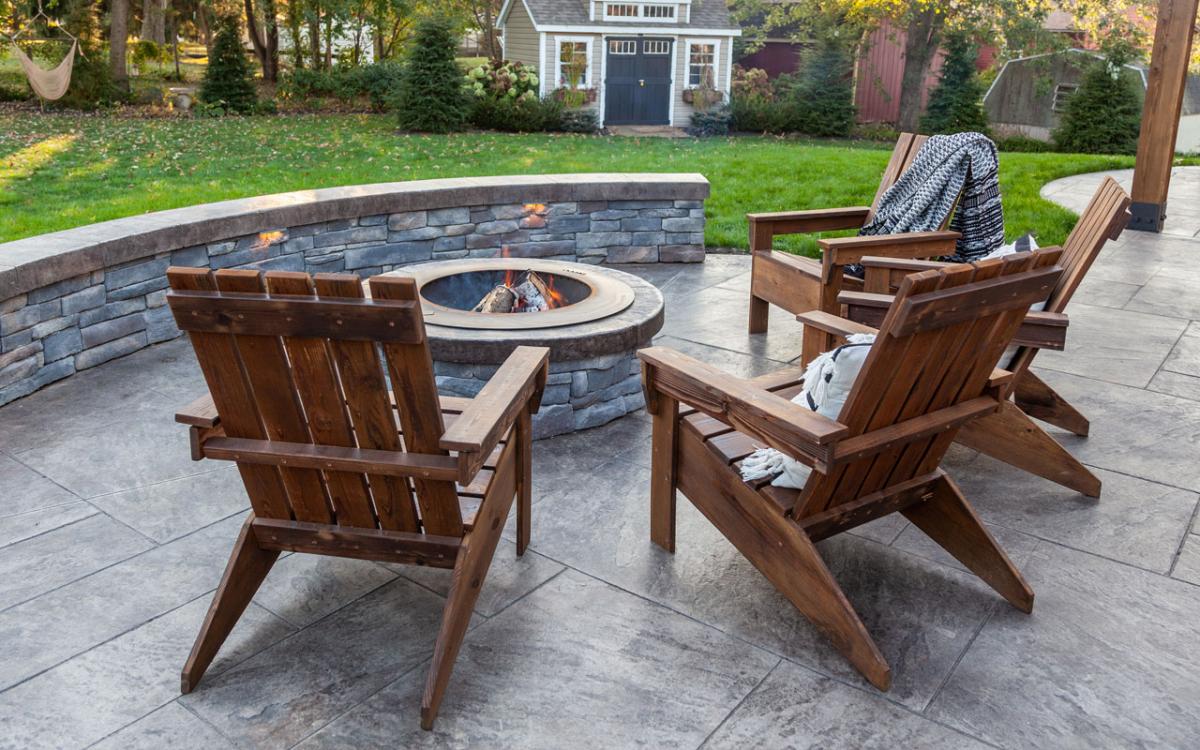
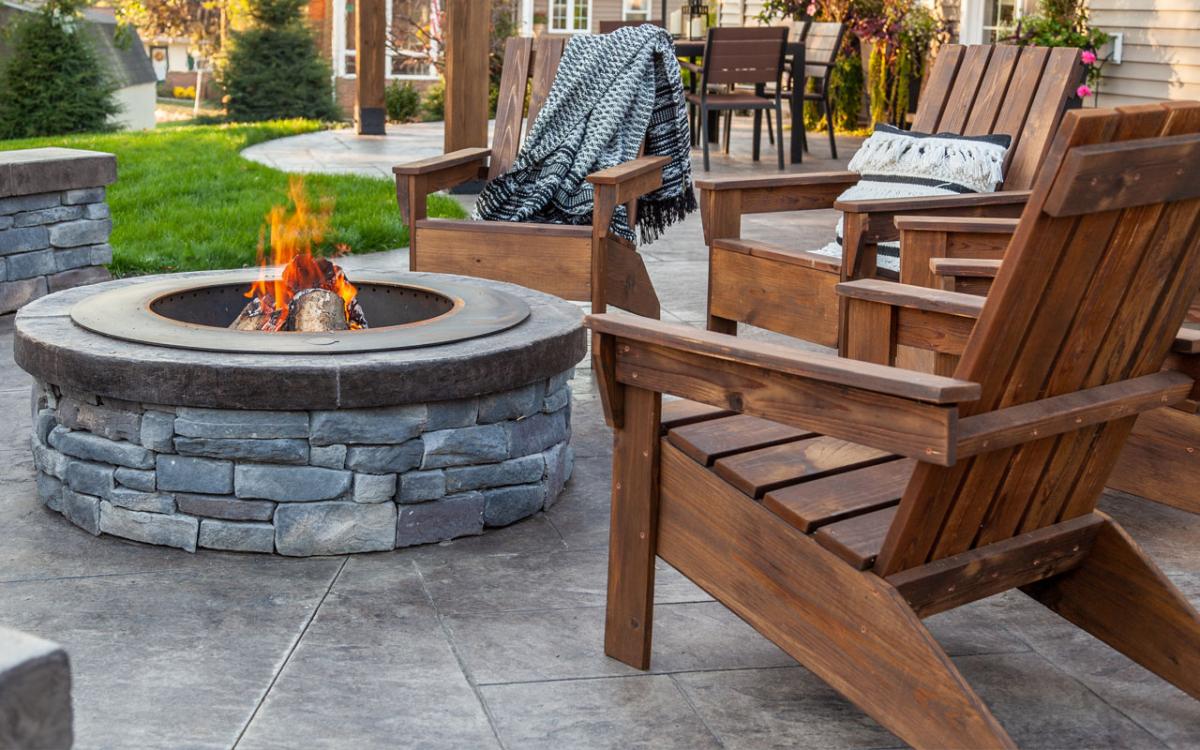
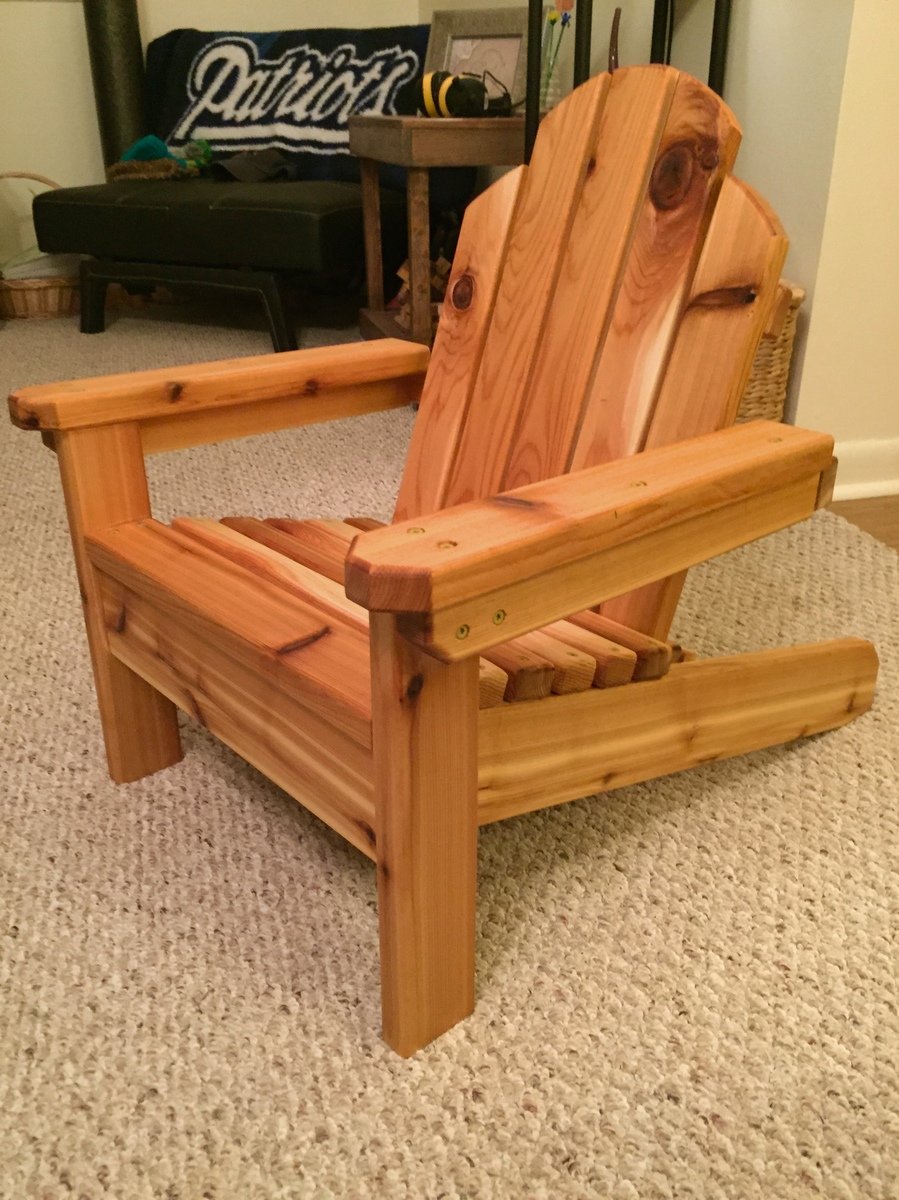
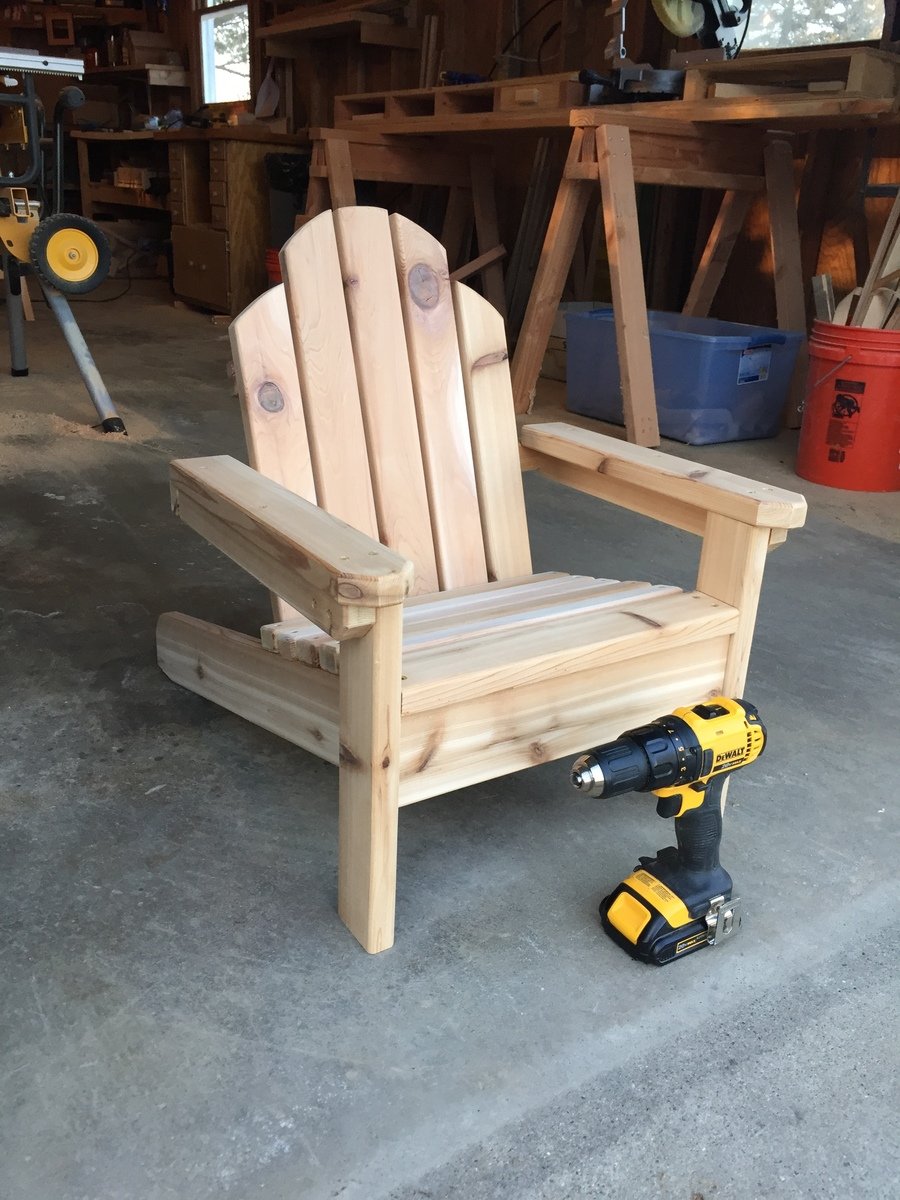
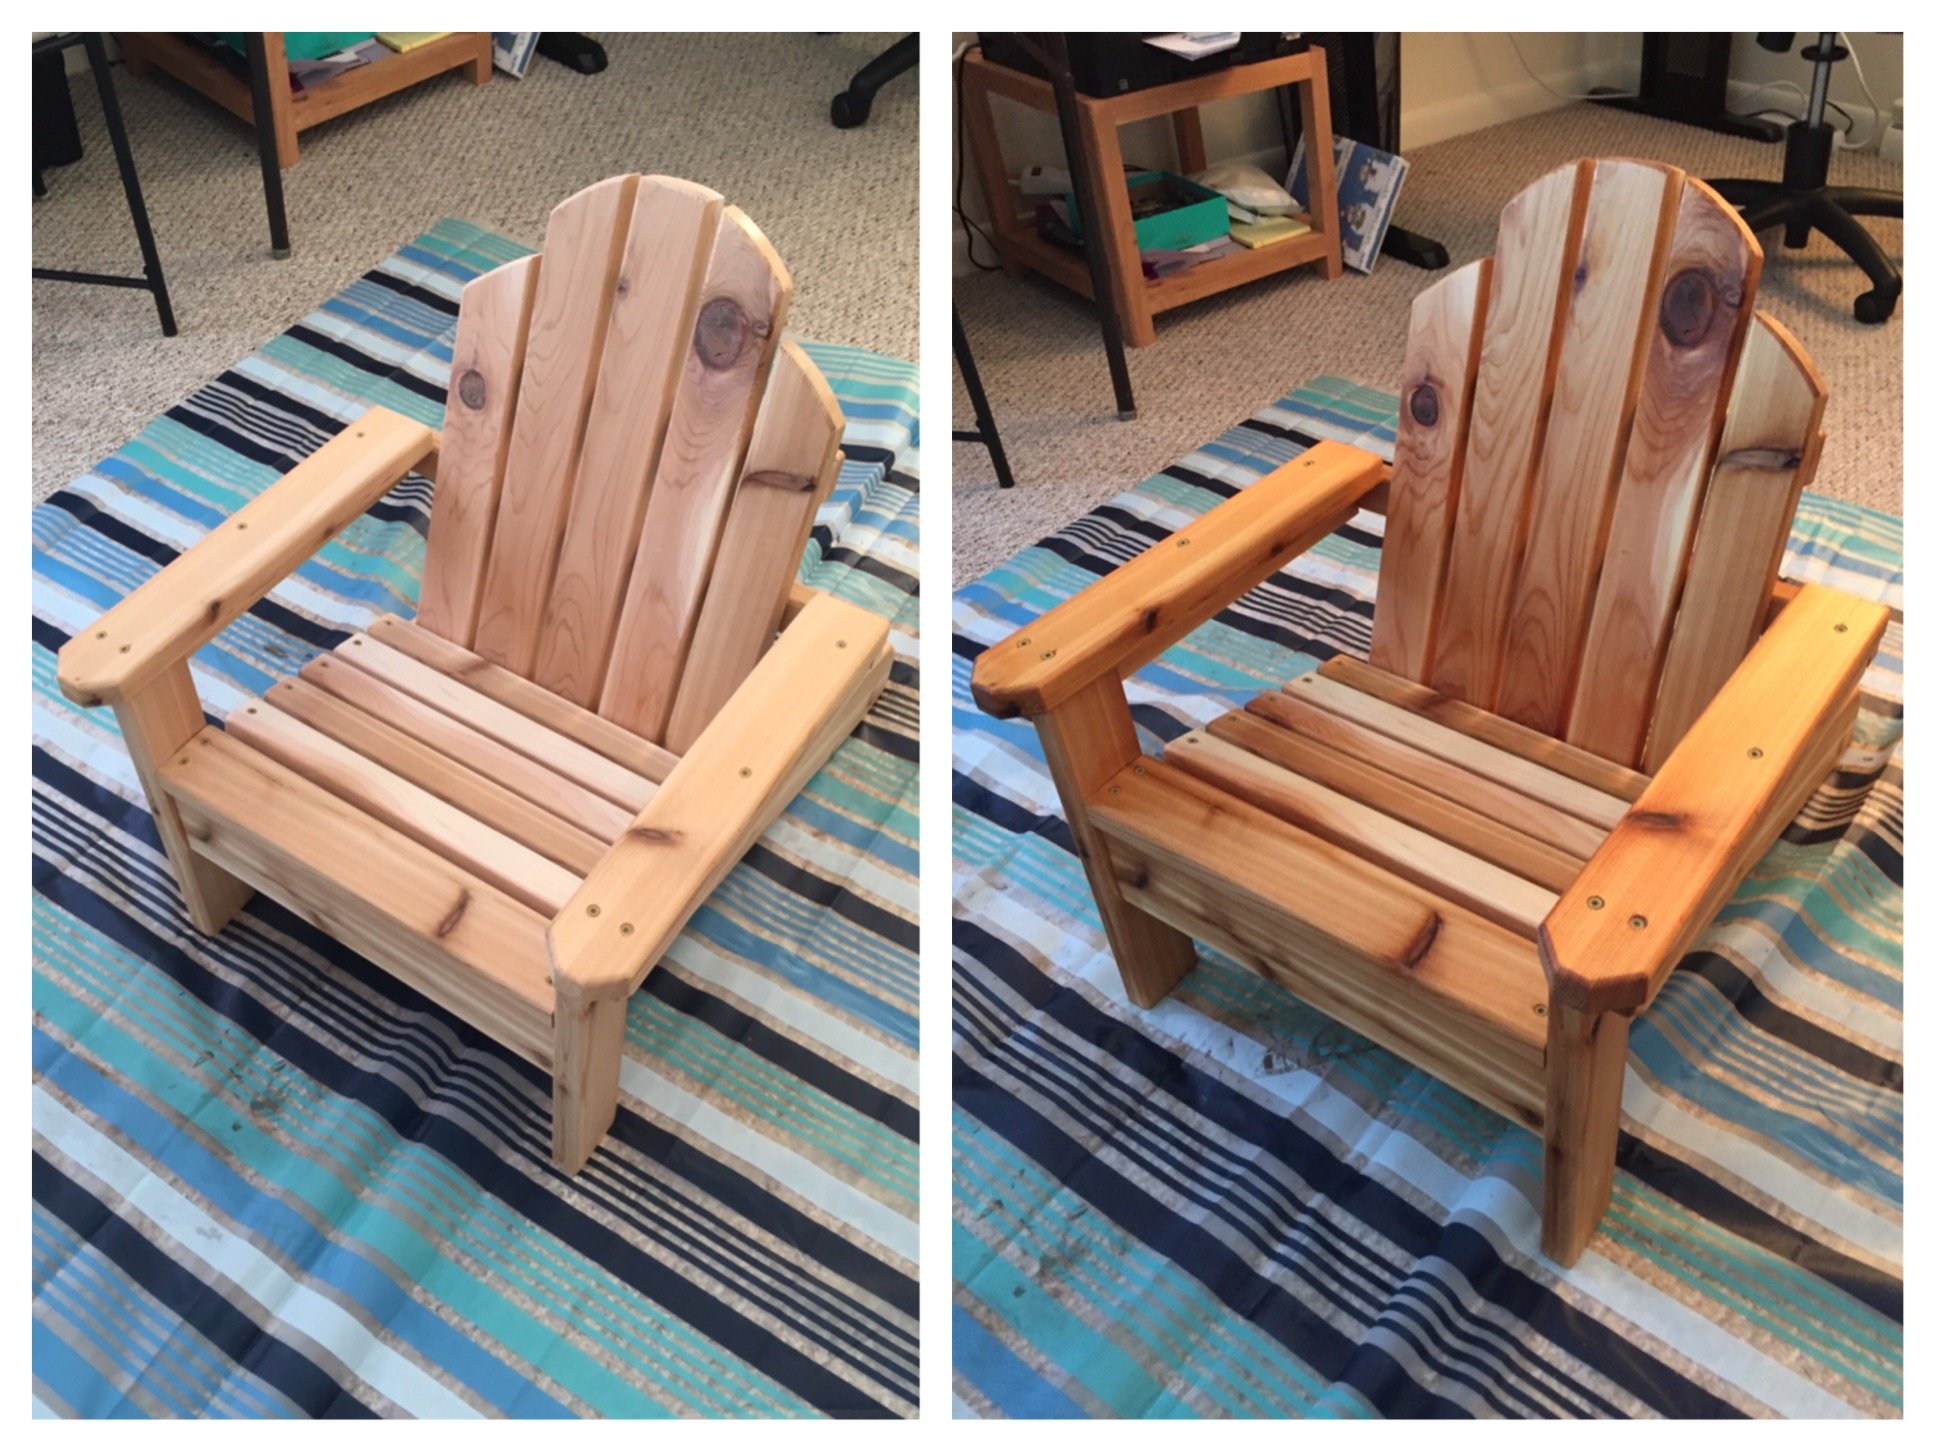
I am long overdue to share these Adirondack chairs that I made last fall. I followed the exact plans for Ana’s Adirondack Chair to make my own. These chairs have such a simple, clean, modern style that I love. Adirondack chairs, no matter what style, are just an all-around classic!
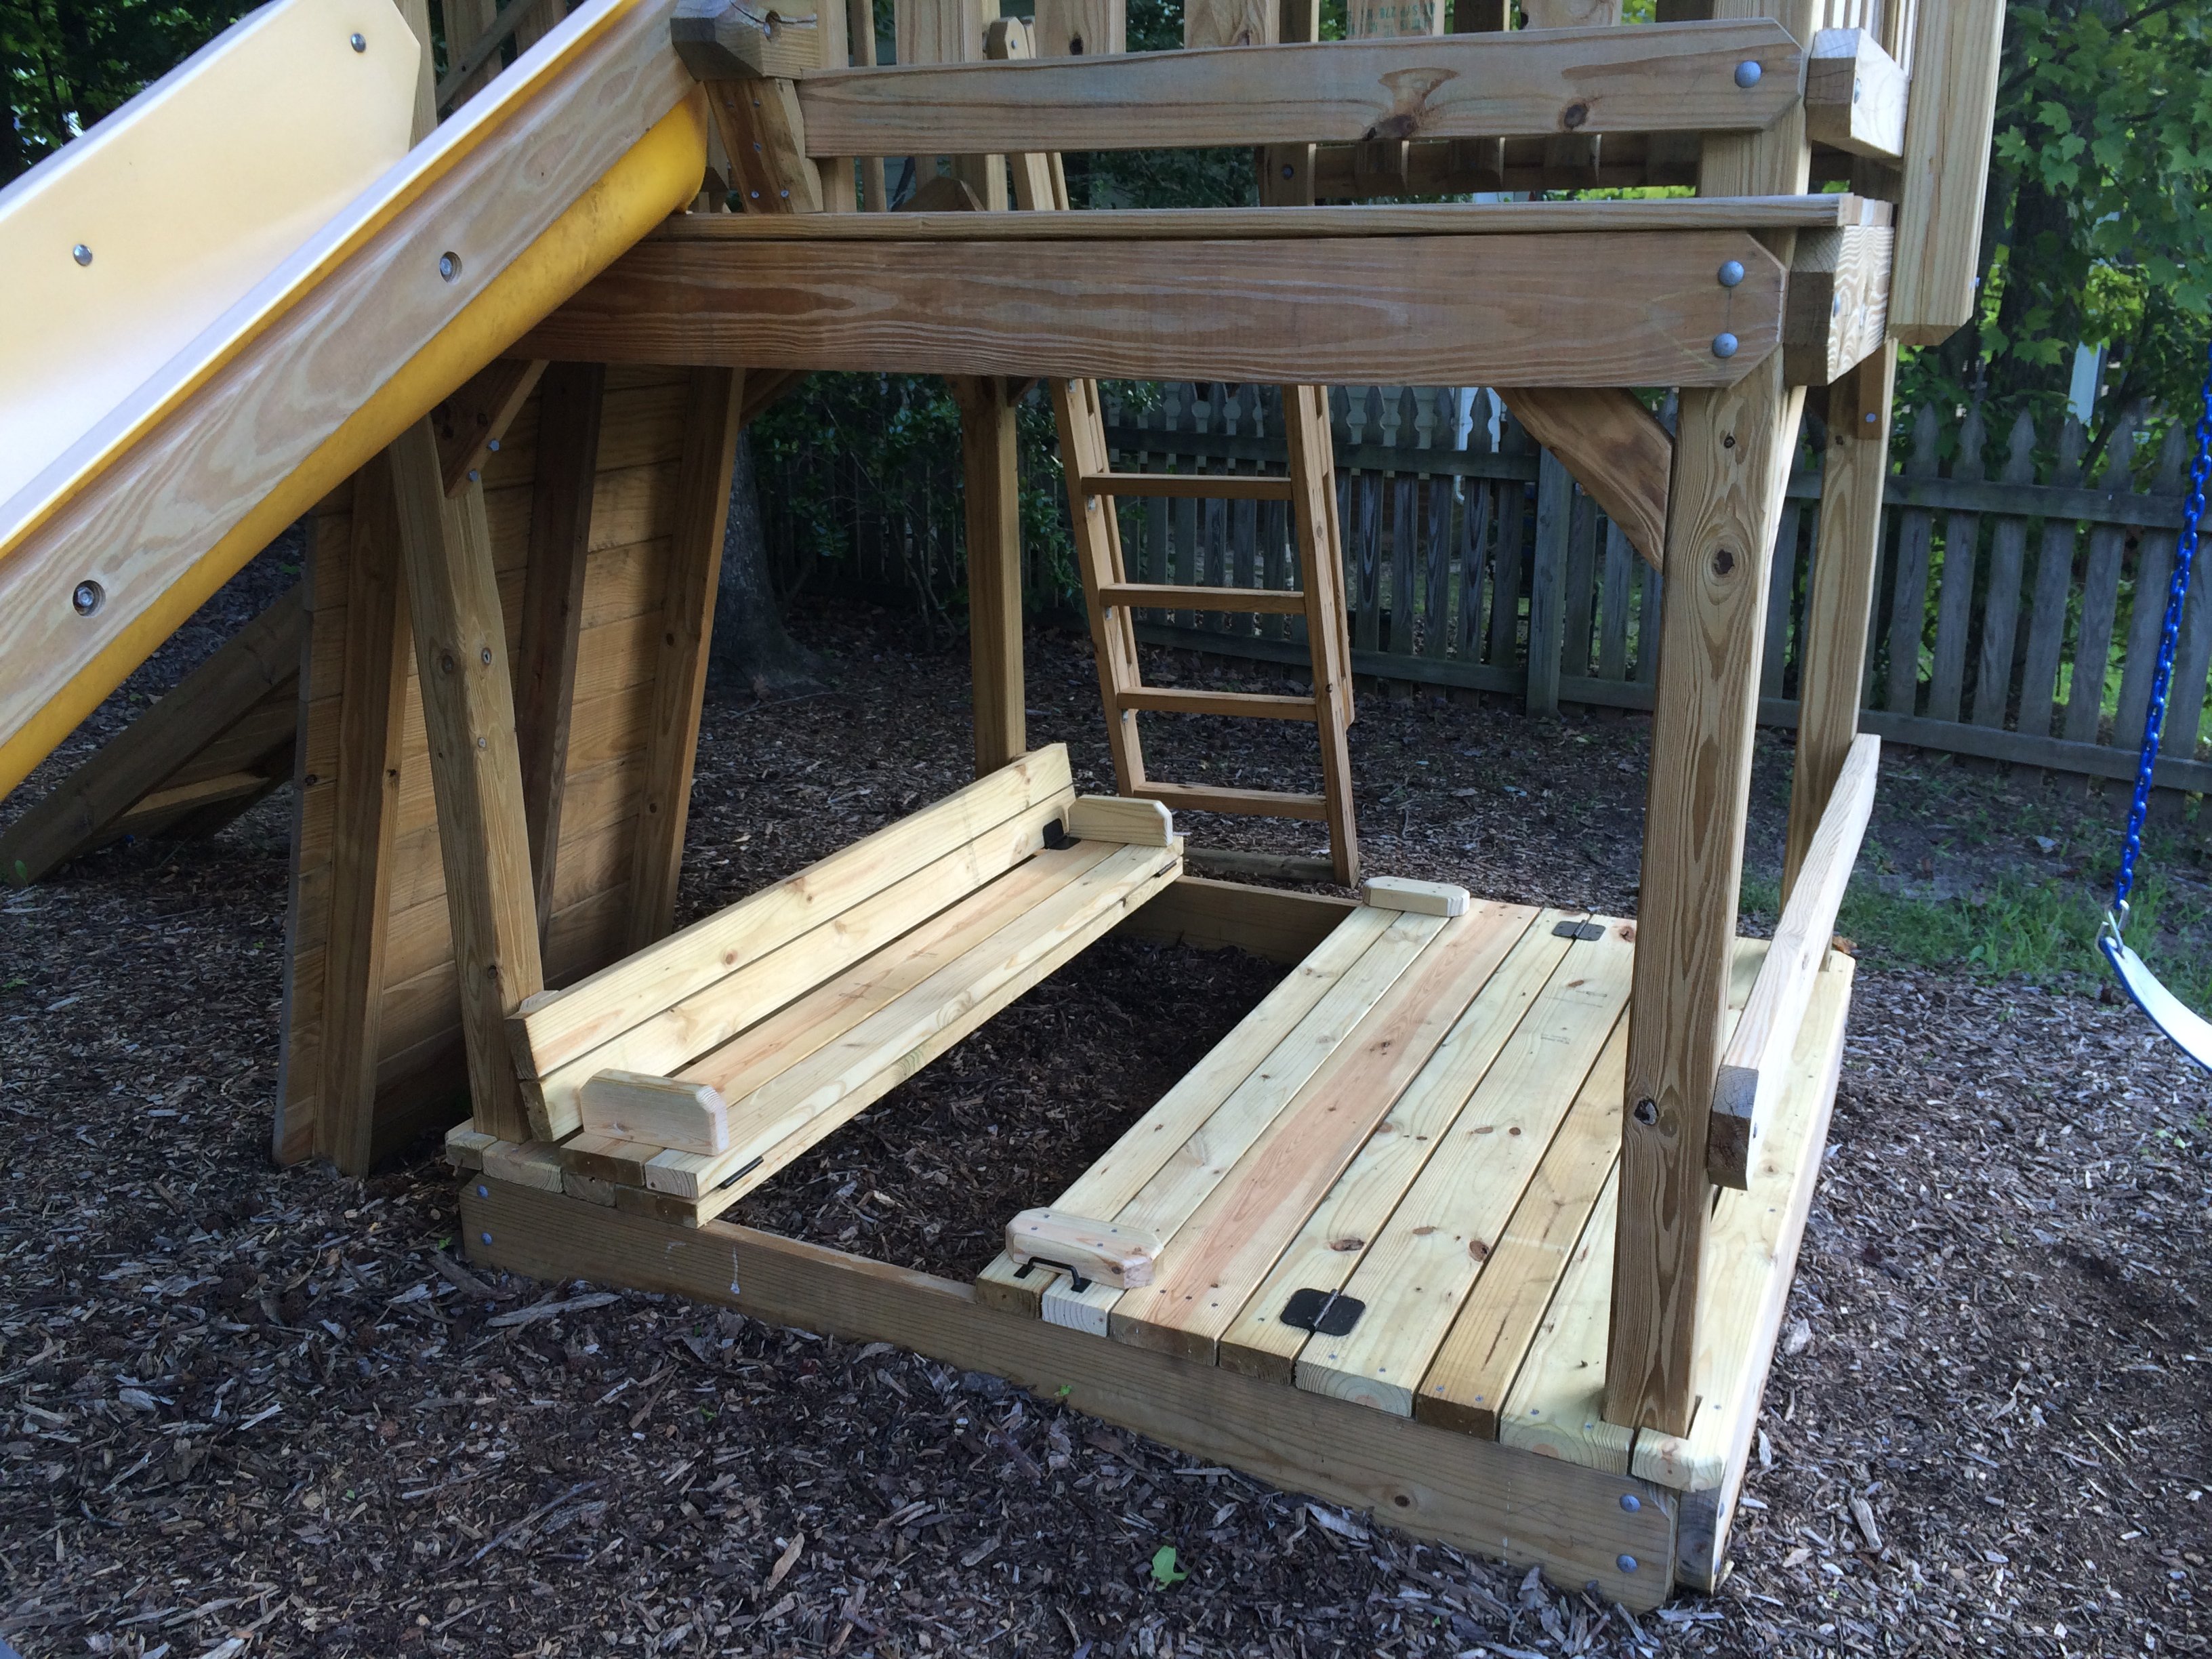
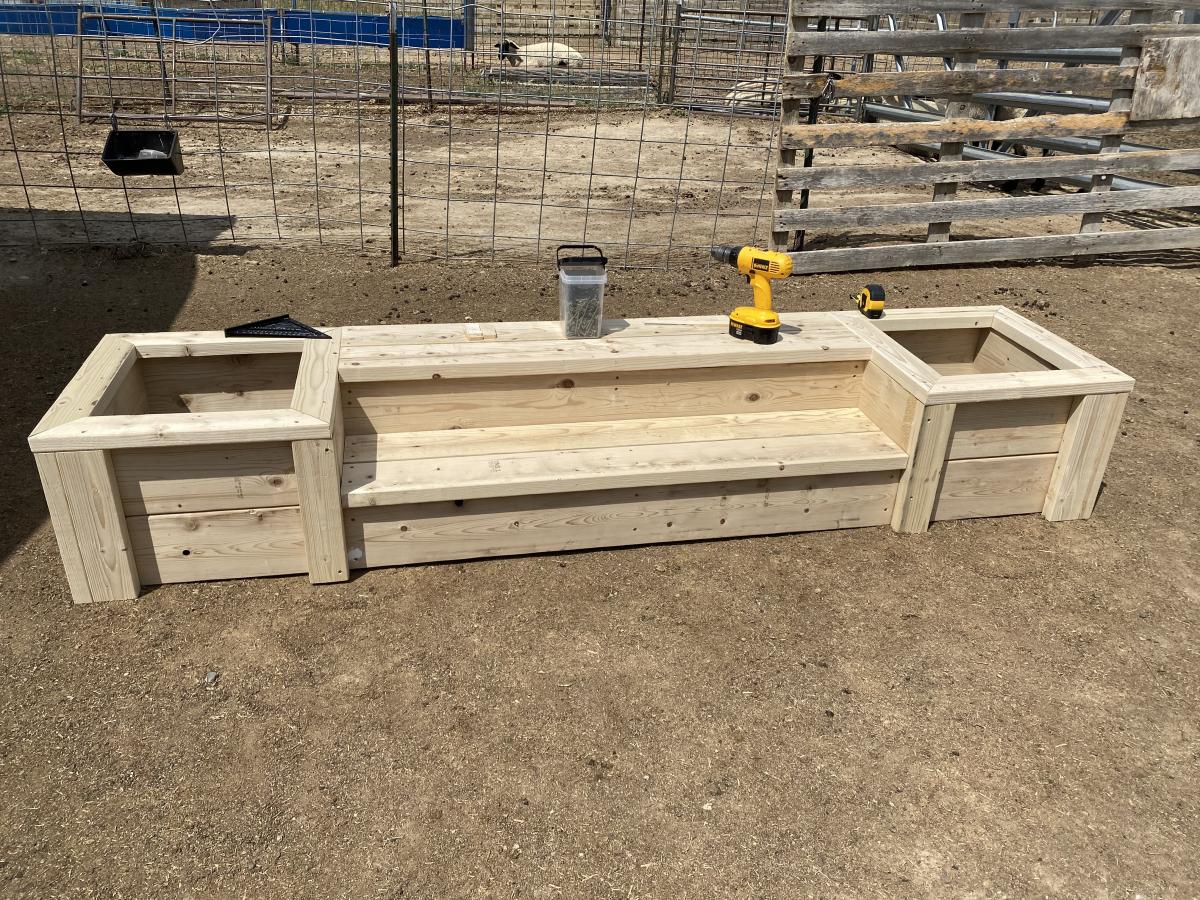
Thanks to inspiration from Ana's post on the Sand Box with Built-in seats, I've retrofit our Jungle Fort (http://www.detailedplay.com/Jungle-Fort-Swingset.htm) with the sandbox cover/bench system. I've upgraded the lumber dimensions to 2x4s and 2x6 to accommodate the increased 67.5" span.
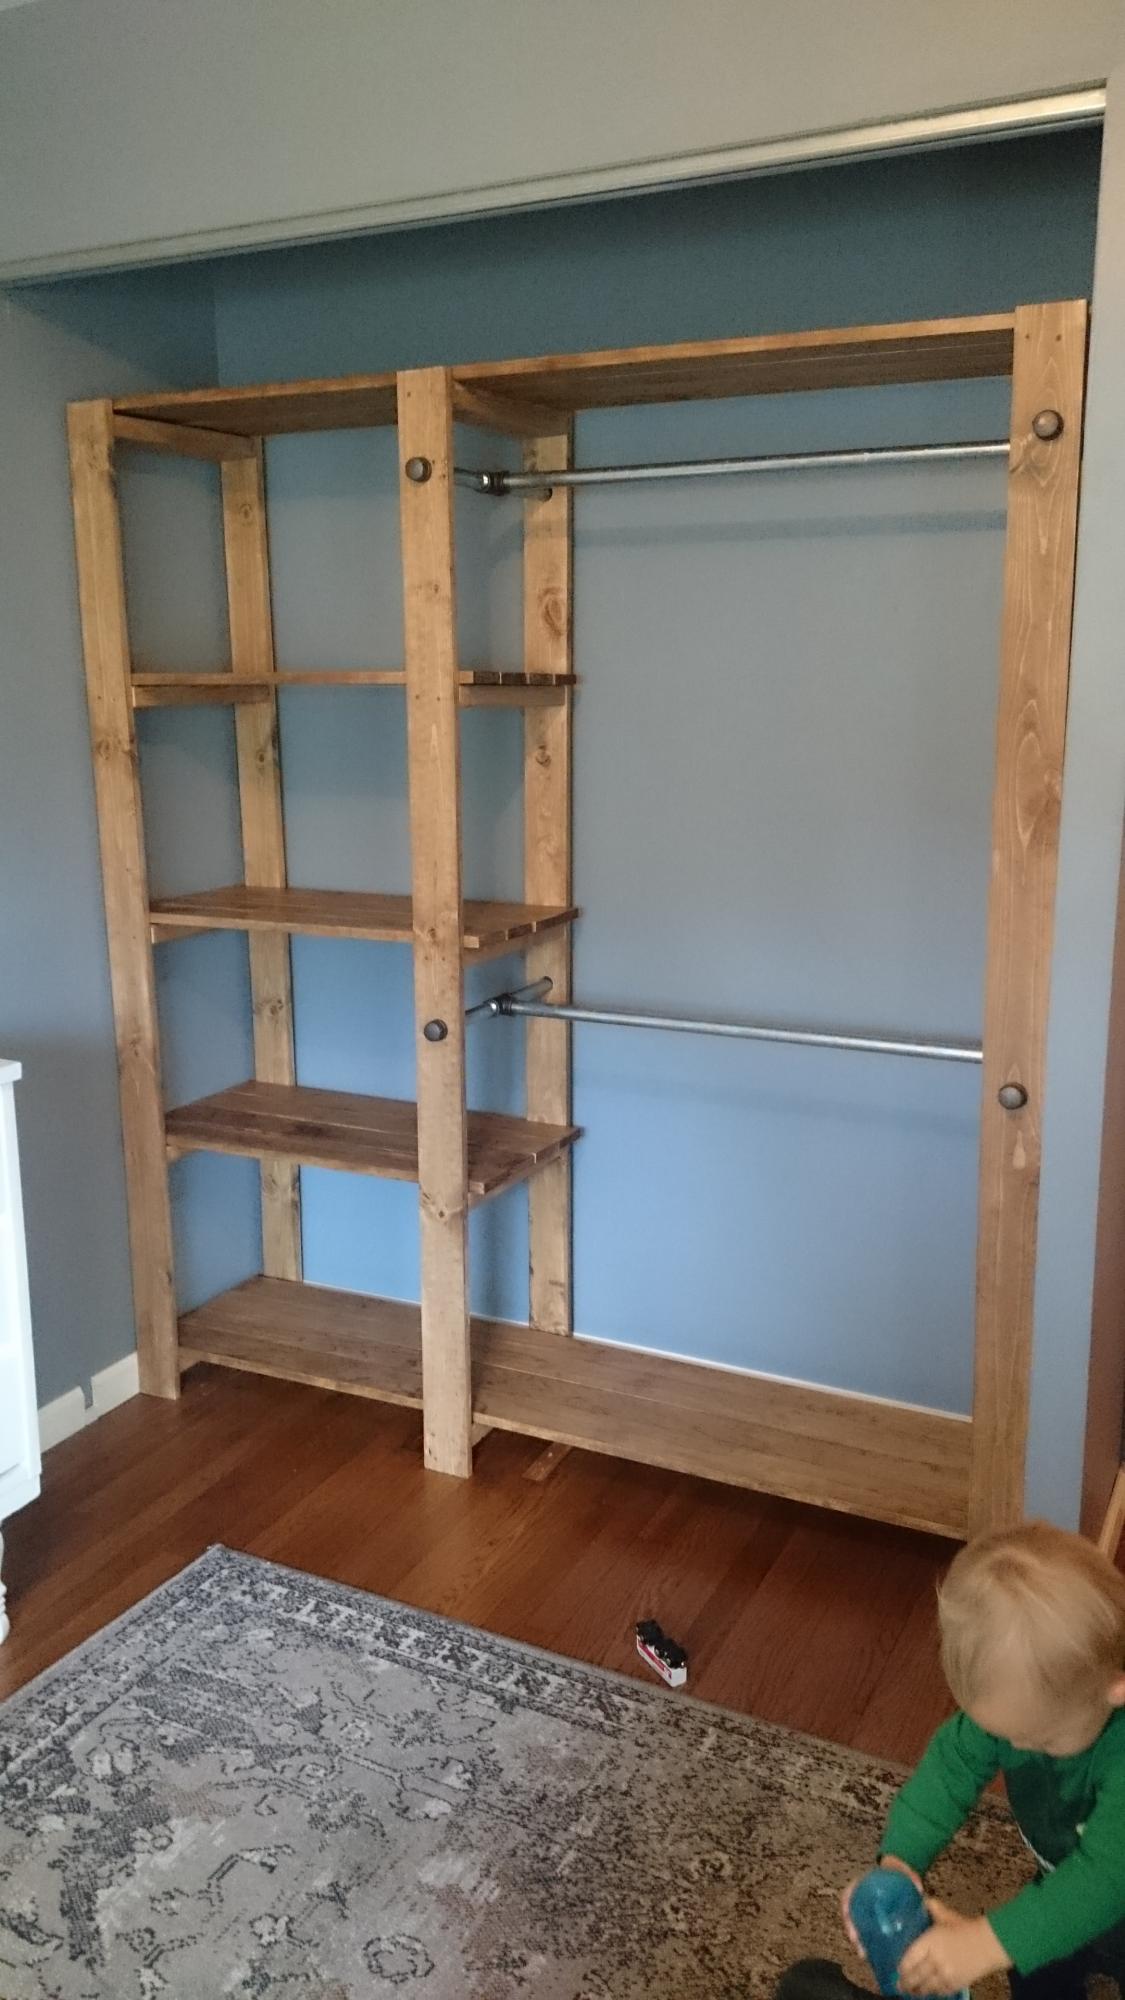
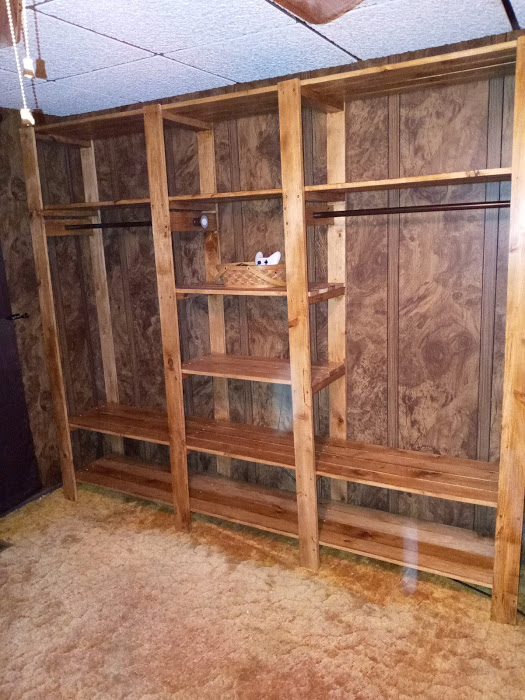
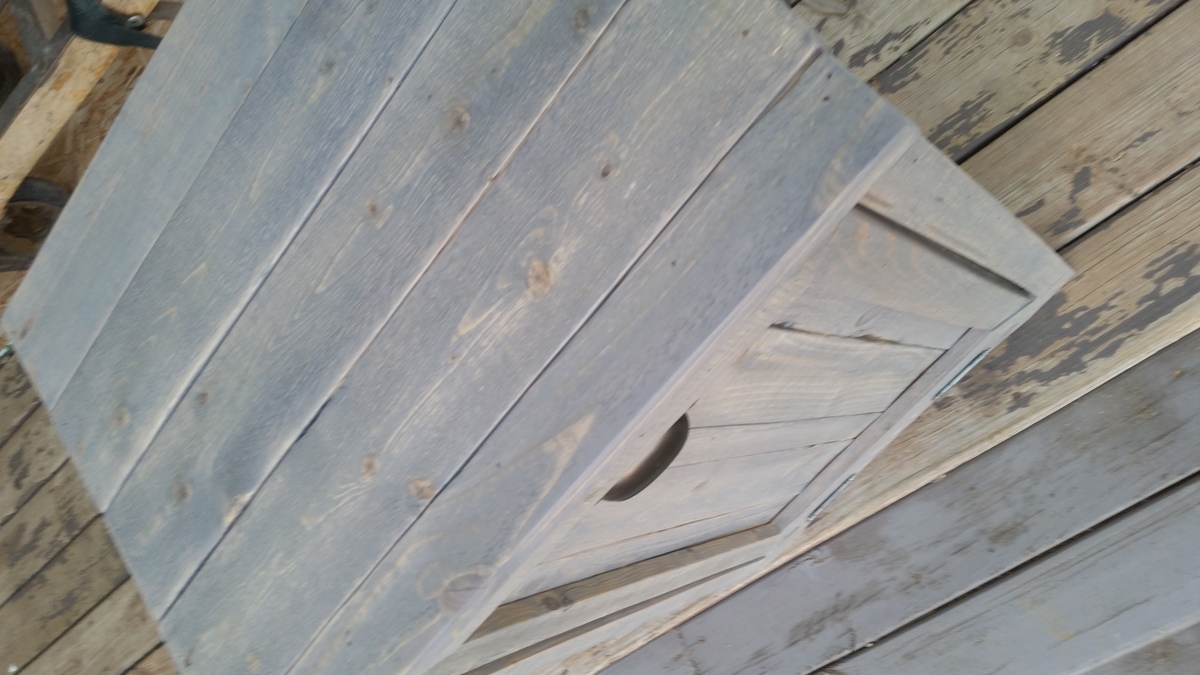
This was the second building project I've ever completed. I had to make a few adjustments to make it fit the size of ray's closet, but it was totally worth it. most of the work was in the measuring, sanding, and sealing of the wood. Ftting the frames can be a little tricky if your planks aren't perfectly straight. Otherwise, this project was pretty straight forward and can be done in just a few days depending on how much time you have to dedicate to it. Thanks Ana!
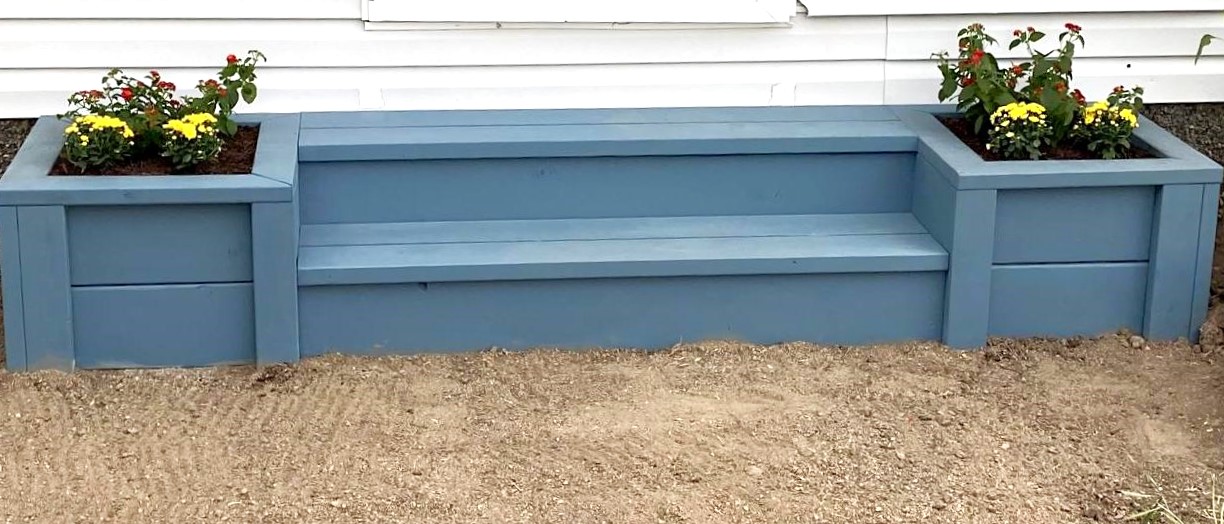
These steps turned out great!!! My in-laws were using some busted up pallets as a front porch so I knocked these out in a few hours. The blue stain looks really good and matches the other blue on various out-buildings. Very easy project and the plans available were spot on. Thanks Ana!!
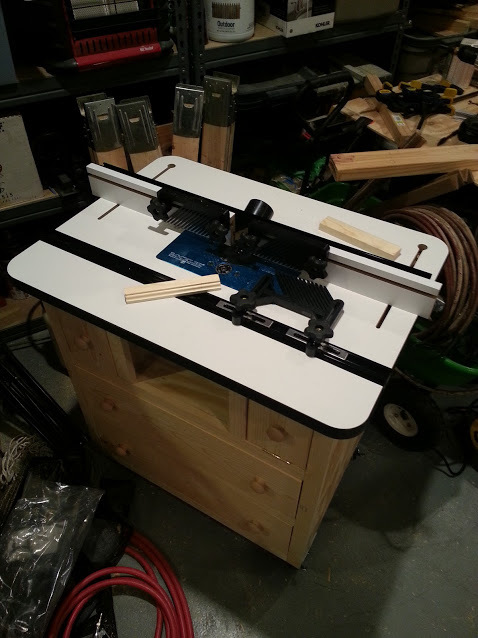
Built Patrick's Router table and added a rockler table, fence, and lift to finish off.
Sat, 11/03/2012 - 19:28
Here's a tip for that 1617 router. Try putting a bandaid over the on/off switch. That thing will get gummed up if left uncovered. It's annoying.
Sun, 03/22/2015 - 05:26
Well, you can read this review http://routertablereviews.com/router-table-lifts-kreg-prs3000-vs-jessem… as well.
Sun, 03/05/2017 - 21:13
My question for Patrick is when he built the top section for 2 small drawers and middle section for the router access..
Did Patrick put on top a 3/4" pc of plywood then the router table top.
Can l attach my router table top to the top pc if 3/4"plywood then my table top is 1 3/4" thick that it would be to thick could you email to let me know please.
Jim
This is my third build and it took about 1/2 a day and cost $50 for lumber and $15 for hardware (decking screws). I previously built Ana's Farmhouse Table and doll farmhouse bed and cupcake stand.
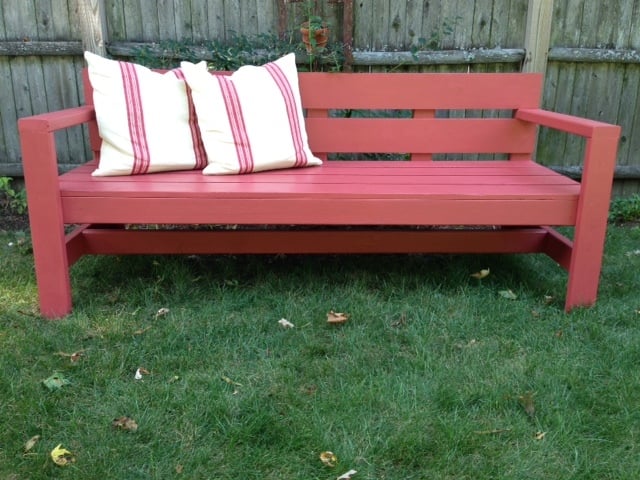
I used the small kreg jig for part of the underseat frame, but it is not necssary. I wasn't using kreg screws so I found it easier to just attach through the end of the 2x4s. I recommend checking for squareness often for this project, especially as the arms and stretcher are attached.
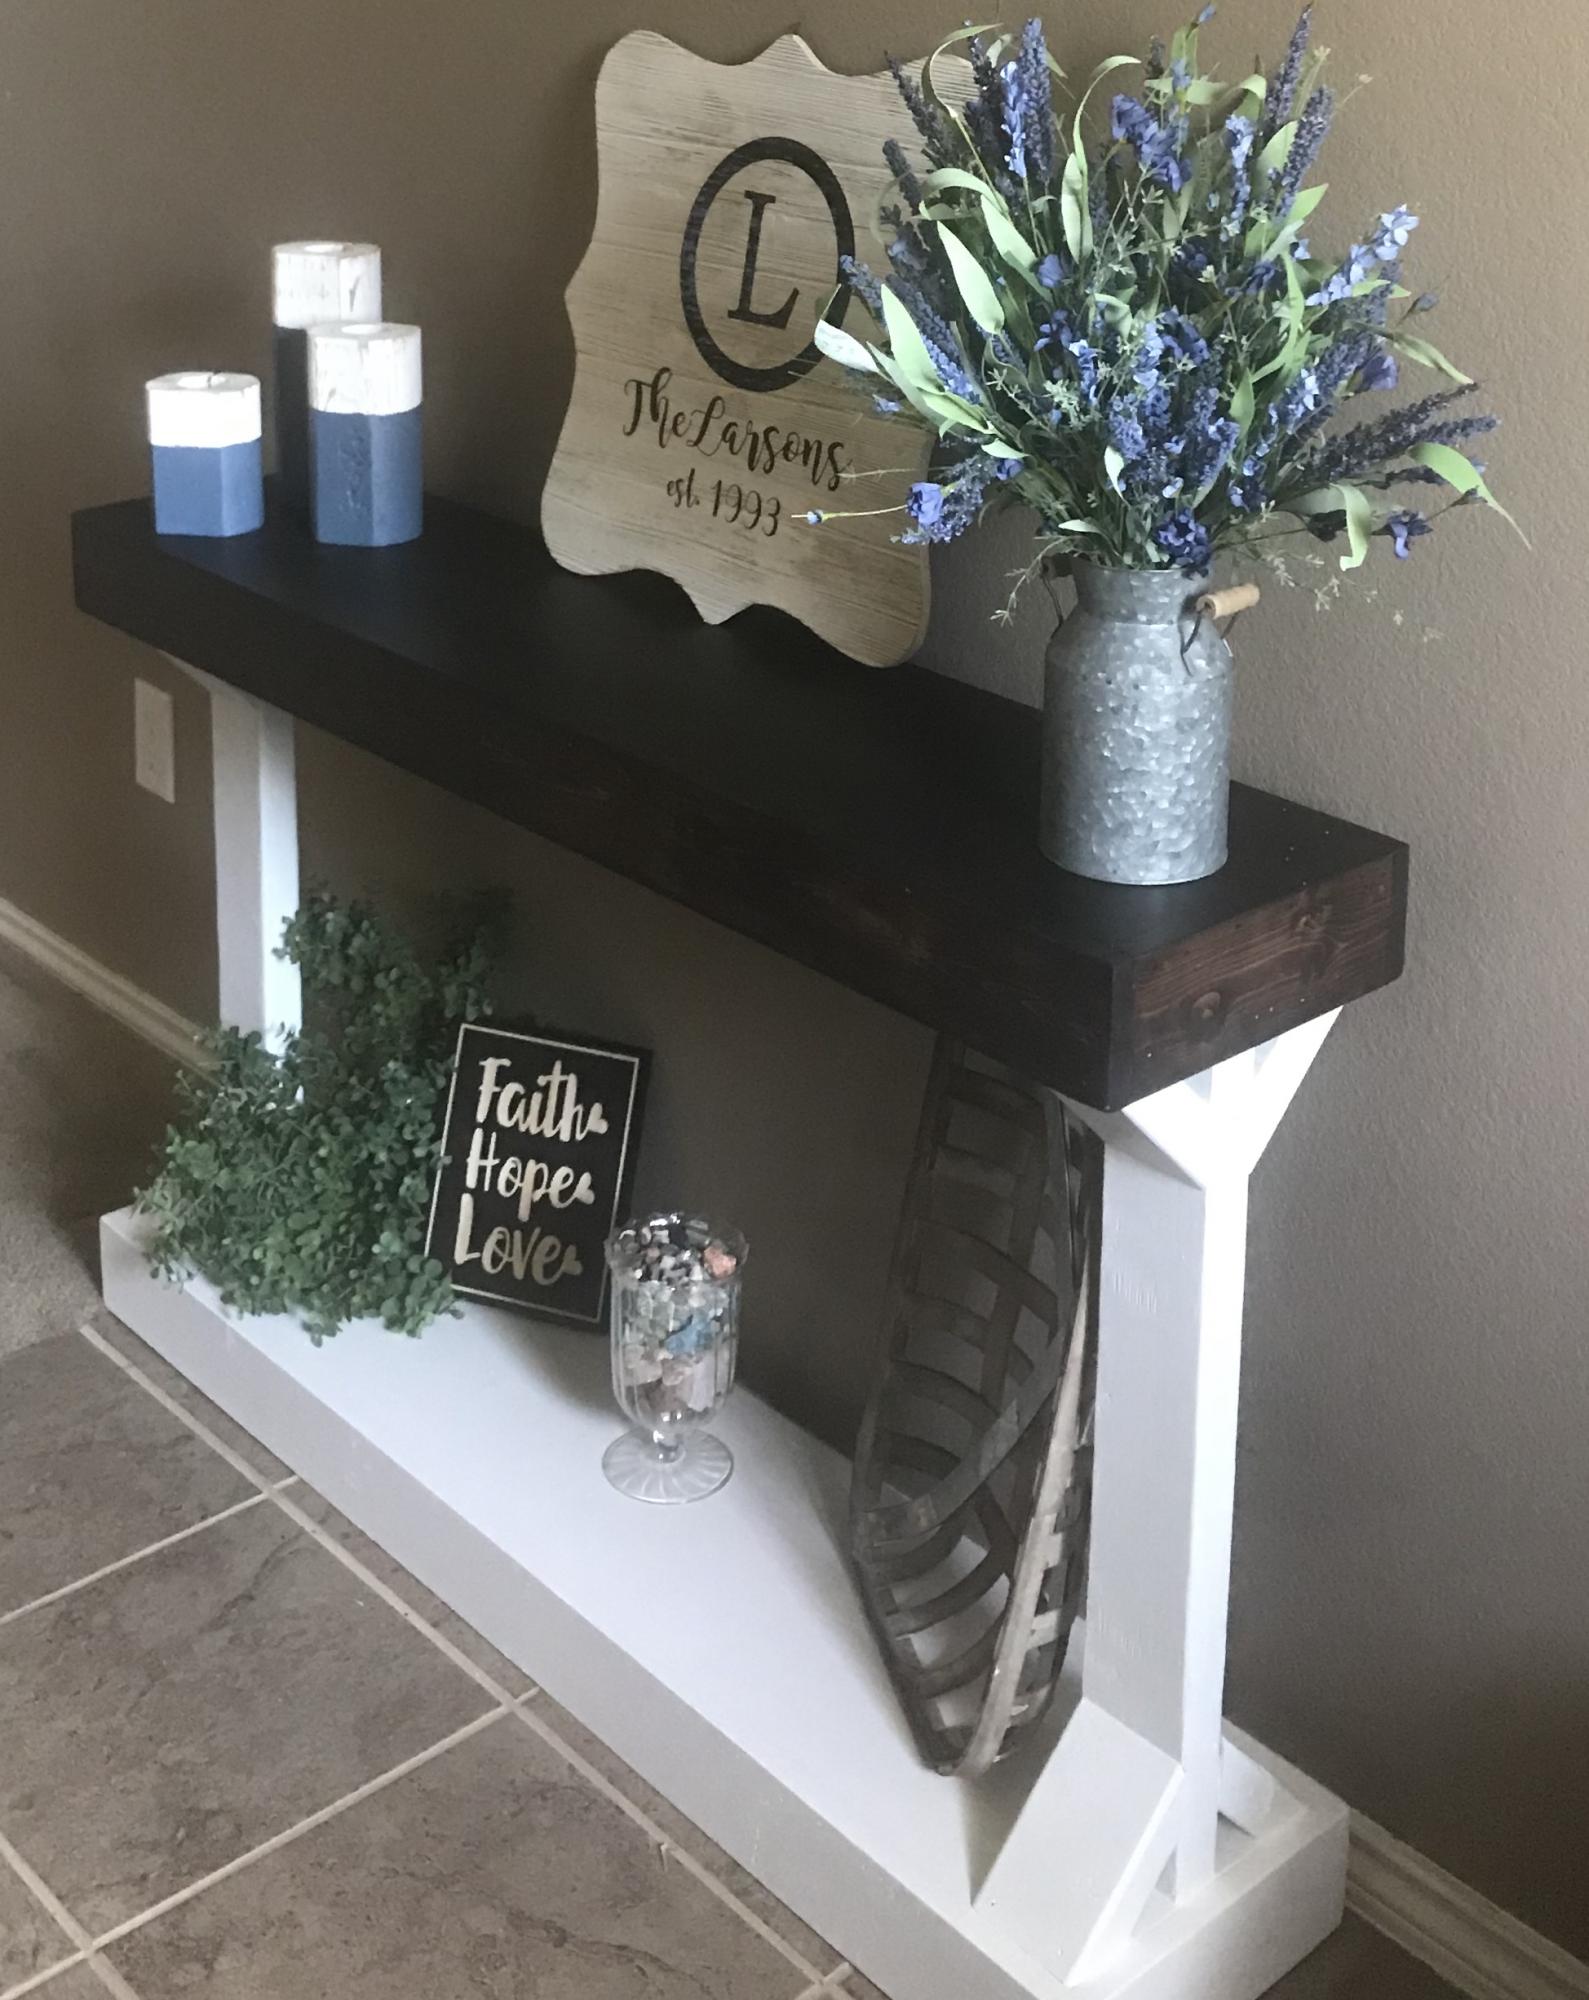
Fun weekend project for an entry redo. Adjusted plan to 4' length to fit the space.
So I was complaining to my wife that our one closet in our bedroom was becoming too cluttered. She asked me to build her one. I told her that if she found the one she wanted me to build, then I would build it. She found this one and so I built it for her. Let me just say that she is very happy with it and it came out very great. I did find a couple of shower curtain rods that were brown to used instead of the iron pipe. It made the whole project cost around $80.
Sat, 11/07/2020 - 11:42
So happy that worked out for you and your wife, thanks for sharing:)
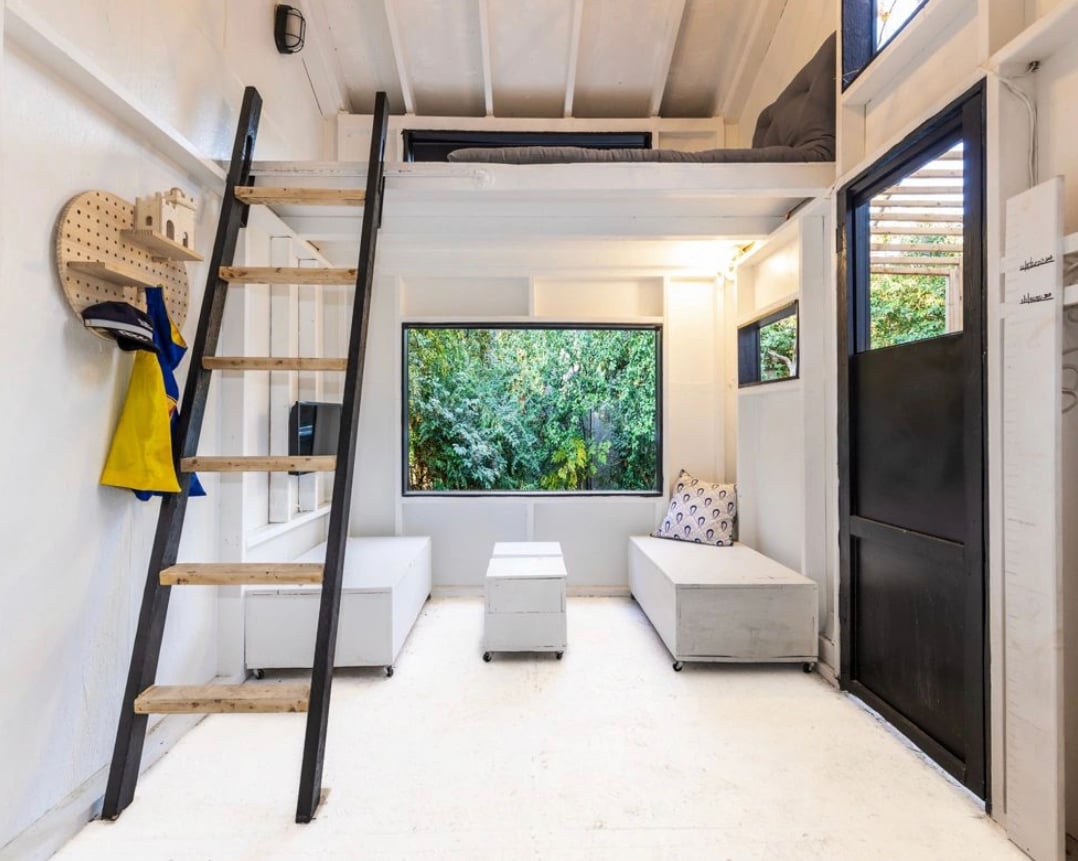
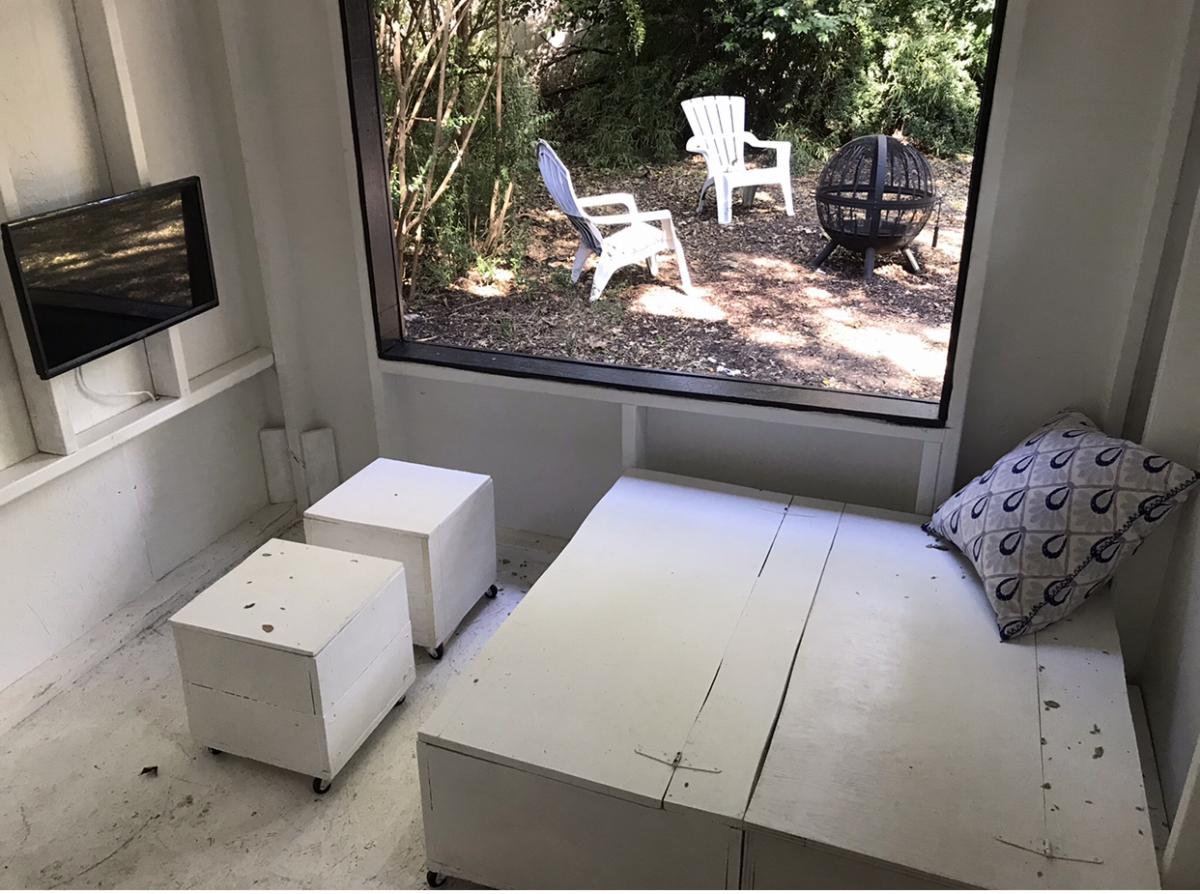
Thank you for the inspiration and plans to build the highly functional and stylish storage + seating solution! You used it for tiny house and I used it in children’s playhouse - it’s been excellent for toy storage! I also love that each piece is on wheels (even the stools that double as coffee table) - very smart and functional. I actually built another one for my garage and use that one for tool and hardware storage. Bravo Ana! Thanks again 😊

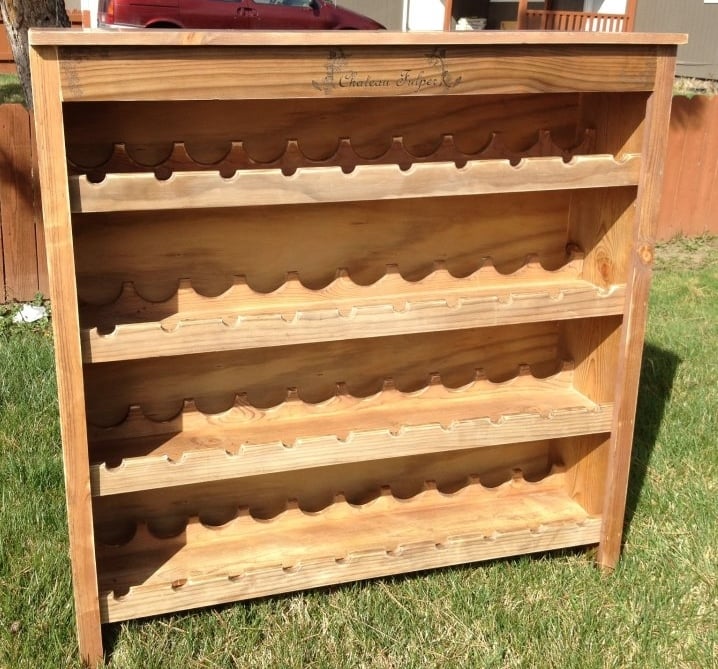
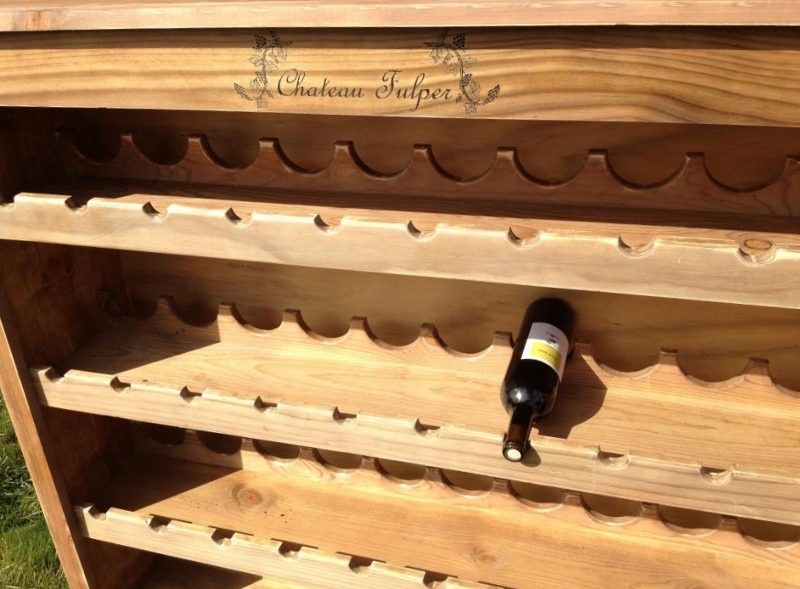
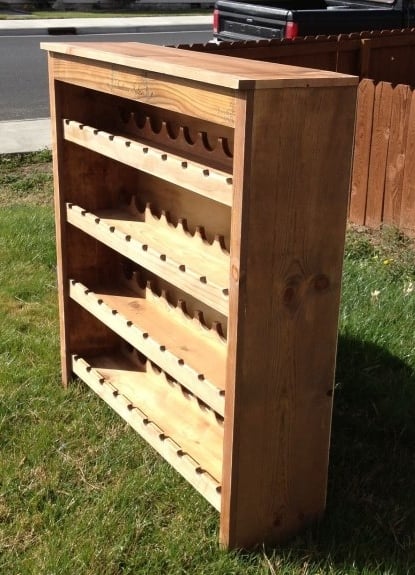
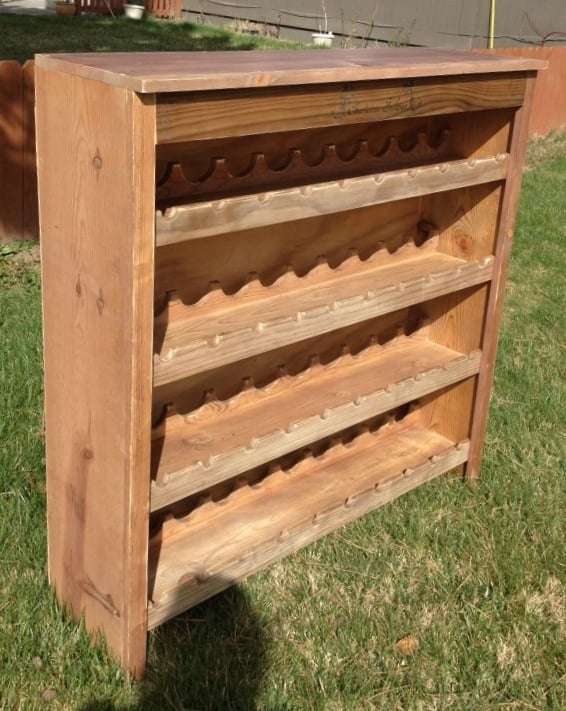
I've built many custom pieces for local folks but this one with all it's half circles really threw me - how was I going to do those, make them precise and not spend 3 days doing it. It's simple really.... I cheated!! LOL I used a 3 1/8" hole saw for the larger ones and a 1" hole saw for the smaller ones. I also took two boards and clamped them together with pipe clamps and then drilled two at once! It gives it a more consistent look and cuts the time literally in half!
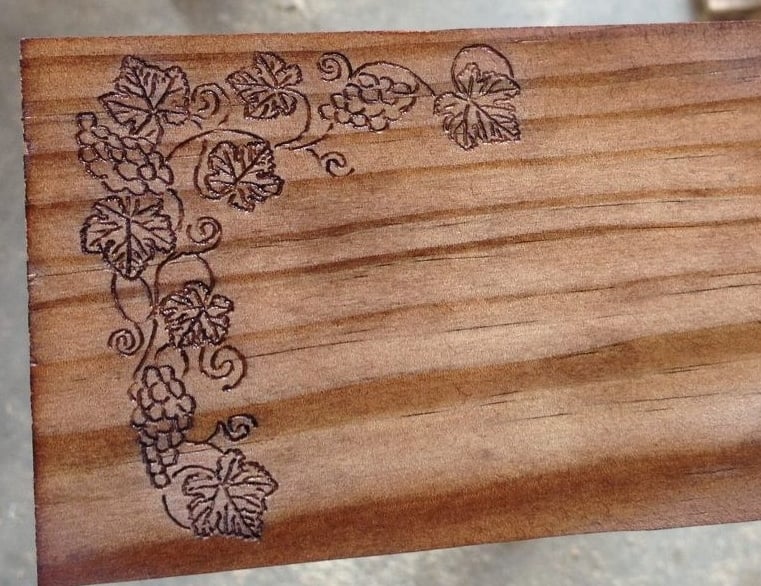
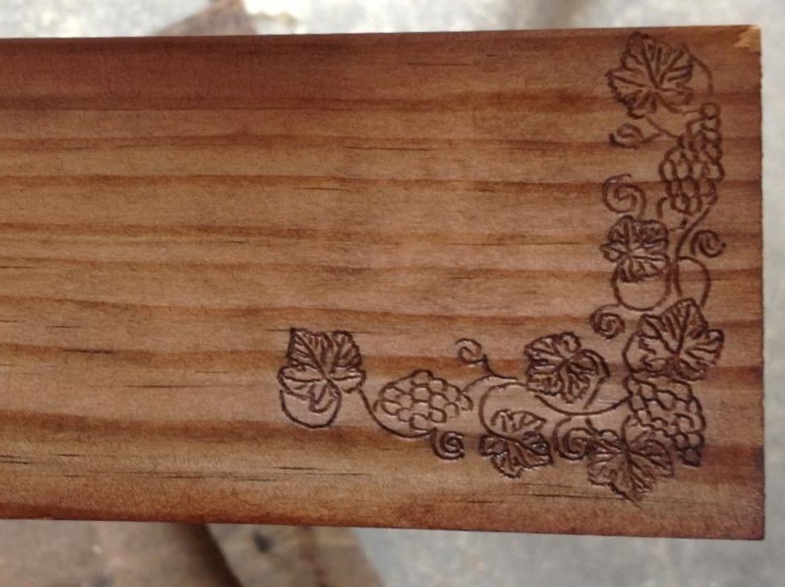
I used a home brew for the stain. Had a friend of mine do the engraving for the front header piece. I think the whole project took between 10 - 15 hours to do because there was a lot of experimenting with the stain and there was also readjusting the sides and top to look how I wanted.
The client loves it and I'll post a pic on my Facebook page of the whole thing loaded up with wine, later today.
Built this one based on a few of the other brag posts. We are happy with how it turned out!
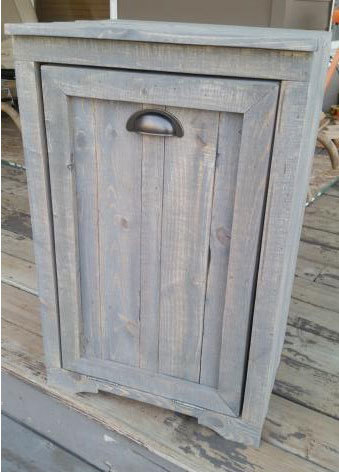
Modified the plan to use pallet wood and stained it classic grey for a weathered look.
Sun, 01/24/2016 - 22:40
how many pallets did it take to make this. Thanks
This was a fun little project that I built for a friend, whose son was turning one year old. I used 5/4 cedar deck boards and ripped them down to size. For a finish I used Watco's teak oil. I love the way it brings out the cedar's natural tones. You can see in one of my pictures the before/after when applying the teak oil.
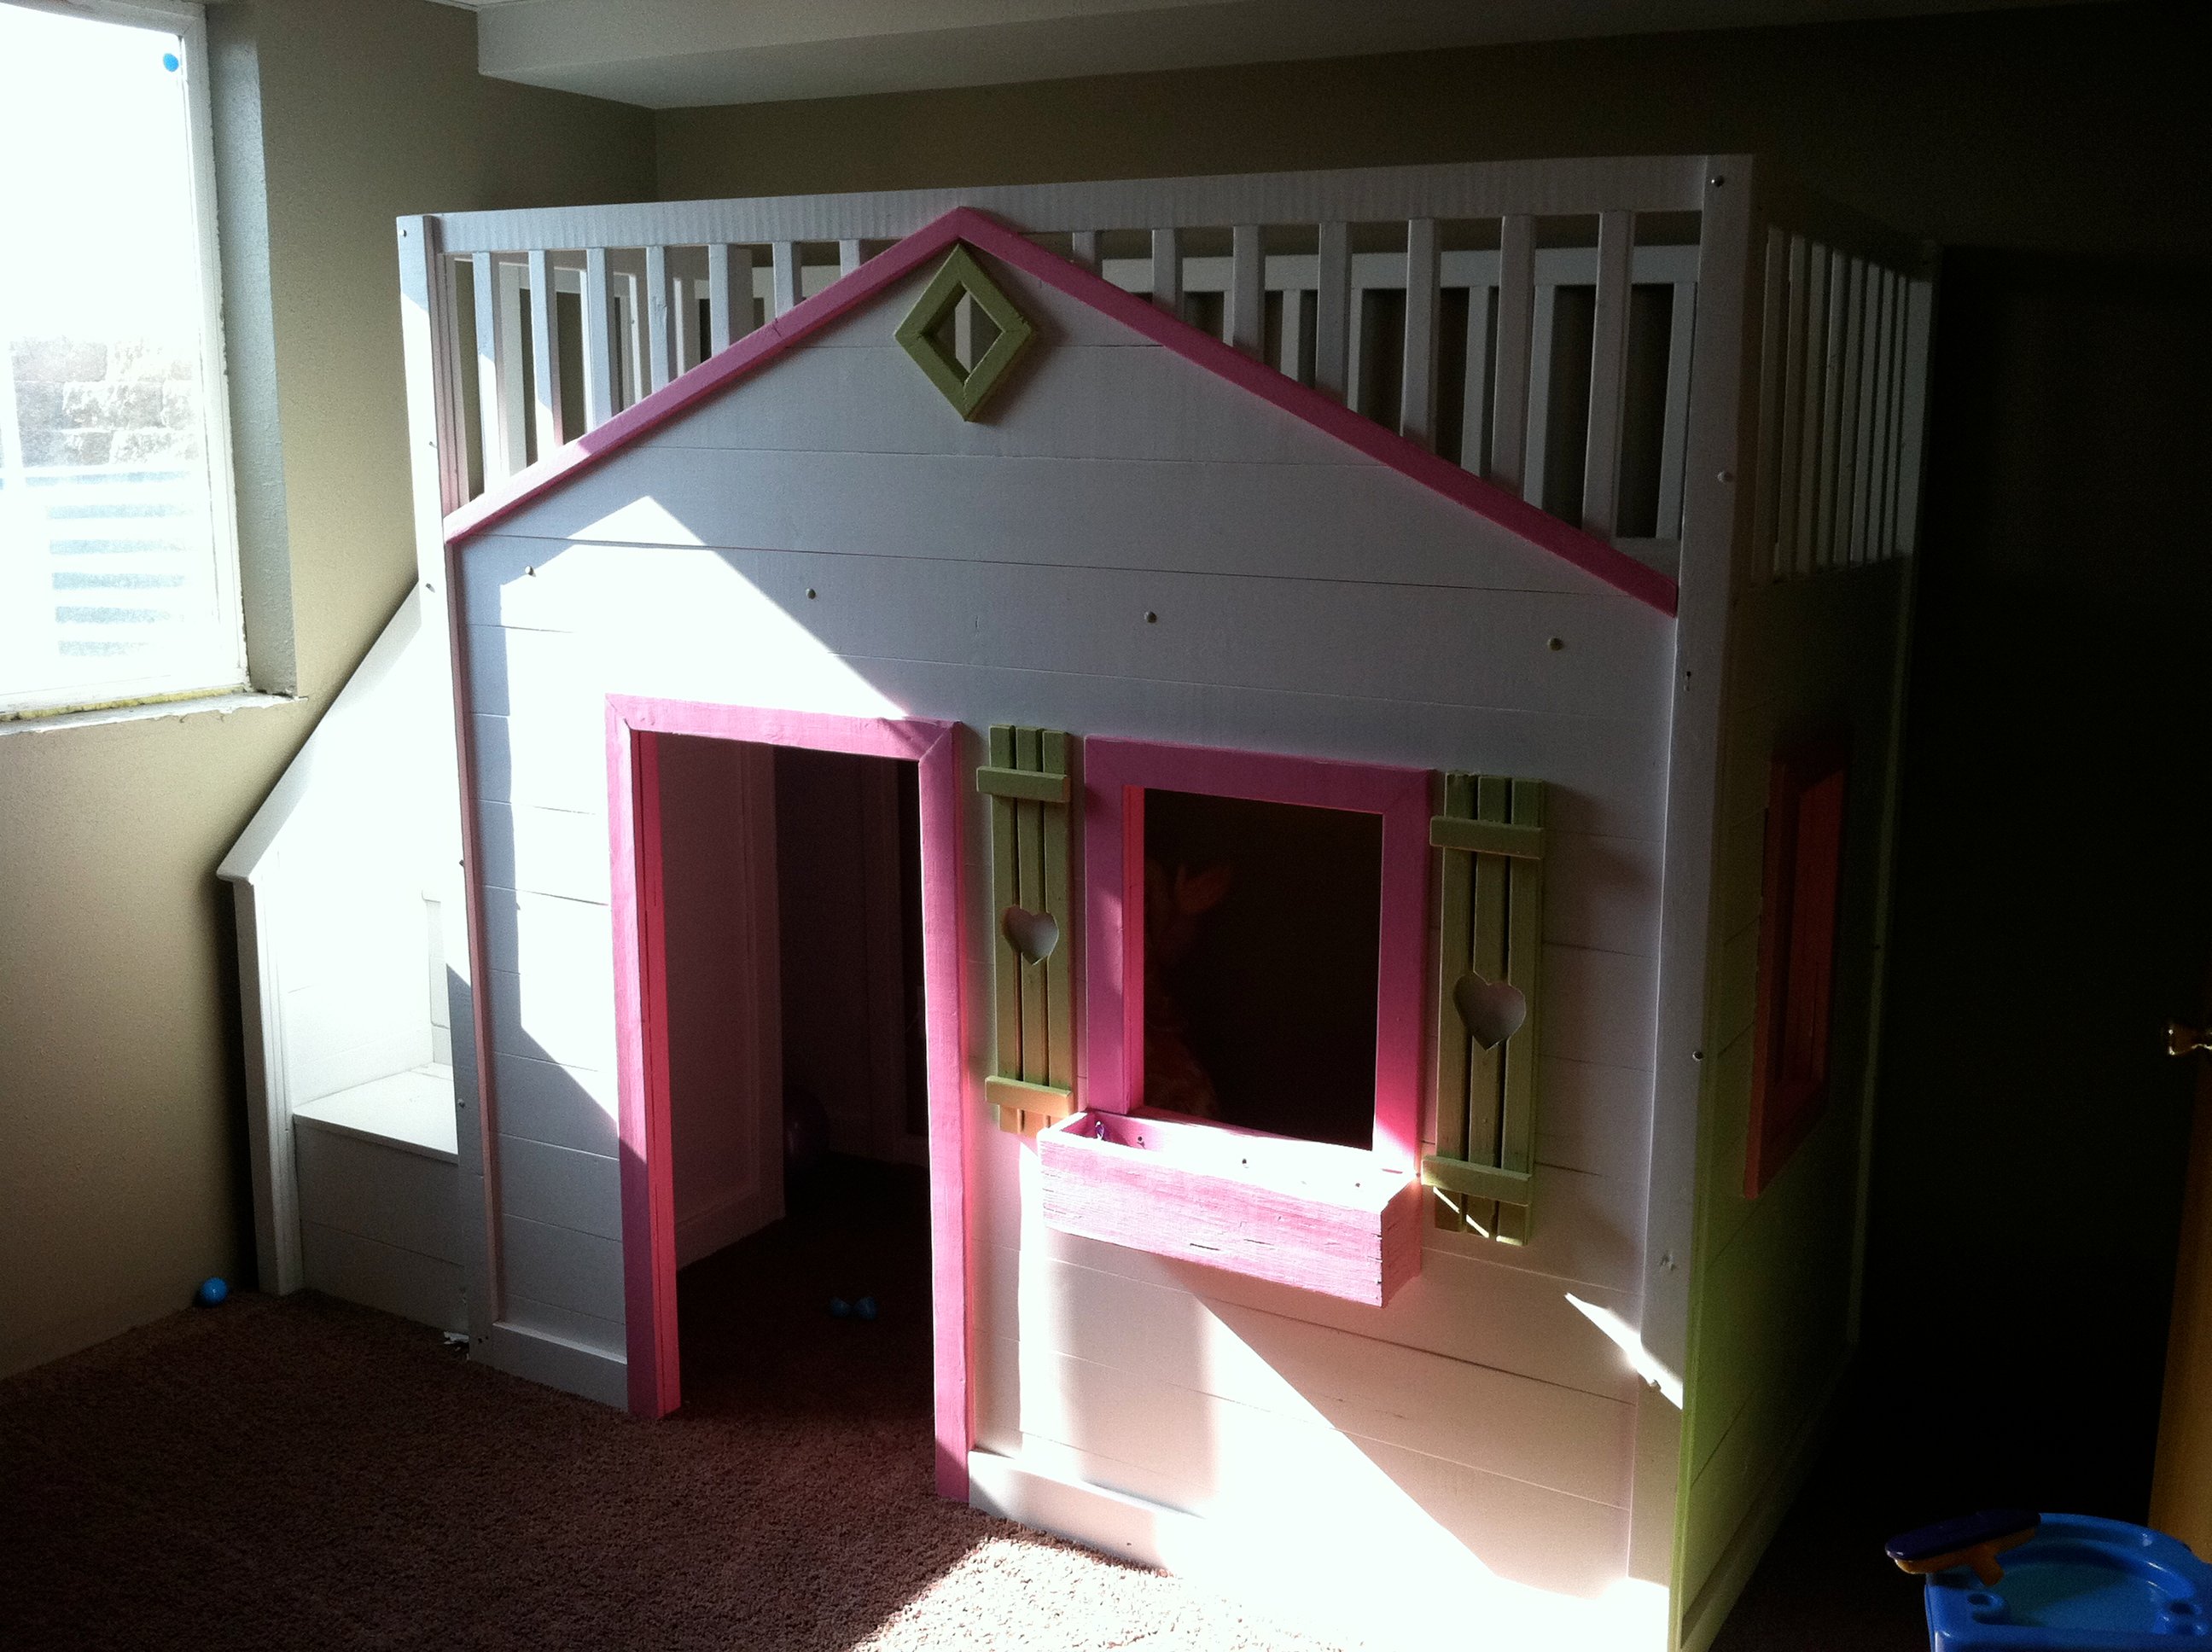
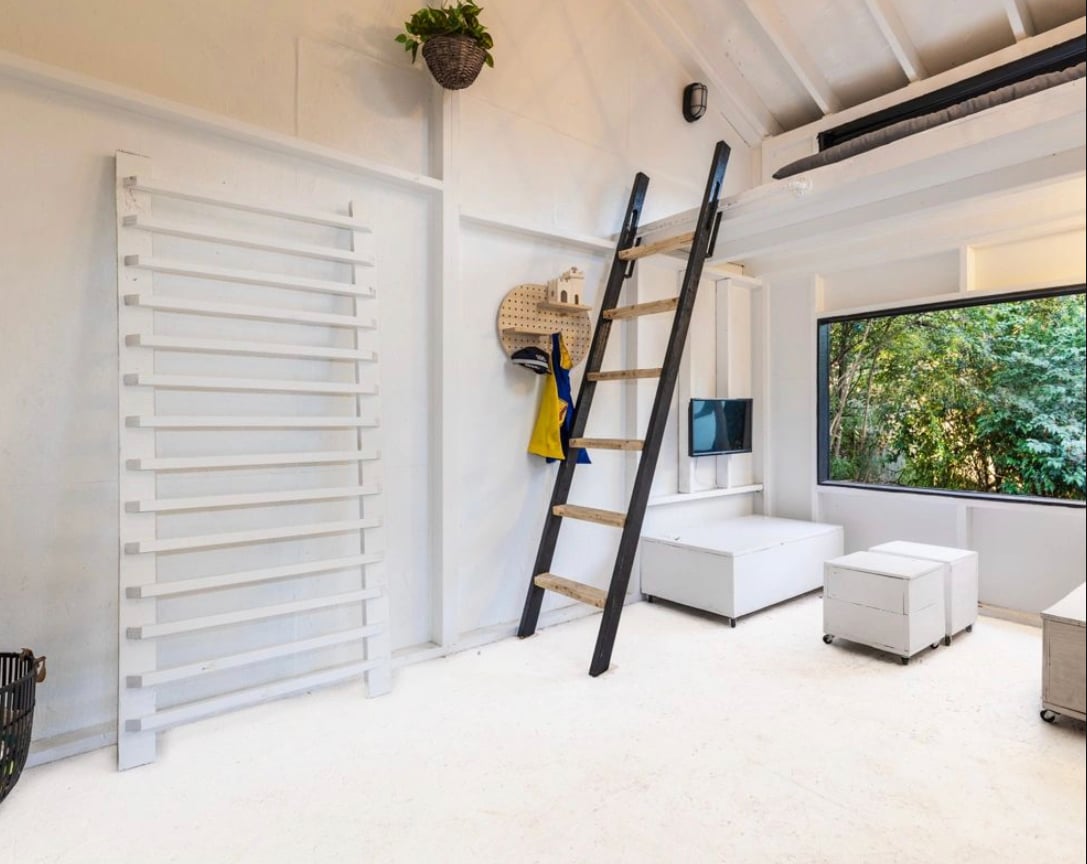
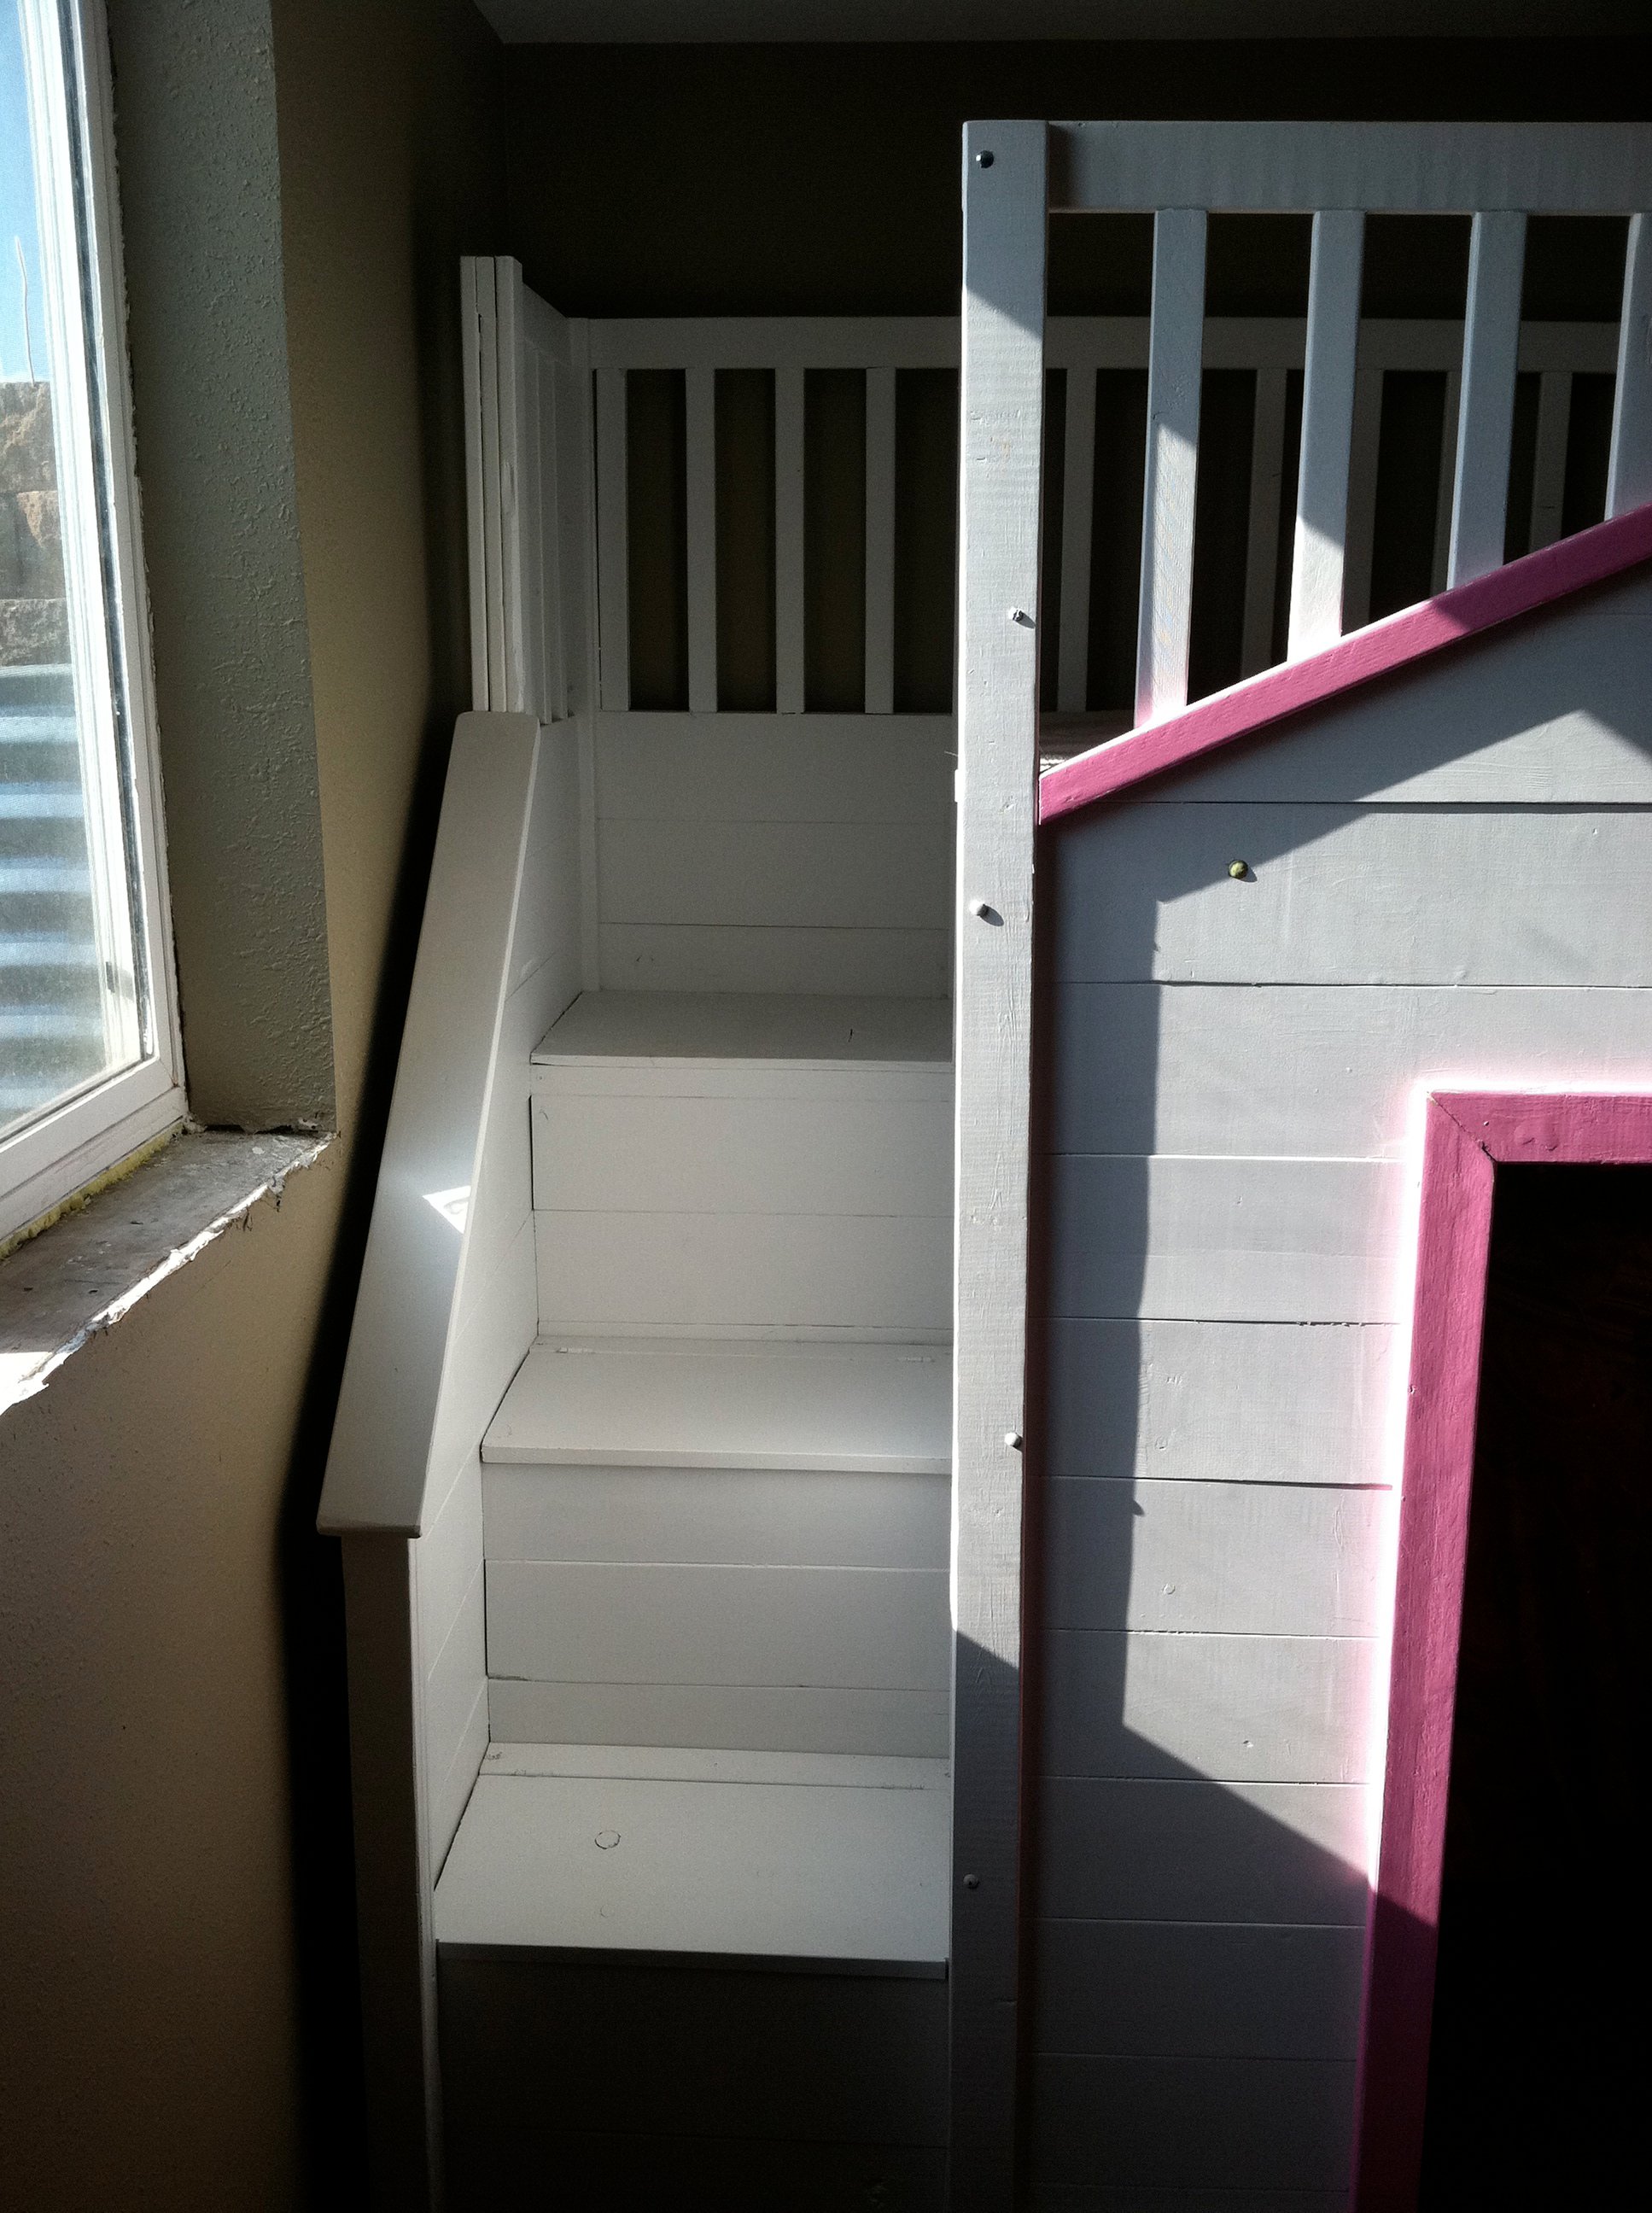
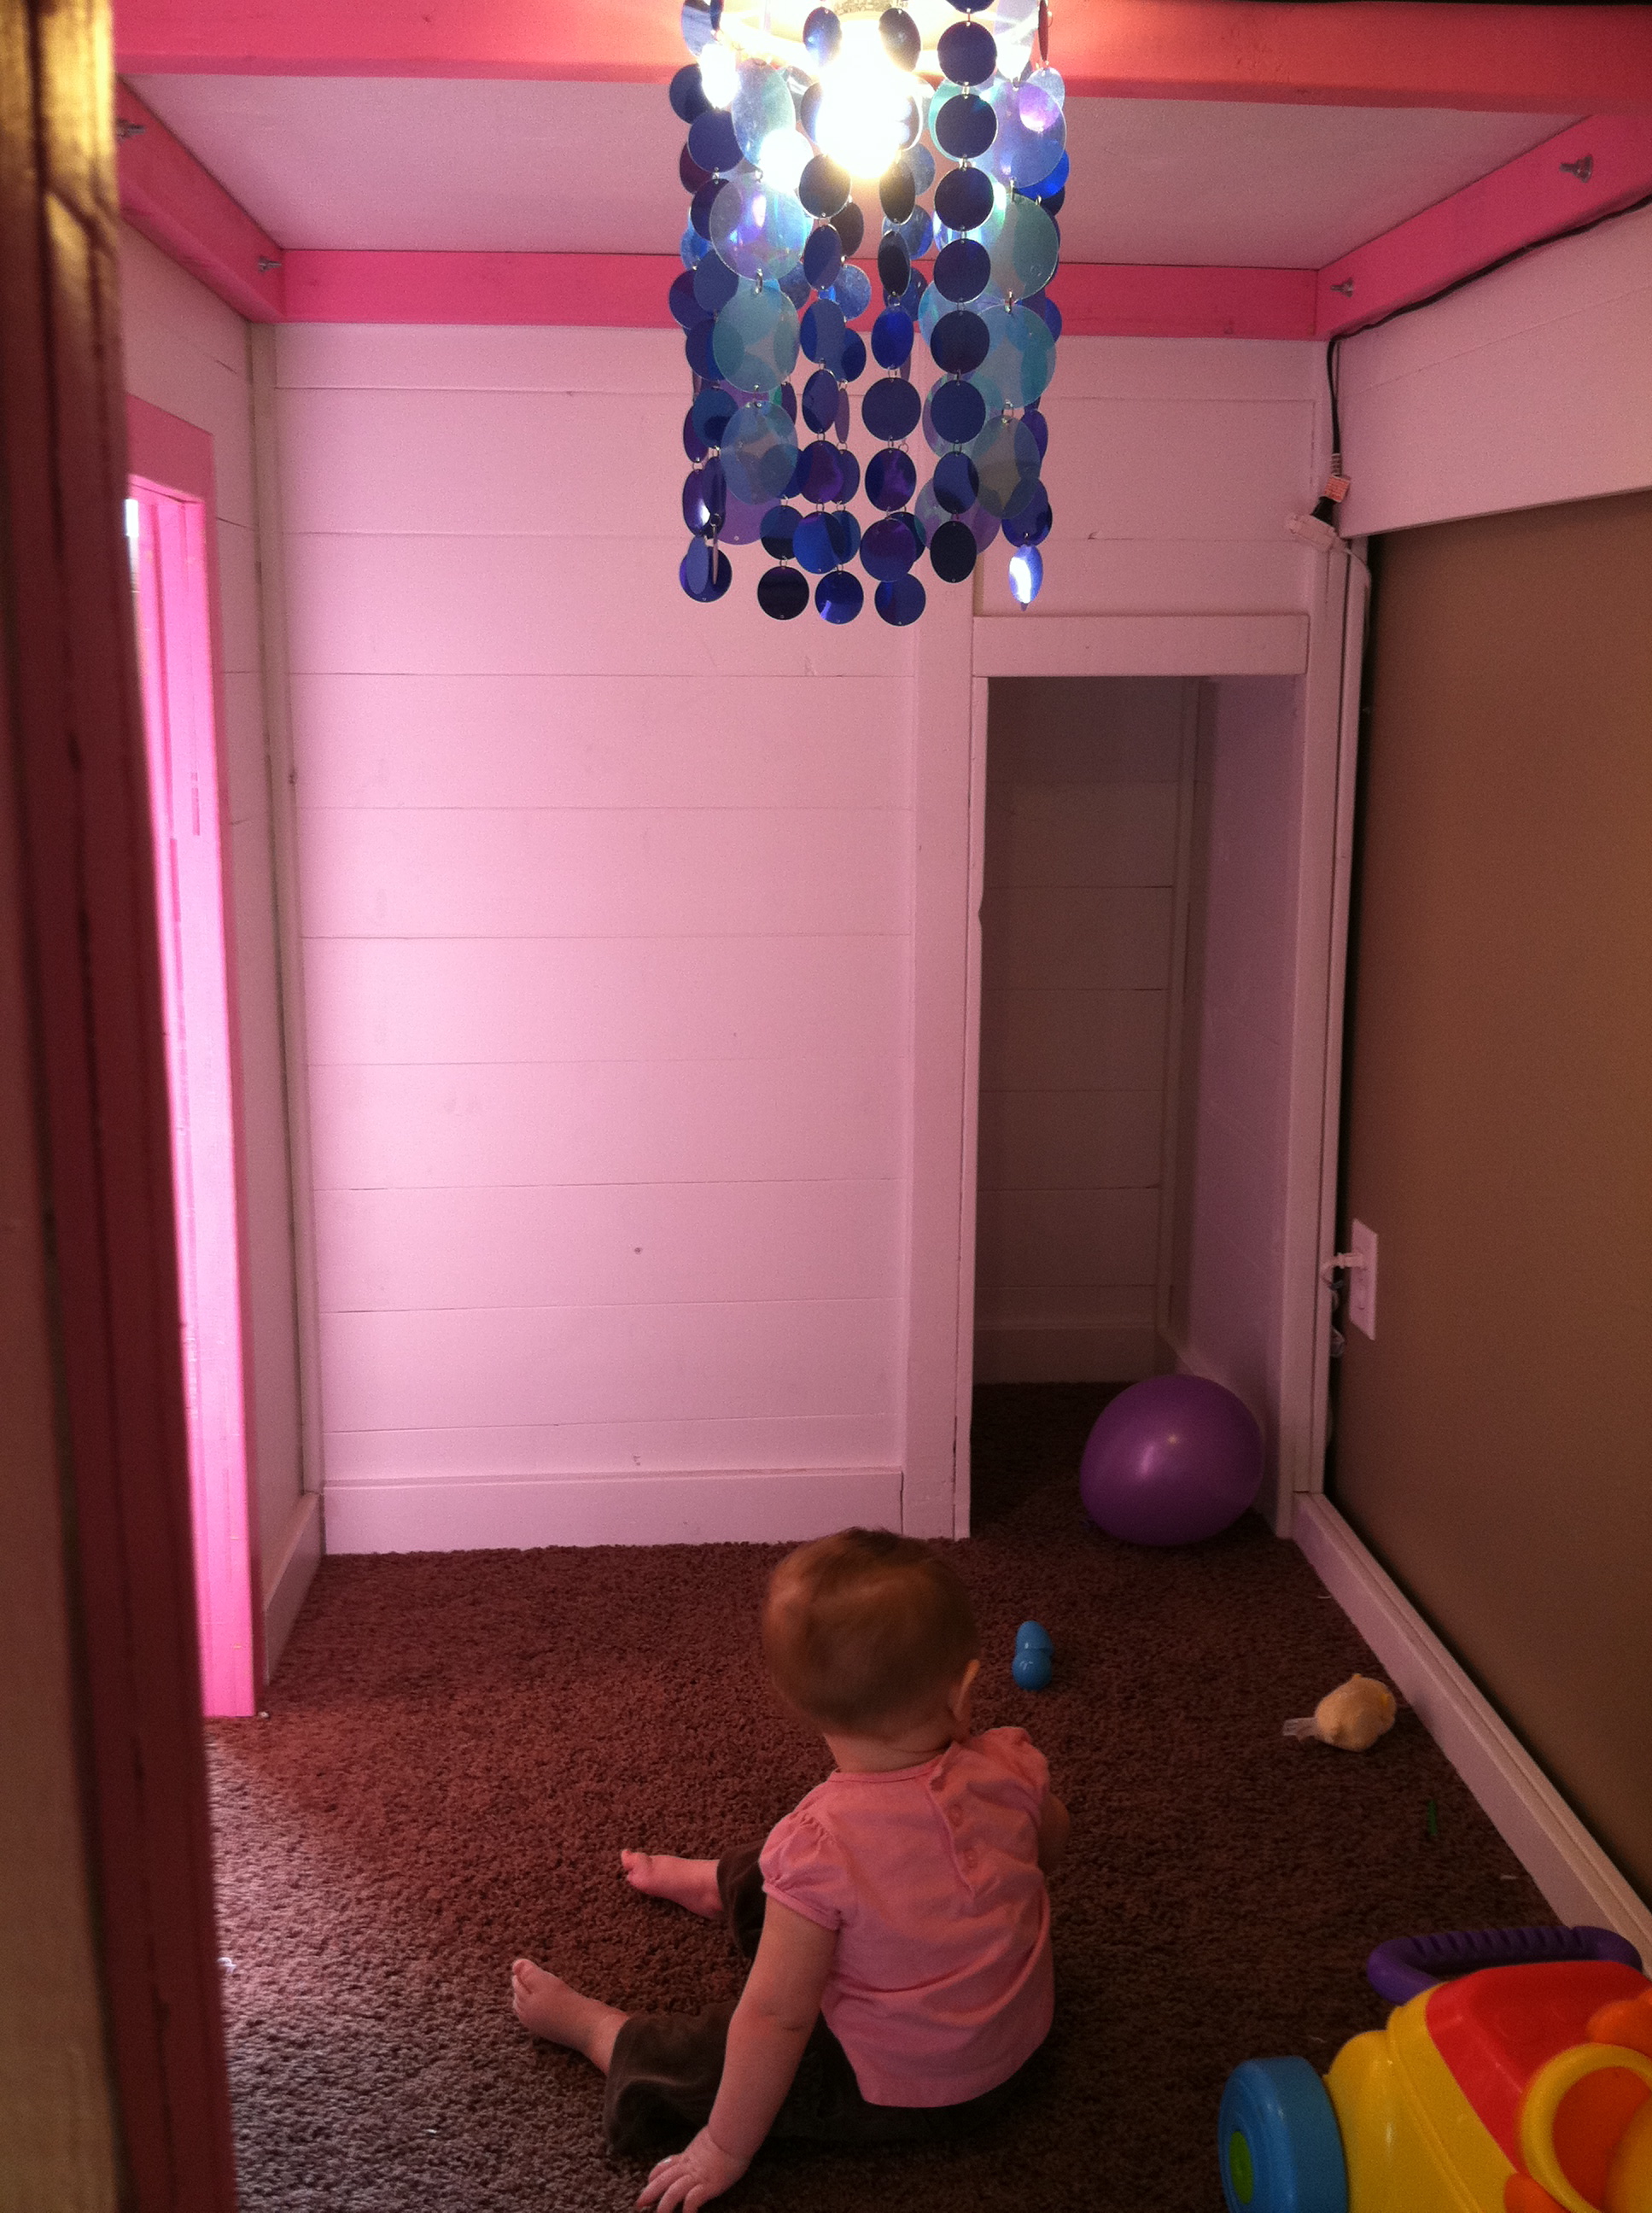
I've been working on this little dandy since before Ana posted her Cottage Loft bed. It took longer because of the 1x6's but I thought it would be cuter that way and more cottage looking. All of the 1x6 boards were fastened together with the Kreg Jig, and the house is sturdy and HEAVY! My intentions were never to use it as a loft bed but rather a playhouse for my two girls and a place to put all their stuff. My oldest has however fallen in love with it, so when I feel comfortable with her sleeping that far off the ground I would guess that it will become a bed. For those of you that are contemplating it a Kreg Jig and some kind of paint sprayer are absolute musts for this project, no way around it! And don't plan on completing it in a short amount of time, with babysitters and being a stay at home mom it took almost a month from first board cut to bringing it back in from the garage. I'll post more on my blog if you'd like to check it out!
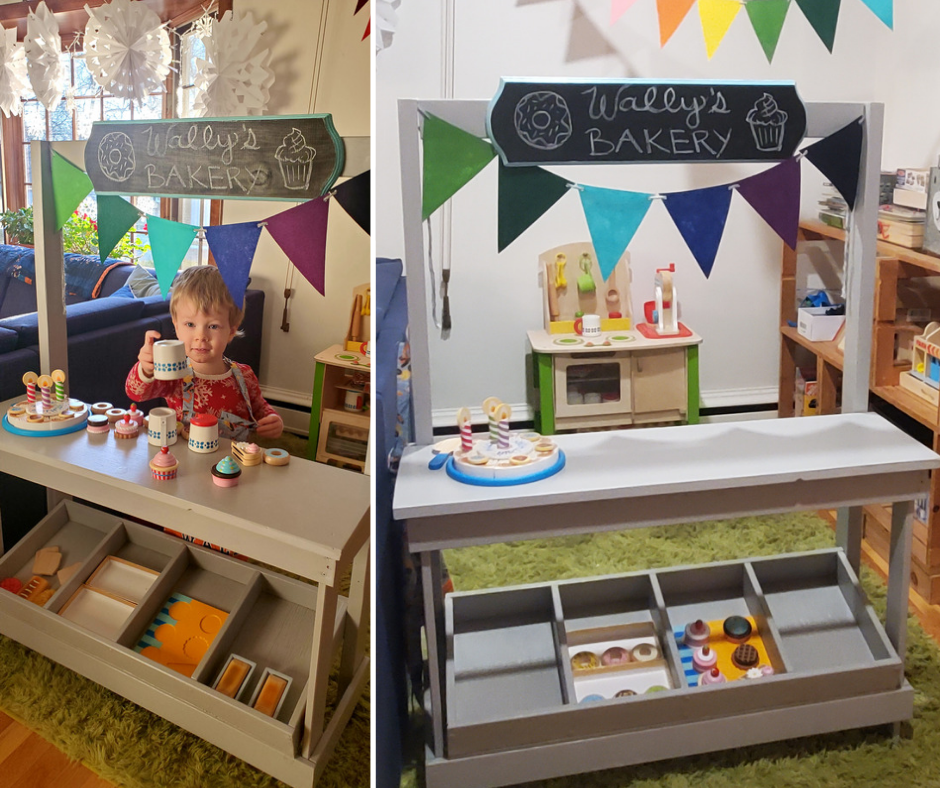
Plans were easy to follow and we were able to build it using scrap and salvaged wood, and leftover paint. Only had to buy screws and the chalkboard sign materials, so very affordable to make. Birthday boy LOVES it! We set it up with some bakery toys, but the dramatic play options are virtually endless. This is one of those type of toys that will be part of all kinds of play with kids of all ages. The size is great for him at 3 years old but I expect it will be usable for many years before he outgrows it. Well worth making.
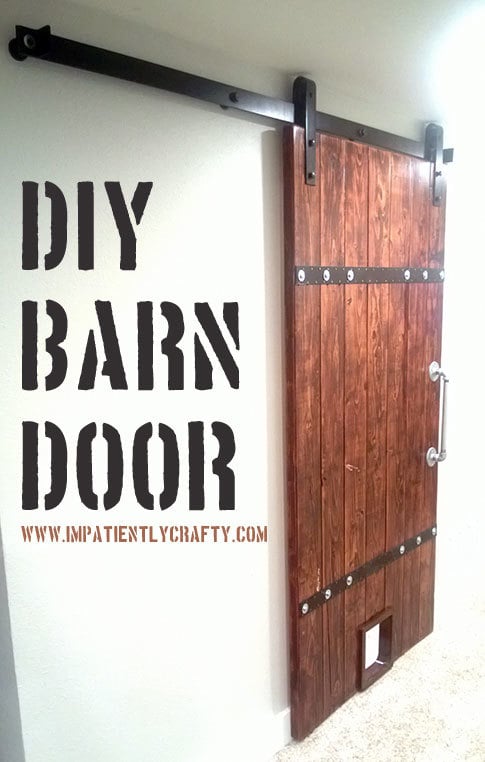
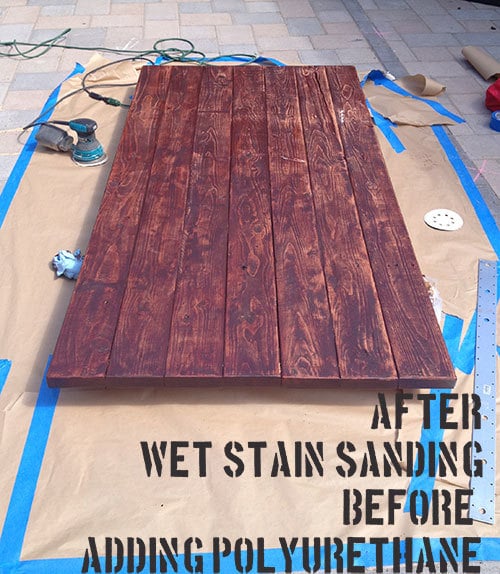
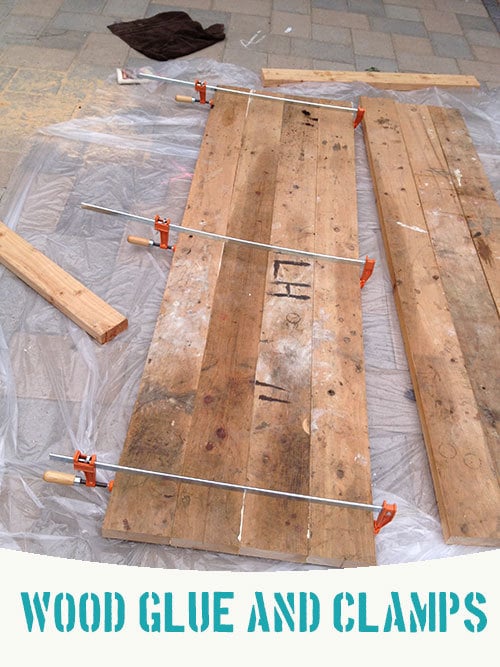
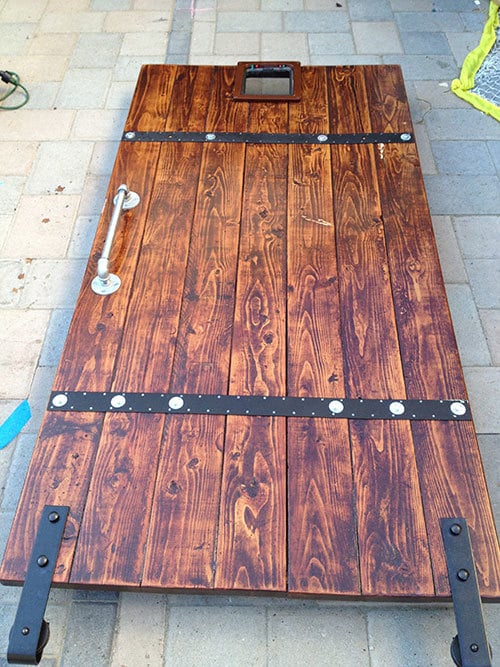
I made his Barn door out of the wood that was left in our garage when we moved in. Using (7) 2x6 boards and adding stain sanding and hardware, it became a super functional industrial rustic (is that a design style LOL) door! (I added a cat door to for our cat ;))
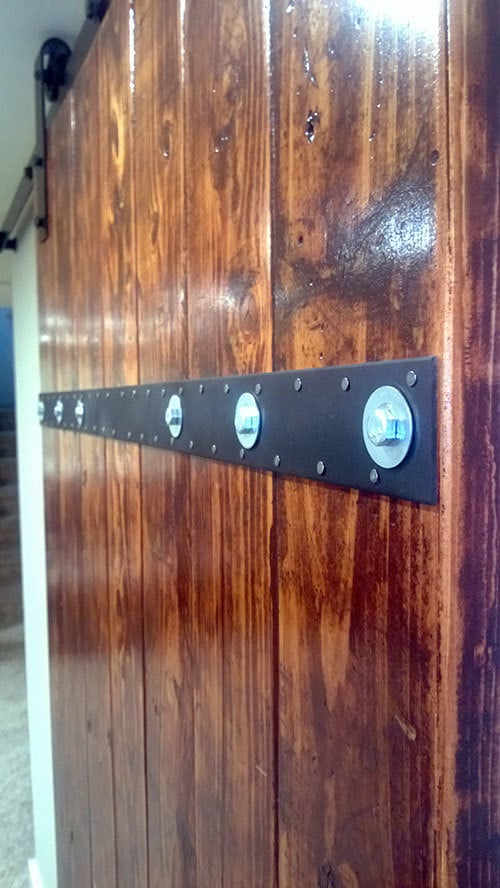
In reply to I love the strapping. This by Pam the Goatherd
Thu, 08/01/2013 - 11:08
Thank you! I was just super happy that I didn't have to cut the strap ties lol. now if our cat would just get used to using the cat door.....
In reply to I love the strapping. This by Pam the Goatherd
Thu, 08/01/2013 - 11:08
Thank you! I was just super happy that I didn't have to cut the strap ties lol. now if our cat would just get used to using the cat door.....
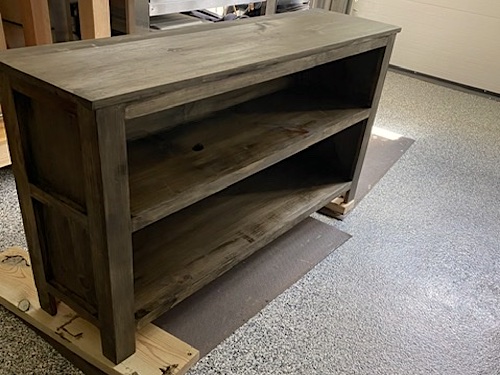
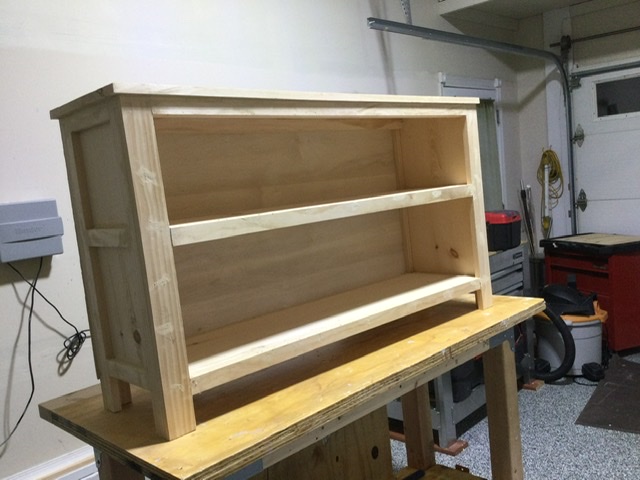
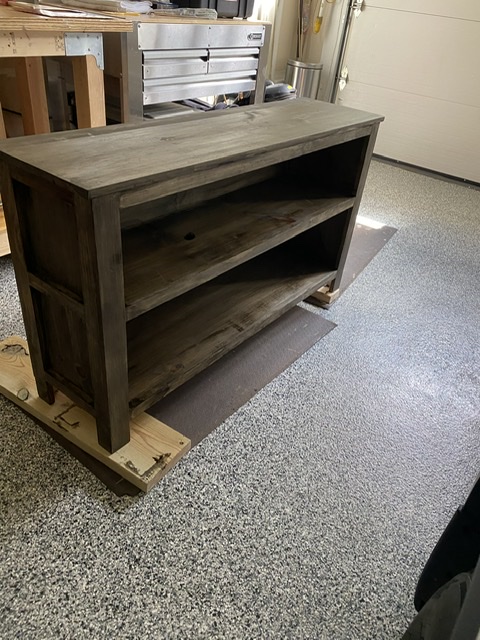
Used knotty pine, and finished with Varathane using stain color “Jacobean”. Modified from a bookcase plan.