Community Brag Posts

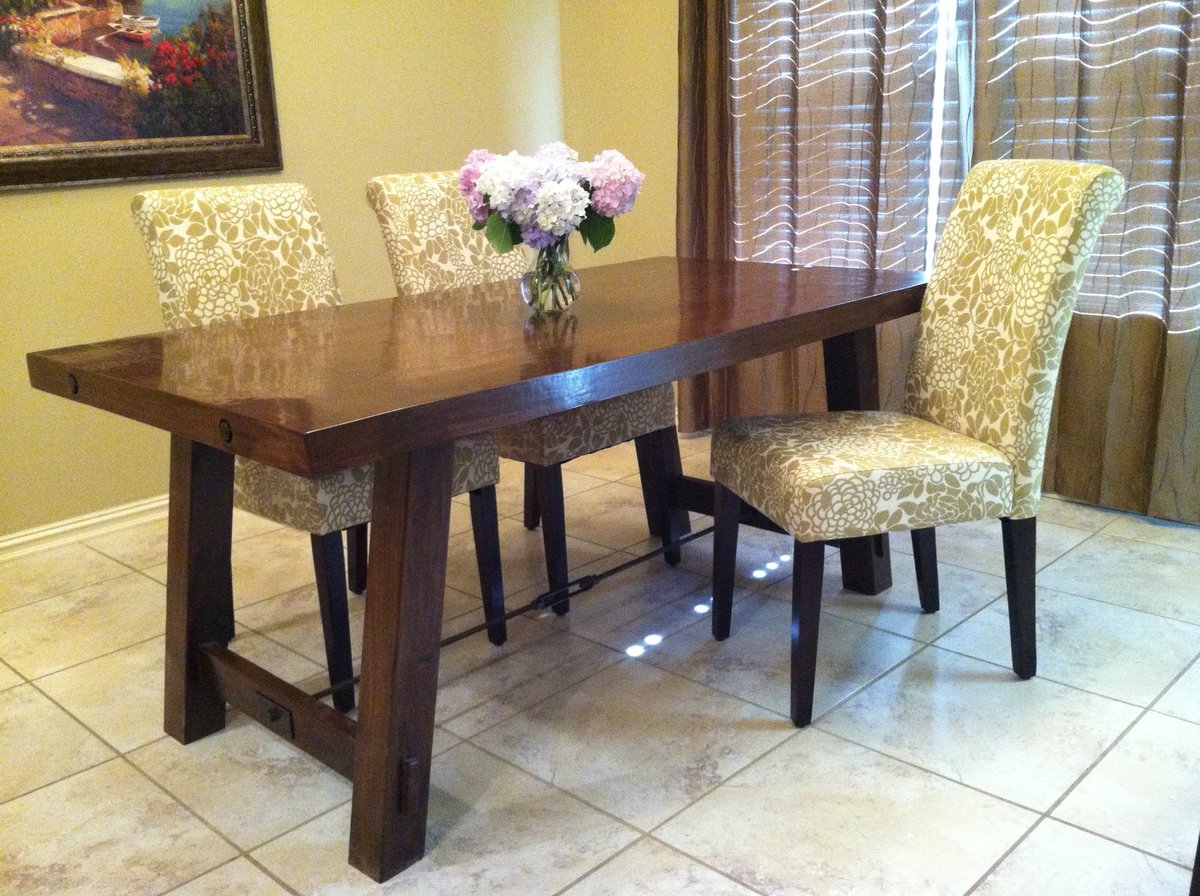
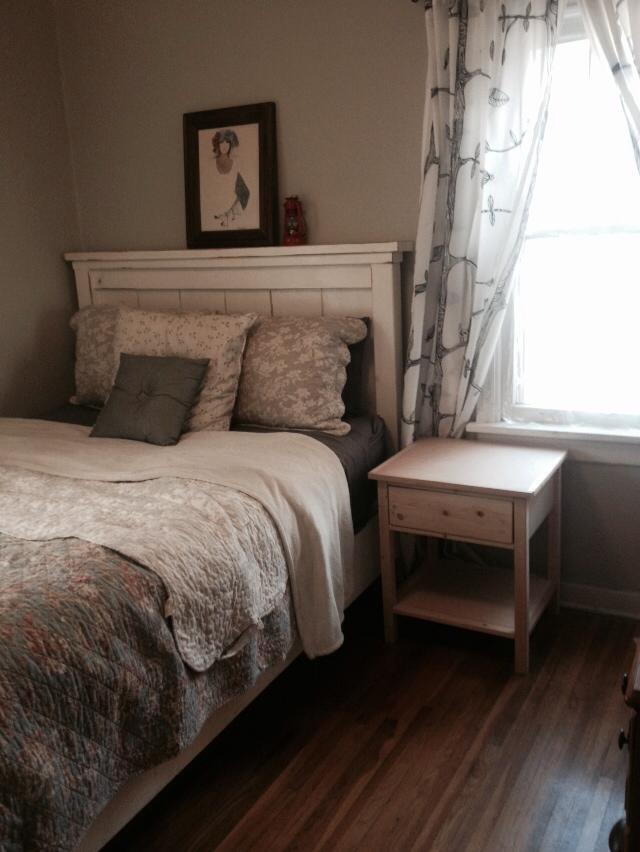
Bed made to order - Twin XL

Submitted by kjoslyn78 on Sun, 12/22/2019 - 10:40

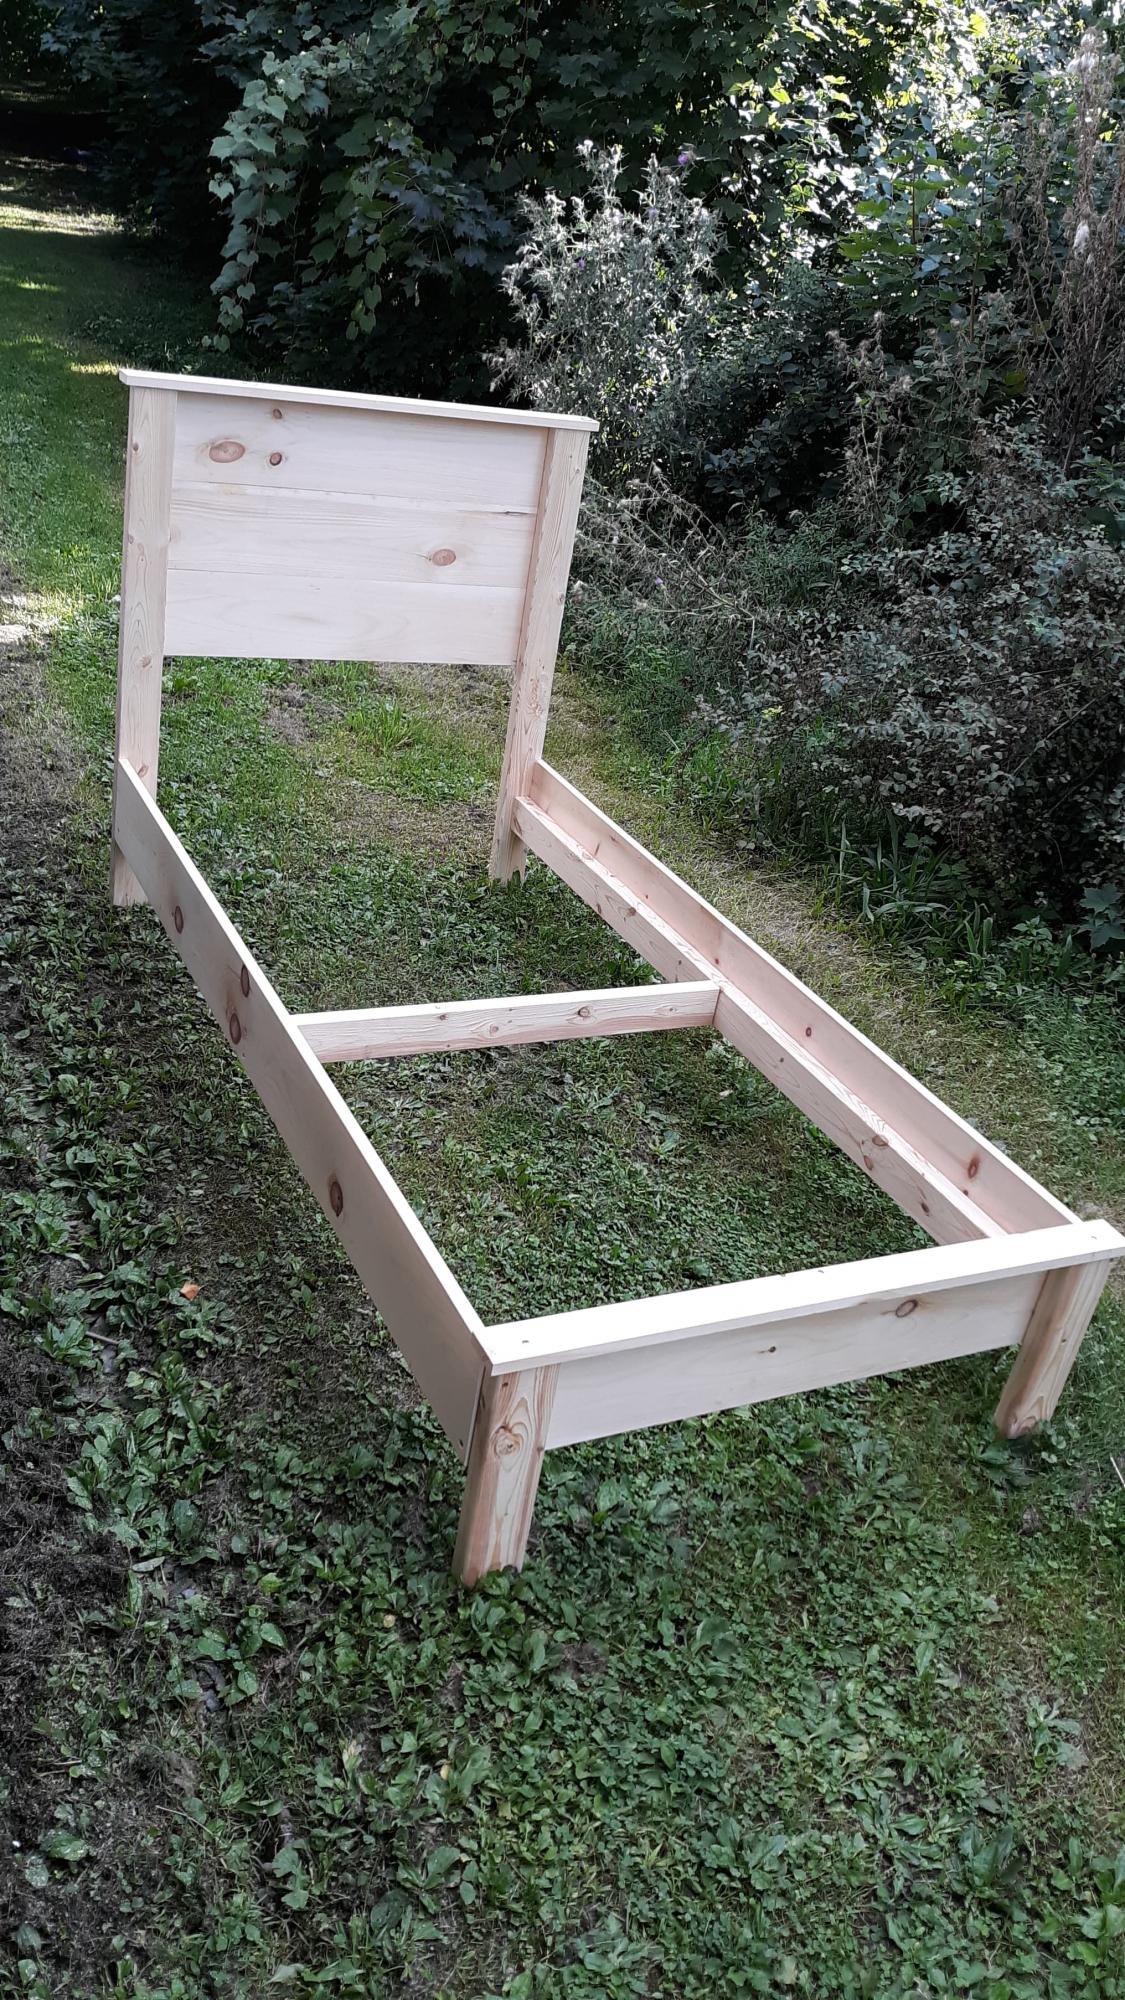
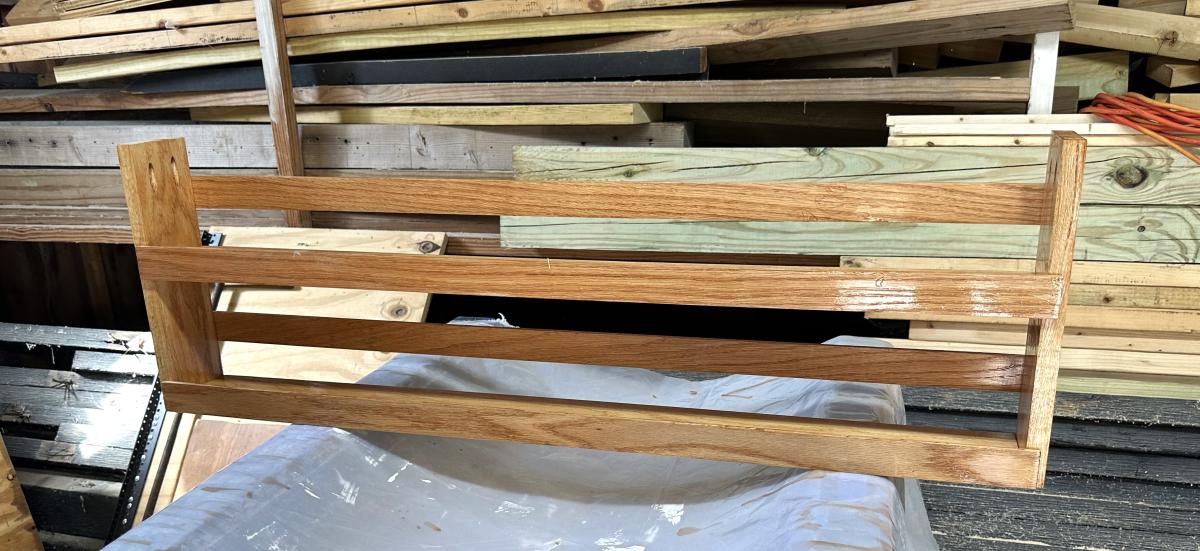
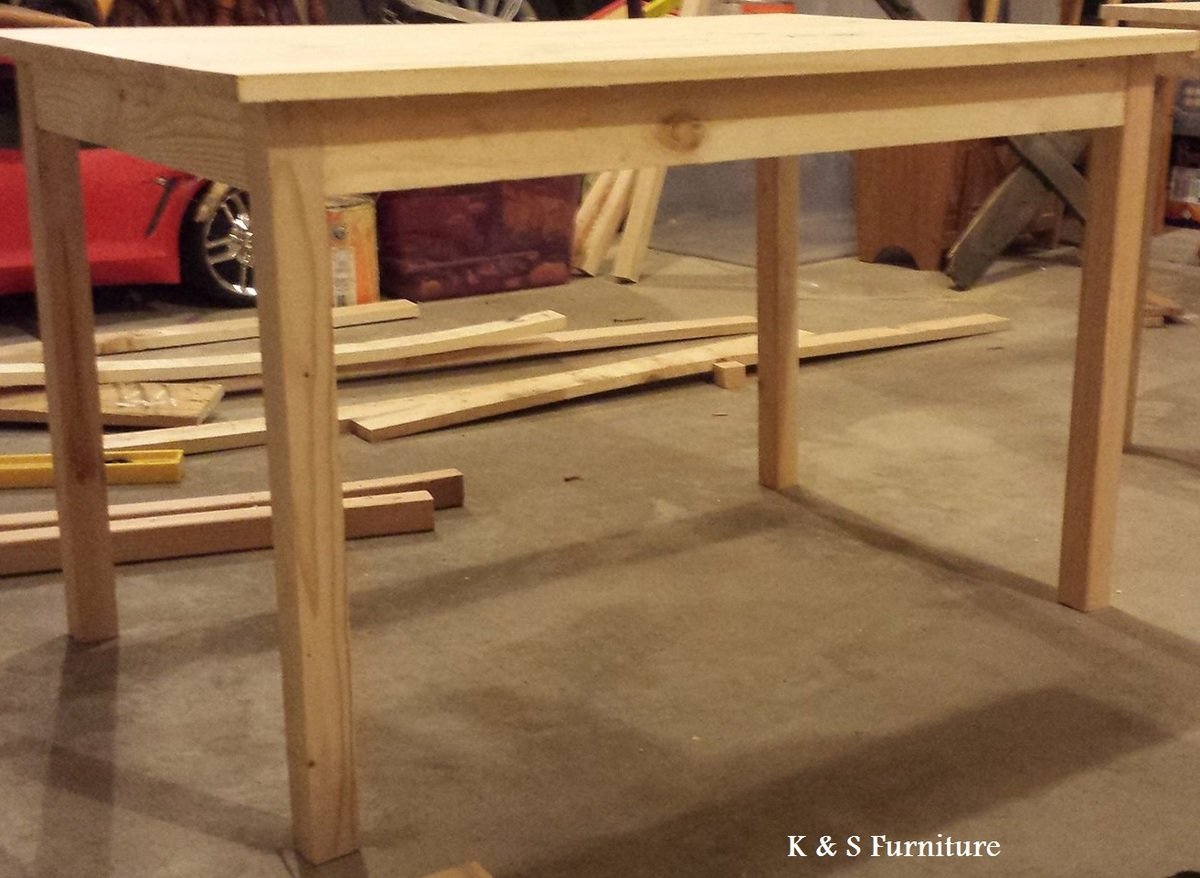
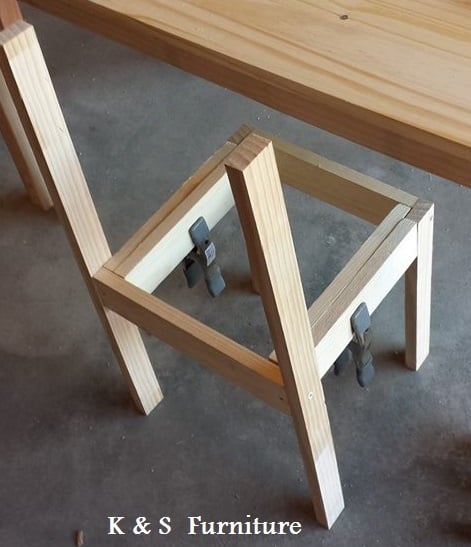
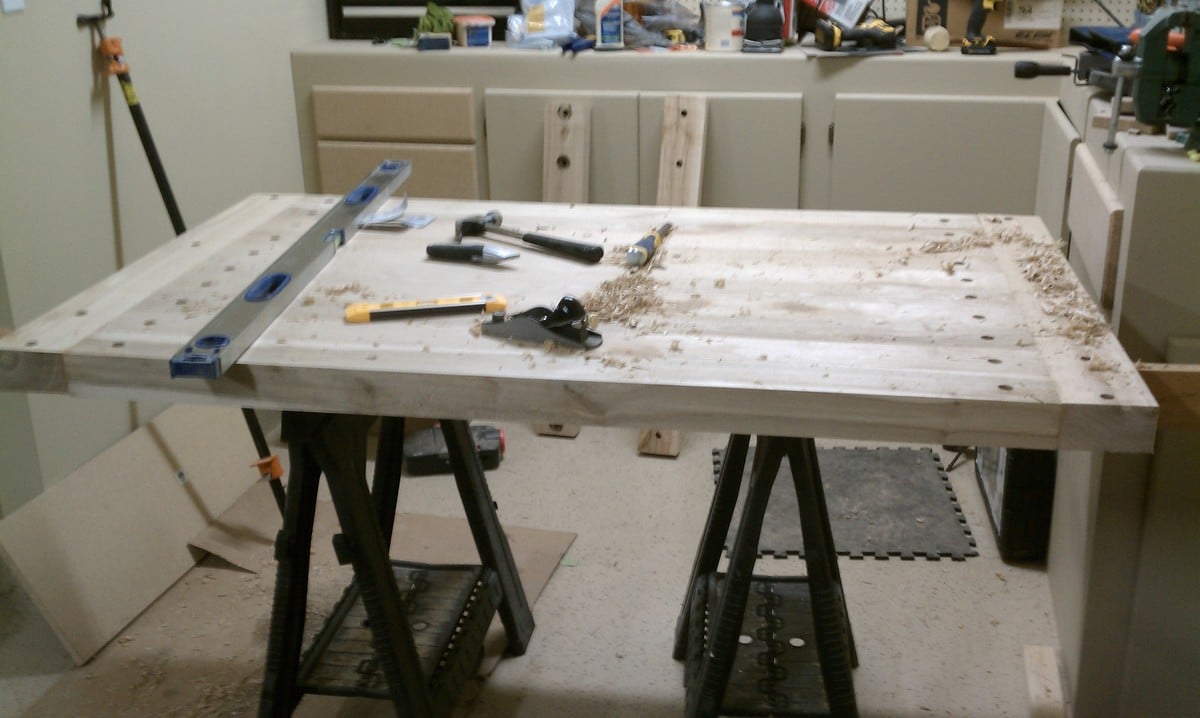
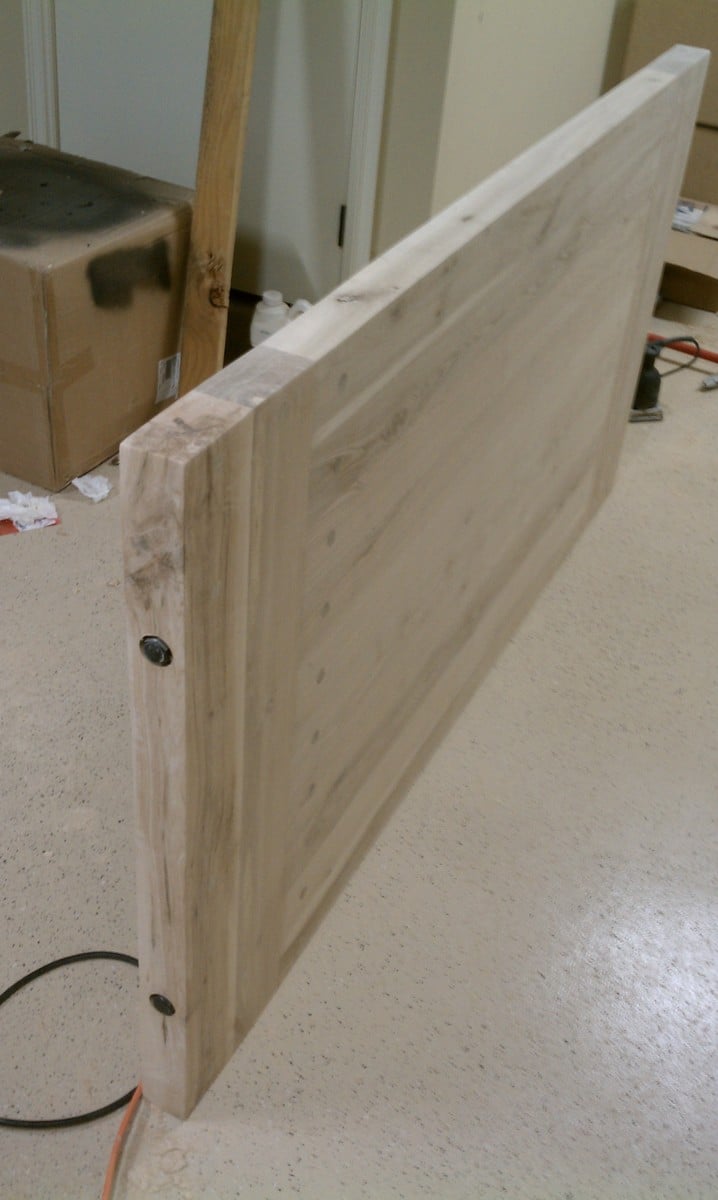
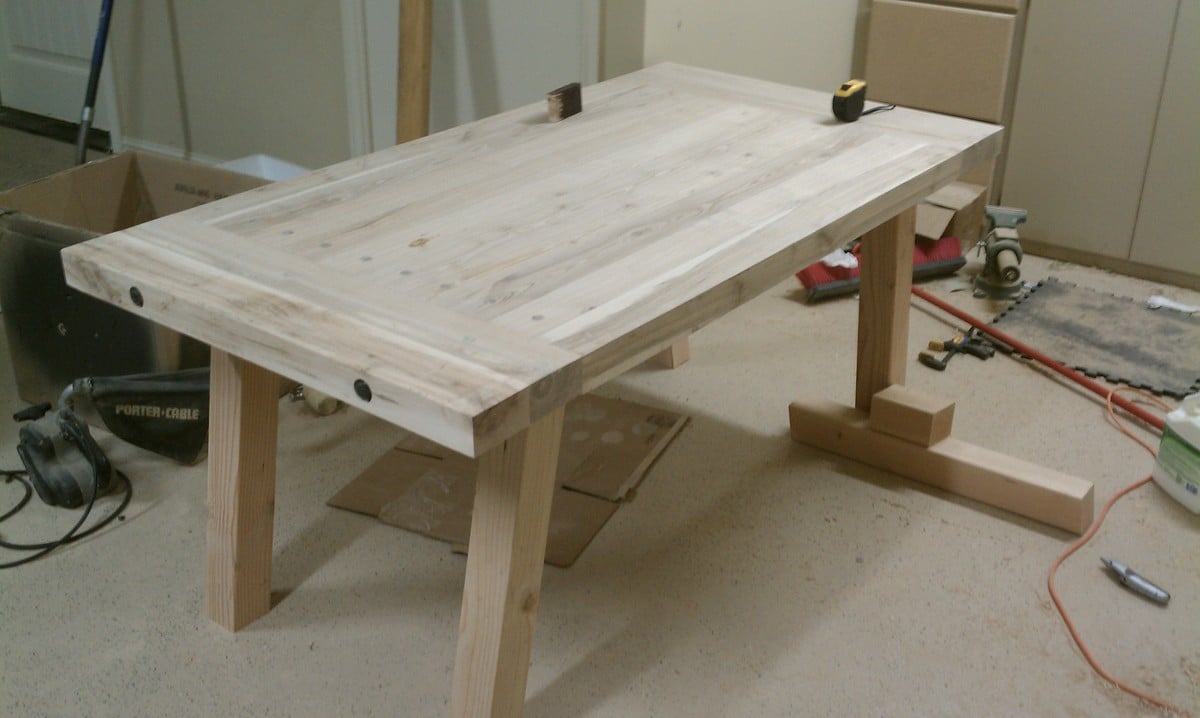
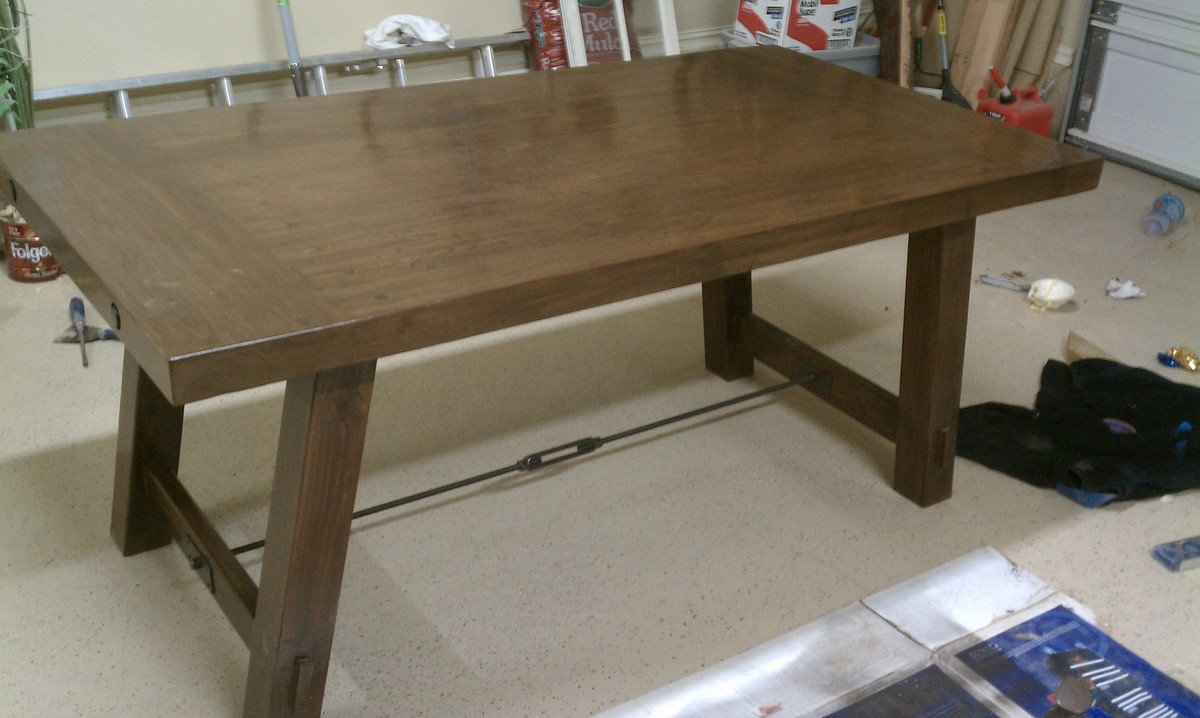
My daughter has a twin XL bed, which we had been unable to find a frame for since getting it. After 2 years of her mattress and box springs on the floor, this plan came out and a plan was hatched to get it made. The biggest change we needed to do different from the twin plans was to make the side rails and the side rail cleats 5" longer to accommodate the XL length. We also added a middle support to keep the side from bowing out, and the cleats are at the bottom of the siderails, as we are using a boxpsring and mattress. 

Estimated Cost
$110
Estimated Time Investment
Weekend Project (10-20 Hours)
Finish Used
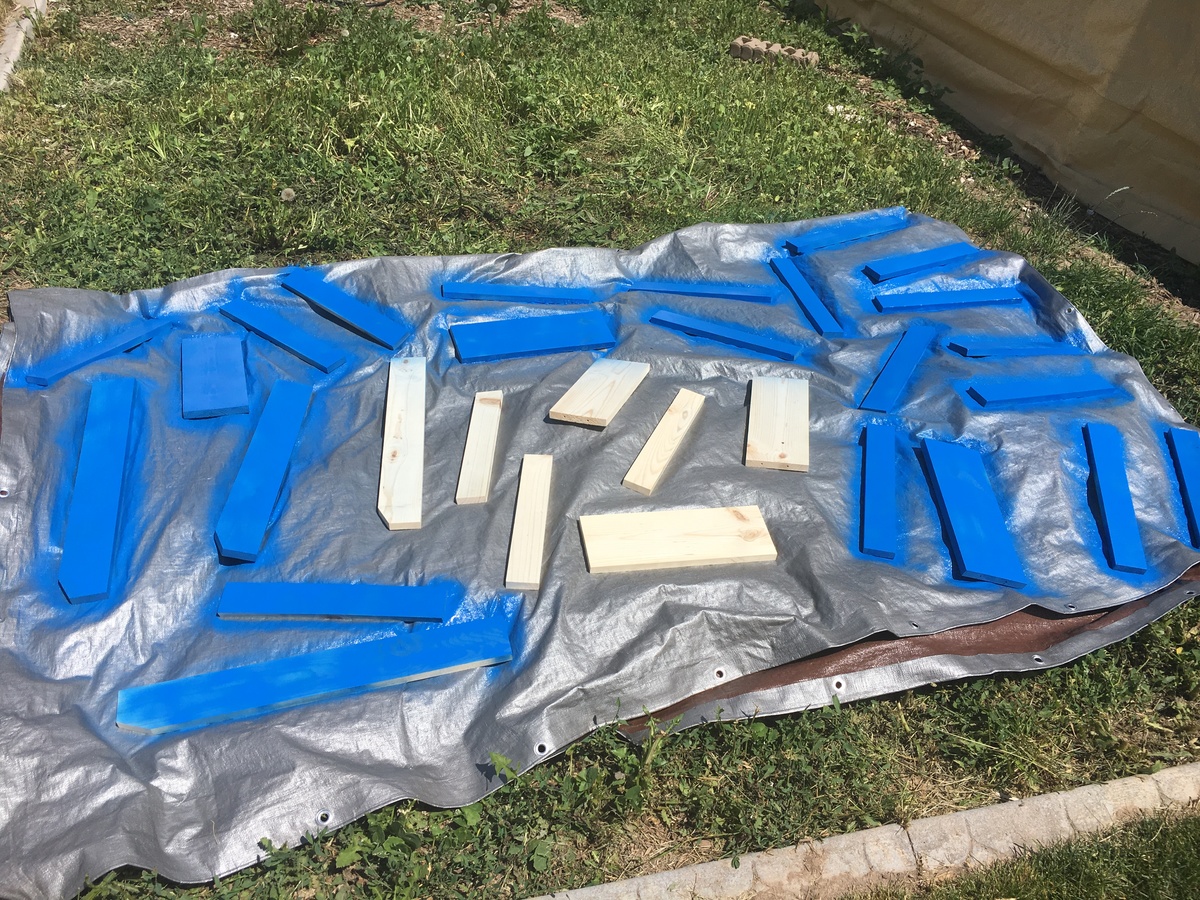
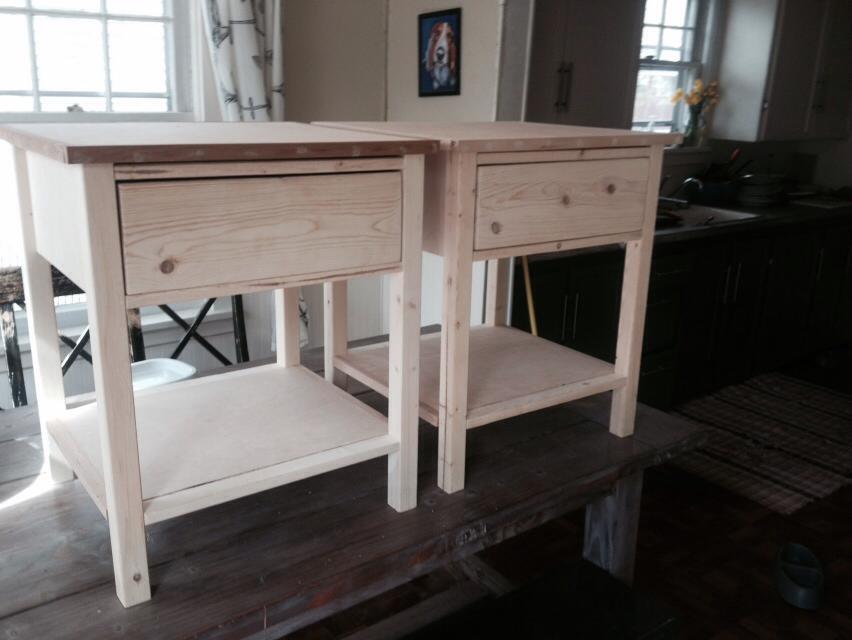
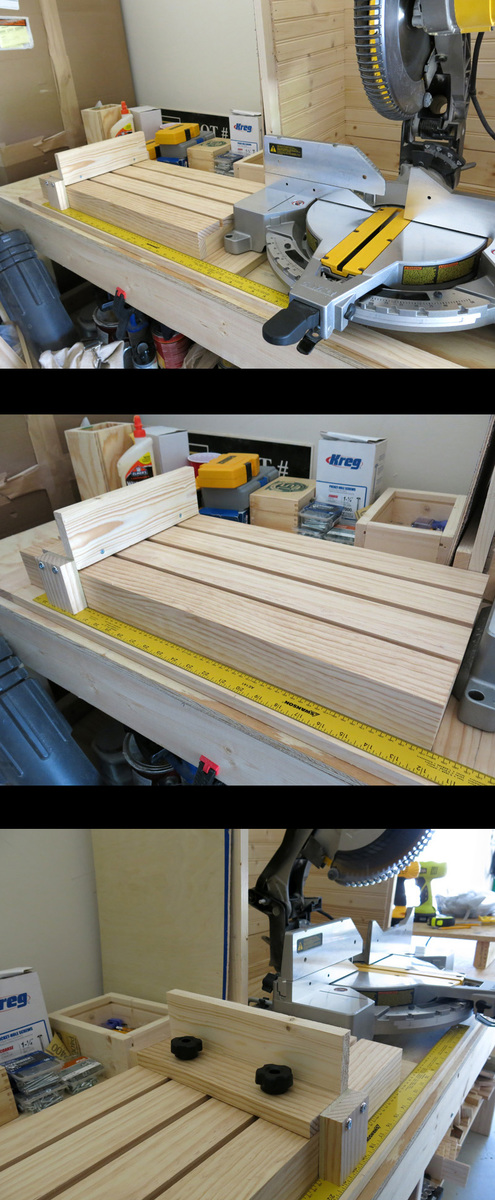
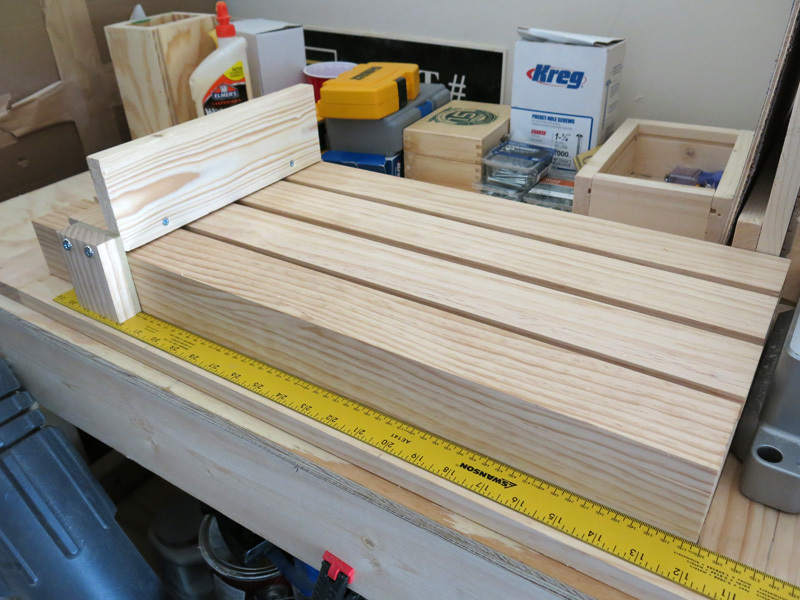
I dont remember what we finished with, but the kid spilled half the can in the grass :)Photo is after sanding, and before finish
Recommended Skill Level
Beginner

Comments

amymarie02

Mon, 03/28/2022 - 09:47

Hi do you have the measurements and what to buy for this bed frame? We also have a twin xl mattess and cannot find a frame anywhere

My farmhouse dinning room table

Submitted by BthAnn08 on Fri, 01/24/2014 - 17:45

I loved working on this project! This was my first real building project! My friend Jody and I had a blast working on it together. It can seat up to 8 people which I love when my family and friends come to visit.

Built from Plan(s)
Estimated Cost
$80
Estimated Time Investment
Weekend Project (10-20 Hours)
Finish Used
Minwax Stain in Early American and a Rust-Oleum polyurethane matte finish
Recommended Skill Level
Beginner

Under Cabinet Spice Rack

Submitted by Anonymous (not verified) on Mon, 09/11/2023 - 13:06

I needed to clear out a shelf in my cabinet and add a spice rack so I could actually see everything. This came out perfect! Made of Oak and stained with classic oak. Very simple to build and hung with pocket screws

James Breadbox

Built from Plan(s)

Laundry basket dresser with a drop-down ironing board

Submitted by getcz on Sun, 04/22/2012 - 18:35

I used Ana's Laundry Basket Dresser plans but I added a drop-down ironing board and and made the entire top surface ready to iron on. A swing-out leg under the ironing board helps to stabilize while ironing.

Built from Plan(s)
Estimated Time Investment
Weekend Project (10-20 Hours)
Finish Used
Laundry
Recommended Skill Level
Intermediate

Comments

Childrens table and chairs

We built Two children's table and 8 stackable chairs for one of our daycare's. It took a lot of work but once we figured out the first chair it was a breeze for the other 7.

Estimated Cost
$30
Estimated Time Investment
Week Long Project (20 Hours or More)
Finish Used
We stained the wood in a Cherry Stain and finished with multiple coats of Poly.
Recommended Skill Level
Beginner

Comments

timh

Sat, 02/08/2014 - 15:54

Awesome! I built one for our homeschool and it works great. Yours look very nice.

Pottery Barn benchwright farmhouse dining table

Submitted by Nathan1342 on Sat, 05/19/2012 - 21:57

UPDATE: For everyone that was asking to see additional photos, I have uploaded them all to flickr. Here is the link: HERE Since doing this table I have built probably 15 more just like this one and developed a much better process then in the pictures above.  If you have any questions or want to chat about it further shoot me a comment or email at [email protected].

I had originally seen this table on the Pottery Barn website. My wife and I really liked it but couldn't afford to pay the $1200 bucks after tax and shipping. it didn't look to difficult to build so I decided to give it a shot. The wood for the top of the table was almost 3in thick 4.5in wide and 51in long. It was wood from an old pallet that was used to transport a very large air handler. Very heavy dense wood. Since the lengths were only 51 inches I opted to put 2 horizontal pieces on either side to extend the total length to approx 70in. I was inspired by the plans for the benchwright table that I saw on this site but chose to deviate from the plans on here to make it as close to the real thing as possible. I also happen to have access to very thick pieces of hardwood. The only thing I had to buy at lowes were the legs. The legs are 4x4 Douglas fir posts. The top pieces were all glued and screwed together. The ends were also done this way but had a very large lag bolt that held them together to match the pottery barn table. This was originally very rough wood so anything to help get the warp out was used. The legs are set at a 10 degree angle and the table stand 30 in tall. The hardest part of this table was finding the turnbuckle and the threaded rods so it could officially be 99% like the pottery barn table. I also had no idea how hard it was to find left hand threaded anything. I ended up finding everything I need at McMaster.com and my local Fastenal store. To make the brackets that went on either side of the rods i simply bought a piece of 1/8 sheet metal at my local Home depot and cut it to size. They also sold hammered brown paint which gave the metal a worked old look. Once this was all constructed I used two heavy coats of wood conditioner to seal the wood. This was the key to getting the color I wanted. It tells you on the can not to let the wood conditioner dry on the wood but if it does, when you apply the stain you get a 100% consistent color. Worked wonders. It almost felt like I was cheating. I used a water based condition and stained it with rustoleums "dark walnut" stain. Finished it with 5 coats of minwax semi gloss. I only did 5 coats because I was brushing it on and had trouble getting the bubbles out of it. In the final picture it looks much shinier then it is in person. The last picture of when it was still in my garage is a better indication of the final finish. I have a boat load of additional picture, so if you have any questions or want to see more pictures of how it was constructed, shoot me a message. Thanks!

Estimated Cost
300
Estimated Time Investment
Week Long Project (20 Hours or More)
Finish Used
Minwax Semi-gloss
Rustoleum Dark Walnut Stain
Minwax water based wood conditioner
Recommended Skill Level
Intermediate

Comments

Bunnie1978

Sun, 05/20/2012 - 08:16

I've had trouble with bubbles too... I have two pieces of advice for your next bubble-free project...
1. Get a sprayer. Seriously.
2. If you don't get a sprayer, use the foam pad-brushes for your final layer of poly. Put the last layer on thick and use the largest side of the brush (the side) and lay it down over the wood and drag it slowly accross with the whole large surface on the wood. If it is soaked in poly it will lay it down smooth with little if any bubbles, keep the surface you're working on flat, and after you've finished that, just make sure you clean up any edges where the poly may have dripped down. Last step, when it's almost dry, use 600 grit sandpaper to VERY lightly smooth out any little bumbs, which will come off more like paste than dust. But really, you should just get a sprayer. :)

In reply to by Bunnie1978

Nathan1342

Sun, 05/20/2012 - 17:42

Hey Bunnie,

Thanks for the tips! I completely agree with you about the sprayer. I do actually have a sprayer but didn't want to get the garage covered in over spray. Maybe one of these days I will get ambitious and apply another coat. :)

Bunnie1978

Sun, 05/20/2012 - 19:22

My whole living room is covered in overspray right now... just got a sprayer and used it for the first time this weekend. LOL. I don't have a garage.

SawgrassHomeGirl

Sun, 05/20/2012 - 09:35

This is awesome! Can you give more direction as to which specific items you got at mcmaster.com and Fastenal?

Also, how did you attach the sheet metal pieces? If you have any more pictures of the underside (frame) of the table, I'd love to see them!

Thank you very much, and again, this is spectacular. We want to try to build this, too.

Great job!

Cindy from Indiana (not verified)

Sun, 05/20/2012 - 10:38

Love it! This project turned out great and I love how you tracked down the hardware - that finishes it off perfectly!

Like SawgrassHomeGirl, I'm wondering what the actual names of the items are that you tracked down. I went and paged through the McMaster and Fastenal sites, but since I'm completely unfamiliar with mechanical doodads I'm not even sure which categories to look under.

Fantastic job! Thanks for posting this!

Nathan1342

Sun, 05/20/2012 - 18:13

Thank you for the nice comments. This was my first official project so I am happy that it turned out well!

Sure! I'd be happy to know the names of the hardware items. At Mcmaster.com the turnbuckle I purchased was Item number 30045T44 . It is about 6in long and seemed to fit nicely with the length of the table. the rods were just simply threaded rods which I purchased at fastenal since we have a few of their stores in town. The rods come in 6 ft pieces so I didn't want to have to pay the shipping. If you don't have a Fastenal near by here are the item numbers for the rods; 90322A220 -right hand threaded rod and 95625A160 - left hand threads. They are a bit more expensive at mcmaster though.

The biggest thing I was worried about was that the entire rod had threads on it so I was worried that it would look odd. But after getting it painted you don't even notice that it isn't just a solid pipe.

Sawgrass: shoot me your email address and I'll send you some more pictures. This site only allows me to post 5 additional photos. But to elaborate on the frame and the metal pieces, I didn't' really build a frame for it. You can essentially break it down into two pieces: Top and the legs. Instead of building a frame and screwing the pieces down on it, I opted to screw each of the pieces together using a Kreg tool and also glue them. the wood was heavy enough to support everything without an elaborate internal structure. The two end pieces help keep things from warping. The only reinforcement I did for the top was to take 3 2x4's and screw them horizontally on the underside. You will be able to see all of this in the pictures. As for the metal pieces, i drilled 5 holes in each piece. 4 holes for the screws that hold it to the leg region and one half inch hole in the middle for the rod to go through. I have a bunch of close ups of this process so you should be able to get a very good idea of how things work. Overall I tried to keep everything as simple as possible.

Thanks for all the interest and if anyone has anymore questions please don't hesitate to ask!

Cindy from Indiana (not verified)

Tue, 05/22/2012 - 09:01

Thank you so much for taking the time to answer our questions! You did a fantastic job on this table and I am adding it to my ever-growing list of projects to do!

Now I'm off to find that hardware. :-)

Thanks, again!

lillylamp

Fri, 11/08/2013 - 06:33

My e-mail is [email protected]
My husband is making this table for Thanksgiving dinner. We are expecting 14 people so he is making the table a total of 12 feet long! Any input or pictures will be greatly appreciated!
Lisa and Gary Peters
Angola, IN

aclisto

Fri, 09/05/2014 - 14:53

Could you send me the more pictures link?  Great job!  goldmoon8(@)hotmail(dot)com

Destiny (not verified)

Tue, 05/22/2012 - 16:58

So i wanna build this table this summer, could you shoot me some more pictures of the designs and actual steps for building it. i absolutely love it, and i hope mine comes out as good as yours!

Robert (not verified)

Sat, 05/26/2012 - 13:13

This has been on my to do list for a while now, but I haven't been able to work out the hardware details like you did. I would love to get some more pictures especially of the underside and of your rod to stretcher connection. Thanks again and you did an amazing job!

Bulldog1Jack

Fri, 04/25/2014 - 18:43

Nathan,
Can you send me the link for the other photos...table is awesome.
Thanks
John

Aubrey (not verified)

Sat, 05/26/2012 - 17:54

I love this table! I am new to this site and to building, but I want this to be my first project. Could you possibly email me the detailed pics and plans also so I can get started? :) Thanks so much!

ajmccallister

Tue, 05/29/2012 - 18:41

I am really inspired by the table you built. It looks like you built your legs with 4x4s. Did you drill through them to get the notch on the outside or did you do something else just to get the look? Great work!

Nathan1342

Tue, 05/29/2012 - 20:58

Hi Aj,

Yes, I did use 4x4's for the legs. It was much easier this way, did a great job achieving the heavy look I was interested in and was the closest I could come to the pottery barn table. To answer you question, no I did not drill through. I attached the 2x4 cross member with 2 leg screws from the outside of the 4x4 leg. I then cut a small piece of the 2x4 and nailed it over the lag screw holes to simulate the 2x4 cross member coming through. It looks just like I cut a hole and the whole thing is coming through. I get asked how I did it by people that see it in person because it doesn't look like a separate piece is just nailed on.

If you look at IMAG0306 and IMAG0308 on flickr you can see what it looks like without them on and if you look at the bottom left hand corner of the picture you can see the pieces that have been cut and not put on yet.

Sara (not verified)

Mon, 06/11/2012 - 06:48

Your table is gorgeous! I'm curious how much this cost for you to build (lumber and finish materials) and how much of an increase in cost do you think it would be if you had to purchase all the lumber?

In reply to by Sara (not verified)

Nathan1342

Mon, 06/11/2012 - 11:01

The Lower portion was probably about $200. The biggest expense was the threaded rods and the turnbuckle. The rods were about $30 each and the turnbuckle after shippping was about $20. The wood for the lefts and cross members were purchased at my local lowes so they were pretty cheap. As for the top, its hard to say since wood prices vary quite a bit between types and thickness. If you were to buy wood like I used you would probably have to visit a sawmill and see if you could get rough cut wood that is at least 2.5 inches thick. I would estimate $300 give or take. If you follow the plans that ana has setup for the top you don't necessarily need to get wood that is that thick. You can achieve close to the same look but just using 3/4 in pieces. I think if you look very closely at the pottery barn pictures, they do not use 100% solid wood either. But I wanted the heavy look and the solid appearance. So total you are probably looking at $500-$600. Hope this helps!

Curt (not verified)

Wed, 06/20/2012 - 11:28

Great job Nathan - I appreciate your workmanship on the table. You've answered one of my questions regarding the look of the cross member protuding thru the leg - slick idea. My other question - why all the large round holes in the bottom of the table? By the way, the dowel effect that you accomplished really pops. I too like the looks of the thicker boards. Thanks for posting an interesting and comprehensive article. Curt

In reply to by Curt (not verified)

Nathan1342

Thu, 06/21/2012 - 13:06

Those holes in the bottom of the table were there when the wood was salvaged. This was a pallet so they had it bolted together with large lag bolts. The bolts had large washers inset into the wood. The bolts were secured on the underside of the wood and went through every piece. Luckily, they were consistent and only bolted from one side.

Thanks!

Sara (not verified)

Tue, 07/10/2012 - 06:36

Thank you, Nathan, that really helps! Did I mention your table is beautiful?

leabea28

Fri, 08/03/2012 - 12:53

Hi Nathan,

Awesome table. I just hope I can find some 3" thick lumber without breaking the bank! It looks like you attached the legs by putting 2 bolts through the legs into the small apron on the short ends of the table. It also looks like you might have also put in some pocket holes on the inside of the legs, going straight down into the underneath of the table boards. Is that right? I am just wondering how sturdy it is, since it's such a heavy table.

Thanks!

Lea

In reply to by leabea28

Nathan1342

Mon, 08/06/2012 - 11:43

Yes, you are correct. I attached the legs with 2, 6inch lag bolts. I pre-drilled them at the correct angle (which I eye balled) and ratcheted them in. I was a little worried about them being sturdy enough so I went ahead and made a few pocket holes and secured it that was also. The legs overall are very sturdy. The table probably weights 150-200lbs and I was able to pick up one side of it only holding onto one leg. Table doesn't wobble at all. The cross member holding the legs together also helped pull everything together.

Thanks for the question! Feel free to ask any others!

Nathan

JenFarrell (not verified)

Sun, 08/12/2012 - 18:17

Fantastic table! Thanks for posting all the instructions and places to buy hardware. My husband and I can't wait to try this!

JenFarrell (not verified)

Sun, 08/12/2012 - 18:19

Fantastic table! Thanks for posting all the instructions and places to buy hardware. My husband and I can't wait to try this!

3RaysofSunshine

Fri, 08/24/2012 - 09:33

Nice work! I made bench seats in this style - maybe I'll post pics sometime too! I saw in your description that you used thick wood to be more like the original... just wanted to let you know that I have seen the "original" and yours is much better! Pottery barn does NOT use solid 3" wood for the top. If you look closely at the pics in their online catalog you can even tell... they use thin planks with a side piece to make them look thick. The only hefty piece is on the very end .

Also, I wanted to mention that I have had great luck with wipe-on polyurethane... never any bubbles. Just be sure to use lint free cloths and lots of thin layers.

Again, nice work!

3RaysofSunshine

Fri, 08/24/2012 - 10:05

I apply with a cloth. It takes many coats but they are so thin they dry fast. In between coats, I wet sand with 1000 grit wet/dry sandpaper. After towel drying, I run my hand across the surface. You'll feel any spots you missed. Then use a tack cloth to pick up any dust (there's always some...) I get a perfect finish using this method. I'm sure spraying is great too... I just like not having another piece of equipment to clean!

My last project (a patio table) I had run out of the wipe-on poly and decided to use something else - whatever I had on hand. Grr! Not nearly as nice looking so I'm doing it over. I'll post pictures of a few projects as soon as I can figure out how.

greenebeansmom (not verified)

Sun, 11/18/2012 - 21:15

Why cant my husband make stuff......booooooooo! Wonderful table I am so jealous lol.

Shannan with an A

Tue, 04/16/2013 - 16:34

Before I clicked on your brag photo, I really thought it WAS a Pottery Barn table posted for comparison! Wow, that is beautiful!!!

Nathan1342

Thu, 05/02/2013 - 15:04

Hey Lea,

It was only 1/8 in thick metal so a simple jig saw with a metal bit worked great. Wear eye protection though. It shoots off all sorts of hot metal bits. To drill the holes I just used a power drill with a metal bit. Make sure you drill 100% straight or the bit will bind and jerk the drill right out of your hand. Ideally, a drillpress would work much better since I nearly broke my wrist on the second large hole.

Let me know if you have any other questions!

Thanks,

tcoche

Sat, 06/01/2013 - 20:36

The table looks awesome man! Love it. I just got done building the benchright table to Ana Whites plan, see mine here http://ana-white.com/2013/05/farmhouse-benchright-table-build-0

I just ordered the left hand threaded rod, right hand threaded rod and turnbuckle from McMaster.com...total cost for all 3 was 22 bucks. Here are the McMaster part numbers:
90036A033- left hand rod
98841A033- right hand rod
30045T44- galvanized turnbuckle

I'll hopefully get the rods and turnbuckle this week so I can totally complete this project.

Again, awesome job nathan!!!

CoreyOrvold

Sat, 07/13/2013 - 22:28

What a great table. We plan on starting ours soon but are having trouble find large bolts for the table top sides. What size did you use and where did you find them?

Modern Outdoor Chair from 2x4s and 2x6s with high backs.

Submitted by ihoppoet on Thu, 03/26/2020 - 23:02

I built these chairs with the plans Ana White shared on this site, they are sturdy and beautiful, but they are also heavy. Heavy is what I wanted though.

I used water putty for the screws and other blemishes, then I primed and painted them. when the Homedepot pillows arrived my wife decided she wanted higher backs, I used an idea shared on here, but that back used 2 2x6s, when I tried that I felt they were too high, so I altered it to one, and found they look and feel a lot better. the angle of the back is 15 degrees from 90 or 105 degrees.  I will be altering the loveseat plans to build a concrete top bbq coffee table to use with the chairs. 

Estimated Cost
$500
Estimated Time Investment
Week Long Project (20 Hours or More)
Finish Used
Exterior primer and paint.
Recommended Skill Level
Beginner

Water table for 3

We have 3 kids and so I wanted them to each have their own place to cut down on arguments. I also chose to make this just a water table because of how close it is to the back door. I'd rather them not bring in a ton of sand each day. Because I wanted to be able to keep the lids on top when they weren't in use, we separated the bin areas so the lids can snap shut. We also made it a few inches taller to fit the stools underneath. It was a simple build, and didn't cost much more than a big box store small plastic sand and water table. Also I found those bins (same brand and size as in original plans) at Walmart with a white lid (which I preferred to the blue) for under $5 each.

Built from Plan(s)
Estimated Cost
<$85 including toys, bucket, bins, building materials, and spray paint.
Estimated Time Investment
Day Project (6-9 Hours)
Recommended Skill Level
Beginner

Fireplace Mantle with Drawers and Hidden Storage

Modified plans to include game storage drawers, a flip open mantle for DVD player and hidden charging port, and hidden cupboards on both sides for DVD storage. I scoured the Internet for months before drawing this up to fit my space and tackling all on my own! I love it and all of my other Ana White inspired projects!

Casey O.

Seasonal And Holiday

Sliding Barn Door Bookcase

Submitted by pballard14 on Tue, 04/28/2020 - 10:15

I used the plan but just made mine taller, some mistakes changed how some things looked and were done. It's always an adventure but fun!

Built from Plan(s)
Estimated Cost
$250
Estimated Time Investment
Weekend Project (10-20 Hours)
Finish Used
Minwax Wood Finish Water-Based Stain Classic Gray Water-based Interior Stain
Rust-Oleum Painter's Touch 32 oz. Ultra Cover Gloss Navy Blue General Purpose Paint
Shelves - Rust-Oleum Triple Thick Gloss Polyurethane,
Recommended Skill Level
Intermediate

Farmhouse Table & Benches

This was my first time building a piece of furniture on my own, so it was a lot of learning and trial and error on my part. The plans were fantastic for the most part (I thought the bench plans could have used a little more specification and couldn't seem to find a pocket hole version). We completed the project over the course of a couple months, simply because we revisited it when time allowed. It could easily be done in a much shorter period. One thing I will say is this -- add a step to the plans and utilize a planer and jointer on all of the boards. I had the table put together at one point and whew, I wasn't sure what I did wrong, and I went back and had followed all the steps. While this might sound obvious now, remember it was my first time doing something like this, so I followed each step to a T. I also used a belt sander on the table and bench tops to level things out even more, and went across the grain to make a smooth surface with an 80 grit belt, then hand sanded with a sanding block with 120, 220, and 320 grit. I also modified the bench plans to cut about 5 inches off so that they would fit under the table.
We used Minwax pre-stain conditioner, then one 10 minute application of Mixwax Honey stain, followed by Mixwax Satin Poly. It turned out great and we are already moving on to other projects!

Estimated Cost
About $400 inclusive of lumber, stain, poly, and sanding.
Estimated Time Investment
Week Long Project (20 Hours or More)
Finish Used
Minwax Pre-Stain Conditioner
Mixwax Honey (10 minutes then wipe off)
Mixway Satin Poly (3 coats, sand with 600 grit after coat 1, 800 grit after coat 2).
Recommended Skill Level
Beginner

New coffee table & a place to rest our feet!

Submitted by Quartney on Sun, 07/08/2012 - 18:43

We needed a coffee table that we could rest our feet on comfortably while watching television (how gauche!). I altered the plans so the table is 15.5" high--just perfect for legs!

Like any project, this one had its ups and downs. I had to remake the table top twice (using the same wood), as the pieces just didn't line up right at first. And then I had had the brilliant idea to stain the bottom part gold for a pop of color in the room. Not cute. I had to paint over the stain with oil-based primer (followed by latex paint); it was worth it to get the final result!

Estimated Cost
$110 for wood and hardware
Estimated Time Investment
Weekend Project (10-20 Hours)
Finish Used
SW Antique White oil-based stain on the top; SW Black Bean paint on the bottom
Recommended Skill Level
Intermediate

Farmhouse End Tables from Ana's Book!

Submitted by ksmith311 on Fri, 04/25/2014 - 10:48

I made two of these farmhouse end tables for a friend/client. She wanted them to be very light gray when painted. I went to the blue store to get some paint mixed and waited... and waited.. and waited... and couldn't find anyone for the paint section. So I eventually just mixed it myself. It does have a bit of a bluish hint to it but I think they are very pretty.

These were a fun build and probably the best drawers we have ever made but we did have to use wooden guides on the inside to be sure it will close perfectly.

I hope she loves them!

Built from Plan(s)
Estimated Cost
100 for two
Estimated Time Investment
Weekend Project (10-20 Hours)
Finish Used
light gray paint
Recommended Skill Level
Intermediate

Chaise Lounge Chair

Submitted by dsipe on Mon, 05/18/2020 - 13:34

This took way longer than anticipated. I didn’t account for how much time would go into sanding, priming and painting the wood. Also, the plans were changed to use 2x6’s but didn’t take that into account for the stop block. Still trying to figure that part out when fully reclined. Other than that, it turned out really good.

Estimated Cost
$65
Estimated Time Investment
Weekend Project (10-20 Hours)
Recommended Skill Level
Intermediate

Mitre Saw Rip Guide

Submitted by AndyH on Thu, 05/01/2014 - 14:52

I wanted a jig/guide that would allow me to cut multiple pieces of wood exactly the same length using my Mitre saw. Designed this Jig and apart from the 4 screws you see everything is pocket holes. Now when I build from Ana's plans and my own designs I can guarantee all the pieces that need to be the same length will be!!

Estimated Time Investment
Afternoon Project (3-6 Hours)
Finish Used
Not finished yet but will put a clear protection on it.
Recommended Skill Level
Beginner

Comments

Modern Adirondack Chair

Submitted by rendall28 on Wed, 06/03/2020 - 10:59

I made 4 of these chairs for around our fire pit. I chose to sand stain and poly before assembling and plan to add another coat of poly now that they are assembled. Sanding was the longest part of the process for me, but if you aren't as particular as I was about the finished project the time investment would be substantially reduced. I also of course had drying time for the stand and poly. Assembly itself was simple and the finished chairs are comfortable and sturdy without being overly heavy and bulky.

Estimated Cost
130 (4 chairs including finishing)
Estimated Time Investment
Weekend Project (10-20 Hours)
Finish Used
Stain: special Walnut

Raised bed planter

Submitted by Anonymous (not verified) on Tue, 06/02/2020 - 16:36

Hey Ana,

I saw your raised bed planter and decided to tackle it for ourselves. It measures 2'x8' and stands 28" to the bottom of the planter. I used redwood fencing for the sides and bottom at a cost of $1.79 each. I didn't use the wire mesh for the bottom but drilled 1/4" holes in the redwood fencing for drainage.

Thanks for the idea!!

Mike Howell

Estimated Cost
$45
Estimated Time Investment
Afternoon Project (3-6 Hours)
Finish Used
I left ours in it's natural state
Recommended Skill Level
Intermediate
Back