Community Brag Posts

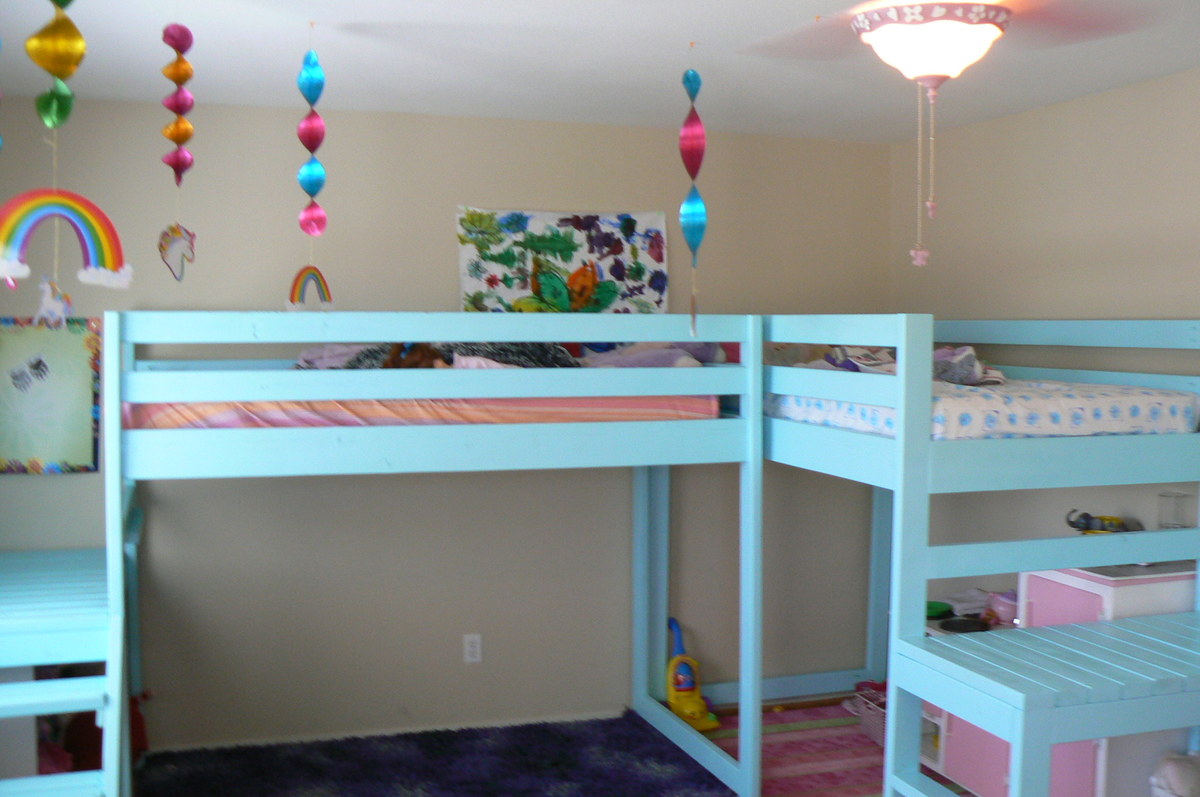
Camp Loft Bed with Video Gaming "Boy-Cave"

Submitted by Anonymous (not verified) on Wed, 03/25/2020 - 08:35

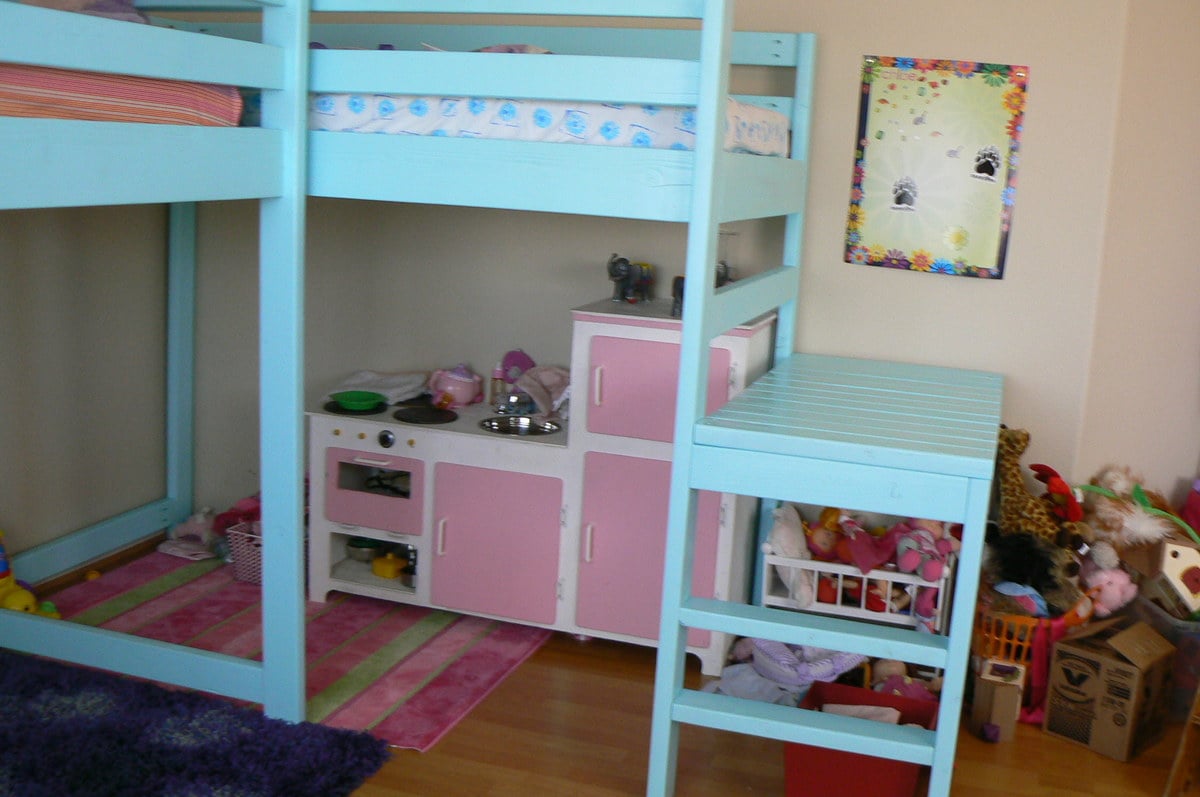
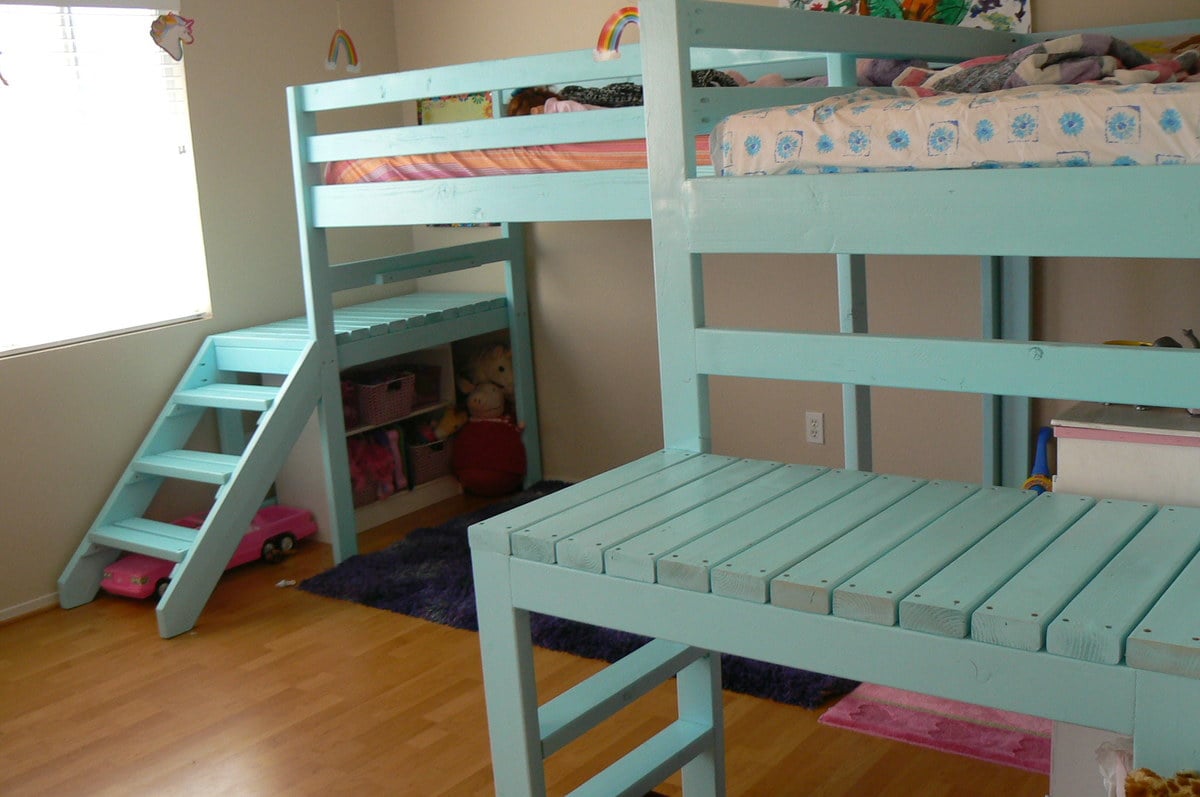
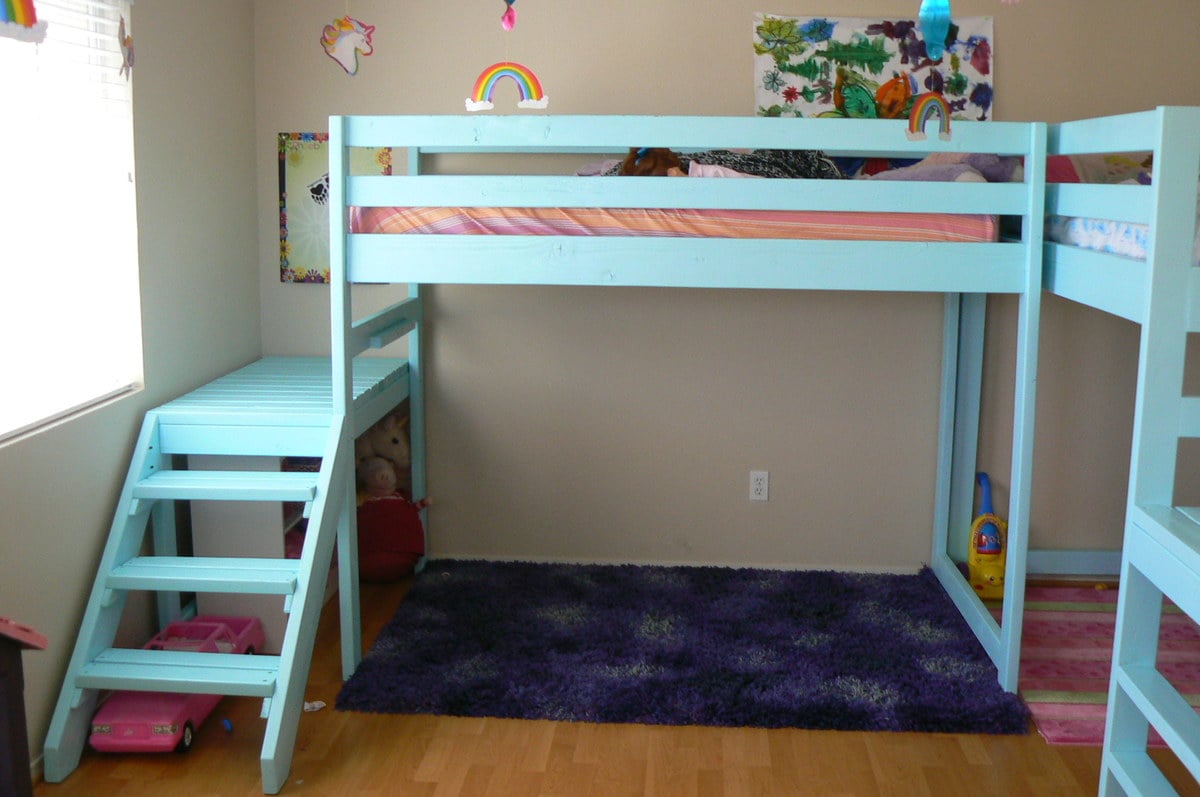
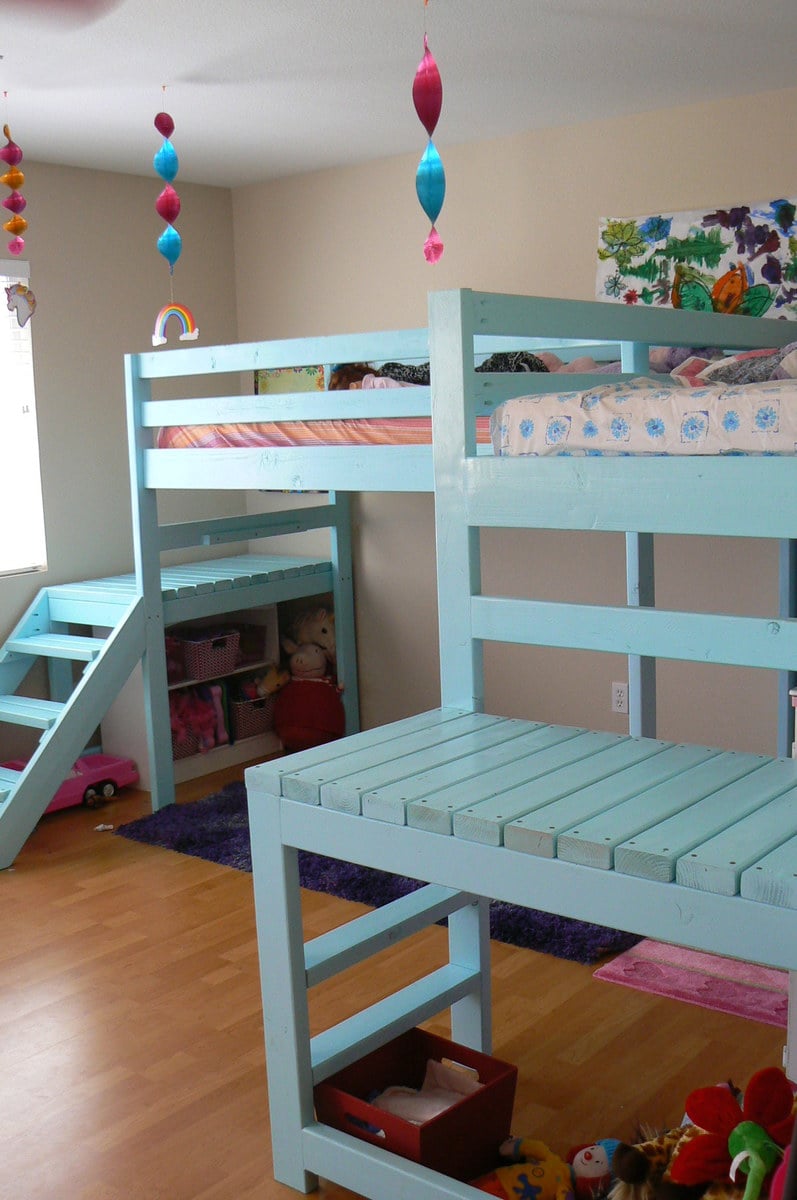
I built this for my 10 year old son. His room is not very big so this loft bed provides the perfect solution to freeing up floor space for playing.

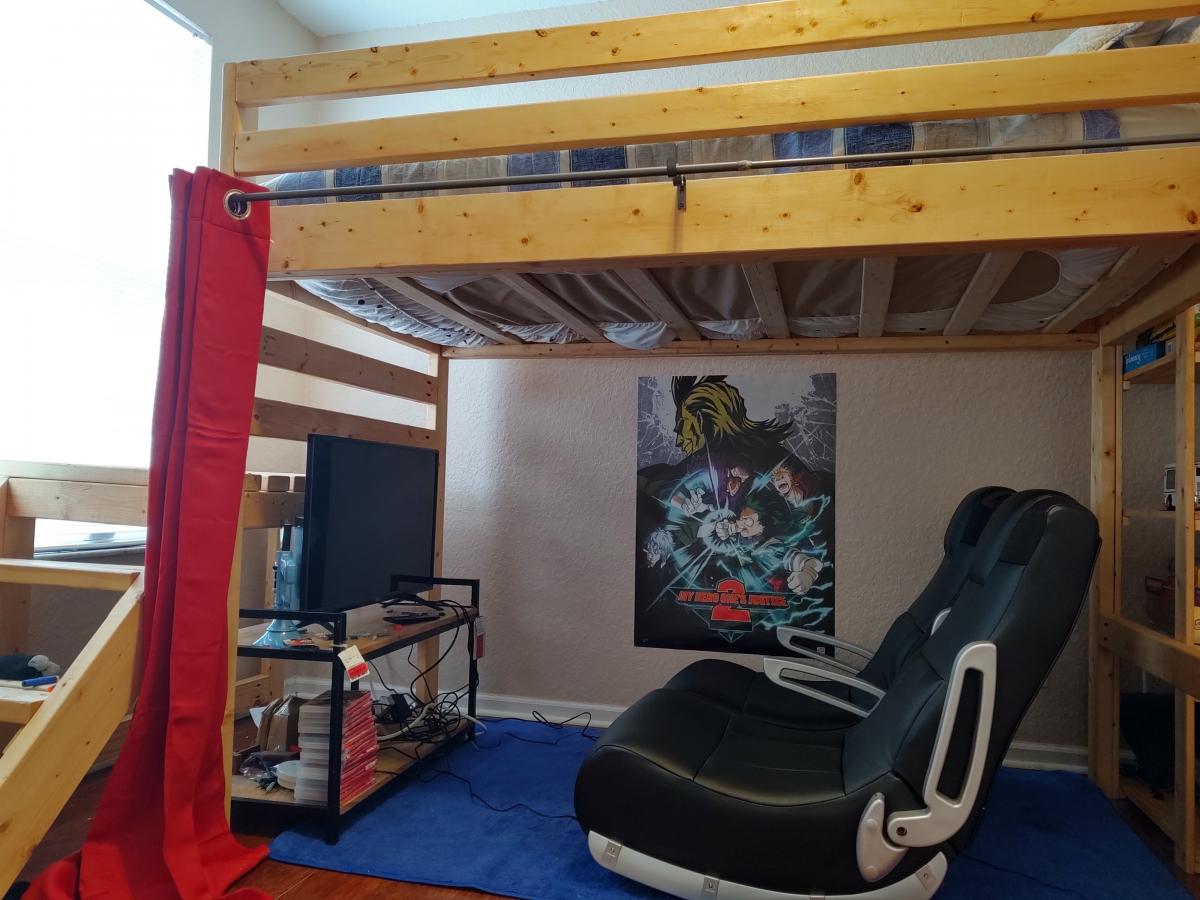
I added some toy shelves to the side for additional storage.

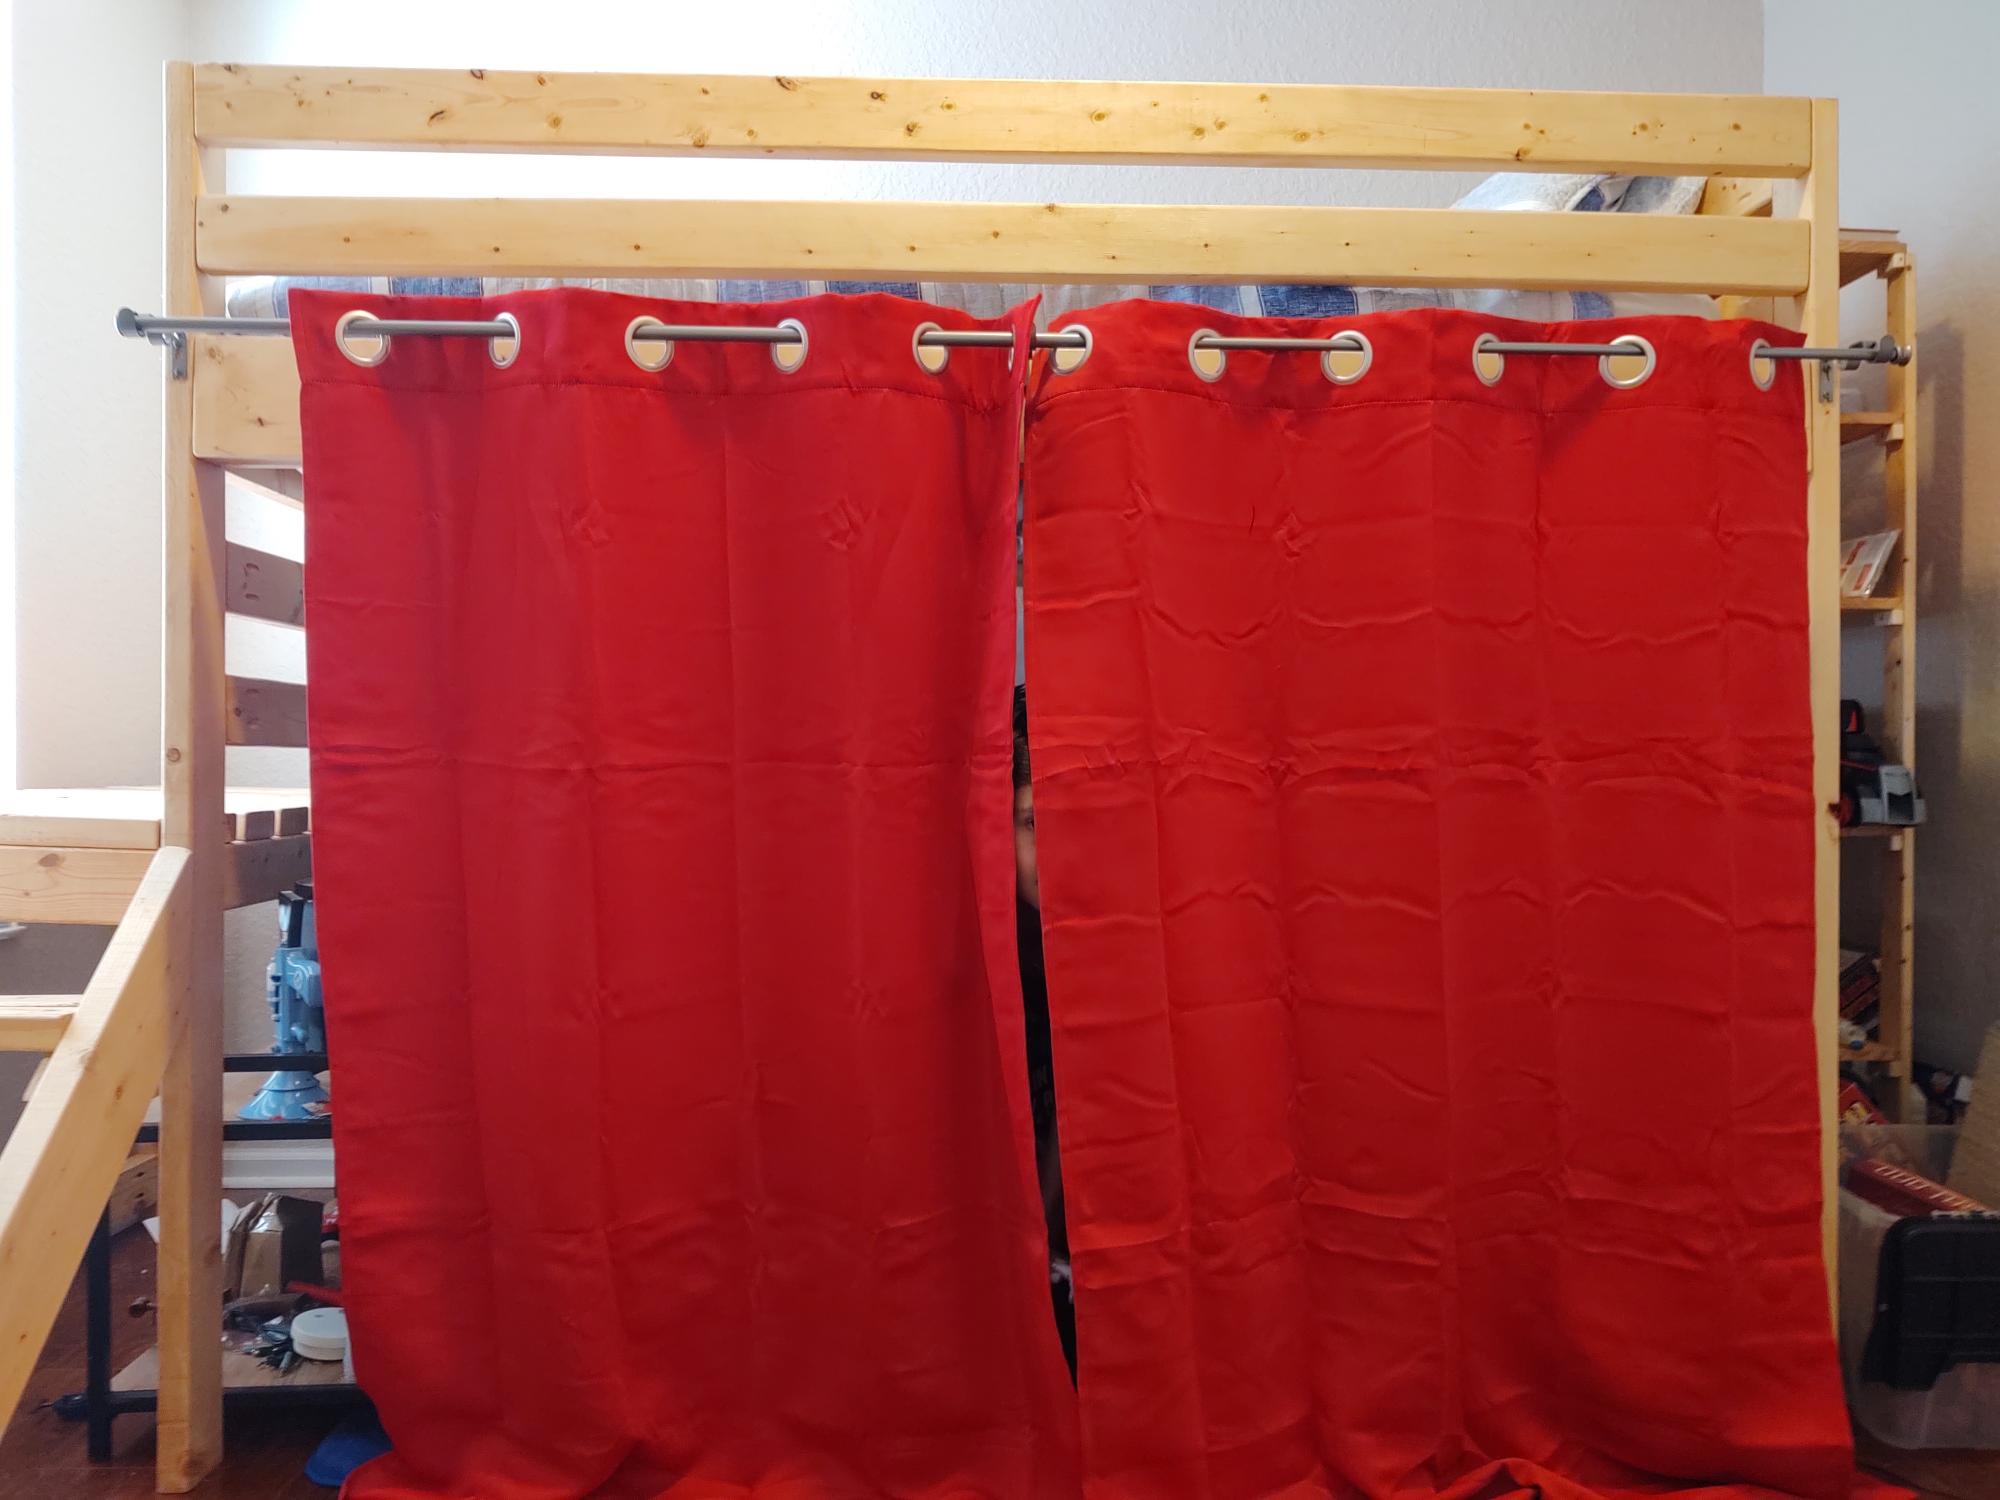
The curtain, TV and gaming chairs turn the under the bed portion into his personal "boy-cave" gaming center.

Thank you for the easy to follow instructions. He loves it!

Estimated Cost
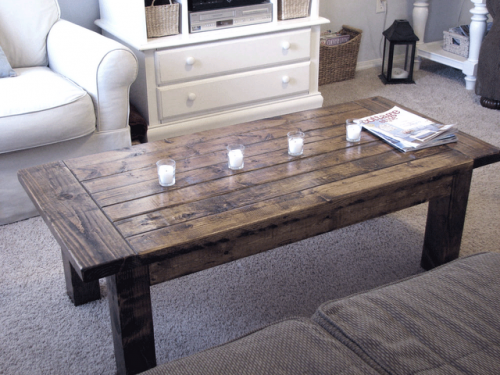
The bed / shelves combo cost me a little less than $200, including sanding, staining, etc...
Estimated Time Investment
Weekend Project (10-20 Hours)
Finish Used
We used a very light minwas stain that my son picked out
Recommended Skill Level
Beginner

Adirondack from Deck leftovers

Submitted by Anonymous (not verified) on Thu, 03/26/2020 - 09:58

We are stuck at home for the Shelter-In-Place due to COVID-19 so we decided to use the scrap wood left over from our new deck. Because we didn't have the materials exactly meeting the specifications in the directions, we had to adapt the design significantly but we're really pleased with how it turned out. My 16-year-old daughter made it with me so it was a great to get her involved in building

Built from Plan(s)
Estimated Cost
$0
Estimated Time Investment
Day Project (6-9 Hours)
Recommended Skill Level
Intermediate

Wishing well projects

Submitted by Jason48 on Thu, 04/03/2014 - 08:02

Started these wishing wells as only having fun and for family it seems now that it is going to be a little more than I thought now taking orders from family friends

Estimated Cost
120.00
Estimated Time Investment
Week Long Project (20 Hours or More)
Recommended Skill Level
Intermediate

Comments

In reply to by Jason48

crafty_love

Tue, 11/19/2019 - 07:33

I love the wishing wells, but I can;t find a plan.  My mom has wanted one of these forever! She now has stage 4 squamous cell carcinoma Stage 4 and I would love to build her one before it is too late.

Outdoor Garbage Can Shed

Submitted by Anonymous (not verified) on Fri, 12/08/2023 - 08:45

Chose the small firewood shed project as a "template" if you will .. built this to house our garbage cans and eventually put a gate on it to "help deter" the Florida black bears (we do multiple things to keep them at bay) but this will also just be a nicer looking way to keep the cans outside.

I modified the floor since the firewood shed had a floor that was suitable for, well, firewood but not so much for rolling garbage cans. Had to leave the one slat off the back for the depth of the can which I didn't completely account for in the beginning. Overall, still need to paint it and water seal it but happy with how it turned out.

Built from Plan(s)

Modern Chairs, Modern Loveseat, and the 2x4 Outdoor Coffee Table

Submitted by Anonymous (not verified) on Wed, 04/29/2020 - 19:58

I took this opportunity while quarantined to make this set. I think it came out really beautifully!

Finish Used
Shou sugi ban, Simple Finish by Maker Brand, and Total Boat Halcyon Clear.

I used a blow torch to burn each board. Then I used a wire brush to remove soot, and washed with water and allowed to dry completely. I opted for pocket holes for the chairs and love seat. After assembling, I finished with Simple Finish by Maker Brand ($40/qt), and top coated with Total Boat Clear Halcyon ($32)

Roll Top Desk

Submitted by Anonymous (not verified) on Sun, 12/31/2023 - 13:20

I didn't get the plans from this site, but figured I'd post a brag anyway. The plans were downloaded from MinWax several years ago , but it wasn't until this year that I started to build this roll top desk. It's made with white oak, along with maple plywood for the side panels. It was finished with a simple polyurethane clear coat.

I'll be using this as a work desk in my den. It has just enough room to house my laptop with the top closed.

This is definitely one of the more challenging projects I've taken on.

https://www.minwax.com/en/woodworking-project-inspiration/wood-furnitur…

Red Oak Truss Table

Submitted by Anonymous (not verified) on Sun, 01/14/2024 - 19:03

Used red oak lumber with ash grey rubio monocoat. The tabletop is 90"x40" and I made the base 64" long in order to place a chair at each end of the table.

Ashely Shook


Built from Plan(s)

Beginner Farm House Table

Submitted by Anonymous (not verified) on Tue, 06/16/2020 - 06:15

We made a 6'ft version of the beginner plans. We initially made the table 1" higher than the plans originally called for so that there'd be more room under the apron but that turned out to be just too high to comfortably dine at, so at the end of the project I shaved off an inch on each of the legs.

Some issues we had with this table is Pine is rather easy to warp and during the staining and poly process 3 of the top boards warped too heavily for the table maintain a fat surface. I ended up buy 3 new 2x6's and doing the sanding staining process all over again. We also modded the plans so have a notch to fit the bottom cross beam in. This was our first wood working project ever it turned out really nice. We used the Dutch oil, Dark Walnut on the pine for anyone interested.

I'm giving a high estimate on both time and money due to mess ups and just being completely and utterly new at this stuff.

Estimated Cost
200
Estimated Time Investment
Week Long Project (20 Hours or More)
Finish Used
Dutch wood oil - Dark Walnut
3 layers of Polyurethane
Recommended Skill Level
Starter Project

Farmhouse Bedside Table

Submitted by jwerne2 on Thu, 08/23/2012 - 09:29

We made two of the Farmhouse Bedside Tables to go with the Farmhouse Queen Bed with Arch. The nighstands went together quickly and are beautiful! You just can't beat the quality for the cost to build them. My husband added a piece of wood behind the drawer to act as a stop so the drawer doesn't push in too far. We chose not to add drawer slides because the drawers are perfect without. Another great plan.

Built from Plan(s)
Estimated Time Investment
Afternoon Project (3-6 Hours)
Finish Used
Rustoleum Java Stain
Recommended Skill Level
Beginner

Laundry Pedestal

Submitted by Kamoanui on Tue, 06/30/2020 - 09:42

This was quick build. First time for us using trim, so we wasted a few feet getting the angles right. We attached the legs directly to the frame, and did not use the metal brackets. We also did not build the floor frame. We measured how high/wide the laundry baskets ($3/piece at Target!) were, and made it to fit them. We added a piece of rubber mat to the top (bought at Lowe's). A few weeks later we helped our daughter and son in law build one for their new house!

Estimated Cost
$40
Estimated Time Investment
Afternoon Project (3-6 Hours)
Finish Used
White satin paint
Recommended Skill Level
Beginner

Two Camp Loft Beds

Submitted by Tjslove04 on Tue, 08/28/2012 - 21:00

Ana read my mind! I was telling my husband that I wanted "L" shaped loft beds for our girls abouttwo weeks before she posted these plans! As soon as I saw them we went and got our lumber. So excited to have these done and the girls love them!

Estimated Cost
$75 each
Estimated Time Investment
Weekend Project (10-20 Hours)
Finish Used
Bher premium paint
Recommended Skill Level
Beginner

Comments

mskatiesartstudio

Thu, 09/13/2012 - 13:05

I saw another post where they did horizontal 2x4s instead of stairs. I see that you did one of each. Could you tell me what your thoughts are on how the kids like them....if the 2x4 steps are easy to get up and down on....
We are adopting and we're not sure what age children we will get....so, I want to make sure they are easy to navigate. Any thoughts???

Thank you!

Tjslove04

Tue, 09/03/2013 - 09:30

we id the stairs for our 3 year old and the ladder for our 5 year old. She has no problem getting up and downthem but our 3 year old doesn't like to come down the ladder ones. The stairs are really nice and make the bed easily accesable even for me. =)

melncurt

Wed, 02/04/2015 - 18:48

What are the overall dimensions with the two landing areas and stairs? I really like this idea, but the bedroom is not super big. Thanks!

Coop and run for Six

Submitted by Anonymous (not verified) on Sat, 09/24/2016 - 08:10

We wanted our chickens to have plenty of room for when we ere not home and could not let them free range in the yard.  One of the six was a rooster-- and long story-- but we don't have him any more-- so 5 chickens now enjoy this coop/run.  It cost about $300 in supplies.  It is 16 feet long.

Built from Plan(s)
Estimated Cost
$300
Estimated Time Investment
Weekend Project (10-20 Hours)
Finish Used
unfinished
Recommended Skill Level
Intermediate

Comments

Awesome! Thank you for the plans!!!

Submitted by Sherice on Tue, 07/15/2014 - 07:41

This is the second project I attempted and it was a huge undertaking for me, but it was fun and went well! I had planned to sew a cushion for it, but by the time I completed the project, I was DONE! So I bought some for now.

The only modifications I made were larger arm rests so I could put cup holders in them. The cup holders I made out of PVC 3" Male end and a 3" drain, which I glued together. I then scuffed the entire thing and painted them with acrylic paint (trying to get them to match the blue and green in the cushions) before spraying them with gloss sealant.

My family LOVES the new "swing bed". It weighs ALOT so I had to make sure to get proper hanging gear. It's obviously not hung yet when I took the pics tho.

Thank you for another beautiful project!

Built from Plan(s)
Estimated Time Investment
Weekend Project (10-20 Hours)
Finish Used
About seven layers of spar urethane, natural/clear, with sanding in between the layers.
Recommended Skill Level
Beginner

Kids Chairs

Submitted by ValBryant on Wed, 09/19/2012 - 13:30

So i made these chairs to go with the table i built. I actually built 7 of them at a time, three for me and four for a friend. I had a little over a hundred pieces of wood to put together which became a chore, so i don't recommend doing so many at once. I got burnt out quite a few times, hence why it took me a month to finish (couple hrs here every other day or so).
Anyways, the plans we very easy, the wood on the other hand was difficult. Using furring strips is inexpensive but i had more then i wanted split, and they wern't all the same thickness. Making the front legs stick out more (no biggy) and some screws went too far through even though they were the right size according to the plans. Two 1x3's furring strips sandwiched together ( side aprons) might not take a 1 1/4 inch screw. I had to cut off a few tips from the inside of the chairs.
All in all i am so happy with the end results, even happier that in total it only costed me less then $20 in wood! Would have been a little more because i got the wood for the chairs for free, in exchange to build my friend a table and chairs set like mine.
Link to the Chair Plans.

http://ana-white.com/2010/11/plans/four-dollar-stackable-children’s-chairs

Estimated Cost
Maybe $35 for wood
Finish Used
Minwax Dark Walnut for stain. Valspar Sea Exposure? And Tint-able glaze for the distressing over the paint. Same a Ana's finish process - DISTRESSED TURQUOISE WITH CHOCOLATE GLAZE.
Recommended Skill Level
Beginner

Comments

Floating Corner Entertainment Stand

This is a corner entertainment stand. I didn't have a plan to follow so I made it up as I went. The dimensions are 40" L xW and 27" tall. It has a base hidden underneath it help support the weight and is also screwed into wall studs to prevent tipping. The angle for the front cross section is 22.5 degrees. I made this for a friend. She is going to paint it unfortunately. Materials cost only around $120. 3 sheets 3/4" plywood, some 1x2s and a couple hinges and cabinet knobs.

Estimated Cost
$130
Estimated Time Investment
Weekend Project (10-20 Hours)
Recommended Skill Level
Intermediate

Comments

Justin G (not verified)

Sun, 01/06/2013 - 04:49

This is REALLY a nice looking corner unit. In our living room, the ONLY place for the tv is in the corner. I have a prebuilt unit now that cost me quite a bit, and we hate it. Its all modern with glass shelves. This corner cabinet is EXACTLY what I want to build. I have a 1 year old so having doors to hide the electronics is a must.

I would VERY much like to build this. Are there any more detailed pictures or a plan I could download? Ive been searching for the last few days an just cant seem to find anything that catches my eye like this one.

Looks great!!

Wounded Marine

Sun, 01/06/2013 - 06:18

The shelves are made out of premium plywood. For the top, bottom, and the middle shelf, I measured and cut out on pieces of plywood. Then used plywood for the "walls" of the unit. I trimmed it with 1x2s. The doors are also plywood. I just rabbit jointed nice wood for the frame of the doors. Underneath the the TV stand is a 2x4 set back a little bit to give it that floating looking. It is anchored to the wall on the inside of the unit with screws going into the studs of the wall. I hope this makes since.

arod718

Thu, 09/05/2013 - 19:13

Is it possible to get dimensions of the stand and what you based the base from. I would like to build the Ana version for my wife because of the storage it has. Thank you, best site ever.

Rustic X Coffee Table

Submitted by Anonymous (not verified) on Sat, 08/29/2020 - 08:17

This was the very first project that my husband and I have ever built and it came out exactly as planned. We followed the instructions exactly as written and I’m in love with this table.

Built from Plan(s)
Estimated Cost
100
Estimated Time Investment
Weekend Project (10-20 Hours)
Finish Used
Top: Varathane Kona gel stain (one coat) followed by three coats of MinWax Polycrylic

Bottom: Primed all of the knots first with BIN stain blocker (to prevent sap bleed through) and then did 2 coats of Bulls Eye 123 water based primer. Once the primer was dry, we painted with one coat of SW Bohemian Lace Latex Satin and topped with 3 coats of polycrylic.
Recommended Skill Level
Intermediate

Small cedar shed part- re deux

Submitted by Kyleelou on Mon, 08/31/2020 - 12:06

I really needed somewhere to park my rototiller and mower during the summer and ended up modifying the plans to include a lean-too/over hang area. This required flipping the shed to extend the roof line. I continued the 15• roofline and also then had to create and cover the soffits. I also reduced it to one door and placed it on a skid foundation so that technically it would be considered a temporary structure, no permits needed. I first used a semi transparent stain that looked much darker and grayer in the store but looked very blue and terribly streaky on the shed, see back wall area. I then restrained it with a solid stain, which I think looks much better and covered the streaky stain. Because I extended the roof and stained it twice, this really increased the cost, but I think it was well worth it. I can store all my yard and garden tools underneath and inside.

Built from Plan(s)
Estimated Cost
$430
Estimated Time Investment
Week Long Project (20 Hours or More)
Finish Used
Behr premium solid stain
Recommended Skill Level
Beginner

Quick and easy step stool

Submitted by danwiecz on Fri, 10/30/2020 - 19:58

Was going for a rustic u finished look with rough cut scrap pine and visible screws.

Estimated Cost
$5
Estimated Time Investment
An Hour or Two (0-2 Hours)
Finish Used
None
Recommended Skill Level
Starter Project
Back