Community Brag Posts

Modified Queen Stratton Bed

Submitted by APagano on Tue, 02/07/2012 - 11:57

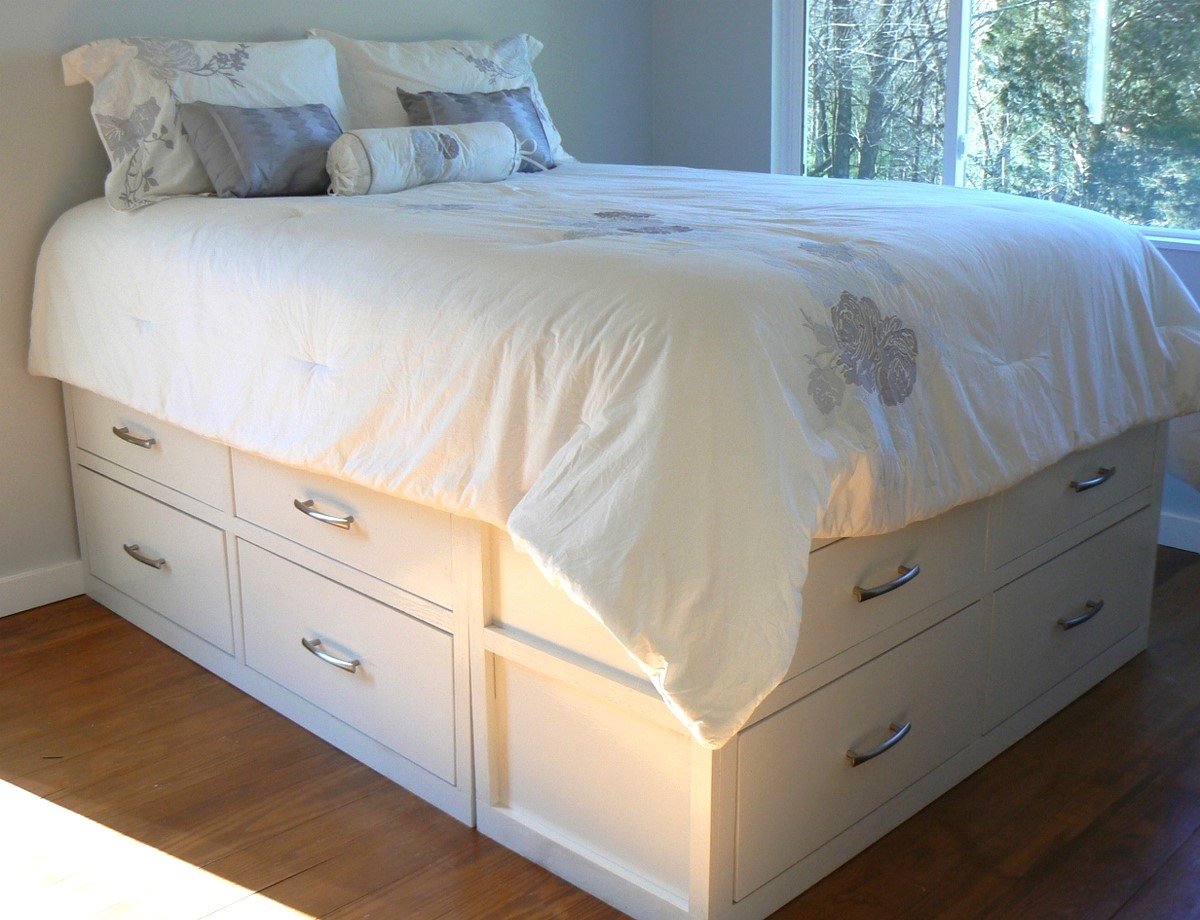
After we built the first level, we decided we didn't like how low to the ground the mattress was going to be, so we made another level. Our master bedroom is very small so this gives us plenty of storage space! The floor throughout the house is wavy, so theboxes do not meet perfectly ( you can see a slight gap at the bottom) which drives me crazy, but I will have to live with it for now. We kept the drawer face simple (less work, and we like the clean lines). Our mattress is quite thick, so I see myself building a step stool in my near future! This was our first project and very easy to follow. Already working on my next project. I am addicted! Thanks for the great site, Ana!

Built from Plan(s)
Estimated Cost
between 500 and 700, taking into account paint, handles, screws, etc
Estimated Time Investment
Weekend Project (10-20 Hours)
Finish Used
Oil based ultra white from Lowes. I think it was Velspar.
Recommended Skill Level
Intermediate

Comments

Guest (not verified)

Tue, 02/14/2012 - 12:54

I too modified this plan with a second rob of drawers and im in the finishing stages of it (hardware and paint). How tall is yours?

APagano

Wed, 02/22/2012 - 13:05

Total height is 25 inches. I love how tall it is, because the dogs cannot jump on the bed! I wish we would have thought about the double drawer height before we started as it would have brought the cost and time down significantly. We live and we learn. Enjoy your new bed!

Marie421 (not verified)

Tue, 07/31/2012 - 19:48

Just wondering how you attached the double drawer layers together... Love the look of it...

APagano

Mon, 06/10/2013 - 17:41

Sorry for the delay in response. I haven't been on the site in awhile and I could not figure out my password! We used the Kreg Jig to attach the top level to the bottom. Looking back on it, we should have just built the walls as one piece, but since the top drawers were an addition, after the fact, we just had to deal. The 1x2 trim piece gave it a finished and less pieced together look. It has been so long since we built this, the details are fading!

In reply to by APagano

diy_lover

Sat, 08/06/2016 - 20:37

I'm new to furniture making and was wondering if you had plans for your work since I like the height, queen and twin size? Also, I was wondering if any drawers are for storage purposes, as I would like them to be?

natasha

Mon, 10/08/2012 - 08:00

Hi this is exactly what I need to do!
we just bought a new bed and I new I'd be making this not thinking I decided not to buy the box spring, now I realize my bed will be on the floor...

I would love it if you could share everything you learned in making it double decker! please
thanks
Natasha

APagano

Mon, 06/10/2013 - 17:48

Better late than never, I hope...
First thing we learned, the bed is a little too high, so we should have made slightly smaller drawers. Still happy our dogs can't get up there, but I have to actually hop up on the bed every night, and still have yet to get around to making my step stool.
Second, cut the side pieces for the height needed for two drawers, then you have a cleaner look with no middle trim piece. I don't mind it, but I would like it more without, I think.
That is really all I would change. The plans were easy to follow and made it easy to alter for our needs.

reneemwhiten

Tue, 05/07/2013 - 23:52

I am flabbergasted by this AMAZING bed you MADE over the WEEKEND! This is simply unbelievable! I absolutely could never do something like this. Are you willing to make a King size one exactly like this and sell it to me??
Oh please?!
Renee

APagano

Mon, 06/10/2013 - 17:53

Thank you for those kind words! I was a little nervous about taking on such a big project, but we had a fun time building it { I can't say the same for sanding and painting :-) } and are very happy with the space it freed up in our very small bedroom! Just take your time, invest in a Kreg Jig, and you can do it too!

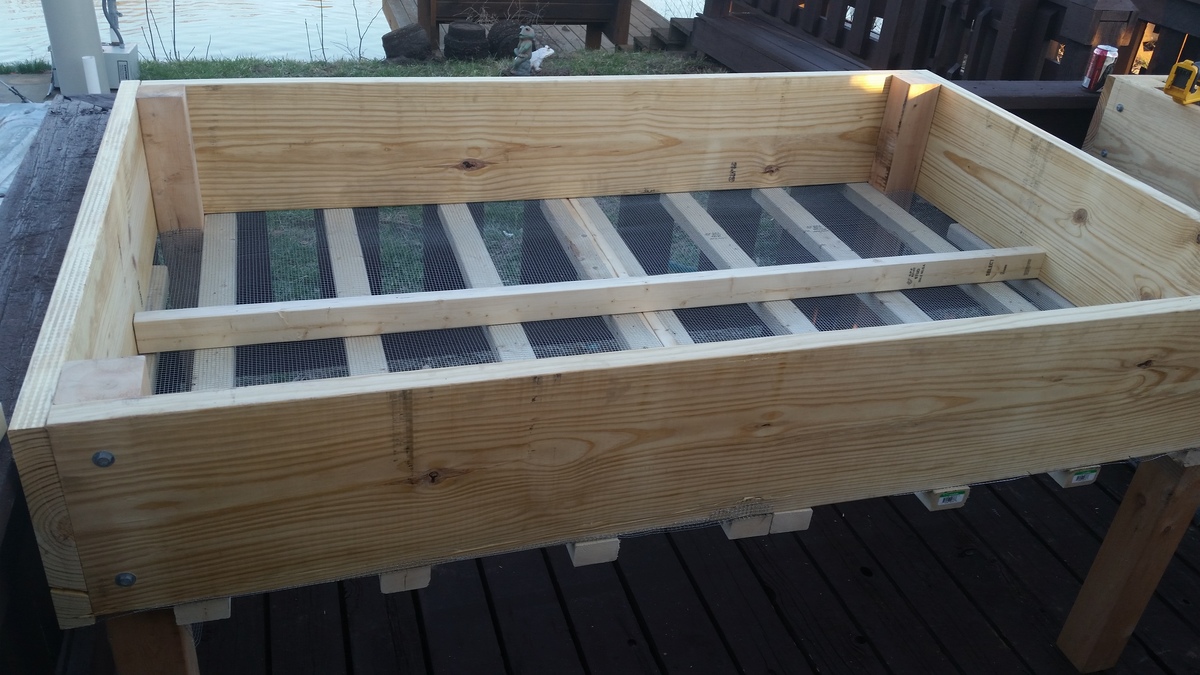
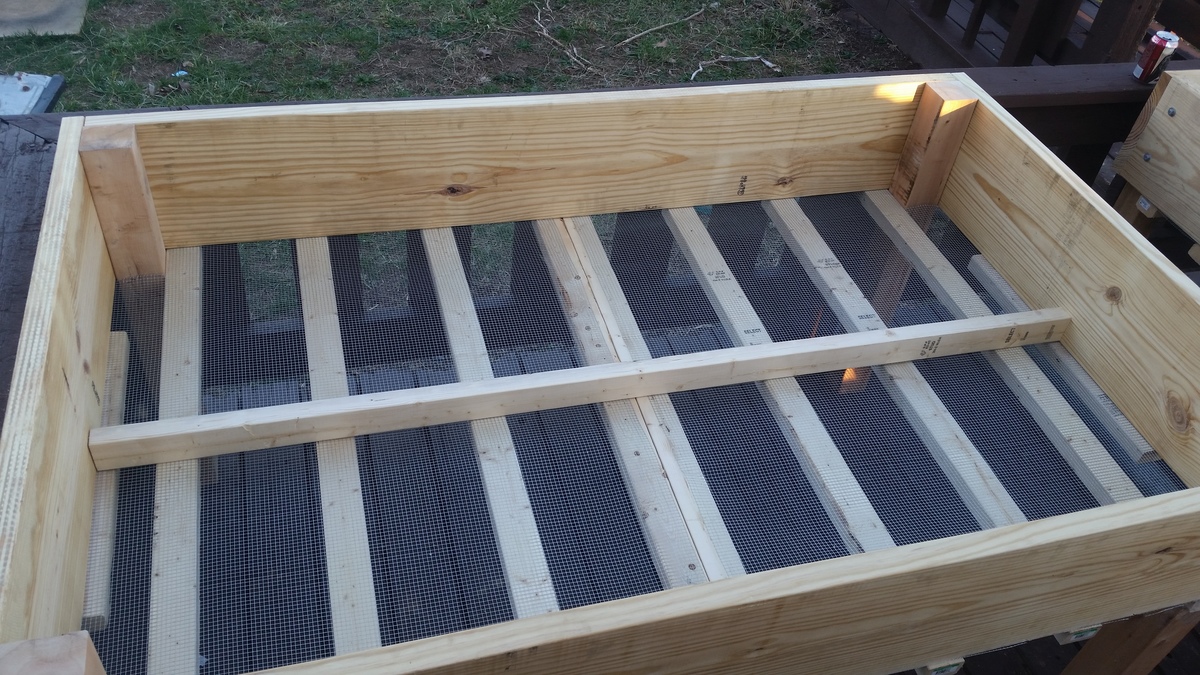
counter raised beds

2 - 2x12x8

2 - 2x3x8

2 - 4x4x8 (cedar, fur is cheaper and will work fine also)

16 - 5/16x4 lag screws 

16 - 5/16 washers

3x10 feet 1/4 hardware wire

20 - 3inch wood screws (outdoor rated, deck screws or the like) 

you will have left overs if you buy extra lags you can make some other boxes depending on how high you want these, or set them on ground without legs. and use the wood screws 

Estimated Cost
$75
Estimated Time Investment
An Hour or Two (0-2 Hours)
Finish Used
no finish
Recommended Skill Level
Beginner

Dani & Brandon's Patio Set

Submitted by Laurie Mac on Thu, 03/08/2012 - 14:47

I gave my son's girlfriend a "gift certificate" for her birthday that said I would build her anything she'd like. There is a small patio outside my son's apartment that faces a lake. She decided to ask for some chairs so they could sit out on a warm night and watch the ducks swim by.

Estimated Cost
Not real sure... maybe $50...
Estimated Time Investment
Week Long Project (20 Hours or More)
Finish Used
Cabot Stains Australian Timber Oil
Recommended Skill Level
Beginner

Modified and Expanded Loft Bed, Shelves, and Desk

Submitted by mickelsn on Mon, 11/25/2019 - 20:09

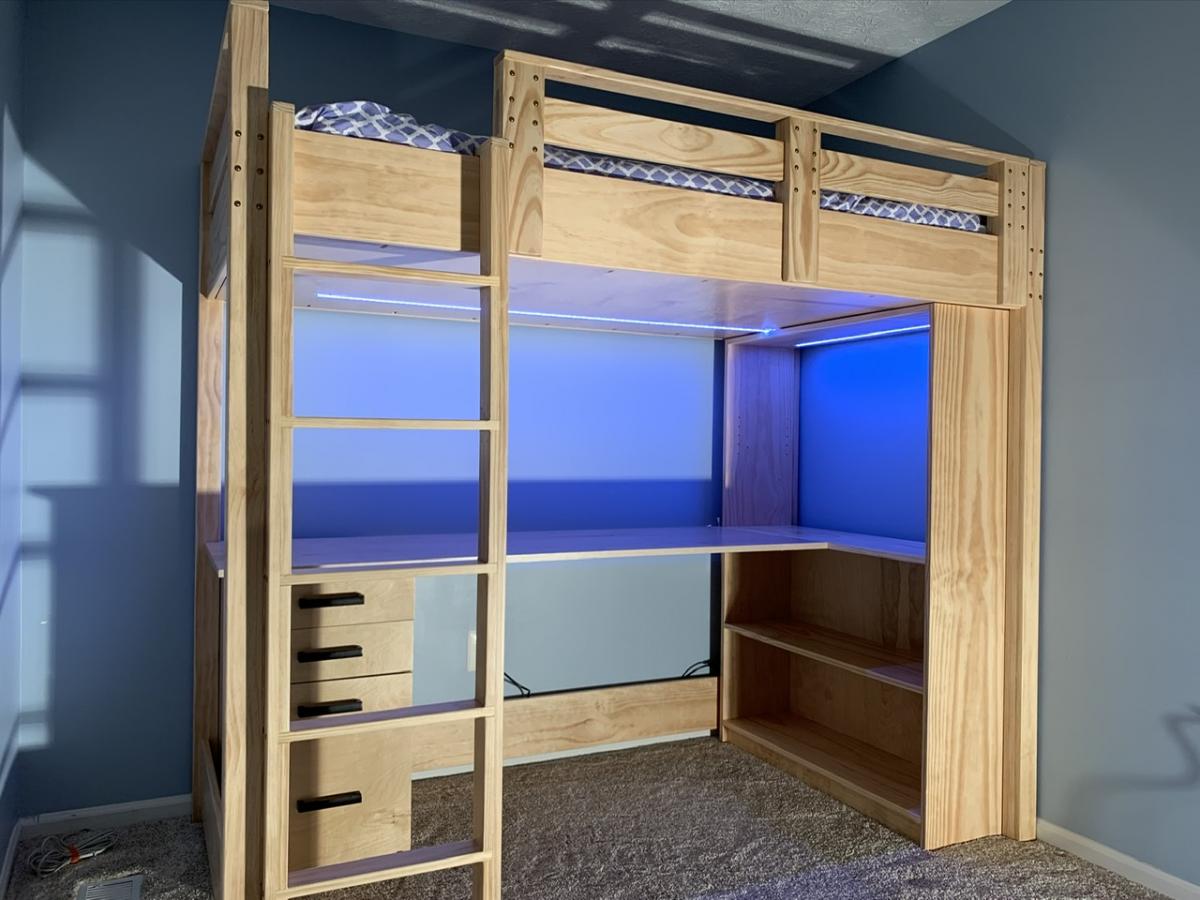
My daughter desperately needed a new loft bed for her small bedroom as she became a teenager. After looking a long time, I finally decided to   take the plunge and make something custom after we couldn’t find a bed that met her needs (she’s VERY tall for her age). Thank you for posting the loft bed and bookshelf plans to this site, as they were great to work from and customize! This is my first woodworking project of any kind, and it came out great with these plans.

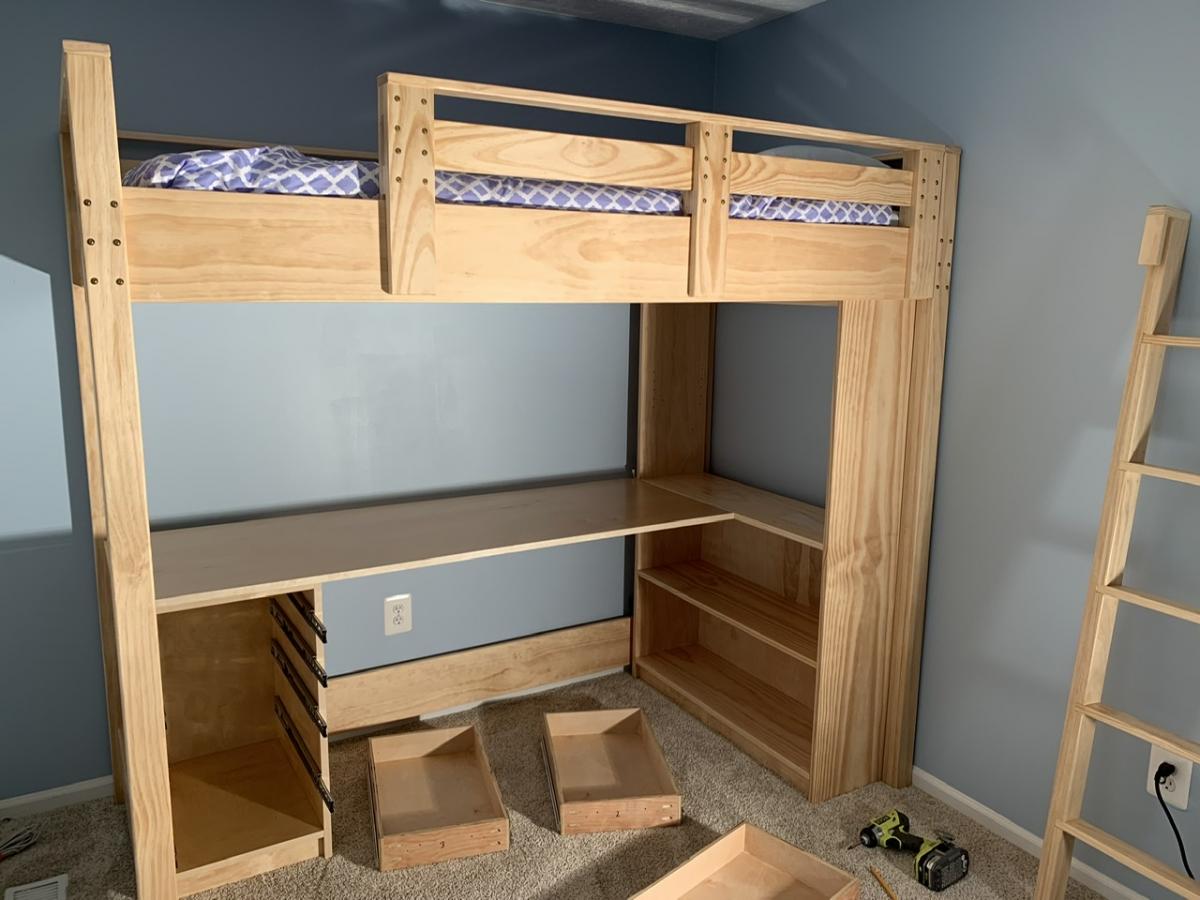
We followed the Loft Bed and Loft Bed Bookshelf plans pretty closely, but we did make some changes as we went...

First, we tweaked the guard rail design to make it removable by adding back vertical posts. This way, the front and back posts slide over the front rail and it no longer needs to be screwed in place. This is a nice tight grip for safety, but it’s much easier to make the bed by removing the guard rail and dealing with the mattress. If you do this, just make sure the back vertical posts are shorter than the front ones to make room for the cleats and slats on the inside of the rail! This also means the top of the rail is made with a 1x3 instead of the 1x2 in the instructions.

We also decided to use a vertical ladder design rather than an angled ladder. We did this for space considerations in the room; it’s a bit harder to get up the ladder, but not that much. This also helped avoid any weird angle cuts with my basic tools. We also made the ladder about 3” wider than the one called for in the plans.

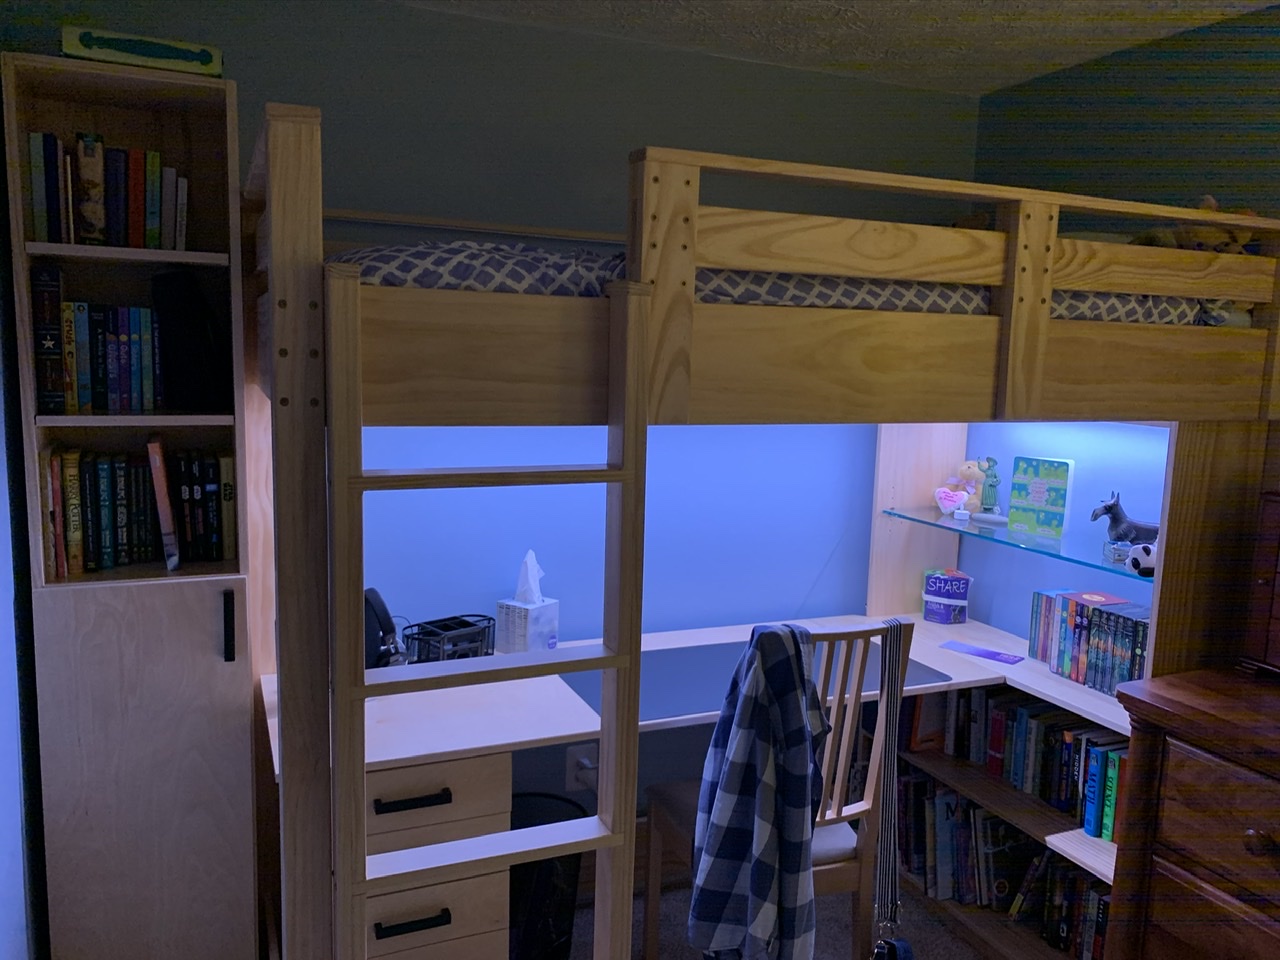
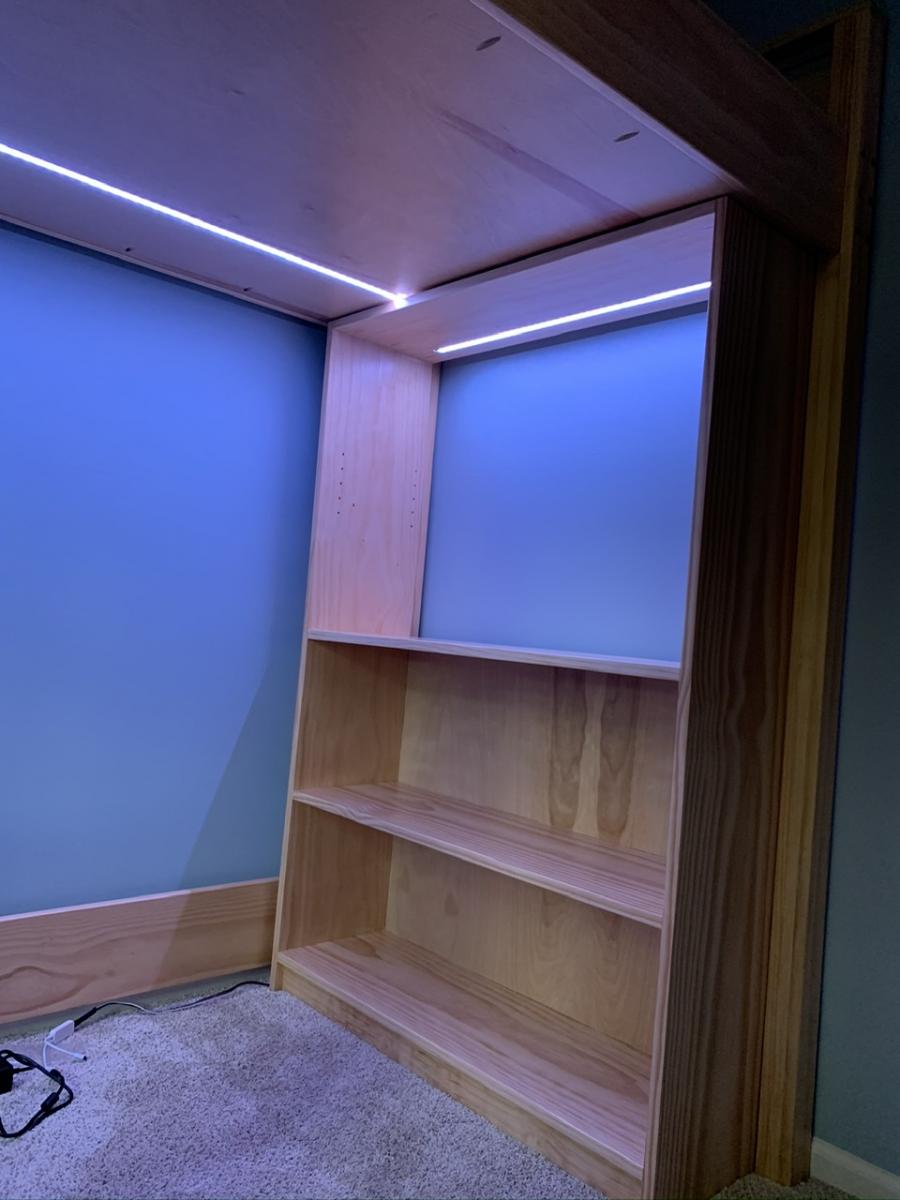
One of my favorite features was adding a 3/4” plywood “ceiling” above the desk. We did this by moving the long side cleats upward by 3/4” of an inch in the plans, and using pocket holes roughly every 10 inches around the perimeter of the plywood. We used this to hide the bottom of the mattress and all the bedding from view when sitting at the desk. It also provides for LED strip lighting above the desk, which is installed by routing out a pathway in the board and installing the lights within an aluminum channel for heat dissipation and to allow installation of a plastic diffuser over the lights. The wiring for the lights lives in the ~1.5” gap between the board and the slats thanks to the 1 x 2 cleats.

In the shelving, we made the upper shelf in the wide bookcase adjustable with the help of a Kreg shelf pin jig. We also ordered a 3/8” tempered glass shelf for this area to let more of the LED light strip we installed in the top of this shelf shine down as well. Again, this was installed in a routed-out pathway that holds an aluminum channel, and the wiring goes up through both the bookcase top and the plywood bed “ceiling” panel to join into the power. We got the strip lights, aluminum channel with diffusers, power supply, and controller from Amazon.

To get power to the LED lights, I routed out a channel for 5-conductor wire in the middle board of a rear leg assembly. Before gluing up the leg, I coated the wire with silicone spray to avoid the glue adhering to it so I could slide the wire around as needed. With a little bit of chiseling, this wire is able to come out of the slide-in joints for the upper and lower wide rails on the back of the bed. On the top, these wires go into a splitter and then to the two sets of LED light strips. On the bottom, the wires to into the LED controller which is mounted to a scrap board along with the power supply that stands on end in the 3/4” gap between the back side wall of the bookshelf and the bottom bed rail.

We created a custom-designed file drawer unit as the pedestal for the desk opposite the wide bookshelf. This was modeled roughly after Ikea Alex drawers with three narrow drawers and one file drawer. The carcass is about 14 1/2” wide by 21 3/4” deep by 29 1/4” tall and made of 3/4” plywood. The drawer boxes are approximately 12” wide by 20” long made of 1/2” plywood with 3/4” plywood fronts. We used full-extension soft-close drawer slides and positioned the cabinet so they have nearly full extension behind the ladder. Four wooden dowels are used on the top corners to align and secure this end of the desk surface.

Speaking of the desk, it is a piece of 3/4” plywood approximately 24” deep by 64” long. One end rests on the file drawer cabinet, and the other end is flush with the middle shelf of the bookcase and attached using two 6” by 5” 14-gauge galvanized T-straps usually used in framing applications. These are screwed upwards into the bottom of the desk and shelf from below, and are holding up quite well. This avoids the need for desk legs by the bookshelf.

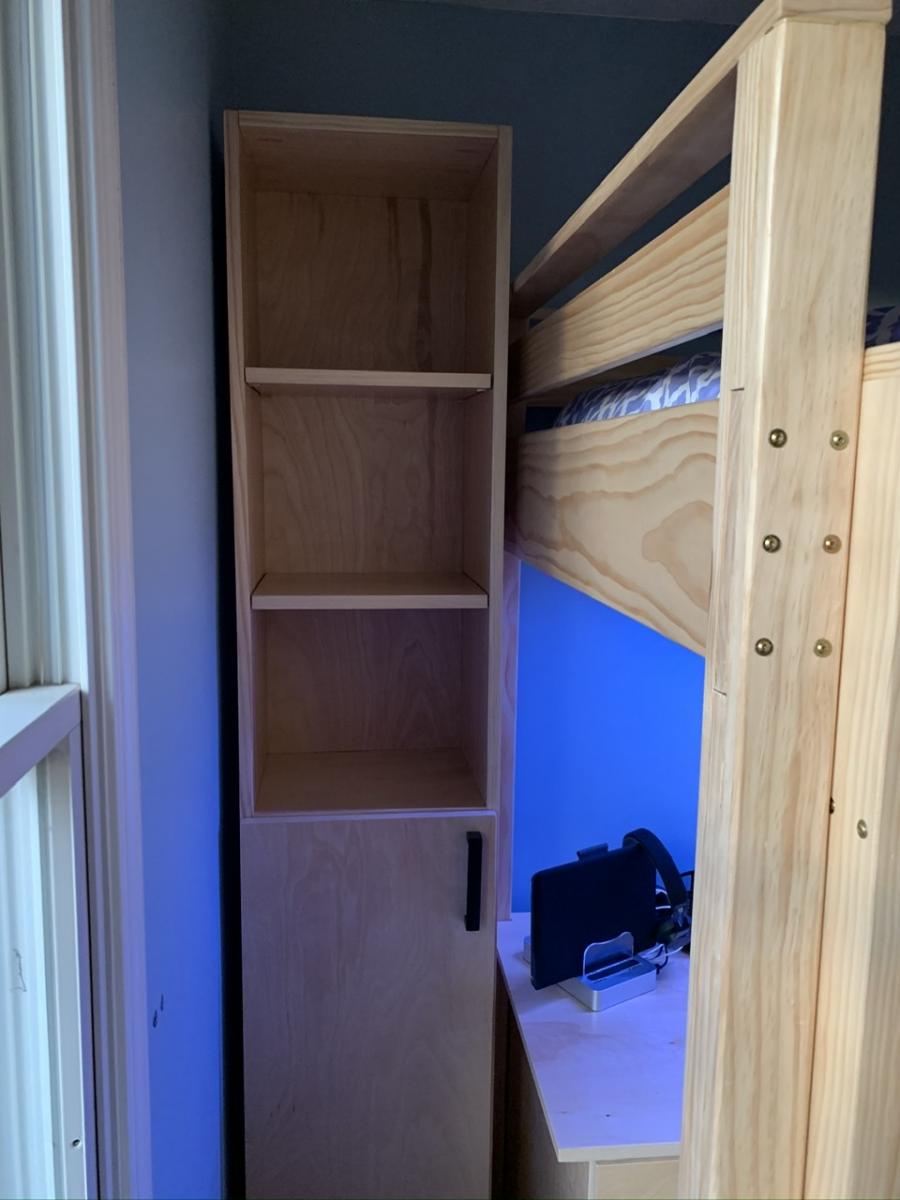
We then adapted the techniques used for the wide bookshelf to build a narrow bookcase (79” tall, 14 1/2” wide) out of two more 10-foot long 1x12 boards. This bookcase sits between the end of the bed and the corner of the room to finish out the look and provide more storage. The top, middle, and bottom shelves are fixed and there are a total of four adjustable shelves (two in the top half, two in the bottom half). We also cut a door and installed it using a pair of full-overlay euro hinges. With these dimensions, the tall bookcase is also capable of working with 11” x 11” x 11” storage cubes just like the wide bookshelf.

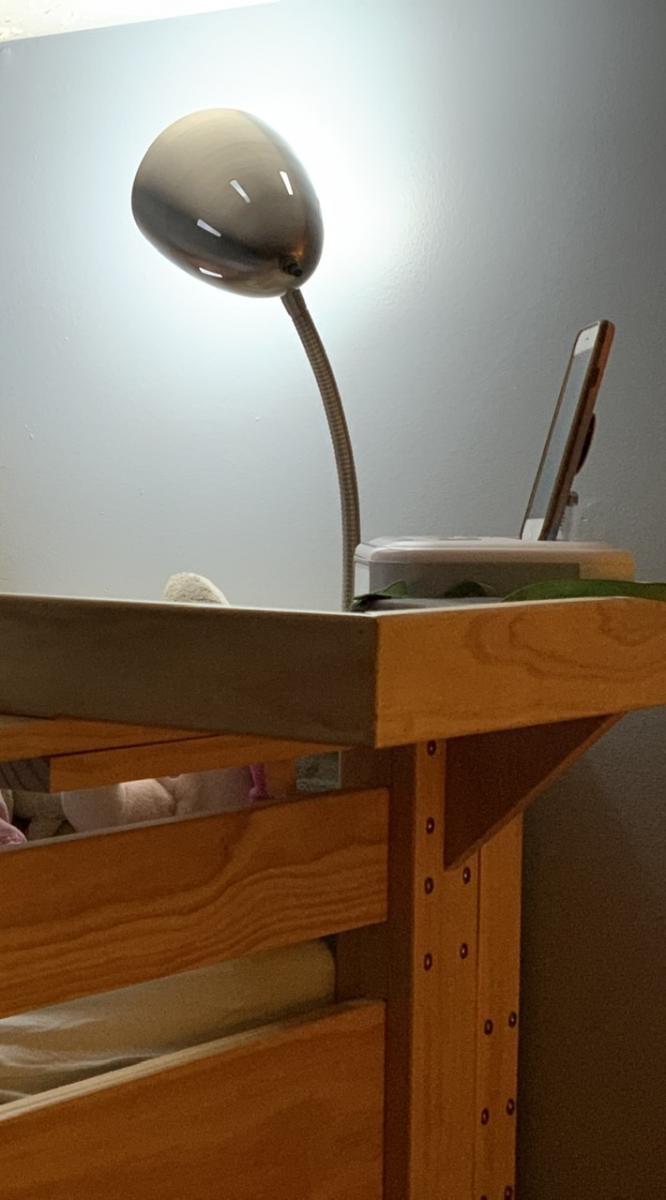
The finishing touch was to create a shelf that attaches to the guard rail and provides a place for my daughter’s alarm clock to sit and be within easy reach. This shelf is made around a piece of the scrap 3/4” plywood that is approximately 21” long and 9” deep. I used leftover 1x3 pine that I glued and nailed to the outside perimeter of the plywood flush with the bottom to hide the layers in the plywood while providing walls around the shelf. I also glued and screwed another 1x3 piece to the front of the plywood, this time flush with the top, as the first piece of a U-shaped grip to slide over the top of the guard rail. Another 1x3 scrap was then positioned, glued, and brad nailed to this front piece to finish the grip. I then cut a triangular piece of wood from a 1x6 to provide additional support under the shelf against one of the vertical pieces of the guard rail. This piece is held in place with counter-sunk screws that go through the top of the plywood shelf down into E-Z Lok threaded inserts in the top of the triangular wood support. The whole shelf assembly is only attached to the guard rail so that I can still easily remove the rail to change bedding on the mattress.

The whole project is constructed out of Home Depot select pine boards and birch plywood. Throughout construction, I used a 3/16” round-over bit in a router to eliminate sharp corners pretty much everywhere on the bed itself (legs, rails, ladder, etc.). I didn’t use this on the bookshelves, the file drawers, or the desk. Edge banding was used to hide any exposed plywood edges. I used 200-grit sanding discs and an orbital sander to sand the various pieces during construction and before finishing. The entire thing is finished with two or three coats of Minwax Polycrylic water-based polyurethane, sanding between coats, which gives this a nice smooth finish and lets the richness of the wood grain come through.

Hopefully the pictures I’ve posted can help understand the write-up on modifications to the project. I enjoyed building this a lot, and my daughter really loves what this did to her room to make it much more usable! That was worth all the effort and time right there.

Ana, thanks a million for the plans!!
Estimated Cost
$750 in materials for wood, LED lighting, tempered glass shelf, etc.
Estimated Time Investment
Week Long Project (20 Hours or More)
Finish Used
Minwax Polycrylic, Satin finish. Used Shur-Line 3.5” x 7” White Fiber pads to apply on most flat surfaces, with foam brushes to get into corners and apply to edges. For complex pieces like the ladder and guard rail, used Minwax Polycrylic Satin spray. Sanded between coats with 320-grit sandpaper in all cases. Used two coats when doing pad application; four coats when doing spray application.
Recommended Skill Level
Beginner

Christmas Cedar Planter

Submitted by LampAtFeet on Tue, 12/10/2019 - 19:21

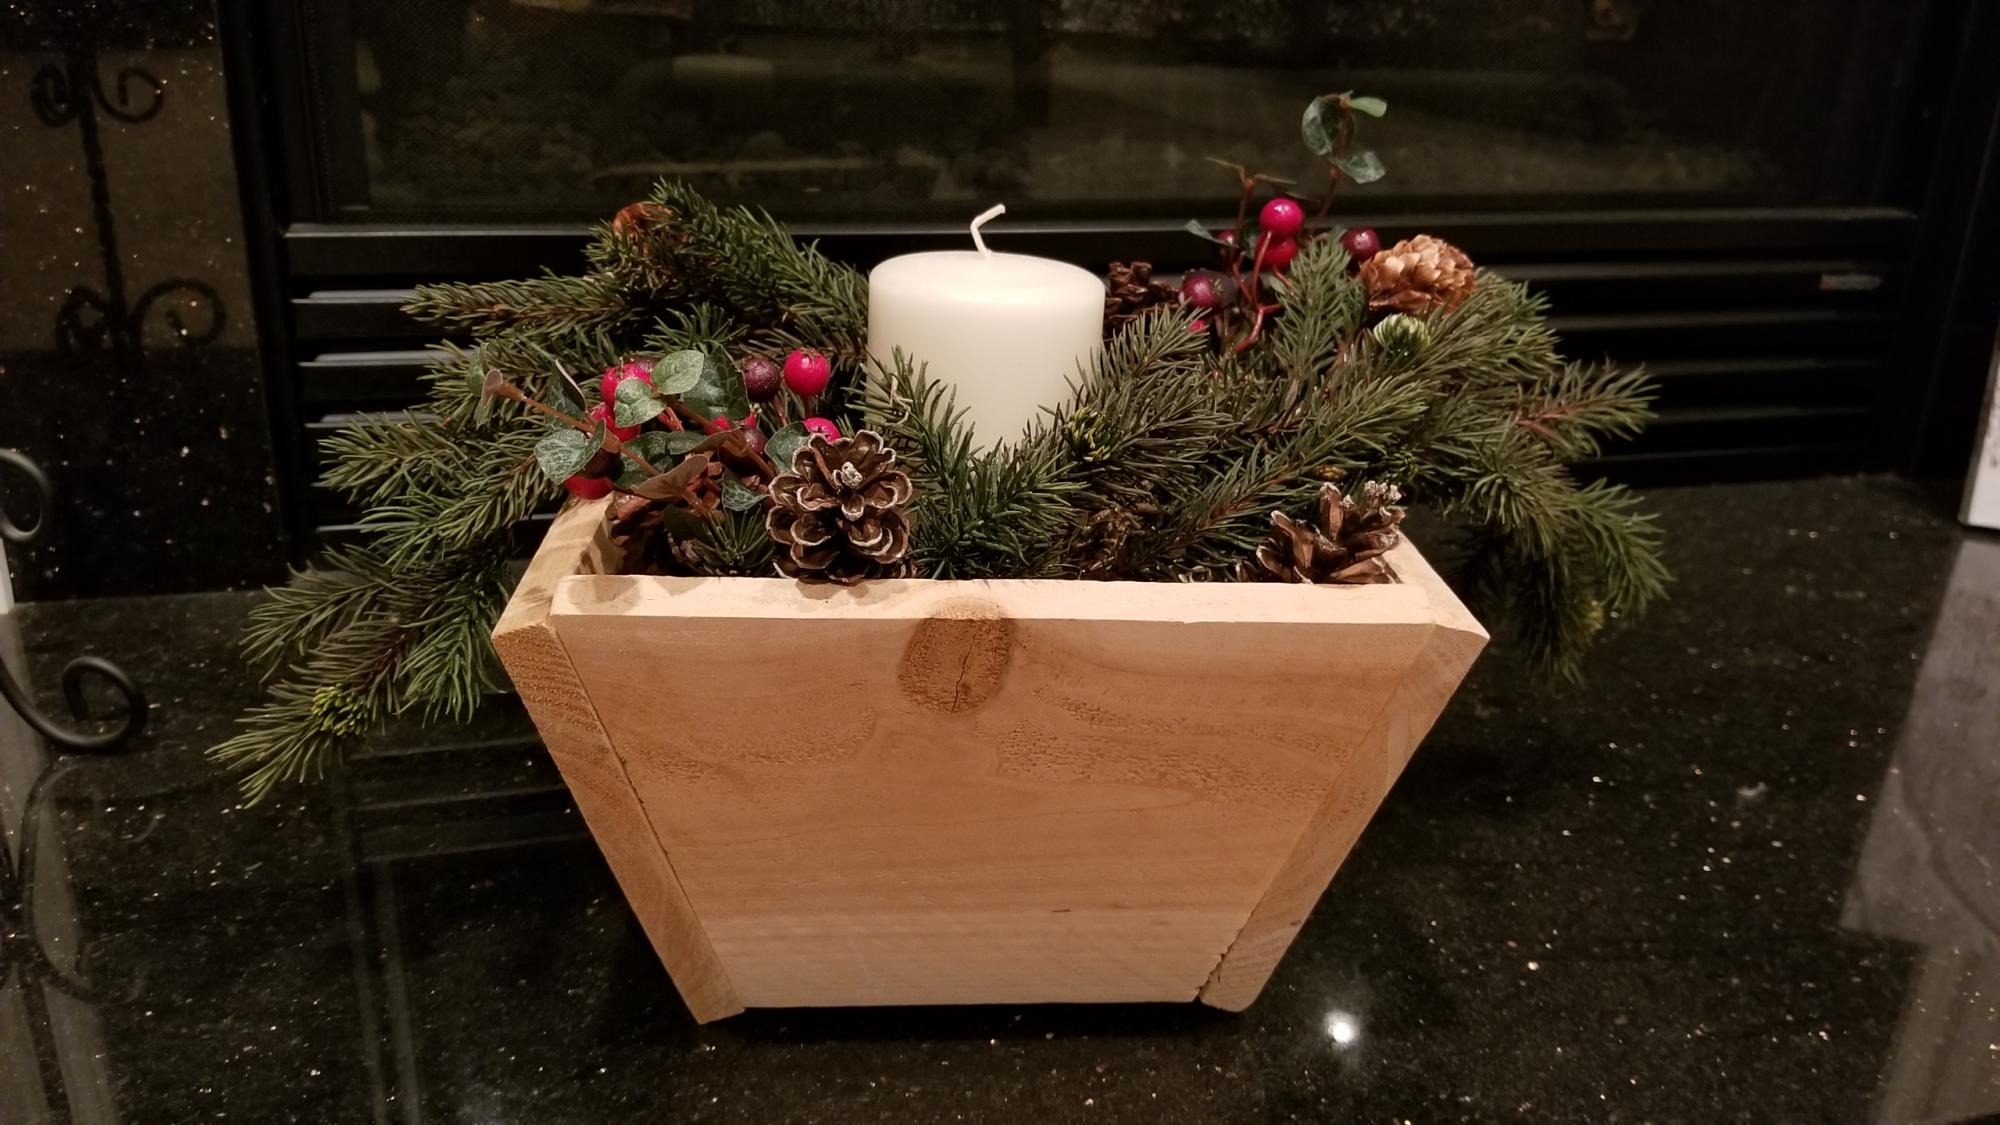
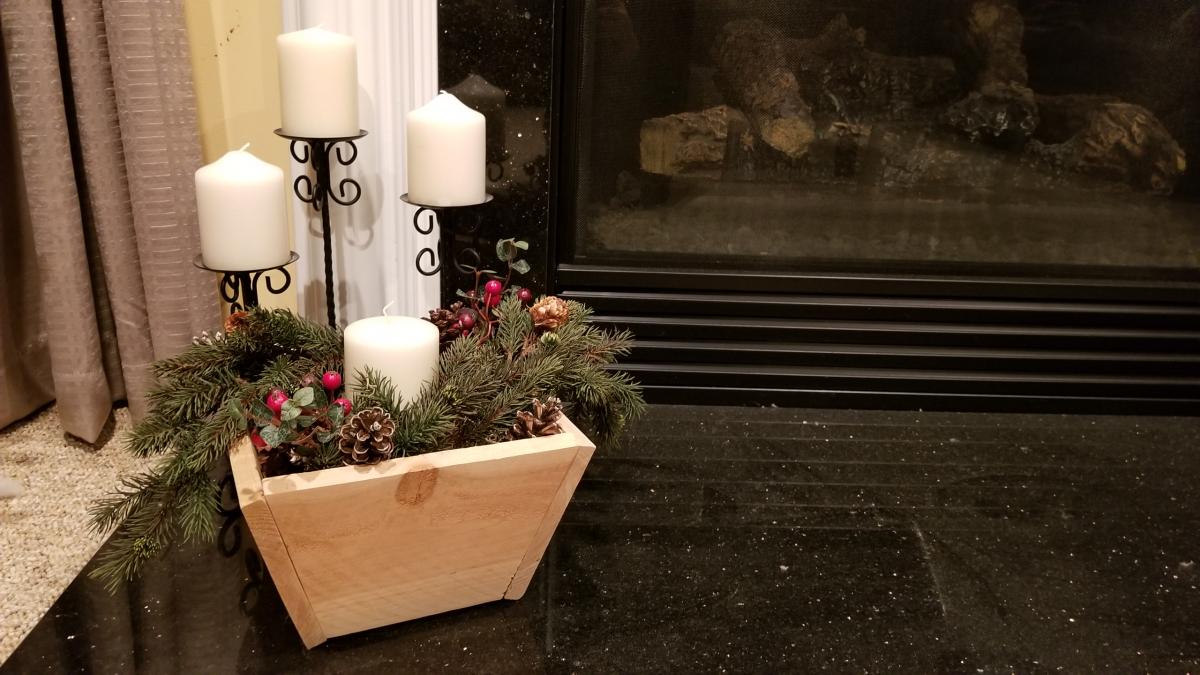
I loved the plans for the cedar planter. It was a quick build and it's such a versatile item. I left the wood natural to give it a more rustic look. I'm planning to make a longer planter to use as a gift basket for Christmas gifts. 

Estimated Cost
$2
Estimated Time Investment
An Hour or Two (0-2 Hours)
Finish Used
Wipe on satin polyurethane
Recommended Skill Level
Beginner

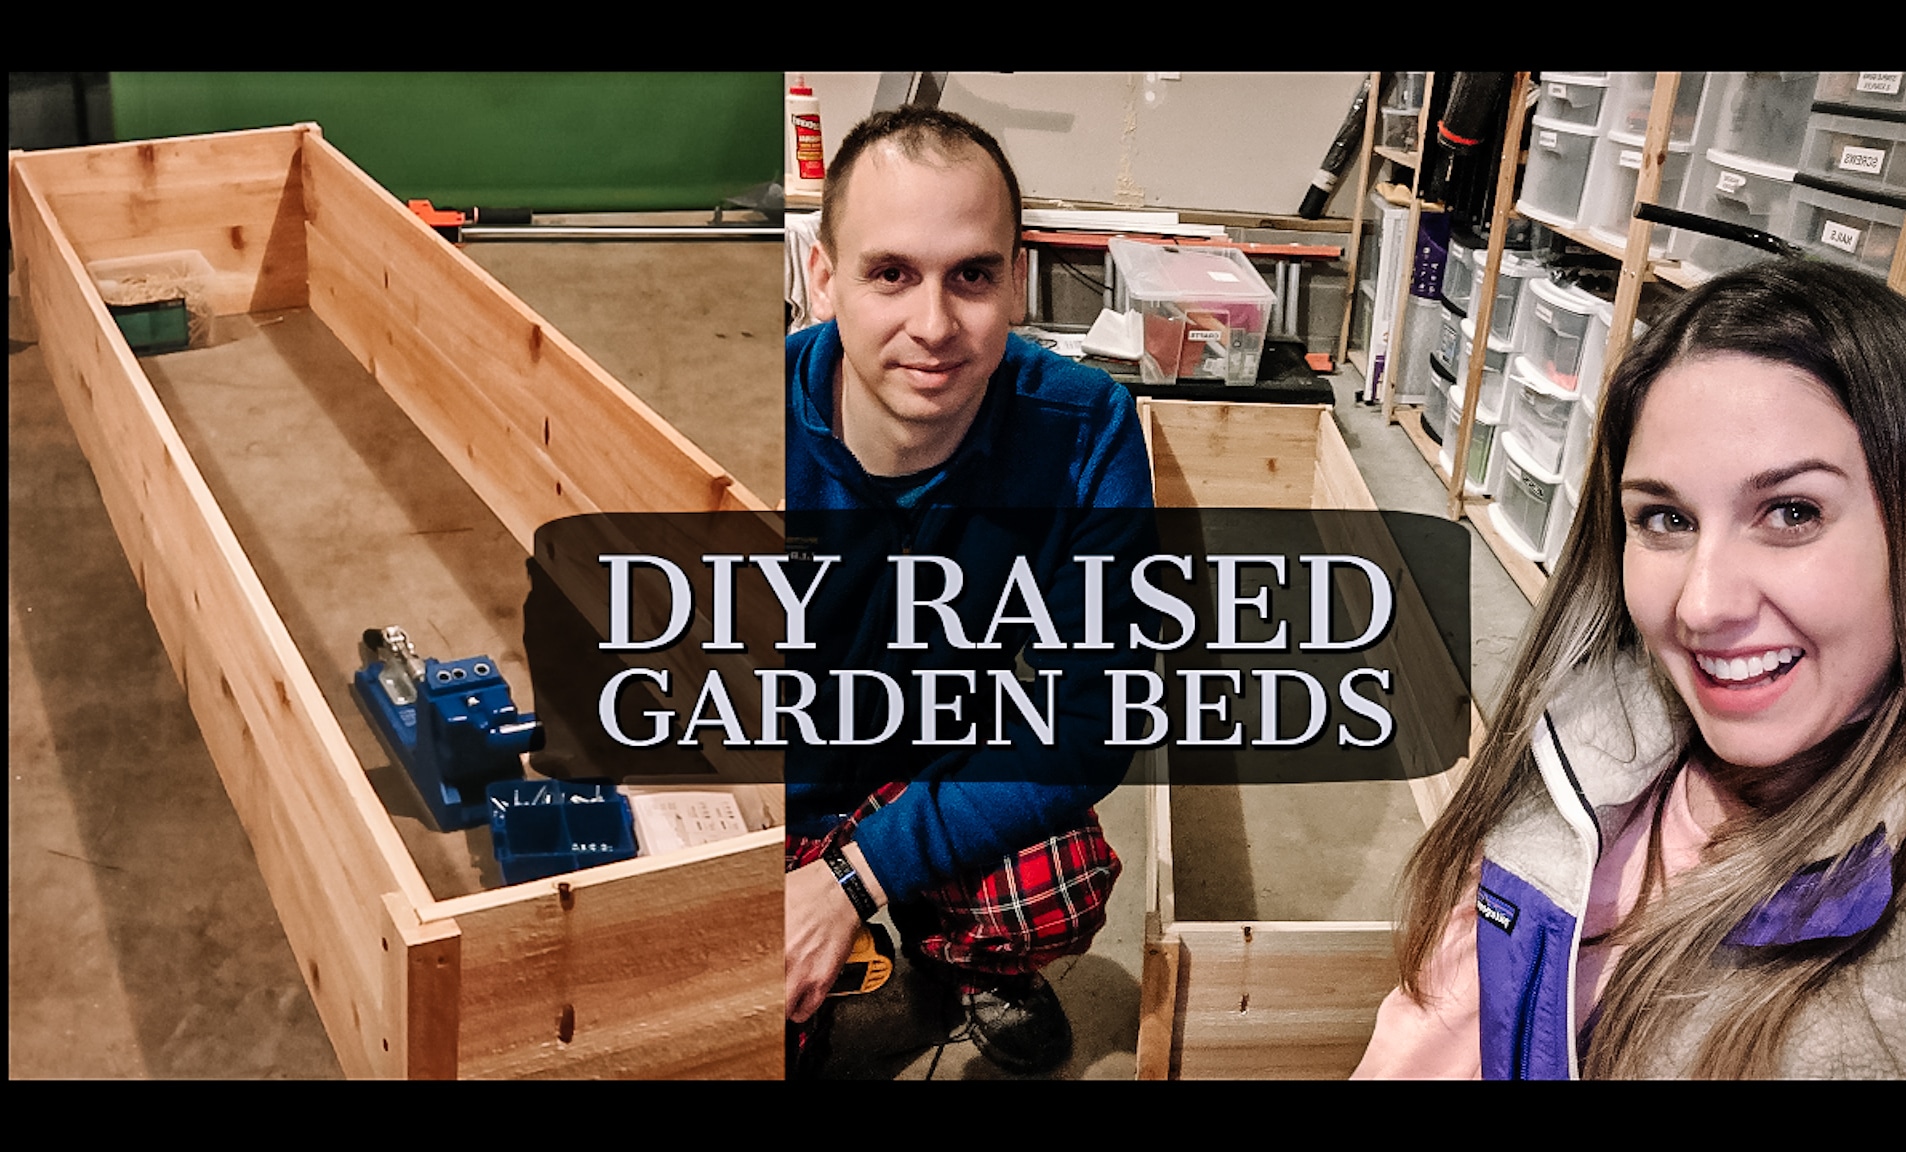
Cedar Raised Garden Beds

We made two $10 raised beds last weekend and can't wait to get them in the yard!

The cedar fence pickets ended up costing us about $15 per bed with another $15 for screws, so total cost was about $30 per bed. 

We found it tricky to do the 1x2 pieces in the order recommended and when we make these again, will form the full box and then add on the 1x2s for support. 

We made a YouTube video detailing the process - hope you'll check it out!

Estimated Time Investment
An Hour or Two (0-2 Hours)
Finish Used
None
Recommended Skill Level
Beginner

Farmhouse Bed - Standard King Size

Submitted by jusgre on Wed, 03/25/2020 - 19:47

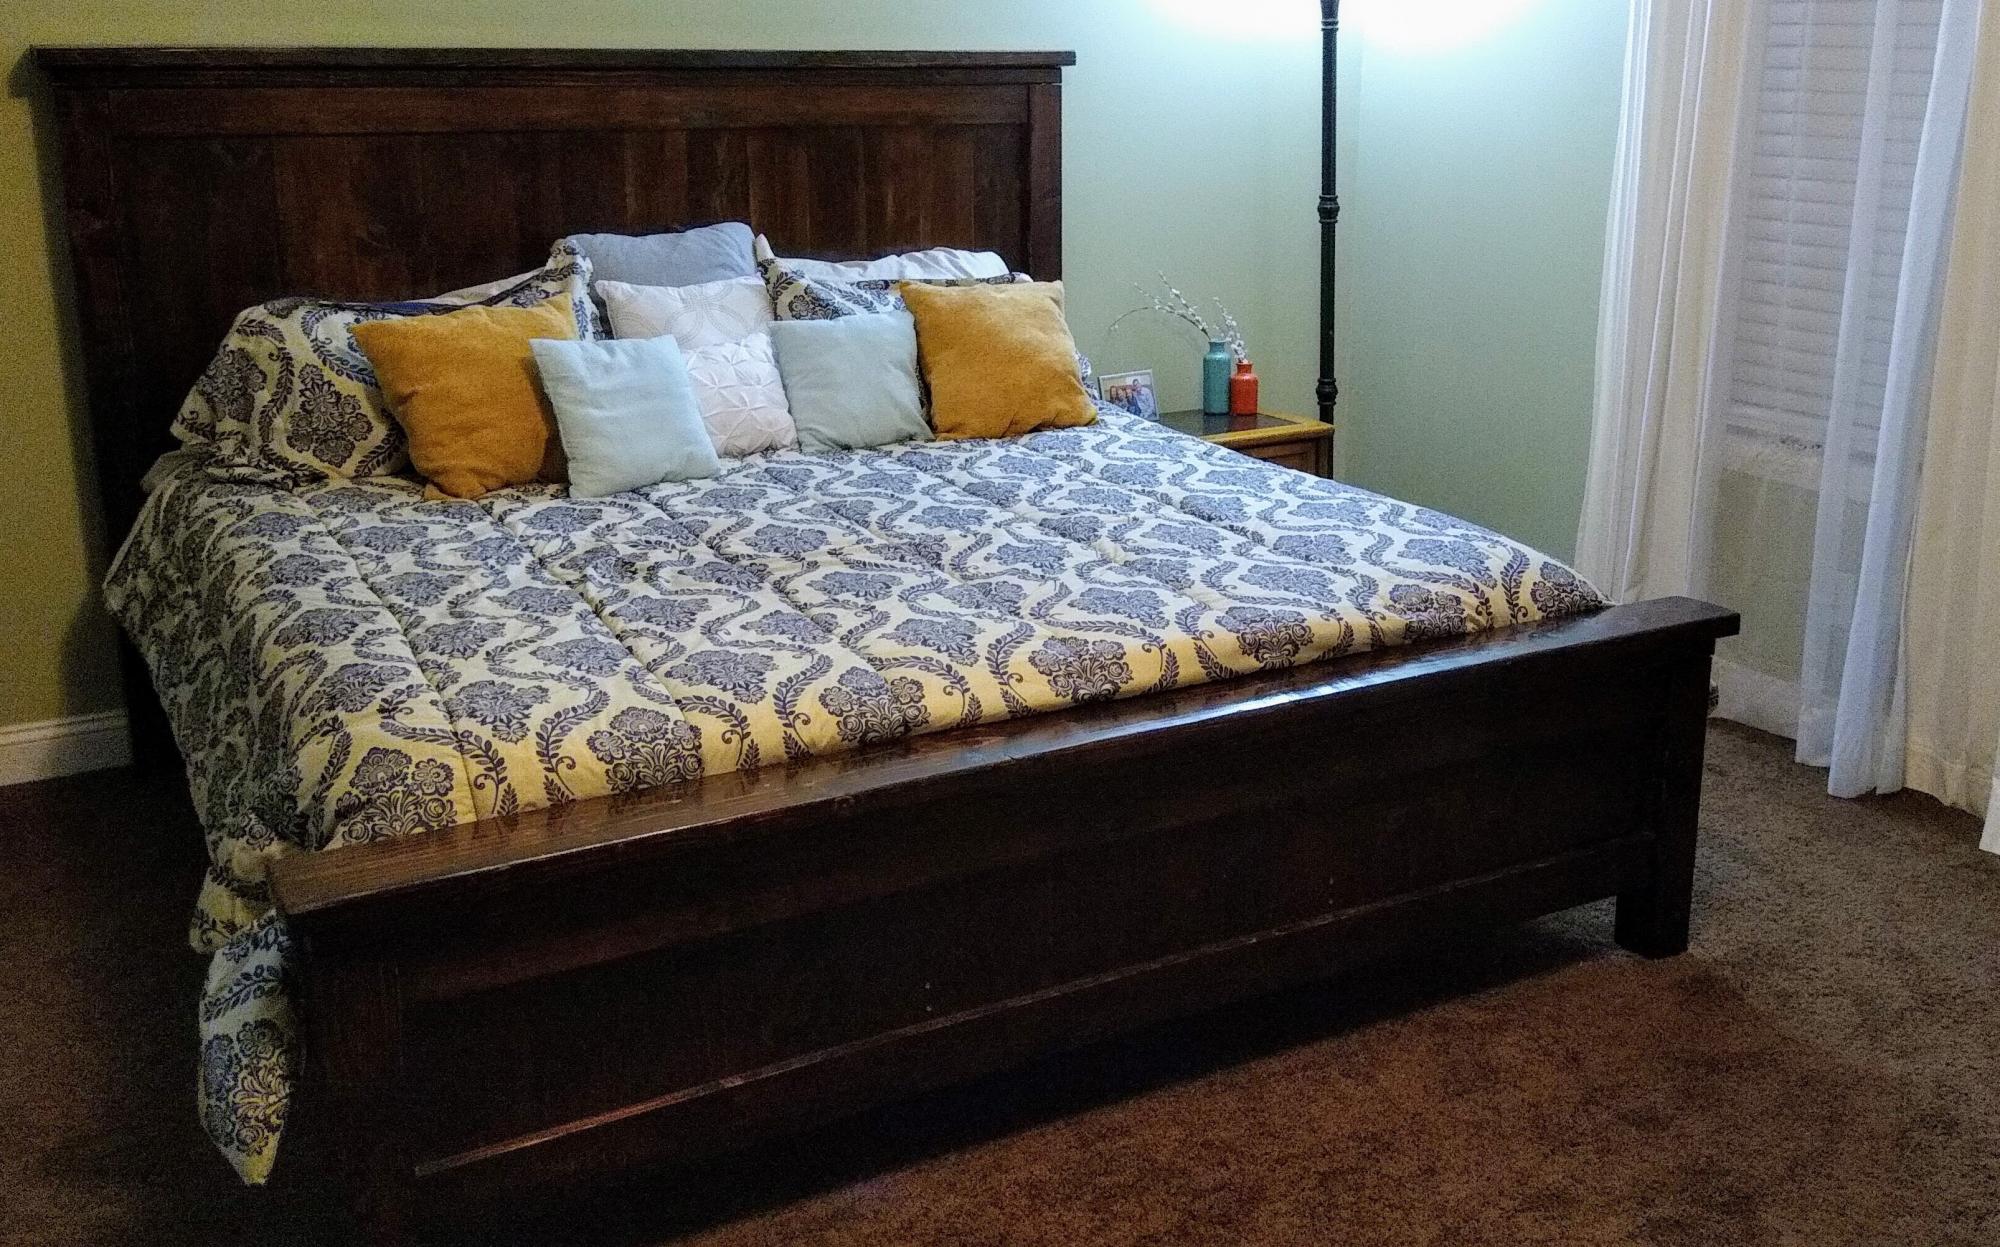
Really loved these plans and they produced a beautiful product.  The only minor change I'd make is to double the number of support slats.  Our Casper mattress requires gaps less than 3" between each slat.  Thank you for the plans!

Estimated Cost
$430
Estimated Time Investment
Weekend Project (10-20 Hours)
Finish Used
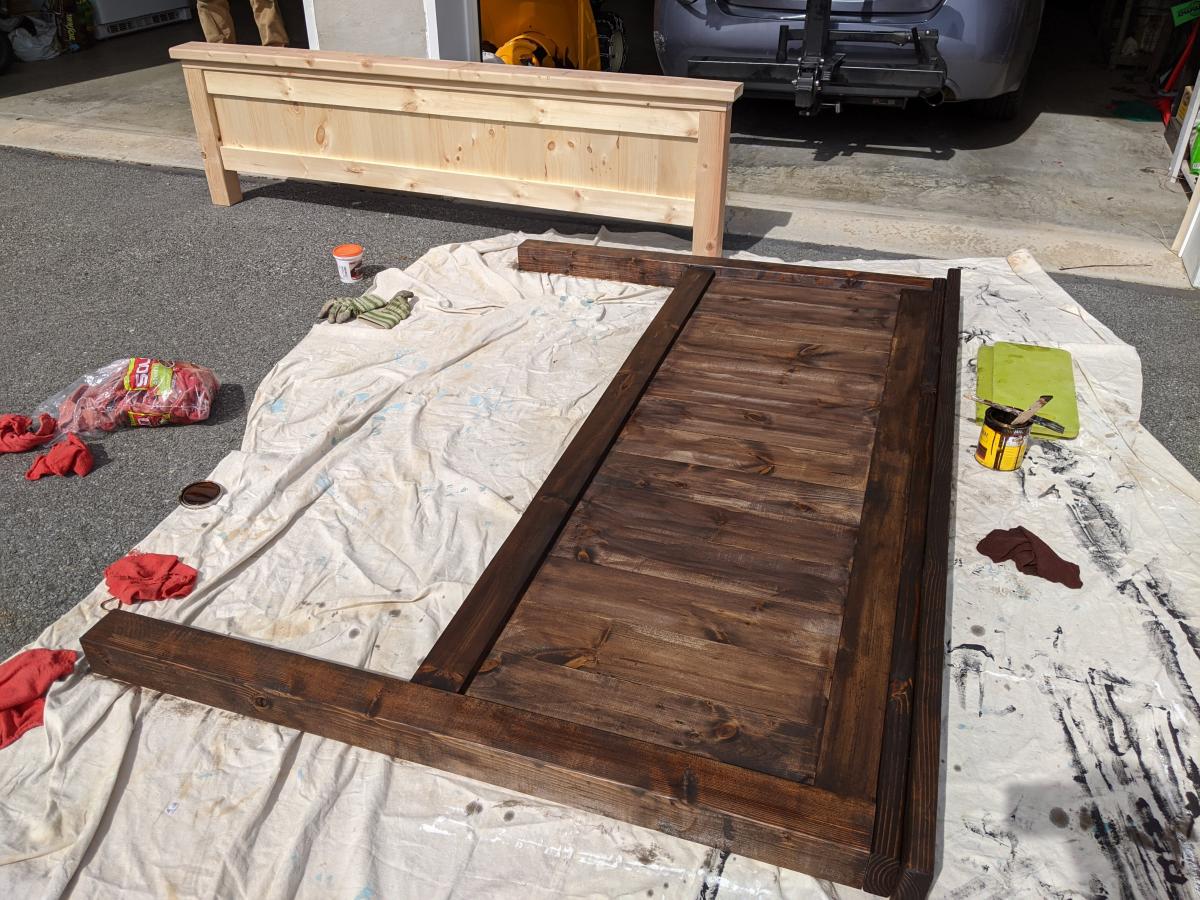
Minwax Honey Stain + Minwax Wipe-On Poly
Recommended Skill Level
Beginner

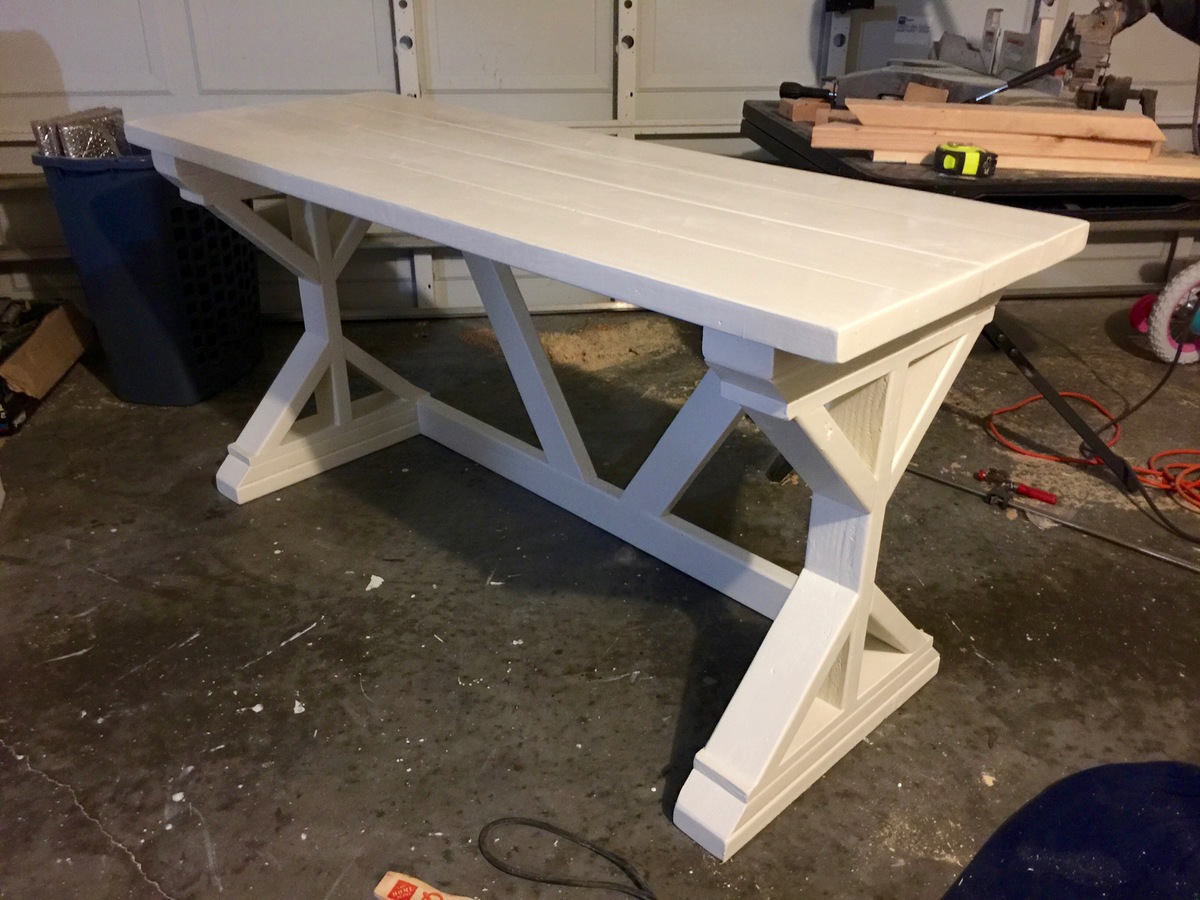
Alabaster White X Desk

Submitted by Anonymous (not verified) on Tue, 08/09/2016 - 09:58

Shortened to 5ft length.


  I used a lot of extra screws in the legs for additional supports, and filled all the gaps and screws with wood filler. I also used electric planer on top to flatten surface and then sand, sand, sand. 

Built from Plan(s)
Estimated Cost
$40 (not including the paint)
Estimated Time Investment
Weekend Project (10-20 Hours)
Finish Used
Alabaster Satin Paint
Recommended Skill Level
Beginner

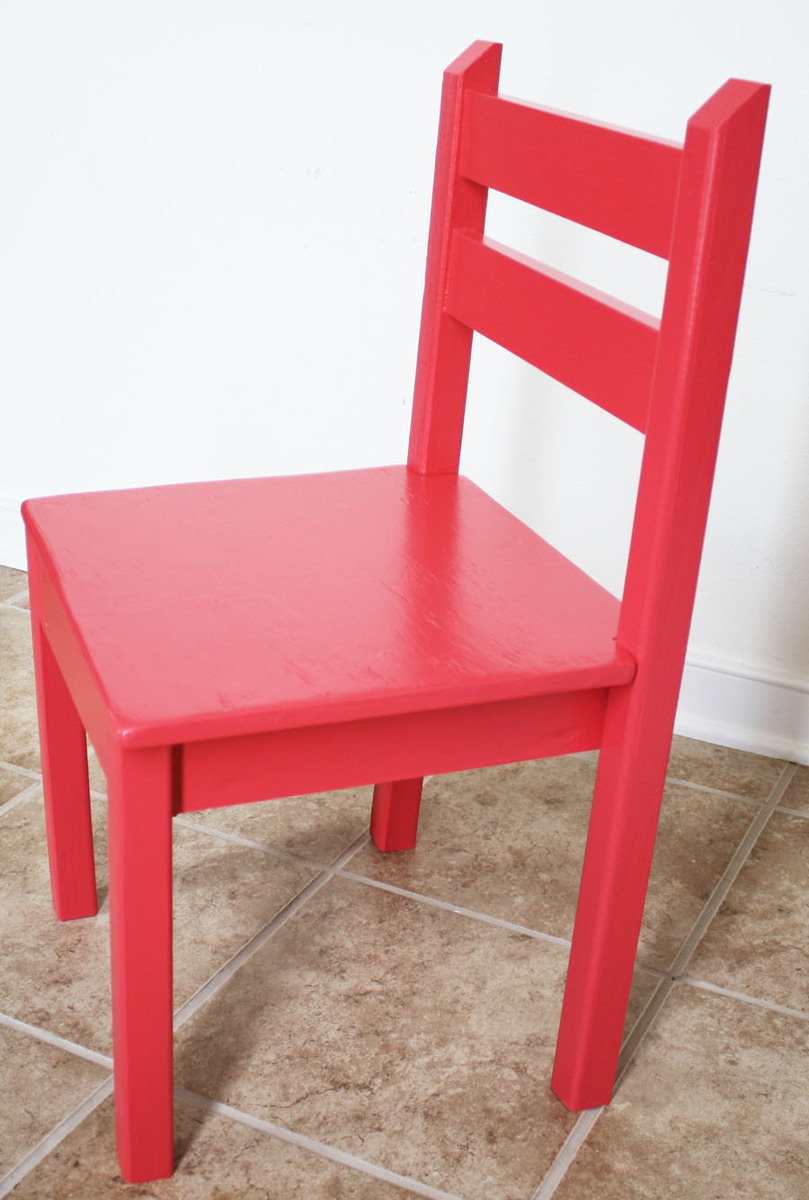
Kiddie Chairs

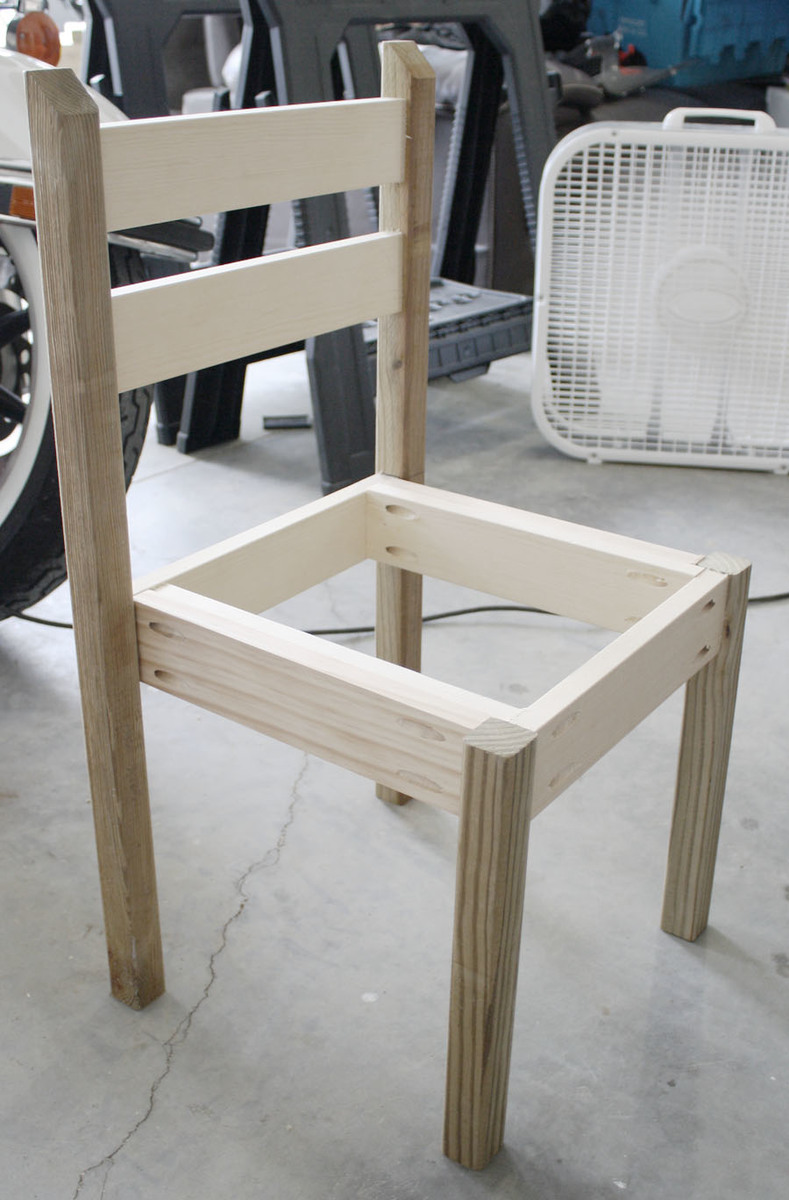
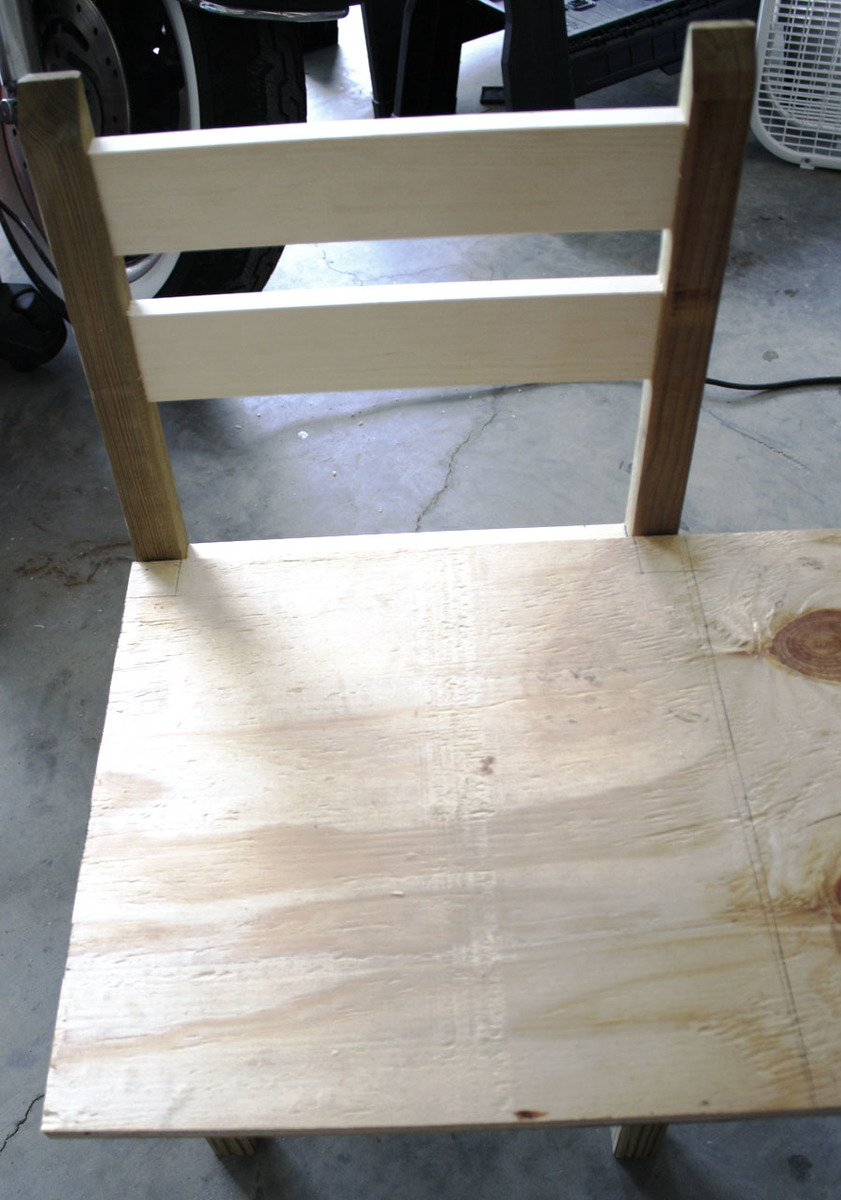
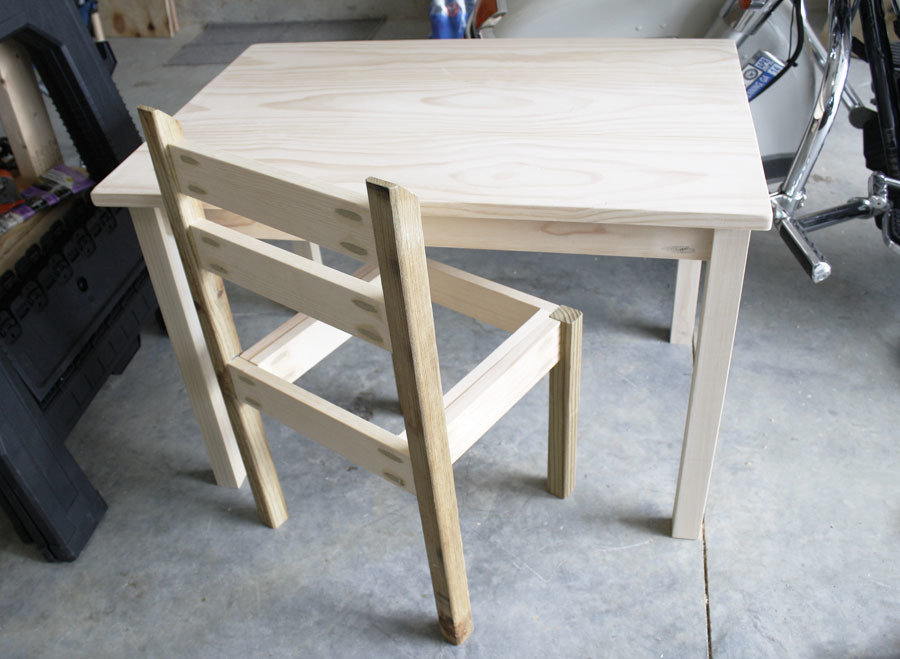
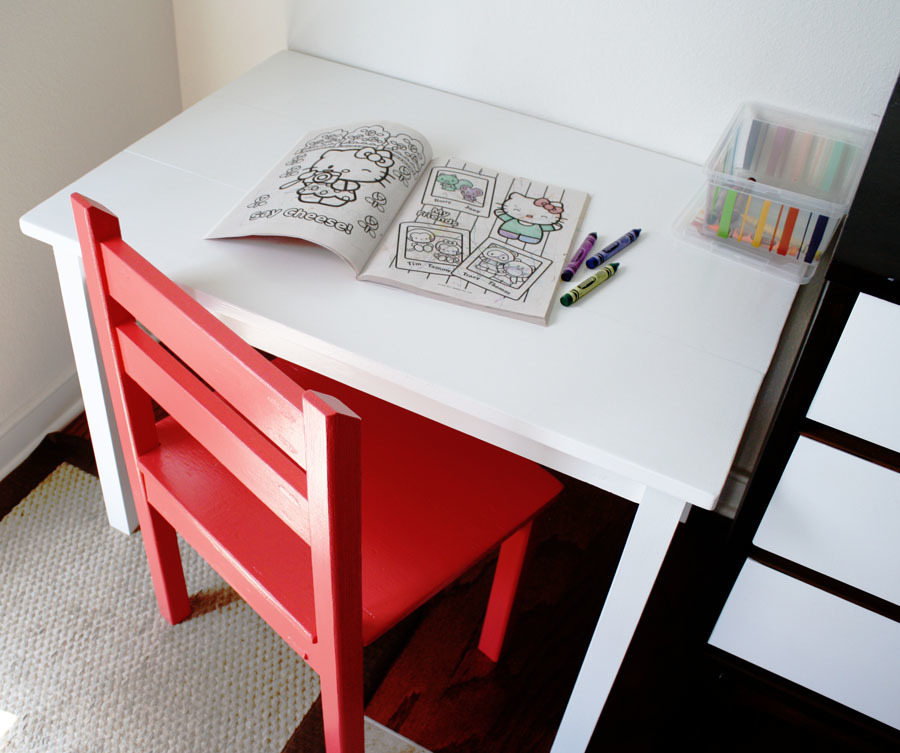
These chairs were easy to build, although I modified Ana's plans a little bit. I opted for solid wood 2x2s for the legs (I wanted it to be sturdier), and a solid seat instead of a slatted one. I notched out the back of the seat so it would fit flush against the back legs. Because of my modifications, my chair was just a couple bucks more.

Also, I was so excited to find solid wood balusters for the chair legs - they're not only better quality, but cheaper than furring strips!

Check out my blog link for a complete play-by-play!

Estimated Cost
$7.00
Estimated Time Investment
Afternoon Project (3-6 Hours)
Finish Used
Primed with Zinsser 3-in-1 Primer, then painted with Red Valspar Paint found in the "Oops" section of Lowes. Three coats of Rustoleum Satin Polyurethane.
Recommended Skill Level
Beginner

Comments

Western Saloon doors

Submitted by tracysmith on Thu, 08/02/2012 - 00:44

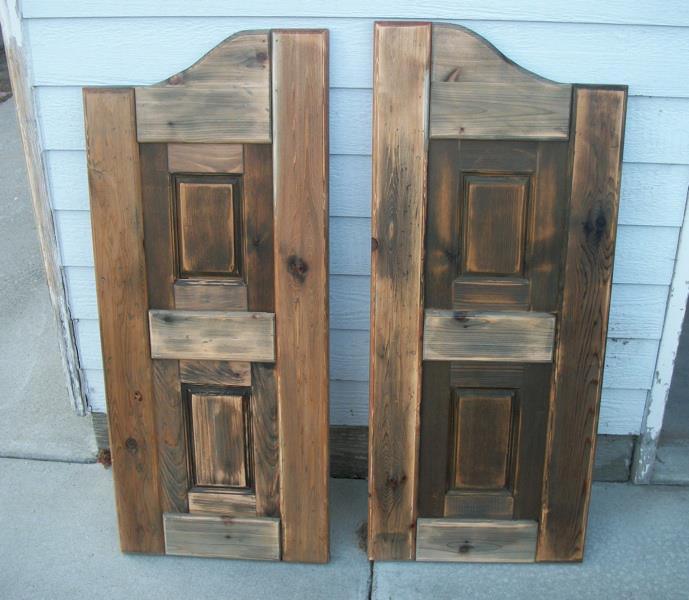
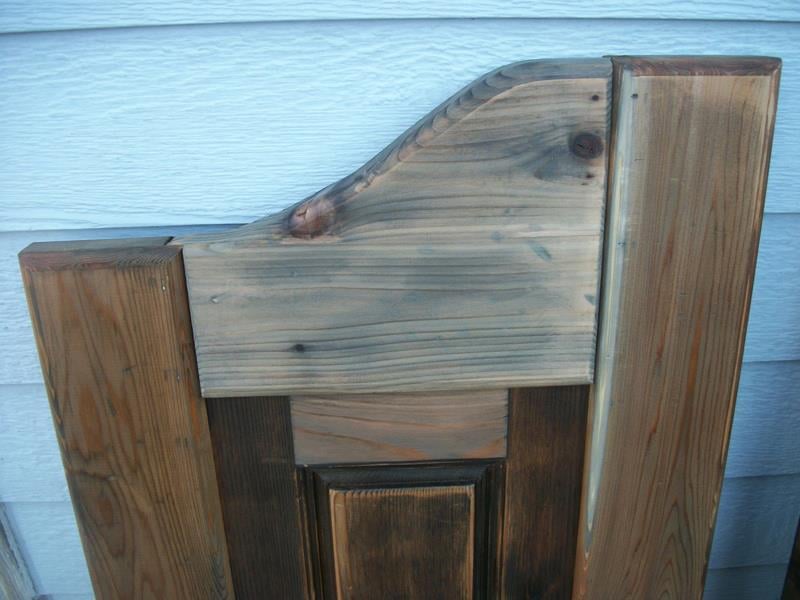
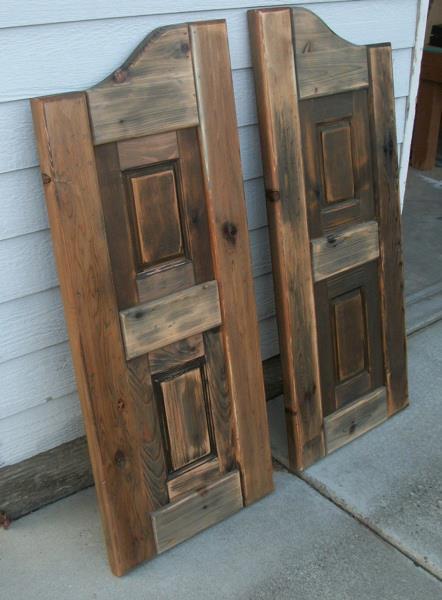
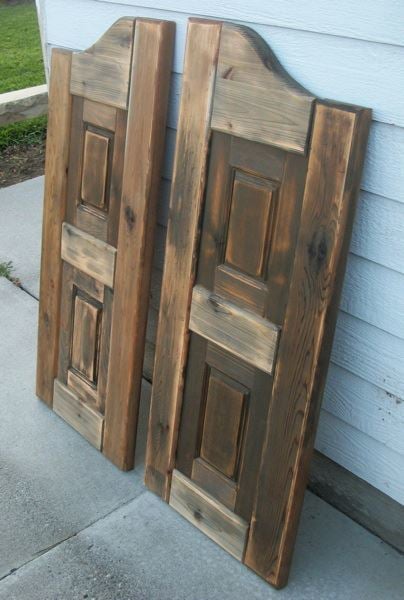
I built these doors for a very good friend of mine who actually helped me get started turning my new love for building (after finding Ana's site) into a way for our family to make some extra money.

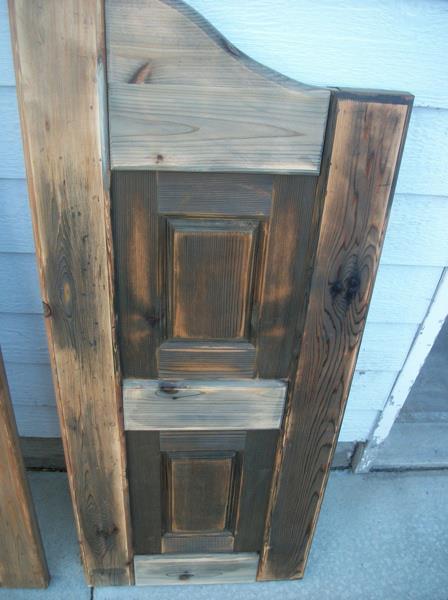
It took me a little while to wrap my brain around building something without using my Kreg Jig. I used a router table set up with some raised panels bits and put the whole thing together with glue and nails! Wonderful experience!

For the finish, I used a vinegar solution to give the cedar wood an old barn look. I think the final result turned out great and the final step was a clear coat sprayed on out of a rattle can.

Estimated Cost
Lumber cost was about $80
Estimated Time Investment
Week Long Project (20 Hours or More)
Finish Used
Vinegar solution and a clear coat put on.
Recommended Skill Level
Advanced

Comments

birdsandsoap

Thu, 08/02/2012 - 10:51

These turned out great! I haven't seen this style of door in forever! They used to be really popular, I remember my Aunt and Uncle having these in the entry to their kitchen. They were the coolest thing ever when I was a kid! Maybe they are a making a comeback?
I'm really impressed with your routing skills, that's a task I have yet to tackle, but I've got the bits laying around waiting.

Nice job!

tracysmith

Thu, 08/02/2012 - 21:10

Thanks a bunch! My friend is replacing an old set of louvered doors that went into her laundry room. Her family are farmers and rodeo people so the western decor really fits in their house. Great western stuff there. They made a chandelier out of a wagon wheel! Really cool!

This was my first attempt at routing so I really appreciate your compliment! It's really simple if you can get the basics of it. I'm sure you'll do just fine when you get to that point. If I can do it, anyone can do it! Thanks again!!
laneal1987

Mon, 01/23/2017 - 09:32

I really want to try and build this for a closet.  Are there any instructions for this?  This is the first door of this style that I have come across that I absolutely love.

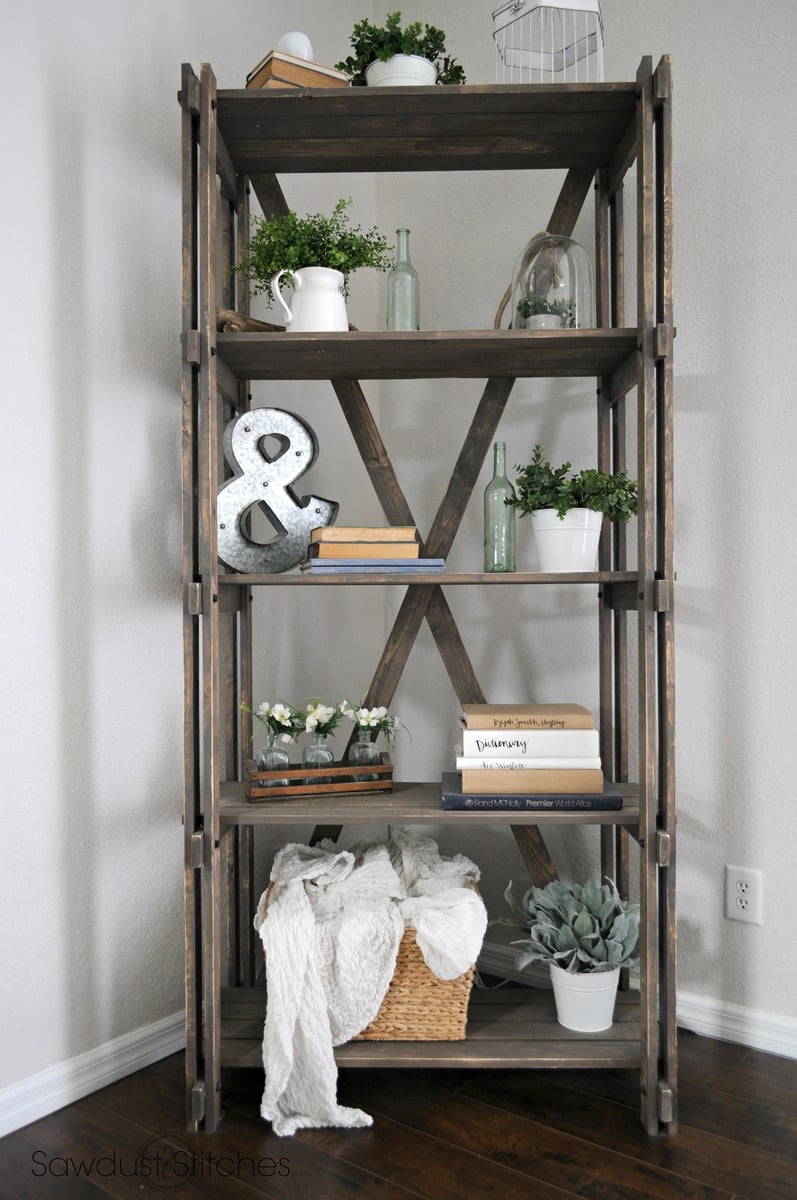
Arhaus inspired bookshelf

 Awesome rustic book case that was inspired by an Arhaus table. It is a fun twist on a traditional  book shelf with  tons of character! 
Estimated Cost
$55 -$75
Estimated Time Investment
Afternoon Project (3-6 Hours)
Finish Used
Briarsmoke Stain "Varathane"
Recommended Skill Level
Beginner

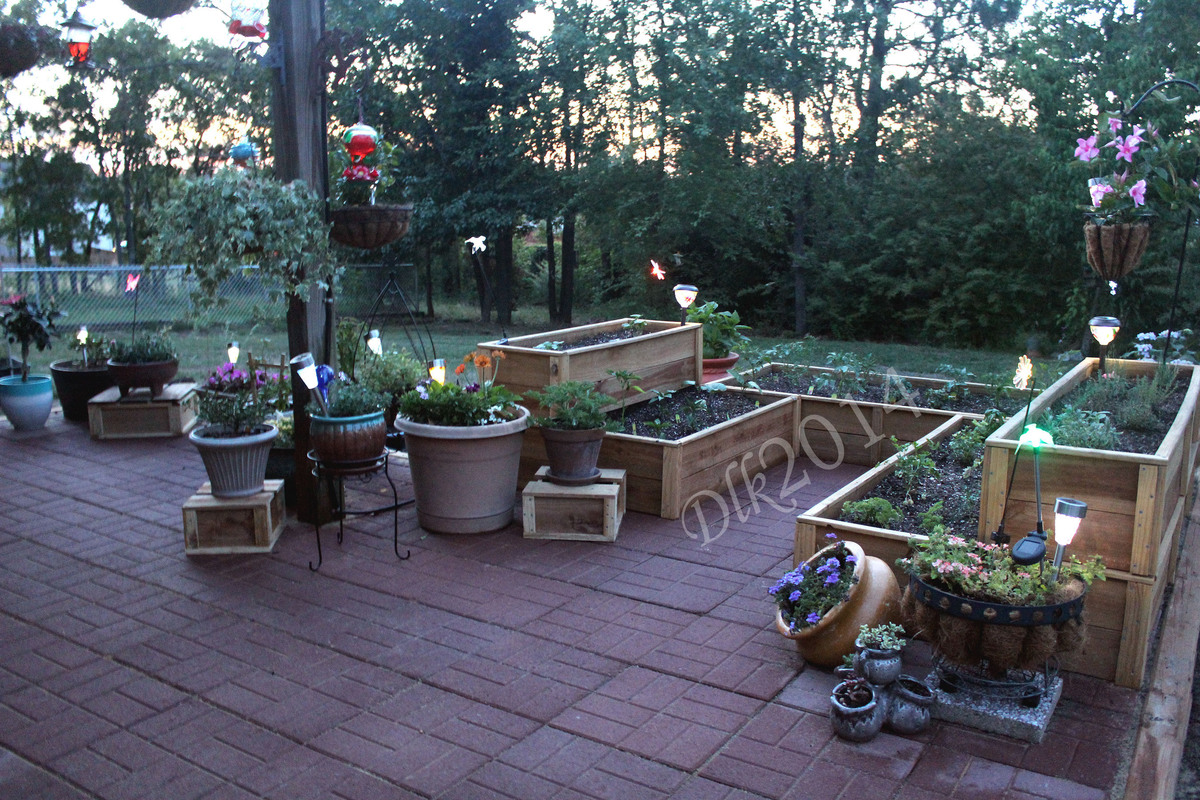
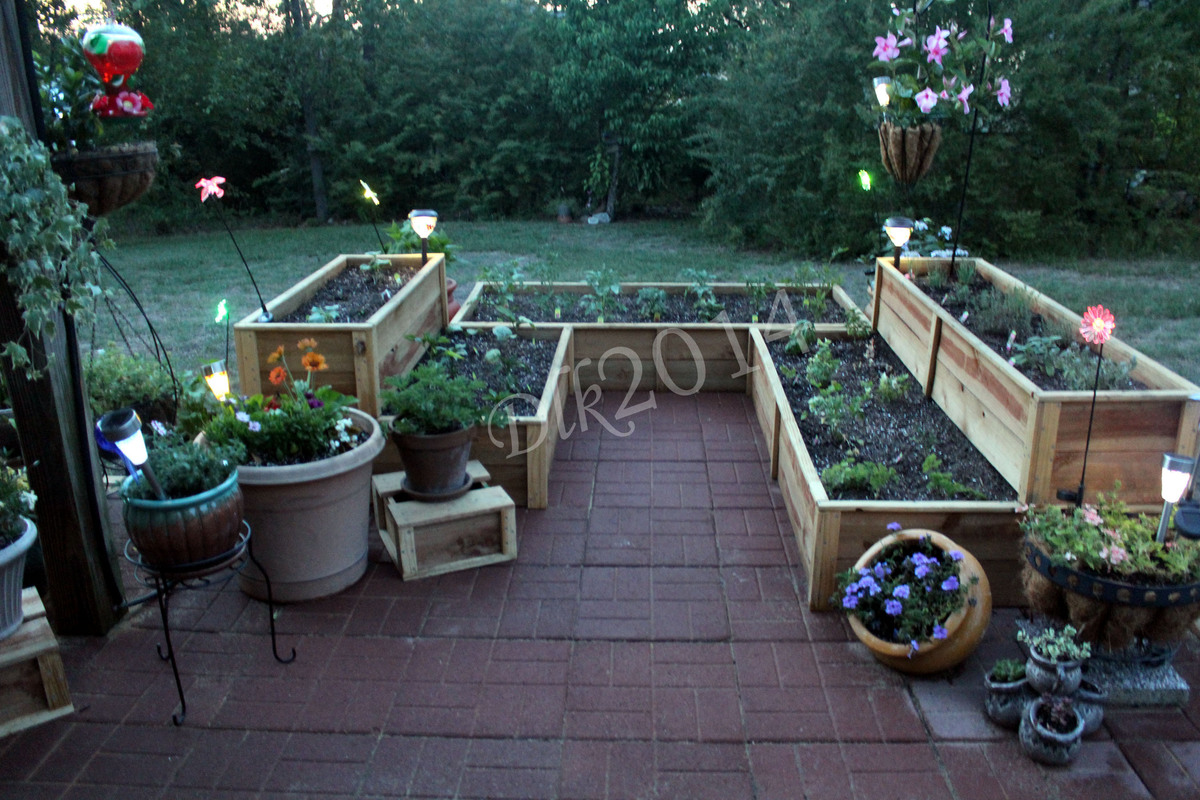
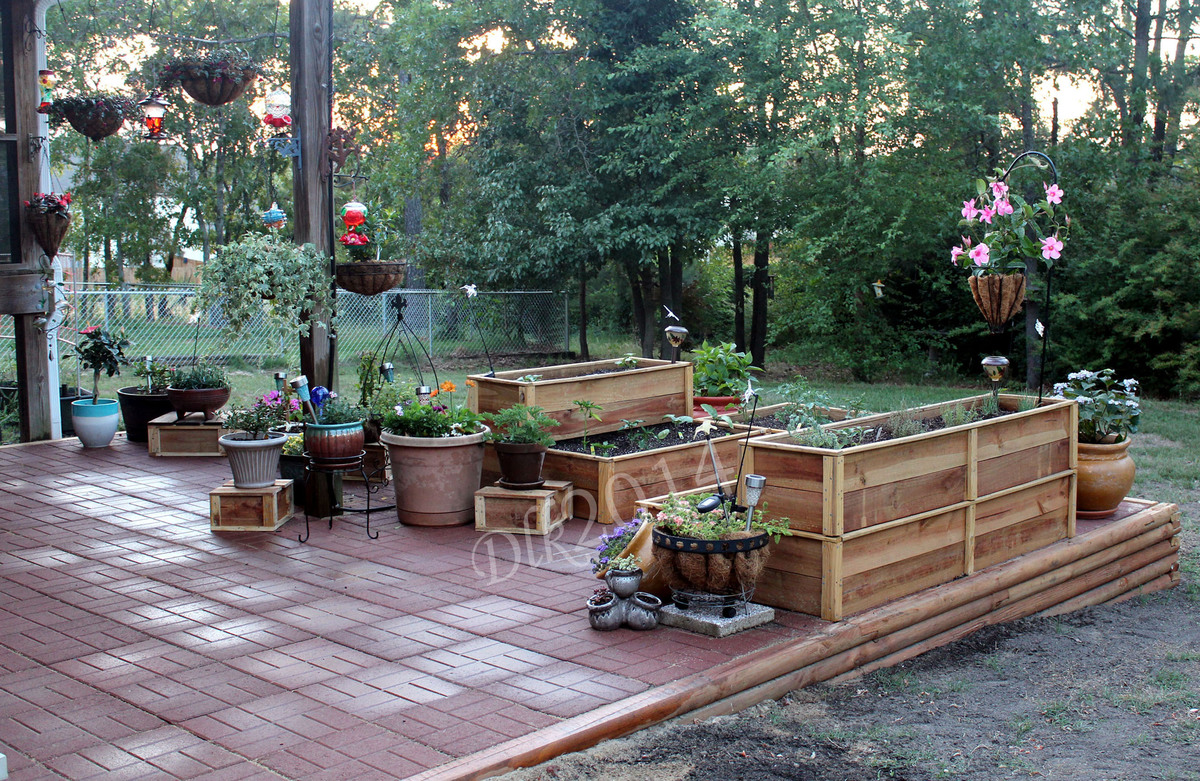
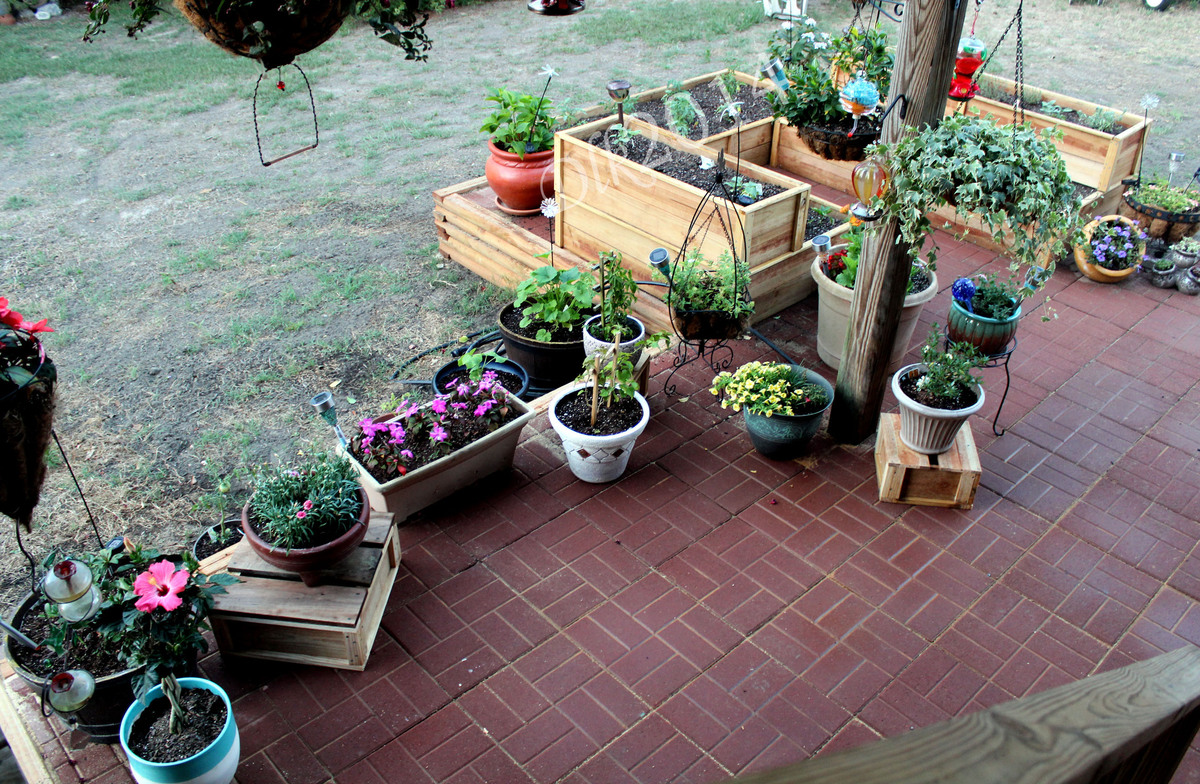
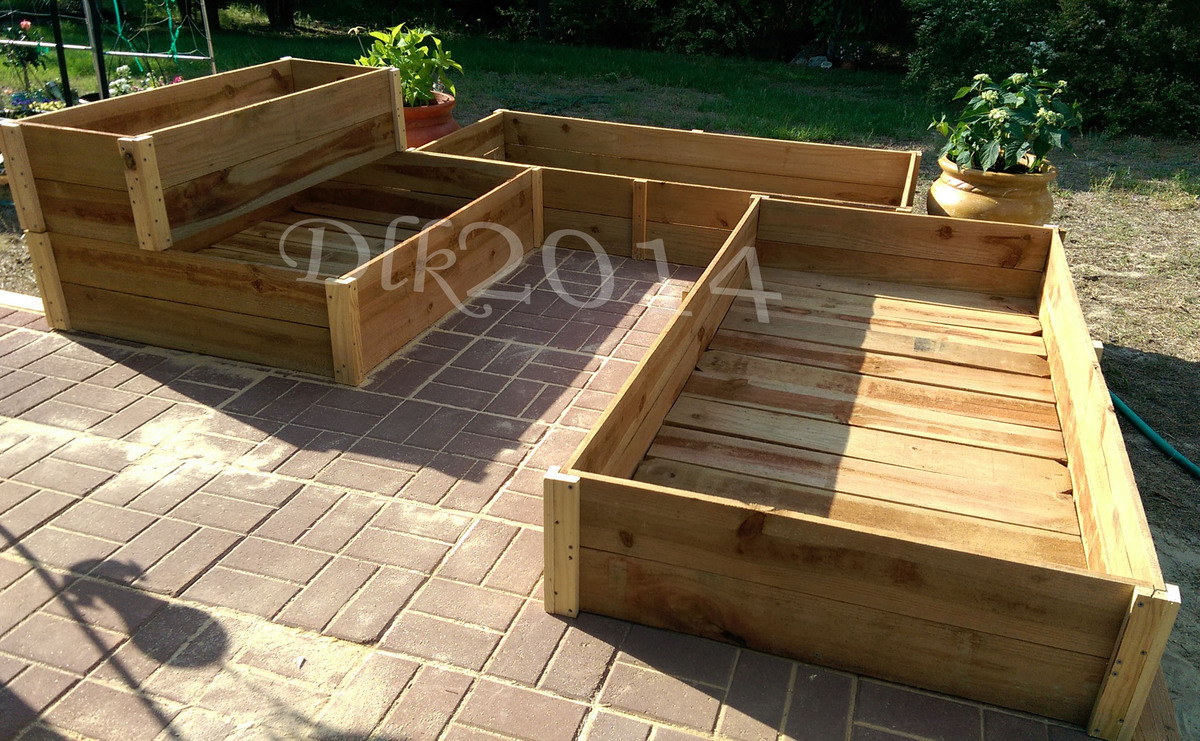
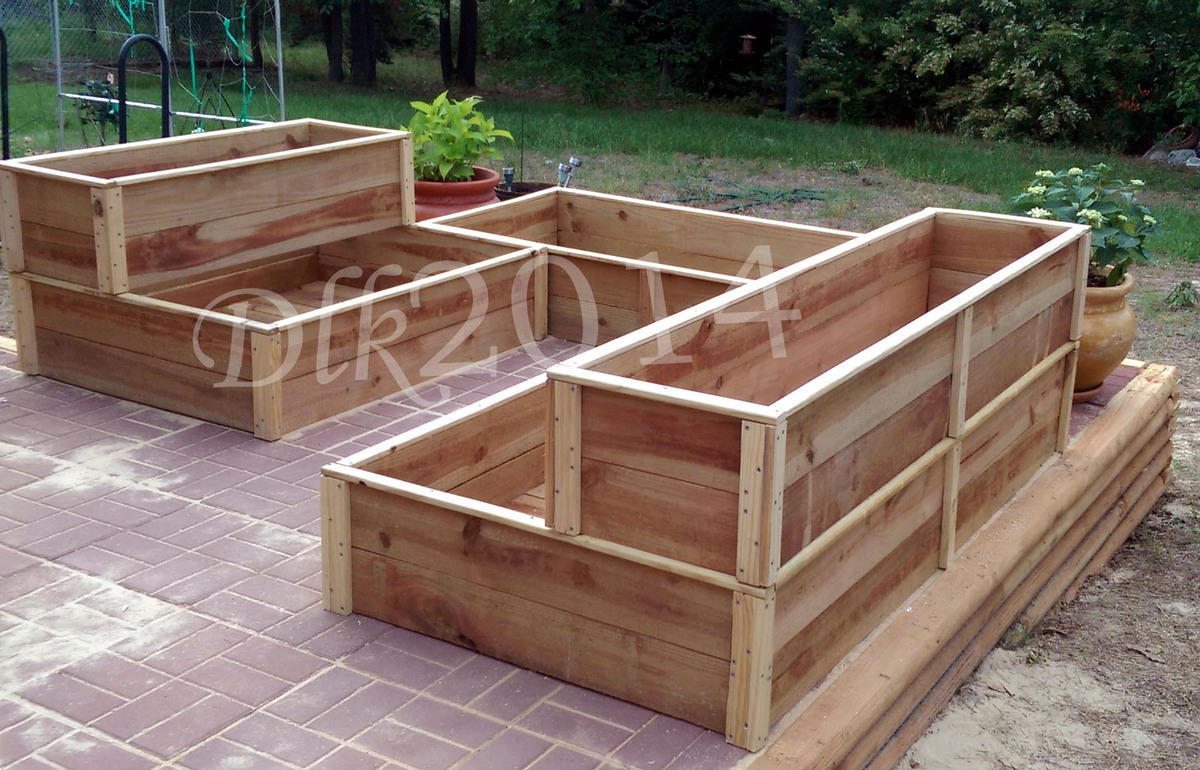
Raised Garden Beds

Submitted by Deekra on Sat, 06/07/2014 - 16:31

I used the basic Raised cedar garden bed plans with a few alterations. I made them different sizes, stacked one on top of the other for some dimension in my garden and secured them together from in inside.

Estimated Time Investment
Week Long Project (20 Hours or More)
Recommended Skill Level
Intermediate

Comments

Backpack Locker Cabinet

Submitted by jwerne2 on Thu, 08/23/2012 - 09:04

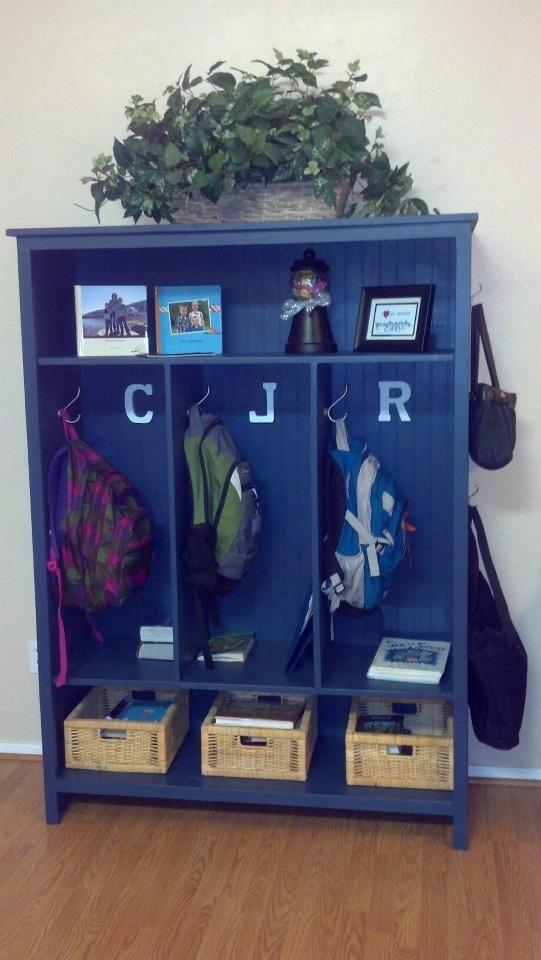
Thank you so much, Ana, for posting these plans. My husband built the storage locker in a few hours last Saturday. Our only modification was to use beadboard for the backing instead of plywood, and to switch out the 1x12's for 1x16 project panels to add depth so the backpacks will fit. I love how it turned out and now there is no more tripping over backpacks! I can't wait for our next project.

Built from Plan(s)
Estimated Time Investment
Afternoon Project (3-6 Hours)
Finish Used
Valspar Latex Paint, Furniture Wax
Recommended Skill Level
Beginner

DIY Greenhouse Project -Added elevated raised beds & temp/humidity control

Submitted by Anonymous (not verified) on Sun, 07/05/2020 - 09:09

We loved this greenhouse plan from AnaWhite and wanted to be able to grow in 3 seasons so we modified the design to include humidity & temperature control & 18" deep elevated cedar beds inside with 4x4 posts for support and trellis option. We added electricity in order to have a lighted workspace and the ability to put in a circulating fan to control mold and fungus. We added 2 work tables (2x2') on the inside of the door left and right side door in order to do seed trays & store supplies. This was a wonderful project for my husband and my plants inside are doing incredibly well compared to my outside garden beds here in zone 5. Products used:

Foundation
We had a landscape company come and scape/dig a platform and then fill/compact with crushed rock
My husband then used rebar driven into a 4x4 frame in order to secure the frame to the ground and create a base upon which to build the greenhouse

Active ventilation
AC Infinity Cloudline T8 Inline duct fan
Air king range hood wall cap 8" on the bottom outside of the greenhouse wall for air intake + flex 8" duct to the fan itself
Shelter logic autovent automatic shelter vent kits (1 on each side of the front wall) in order to allow air intake from the bottom back of the greenhouse under the elevated beds to flow to the front of the greenhouse and out
Circulating fan- Hurricane wall mount fan 16" - this fan has 3 speeds with tilt function and small mounting bracket

Soil - sourced 3 yards of 50/50 loam/compost from local landscaping supply
60% loam
30% organic compost
10% organic topsoil + perlite

Soil beds
-cedar frame 2 feet wide along sides, 3 feet wide on the back wall
-galvanized metal roofing with holes drilled into it for drainage
-landscape cloth lined

Built from Plan(s)
Estimated Cost
$2000
Estimated Time Investment
Week Long Project (20 Hours or More)
Finish Used
None
Recommended Skill Level
Intermediate

Comments

bushy99

Wed, 09/09/2020 - 13:09

Thanks for that update! I was wondering how to vent this project, as Green houses need the ventilation. Good to know dollar amount also. Great photos.

bushy99

Wed, 09/09/2020 - 13:09

Thanks for that update! I was wondering how to vent this project, as Green houses need the ventilation. Good to know dollar amount also. Great photos.

bushy99

Wed, 09/09/2020 - 13:09

Thanks for that update! I was wondering how to vent this project, as Green houses need the ventilation. Good to know dollar amount also. Great photos.

"Nook of woe" is now "nook of wow!"

Submitted by OliveJuice on Sun, 06/29/2014 - 11:36

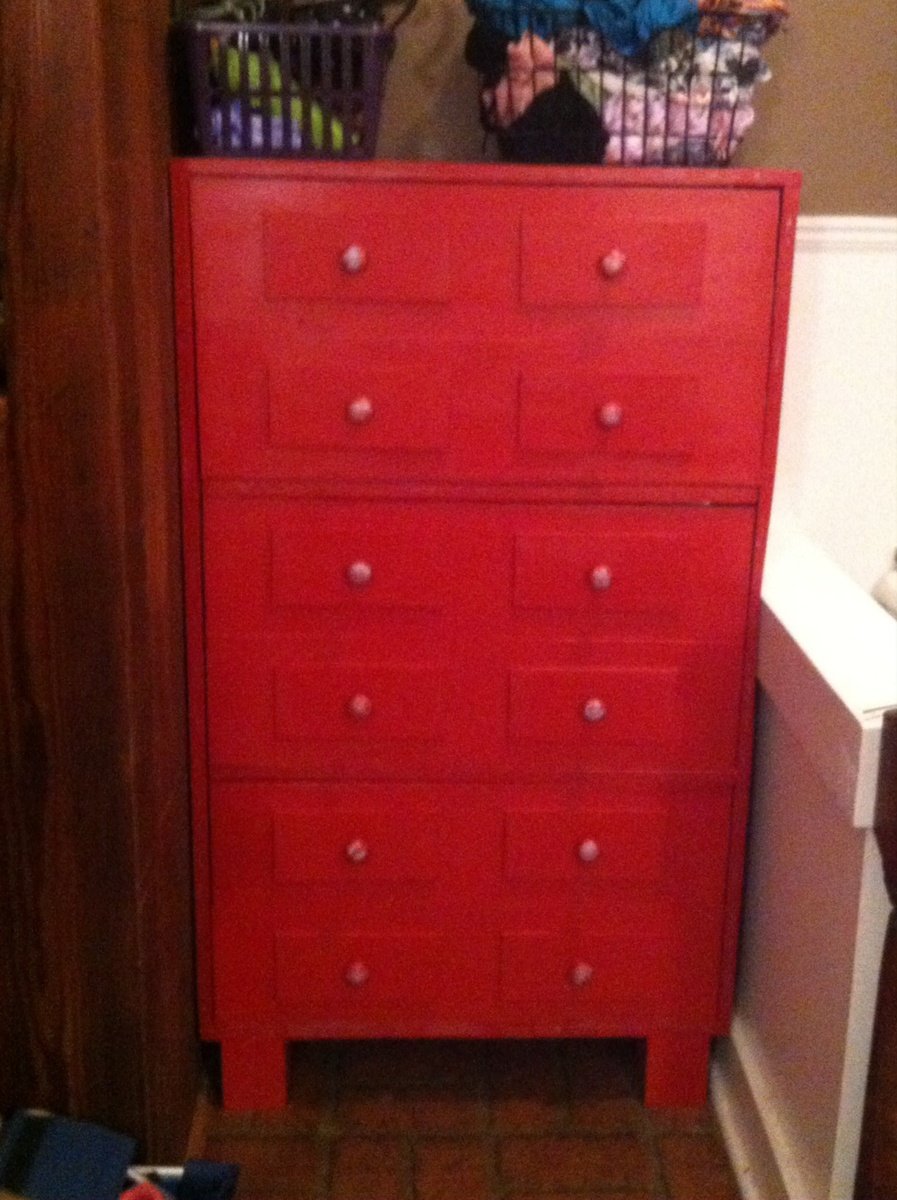
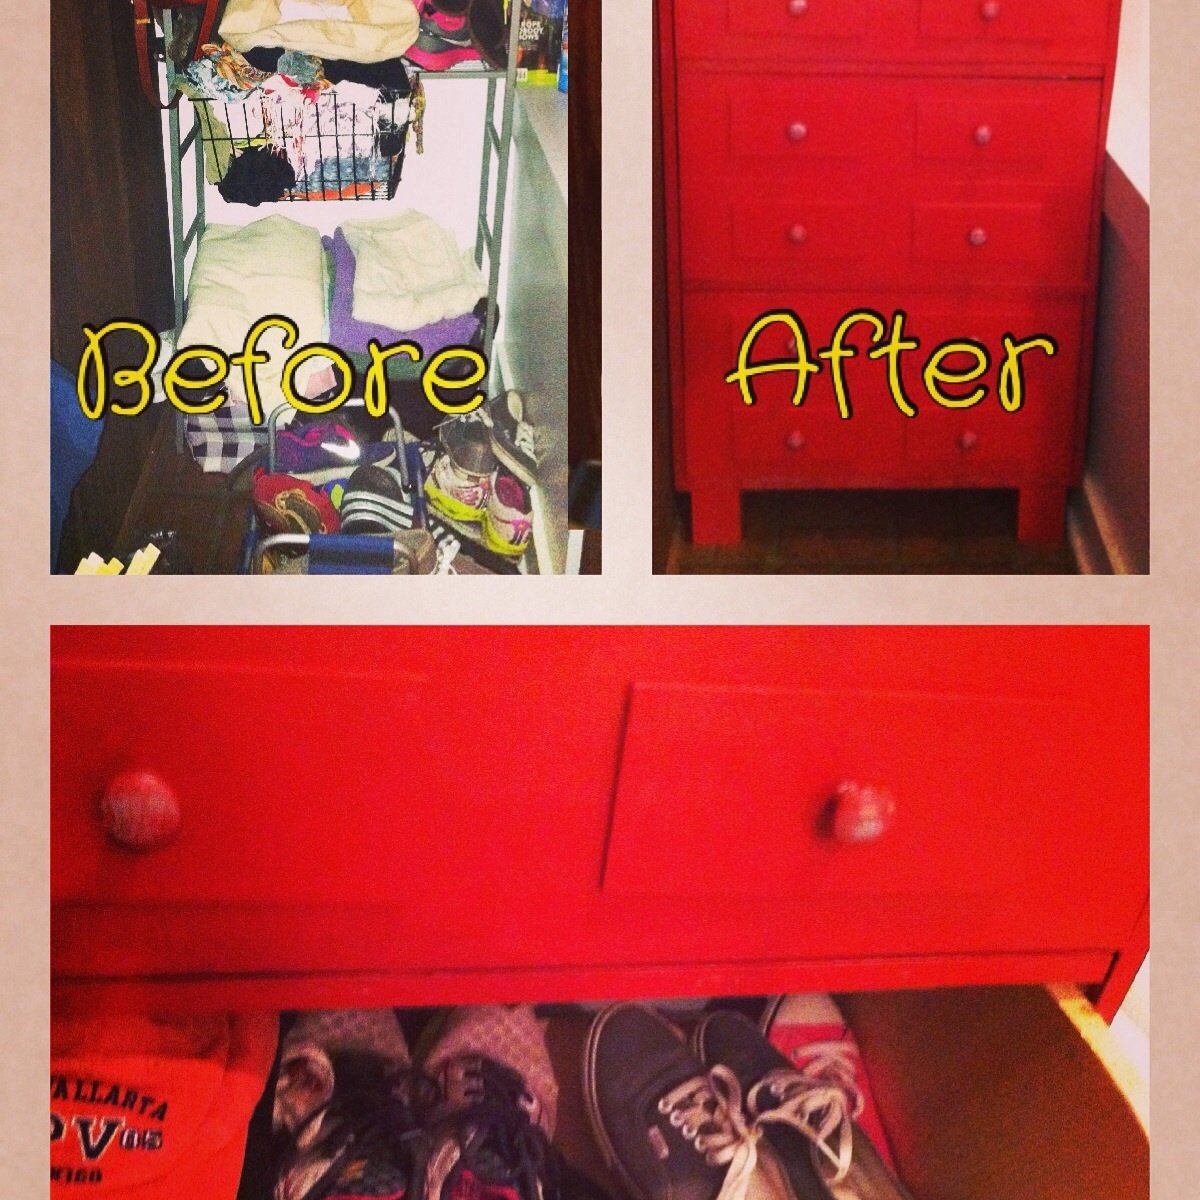
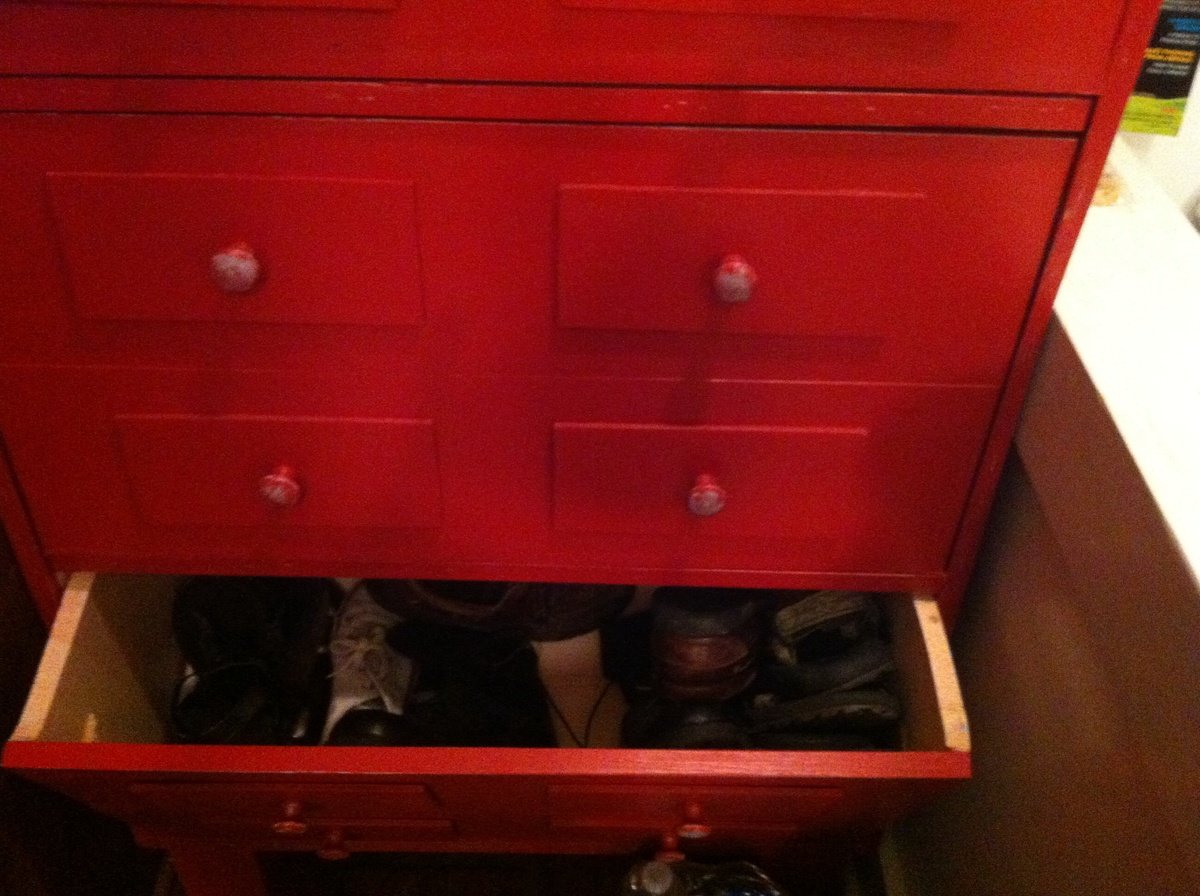
We had a 28 inch nook in the mud room/bathroom that was the collect all for our shoes, hats, boots, scarves, and pup accessories. Had seen shoe cabinets at ikea but with the space being small it needed a "custom" build. Ana had the perfect solution!! We took basic plan and reduced length to 28 inches and top width to 12 inches. I wanted a larger top surface to place baskets. We took the 2 drawer and added a 3rd for increased storage space. Drawers were also made deeper to fit with the wider top piece. Also added a 4 thick chunky legs (4x4) to help support and stabilize dresser. Those were set in a bit to accommodate the molding along baseboard. Added faux drawer fronts using 1/4 inch ply wood. We put the magnets on but made drawers hard to open so we kept magnet but removed the plate. An old leather belt was recycled for the back strips to prevent drawers from flopping down.

Built from Plan(s)
Estimated Cost
$60 (we had drawer pulls from other project that we recycled)
Estimated Time Investment
Day Project (6-9 Hours)
Finish Used
Morocco Red with a turquoise under coat. (Used 1 small sample sized jars each from Home Depot) lightly sanded red off edges to let the turquoise show through. Same with the wooded knobs.
Recommended Skill Level
Intermediate

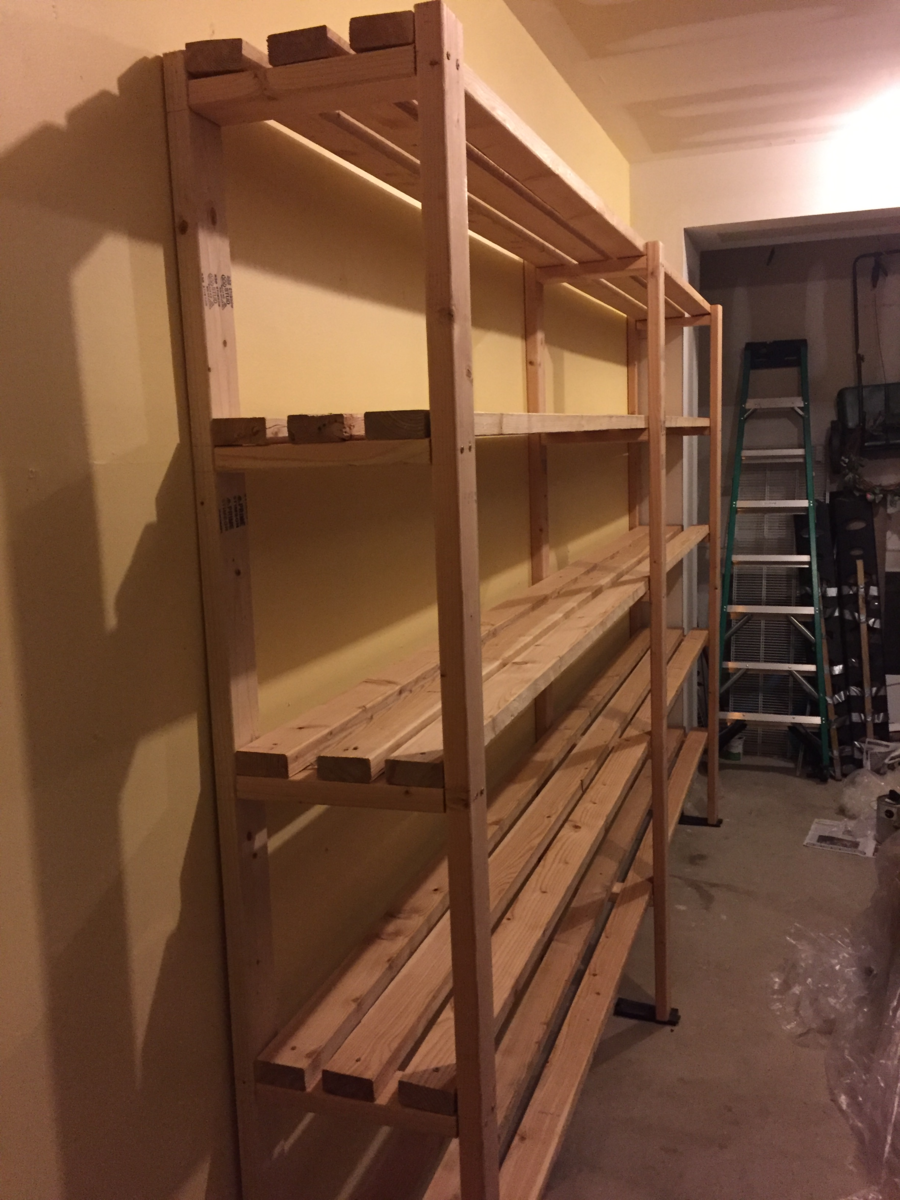
Garage Shelving by using 4 by 2s

Submitted by Anonymous (not verified) on Sun, 10/02/2016 - 19:02

Simply inspired by Ana's Garage Shelving project using 2 By 4s. Thank you Ana. Below are my project details.

1. Shelving Height =  8 Ft, Width = 12 Ft, Depth = 13 inches (Each shelve having 3 pieces of 2 by 4s). All 8 Ft and 12 Ft lumber available in this standard size.  Only cutting required (done at Home Depot) was for the 13 inch pieces to build the shelving legs (which in Ana's original plan is 17 inches, and has 4 pieces of 2 by 4s).  Able to carry all lumber (multiple trips) in minivan after folding seats.


2. Garage Floor was a bit uneven - so I used Shims (plastic) as suggested by HomeDepot associate.


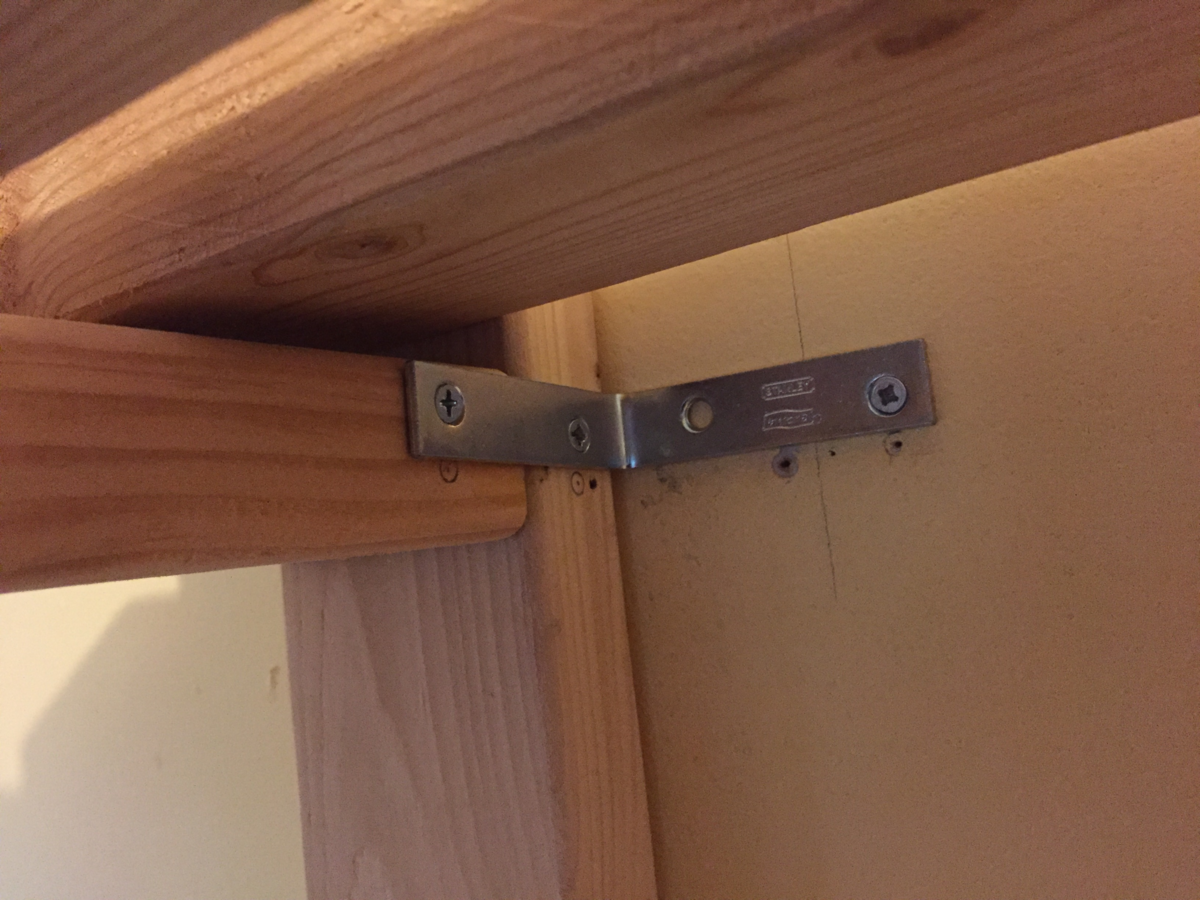
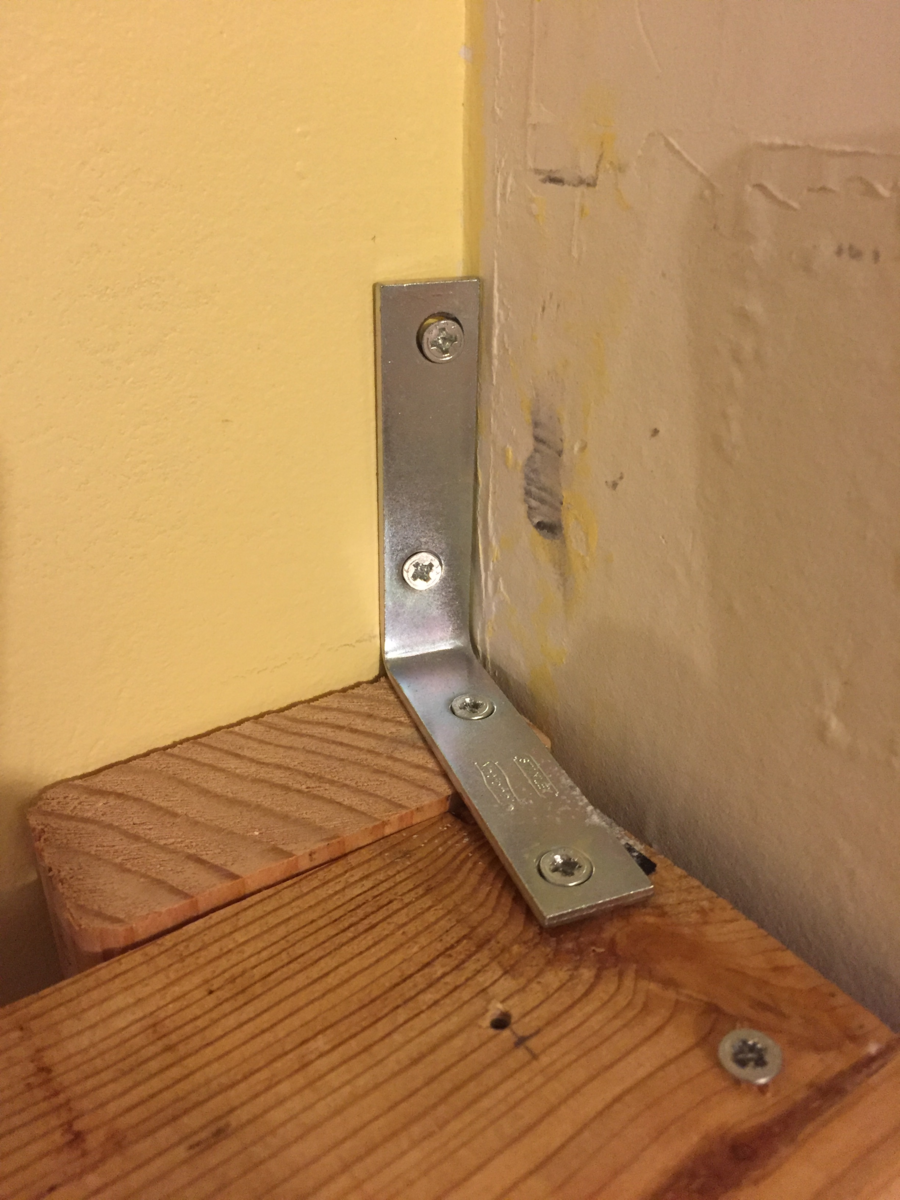
3. To secure the shelves from the top of the wall, I used corner L brackets, 3 inch by 3 inch.  I used 1-1/2 inch screws to mount the bracket on the 2 by 4s, and then to mount the other side of the bracket to wall studs, I used the 2-1/2 inch screws (which I used throughout the project as Ana suggested). I mounted two brackets sideways, and one on the top (because the stud was around the corner).   Used a thin nail to find the stud as studfinder results were not reliable


4. After making shelving legs, we made them stand next to the wall, and then mounted the shelves (3 pcs each on each shelve) and then put screws.  My wife, her uncle, aunt, and cousin helped to mount finally, and it was great fun.

Estimated Cost
Approx $150
Recommended Skill Level
Starter Project

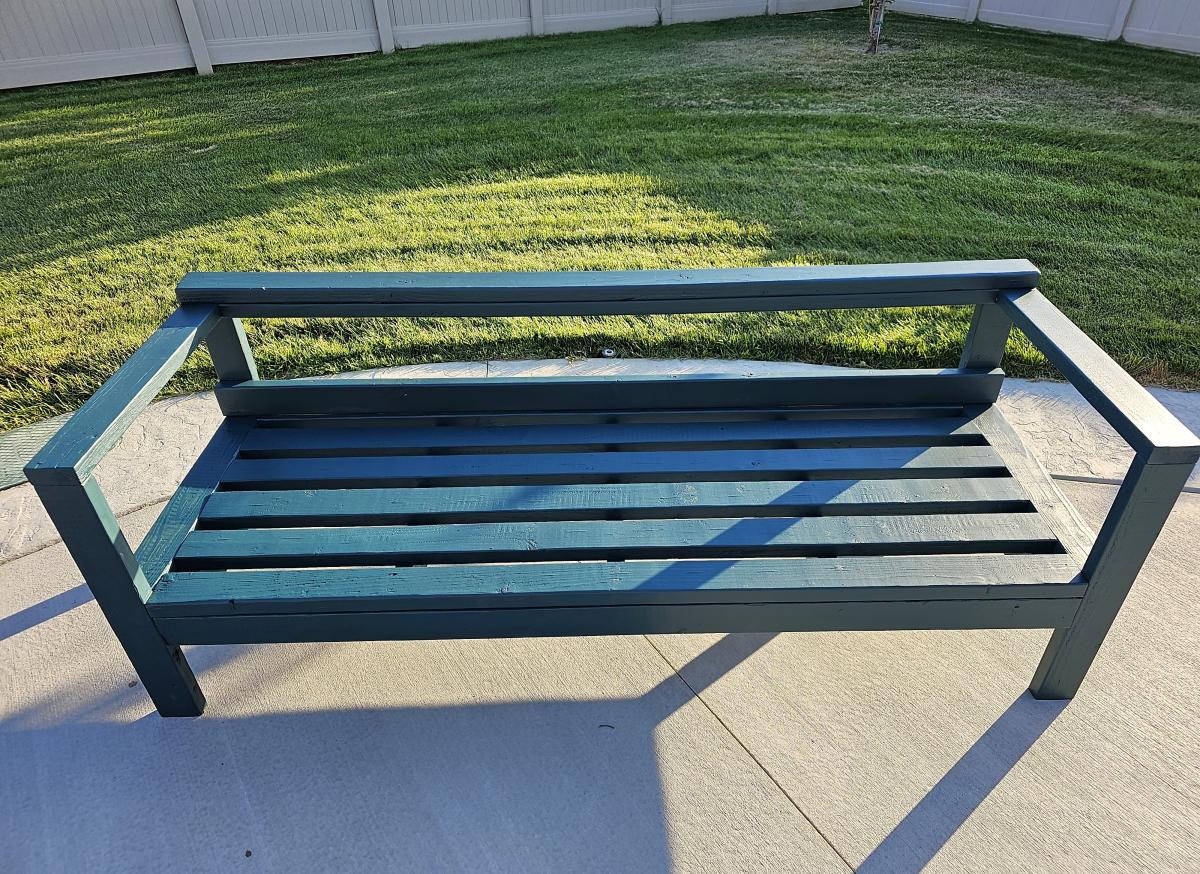
Cedar Outdoor Sofa

Submitted by Anonymous (not verified) on Sat, 10/08/2016 - 18:58

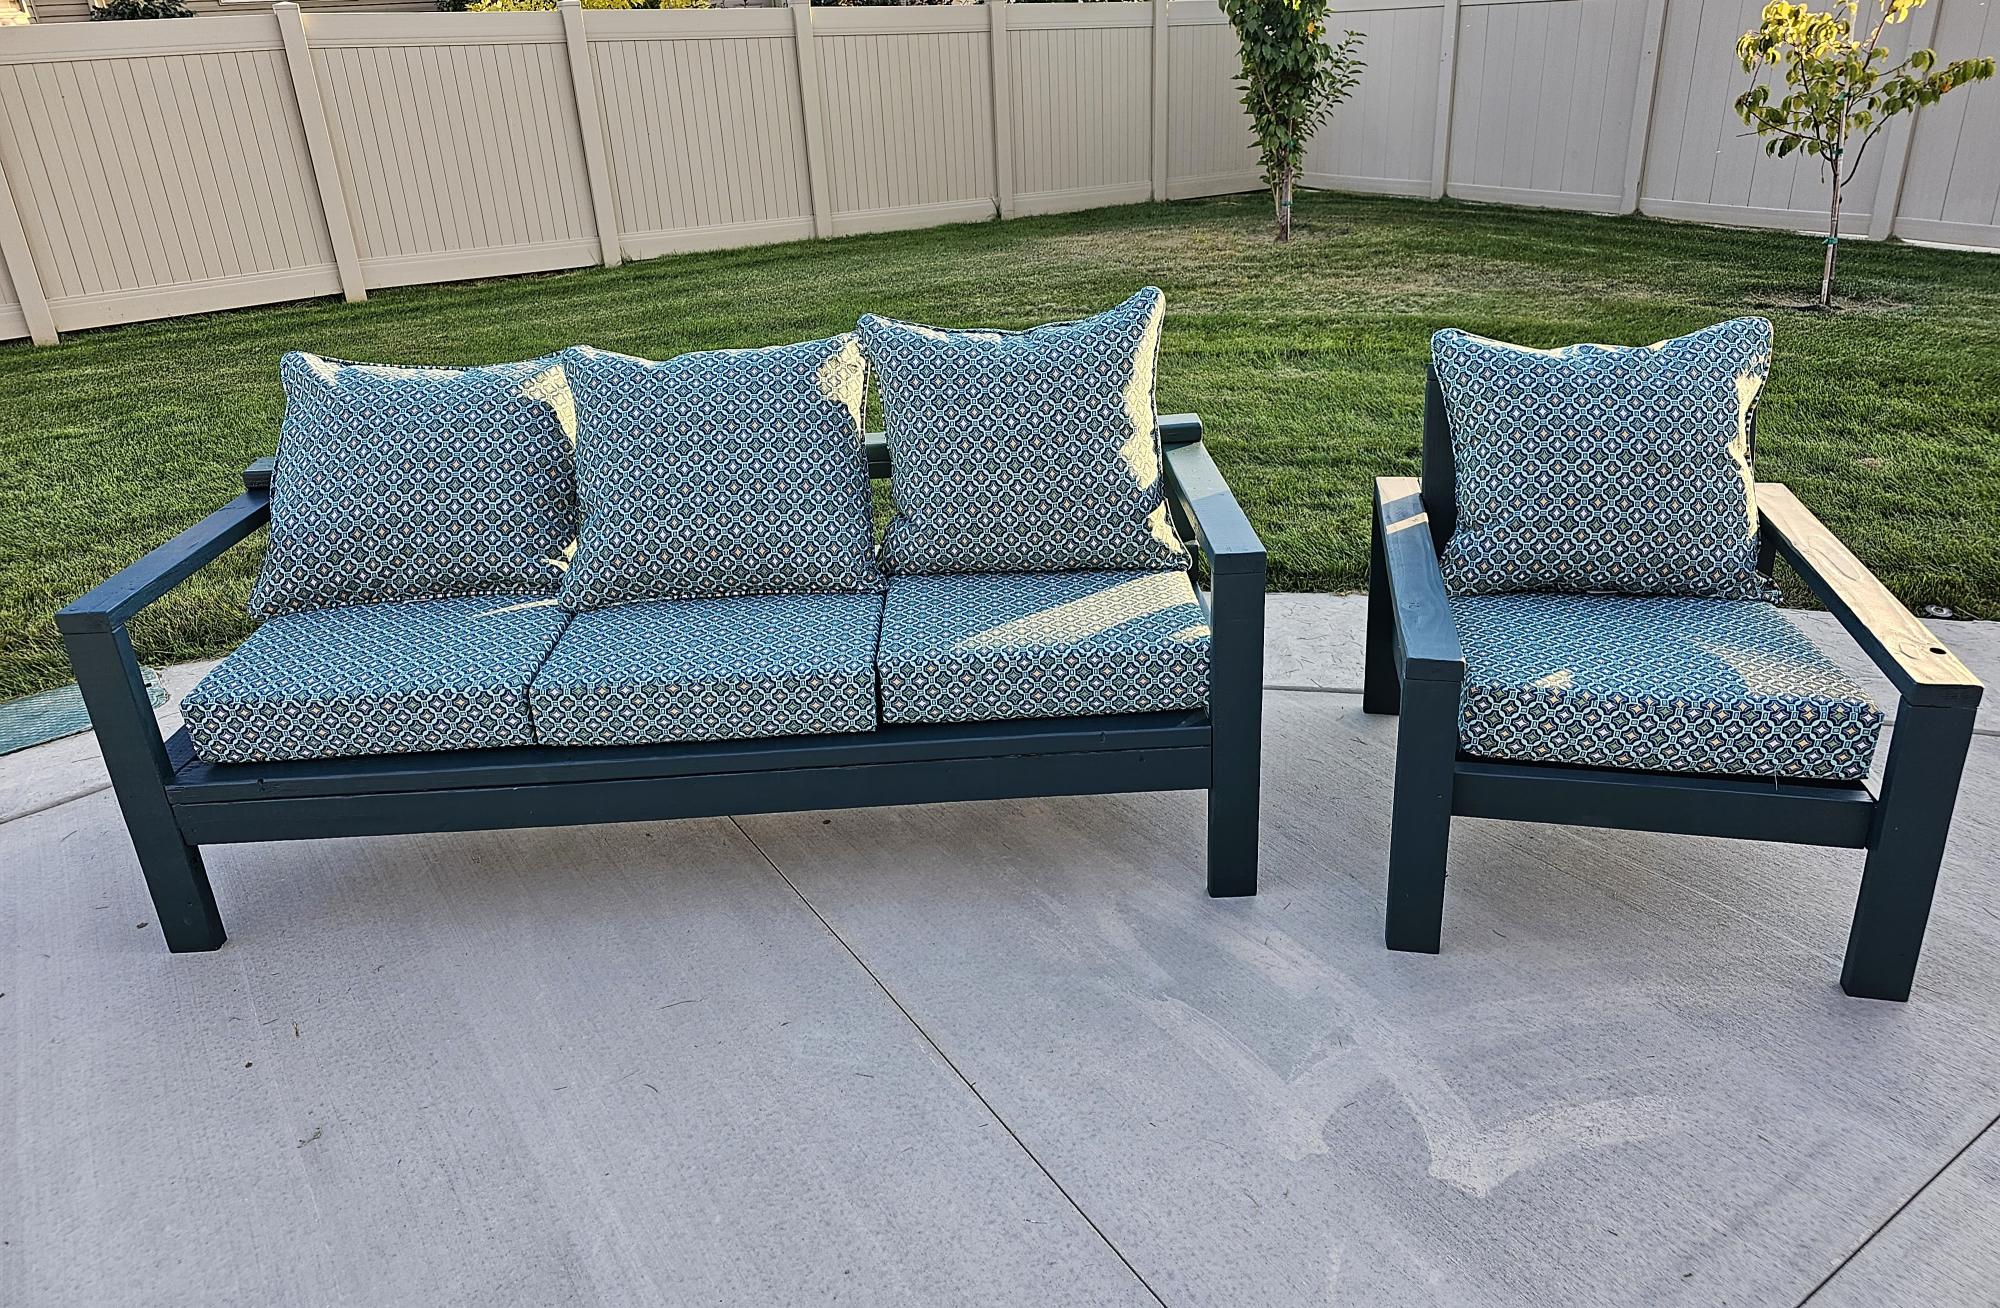
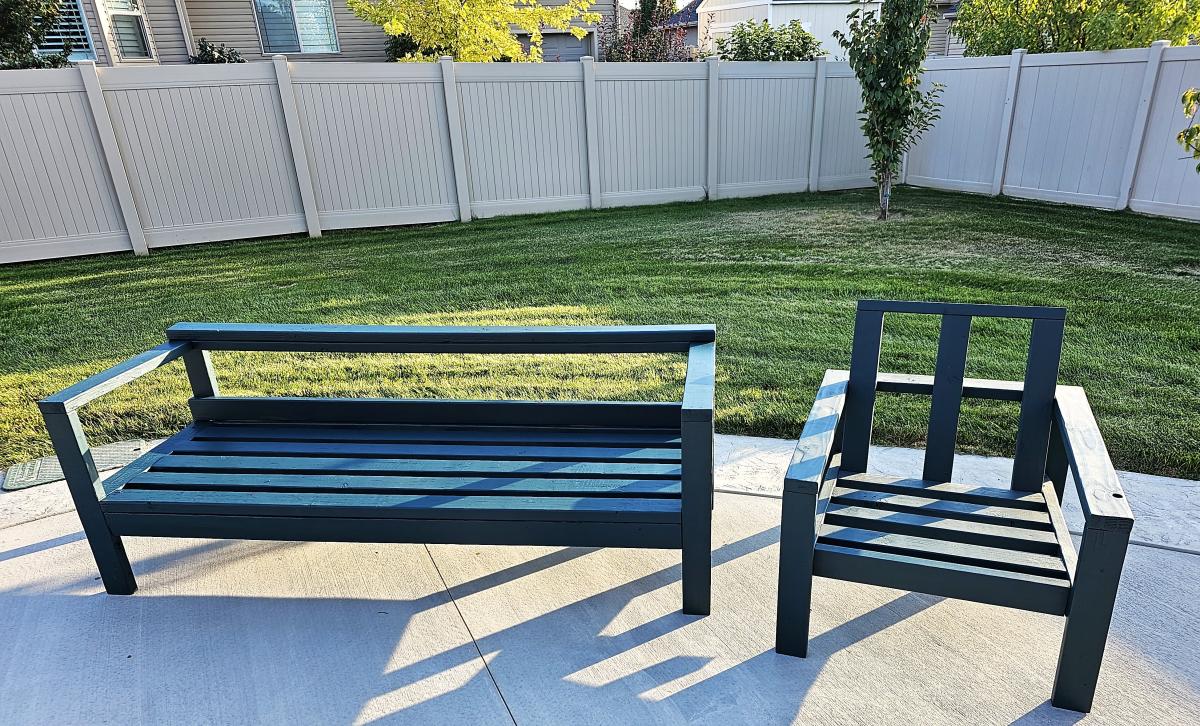
Made an outdoor sofa inspired by Ana White's plan. I made a few modifications including using 2x6's, hiding more of the non-pocket hole screws, using HD pocket holes in more areas and building an incline for the backrest. Cushions are Sunbrella from Lowe's.

Estimated Cost
about $550
Estimated Time Investment
Weekend Project (10-20 Hours)
Finish Used
MinWax Spar Urethane. 2 coats with sanding in between coats using 220 grit
Recommended Skill Level
Intermediate

Comments

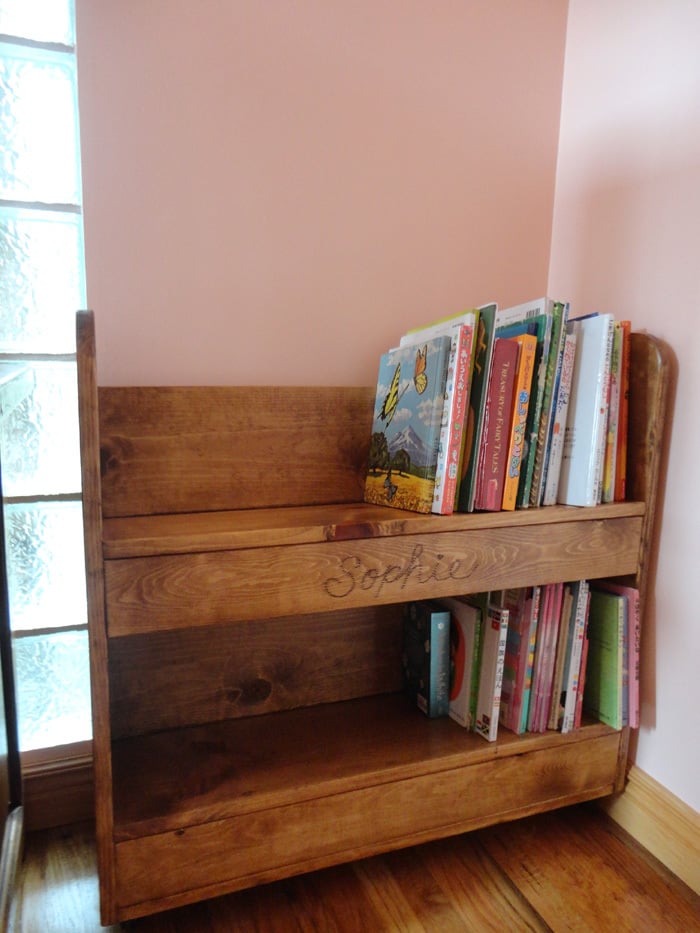
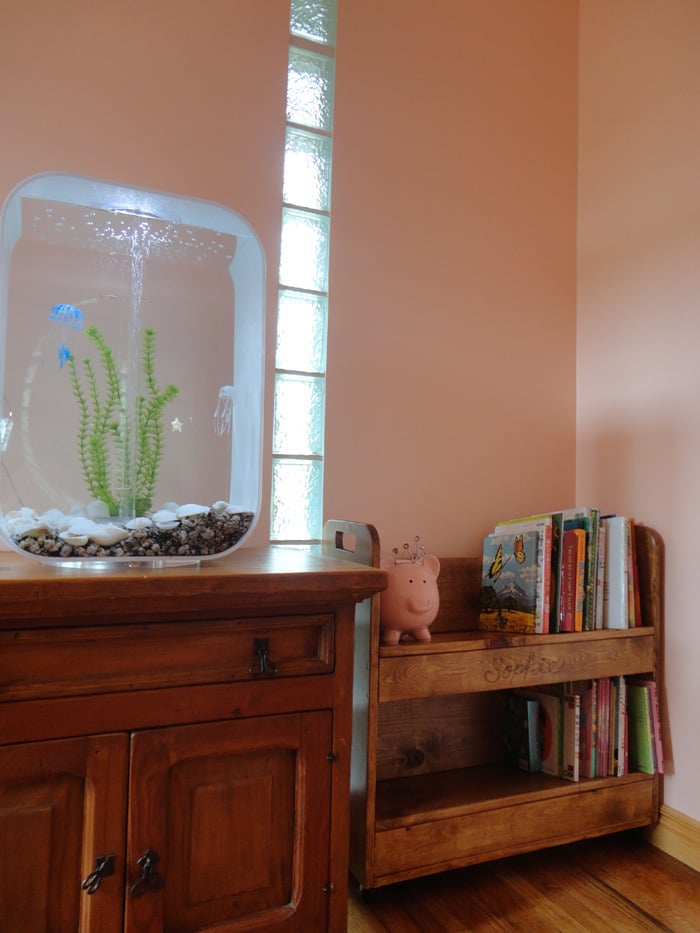
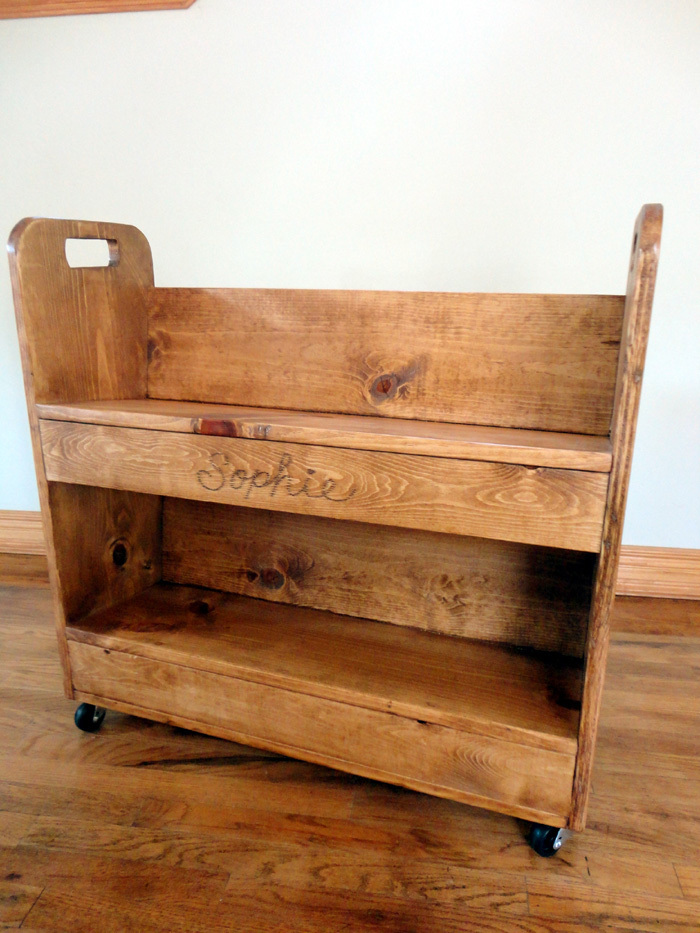
Library Book Cart

Submitted by Terukosan on Wed, 09/12/2012 - 22:54

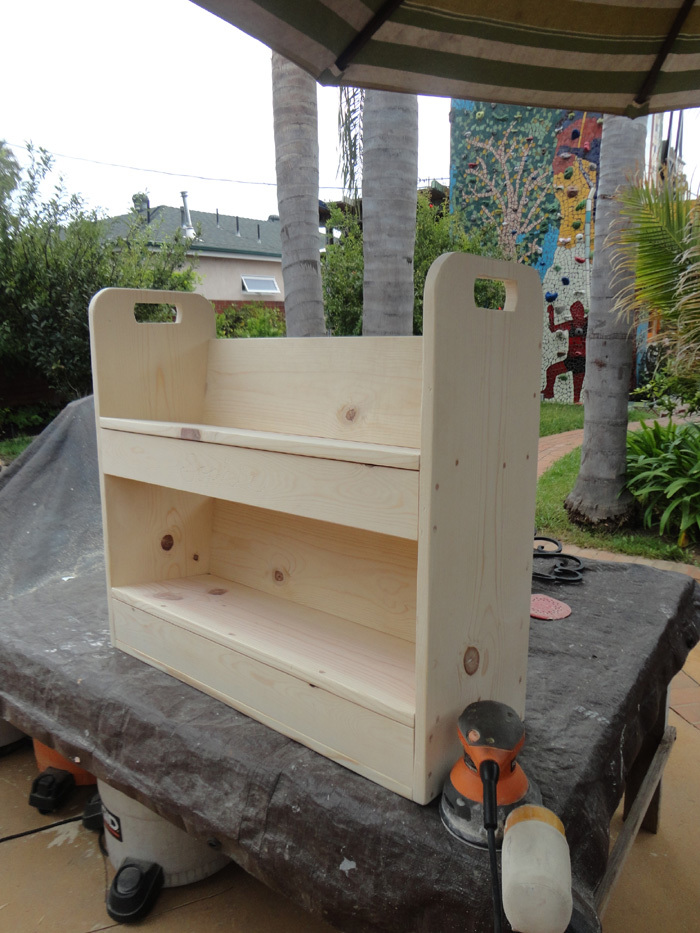
I built this book shelf for my daughter.

I made both the top and the bottom shelves an angled.
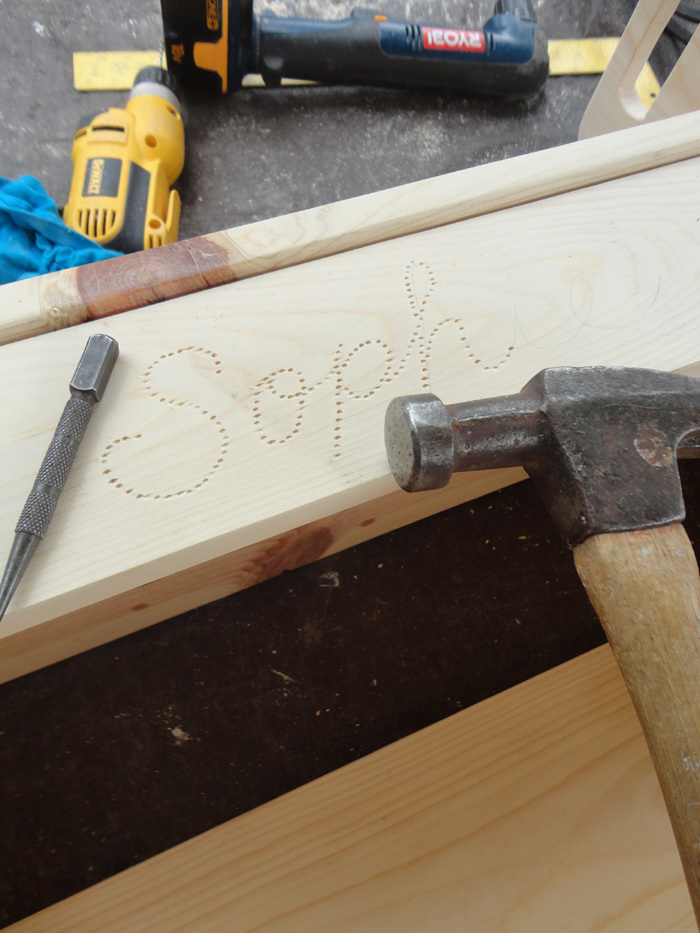
I used a finishing nail punch to emboss the name.

I mixed 3 different color stains to match the other furniture.

Used 2" caster wheels from Home Depot.

Built from Plan(s)
Estimated Cost
$55
Estimated Time Investment
Day Project (6-9 Hours)
Finish Used
Minwax wood finish (Golden Pecan, English Chestnut, Red Oak), Minwax Wipe-On Poly
Recommended Skill Level
Beginner

Comments

tommirhea

Fri, 09/14/2012 - 09:39

This is so pretty, I love the name in it! How wonderful. When you mix your stains, how do you know how much of each? Is is just a trial and error type of thing?

Terukosan

Fri, 09/14/2012 - 12:06

Hi tommirhea,

Thank you for your nice comment!

Mixing stains is just a trial and error. Pour into empty yogurt cup and mix with form brush. I like rustic looks, so, I don't care if color is not even ;-)

Have a nice weekend,

Sunny

tommirhea

Fri, 09/14/2012 - 12:14

Okay, thanks. I think I will try it on the desk I am going to make. I don't always love the color of stains, but never thought I could just dump different ones in to make my own :) I like rustic looks as well, makes it more unique.

Back