Easy small space side table
This was my first project. It was relatively easy but I did make some mistakes that are now design features
I've been wanting to build an outdoor farmhouse table for quite some time. Getting it to look old with new materials was the idea.Using notches to hold part of the base and experimenting with finishes got the 'rustic' look. I took a few ideas from the Gaby Kitchen Island and implemented my own; it turned out to be a great weekend project!
Fri, 10/26/2012 - 23:43
Love the table, especially the finish you used, it looks amazing. just have a question about if it is waterproof...i know it is an outdoor table, but is it protected by a veranda or is it completely exposed to the elements. i want to make one but am hesitant as it will be completely outside! Thanku!
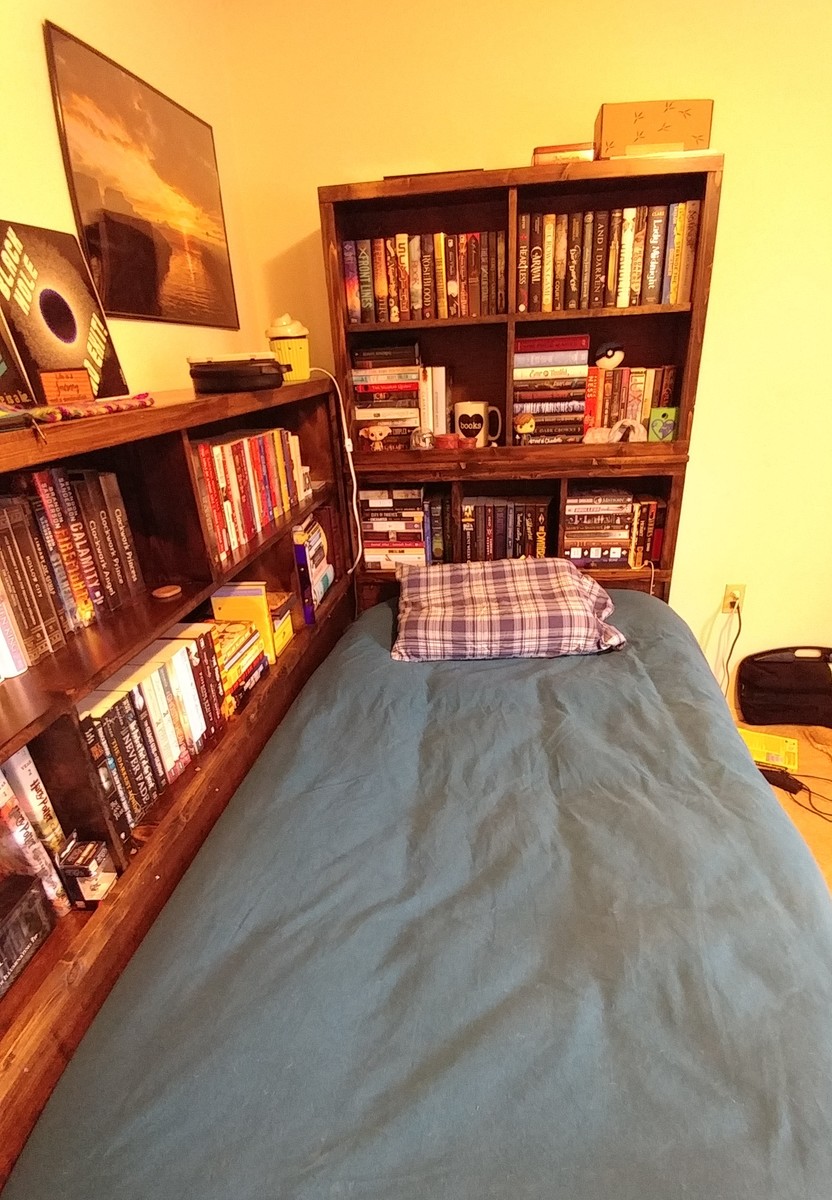
Update 8/2017: This project started with the Storage daybed, which I built in 2014. My daughter is a book lover and I wanted to provide her with more space for her books. I recently added the following plans to the Daybed with Storage Trundle Drawers:
- Twin Storage Headboard Base
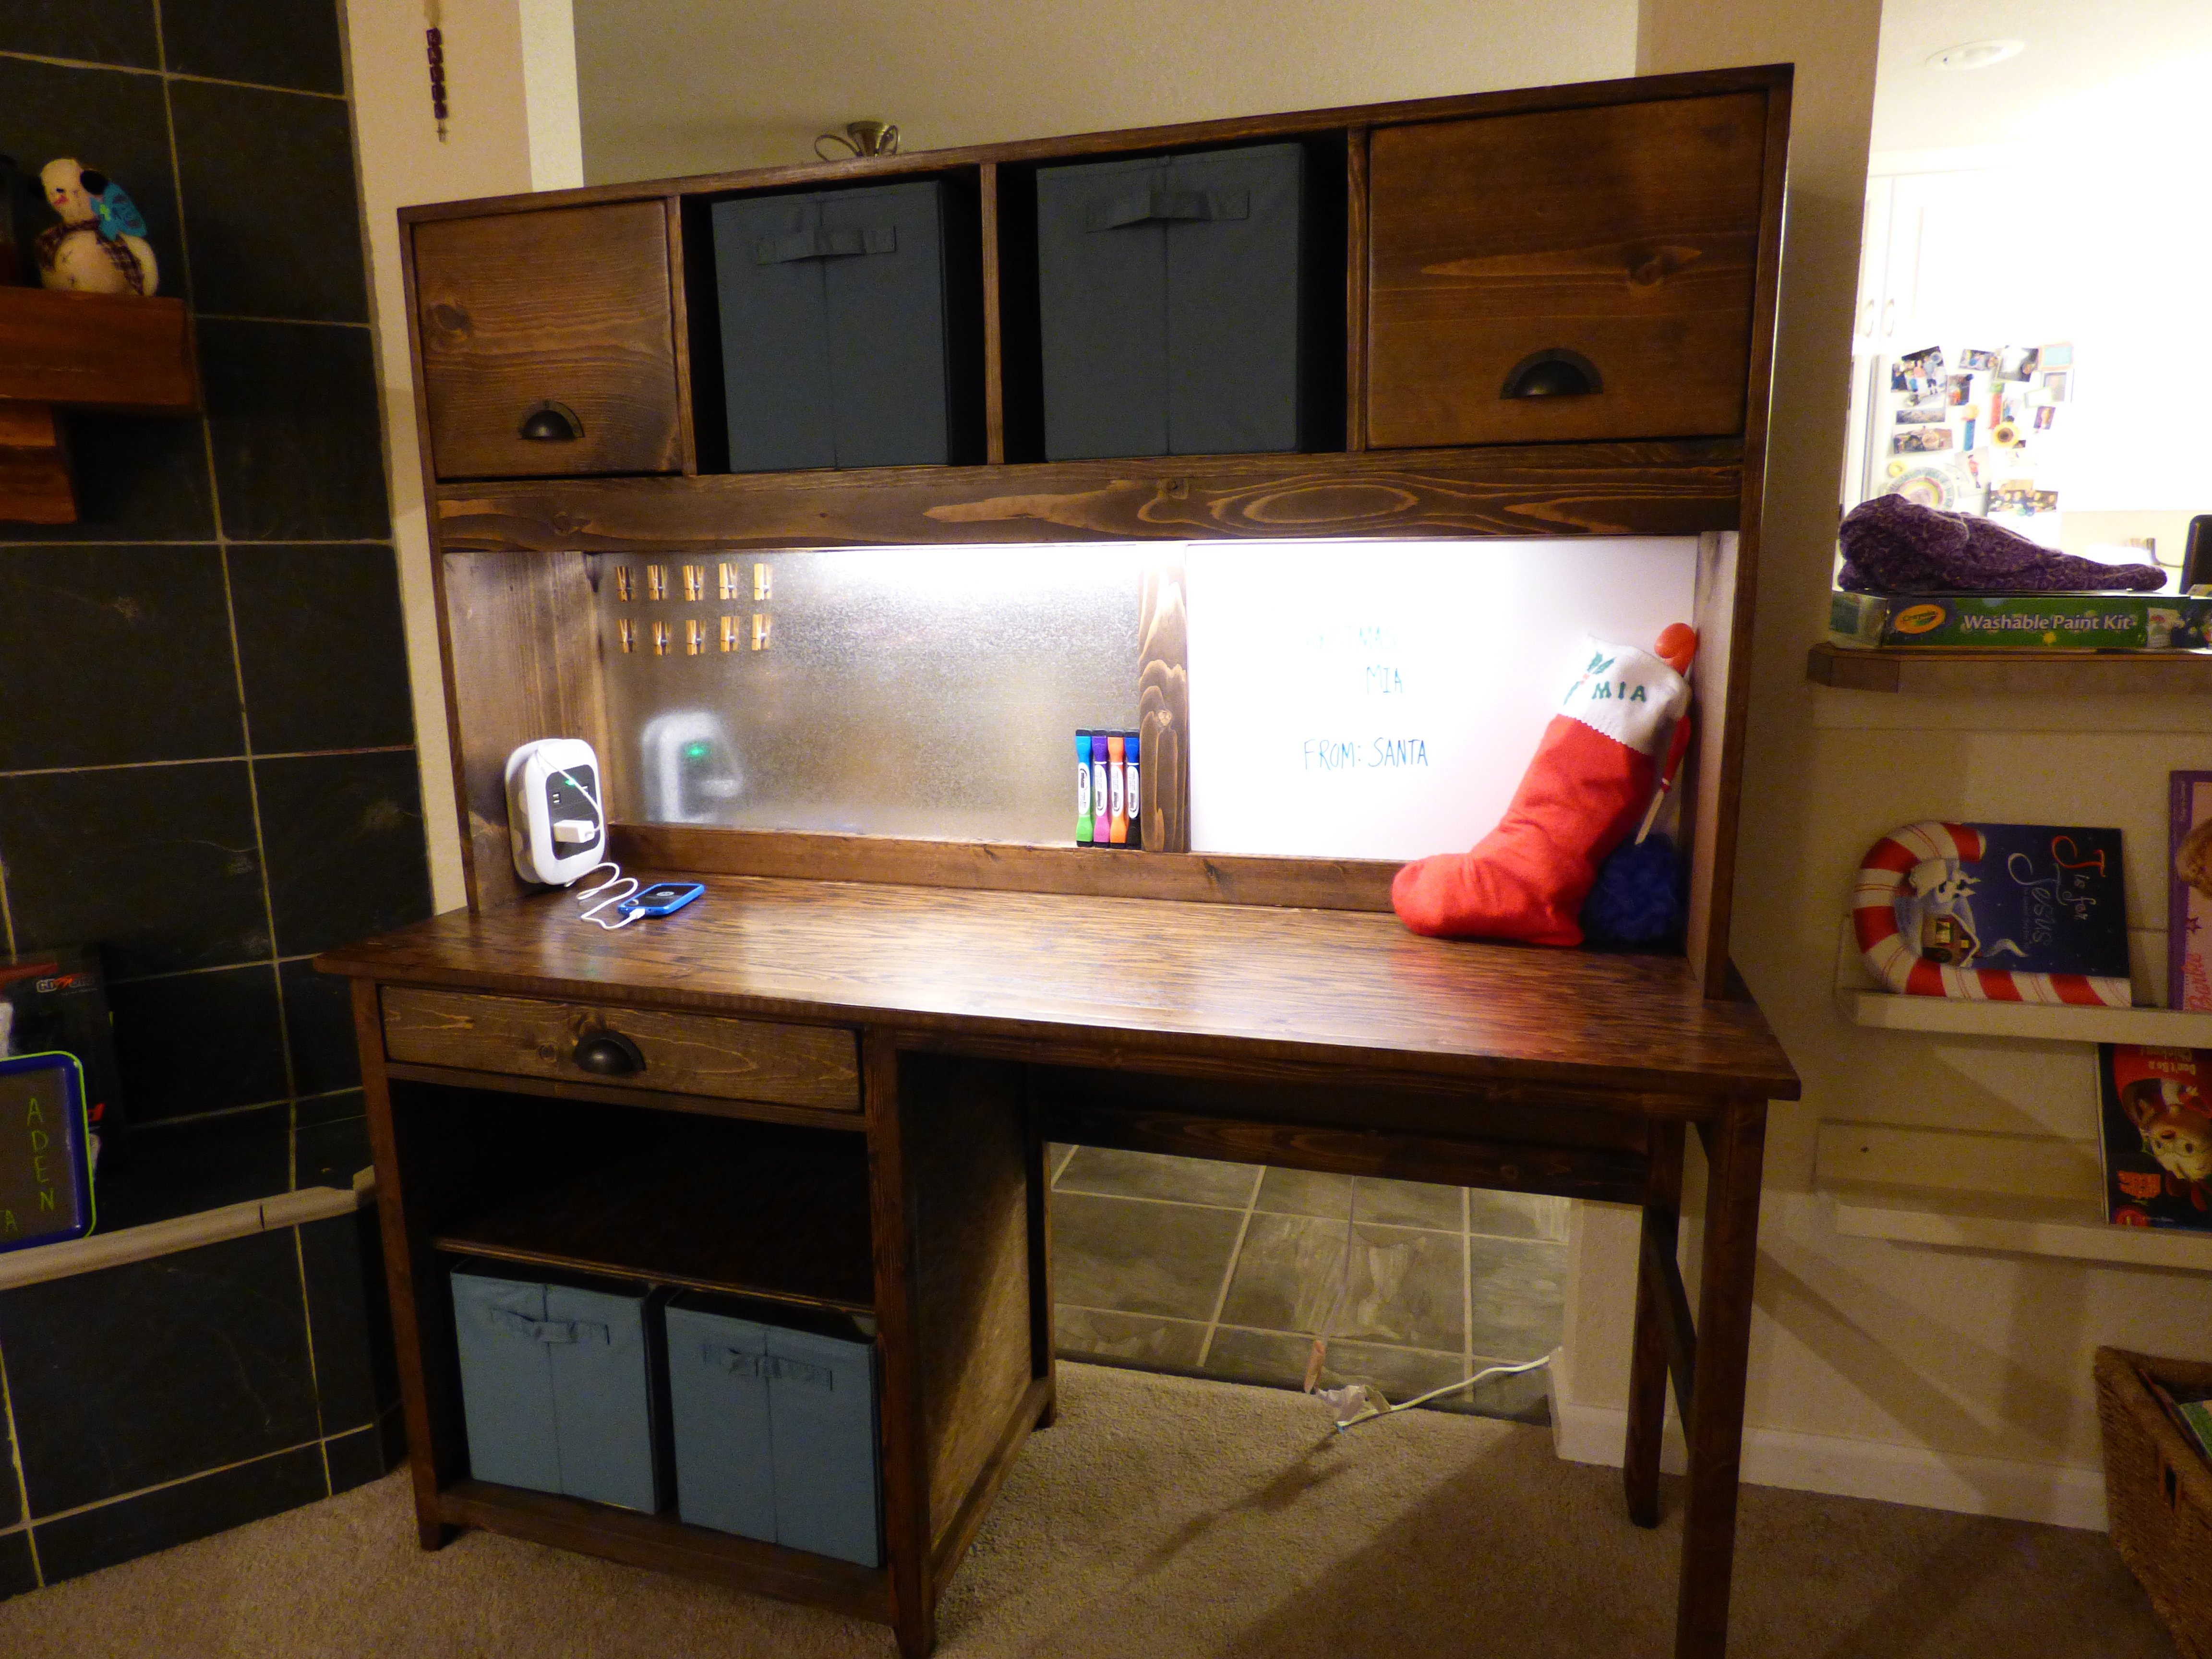
- Small Hutch for Storage Headboard
- Cubby Hutch Plans for the Storage Headboard
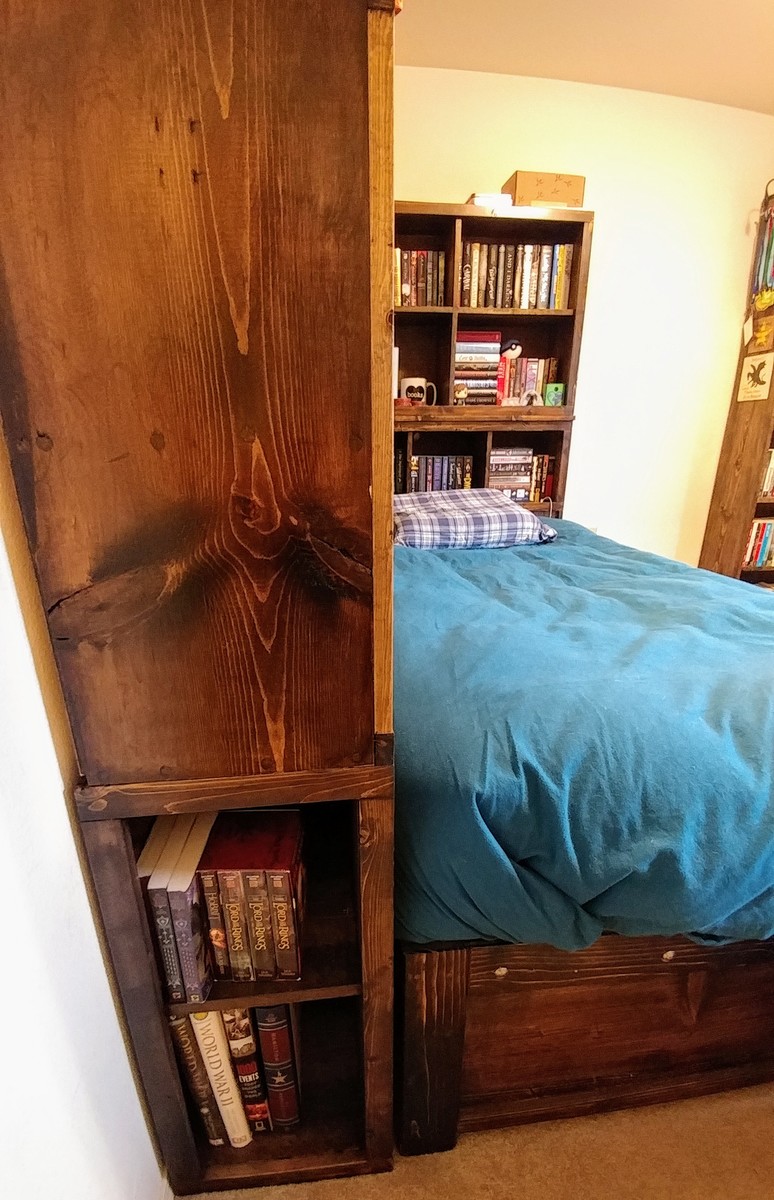
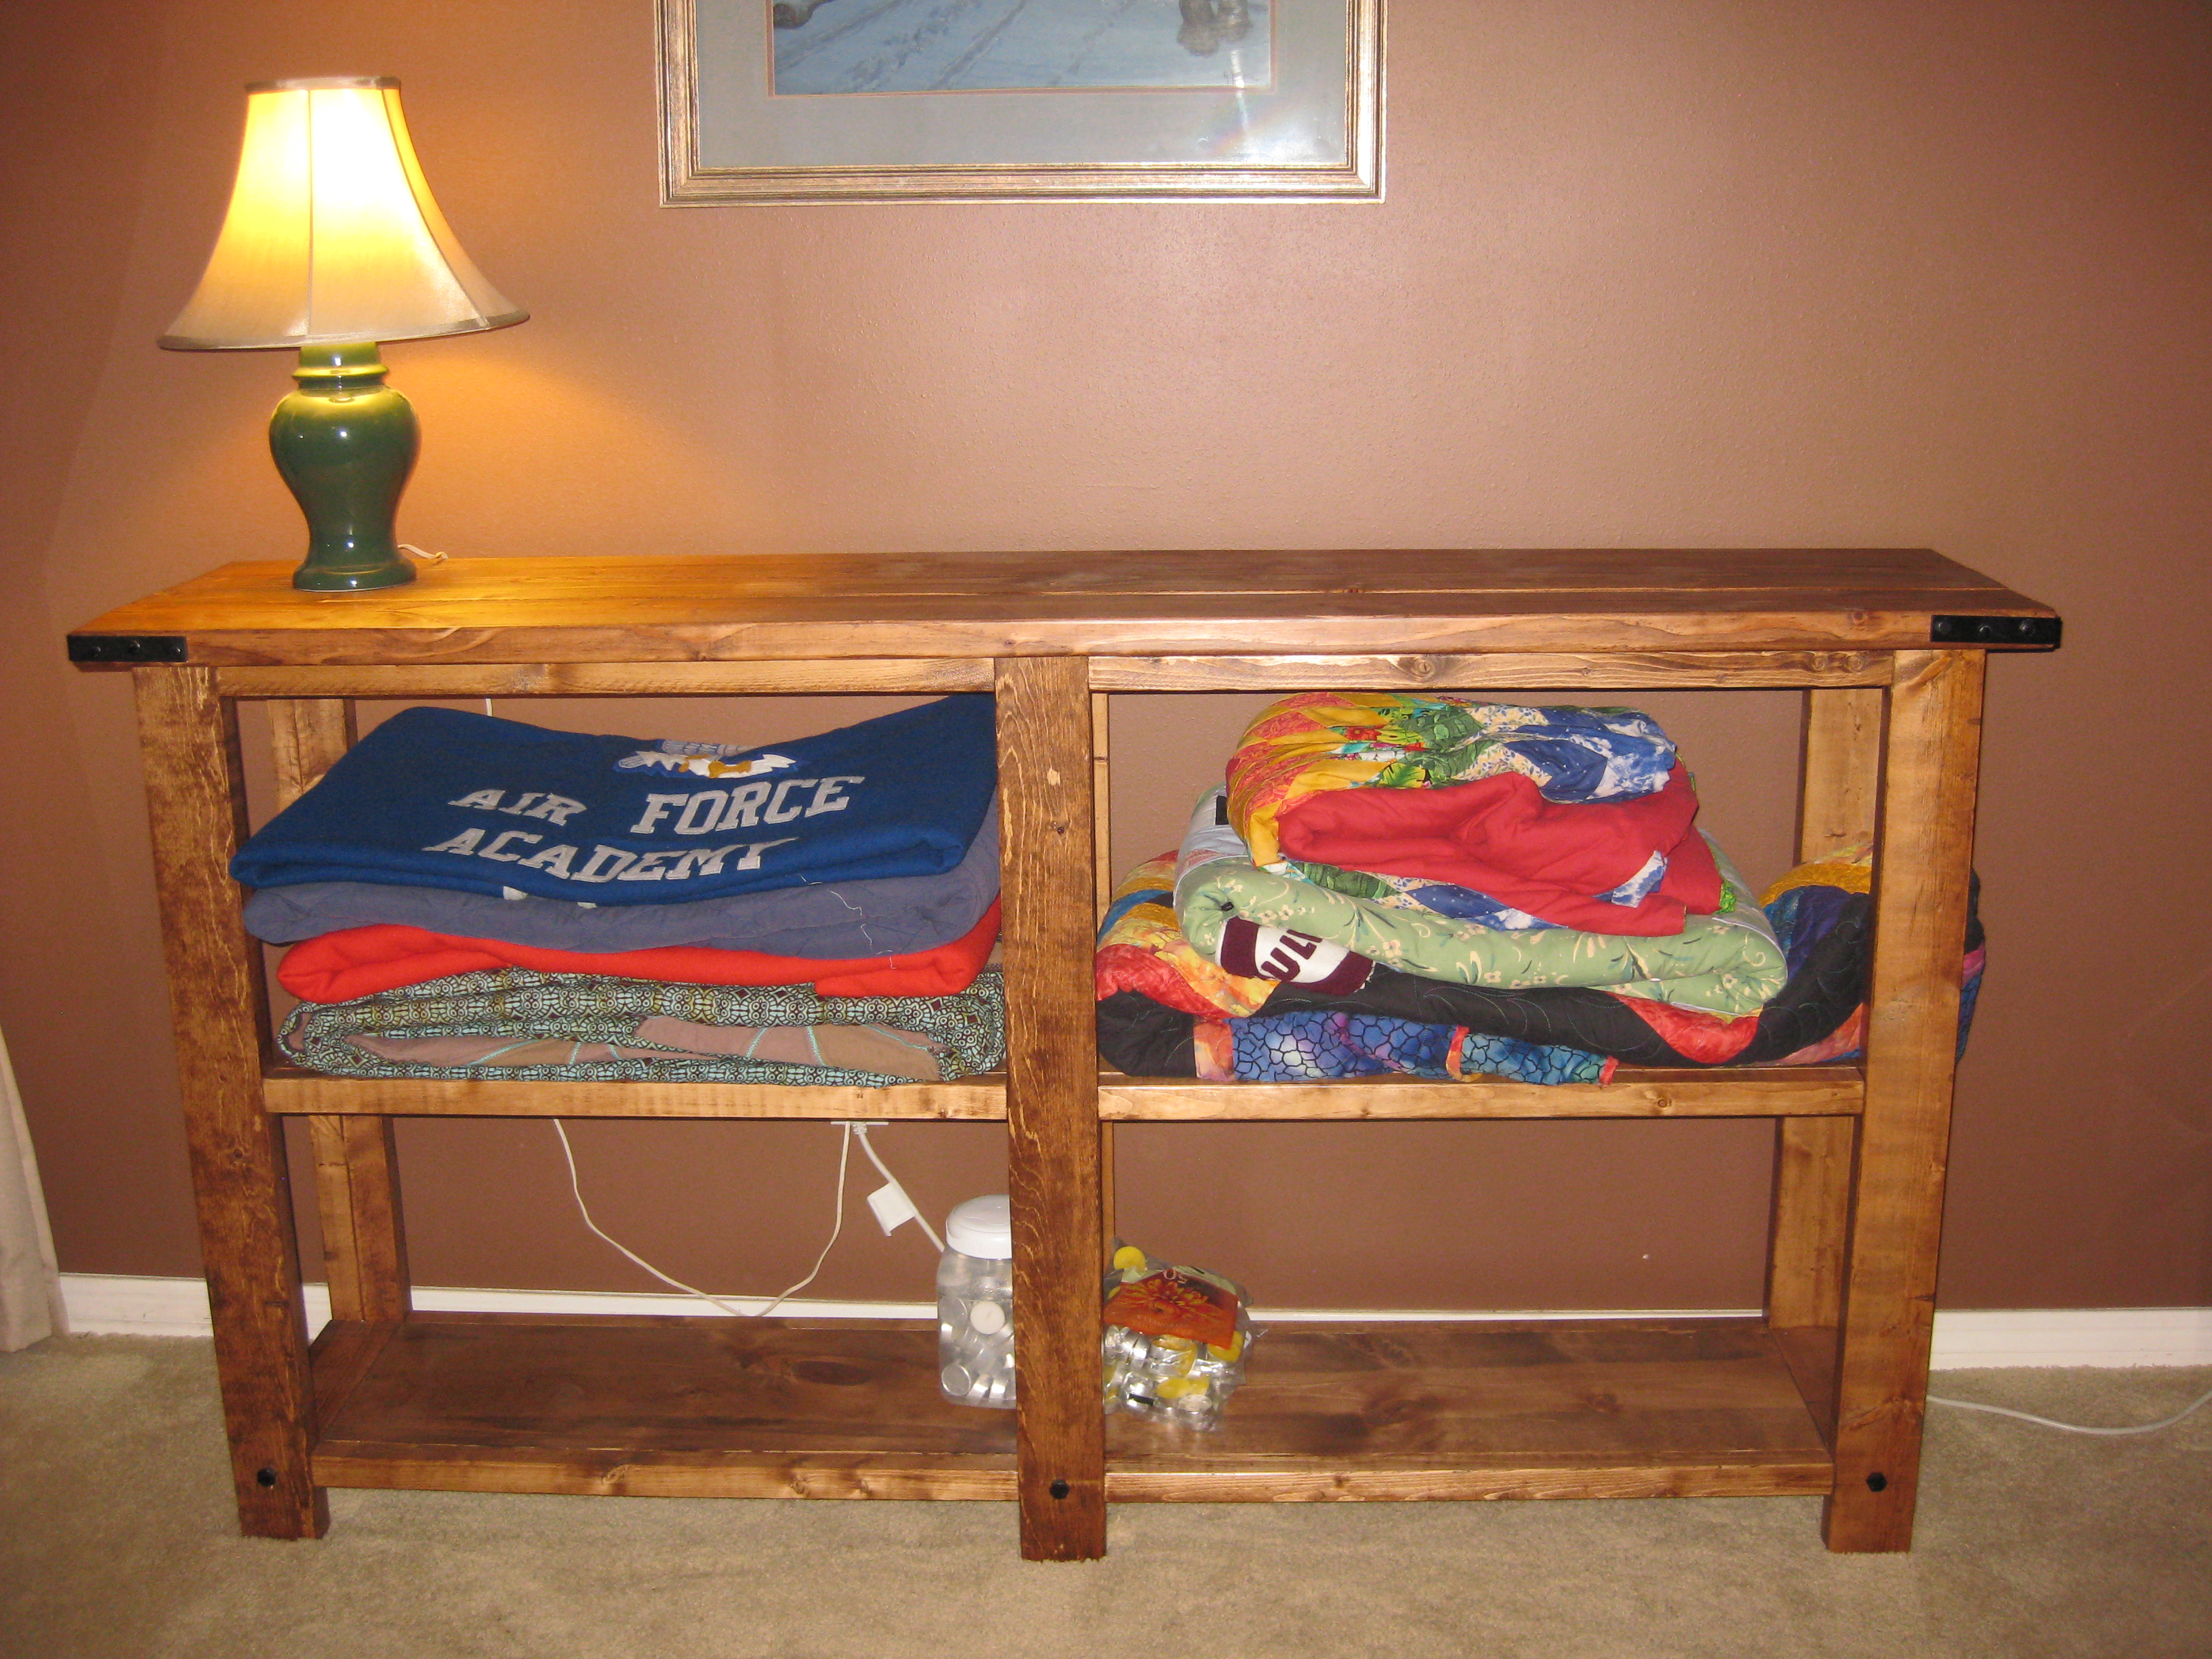
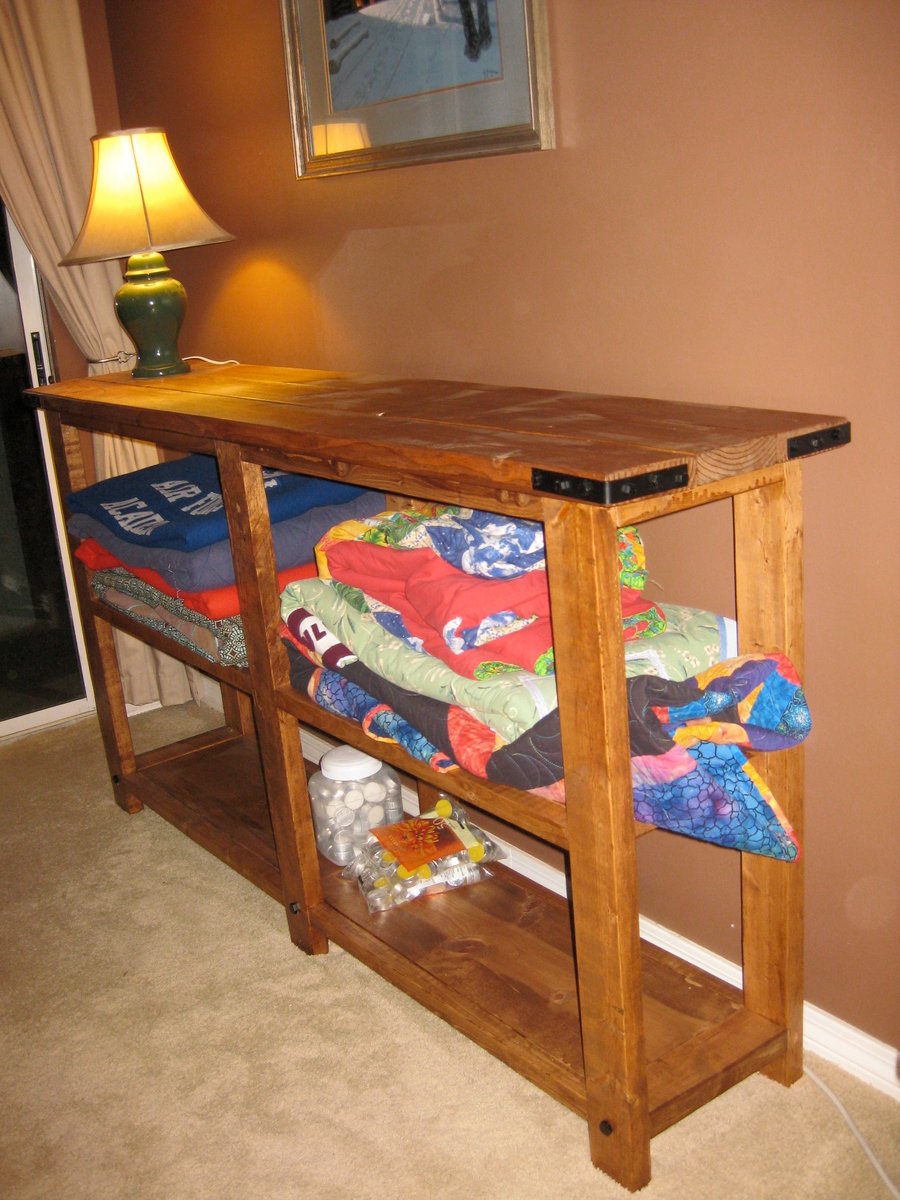
I also made one extra storage headboard base and added more shelves along the long side of the bed so she could be surrounded by books. There are two additional supports under long bookshelf and I placed them roughly behind each of the trundle drawers.
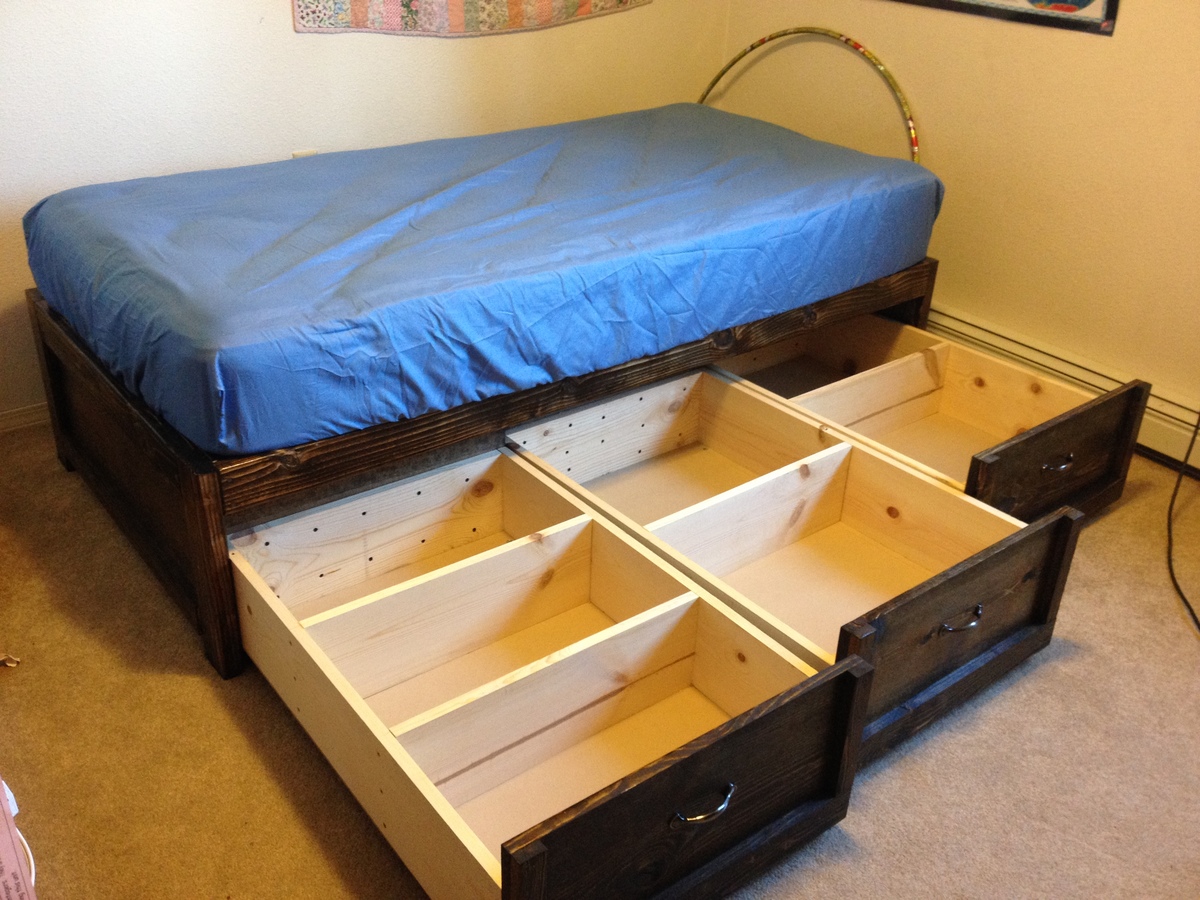
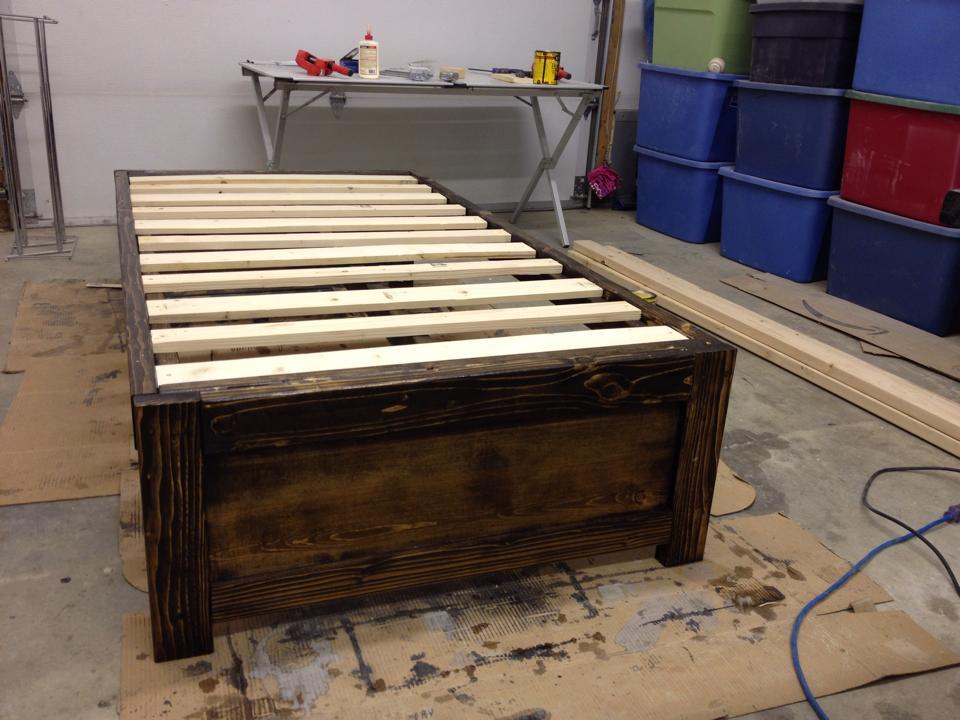
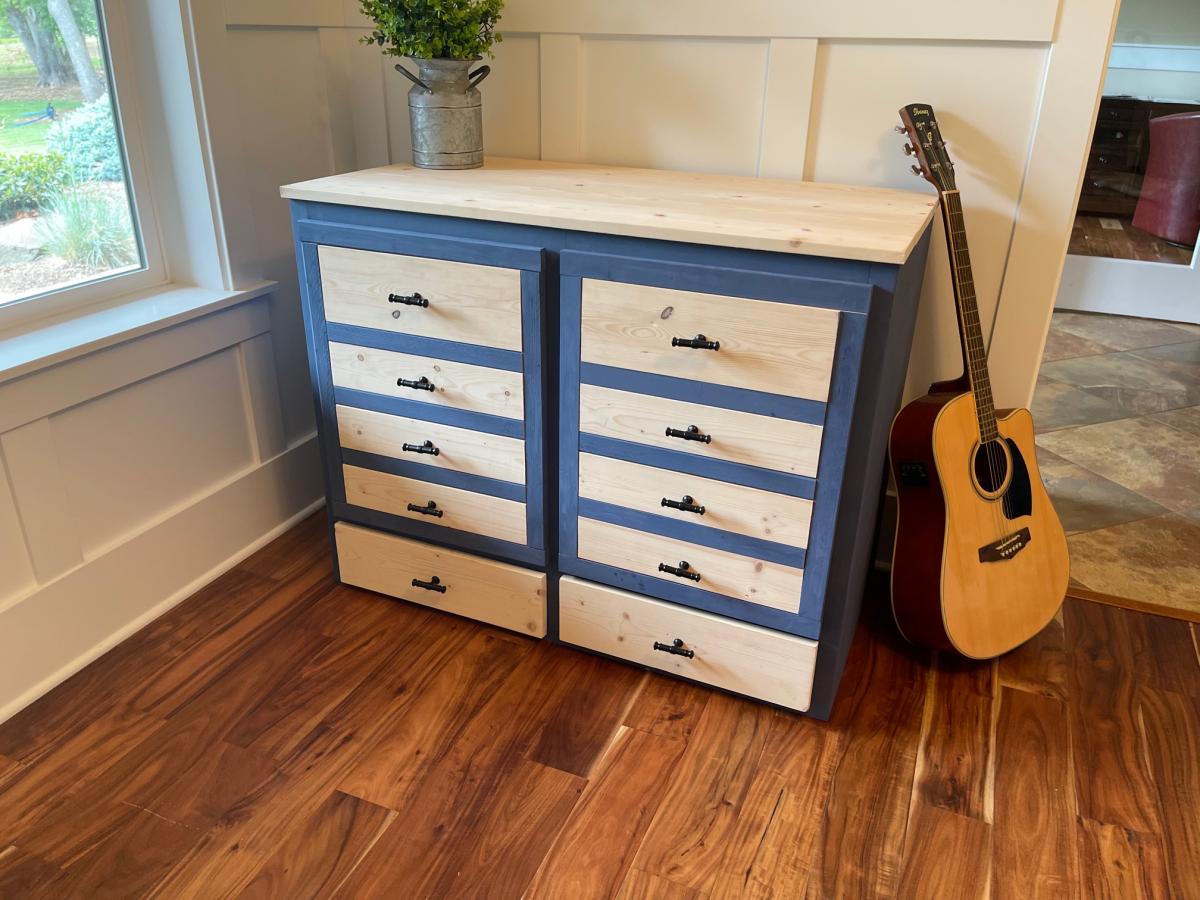
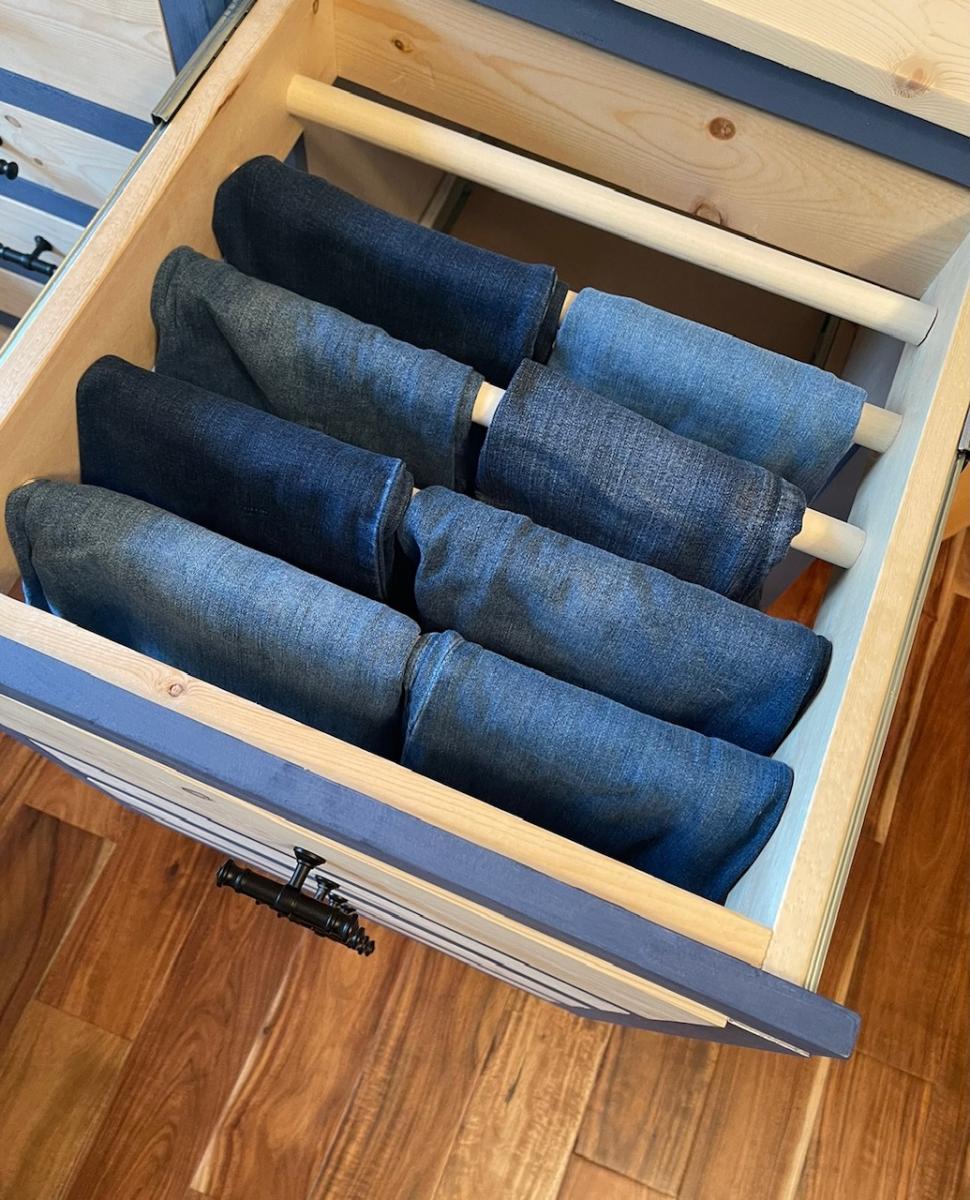
For the bed (I built two), I opted to use the alternate slat system. I also used 2" caster wheels and added dividers to the drawers--one drawer has three compartments, and the other two drawers were divided in half.
Note: In my main brag photo it looks like the drawers don't close flush... I didn't notice when I took the photo because I was focused on the new shelves. But they do close and line up perfectly!
I chose to modify the outdoor daybed with canopy for my finished basement, to replace a secondhand sleeper sofa.
The only power tool I used was a drill, including screwdriver bit -- with hand tools it took longer, but wasn't impossible.
My husband did the cutting and we worked together. Everything was great. We used screws to attach the sides instead of finishing nails because we didn't have the right length.
This project was quite easy and did not require many tools. The plan allowed me to adjust the measurements easily so it could fit in that space. I used regular 2x4’s and treated the wood with Mountain Ash colour in a semi-transparent stain from Sherwin Williams, I just love the colour! I build 2 - 2 seaters exactly the same. The one side has no arm, as I wanted it to look like a lounge chair. I love to sit in the corner and stretch my legs 😊. I bought the cushion covers from IKEA, and got good quality foam.
Hey Ana -
You're plans have been such a great help to me here in the Bahamas. You've saved us thousands of dollars. Really! Here's one of my many adirondack chairs under construction. I added a Bahamian accent.
I was not able to get to this desk last year and thought my 15 year old teenage daughter had forgotten about it and was getting too old. Around Thanksgiving she made a comment with a sigh that it would never happen and she understood. I immediately went to work in the garage to have this ready on Christmas morning. She had no idea and was very surprised to find it near the Christmas tree!
Desk included a power strip with USB ports, an under the hutch light, magnet board & dry erase board w/ magnet markers to stick on the magnet board.
Thank you so much for putting these plans on-line.
We built this table for our dining room. The project followed the plans for cuts and dimensions except for the top. Instead of using 2x10, we used 2x12 and ripped an inch off each side to have flatter top with out needing to plane.
We used pine for the top and douglas fir for the 4x4 base. Before staining we used a pre-stain conditioner. The table was stained using Minwax Early American and then finished with a clear satin polyurethane.
Have been wanting to build this for 6 months now and just havnt had the time. Finally completed it!
I made some small changes to the design, different trim layouts, different dimensions, and went with a plank look for the back of the hutch instead of a solid peice of 1/4" plywood.
In reply to This looks great. I love the by handmadewithash
Wed, 12/31/2014 - 17:00
Thank you very much for the comment! =).
Happy New Years as well!
Cheers,
Justin
Thu, 01/01/2015 - 22:48
Thank you ehays216! Ive looked at your Farmhouse Storage Bed a few times.. Have always wanted to try the Steel wool/Vinegar trick.
Cheers,
Justin
In reply to Stunning! by Ana White Admin
Thu, 01/01/2015 - 22:49
Thank you very much Ana White Admin!
Cheers,
Justin
In reply to Beautiful!!! by Smjackson82
Sun, 01/04/2015 - 16:07
Of coarse! I used the same height and depth dimensions, just shortened the width by 9 inches.
Cheers,
Justin
In reply to backdrop by timberandsoul
Sun, 01/04/2015 - 16:09
Thanks a lot timberandsoul!
Photo was taken on an empty wall in my living room, Which is currently a light gray wall. thought it looked boring so I did a quick switch of backdrops in PS. I just typed in brick wall in google.
Cheers,
Justin
Sun, 01/04/2015 - 11:30
Hi Justin. Did you use any special technique between the two coats of stain to achieve that effect. Thanks. Andy
In reply to How to achieve that finish? by AndyH
Sun, 01/04/2015 - 16:10
Got your email Andy, hopefully you got mine!
Cheers,
Justin
Sun, 01/04/2015 - 18:36
Hey Singhs, I went with Home Depot Regular Knotty Pine. Cheap and easy to work with.
Cheers,
Justin
Mon, 01/19/2015 - 13:03
I love this! Can you give me information on how you modified the plan to achieve the plank backing and the stain color?
In reply to Stain color and plank backing by juddgirl2
Sat, 01/24/2015 - 13:08
Sure! the plans call for 2 solid sheets of 1/4 plywood for the backing.. I simply just ran the plywood through a table saw at 5.5" wide and brad nailed it the back. =)
The stain is weathered oak and let sit for 15min. Then right away special walnut and let sit for 15 min.
repeat until desired colour. let me know if you have any more questions!
Cheers,
Justin
Sun, 01/08/2017 - 07:33
How many coats did you have to do to achieve this look? The weathered oak looks so light...and gray.
Thanks!
Sun, 05/17/2015 - 19:40
What was your strategy on attaching the sideboard to the Hutch. I haven't seen where there is any instructions or conversation around this. What and how did you accomplish this and/or is there anywhere to go that discussed this that helped you.
Thanks,
Tue, 07/05/2016 - 00:19
This inspired hutch/sideboard is absolutely divine! What an awesome job!
These modern Adirondack chairs were my first wood working project ever and they turned out awesome! I wanted to build a small table to complete the set and Ana’s new side table plans were exactly what I was looking for. I am truly amazed at how easy these projects were to make and how great they look on our front patio. Ana’s step-by-step plans make it so simple. My wife and I can’t wait to build some more of these projects for our backyard lanai and pool area.
Mon, 04/12/2021 - 10:21
Amazing job on your first build, I see more handmade pieces in your future!
Well...this was pretty much all done by me.
I am really not liking how many bad boards there are at the store. It takes forever to find a decent board. I had some of my x12s measuring closer to 11 (yes I know they aren't 12 inches).
The door is a little wonky but if it bothers me too much I will just replace it with a curtain on a tension rod.
I love the yellow and I am very proud of myself :)
I didn't have a Kreg jig (too expensive for us right now) but it would definitely have been helpful...
Sun, 03/31/2013 - 07:44
I run into that problem as well!!! And with two kiddos at my hip it gets more annoying to sift thru 5 boards before a good one comes up. But it's all worth it. I made this as well and and the magnetic closure made all the difference. This is really nice by the way. The color is fab!
I built this before my son was born to use as a changing table in his room. I used leftover plywood from another project which made it a cheap build. It is super sturdy and has plenty of storage on the top to hold wipes, diapers, and creams. I used shelf lining and bought cute baskets to complete the look.
I used the Ana's Cedar Planter plans and flipped it, placed a bucket with cement inside to support umbrella and made a simple table top for drinks. Hope you like it ✌🏾
I modified this plan to use wood that I had and also a piece of kitchen counter top that was left over from my daughters new house.
We used Anna's outdoor Sofa plans, which were very easy to read. For wood, we kept costs low by using pressure treated wood, and staining it with Minwax Colonial Walnut stain. We did use the lumber cutting service at Home Depot- only $15 for the cuts, and it made the project time very quick. The cushions were from Lowes, and throw pillows were purchased the previous season at Homesense. We are so happy with how it turned out. Thanks, Anna!
I used Shelf Help for the plywood pieces and a mash up of Ana's plans for the rest. I shared a video on my family page for steps used here https://www.youtube.com/watch?v=urFoX5j4J0s
This was my first Ana White project! I didn't do the x's on the ends, obviously, and it's both taller and wider than the plans in order to fill up the giant space along our back wall. I notice the glue blobs that didn't stain, and the decorative hardware was trickier than I expected, but it was fun to build... and totally functional :)
Thanks so much for the plan!
Fri, 02/20/2015 - 09:35
This looks INCREDIBLE!!!!! I was hoping you could possibly share how you painted on the American Flag, and gave it the rustic look to match the coffee table? I'm new to this site, so I'm not sure if you can reply directly to this comment or not. If you can't, would you mind emailing me at [email protected]?
Thank you so much!
Wed, 10/07/2015 - 13:59
Hi. I love this coffee table. I have read through all the directions. I have one quick question. After I have built the coffee table and then oxidize the wood, do I then paint the flag with regular red white and blue paint and then seal it with the wax? Thank you
Welcome to our labor of love. This is our first build and while my bf did most of the work, it was a great project for us as a couple. It was definitely work, but well worth it. We love the way it fits perfectly in our courtyard and people keep commenting on how high-end it looks. Thanks for the plan, Ana! The project took a little longer than it probably should, since it was the first project for us. You should account fort he time it will take to cut, sand and stain your pieces before assembly. There are times you will need to allow for the lumber to dry etc.