Community Brag Posts

Truss End Table

I had trouble with this project. I wasn't sure of the terminology, off square and such. It went well, I ended up not putting the truss part on due to not paying attention when cutting the wood.

Built from Plan(s)
Estimated Cost
$20
Estimated Time Investment
Afternoon Project (3-6 Hours)
Finish Used
Rust-Oleum Ultimate Dark Walnut
Recommended Skill Level
Beginner

Simple Outdoor Bench and Table

Submitted by Rose988 on Sun, 06/08/2014 - 19:50

This was my first project, my wife and I started with the table, which took us a little while but ended up being pretty simple. Unfortunately we do not own a saw but discovered that Lowes will happily cut the wood for you. After we completed the table we started working on the bench, which is where we ran into a slight problem. Some how our frame boards ended up being two short, so as a fix we did not put any spaces in between the seat slats and used four 7 inch pieces we had left over to complete the full frame. We also altered the plan to make our bench a little longer than the original its 57 inches instead of 52.

Estimated Time Investment
Weekend Project (10-20 Hours)
Finish Used
Lowes Stain: Brick Red
Recommended Skill Level
Starter Project

RH Inspired Shanty Hutch & Sideboard + glass doors

Submitted by mandi10uga on Fri, 09/09/2016 - 10:50

This was my first woodworking project ever - and am thrilled!! Thank you Ana-White.com!! I needed a beautiful china cabinet for a fraction of the retail cost. Once I found plans on this website, I bought some power tools and got started! I only worked a couple of hours each weekend so it took a while to finish.


I modified the Shanty sideboard and Shanty hutch plans in a few ways: Shorter overall width to more comfortably fit my dining room, shorter height (which I now regret), fewer shelves in the hutch, different method to attach shelves, and added glass doors to the hutch. My shelves were not perfectly flush with the cabinet walls (oops) so I couldn't use pocket holes to attach them. Because I detest traditional shelving hardware, I just secured 1/2-in quarter round to the walls and rested the shelves on that.


For the glass hutch doors, I built frames similar to the sideboard doors' frames -- two frames for each door, for a total of 8 frames. On 4 frames, I used a rabbit router bit to create an inset for the glass I bought and had cut at Lowe's. I secured the glass with glazier's points and silicon caulk, then attached an un-routered frame to the back of each door with screws. I chose to keep the screws on the back visible and accessible so that I could easily replace the glass if needed without destroying the door.

Built from Plan(s)
Estimated Cost
$630 plus $70 for fancy door knobs
Estimated Time Investment
Week Long Project (20 Hours or More)
Finish Used
Followed Ana-White staining tutorial and used Minwax Weathered Oak (1st coat) and Minwax Special Walnut (2nd coat). Used matte polyurethane clear coat.
Recommended Skill Level
Intermediate

Comments

4x4 Truss Beam Table

Submitted by Anonymous (not verified) on Mon, 06/22/2020 - 14:44

I followed this plan to create our new dining table and bench. I went with a distressed chalk paint for the base, and the top is made from 100 year old douglas fir barn rafters. They look great with our blue/white cafe chairs. Thanks for the great plan!

Estimated Cost
$400 (mostly from purchasing the reclaimed rafters)
Estimated Time Investment
Week Long Project (20 Hours or More)
Finish Used
Behr Chalk Paint and Dark Wax on Base, combination of Special Walnut and Oaked Grey stain on Top, matte poly
Recommended Skill Level
Intermediate

Turned Leg Coffee Table

Submitted by maryjacob on Mon, 08/20/2012 - 18:57

Okay, don't mind the husband and the pooch in the background there! I fell in love with the Pottery Barn version of this table (actually, I've fallen in love with everything from Pottery Barn, if we're being honest here), so I've been wanting to make this coffee table for quite awhile. I found the legs on ebay for a really low price, so I splurged and bought premium 5/4" thick pine planks for the table top to make it look more substantial. This table was so easy to assemble using pocket holes. My husband and I both love how it turned out!

Estimated Cost
About $130 for all wood and finishing supplies
Estimated Time Investment
Weekend Project (10-20 Hours)
Finish Used
Stained with a mix of Minwax English Chestnut and Minwax Dark Walnut, then finished with 3 coats of Minwax Clear Satin Polyurethane
Recommended Skill Level
Beginner

Umbrella Stand (in PVC)

Submitted by lewg on Tue, 06/10/2014 - 18:29

Great plans, Ana! I swapped out the wood for PVC trim, and used stainless steel screws to hopefully make this thing weatherproof.

Built from Plan(s)
Estimated Cost
$80
Estimated Time Investment
Day Project (6-9 Hours)
Finish Used
None. The PVC comes white, and I wanted a white table!
Recommended Skill Level
Intermediate
Seasonal And Holiday

Connie's coop

Submitted by Anonymous (not verified) on Sat, 09/10/2016 - 23:45

http://www.backyardchickens.com/a/connies-coop


I built this and posted it on 6/8/15 on backyardchickens.com and it has been "pinned" a few thousand times since then... 

Estimated Time Investment
Week Long Project (20 Hours or More)
Recommended Skill Level
Beginner

DIY Tryde Table

Submitted by Anonymous (not verified) on Wed, 06/24/2020 - 17:31

Thank you Ana for a great design. I was looking for a gift idea for my Dad on Father's Day and your design was perfect for what I wanted to make. My Dad really loved it! My name is Nathan and kinda new at builders with wood. You see, I am a brain tumor survivor of 20 years and I lost most of my vision from it. For the longest time I was told that I couldn't do this or that. Note, I am very careful and take safety seriously. Your ideas and designs have helped me a great deal with developing confidence with my newly learned skills and I wanted to thank you for that. Also, your designs are reaching people out there and they're bringing joy to a lot of people. Keep up the great work and I look forward to your next inspiration.

Estimated Cost
$25
Estimated Time Investment
Weekend Project (10-20 Hours)
Finish Used
Baby Grand Piano and clear gloss polyurethane
Recommended Skill Level
Beginner

Standing Console for Teaching

Submitted by Anonymous (not verified) on Wed, 04/10/2024 - 07:48

I am a teacher and constantly bending over lower desks and I did not have a table to teach off of in the front of the room. So, I built one with Ana’s ideas of a console table with two shelves. I found a link to Kreg from her site and here was this table. I changed the height and width to give proper support of my back (counter hight) and a width that would hold a teacher book. I liked the A-Frame loom and had not built anything like this before, so I learned. I burned the wood for a fun mix of light and dark wood tones. My dad gave me some router bits and I used one to curve the edges of the top, ropy under frame, and shelves. That way all edges are curved for myself and students. I finished it with a coat of poly and a light sanding in between. Thank you Ana for the skills, confidence, and now a love for creating something useful and fun! My students and parents were shocked !! Plus it adds so much warmth to the classroom. Blessings, Jennifer

Schoolwork organizer

Submitted by Deborah on Thu, 08/23/2012 - 15:45

I'm trying to revamp our family "launch pad" in time for the start of school and was hoping to have a box for each kid to drop off their school forms and stuff. The "numbered cubbies on the wall" plan is just not practical for us -- I don't need a lot of little cubbies, just a few big ones! So I modified it to work for us. The letters are each of my boys' initials.

Also, I used scrap wood and leftover paint. So basically the cost was almost nothing, just a few nails and some wood glue.

Built from Plan(s)
Estimated Cost
0
Estimated Time Investment
An Hour or Two (0-2 Hours)
Finish Used
First I painted the piece black, and then covered it with some light gray house paint I had leftover. I used a sharpie pen for the letters and distressed everything.
Recommended Skill Level
Beginner

Sand Box

We adjusted the plan and created a 4x7 sand box with toy box and canopy. We are in love with the way this has turned out!

Estimated Cost
300
Estimated Time Investment
Weekend Project (10-20 Hours)
Recommended Skill Level
Intermediate

Comments

Channing Bookcase

Submitted by Anonymous (not verified) on Tue, 09/13/2016 - 09:47

Stained with Minwax Jacobean. Thank you for the plans!

Built from Plan(s)
Estimated Cost
$200 per bookcase
Estimated Time Investment
Weekend Project (10-20 Hours)
Finish Used
Minwax Jacobean and Semi-gloss Poly
Recommended Skill Level
Intermediate

Chick Brooding Cabinet for Quail

My family has started raising quail recently and I built their first home while they were still in the incubator. I have never done any wood work before, so this turned out much nicer than I expected! I followed the suggestion of having the brooder part on the top instead of the bottom and omitted the extra shelf. Two 5-gallon buckets fit nicely below the chicks. Since the quail are so small when they hatch, I used 1/4 inch hardware cloth for the "floor" but it wasn't long before that was too small so we had to change it to 1/2 inch. I am going to make a tray with each size of hardware cloth on it to make it easier to change out for next time, because they really do need both sizes.

Built from Plan(s)
Estimated Cost
$75
Estimated Time Investment
Weekend Project (10-20 Hours)
Recommended Skill Level
Intermediate

4 Drawer Entry Way Bench

Submitted by Anonymous (not verified) on Mon, 04/15/2024 - 10:49

I had an empty space next to my stair case and desparately needed a place for my kids to hand their back packs and put their shoes that wasn't all over the place! I adjusted Ana's plans for 4 drawers since there are 4 of us and added board and batten. I also was placing the bench over an outlet which I didn't want to lose so I got an extension piece and cut a space out for it on top with a jig saw. Love the way it came out!

Built from Plan(s)

Make Beachy Style Picture Frames From Fence Wood

Submitted by ananda on Wed, 06/18/2014 - 23:32

These picture frames are inspired by furniture and frames made from
reclaimed boat wood which came from fishing villages in many parts of
the world. The frames here are made from readily available materials – the humble fence wood boards, some stores call it lathe. An 8' long piece only cost $1-$2. The complete detailed tutorial is here- http://www.apieceofrainbow.com/diy-make-beachy-style-picture-frames-from-fence-wood/

Estimated Cost
$5
Estimated Time Investment
Day Project (6-9 Hours)
Finish Used
paint
I chose a palette of subdued blues, greens, a little yellow and white. I like acrylic paints because they are non-toxic. Mixing colors becomes a lot easier with the guidance of the fan deck.
Recommended Skill Level
Beginner

Kitchen island

Submitted by deadspuds on Tue, 06/30/2020 - 20:36

Built this island off your coffee table plans...love this sight thank you.

Estimated Cost
200
Recommended Skill Level
Beginner

Garden Enclosure with Raised Beds

Submitted by Anonymous (not verified) on Sat, 04/20/2024 - 07:39

I finished my first project. Although there are some cosmetic errors, I think overall it’s amazing. We had a lot of wood left behind by the builder of our log home. So, I was able to use a lot of that. I made some adjustments to the height of the boxes to help the back!

Michelle M - Jefferson, NC

Built from Plan(s)
Seasonal And Holiday

Parson Console Table

Submitted by lee12477 on Mon, 08/27/2012 - 16:18

Thank you so much for the plan. I created a console table by adjusting the dimensions (finished table is 54 x 18 x 30) and omitted drawers. Used Modge Podge to adhere raffia to table (this was the most time consuming part of the project). Finished with a clear coat of polyurethane. Based this project on a table I originally saw in the HGTV Green Home 2010 master bedroom. http://hgtv.sndimg.com/HGTV/2010/03/03/GH2010-105_03-master-bedroom-wid…

Built from Plan(s)
Recommended Skill Level
Beginner

Comments

simplyelle

Sat, 06/22/2013 - 13:45

I'd been wondering on how to attack the covering of my desk with fabric. I'd toyed with the idea of Modge Podge but was not quite sure on its adhering capabilities. Around here, it gets so humid that the adhesive on my 3D Command strips melts and things fall off the walls. How has it held up thus far? I'm attempting to cover mine in upholstery fabric.

Triple Pedestal Farm House with Bench

Submitted by hoosierary on Sun, 06/22/2014 - 15:01

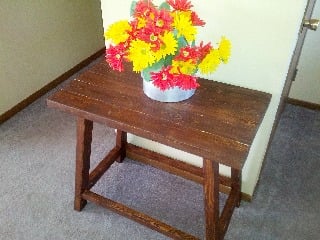
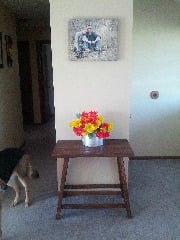
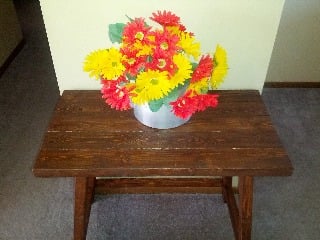
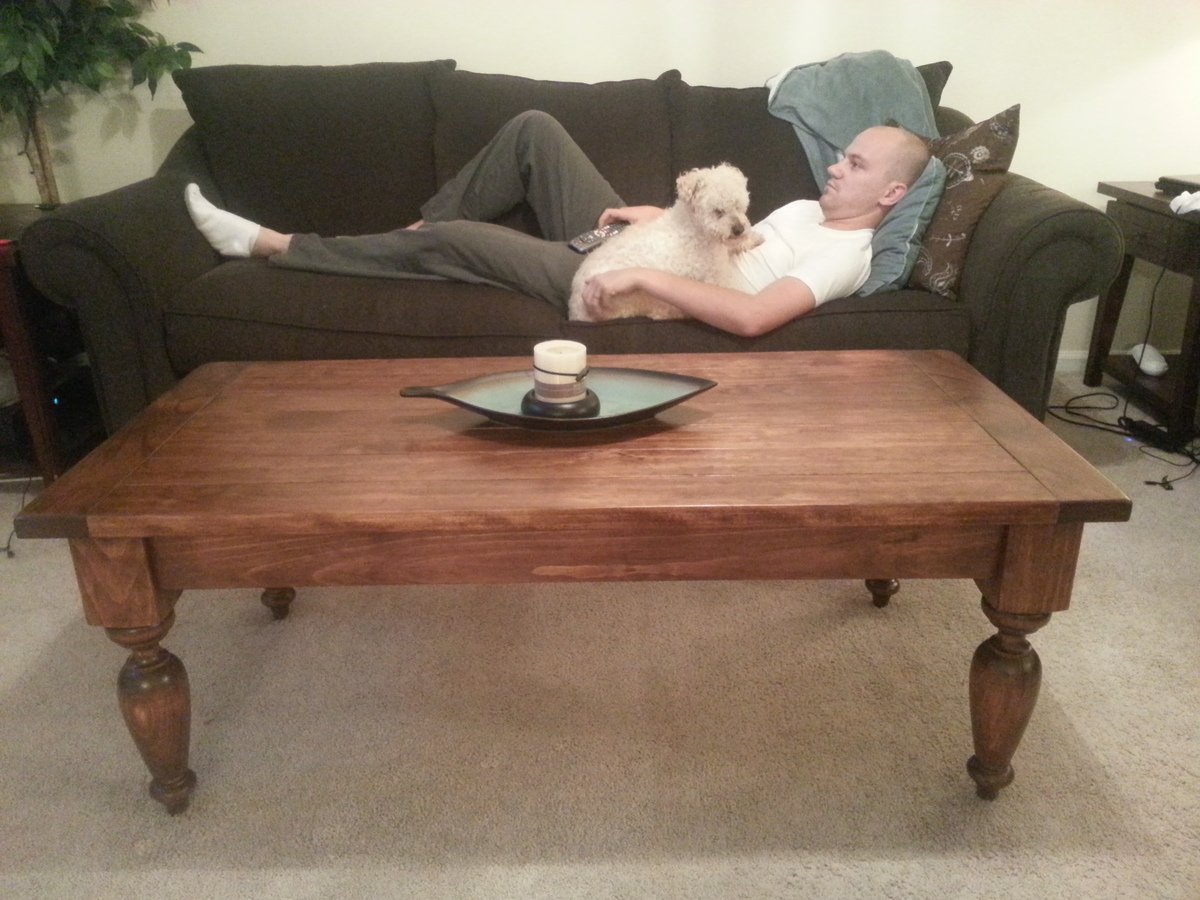
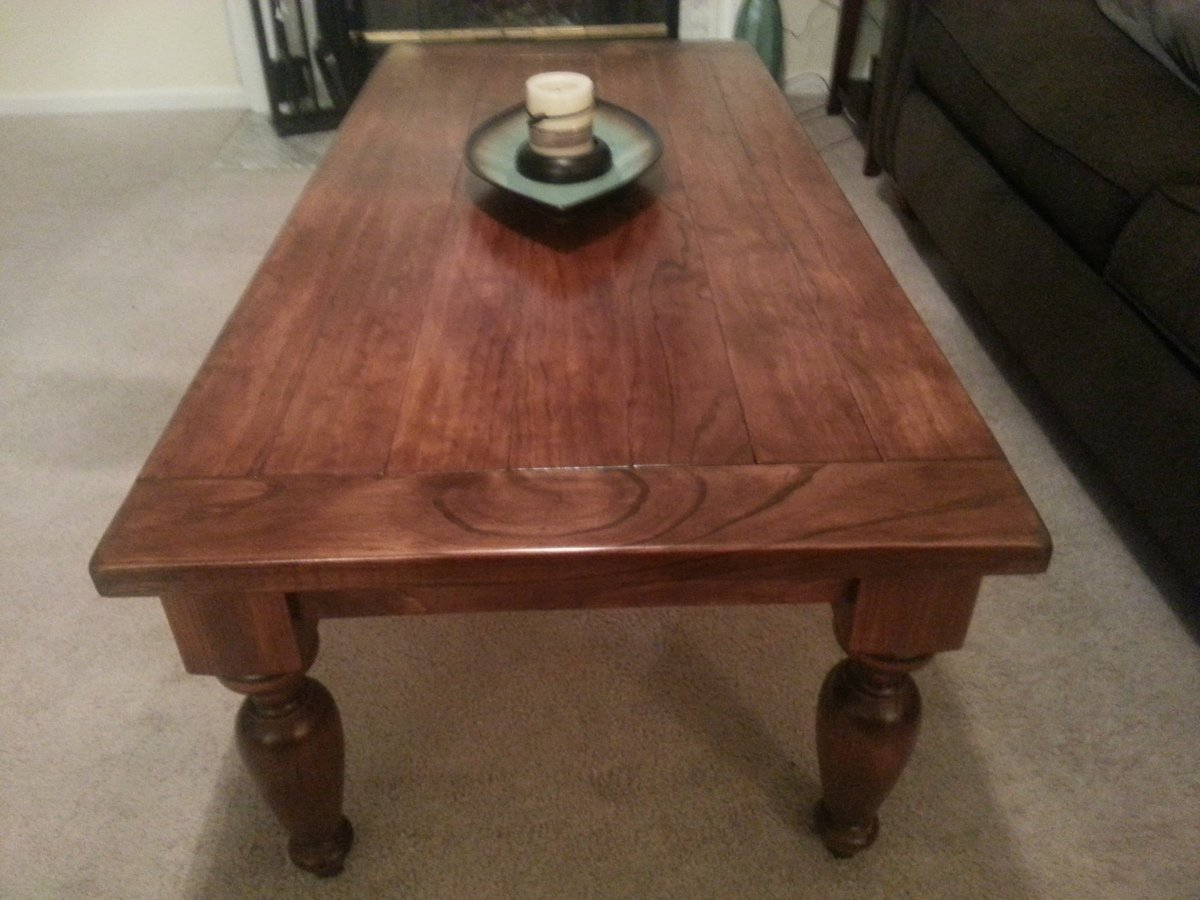
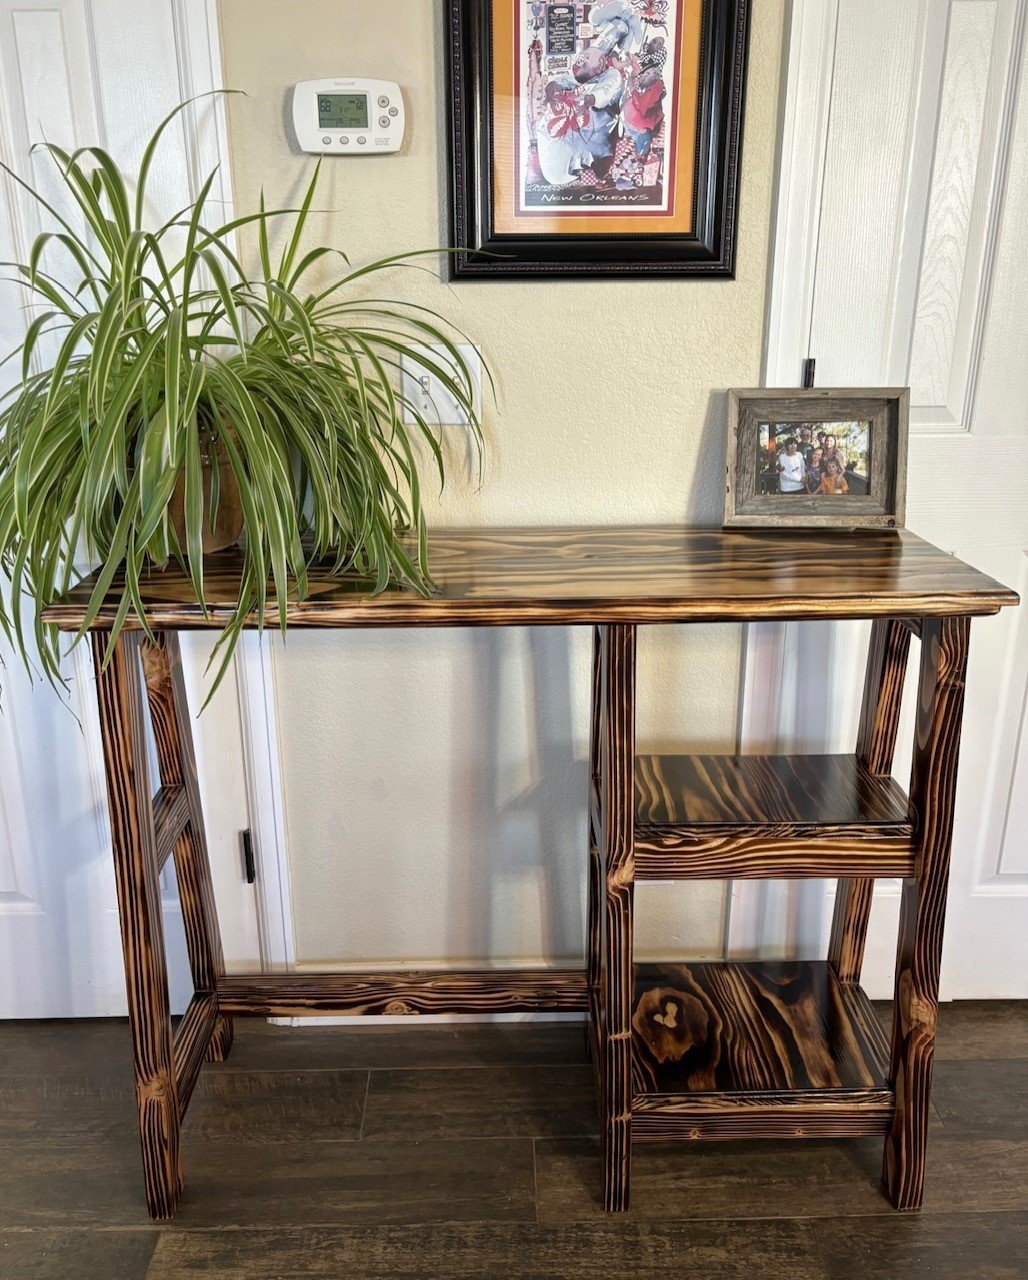
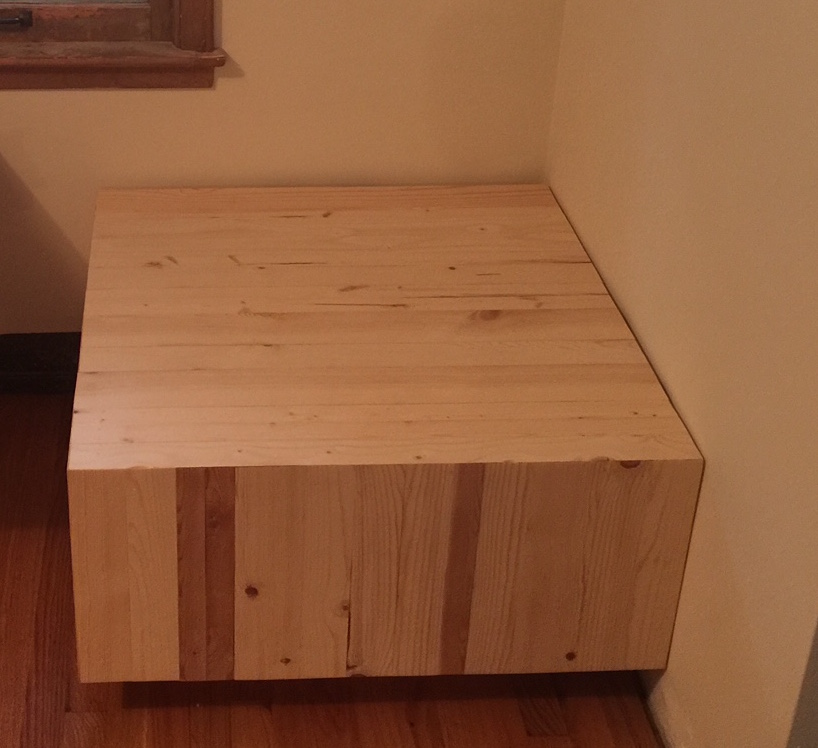
So I finally broke down and decided to make the table that my wife had been asking for sometime. This after our last table was damaged by mold in our last move. I have completed a few woodworking projects before this so from a skill level on this project it was not too hard. The problem was that I wanted the table to be perfect but my wife wanted the dings and dents that came along with a farm table, so we compromised somewhat.

I did run into one significant issue that will be a life long lesson. The Douglas Fir wood that I bought had a very high moisture content and during the course of the project most of the wood began to shrink up to a half an inch in some parts as the wood dried out. I was talking to a construction friend in the area when I was finishing up the table and he confirmed that he had the same issue with this wood locally. Would have been nice to know this from the beginning.

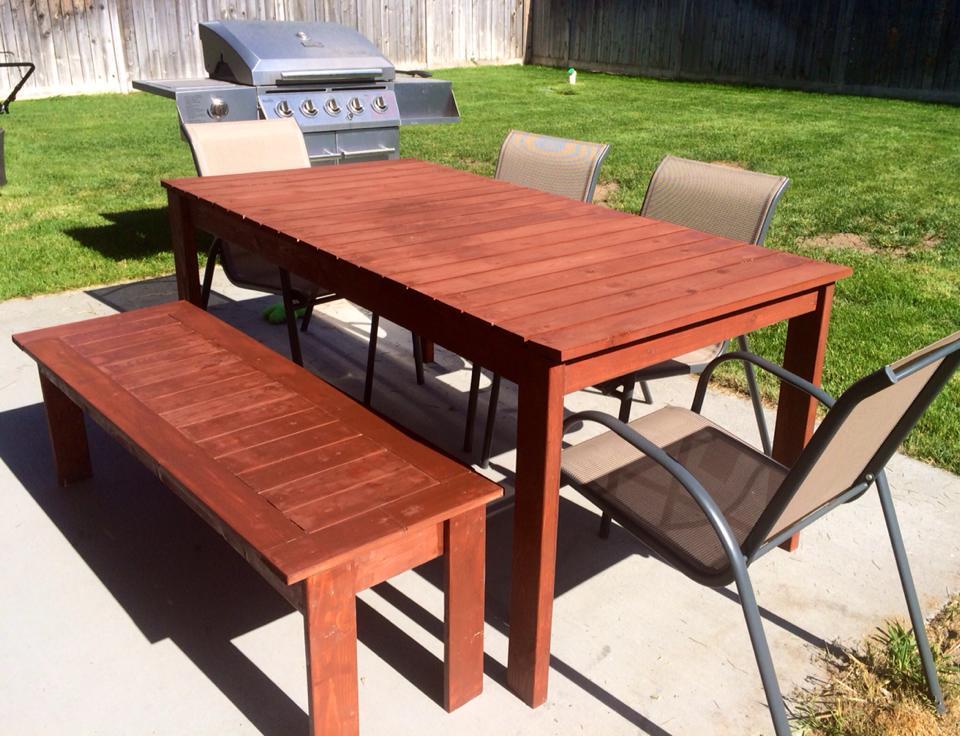
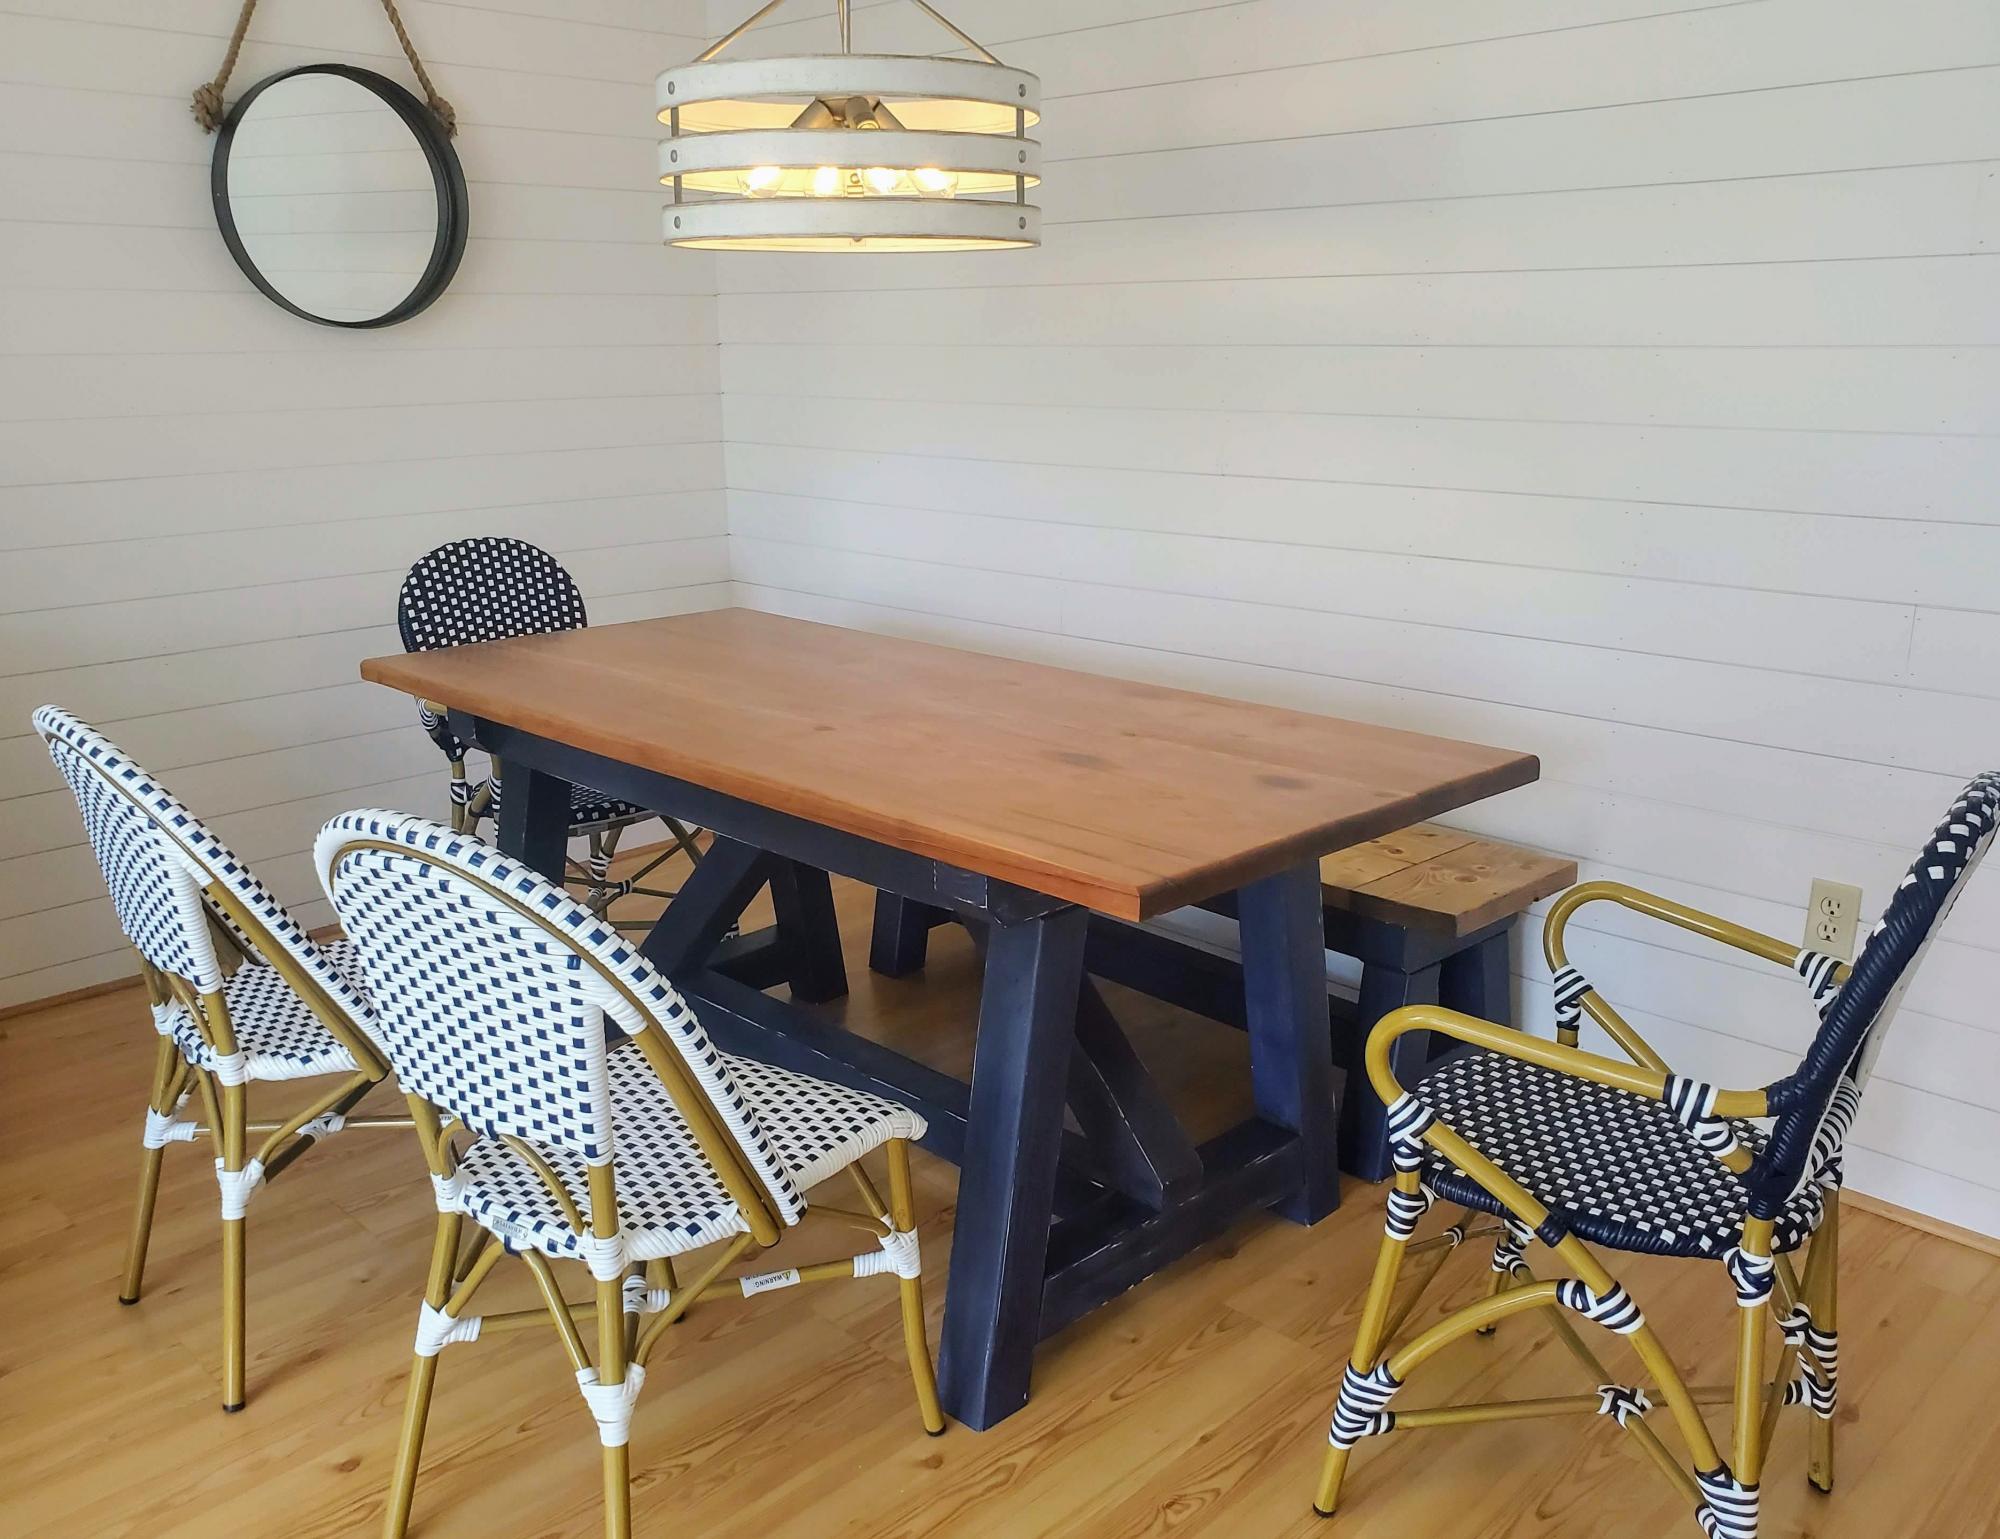
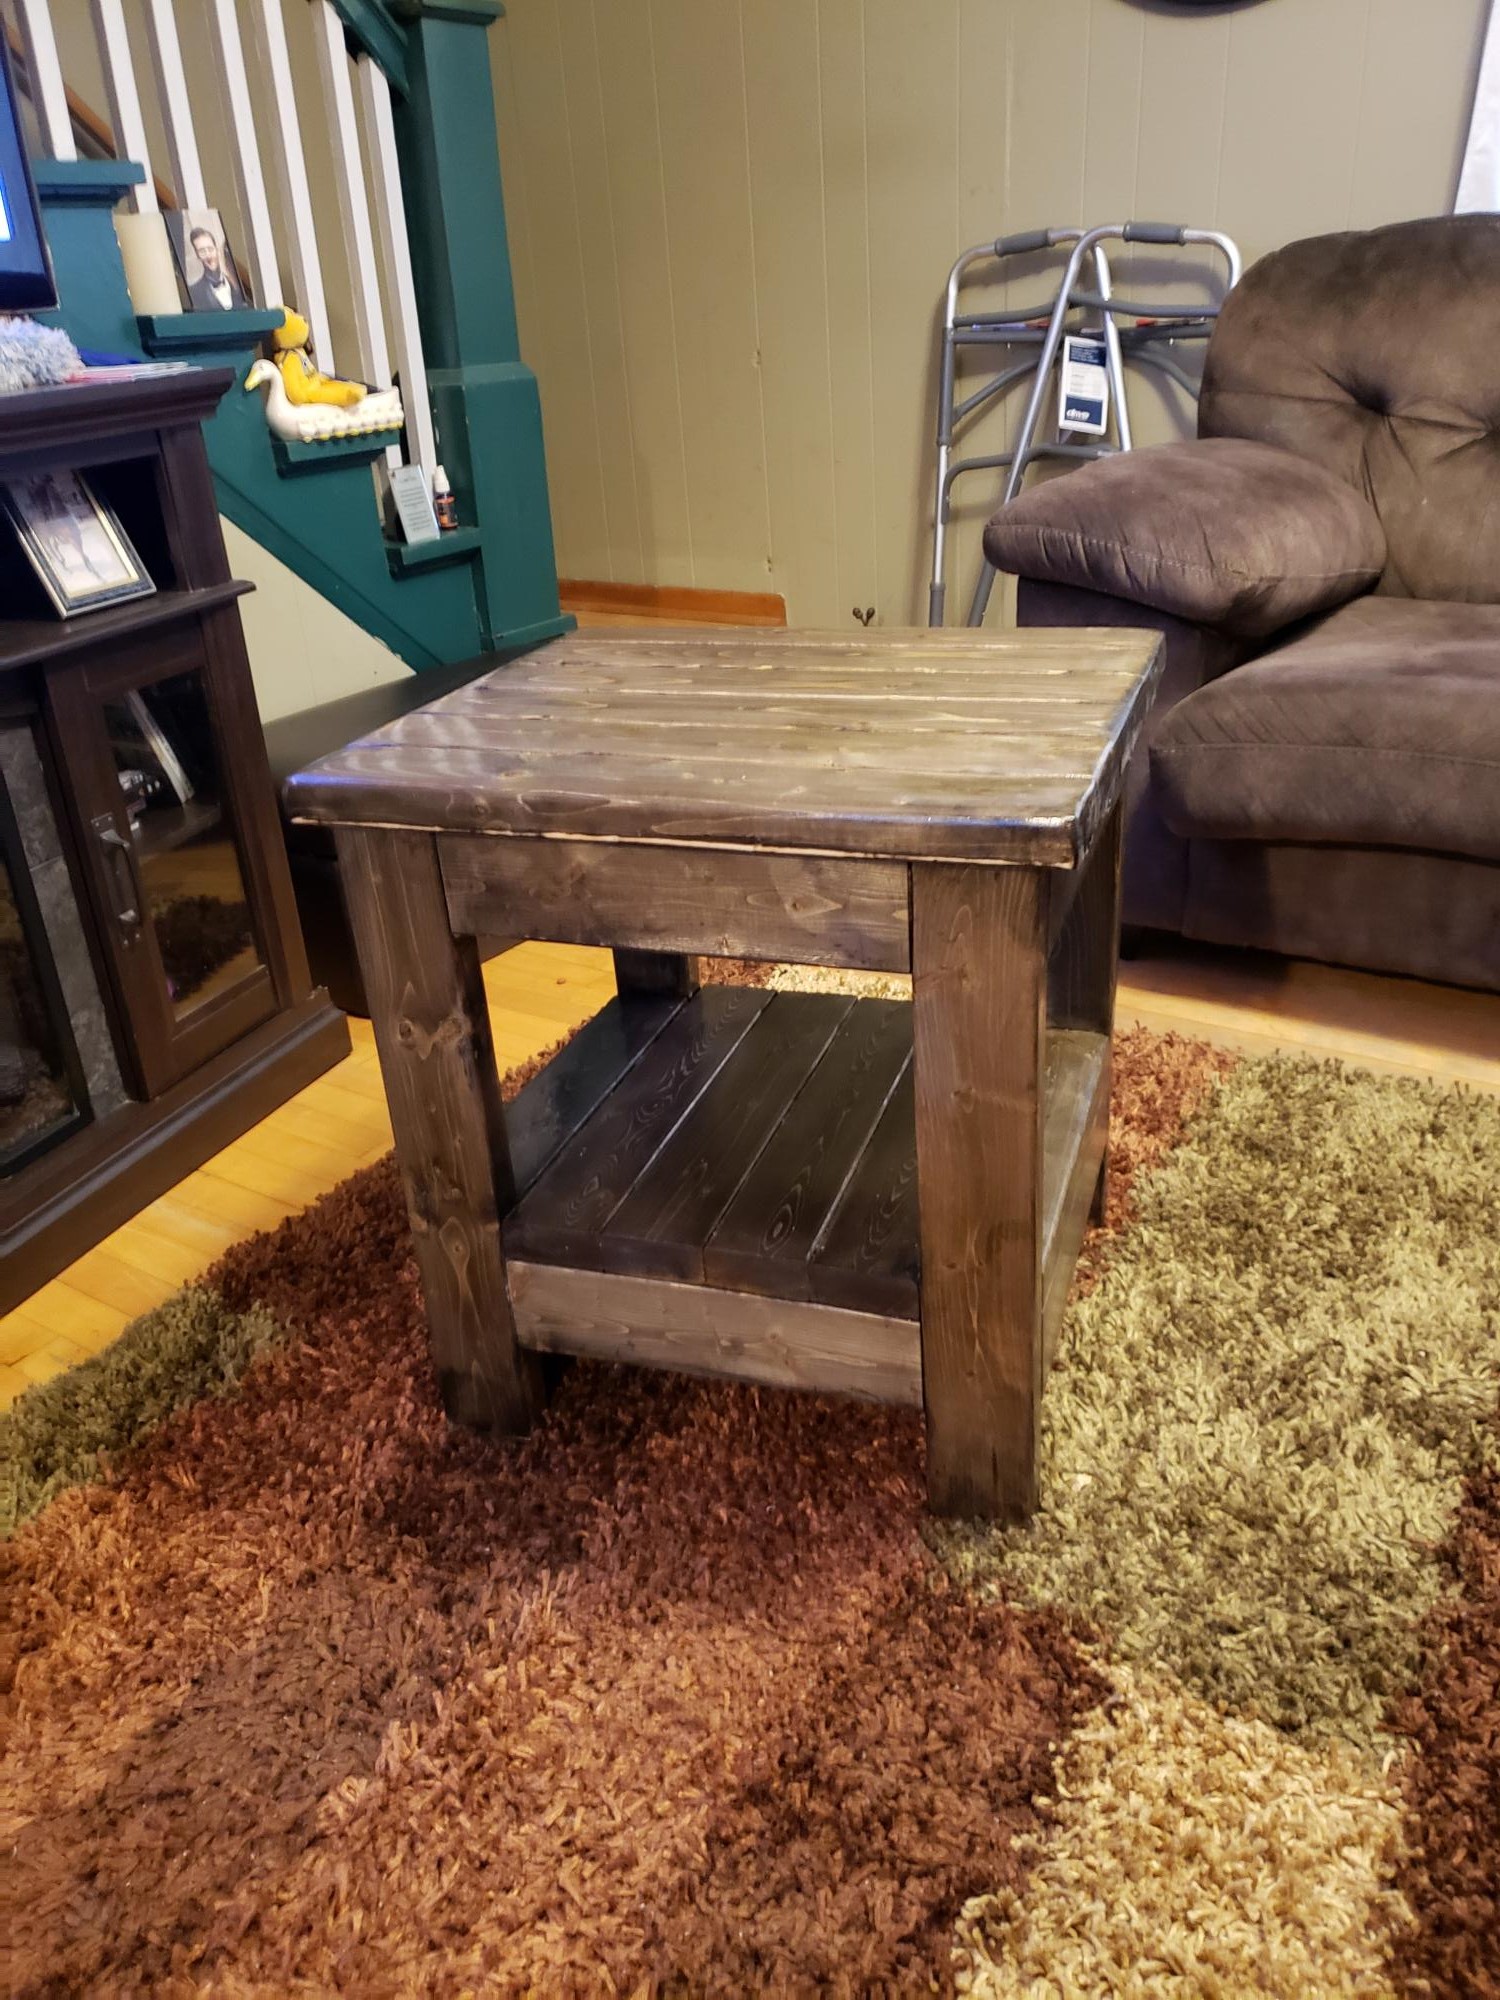
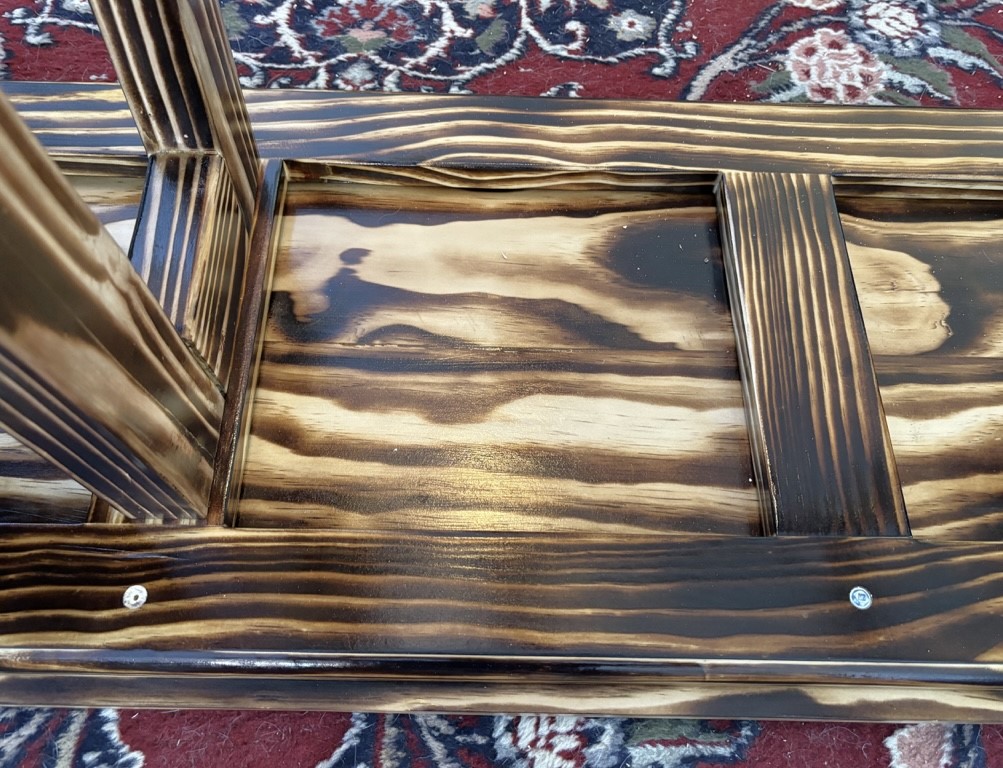
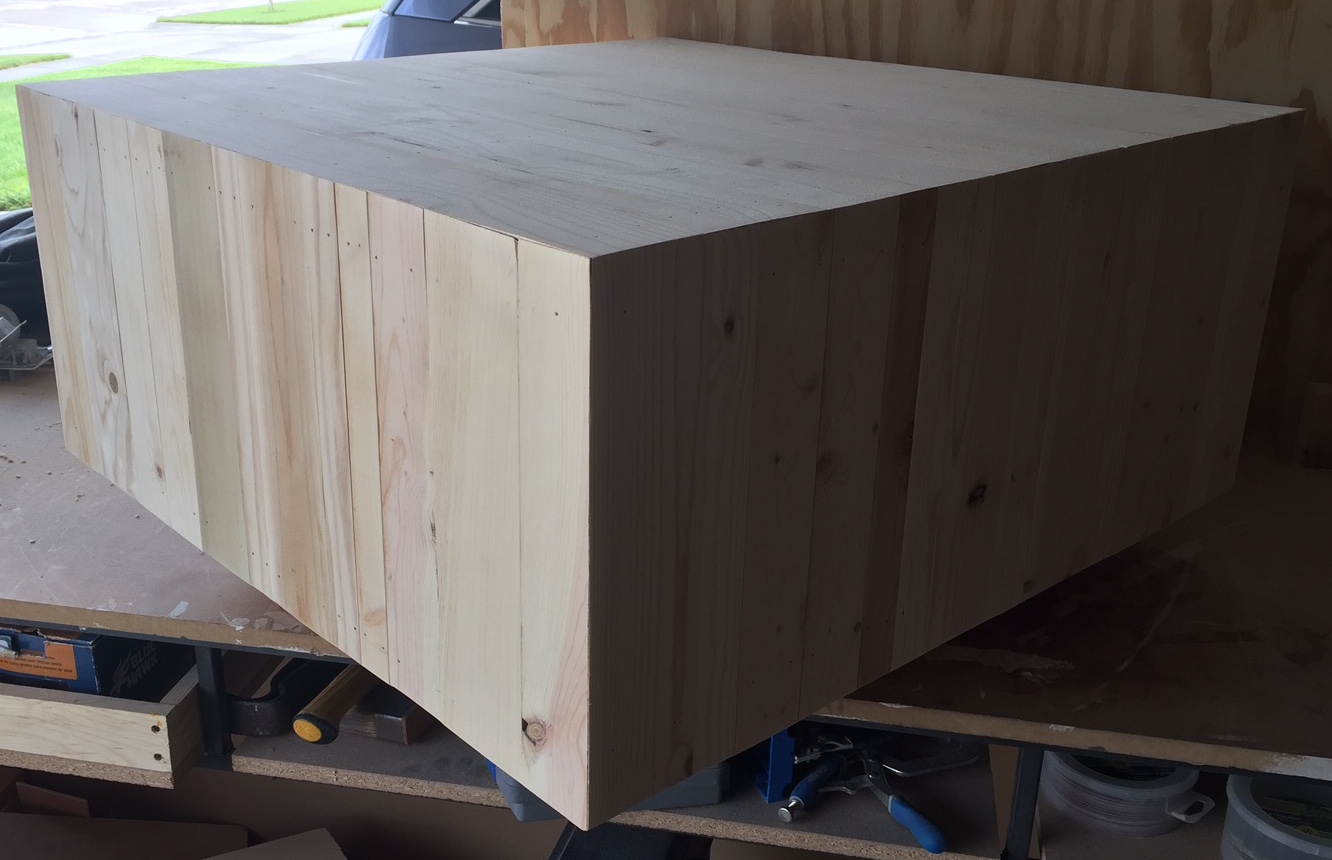
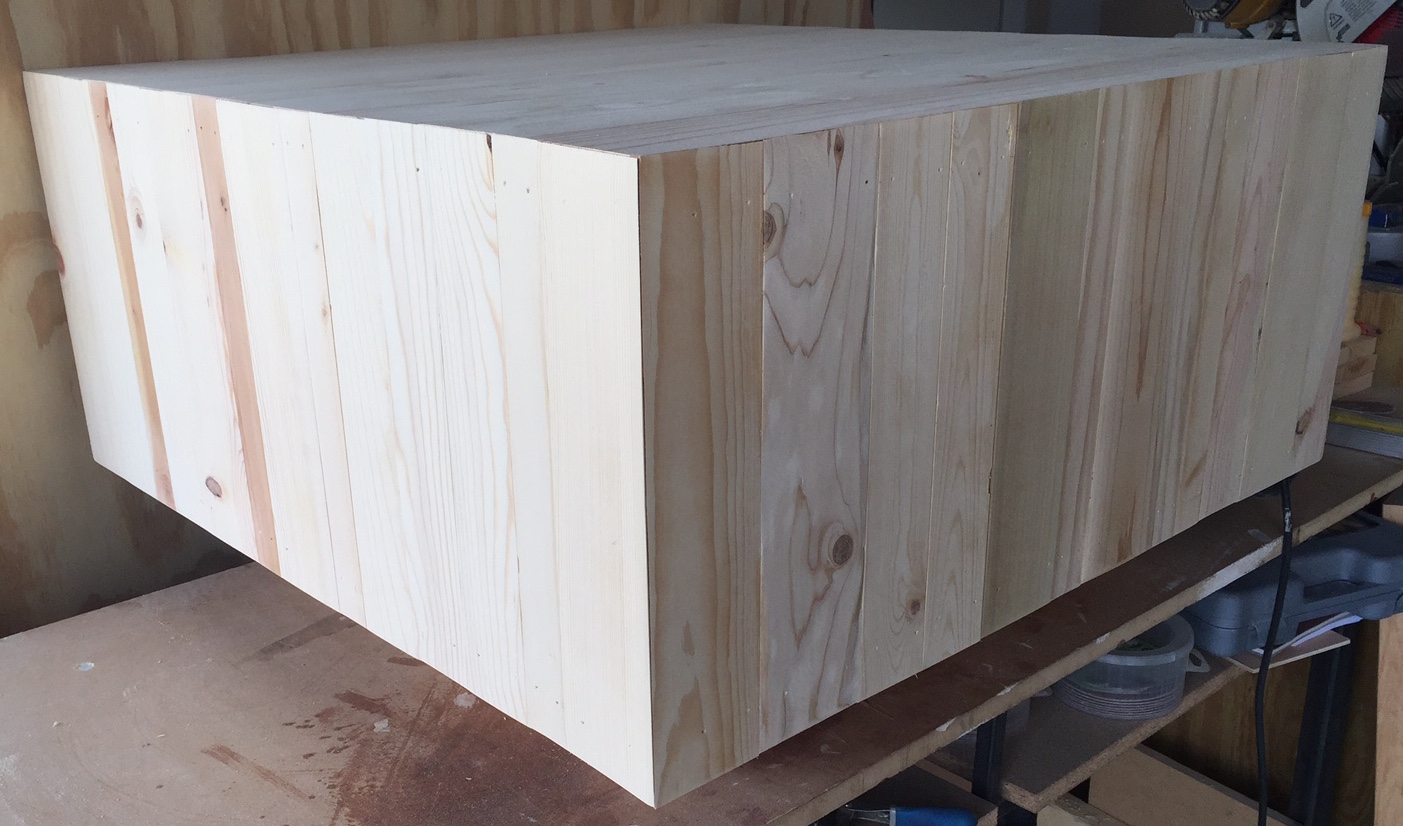
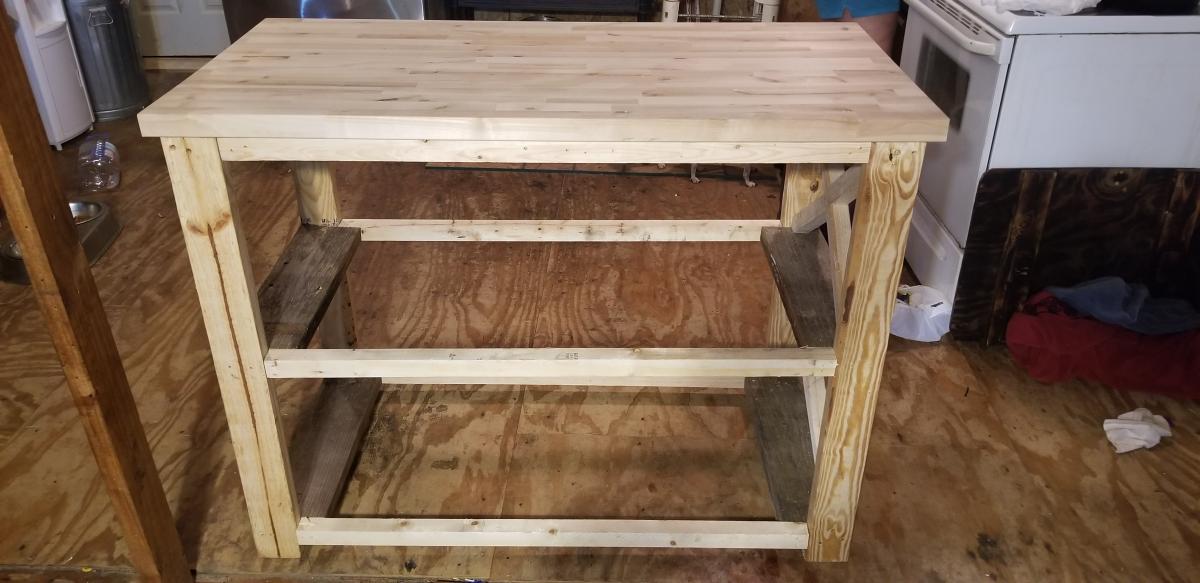
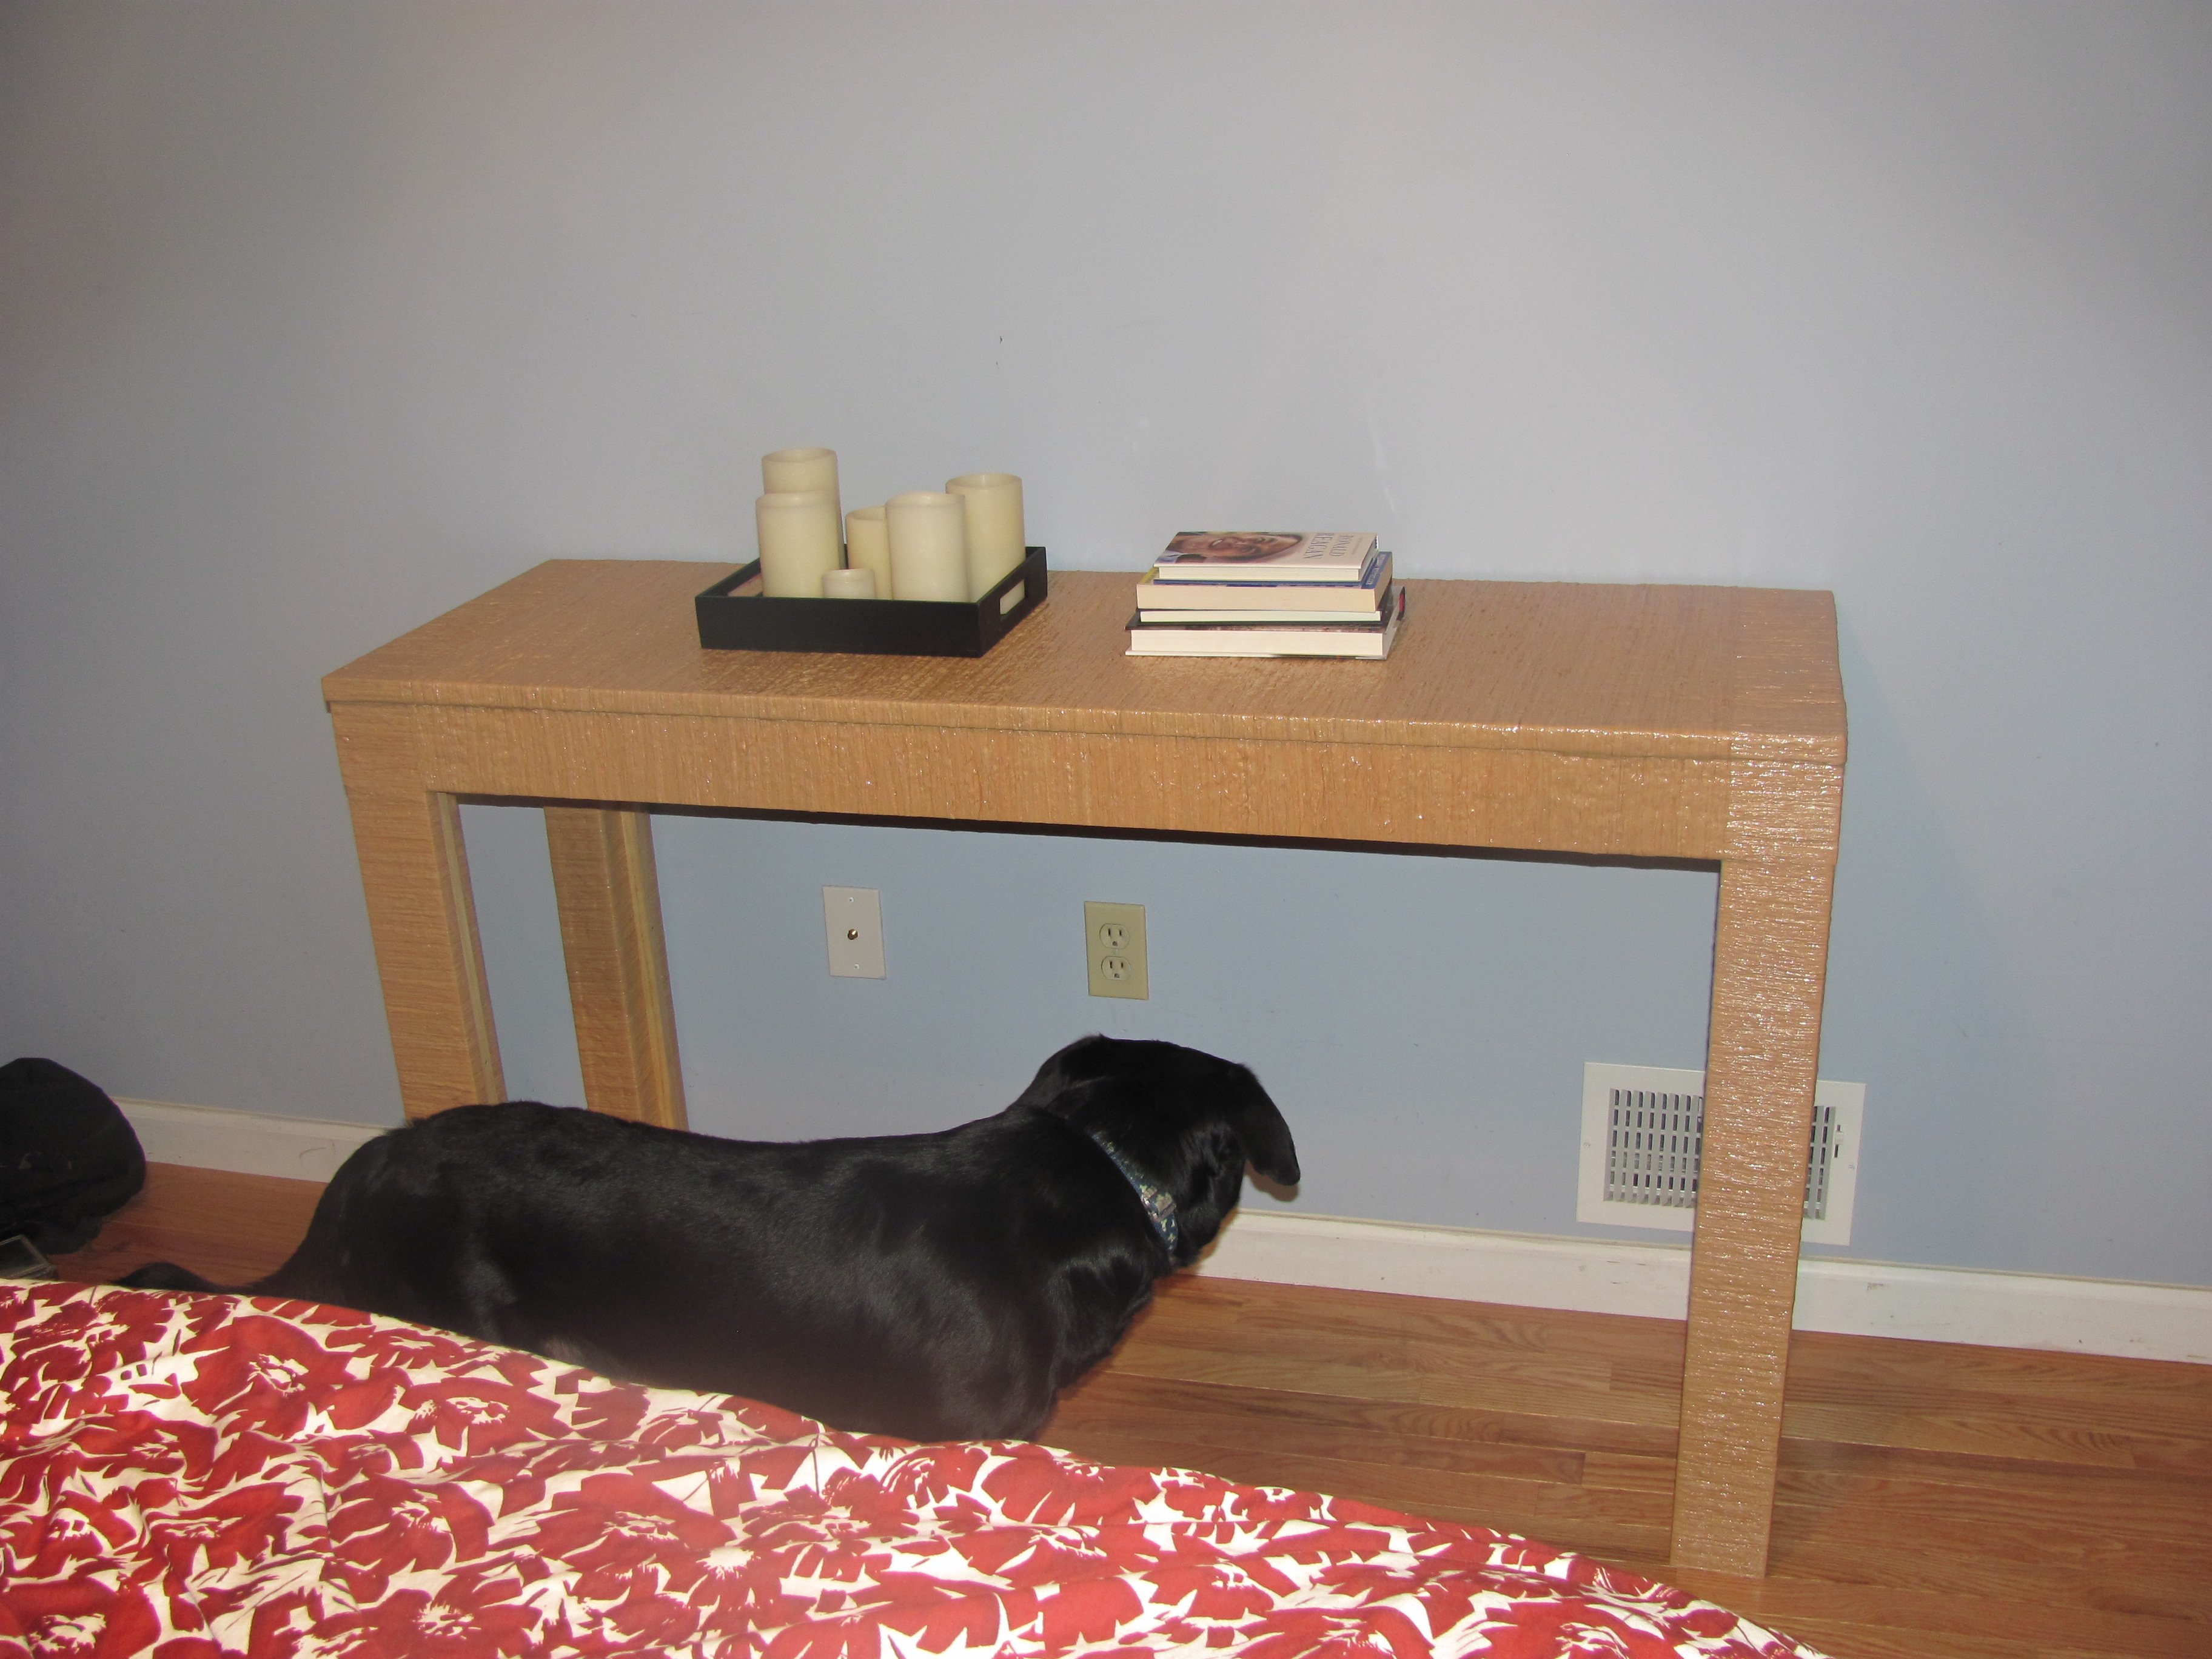
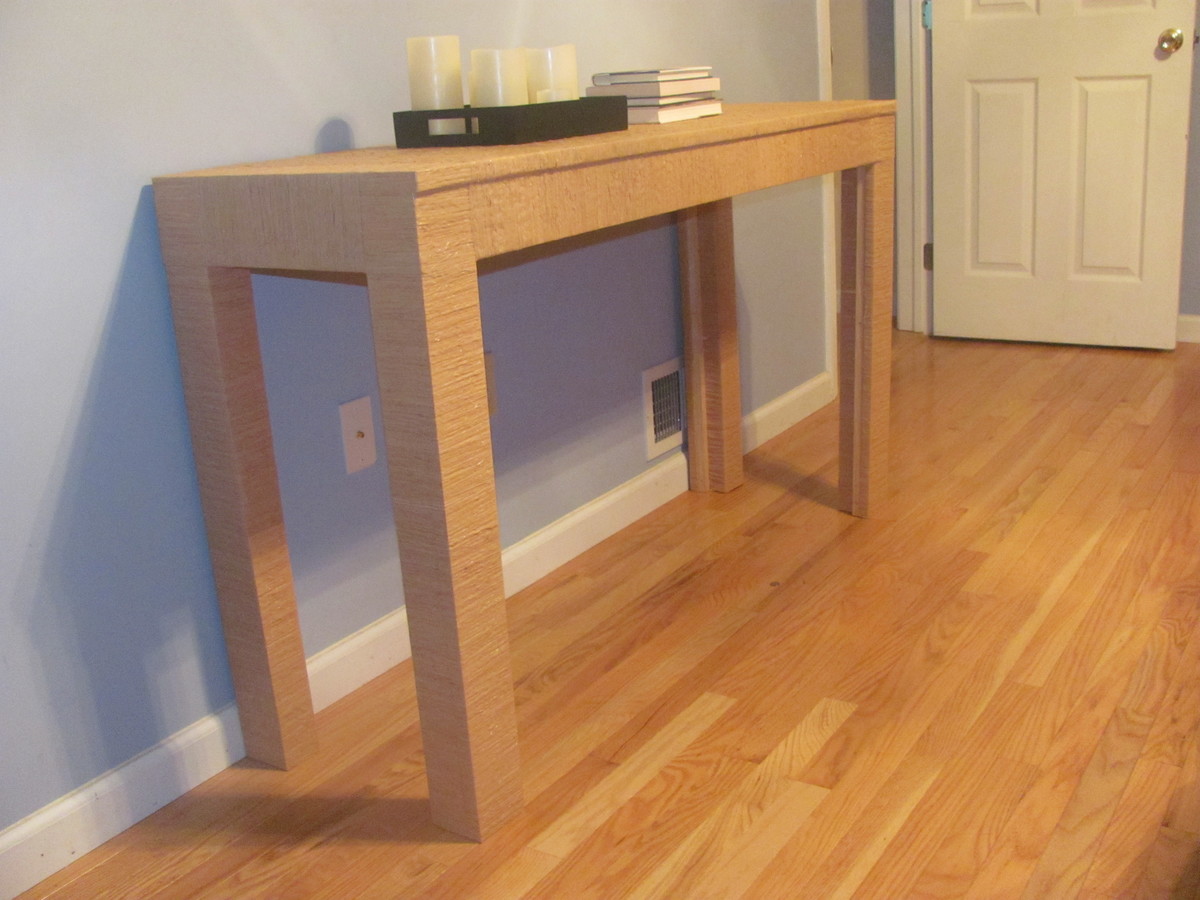
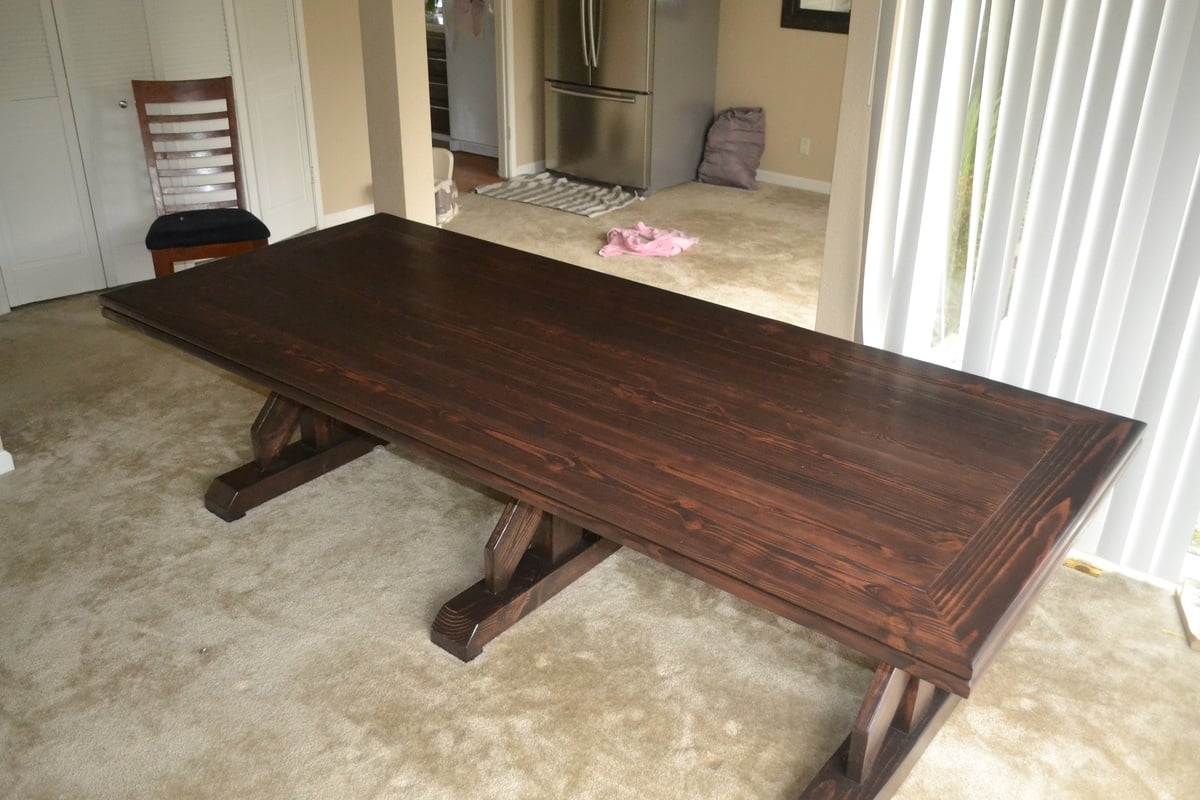
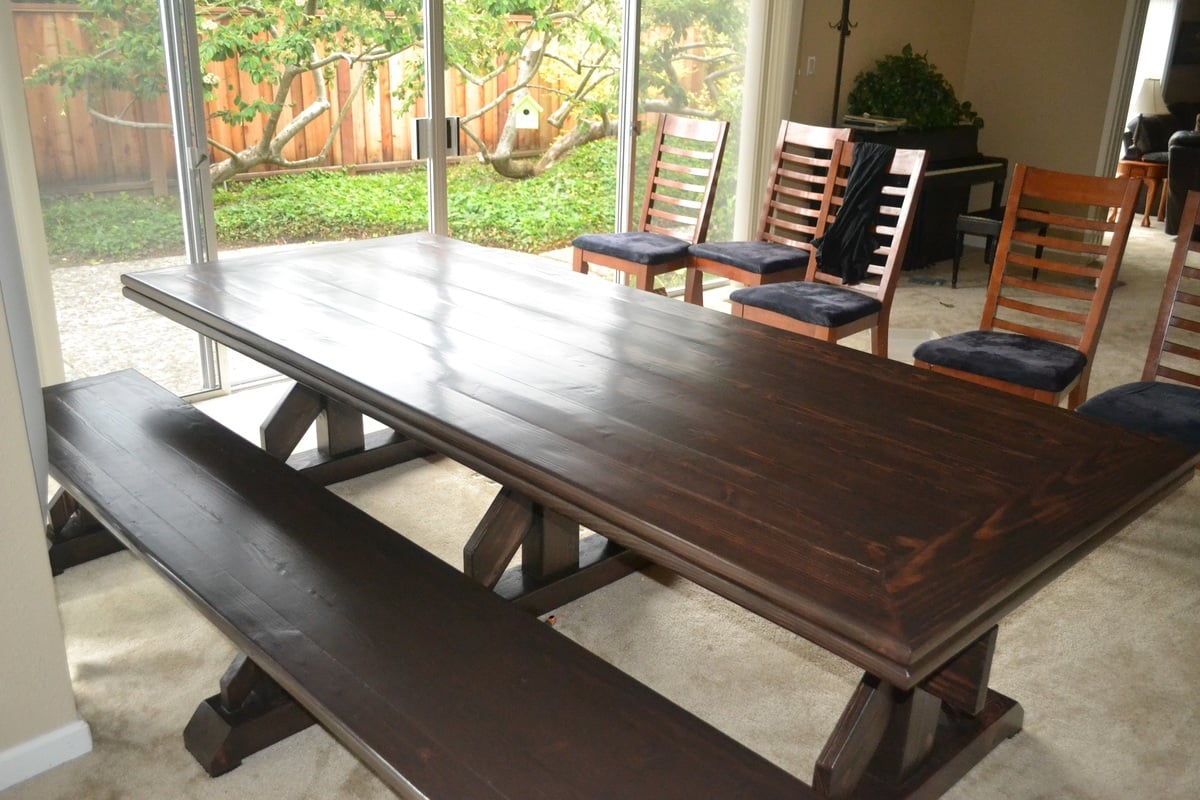
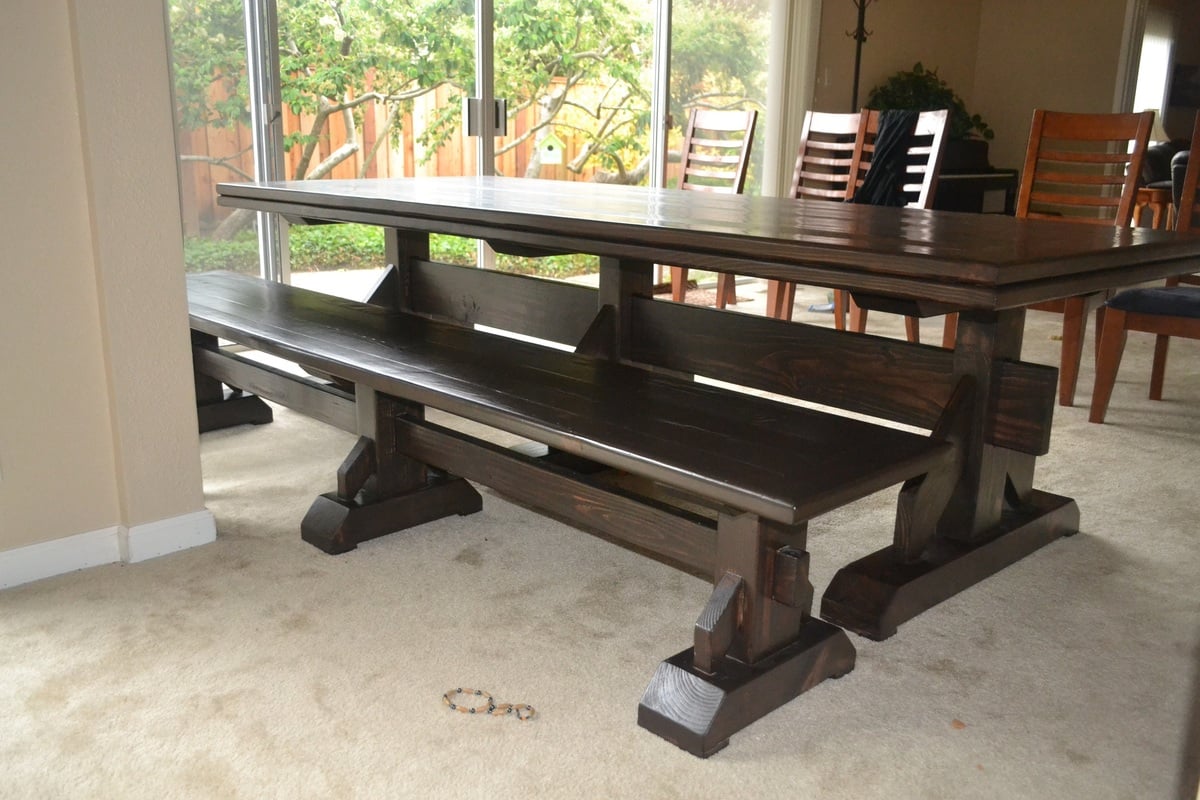
Anyways, we followed the Triple Pedestal Table and Bench with the following adjustments. We used all 2x6 boards for the table top in order to provide additional thickness for durability, we also removed the center divider and just opted to use the full length of the 8 foot boards. We then framed the table with 2x6 and then added another lip of 2x6 below the table top. The purpose of this was to create a large enough area to notch the boards for a resting areas of the leg tops. We also rounded all of the 2x6 edges on the top with a router as we didn't want to have any sharp corners for the kids to run into.

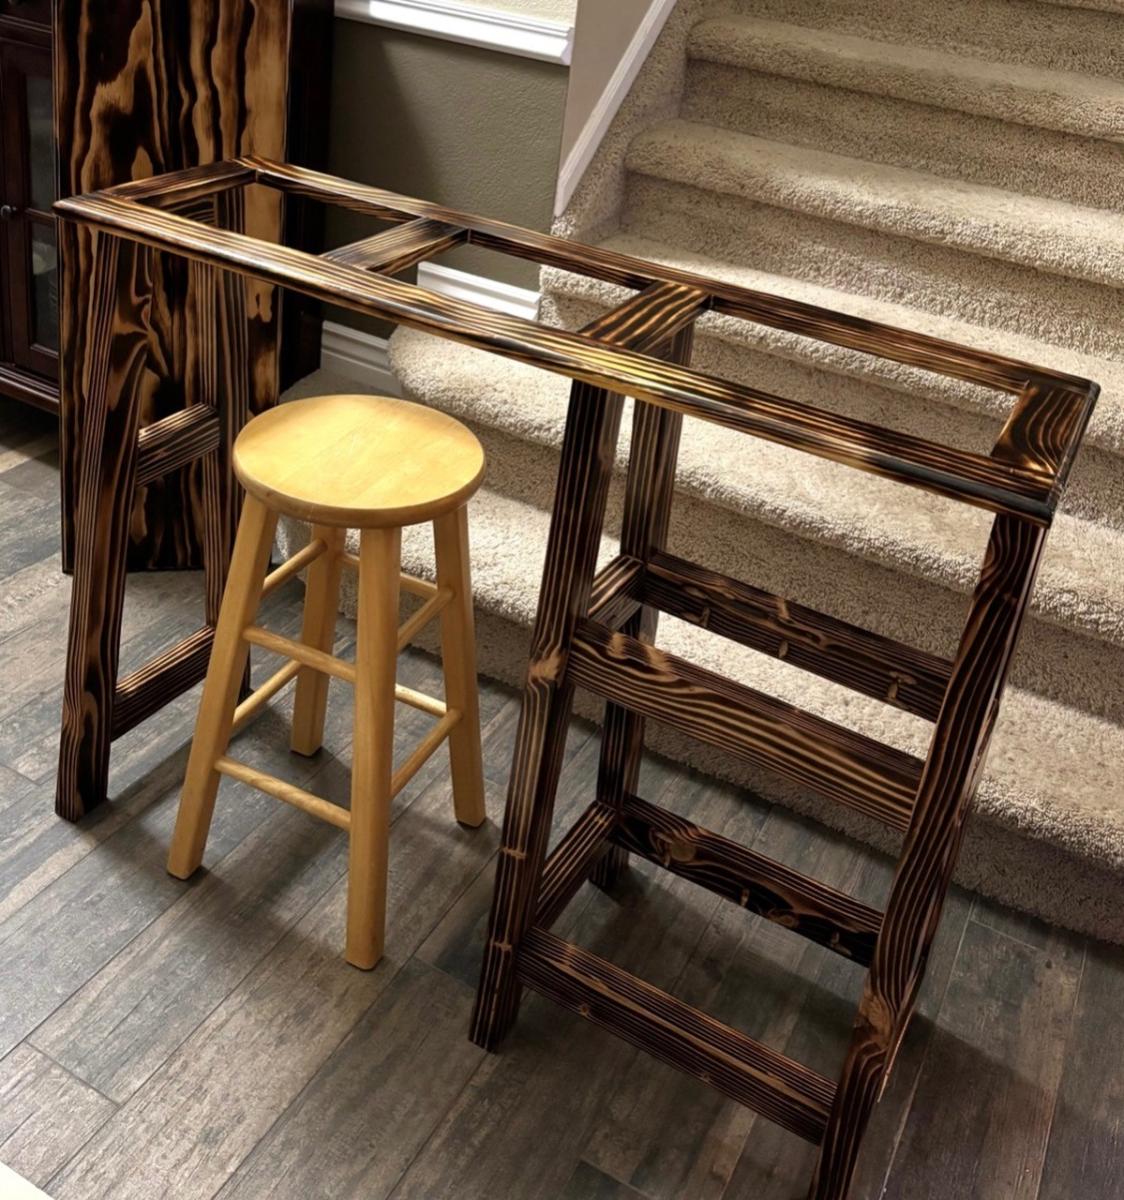
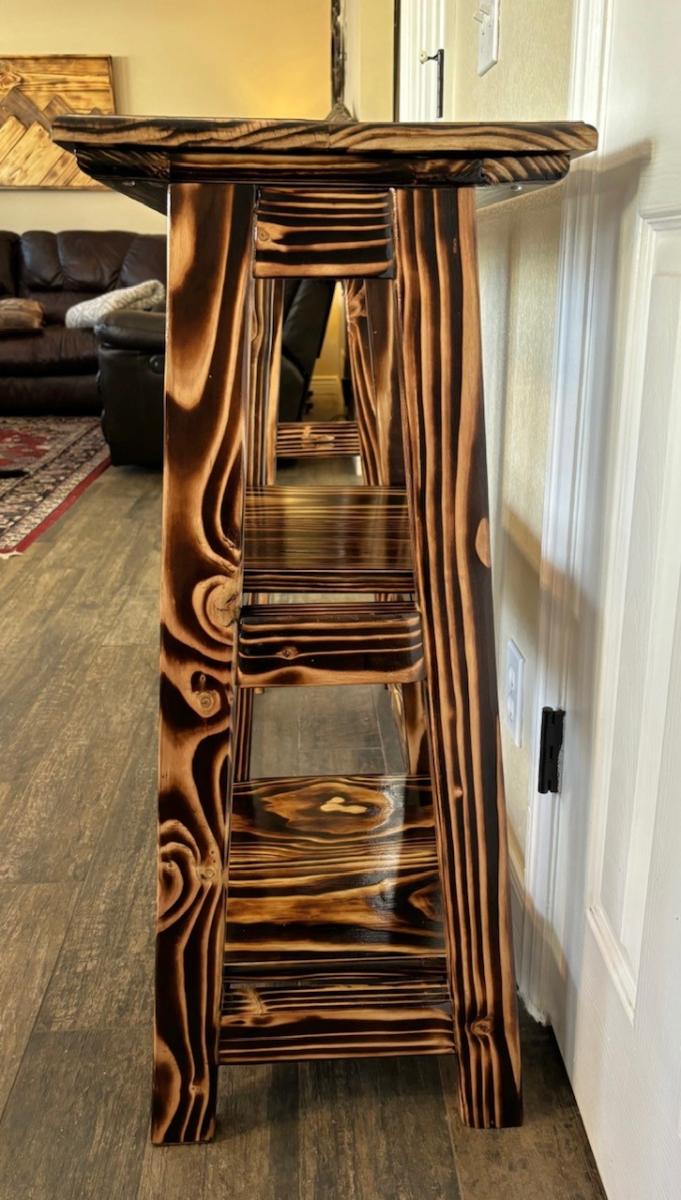
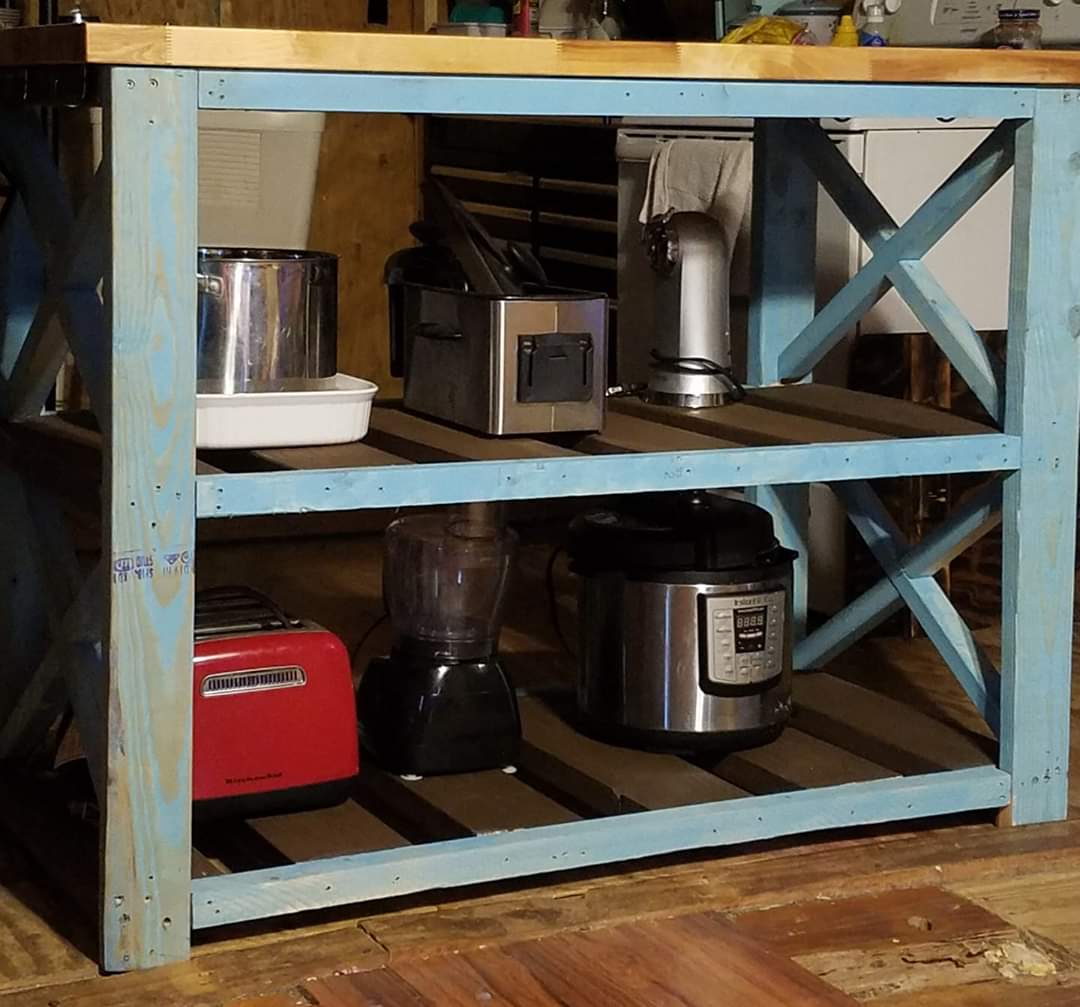
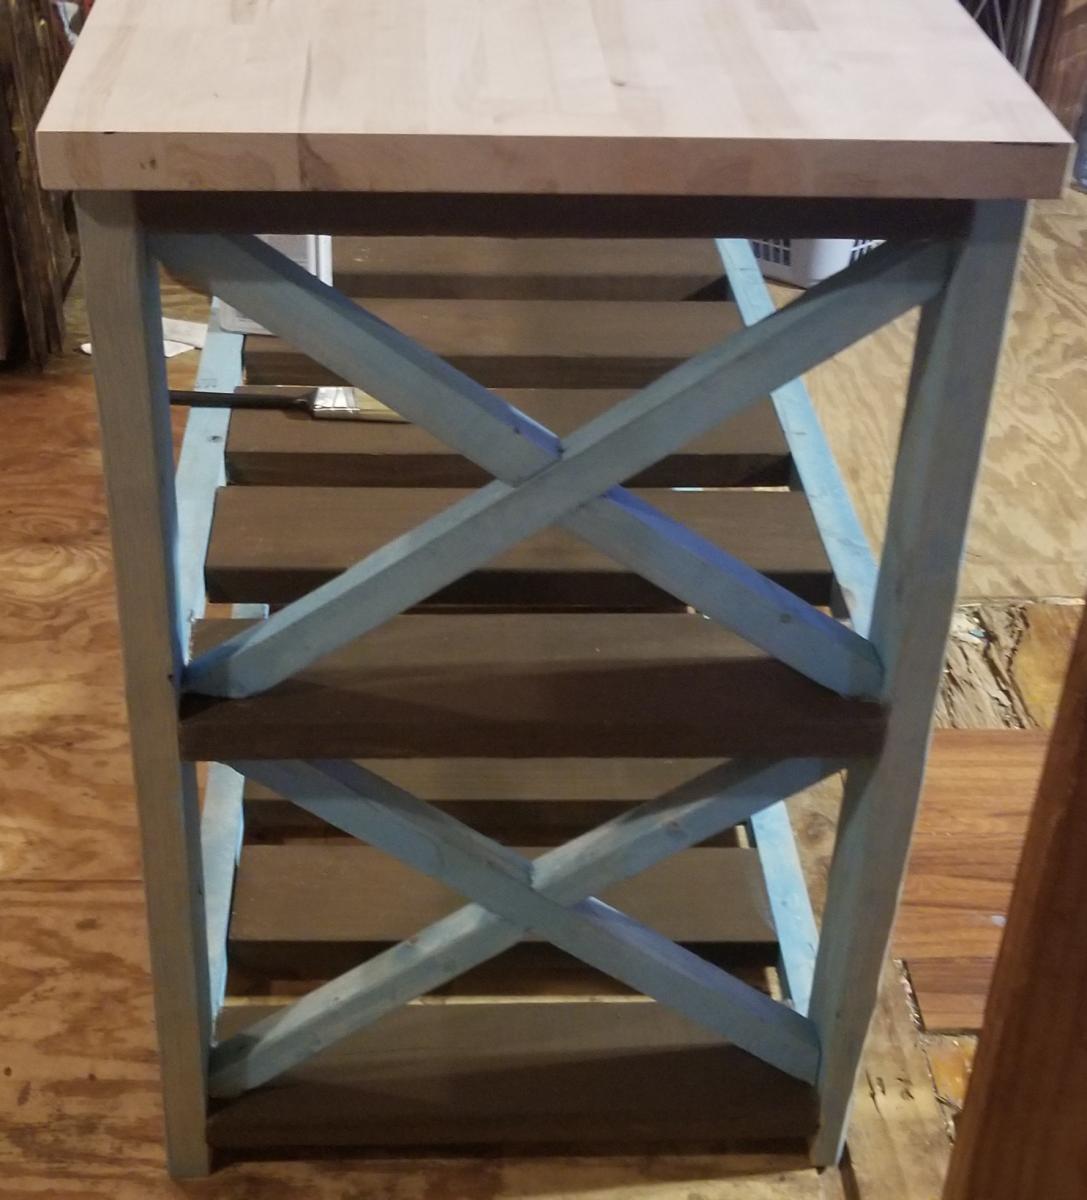
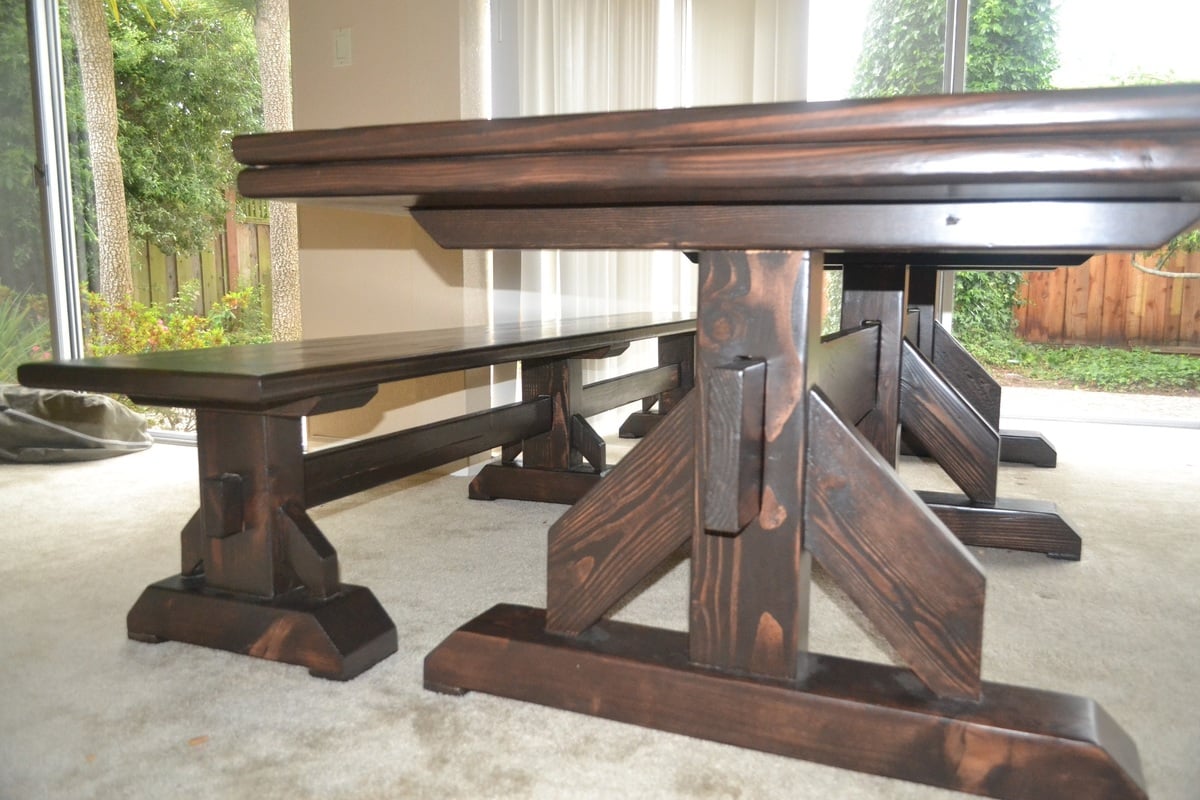
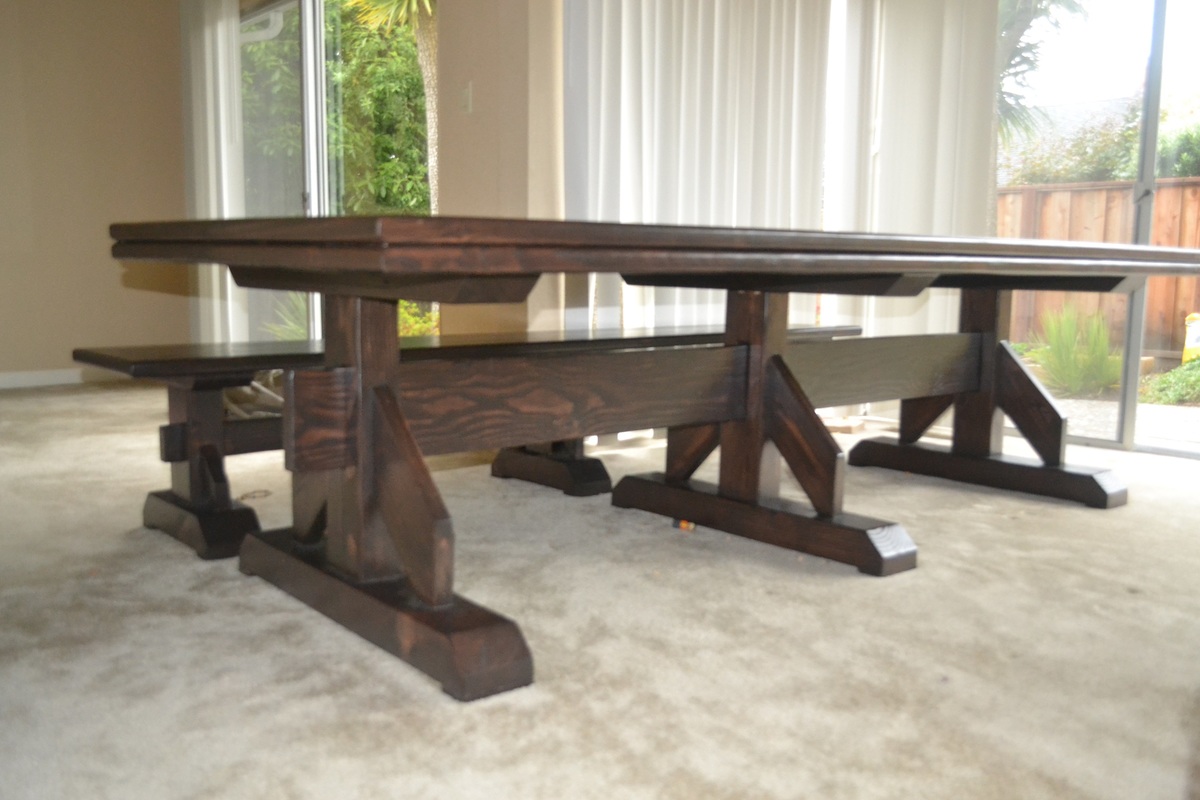
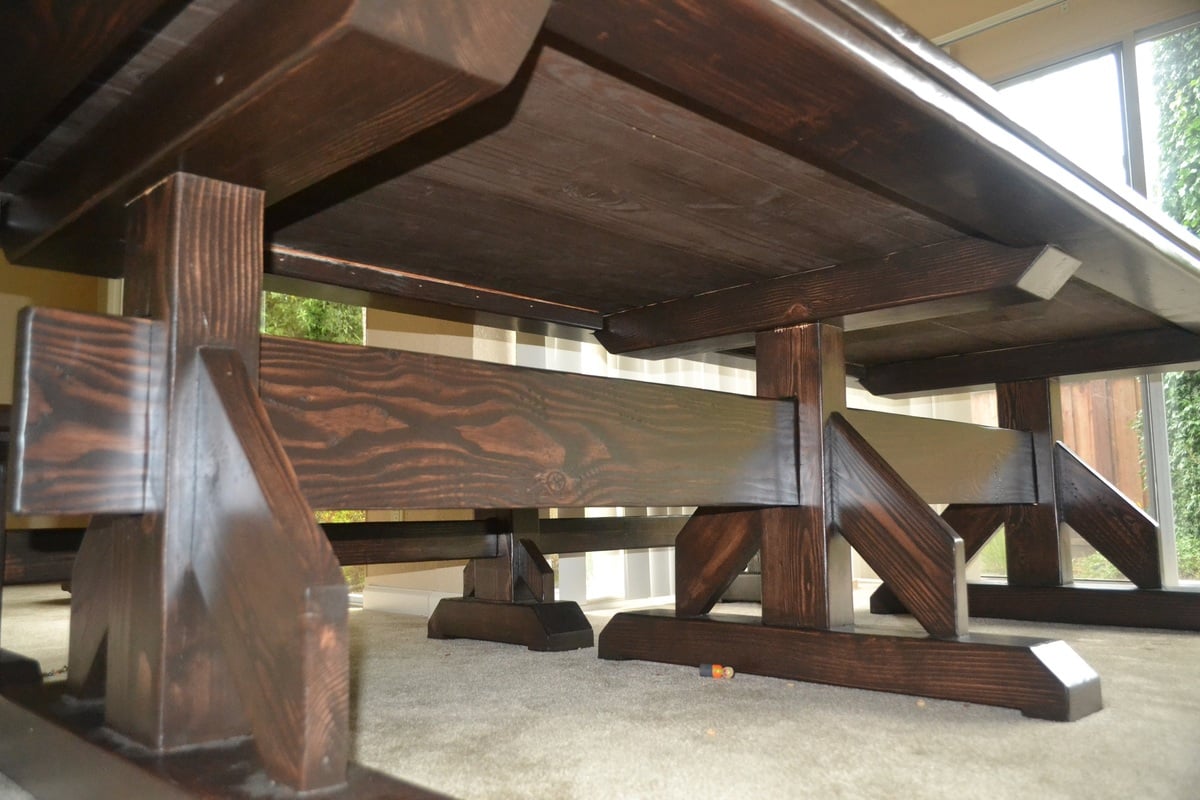
On the legs, we opted to use 4x6 posts for the leg bases and tops, as well as the leg post. We (meaning me) wanted to have a nice clean look rather than the layers of 2x6 and 2x4's in the original design. I used the router to create the hole in the post for the runner beam, and used a 2x8 beam rather than the 2x6 beam. Finally I did not have the patience to cut out all of the arches for both the table and the bench and my jig-saw was not working properly, so we just decided to improvise with the design as shown in the pictures.

Estimated Time Investment
Week Long Project (20 Hours or More)
Finish Used
Rustoleum Kona Stain, one coat and wiped dry with towel after 5 minutes. Rustoleum Satin water based polyurethene, 3 coats on legs and 4 coats on bench and table top, sanded after each coat.
Recommended Skill Level
Beginner

Comments

Back